
Dan Eldredge's Blog, page 4
June 16, 2017
COMMAND: Northern Inferno Scenario 5: Beware the Badger Part 5

In Parts One, Two, Three, and Four of this scenario, NATO forces are attempting to send an amphibious group to reinforce Narvik and Bardufoss. The Soviets are determined to stop them. Their level of determination was demonstrated when they used nuclear weapons to attack both Bodo Airbase and radar sites in northern Norway. NATO has fought its way north through submarines and multiple air raids by Soviet Naval Aviation, while also being threatened by Soviet surface forces.
The NATO forces have taken some punches in the loss of several escorts, but delivered some serious counterblows as well, sinking submarines, several ships, and a large number of bombers. Now they are closing in on their objective, and it remains to be seen if the Soviets have anything else up their sleeves.
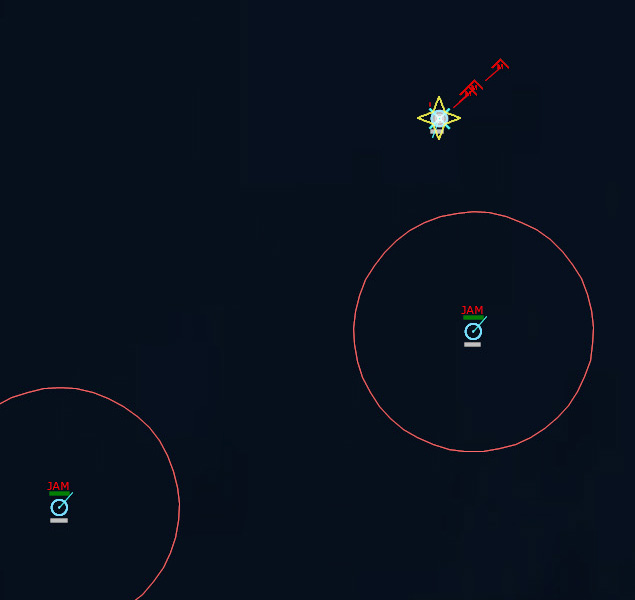
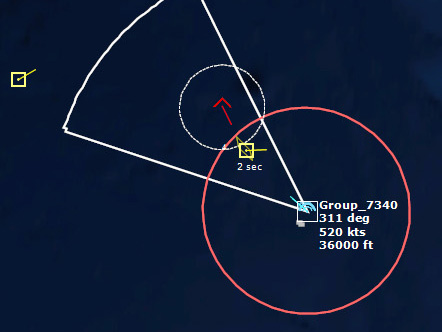
211004Z Four Buccaneers fly in to finish off Ognevoy, dodge the three fired SA-N-1b Goas, and launch 11 AJ.168 Martels at the hapless vessel. The first missile sinks it, while the remaining ten missiles are all overkill.
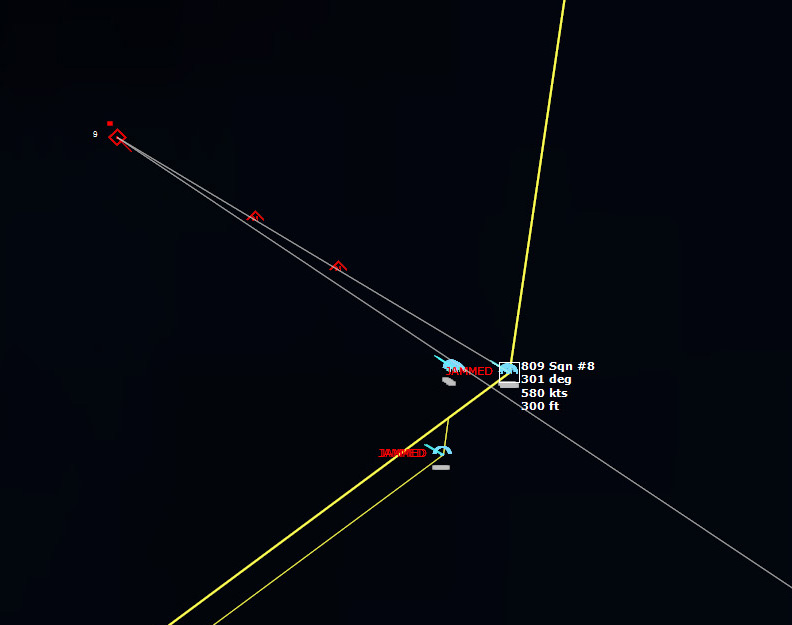 Missiles away!
 The Ognevoy is overwhelmed235241Z It has been 2.5 hours since the last raid, with little activity. I have the group shut off sensors, as I have AEW up. I haven’t even seen any recon aircraft from Ivan, either. Things are quiet...I couldn’t have wiped out their strike forces, could I? Time will tell.
August 31, 1975. 021440Z Torpedo in the water! Detected by SOSUS. Four seconds later, USS Biddle is hit and sinks. It was our primary anti-air asset. This is NOT good.
 USS Biddle is hit.021450Z Torpedo in the water! The second torpedo hits the wreckage of the Biddle. Not good at all.
The surface groups go active sonar again, but nothing turns up. I have 3 Sea-Kings and a Sea Sprite searching the area, but I’ve found nothing at all.
 The searching helicopters find nothing023806Z A submarine is located, and the helos swarm it like angry bees.
024020Z Glamorgan Flt 1, a Wessex HAS.3, arrives on the scene first and drops a torpedo. The torpedo searches...and strikes the target, hitting B-64. The contact disappears.
 The Wessex drops a torpedo on the target064226Z As dawn approaches, a P-3B spotted a contrail far to the north, probably belonging to a recon plane. I dispatch a lone F-4 to investigate. Upon reaching the target, it spots a target and fires a pair of Sparrows. Then another Bogey is spotted nearby.
064235Z The aircraft is IDed as a tanker. Definitely a good target, but what’s it doing out here? Are the Soviets planning a wide raid to the west?
 The Phantom takes out the first BogeyUnsurprisingly, the first two Sparrows miss. The Phantom fires its second pair. The last missile hits. The Phantom goes after the second Bogey, which also turns about to be a Tu-16Z Badger A Tanker. Four Sidewinders later and the Badger is still alive. Winchester, the F-4 turns around and scouts for more targets. A F-104 from Bodo is scrambled to go after the tanker.
The F-4 spots no one, and turns around to continue shadowing the tanker, which ends up following a standard racetrack pattern. Eventually the F-4 has to go RTB, but the F-104 catches up to it and shoots it down with a Sidewinder.
081145Z My Gannet AEW detects another bogey, presumably a Badger, heading out to sea, and another F-104 is scrambled to intercept.
The bogey leaves radar coverage before the F-104 can intercept, and the F-104 begins searching far to the north for it, but there’s a lot of ocean out there. Ultimately the F-104 doesn’t find it.
131519Z As the forces get closer, the AEW aircraft moves further north, and detects Soviet tankers far to the north, trying to stay far from the allied TF. F-104s are launched from Bodo to intercept, and one is shot down. Over the next hour and a half, F-104s shoot down three tankers, but one F-104 is shot down by a lucky shot. [base-Ph of 5%, agility modifier -30%, Final Ph: 1%. Result: 1 = Hit. This has been happening a LOT in this mission]
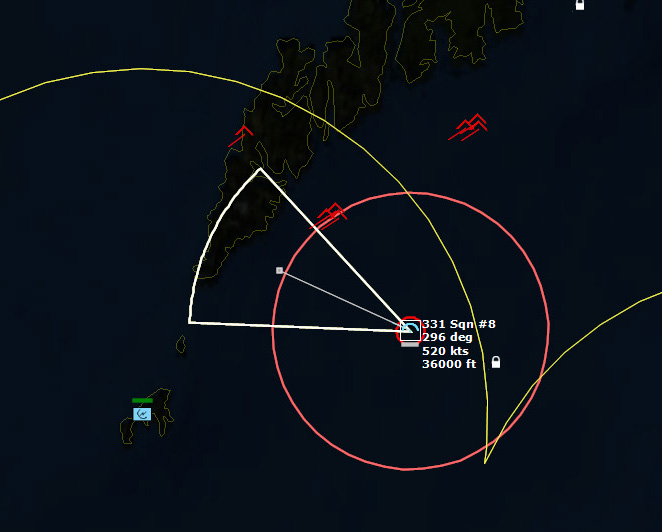
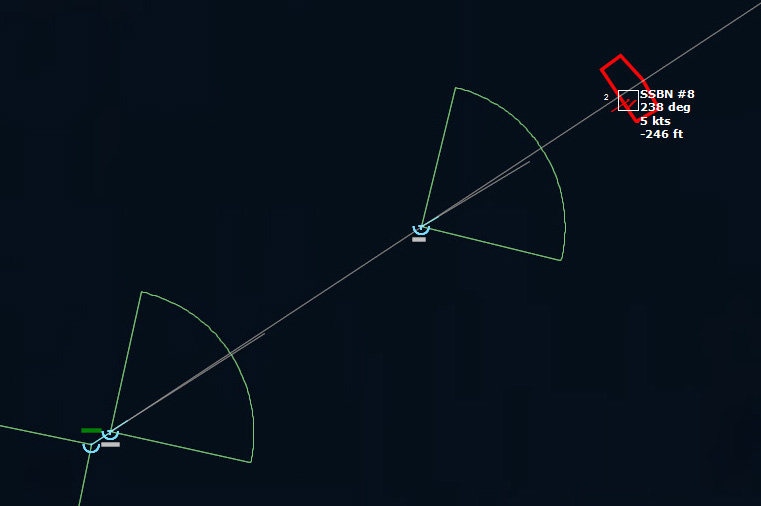
142138Z 331 Sqn #8, on his second sortie, takes out another tanker--his ninth kill of the day.
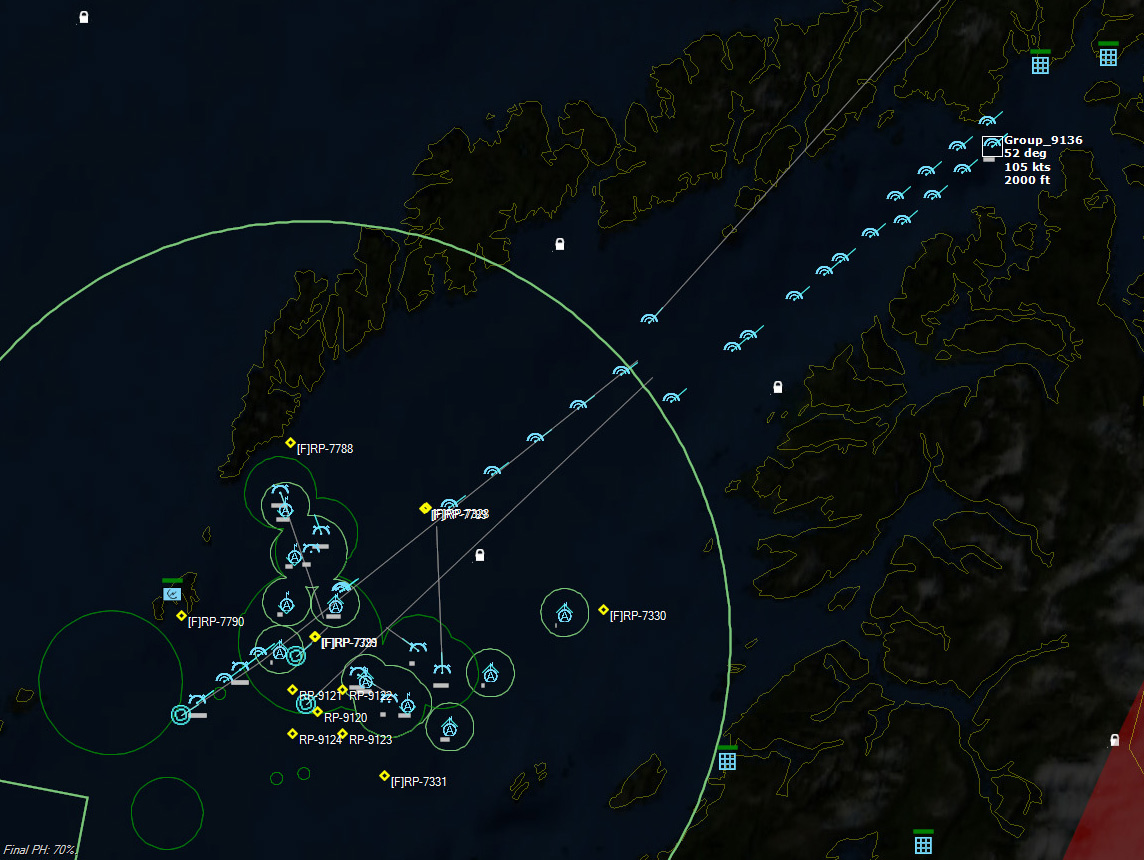
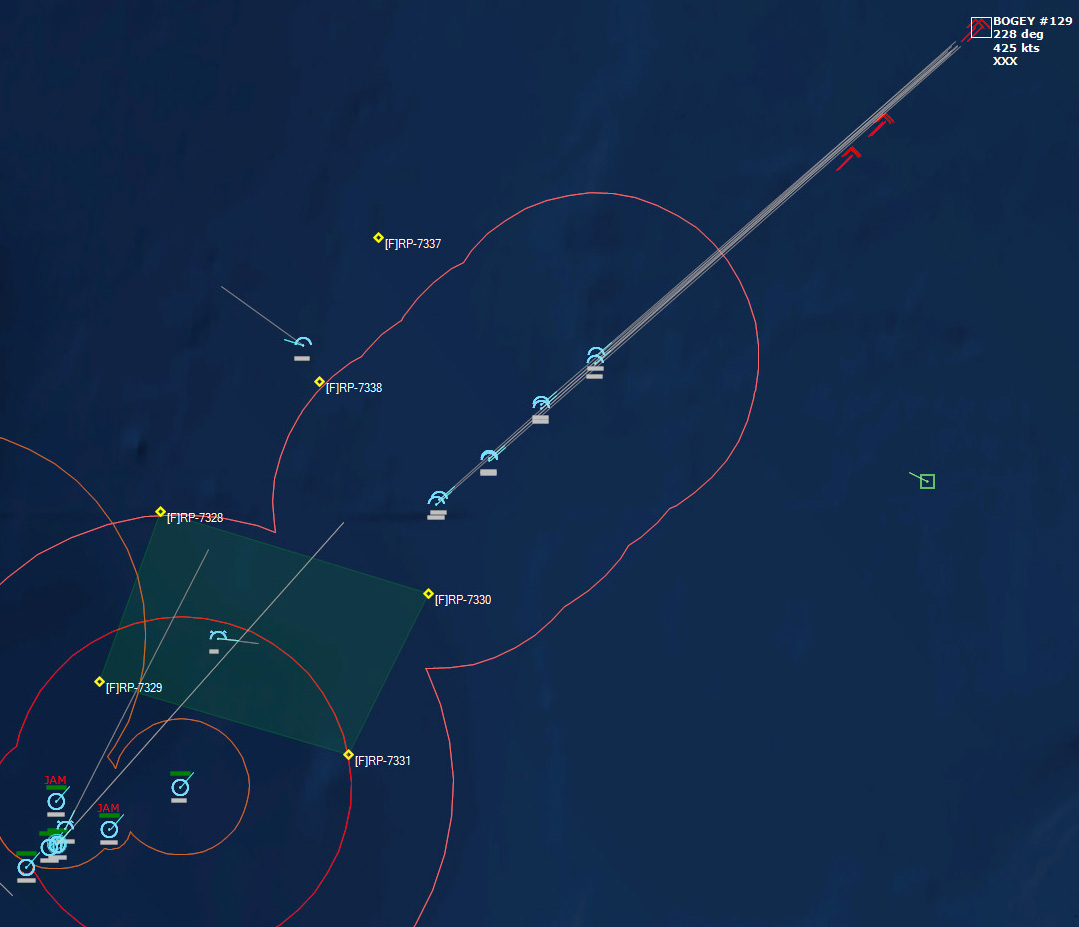
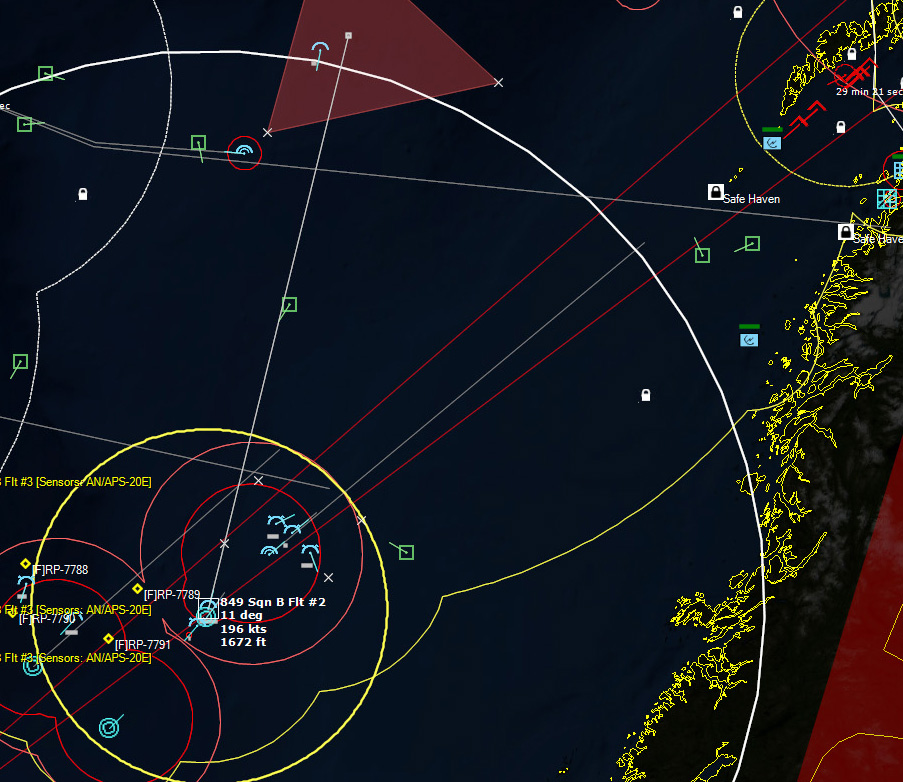
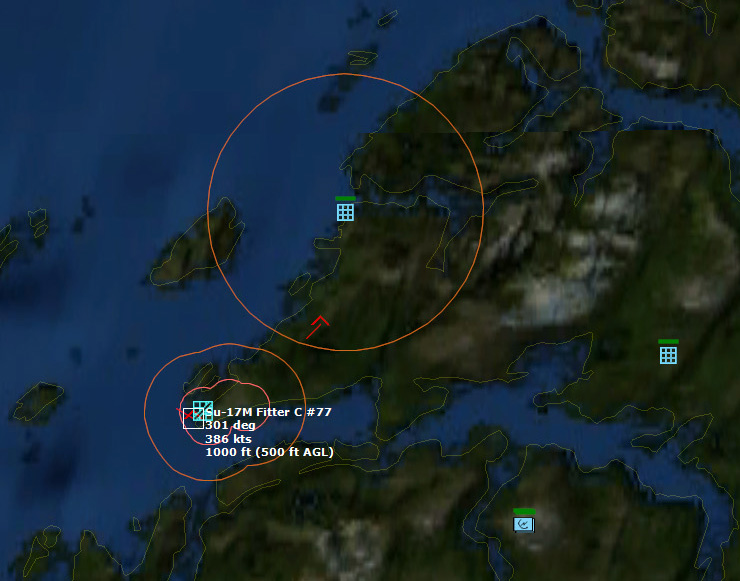
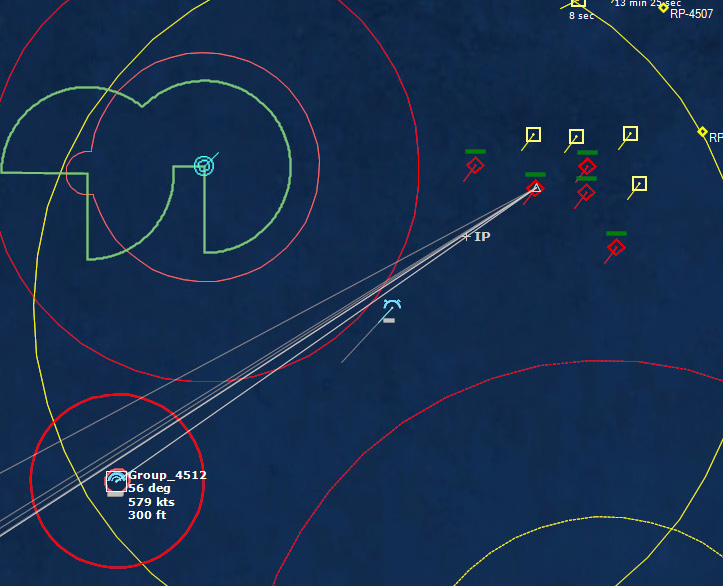
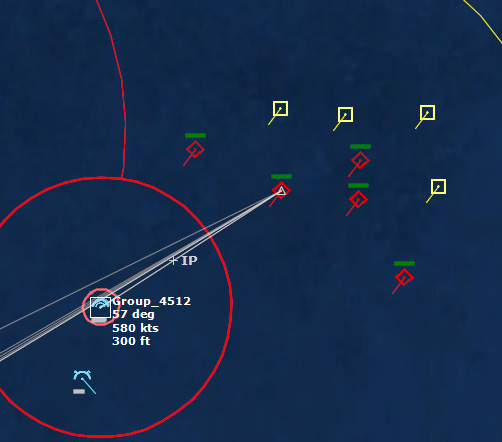
152054Z Bogey detected, this time heading SW towards the Narvik region. The CAP is diverted to intercept. Speed 525 kts. More F-4s are launched as the raid count increases to three. Could they be going after Bardufoss like they did with Bodo? Two of the aircraft are at 525 kts. Fitters? Or are they Tu-16KSR-2-5-11 Badger G Mods? The last is 425 kts, probably a Badger.
 The new raid is detected152938Z The CAP closes in. Bardufoss itself marks 200nm from the fleet, so I really need to take out these bombers before then to eliminate the chance of cruise missile shots.
153048Z Sparrows away. Unsurprisingly, the first four Sparrows miss. The second salvo is launched.
 Sparrows away.153124Z The sixth Sparrow hits, destroying a Badger G.
153136Z And then the seventh Sparrow hits, destroying a second Badger G. Whew. One Bogey to go.
 The last Bogey is eliminated153340Z Splash Three. Everyone breathes a sigh of relief.
162037Z A Bogey is detected, and then another, but both are heading NW. This could be another raid. The CAP is diverted to intercept. Both contacts at 425kts.
162309Z The raid count is now 3, and the lead Bogey begins to turn south. CAP moving to intercept.
163234Z Sparrows away. Again, the first four Sparrows miss, and three are spoofed. For a 35% chance of spoofing, it’s amazing how many are getting spoofed.
 Sparrow after Sparrow gets spoofed163412Z The eighth Sparrow splashes a Badger. The second Badger is taken out by the second Sidewinder shot at it.
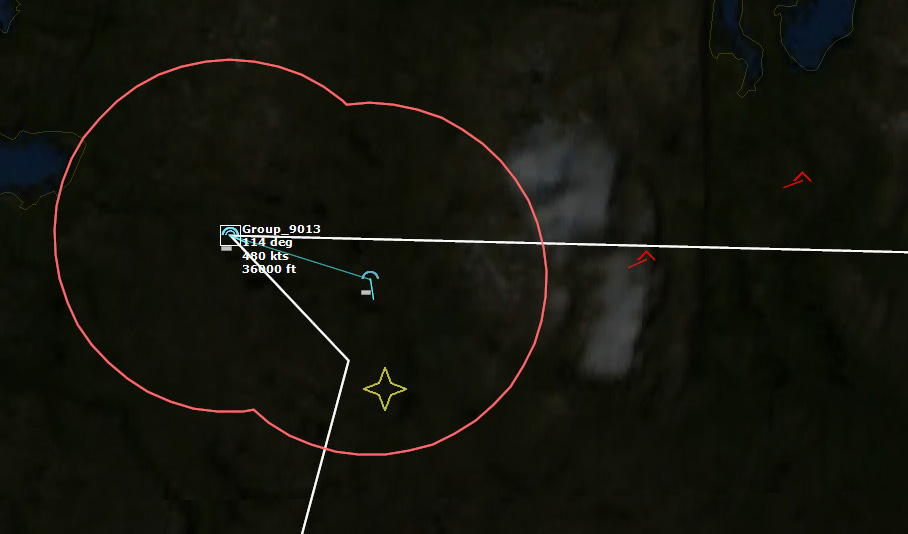 A Badger is taken outThe third Badger is splashed, and the raid is wiped out. Hopefully there will be no more, although there are plenty of fighters to deal with them if any should be launched.
164604Z Bogey detected...again. These guys just don’t know when to quit. It turns out to be a tanker, which is shot down, and then the tanker returning home is also shot down.
172123Z This is disconcerting...Ark Royal needs supplies! My F-4s are all out of Sparrows and and Sidewinders. Looks like this is it, kids.
Perhaps a strike on the airbases is in order.
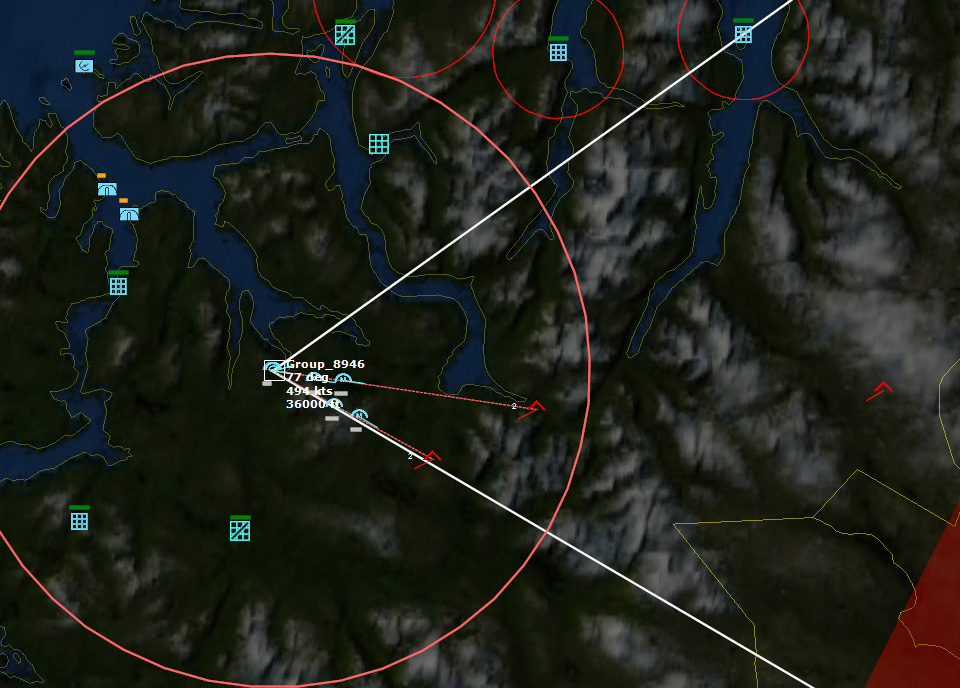
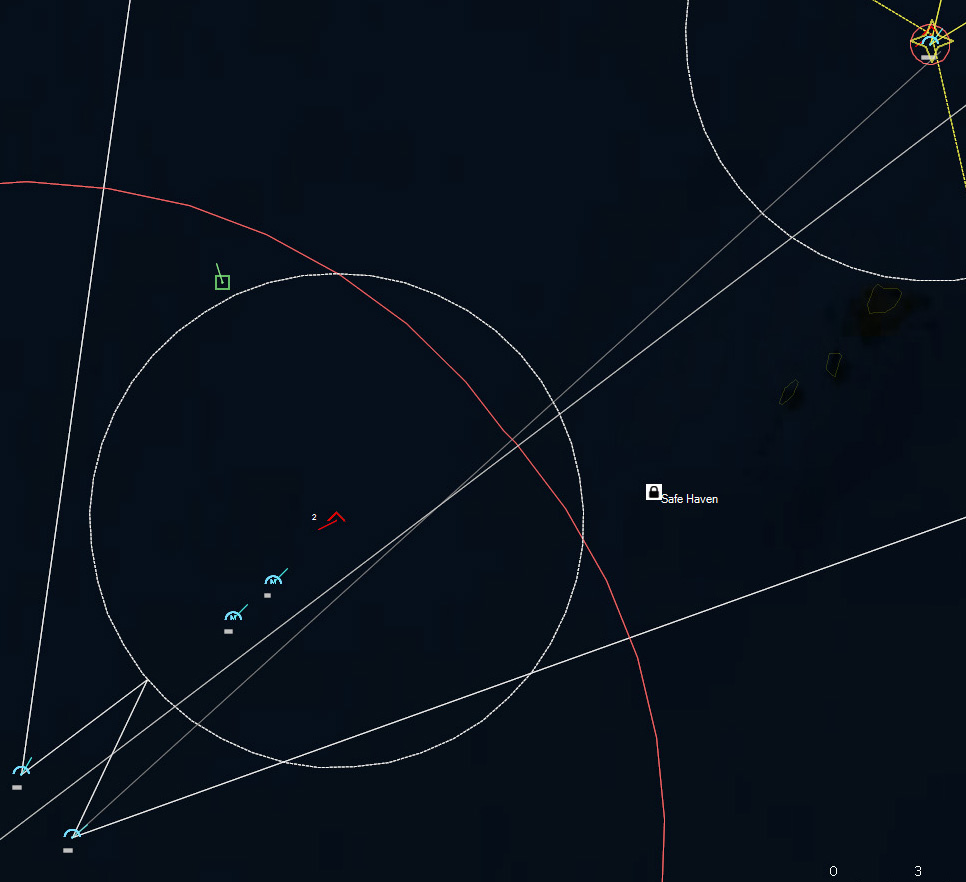
200830Z All ships are now within the Safe Haven, and despite it being “safe”, I’m still a little nervous. What if I sub got in here? I want to keep going for a while before I start unloading operations, because I my boats might be too slow.
And then a 53-65K WH attacks HMS Devonshire.
200836Z The first torpedo misses...the second hits, and Devonshire sinks. I dispatch all my airborne choppers to the area. Not too pleased about this.
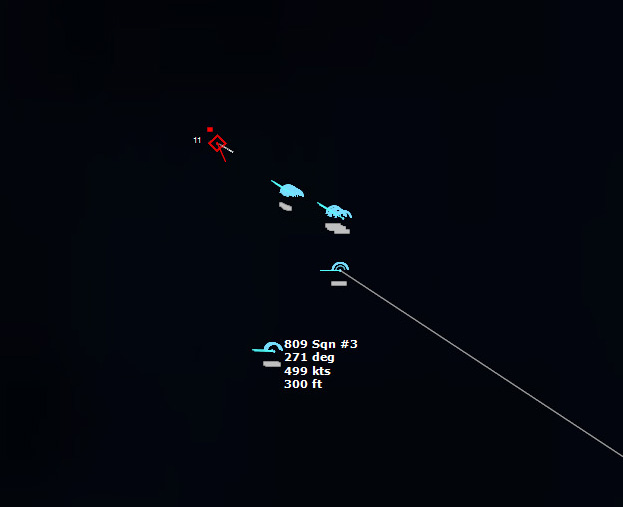
 HMS Devonshire is sunk202229Z Contact! Biddle Det #1 detects a sub with its dipping sonar. It monitors the sub while 824 Sqn #3 charges into attack. The sub is currently making a beeline towards Ark Royal.
 Contact!202420Z Torpedo away. The torpedo acquires and homes in...and misses. The seconds hits, but does not kill the sub. 824 Sqn #3 drops an active sonobuoy on the target to lock it in, and then has to depart the area.
 Torpedo away824 Sqn #2 arrives and drops a torpedo. The torpedo misses on its first pass, but keeps circling, finally acquiring the sub and sinking it. Whew.
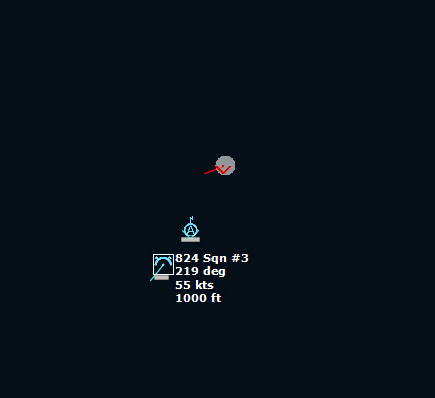 The torpedo impacts202930Z I begin my helo ferry missions to Bardufoss. I will be launching helos at regular intervals now.
211436Z All the helos are now airborne, and on the way to Bardufoss.
 All aircraft begin the ferry mission to Bardufoss082007Z Enough landing craft make it into the area, that the scenario concludes.
The hero of the scenario is clearly the pilot of 333 Sqn #8, who survived the nuking of his airbase, only to fly two sorties from it and rack up no less than nine kills. He is evacuated from Bodo, suffering from radiation poisoning, and later received the Norwegian War Cross with Sword, as well as Knighthood in the Order of the British Empire for his efforts in protecting the Ark Royal Group.
Score: 600
SIDE: Soviet Union
===========================================================
LOSSES:
-------------------------------
6x Su-17M Fitter C
2x SSV Okean
1x PLA-671 Victor I [Yorsh]
5x Tu-95RT Bear D
1x SSV Mayak [Pr.502, Intelligence Mod]
30x Tu-16KSR-2-5-11 Badger G Mod
2x Ka-25BSh Hormone A
1x RKR Kresta I [Pr.1134 Berkut]
1x BPK Kresta II [Pr.1134A Berkut A]
1x BPK Kanin [Pr.57A Gnevny]
3x Tu-126 Moss
1x BRK Kildin [Pr.56U]
1x SKR Kotlin Mod [Pr.56PLO Spokoinyy]
9x Tu-16Z Badger A
1x PL-665 Whiskey Long Bin
1x BPK Kashin [Pr.61]
1x PL-611 Zulu III
1x PL-641B Tango [Som]
EXPENDITURES:
------------------
22x AS-9 Kyle [Kh-28]
2x RN-40 Tactical Bomb [30kT Nuclear]
4x SS-N-3b Shaddock [P-5D, AGM, 350kT Nuclear]
8x 53-65K WH
3x 14.5mm/73 Twin Burst [20 rnds]
3x SA-N-5 Grail [9M32M]
8x Generic Acoustic Decoy
4x SS-N-3c Shaddock [P-35 Progress, ASM]
59x Generic Chaff Salvo [4x Cartridges]
32x SA-N-1b Goa [M-1M/P Volna-M/P, 4K91 / V-601]
50x Generic Flare Salvo [4x Cartridges, Single Spectral]
78x 23mm AM-23 x 2 Burst [50 rnds]
15x 23mm AM-23 x 2 Burst [50 rnds]
8x AK-725 57mm/80 Twin HE Burst [6 rnds]
31x 57mm/81 ZIF-75 Quad DP Burst [6 rnds]
8x SA-N-3a Goblet [4K60]
3x AK-630 30mm/65 Gatling Burst [400 rnds]
4x AS-5 Kelt [KSR-11, ARM]
5x 53-57 Pattern [NATO 53-56]
17x AK-230 30mm/65 Twin Burst [50 rnds]
1x 53-51 Pattern
20x AS-6 Kingfish A Mod 1 [KSR-5, ASM]
60x 45mm/85 Quad Burst [8 rnds]
10x 130mm/58 Twin HE Burst [2 rnds]
8x 25mm/80 Twin Burst [20 rnds]
3x AK-726 76mm/60 Twin HE Burst [2 rnds]
SIDE: NATO
===========================================================
LOSSES:
-------------------------------
2x Radar (S-266)
4x Radar (S-244 HF)
1x Radar (S-600 Gapfiller)
3x Vehicle (NH Target Tracking Radar (TTR))
3x Vehicle (AN/FPS-71 HIPAR)
3x Vehicle (NH LOPAR)
3x Vehicle (NH Target Ranging Radar (TRR))
3x Vehicle (NH Missile Tracking Radar (MTR))
1x Runway Access Point (Very Large Aircraft)
6x 40mm/70 Single Bofors
30x A/C Hardened Aircraft Shelter (1x Medium Aircraft)
13x F-104G Starfighter
13x F-104G Starfighter [CF-104C]
8x A/C Hangar (4x Large Aircraft)
1x Building (Control Tower)
2x A/C Underground Aircraft Shelter Entrance (Blast Doors)
1x AvGas (400k Liter Tank)
1x D 20 Fife [County Batch 2]
3x Wasp HAS.1
1x F 109 Leander [Type 12I Leander Batch 1]
1x P-3B Orion
1x Phantom II FG.1
2x Buccaneer S.2D
1x D 80 Sheffield [Type 42 Batch 1]
1x F 109 Leander [Type 12I Leander Batch 1, Ikara]
1x P-3B Orion
1x CG 26 Belknap
1x Wessex HAS.3
1x D 02 Devonshire [County Batch 1]
6x AH-1J Sea Cobra
EXPENDITURES:
------------------
402x AN/SSQ-47 Julie Active Range-Only
5x MIM-14B Nike Hercules
69x 40mm/70 Single Bofors Burst [4 rnds]
24x AIM-9J Sidewinder
18x 20mm/85 M61A1 Vulcan Burst [100 rnds]
1x Type 182 Towed Torpedo Decoy
12x Mk13 1000lb GPB
6x Mk82 500lb LDGP
31x AJ.168 Martel
2x Ikara [Mk46 Mod 2]
8x Mk46 LWT Mod 2
687x AN/SSQ-41A Jezebel LOFAR
87x AIM-7E2 Sparrow III
4x AGM-65A Maverick EO
152x 127mm/54 HE-PD [HiCap]
212x 127mm/54 HE-CVT [HiFrag]
147x 127mm/54 WP
41x AIM-9D Sidewinder
11x AS.37 Martel [ARM]
18x Sea Dart Mod 0
3x 30mm ADEN Mk4 x 2 Burst [50 rnds]
2x AIM-9G Sidewinder
4x Corvus Chaff [Distraction]
4x Corvus Chaff [Seduction]
5x 40mm/70 Mk9 Single Bofors Burst [4 rnds]
9x AGM-12B Bullpup A
229x AN/SSQ-41B Jezebel LOFAR
SIDE: Neutral Shipping
===========================================================
LOSSES:
-------------------------------
2x Commercial Fishing Boat [35m]
EXPENDITURES:
------------------
SIDE: Cuba
===========================================================
LOSSES:
-------------------------------
1x Commercial Supply Vessel [6,000t DWT]
EXPENDITURES:
------------------


June 15, 2017
COMMAND: Northern Inferno Scenario 5: Beware the Badger Part 4
 In Parts One, Two, and Three of this scenario, NATO forces are attempting to send an amphibious group to reinforce Narvik and Bardufoss. The Soviets are determined to stop them. Their level of determination was demonstrated when they used nuclear weapons to attack both Bodo Airbase and radar sites in northern Norway. NATO has fought its way north through submarines and raids by Soviet Naval Aviation, but it appears that its luck has run out: the latest raid by Soviet Badgers managed to get their anti-ship missiles off, and those missiles streak past the now ineffective anti-air assets of the NATO fleet. These anti-ship missiles are headed straight for Ark Royal, an indispensable asset to the NATO forces.
183337Z Sheffield opens fire, but it has only 4 Sea Darts left. Behind Sheffield are Galatea and Berwick with Sea Cats, but I have little hope they’ll work. There will likely be 20 Vampires inbound. Ark Royal is in deep, deep trouble.
The Sea Darts do horribly. The angle is poor and they cannot strike the missiles.
Galatea’s Sea Cats will not fire at all, as they are incapable of striking the inbound missiles. I fear Ark Royal is doomed many times over.
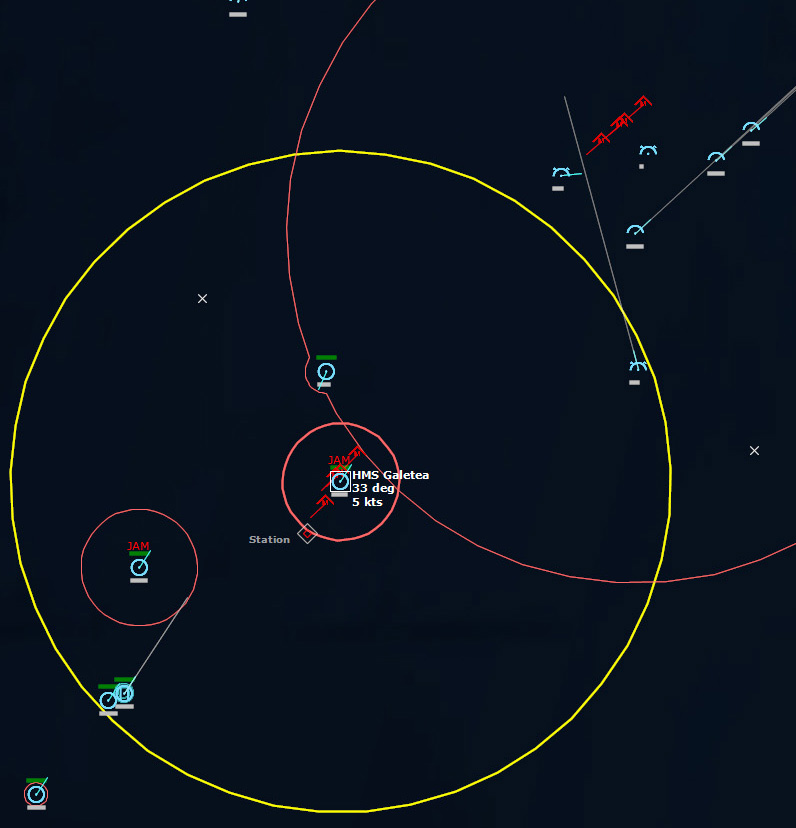 The Vampires zoom over GalateaThe Vampires zoom over Galatea, completely ignoring her, making a beeline for Ark Royal.
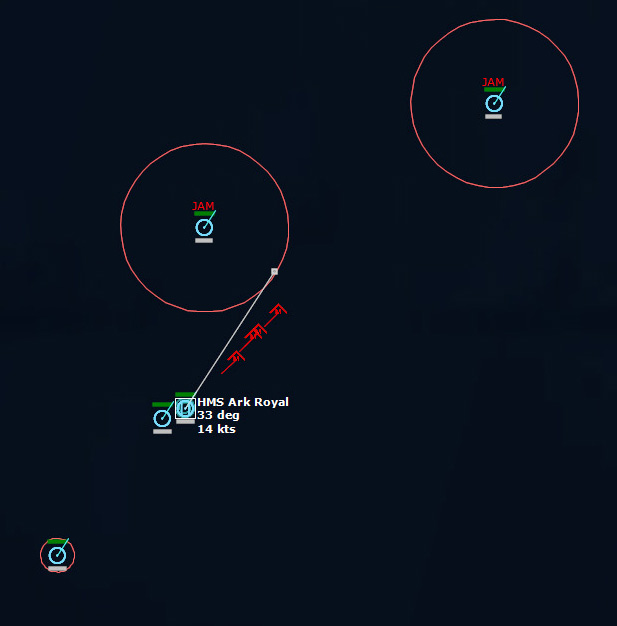 Impact in seconds...183504Z Holy crap. Less than two miles from Ark Royal, the four AS-6 Kingfish all run out of energy and crash into the ocean. Unbelievable luck.
 Vampires inbound on the SheffieldThat said, Sheffield has 4 Vampires inbound.
183522Z Sheffield is hit by the first Vampire and is sunk. The three remaining vampires turn and go after Galetea.
 Sheffield is sunkIn the meantime, the lead F-4 has finally gotten into missile range and fires on the retreating Badgers.
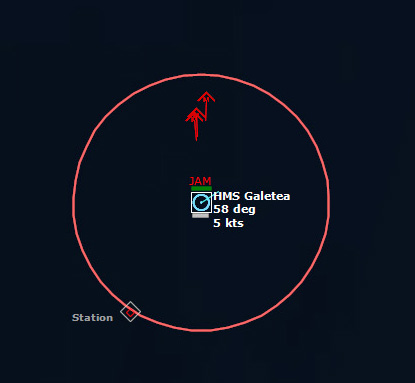 The three Vampires close in on Galatea183545Z Galatea is hit. The two remaining Vampires head due south and self-destruct. 12 Vampires remain.
 Galatea is sunk183626Z The lead Phantom kills one Badger, but is now down to Sidewinders.
 The Phantoms splash one Badger183744Z Meanwhile, 2 F-104s from 334 Sqn have reached their attack position against the Soviet fleet, and totally botch the attack. They fire 3 out of four Bullpups, which all miss, and one of the Starfighters is shot down to boot. Pathetic.
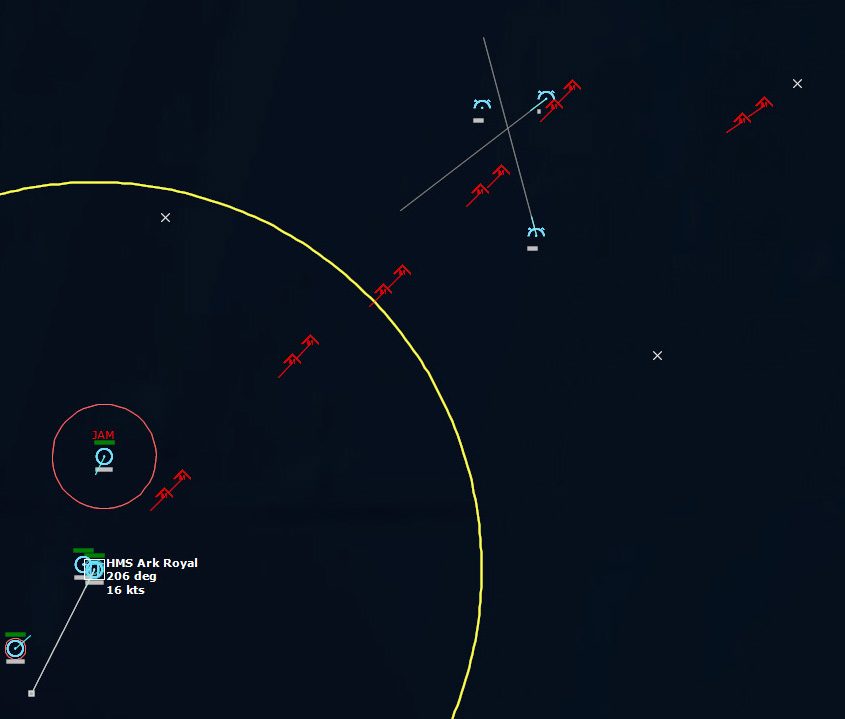 More Vampires close in on the Ark Royal183839Z More Vampires close on Ark Royal, but again, 2.8nm away from her, the Kingfish runs out of energy. One by one the Kingfish close in...only to run out of energy. Holy crap that was close.
 One by one the Vampires run out of energyThe Phantoms continue their pursuit, but it is clear that some of them are just too far away to catch up. The results of the Sparrows and Sidewinders as embarrassing. It takes something like 7-8 missiles to score a single kill.The Phantoms fire 24 missiles and manage to splash 3 Badgers out of 10 before the remainder escape.
190748Z Late to the party, a pair of F-104s from Bodo are launched and sent on afterburner in an attempt to catch up to the Badgers. One is spotted, and an F-104 fires a Sidewinder at it. Splash one Badger.
 F-104s attack the Badgers on their way home
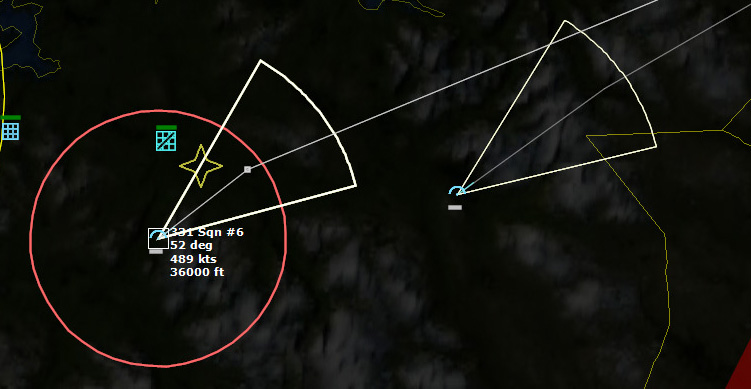 Splash One
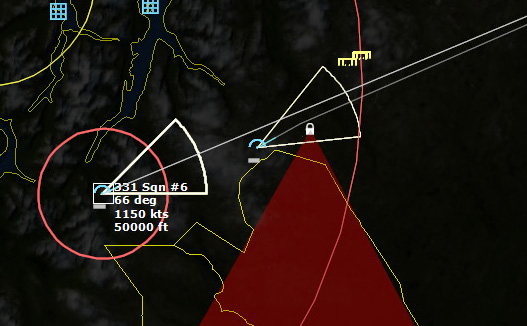 The F-104s detect the retreating Badgers191007Z Contact! The F-104s detect the retreating Badgers. Closing in at 1150kts, time is short, as they have 8.5 minutes until Bingo fuel. The first F-104 enters Sidewinder range and fires four missiles at four targets. One hits. The F-104 closes to gun range, misses its target, and then is destroyed by a lucky shot…The 2nd F-104 closes in, and fires its 3 missiles. Splash one. The other two Sidewinders are spoofed.The F-104 closes into gun range. Again, the F-104 is shot down. Still, the effort was worth it. The raid of 10 Badgers is ultimately reduced to 3.
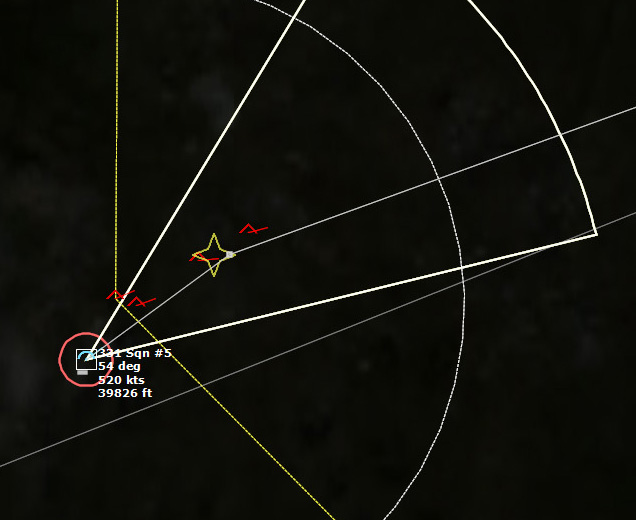 Splash another Badger
 Missiles away
192326Z A followup strike by F-104s with Bullpups on Skromny succeeds in damaging it enough to sink it.
200628Z A P-3B Orion sinks a Whiskey-class sub, likely the one that launched several a pair of Shaddock nukes to take out the Radar S-366.
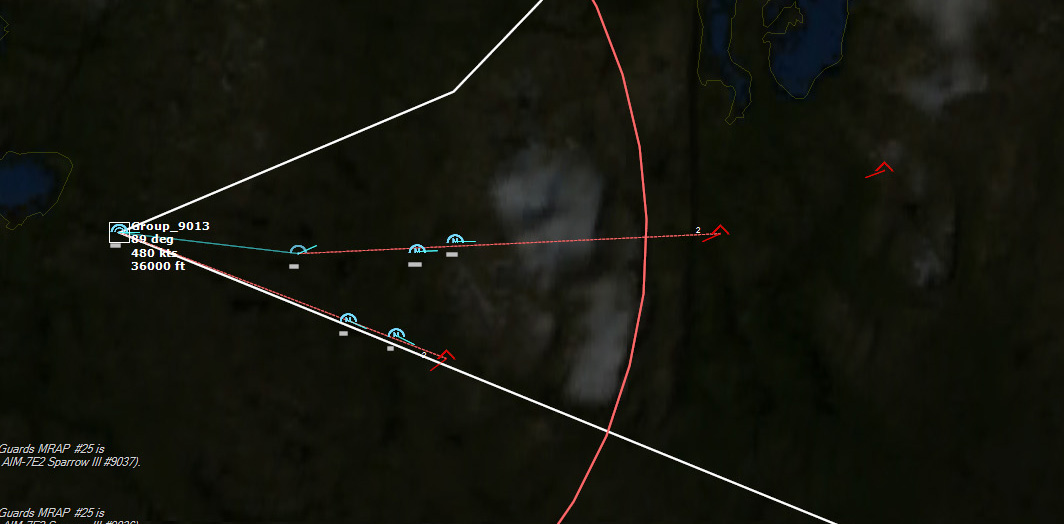
201355Z Contact. Another raid inbound, designated Raid 4. Raid 4 is four aircraft. An F-104 is launched immediately from Bodo, and the two F-4s currently airborne are diverted to intercept. (Unfortunately one is near Bingo and unable to intercept. The 3 available F-4s on Ark Royal are immediately launched.
201527Z Raid count is 7. Looks like the other F-104 will be Bingo before intercept too. Not good.
202130Z Raid count is now 9. The last F-104 closes on intercept.
 The F-104 intercepts the new raid202220Z The F-104 fires its Sidewinders. The first one is spoofed, but the second splashes a Badger.
 One Badger down202243Z Splash two. One of the Badgers turns away for reasons unknown.
202441Z After a gun pass at a trio of Badgers, the F-104 goes after the Badger that turned, and successfully shoots it down. Splash three.
 Splash Three202811Z Splash four.
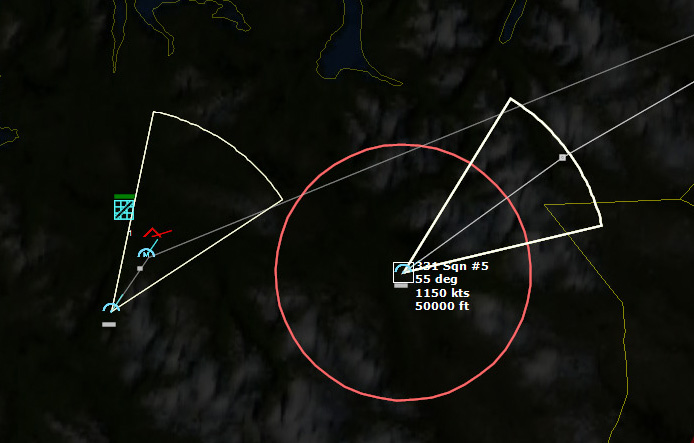
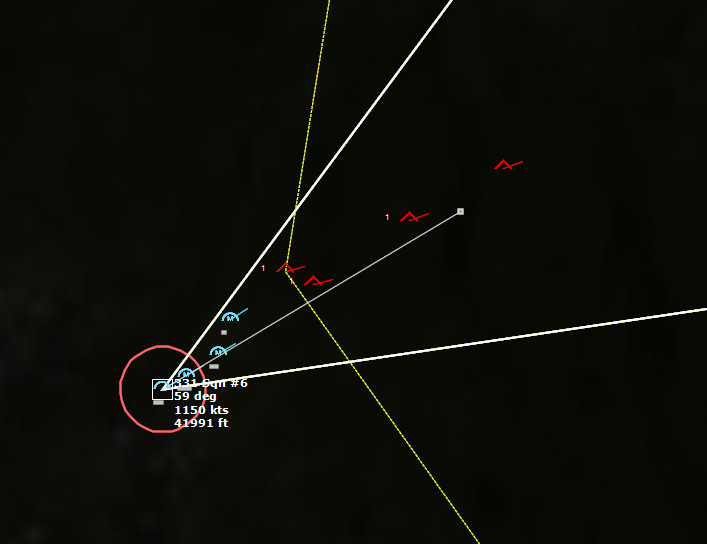
 Splash four.202928Z Splash five. 331 Sqn #8 has made Ace in a single sortie.
202934Z Splash six.
 Splash Six. Norwegian Starfighters show the British Phantoms how to get things done203048Z Raid count is down to three, and the lead pair of F-4s are closing into Sparrow range.
203133Z Splash seven.
 Missiles close in on the last Badger203137Z Splash eight. The lead Phantom shoots down a Badger with a Sparrow.
203349Z Splash nine. The two Sparrows fired at the last Badger miss, but then the F-104, with its last burst from its 20mm cannon, makes his eighth kill. This pilot is getting a medal. Raid Four is wiped out.
 The Norwegian Ace makes his eighth kill
To be continued...
June 14, 2017
COMMAND: Northern Inferno Scenario 5: Beware the Badger Part 3
 In Parts One and Two of this scenario, NATO forces are attempting to send an amphibious group to reinforce Narvik and Bardufoss. The Soviets are determined to stop them. Their level of determination was demonstrated when they used nuclear weapons to attack both Bodo Airbase and radar sites in northern Norway.
For its part, the NATO Task Force has fended off some Soviet submarines but not without cost. But the main attack is about to begin: the Soviets have blasted a path through northern Norway, and raids of Badgers will sent through it.
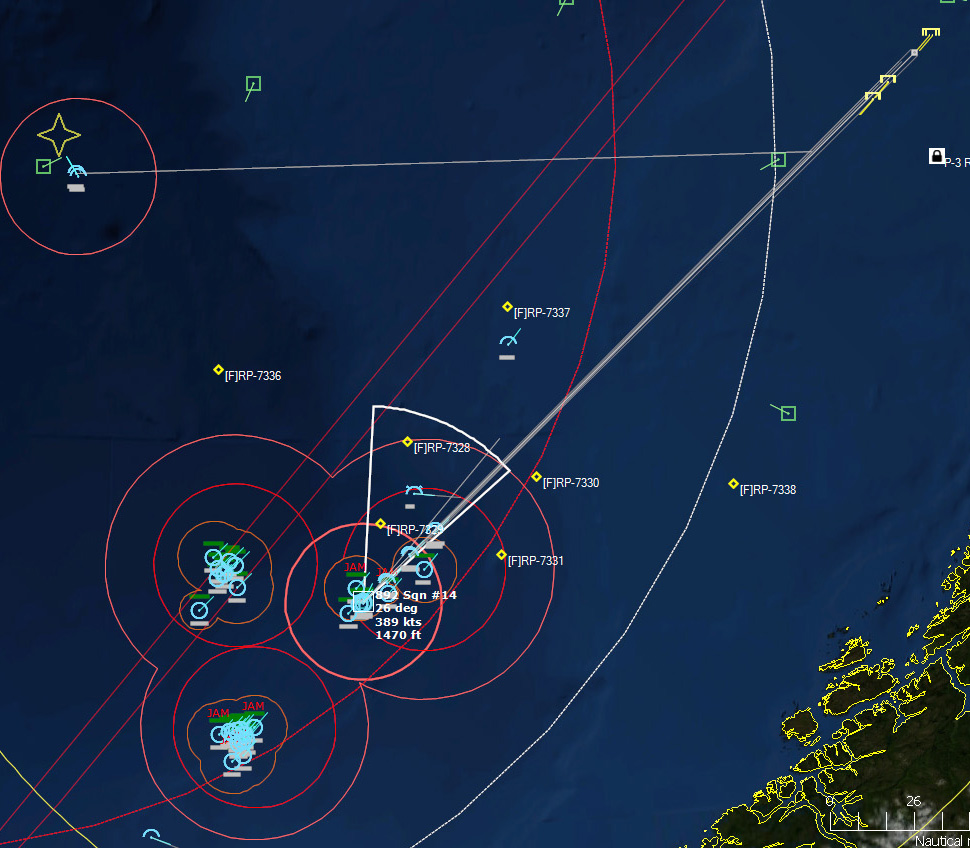
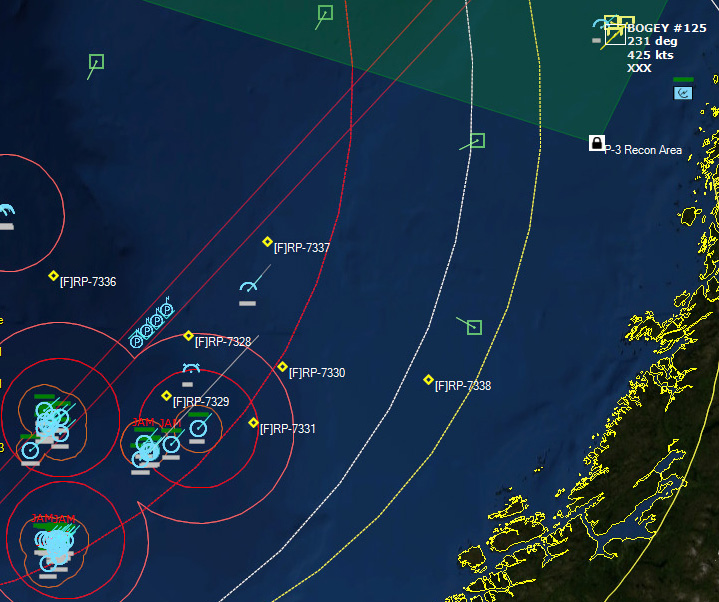 AEW detects an inbound strike143038Z The P-3s have done well in identifying the Soviet surface groups, and Ark Royal is preparing a strike. However, it will be 1.5 hours before the entire package is ready. But there is a problem. The Gannet AEW detects an inbound strike--probably Badgers. All ready F-4s are launched to intercept. Currently there are four inbound, but undoubtedly there are a lot more behind.
The strike will have to launch now with what I have, otherwise I may lose it. Six Buccaneers from 809 Squadron, four with AS.37 Martels (ARMs) and two with AJ.168 Martels (ASuW missiles) launch. Hopefully Ark Royal will still be around for a follow-up strike.
143206Z Contact. Raid 1 is now 6 aircraft, bearing 054 for 200 miles. 2 Phantoms are airborne and heading to intercept.
 F-4s splash a Bear and are then diverted to go after the incoming raid143557Z Two of my F-4s splash another Bear D. They are then diverted to go after the incoming raid.
144502Z Not taking any chances, I declare all the contacts hostile. My 8 F-4s, moving at Buster, close in on the Badgers which are doing 425kts.
 F-4s close in on the raid in pairs144605Z Things are about to get interesting.
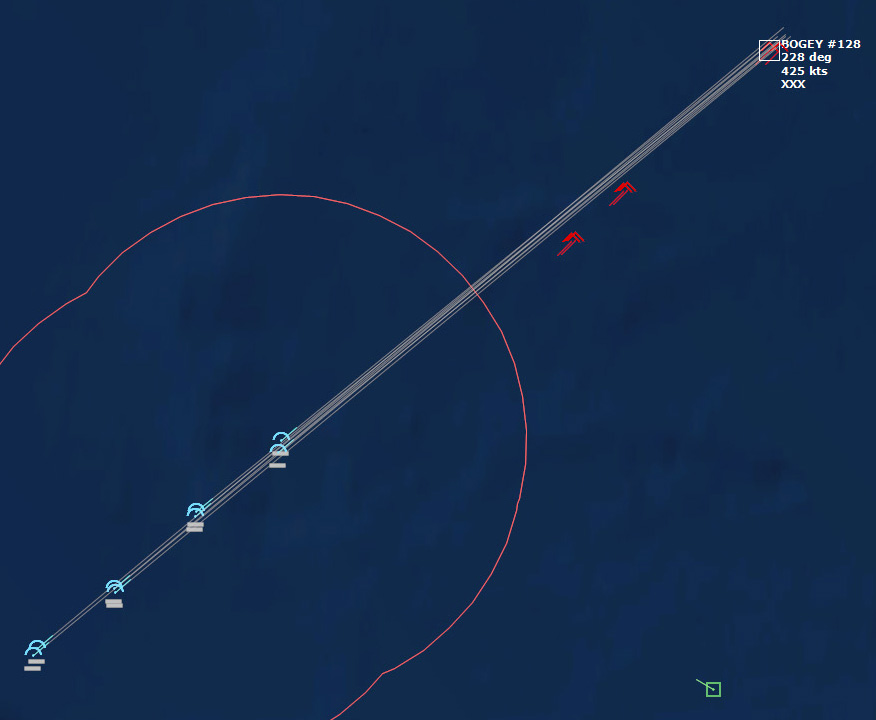 Closing into missile range144642Z Fox One! Four Sparrows are launched.
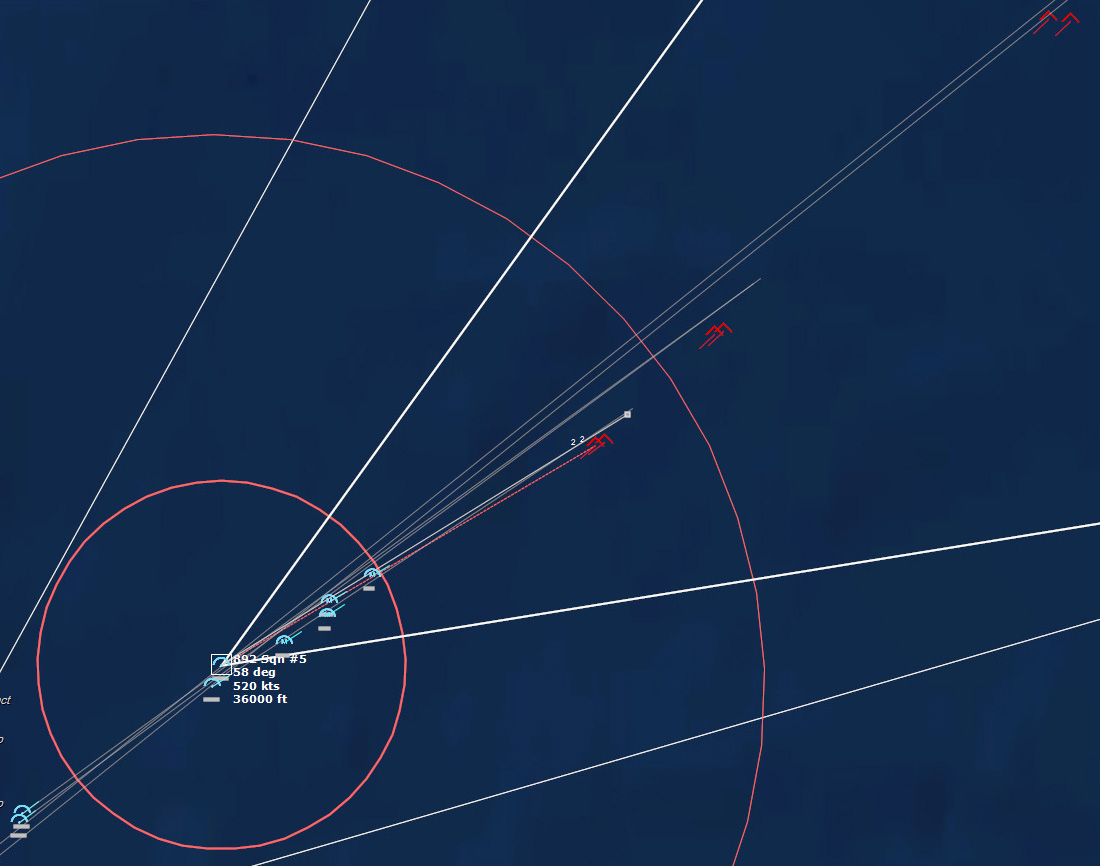 Missiles away144717Z Splash One Badger.
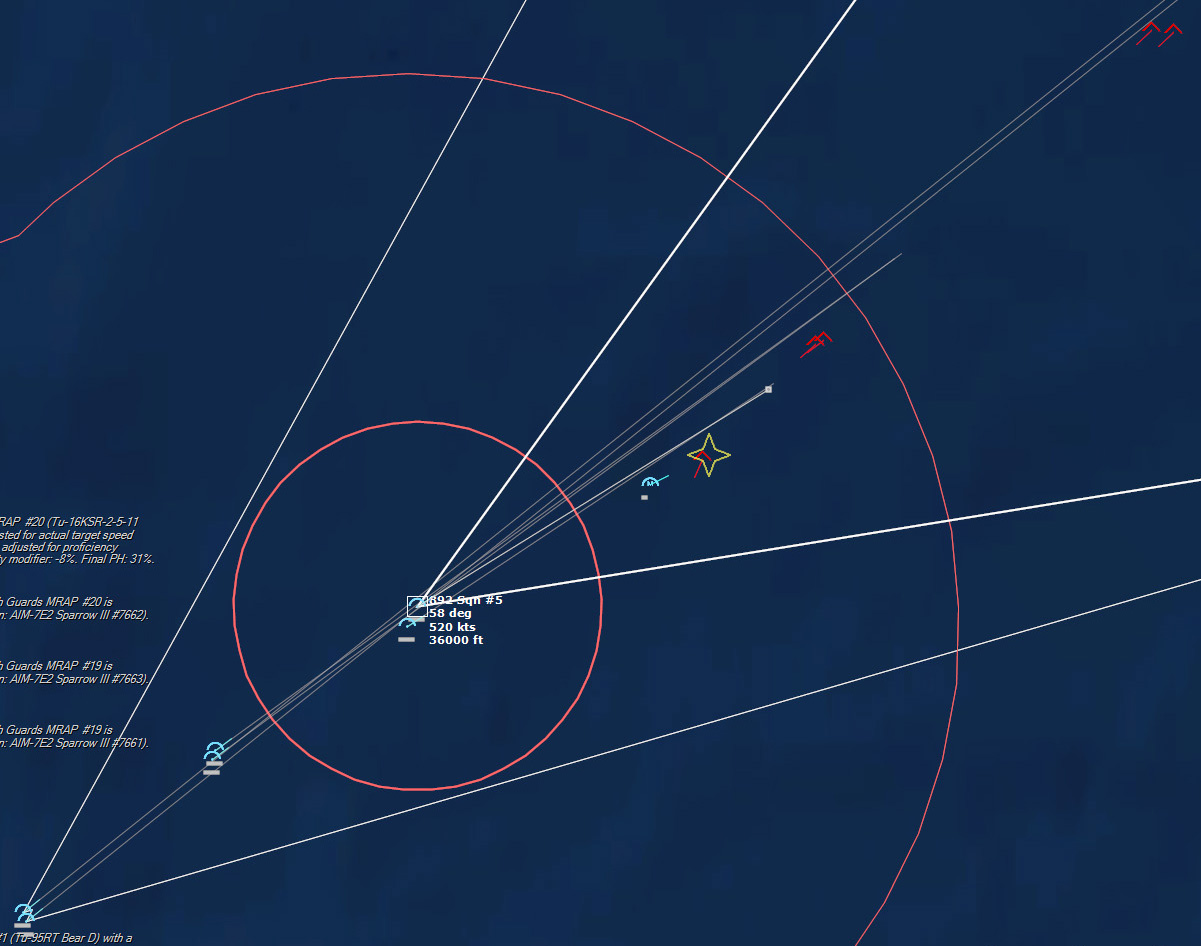 Splash One Badger144830Z Splash Two.
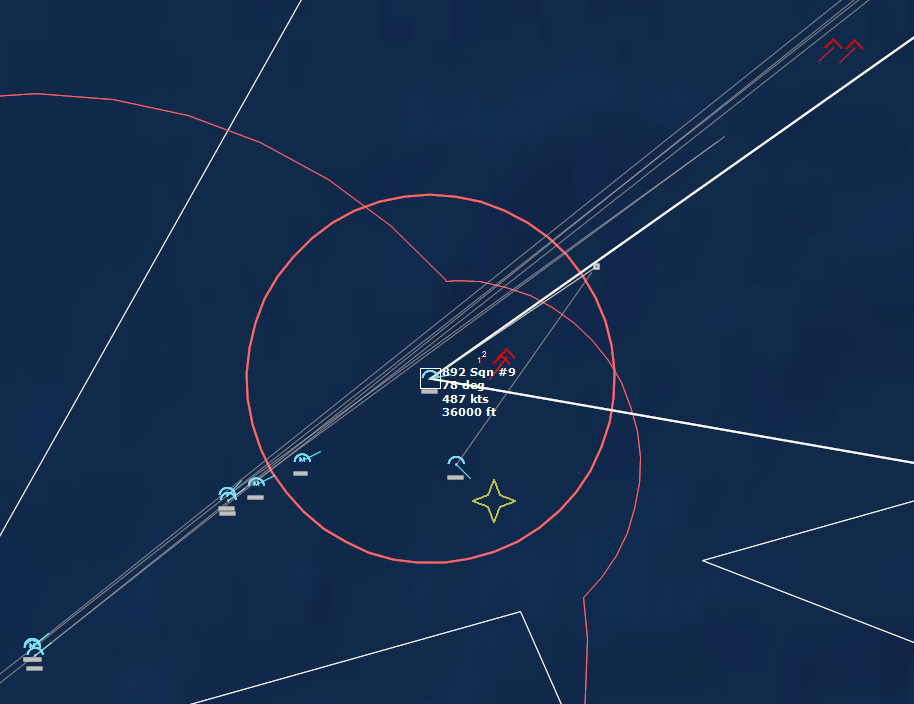 Splash Two144845Z Splash Three.
 Splash Three145001Z Splash Four.
 Splash Four145006Z 892 Sqn #9 is shot down by a burst of 23mm rounds...a very lucky shot.
 An F-4 is shot down145022Z Splash Five.
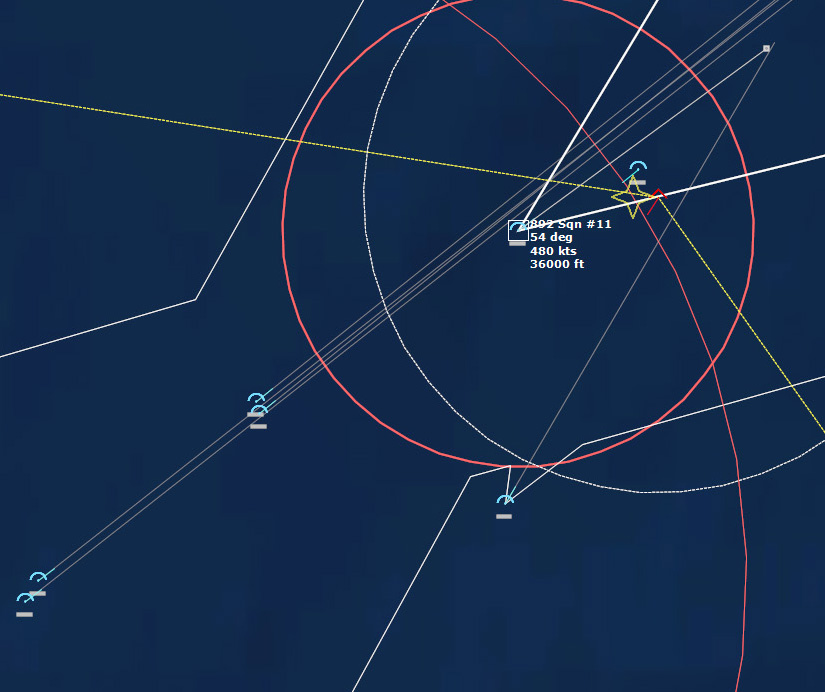 Splash Five145050Z Splash Six. Raid 1 is destroyed, with no missiles launched. Whew. No more Badgers are detected. Several of the F-4s go RTB Winchester.
 Splash Six. Raid 1 is destroyed.150026Z My strike upon the Sevastopol Surface Group begins. I decide to drop one target from the list at the last minute--which turns out to be a good decision, as it turns out to be a civilian vessel.
 Missiles awayOne AJ.168 Martel hits Sevastopol, and another hits Ognevoy, a BPK Kashin.
150336Z Sevastopol sinks. Neulovimyy takes a hit as well.
 The Martels impactThe remaining Buccaneers, two of them, head north to attack the second Soviet surface fleet.
 151136Z Two more bogeys detected, designate Raid 2, along the same flight path as Raid 1 earlier. One contact is moving at 525kts, the other at 425--probably a Badger. First contact unknown.
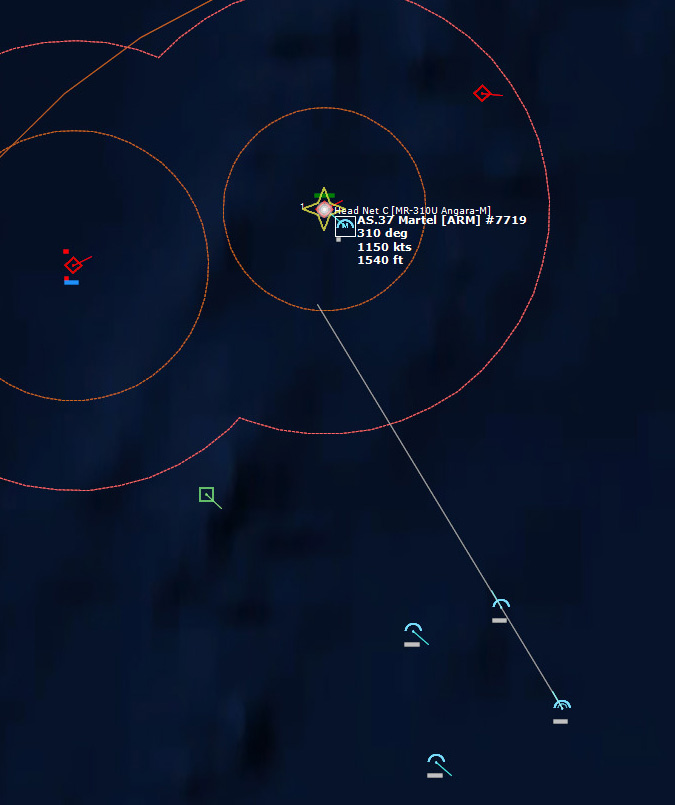
151510Z None of the soviet surface contacts have any radars on, so my AS.37s cannot track. Therefore I deliberately send in a buccaneer to do a flyover. The CG takes the bait and fires a SAM, and immediately the trailing Buccaneer launches a pair of AS.37s.
 A Buccaneer does a flyover to bait the Soviets into turning on their radarsFortunately both SA-N-3a Goblets miss the lead Buccaneer.
151624Z The strategy works and the CG is hit by an AS.37. Unfortunately, a subsequent SAM launch kills one of the two Buccaneers, and the survivor heads for home.
 The CG is hit by an AS.37151703Z Fox One on Raid 2. The F-4 fires 2 Sparrows and 4 Sidewinders at the Badger...and misses with all of them.
 Fox One!152501Z Vampire! The lead Badger shoots its weapons. The two Vampires appear to have been fired bearing-only, as they leave on a heading of 204, which leads far to the east of the Ark Royal group by about 40 miles. Soon the Vampires change course--it looks like they will hit the group.
Sheffield shoots down all the inbound missiles--they appeared to miss Ark Royal’s group, but there was a danger of them hitting the following group.
The Badgers are destroyed. A followup strike is launched to go after the Soviet surface action groups, and the Ark Royal works fast to get the F-4s ready for launch again.
163027Z Torpedo in the water! Apparently my ASW efforts are grossly inadequate. There is panic for a time, but as the torpedo contact forms up, it appears to be far from my fleet. Still, I use the opportunity to beef up my ASW patrols a little bit.
163744Z The follow-up strike on the Soviet SAG is underway.
 The followup strike is underway163911Z The Kresta II-class Marshal Timoshenko is hit and sunk. One of the Buccaneers is hit by a SAM launched from Gremyashchiy, but it has 6 Martels inbound. Gremyashchiy is hit hard and sinks.
 Marshal Timoshenko is hit
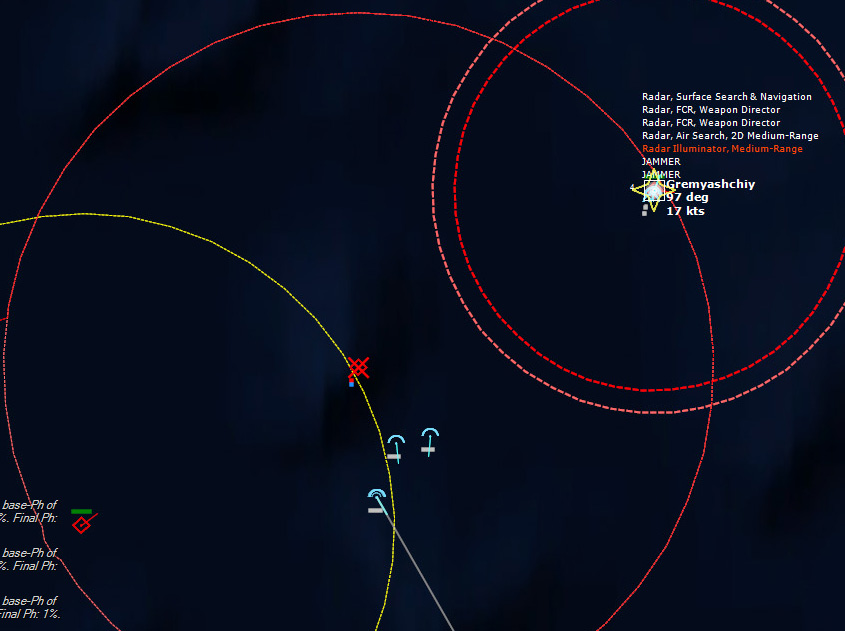 Gremyashchiy is hit hard164252Z Another Torpedo contact...this is the third. It makes me wonder if someone is just randomly firing torpedoes. I’ve seen no targets hit or destroyed. I wonder if someone is firing at one of the commercial vessels ahead of my task forces.
170438Z A F-104 splashes another Bear D between Bodo and Andoya.
181632Z More inbounds--designate Raid 3. Most of the F-4s are nearing readiness, so they will be tasked to intercept. Raid count is four.
181910Z Raid count is now 6. This looks to be a major raid in the making.
182020Z Raid count is now 10. One F4 Interceptor is airborne, the others are being launched as fast as possible.
 Raid 3 numbers ten aircraft182855Z The last available F-4 is airborne, leaving eight fighters to take on the raid of ten bombers.
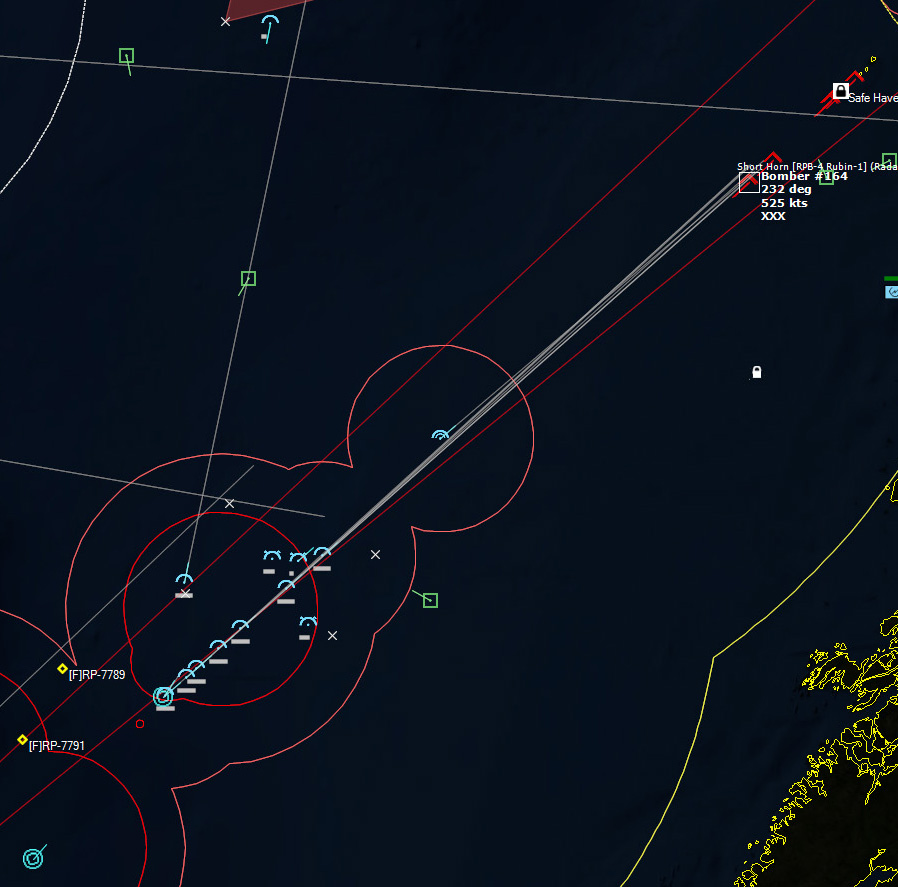 The fighters move to intercept the raid182948Z Uh-oh. The first two bombers turn...did they already launch? No vampires detected...yet. They are currently 190nm miles away from Ark Royal, and 50 miles from the nearest F-4.
Now it looks like the second pair of bombers are turning. This is not good. I should have detected inbound vampires by now…
183037Z Vampire! Vampire! Multiple missiles inbound! The lead Phantom sees them first.
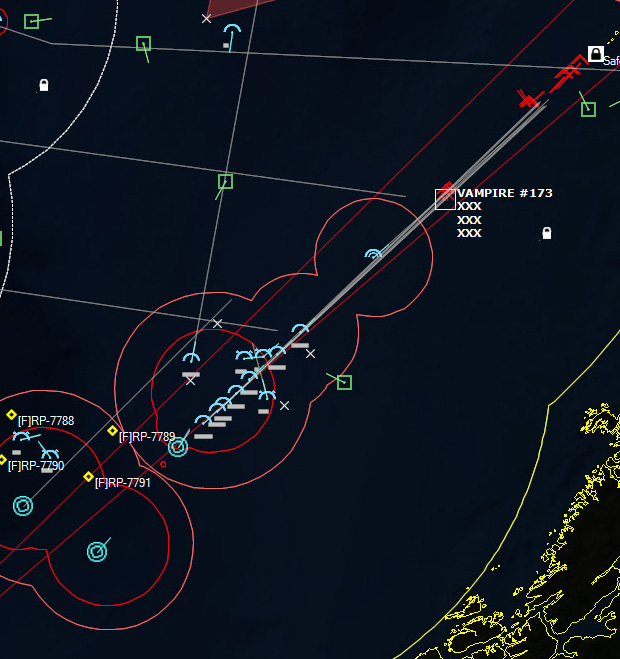 Vampire! Vampire!183127Z More Vampires inbound, 8 in number.
 Vampire count increasing...Vampire count increasing…
 Here they come...183337Z Sheffield opens fire, but it has only 4 Sea Darts left. Behind Sheffield is Galatea and Berwick with Sea Cats, but I have little hope they’ll work. There will likely be 20 Vampires inbound. Ark Royal is in deep, deep trouble.
 Sheffield fires its Sea DartsThe Sea Darts do horribly. The angle is poor and they cannot strike the missiles.
 The angle is terrible and so the Sea Darts missGalatea’s Sea Cats will not fire at all, as they are incapable of striking the inbound missiles. I fear Ark Royal is doomed many times over.
 The Vampires soar over the impotent GalateaThe Vampires zoom over Galatea, completely ignoring her, making a beeline for Ark Royal…
 Ark Royal is in deep troubleTo be continued...
June 13, 2017
COMMAND: Northern Inferno Scenario 5: Beware the Badger Part 2
 In Part One of this scenario, the Soviets executed a series of air raids against northern Norway, taking out several radar stations and culminating in the destruction of the airbase (and town) of Bodo with two nuclear weapons. Fortunately, Bodo had maintained several underground hangars that survived the nukes, so the airbase was not completely out of action. This was small consolation to the inhabitants of the town of Bodo, who were obliterated.
In the meantime, the NATO amphibious task force continued to head north in a bid to reinforce Narvik and Bardufoss before northern Norway was completely overrun by Soviet forces.
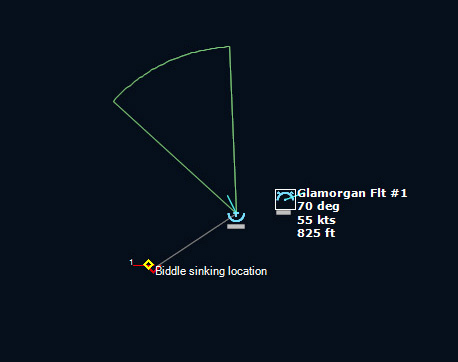
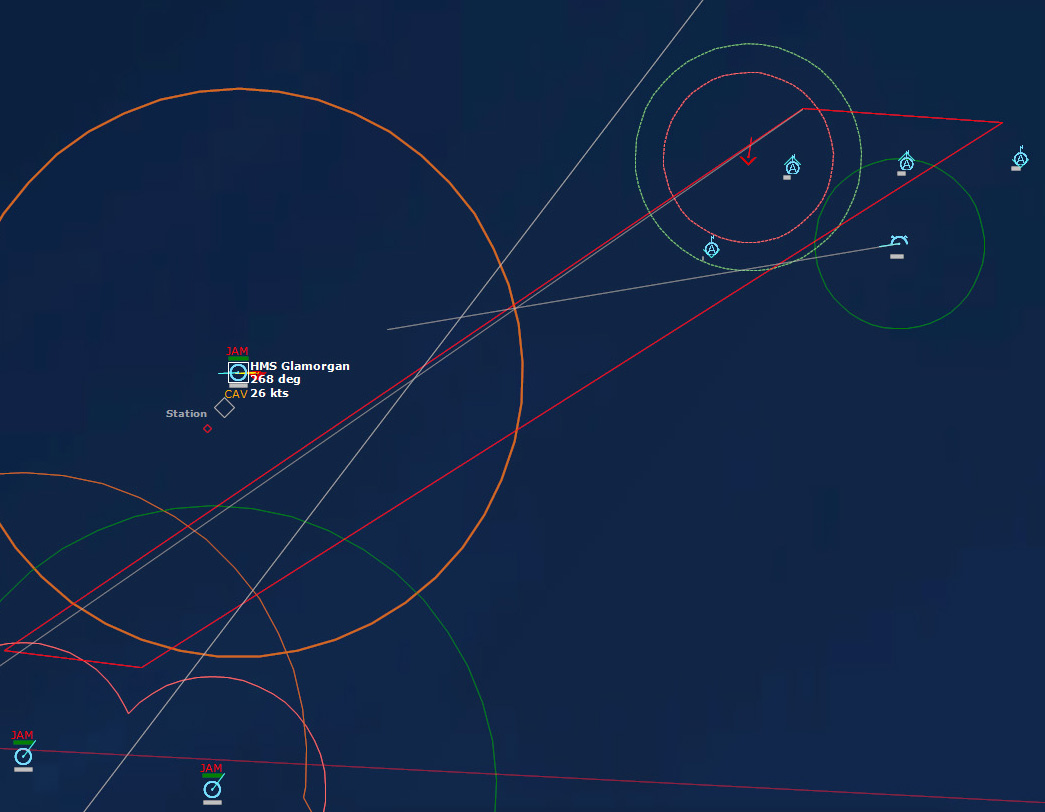 Torpedo in the water!The torpedoes appear to be aimed at HMS Glamorgan, which goes due west and accelerates to flank speed. The helos move in to prosecute the contact.
The first torpedo misses, spoofed by the towed decoy. The second hits, sinking Glamorgan.
085545Z One of the Ark Royal’s CAP of Phantoms investigates a surface contact, determining it to be a Russian AGI, the SSV Okean. Ark Royal launches a strike to take it out (a Buccaneer with a 1000lb bomb).
 HMS Ark Royal085808Z Another pair of Phantoms investigates another surface contact, and determines that it is another Russian AGI. These guys are everywhere. Another strike is launched, this time, a pair of Harriers from USS Guadalcanal.
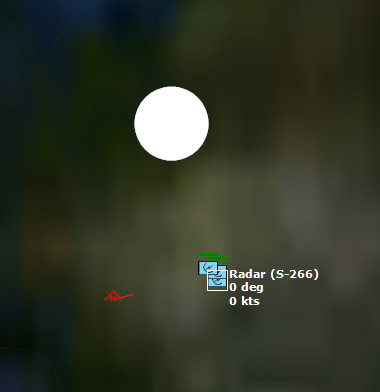
090106Z SE of the ruins of Bodo, Radar S-266 detects a pair of Vampires inbound--it is likely that they are cruise missiles launched from a submarine.
090152Z The inbound missile classified as a SS-N-3b Shaddock [P-5D, AGM, 350kT Nuclear]. These guys aren't playing fair at all.
 The first nuclear cruise missile detonates
 ...and the second
090519Z A Buccaneer drops its bombs on the SSV Okean. The bombs apparently do very little damage, so a follow up strike will be necessary.
 The Buccaneer bombs the Okean092321Z One of the P-3C Orions out of Keflavik detects multiple ships heading east, and to their southeast is an unidentified helicopter--I suspect this is one of the Russian fleets.
 A P-3C Orion detects a group of ships heading east094300Z After a long and desperate search for the Victor I-class submarine that sank the Glamorgan, it is finally localized by the 3 Sea Kings. Instantly HMS Galatea launches an Ikara [Mk46 Mod 2] at the contact.
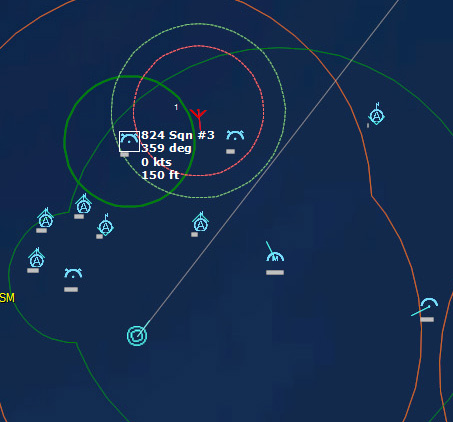 The Galatea launches an Ikara at the submarine contactThe rocket lands and quickly the torpedo hits, damaging K-370, but the sub is still kicking. One of the Sea Kings retracts its dipping sonar and heads over to the location at full speed. Galatea reloads.
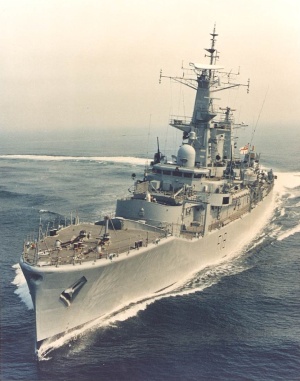 HMS Galatea094530Z Torpedo in the water! K-370 must be firing in hopes of sinking more of the fleet before it is destroyed. HMS Danae is the closest target. A second torpedo is detected. Danae appears to be the target.
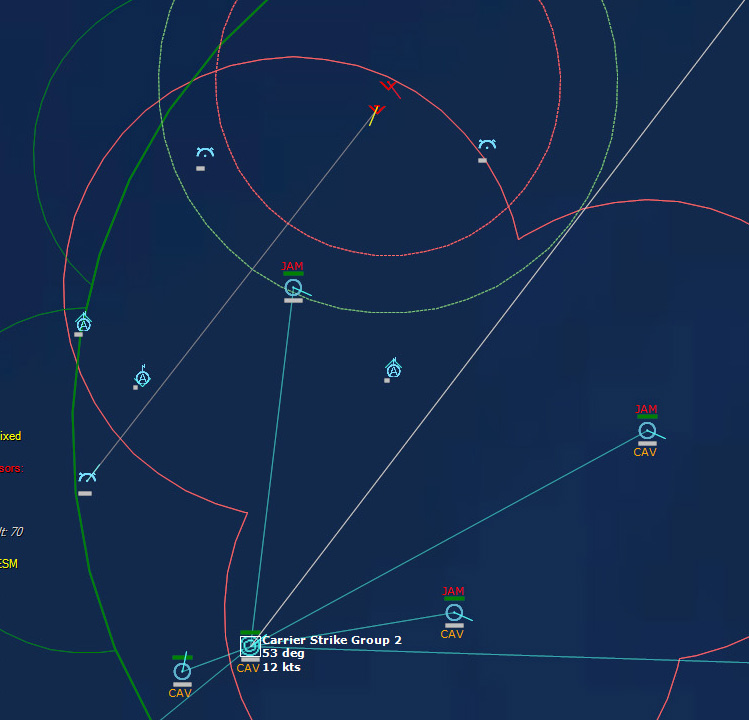 Torpedo inbound on the Danae094854Z The torpedoes close in on the Danae, and Galatea launches another Ikara at the K-470.
 Two torpedoes close in on the Danae095018Z HMS Danae is hit and sunk.
 Danae sinks095051Z A Sea King’s Mk46 impacts the Victor, rendering it dead in the water, but not sinking it. The Sea King drops another, which goes on a search. The second torpedo hits, and the contact is lost.
 095807Z A pair of the Ark Royal CAP Phantoms close in on a snooping Tu-95RT Bear D. The third Sparrow shot splashes the Bear.
 F-4s close in on the Bear-D
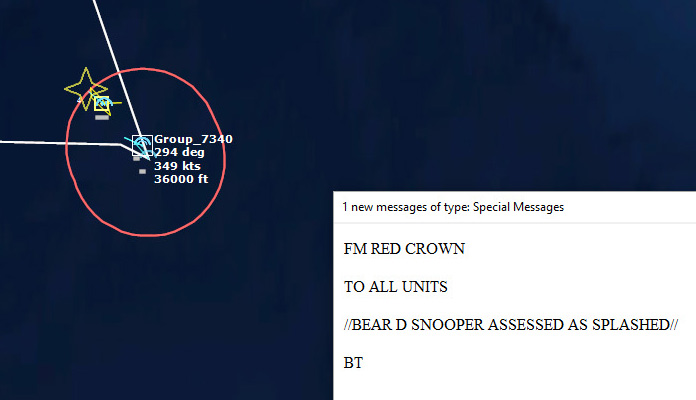 And the Bear is shot down101732Z Vampire! HMS Sheffield detects a missile. For all I know, there is a Badger strike inbound and I can’t detect it…
 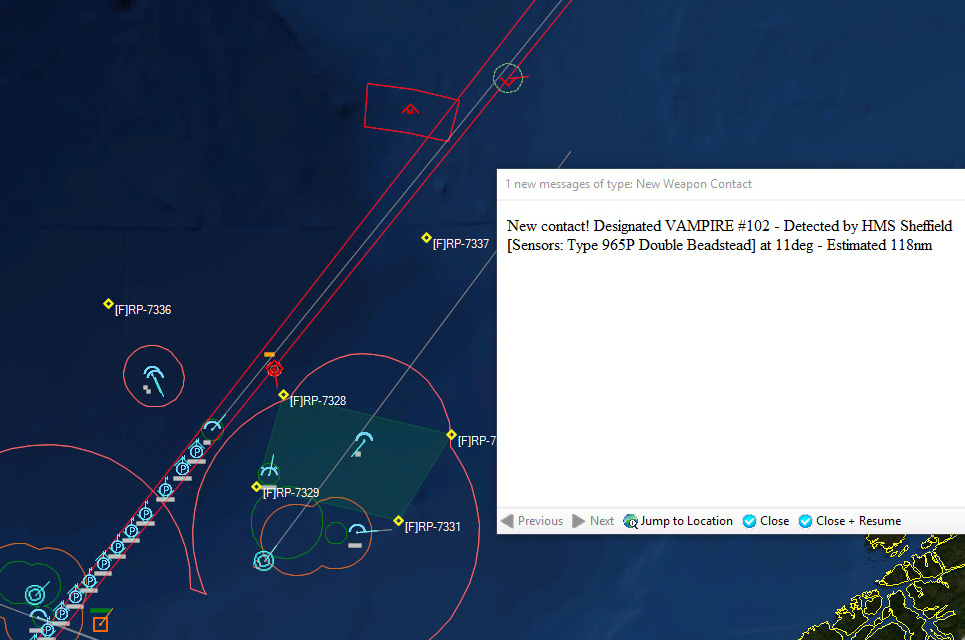 Vampire!Seconds later, the Vampire is determined to be on a course of 99 degrees. That makes it appear to have been launched from the group of ships to the NW, but the target is unknown--we have no assets in that area. Eventually the contact is lost.
 The supposed location of the Russian task force is some 260 nm away from Ark Royal, but I only have 2 Buccaneers ready for a strike. It will be just under 4 hours until more aircraft are ready. I’ll have to wait.
113144Z Several P-3Bs are exploring surface contacts.
 P-3Cs investigate contacts124226Z One of the P-3Bs from 333 Sqn is shot down by the Sevastapol when it wanders too close. Still one hour and twenty minutes until the first airstrike will be ready.
In the meantime, the Soviets are certainly preparing their air raids from the Kola peninsula. It's only a matter of time before the skies over Norway are filled with cruise-missile armed Badgers, eager to sink the NATO ships.
To be continued...
June 12, 2017
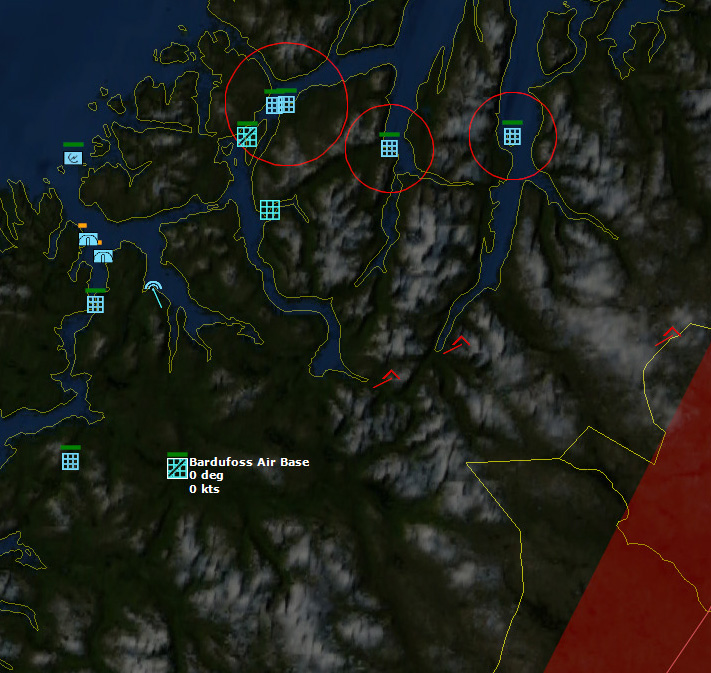
COMMAND: Northern Inferno Scenario 5: Beware the Badger Part 1
 Introduction
Soviet Forces have crossed the border near Pechenga. Although Intelligence is sparse, Norwegian forces at present are holding their own against overwhelming odds. The objective of the Soviet forces is unclear at the moment, but it could be the start of a major Soviet offensive against Norwegian ports and airfields.
NATO has ordered limited reinforcement of the North Cape area; British airborne forces have been flown in to support Norwegian troops at Banak.
Britain has deployed the 3rd Commando Brigade to Norway, along with Dutch Marines embarked on HMS Bulwark, Fearless and Intrepid along with numerous small landing craft. The United States have also put together an amphibious group comprising of USS Guadalcanal, Ponce, Portland and Sumter.
Reconnaissance flights and satellite imagery have detected Tu-16 Badger regiments fueled and armed with supporting assets in the Kola Peninsula. These forces are expected to contest any NATO movements in the Norwegian Sea.
Can the 'phibs make it to safe waters before Soviet aircrews add them to their kill tally?
Orders for Cmdr NATO Forces
Situation Norway is standing alone at the moment holding off the Soviet Invasion, with reserve units been mobilized. NATO has airlifted stores and supplies to the northern airbases, including QRF troops from the UK and the Netherlands.
En route to Norway is a combined amphibious group carrying Royal and Dutch Marines with escorts including the Ark Royal strike group; as the only aircraft carrier available within 1000 miles she must face and defend the amphibious group against air, surface and subsurface threats.
Over the last few days Sweden has protested to the Soviet Union about violation of Swedish airspace, so be advised to expect possible aircraft crossing the Swedish border.
Enemy Forces
Surface: At least two Soviet KLUGs (Surface Action Groups) have been detected north-west of Narvik, this group includes Kresta I and II cruisers and Kashin, Kotlin and Kildin destroyers.
Air: Tu-16 Badger G Mod, Su-17M Fitter C, Tu-16 Badger A, Tu-16 Badger H, Tu-16 Badger J, Tu-126 Moss.
Subsurface: Tango Class SSK, Whiskey Class SSG, Zulu Class SSK
Friendly Forces
Andoya air base:
333 Sqn (P-3B Orion)
Bodo air base:331 Sqn (F-104G Starfighter) 334 Sqn (CF-104G Starfighter)
RAF Kinloss:8 Sqn (Shackleton AEW)
NAS Keflavik:VP-26 Dragons (P-3B Orion)
Carrier Strike Group 2: HMS Ark Royal CVA, HMS Glamorgan DLG, HMS Sheffield DDG, HMS Berwick FFh, HMS Danae FFh, HMS Galatea FFh, RFA Resurgent AE, RFA Tidespring AO
TU 603.01.05: HMS Bulwark LPH, HMS Devonshire DLG, HMS Amazon FFh, HMS Diomedie FFh,HMS Hermione FFh, HMS Rothesay FFh, HMS Fearless LPD, HMS Intrepid LPD, RFA Sir Galahad LSL, RFA Sir Lancelot LSL, RFA Sir Percival LSL, RFA Sir Tristram LSL, RFA Black Rover AO.
TU 603.01.06: USS Guadalcanal LPH, USS Biddle CG, USS Blandy DD, USS Forrest Sherman DD,USS Julius Furer FFG, USS Ponce LPD, USS Portland LSD, USS Sumter LST.
Mission
1. Ensure safe transit of amphibious groups to area marked "Safe Haven"; the groups have to remain in area for at least 6 hours to unload forces.
2. Once the amphibious groups are in "Safe Haven" area, launch helicopters to Bardufoss Air Base and deploy LCVPs and LCMs to Narvik muster area.
Execution
1. Air assets in Norway to detect and destroy any Soviet forces.
2. Ark Royal CVBG to provide maximum protection to amphibious groups, your escorts are expendable but the Ark Royal is not.
Command and EMCON
Command: HQ Northwood
EMCON: Alpha-limited emissions
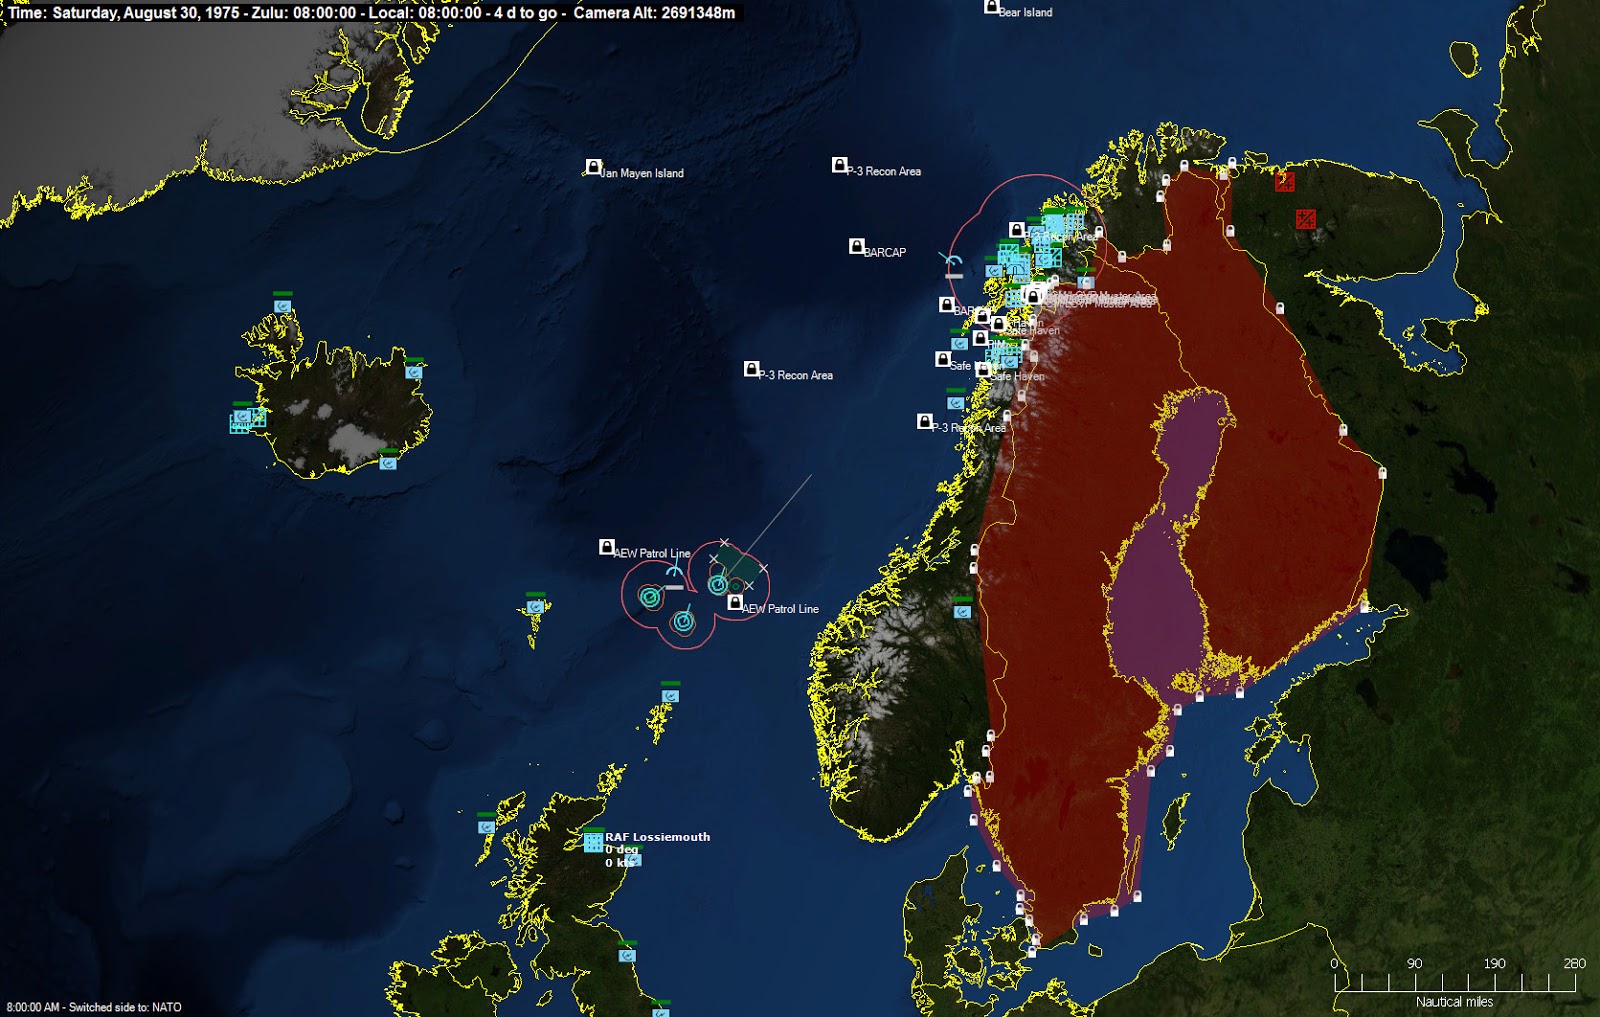 A long way to go...August 30, 1975, 080000Z
I set up an AEW Patrol, ASW Patrols (P-3 Orion) and Sea King (TF Ark Royal), and a BARCAP (F-104G Starfighters). This looks to be a complicated mission. Lots of contacts are detected, and where possible aircraft are tasked to investigate.
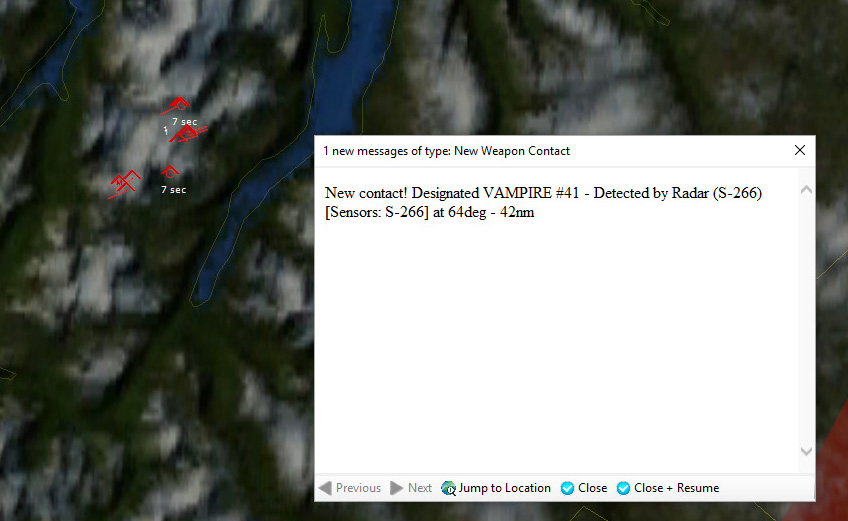
082003Z A Bogey overflying northern Norway is observed attacking a friendly unit and declared hostile. I suspect it is a Badger. Two more aircraft are soon detected, and all three are observed to be turning away. As they do, one of the Nike Hercules SAM batteries launches against them. More bogies appear inbound. Another SAM launches.
 The Soviet aircraft turn away after almost certainly firing missiles
082111Z Vampire! More missiles are detected inbound. The missiles appear to be inbound toward Norwegian radar sites.
 Vampire!082201Z One of the Nike Hercules missiles hits a Su-17M Fitter C.
 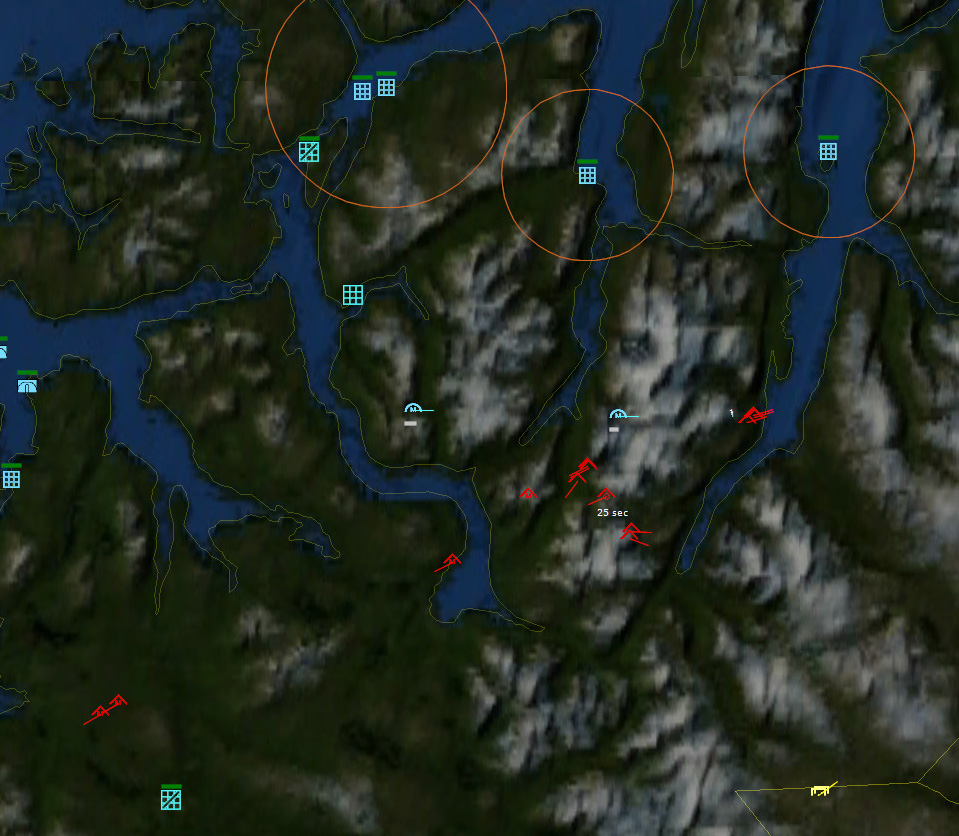 Nike Hercules SAMs go after the inbound bogeys082211Z Radars are indeed the targets.
 The radars are overwhelmed with targets082300Z There are missiles airborne all over the sky now, and they are clearly overwhelming the defenses. Two more Radar sites go down, but another Fitter is destroyed. Three vampires are inbound towards the Nike Hercules SAM sites.
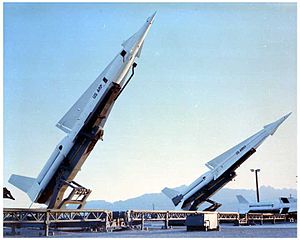 Nike Hercules missilesThe missiles destroy the tracking radars of both SAM sites, rendering them completely useless. The will make the follow-up strikes by the Badgers far easier.
082937Z A submarine contact near the Ark Royal Group is IDed as a Victor I. Two Sea Kings attempt to prosecute the contact but are having difficulty localizing it.
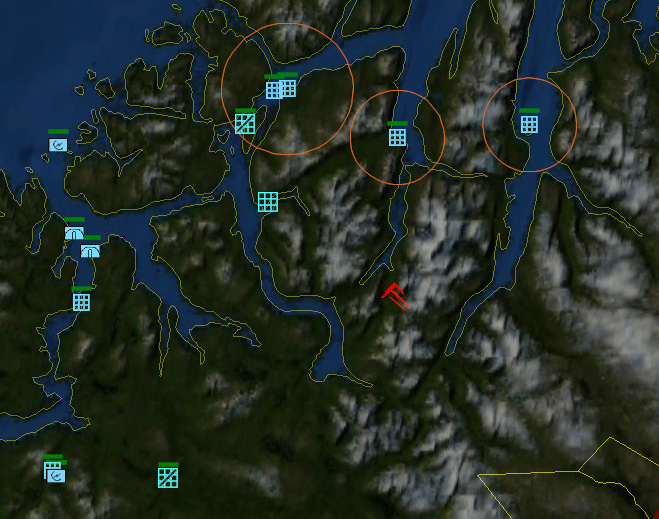
084335Z Some Su-17M Fitter Cs attack Bodo Airbase. My F-105s are directed to intercept. The two Fitters drop bombs on Bodo Airbase. I wonder what is taking so long for the bombs to land, and surmise they must be dropping by parachute.
 A pair of Su-17 Fitter Cs make it over Bodo Airbase, dropping bombs084535Z An EMP blasts the entire airbase. That can only mean one thing.
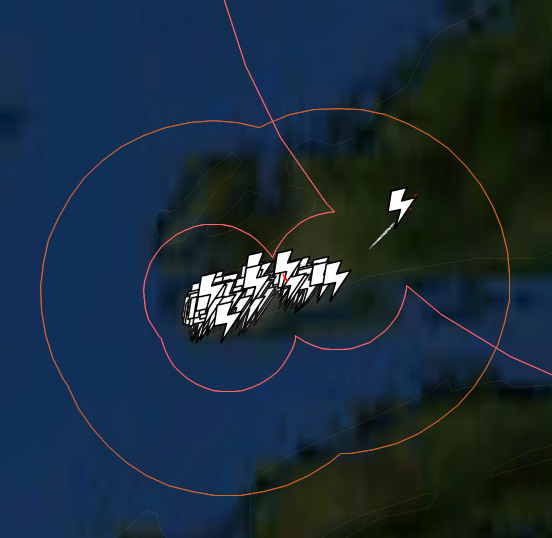 A massive Electromagnetic pulse blasts the areaJesus Christ, they just nuked Bodo.
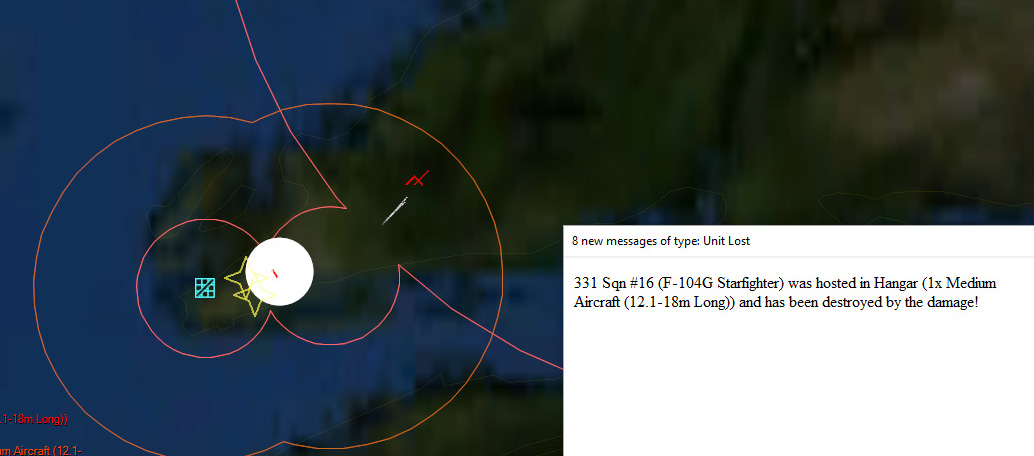 The fireball expands rapidly, destroying everything in its path
 The town of Bodo...before it was blown away.The town of Bodo is annihilated.
 The devastation spreadsThe fireball expands to some 8nm in diameter before it begins to fade. An F-105 destroys the first Fitter, but it is small consolation.
 The first fireball fades...and then the second nuke detonates084636Z The second Fitter C is shot down, but just as that happens, the second nuke detonates over Bodo.
 The second 30kt blast beginsTo be continued...
June 7, 2017
COMMAND: Northern Inferno Scenario 4: Barents Sea Boomers
 Introduction Soviet forces have launched a surprise offensive on NATO's northern flank. Norwegian forces have been caught unprepared and are reeling back under the onslaught of Soviet divisions and airborne forces.
No nuclear weapons have been used on land as yet, but over the last 2 weeks nuclear depth charges have already been used.
The deployment of Soviet submarines is markedly increasing, as can be seen with the HMS Revenge sortie incident a few days ago. NATO's own attack subs have been deployed and are now en route to the Soviet backyard to repay the visit.
Intelligence has concluded the remaining Northern Fleet SSBNs, particularly the new Delta-class, are now in the Barents Sea under constant ASW cover by air, surface and sub-surface units forming a protective ring of steel.
But NATO is determined to show the Soviets that their strategic subs have nowhere to hide.
Orders for Cmdr NATO Forces
Situation
Three days ago, HMS Revenge was sunk by a Victor II SSN [Not in my game! Woohoo!]. NATO has planned retribution for this act and deployed submarines to the Barents Sea. Over the last few days the remaining Red Banner SSBNs have retired to their "Bastion" under the protective umbrella of air, surface and subsurface forces.
This mission is vital: it is hoped that threatening Soviet strategic weapon systems will compel Soviet commanders to increase their defence of the Bastion, drawing forces away from the front. Sinking these SSBNs will also reduce the Soviets' essential offensive nuclear strike capabilities.
It is NATO's intention to sink the remaining SSBNs in the "Bastion".
Enemy Forces
Subsurface:
Delta I SSBN Tango SSK Foxtrot SSK Victor II SSN Surface:
Petya FFL Poti FFL Krivak FFG Kanin DDG Air:
Be-12 Mail Il-38 May Friendly Forces
USS Whale SSN USS Tunny SSN Allied Forces (not under player control)
HMS Swiftsure SSN HMS Warspite SSN ***WARNING*** HMS Swiftsure and Warspite locations at present are unknown so ensure correct classification before weapon engagements.
Mission
1. Sink at least two SSBNs. Last known positions available on map, based on Datums 1 and 2 DTG 232200ZAUG75.
2. All NATO submarines are considered expendable, priority is to sink the SSBNs.
Execution
1. All units are to prosecute last known position of Soviet SSBNs.
2. Other surface/sub units are not to be engaged unless they present a threat, the main target is the SSBNs.
Command and EMCON
Command: COMSUBLANT
EMCON: Alpha-Limited Emissions
[image error] Initial positionsAugust 24, 1975 080000Z
Tunny goes for Datum 1, while Whale goes for Datum 2. Both submarines dive under the layer.
[image error] Sturgeon-class submarine USS Tunny (SSN-682)100000Z A flash message is received:
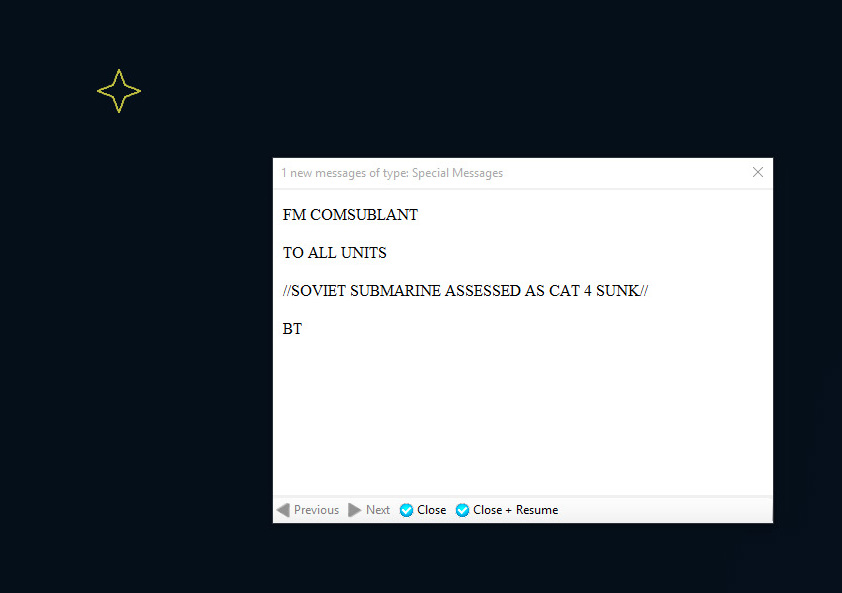
FLASH FLASH FLASH FM CINCLANT TO ALL UNITS // THE USE OF ASW NUCLEAR WEAPONS IS AUTHORISED// BT
[image error] The FLASH message is received
135032Z USS Whale: Contact, Goblin 6 Bearing 328, estimated 16nm. Whale is tasked to investigate the contact.
142500Z Goblin 6 is IDed as biologic in nature.
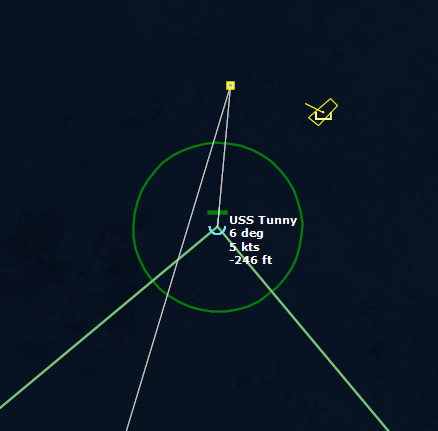
164849Z Tunny detects a contact, Goblin 7, 070 for 16nm. It slow to 5kts to investigate. The target is below the layer at -253ft and moving at 3 kts.
Goblin 7 is IDed as a submarine, but not sure what kind.
185135Z Tunny closes to within 400 yards...and still the contact is not positively identified.
185744Z Tunny closes to within 50 yards of the target...and still cannot ID it. It is assumed not to be an SSBN, so Tunny allows it to pass on. [I shadowed that thing at extremely close range, but simply could not identify it. I'm convinced that if the game handled ships ramming each other, I would have rammed it. Maybe it was one of the British subs?]
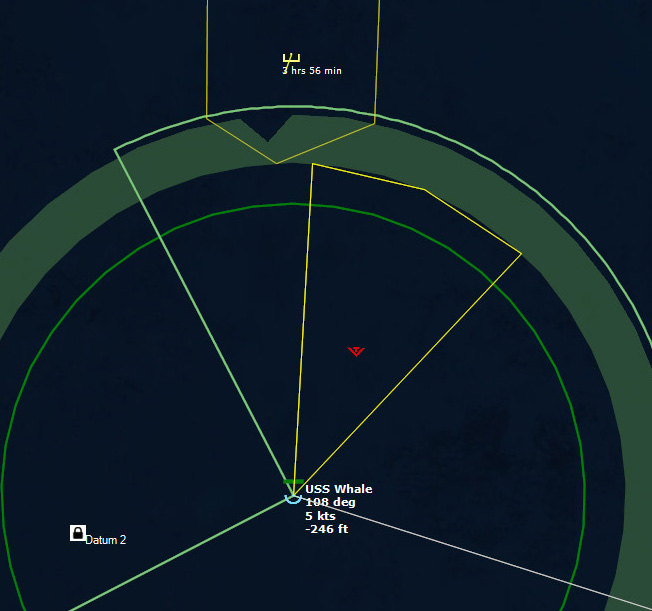
222552Z Whale detects a contact, 031 for 35nm. It turns to intercept.
After a speed run at 12kts, Whale slows down to 5 kts and localizes the contact to 054 at 10nm.
August 25, 1975
001122Z Whale type classes the submarine as an SSBN.
The contact is out of range of torpedoes, so it will have to close the range a bit.
[image error] Whale detects the new contact Torpedoes away!
[image error] Torpedo away!
 Two torpedoes track the contact
002418Z The enemy sub detects the incoming torpedoes by increasing power and going deep.
The sub goes down to 787 ft and speeds up to 15 kts, but the Mk48 follows it implacably.
[image error] The first torpedo closes in. 002528Z Impact. The Delta-class sub K-279 is destroyed.
 First target down.
 010644Z Torpedo in the water! Whale detects a torpedo at 330 degrees, 0nm. It’s close! Whale goes to flank speed and as deep as possible. This must have been an air drop.
010706Z Whale launches a decoy, which succeeds in spoofing the torpedo.
 Torpedo in the water!
 015536Z Torpedo in the water, bearing 023! Whale goes deep and guns its engines again, but it is not enough. USS Whale is hit and sunk.
 USS Whale sinks, and "Next of kind will be informed." Thanks for rubbing it in.
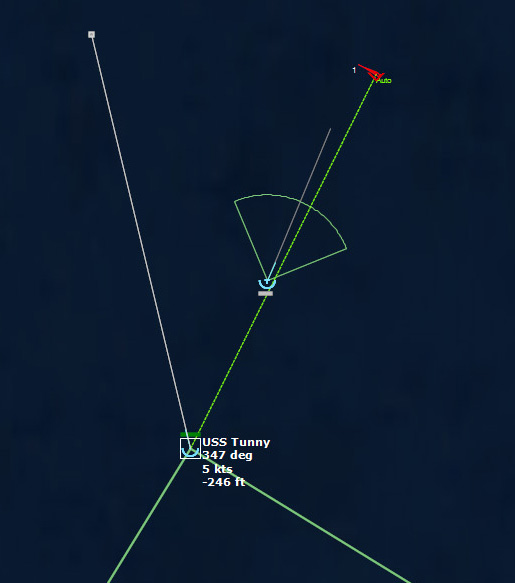
 140751Z Twelve hours after the sinking of the Whale, USS Tunny detects a contact, a surface contact bearing 242, est 6nm. It maneuvers to avoid the potential threat.
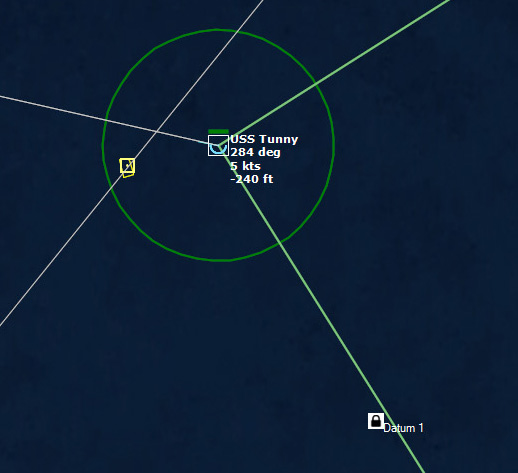 Tunny detects a surface contact.
 August 27, 1975 011507Z Ten hours after that, Tunny detects a submarine contact.
014857Z After some 30 minutes closing in, the contact is classified as an SSBN.
 Tunny closes in on the new contact.
 Match generated bearings and shoot!031434Z Tunny closes to within torpedo range and launches.
 032404Z The Delta I sub has no chance, and it is hit and sinks.
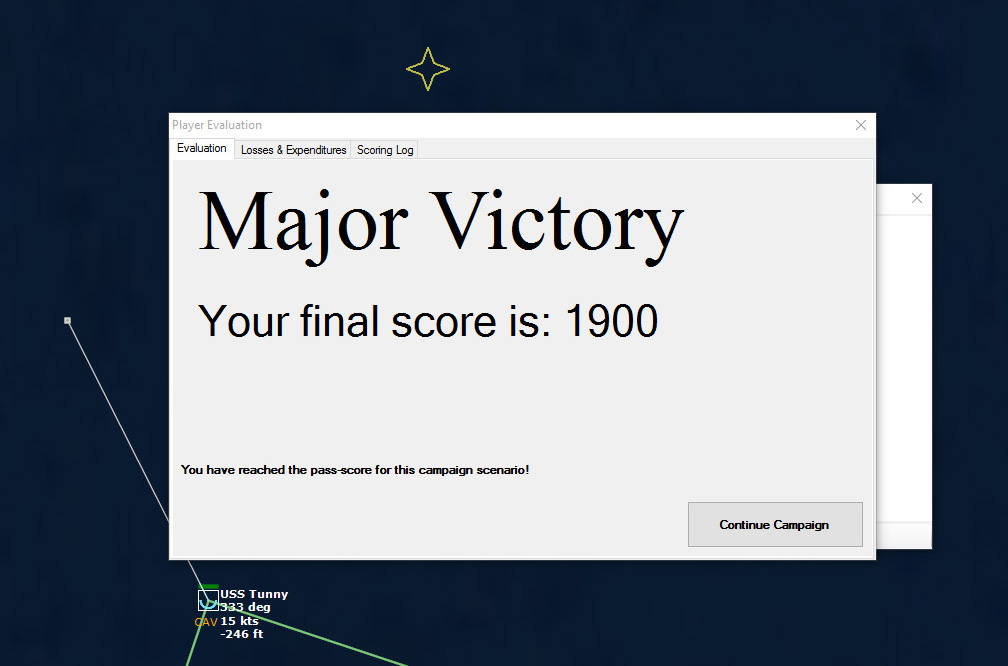 And...victory.
May 31, 2017
COMMAND: Northern Inferno Scenario 3: The Fast and the Furious
 Introduction
The Soviets have mobilised numerous motorized rifle divisions, artillery divisions, and an airborne division, which have been positioned to ensure rapid assaults towards critical objectives in northern Norway.
These have been backed up by an amphibious group, which has now been spotted about 140 nautical miles off the coast of Norway, heading directly for the Banak area.
Powerful Northern Fleet fast-attack craft squadrons have sortied from their bases and sailed into the Norwegian Sea 12 hours ago, screening ahead of the amphibious group.
Can Banak be saved?
Situation
An attack on Norway is imminent. Two Soviet amphibious groups believed to be carrying the Northern Fleet's Naval Infantry Brigade and a complete Soviet mechanized division are heading toward the Norwegian coast.
In addition, Soviet missile boat groups are reported to be heading into your patrol area. The submarine threat is unknown. No hostile air units are expected in the patrol area.
Enemy Forces
1. At least a dozen Soviet Osa I and Osa II missile boats are believed to be operating in the area, armed with SS-N-2 Styx missiles.
2. Amphibious units with heavy escort are heading towards Banak.
Friendly Forces
Hunter Group: HNoMS Trondheim FF, HNoMS Sleipner FFL
21st MTB Squadron det: HNoMS Snøgg, HNoMS Rapp, HNoMS Snar
22nd MTB Squadron det: HNoMS Arg, HNoMS Blink, HNoMS Brann
24th MTB Squadron Det: HNoMS Teist, HNoMS Tjeid, HNoMS Skarv
Banak air base:
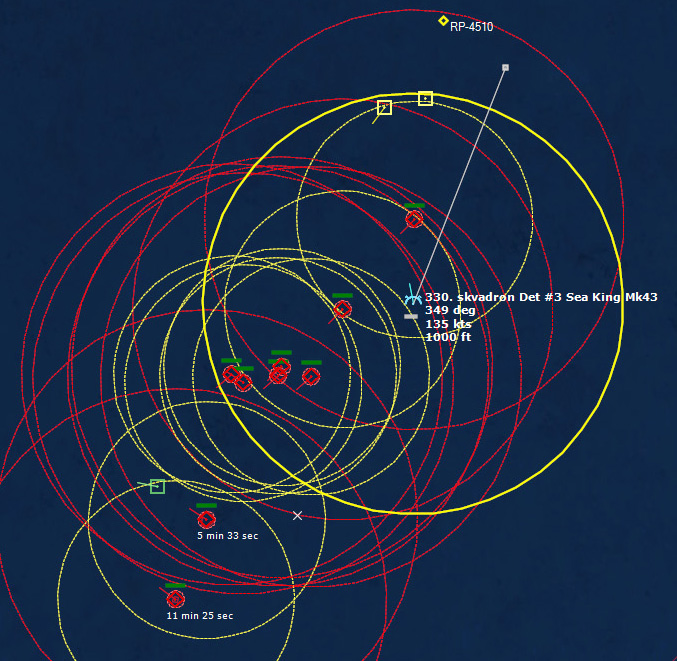
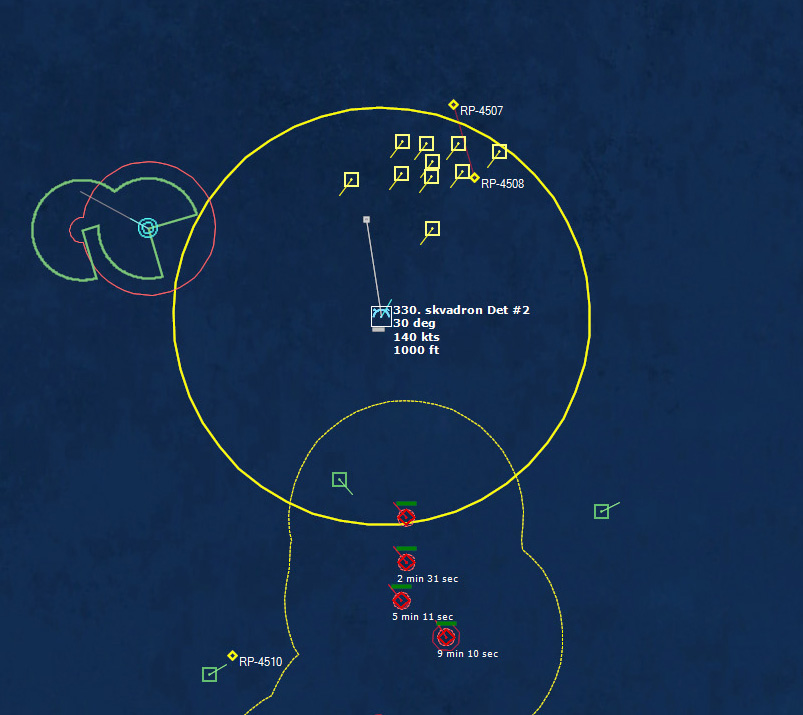
718 Sqn (F-5A Freedom Fighter) 717 Sqn (RF-5A Freedom Fighter) 330 Sqn Det (SeaKing Mk.43) Mission
1. Seek out and destroy the amphibious units before they reach Banak. The amphibious units are your highest priority targets.
2. Destroy the enemy missile boats.
3. This is a prelude to an invasion, so make your missile shots count.
Execution
Engage all Soviet units encountered. Torpedoes are largely ineffective against small boats, so you may have to rely on missiles and guns to counter smaller enemy warships.
Several neutral fishing boats may be in the area so be careful on target identification.
Command and EMCON
Command: HNoMS Trondheim
EMCON: Alpha-limited emissions
 HNoMS Trondheim
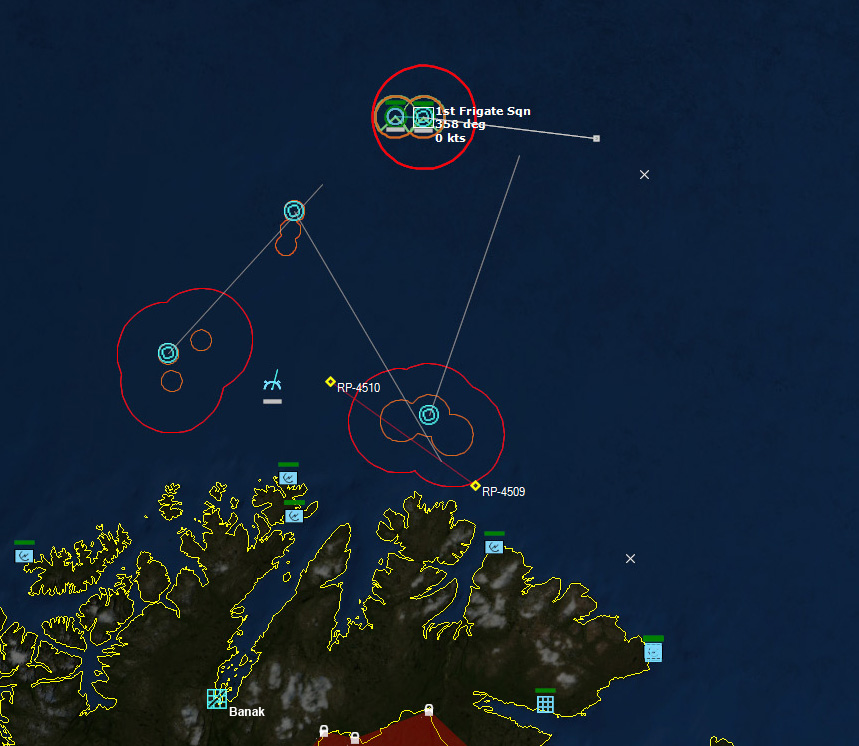 Initial disposition of Norwegian forces
August 20, 1975 050000ZSet up a recon mission of RF-5s on a barrier north of Vardo. Ship squadrons to patrol the area west of there and guarding the entrance to Porsangerfjorden.
 OSA I Missile Boat053716Z Recon Squadron F-5 detects four surface contacts and IDs them as 3 OSA Is (R-49, R-65, R-77) and 1 OSA 2 (R-163). The OSA ASuW weapons outrange that of the Norwegian ships, so I don’t want to engage until ready. There are plenty of other targets lurking out there--I don’t want to waste my ships on this--I need to save them for the primary target.
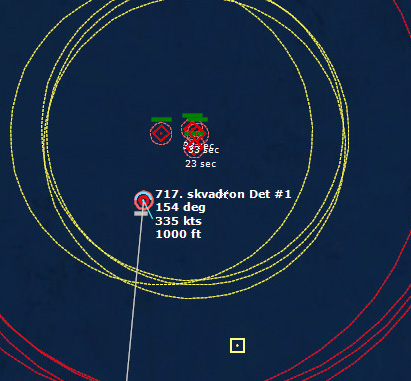 An RF-5 scouts for the enemy fleets053735Z Contact. Perhaps a second cluster of ships. RF-5 investigates.
054100Z The new contact is an OSA I, R-12.
 A second group of ships is found
054214Z Contact.
054230Z Another contact. The first is IDed as R-1, an OSA I, by the RF-5. The other is detected by the Sea King’s radar. The F-5 goes to investigate.
The second contact is determined to be a fishing vessel.
A third contact is detected by the Sea King and investigated by the RF-5. This is determined to be OSA R-9.
060208Z Two more contacts detected. One is a fishing boat, the other, another OSA. There are now 8 OSAs detected. At least four more are hiding somewhere...and then the Amphibious invasion fleet. I don’t want to commit to any attack until that fleet is located.
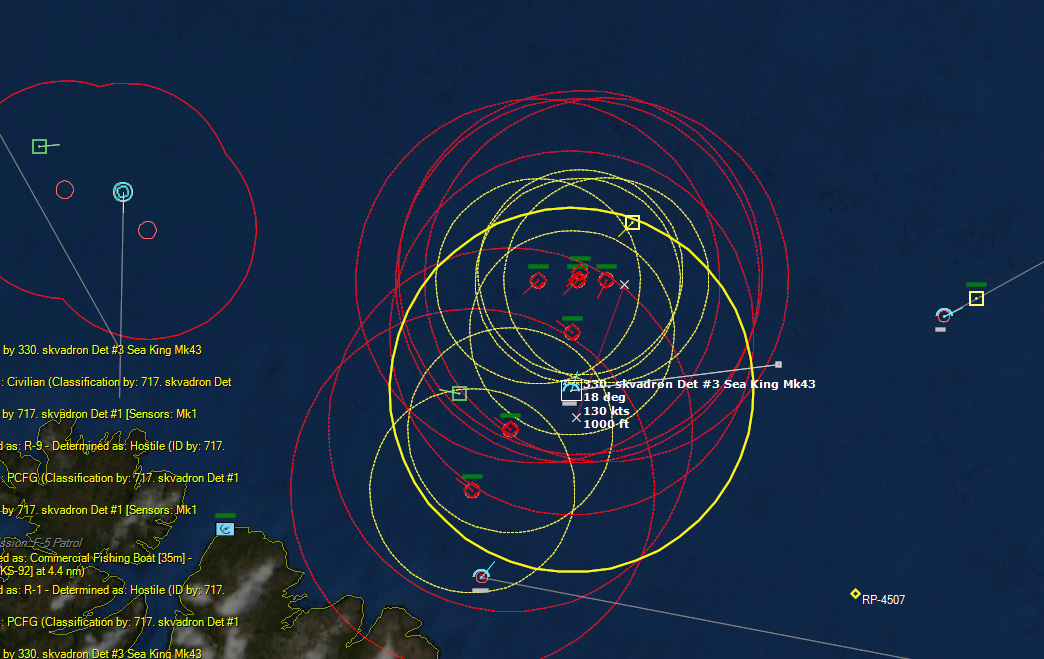 The contacts continue to pile up060933Z Another contact. I suspect it’s the 10th OSA, as they seem to be forming a SW to NE skirmish line. My suspicions prove correct--it’s an OSA II.
061614Z Two more contacts, relatively close. My guess is that this is another part of the barrier--perhaps 3-4 more OSAs in a group.
 Might have found the invasion flotilla...061618Z Looks like three of them. All three are IDs as OSAs. That’s 12 now. There’s likely to be more out there--probably with the invasion fleet.
062314Z Another contact. Looks like this one is a civilian.
 Trondheim detects a lone helo...far from home.070305Z Contact. This one is a helo, detected by the Trondheim. An aircraft like that couldn’t have gotten that far out on its own… Must be part of the invasion fleet. The RF-5 on patrol is sent to investigate the area.
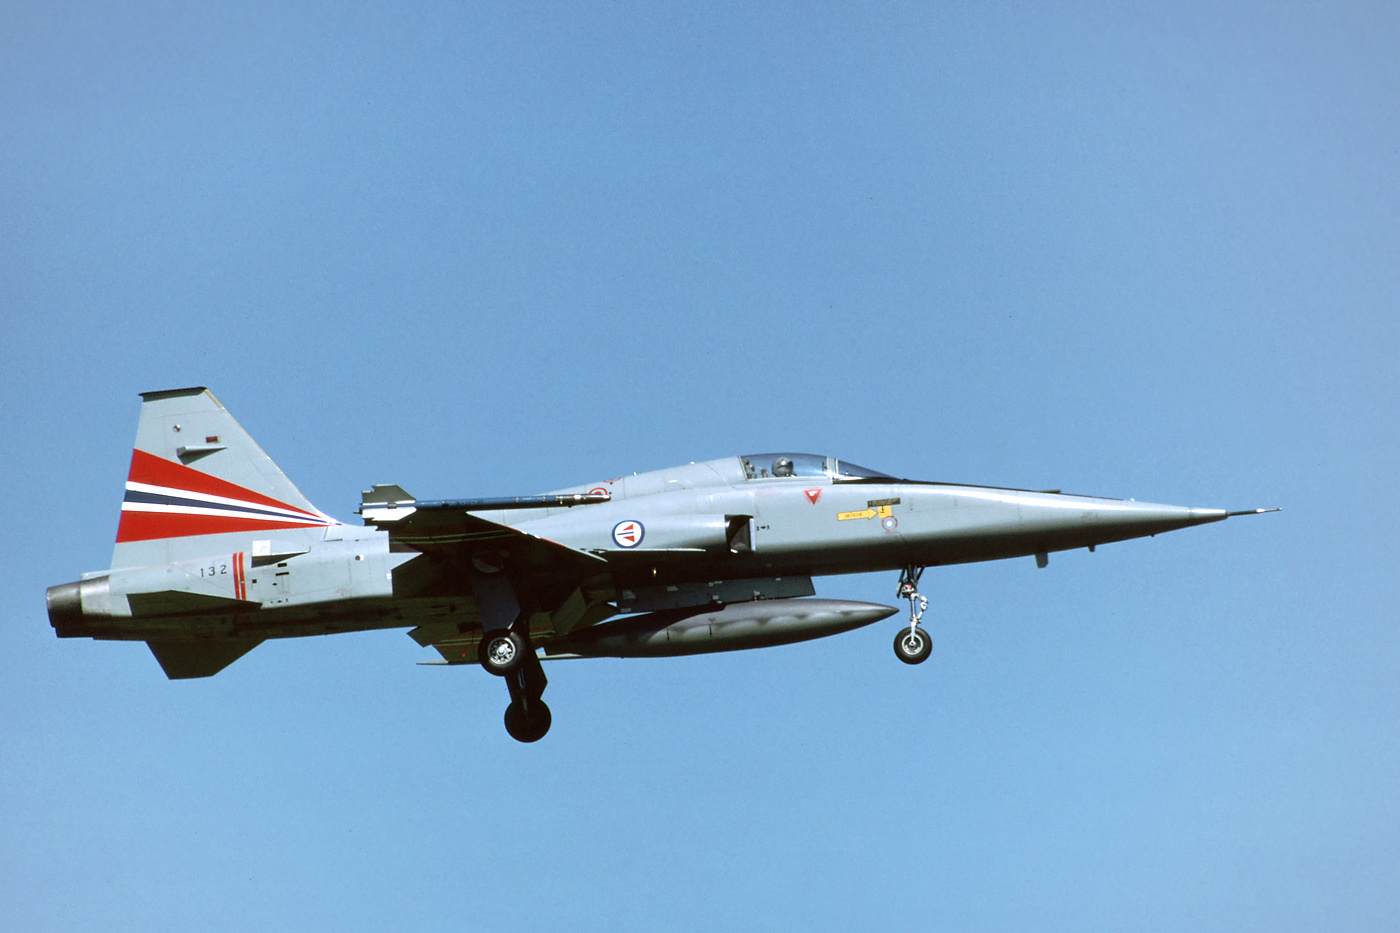 Norwegian F-5A070823Z The helo contact is localized. Perhaps a Helix? A Hormone?
071102Z I’m beginning to think that the OSA force, rather than a lead screen, is instead a coastal sweeping force, and that the invasion fleet is going to come in from the north.
Unfortunately the RF-5 is Bingo fuel, and so goes RTB. It will be two and a half hours before the other RF-5 will be ready at Banak. In the meantime, it will be up to my Sea Kings to keep recon.
075356Z Contact. My Sea King detects a surface contact. I think this might be the invasion fleet.
075857Z Three more contacts. My suspicions are growing.
075913Z Ten contacts now. Yeah, I think this is it… Preparations begin to launch an airstrike. I need to be careful that I don’t lose my Sea King.
 It's time to ready an airstrike080456Z Uh-oh. Sea King detects what appears to be an attack helo. I’ll have to keep an eye on it and keep my distance.
082517Z The first 2 F-5s, armed with AGM-12B Bullpups, descends to 300ft to begin their attack run.
 The F-5s descend to 300ft
 AGM-12B Bullpup
082754Z The first 2 F-5s reach 10 miles from the target, the lead LST. No indication yet that they have been detected. The fighters divert their IP a little to the SE to give the FFG a wider berth.
 The F-5s prepare to strike082830Z The FFG is IDed as the Smyshleny, a Kotlin SAM class.
 Kotlin SAM-class DestroyerBullpups away!
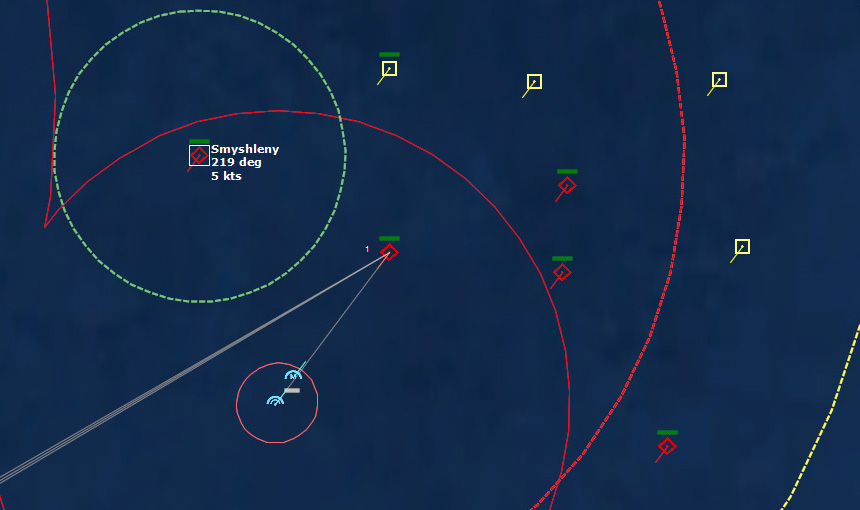 Bullpups away!
082911Z The LST Ropucha I is destroyed by the four missiles. Upon egress, the Smyshleny launches SAMs.
 Smyshleny launches SAMsThe lead F-5 is shot down. The second drops to 100 ft and goes to full military power. The second F-5 dodges some gunfire and a pair of SAMs. While in the area, the F-5 IDs several more ships, and relays their locations to the rest of the strike package.
Other ships detected: 2 LSTs, 1 LSM, the Alligator, and the KU Zhdanov, a light cruiser.
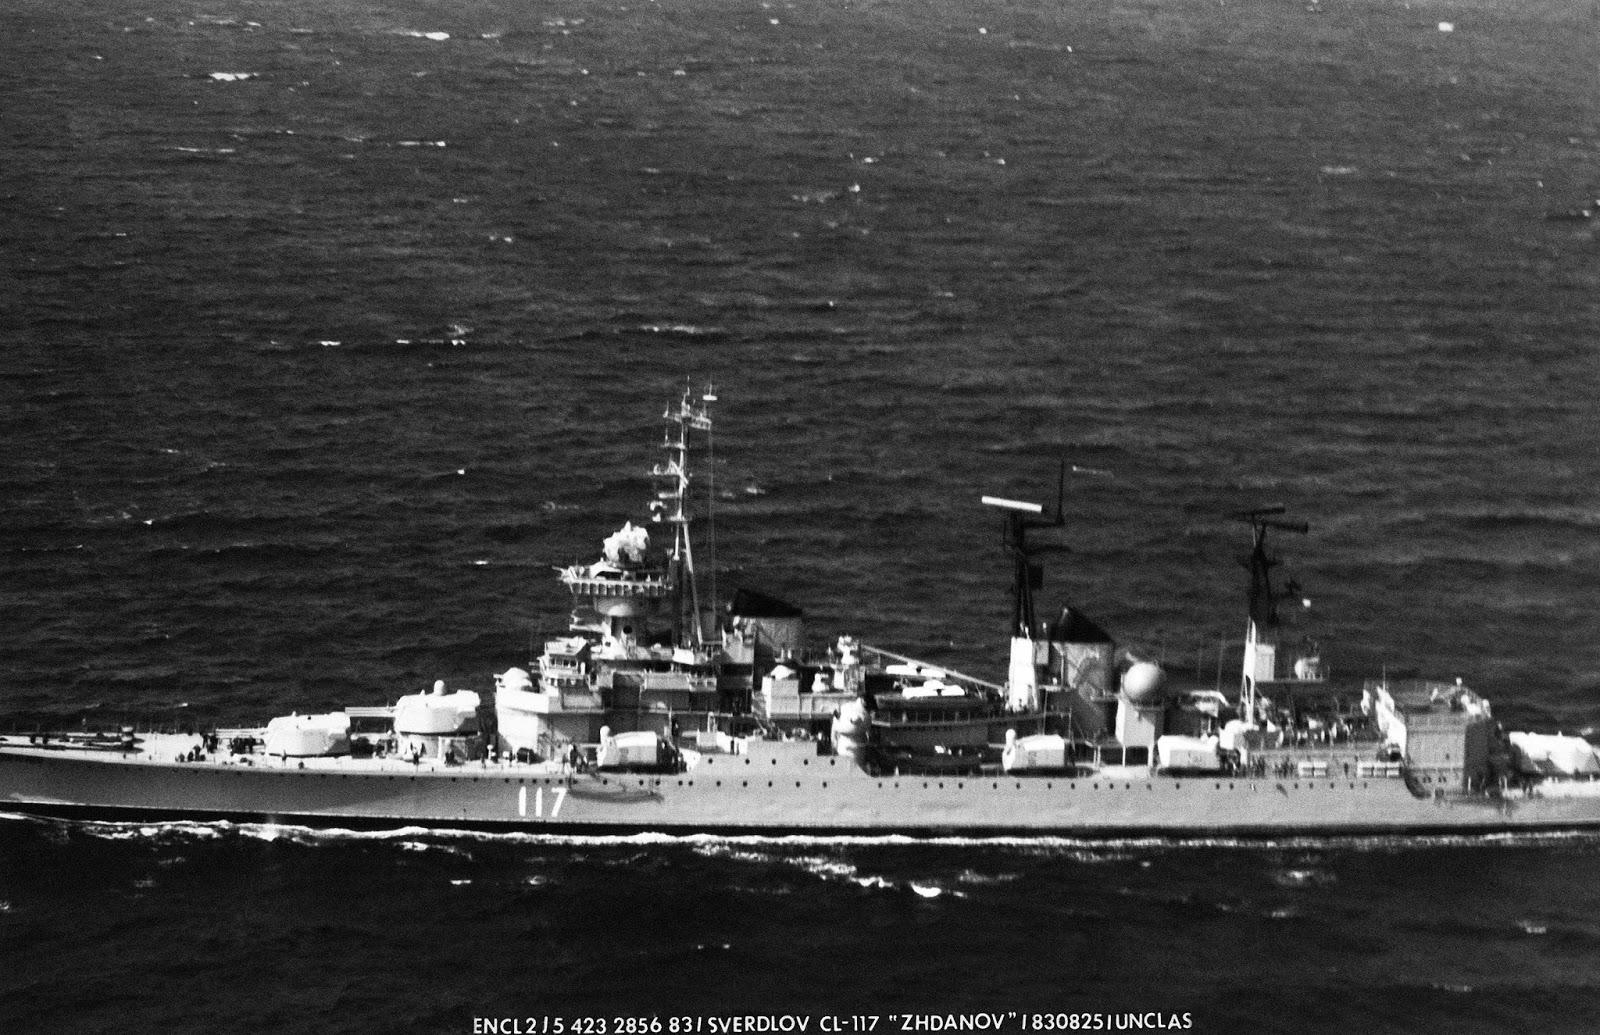 Sverdlov-class cruiser Zhdanov
The Smyshleny should have 12 SAMs left with a range of 10nm. The Zhdanov should have 20 SAMs with a 5nm range.
083049Z Strike Mk82 is fired upon by the Smyshleny. Fortunately, both SAMs miss.
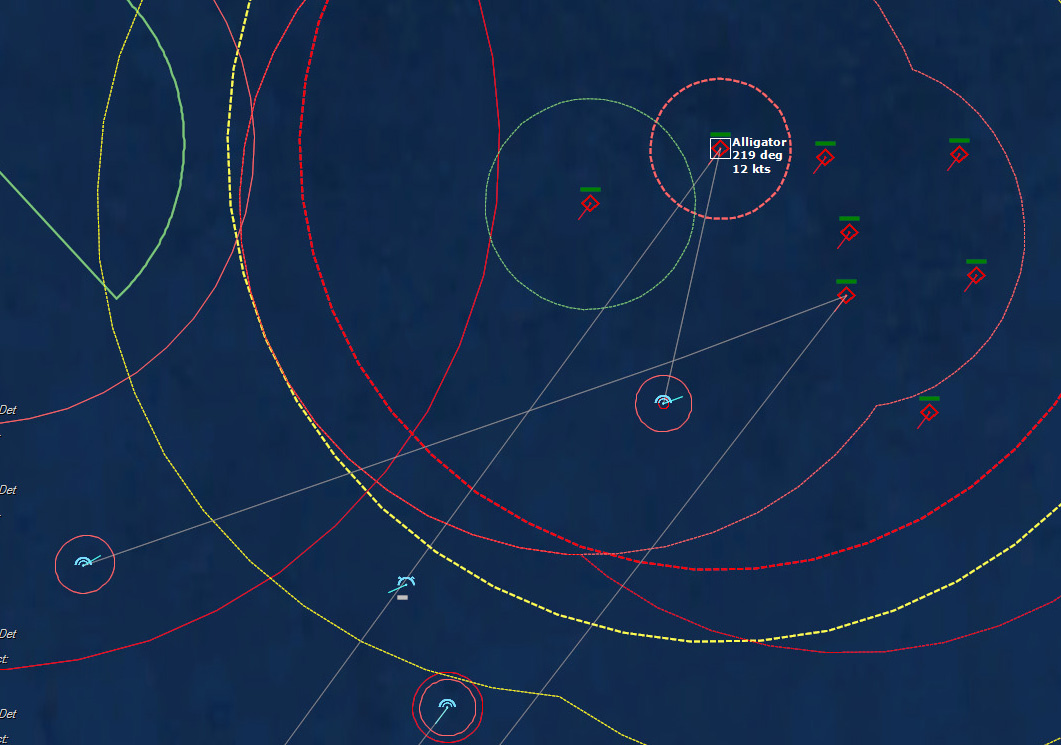 "Strike Mk82" is directed to attack the Alligator083111Z Strike Mk82 is directed to attack the Alligator, while Strike Rockeye goes after the Polnocny C.
 Alligator-class LST
083122Z Smyshleny fires two more SAMs. The first one destroys an F-5, while the second misses.
 A SAM takes out one of the F-5s083203Z Bombs away. The second F-5 damages the Polnocny C, starting a fire.
083220Z The Zhdanov launches SAMs at the second F-5, destroying it.
083249Z The Smyshleny fires a pair of SAMs on Strike Rockeye, but both SAMs miss.
083324Z Two more SAMs at Strike Rockeye, and both miss.
Strike Rockeye drops their weapons on the Alligator, lightly damaging it. They evade two more SAMs and then make their escape.
As the F-5s egress, Trondheim lies silent to the west, waiting patiently for the invasion fleet to pass so it can strike.
090328Z Trondheim decides that the time to strike is now, and heads towards the invasion fleet. Its targets are the two Alligators.
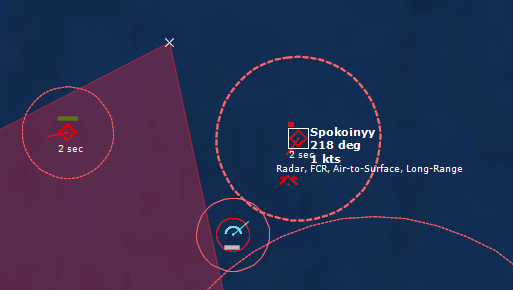
 Trondheim begins its attack run091429Z Trondheim closes the distance, and her long range camera IDs a Soviet picket frigate as the Spokoinyy, an SKR Kotlin class.
091953Z Trondheim is in range of the two Alligators. Fire.
092035Z Birds away. Two Penguins each are allocated to the targets.
 Birds awayThe Soviet fleet’s sensors go on. The missiles close in.
092128Z The first Penguin hits the Alligator, damaging it. The second malfunctions...typical.
 The Soviet fleet lights off their radars as the Penguins close inThe remaining two Penguins both impact the second Alligator.
The first Alligator is on fire and its speed drops to 9 kts. The other Alligator is at 4 kts.
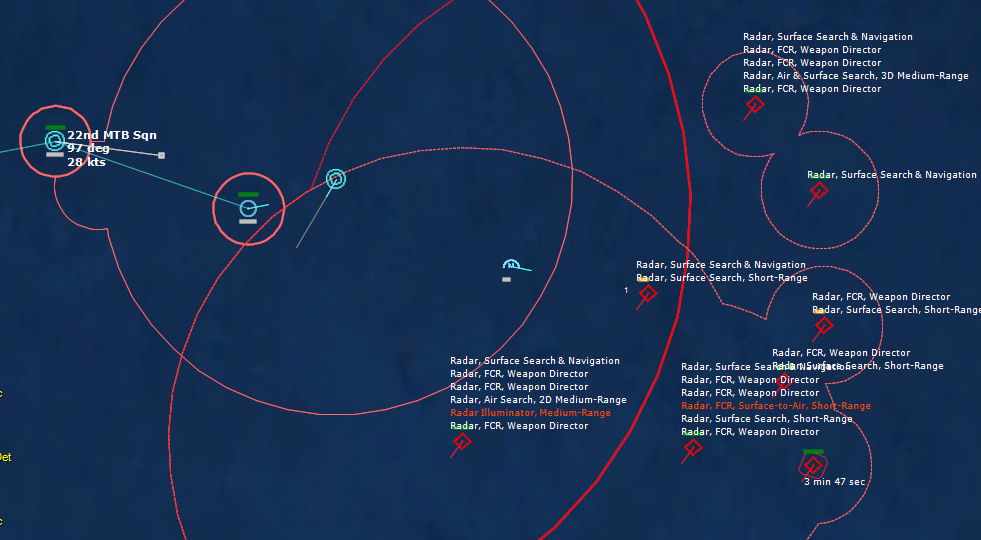
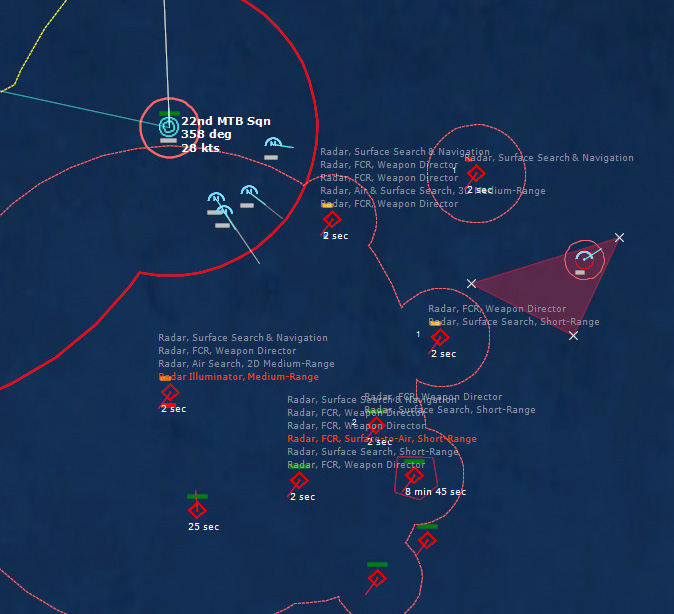
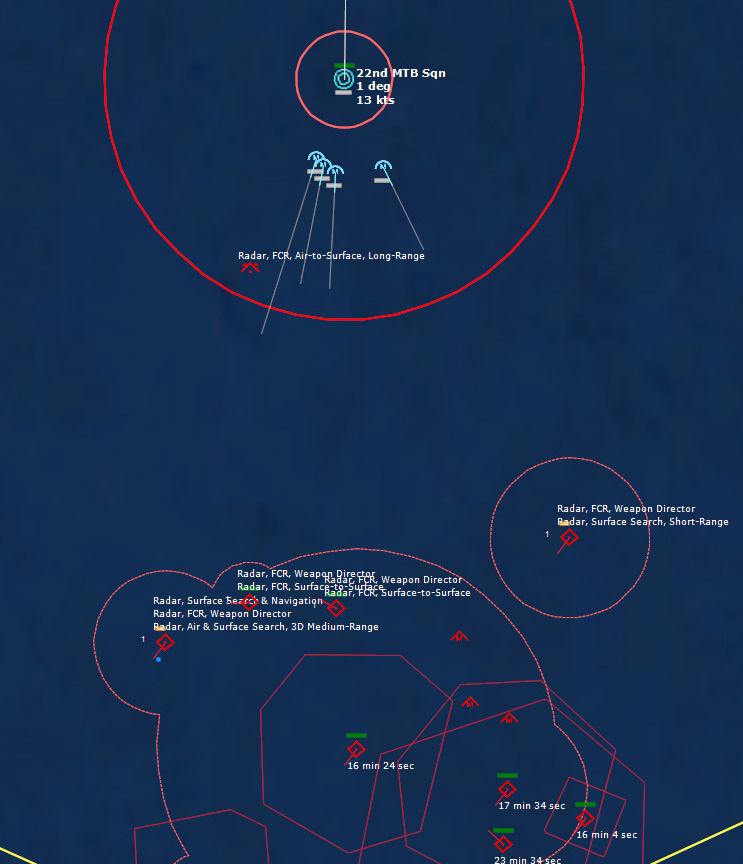
094648Z 22nd MTB Sqn moves northeast at Full power, attempting to get a flanking position and launch a similar attack to what the Trondheim did. Several of the Osas has been closing on them, but now seem to be turning away--which is good. I want to eliminate the invasion fleet before worrying about the Osas.
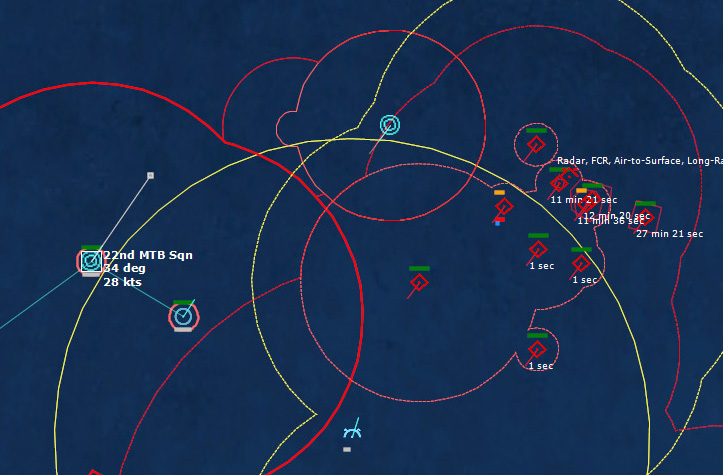 22nd MTP squadron goes to full power to flank the Soviet invasion fleetIn any event, it appears that there are 4 amphibs left: the two damaged Alligators, one Polyonyy Cs, one unidentified LSM, and one Ropucha I.
The Soviet recon Helo is IDed as a Ka-25Ts Hormone B.
101608Z HMNoS Brann comes into range of Alligator 1, and launches a Penguin at it.
 Brann launches a PenguinThe Penguin impacts the Alligator, which slows to 2kts with fire and flooding.
102113Z The RTB Sea King observes a missile launch from one of the Osas...apparently either the Trondheim or the Brann is barely within missile range. Both vessels alter course.
Four Vampires are airborne. Trondheim launches Sea Sparrows to defend itself. It looks like all of the Vampires are targeted at it. Brann launches a Penguin at the Alligator in an attempt finish it off. R-178 is out of Styx.
Trondheim fires 8 Sea Sparrows, and shoots down three of the incoming Styx, but now must reload.
102411Z The Penguin impacts the Alligator, sinking it. In the meantime, the Styx is still inbound to the Trondheim.
 Trondheim comes under attack by a Styx missileTrondheim fires its 76mm Twin Frag Burst, but to no avail...
102420Z Trondheim is hit and sinks.
102617Z RF-5 wanders too close to a DDG in the amphib group. The RF-5 dodges no less than 7 SAMs before it makes it out of range.
102903Z More Styx are launched, this time at Brann. Realizing that its number may be up, Brann fires its remaining Penguins, one each at the Smyshleny and the Spokoinyy, as no amphibious targets are within range. It then goes to Flank speed north to escape.
Smyshleny is hit first, in spite of its point defenses. Spokoinyy is hit next. Both ships slow dramatically.
The Styx approach Brann. Brann opens up with its 40mm gun, to no avail. The first Styx begins to attack...and malfunctions. The 2nd Styx hits...and Brann sinks.
103518Z RF-5 decides to go after the Hormone. It jets in at buster, getting into SAM range. It dodges a SAM, then shoots down the Hormone with guns. Two more SAMs inbound. It dodges both.
With the Hormone gone, the ability of the Soviets to detect the fleet is compromised. Hopefully this will allow me to get off ship attacks better.
103840Z Taking a chance that with the loss of the Hormone, the Soviets will have lost targeting ability, HMNoS Arg goes to flank speed into range of the Osas, preparing to launch its missiles at the amphibs.
104801Z HMNoS Arg is in range of its targets. It launches all four Penguins.
The Soviets light up their radars, and the Arg heads north at flank speed. There’s a good chance some Styx missiles will be inbound shortly.
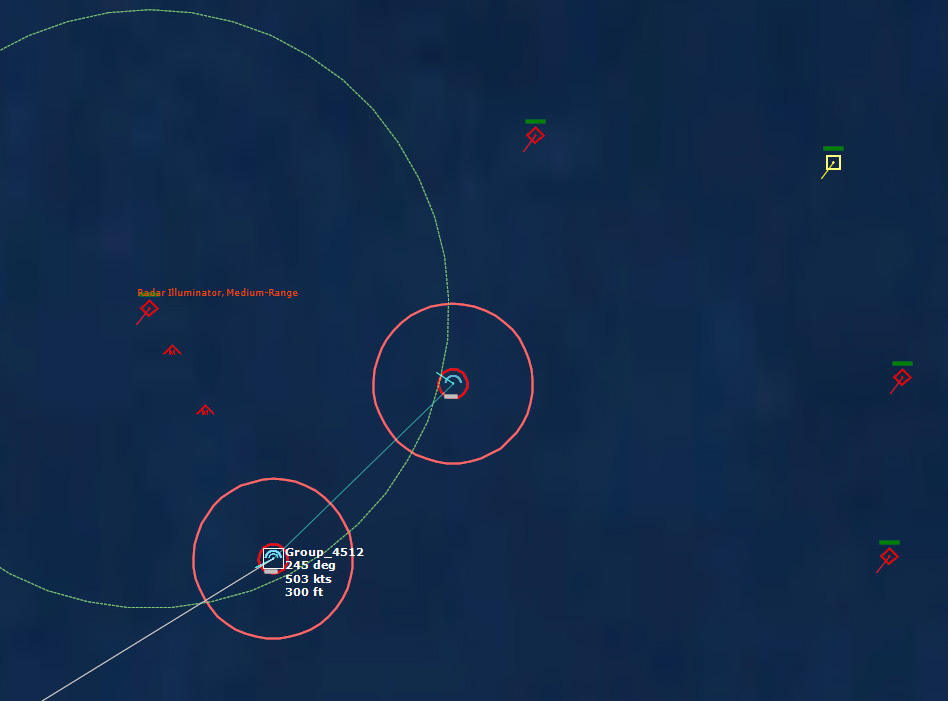
 Arg launches all four Penguins at the Soviet fleet104852Z Four Styx launches are detected. The Arg is in deep trouble, but it did its job. The first Penguin hits the Alligator and sinks it. The Penguin targeted on the damaged Polnocny C malfunctions. The remaining two Penguins sink the second Polnocny C. The Arg has done well. The Soviet radars go off, and the Arg turns hard starboard in an attempt to evade the incoming Styx. It’s probably far too late, but Arg has little choice. The lead Styx’s seeker goes active. Arg fires its point defenses, but it’s too late. The Arg doesn’t make it.
The Smyshleny sinks.
111340Z A new recon helo is detected lifting off the Zhdanov. This could be very bad news for the Blink and the Sleipner, which are both currently in range of Osas.
111719Z The Hormone lights off its radar. Missiles may be inbound shortly.
112722Z The Hormone investigates the Blink, and almost immediately Styx are detected inbound. Blink launches its missiles, one each for each target in range. The Spokoinyy, the Polnocny C, R-118, and R-255.
 Blink launches its PenguinsBlink has four Styx tracking it. It heads north at flank speed.
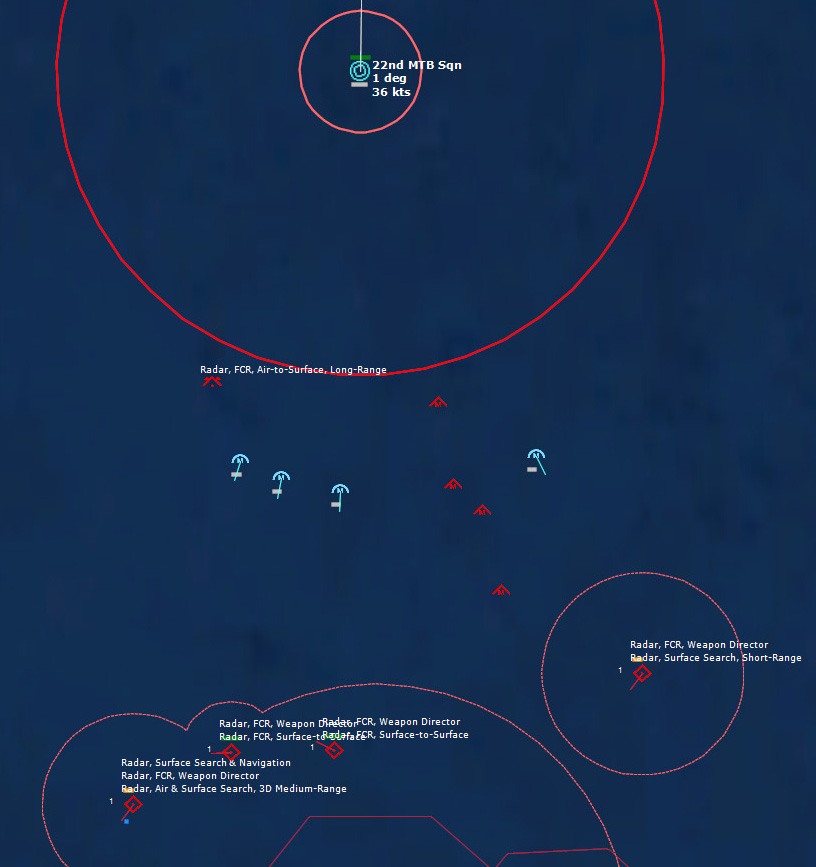 Blink flees the incoming Styx while its own missiles rocket towards their targetsThe missiles pass each other on their way to their targets. The weapons hit their targets at almost the same time.
The Polnocny C is hit first and sunk. R-118 is hit next and sunk. The first Styx misses Blink by ten yards, and damaging it severely. R-255 is hit and sunk. The second Styx hits the Blink and finishes it off. Finally, the last Penguin damages the Spokoinyy, but does not appear to sink it. Blink is 4 for 4, and its sacrifice will not be forgotten.
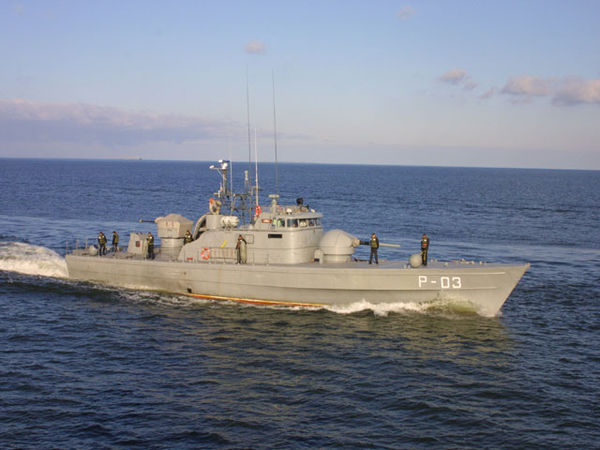 Storm-class Patrol Boat (similar to HNoMS Blink)
113806Z RF-5 Det 2 goes after the 2nd Hormone. The Hormone appears to be sheltering behind the Spokoinyy, but that ship is so damaged the risk is taken anyway.
 The RF-5 goes after the HormoneSpokoinyy tries to fire its 130mm guns at the RF-5, then its 20mm gun, then its 45mm gun. After several passes, the RF-5 nails the Hormone. Excellent.
114224Z It will be 3.5 hours until my next airstrike is ready. In that time, there’s no way that the last amphib will be able to reach the coast to make its landing--it’s currently 80nm away from the coast...and at its top speed of 18 kts, it won’t get that far. I could close with 21st MTB Sqn, and probably get the required shots off to sink it, but in doing so I likely would lose the ships to a retaliatory strike from the Osas, who would turn on their radars upon detecting the incoming Penguins, and then detect the MTBs. I must be patient. If the airstrike fails, then I go in with the MTBs.
RF-5 Det 2 gets careless, and wanders too close to the DDG, which is identifies as a Kashin-class, the Stroiny, and finally gets shot down with a SAM.
 Kashin-class DDG
121934Z R-178, an Osa that I know is out of Styx, closes to within range of the Sleipner’s guns. Having made sure that it’s out of range of the other Osas, the Sleipner opens fire with its 76mm gun. The 13th round is in the air when the first lands. Sleipner fires 20 rounds total, and then is forced to reload from her magazines.
122418Z Having reloaded, Sleipner fires again. Sleipner’s second salvo is with Twin HE Bursts, and hits with the second shot, causing light damage. A second hit damages R-178 further, slowing it to 15 kts. Sleipner reloads again. On the third barrage, R-178 is hit three more times, starting a fire. Sleipner closes the distance to finish it off. Fourth barrage, R-178 is hit twice more. R-178 comes within range of Sleipner’s 40mm gun. Splashes erupt all around R-178.
 Sleipner shoots at the OsaSleipner detects an inbound Vampire...it turns away from R-178 and guns its engines to flank speed. A second Vampire is detected, 11nm away, inbound fast.
R-178’s comrades may get revenge…
123342Z The first Styx misses Sleipner by 22ft, damaging her engines, a torpedo tube, and causing light flooding. The second Styx is not so merciful, and Sleipner sinks.
124005Z HMNoS Snar detects a inbound bogey--which fires a missile! It looks to be an attack helo, probably from Zhdanov. It’s an Mi-24A Hind A.
 Snar comes under attack by a Mi-24ASnar ignores the missile and shoots at the Hind A. The first Skorpion missile misses. The Hind fires another, while the Snar continues to fire at the Hind. The AT-2 Swatter B [9M17M Skorpion-M) misses by 28 ft. Once within range, the Hind unleashes its S-5K 57mm rockets, bracketing and annihilating the Snar. The Hind gets away clean.
124159Z The Hind makes a beeline for the Rapp, the lead ship in 21st Sqn. They light off their radars. Perhaps that will make it easier to fight off the Hind. The Hind launches a missile, then turns to flee. The Skorpion misses, and very slightly damages the Rapp.
130000Z Two more hours until the airstrike will be ready.
150000Z The first of 3 F-5s takes off at Banak, Target: Ropucha I
151240Z Bullpup 1 closes in to strike.
 Bullpup 1 goes in to strike151829Z Bullpups away. The first Bullpup hits, the 2nd misses by 58 feet. Still, the Ropucha suffers heavy damage, flooding, and a fire.
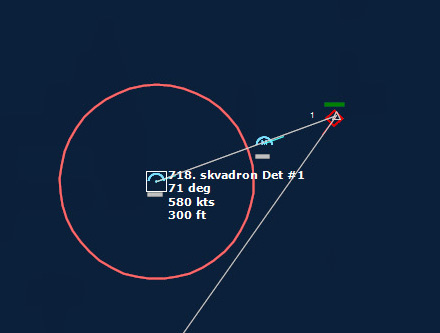 Bullpups away152315Z The second F-5 is inbound. In an act of a happy trigger finger, the F-5 fires a Bullpup at the Otmenny, a EM Skorry Mod...wasting a shot. The missile misses...lightly damaging the ship via blast damage.
152450Z Bullpup away. The missile hits...and the Ropucha sinks! All the amphibious vessels are sunk!
 A Bullpup finishes off the last RopuchaAfter the Amphibs, the secondary targets are the missile boats. The F-5 goes after a pair of Osas. In the meantime, 24th MTB squadron, armed with torpedoes, decides to charge in after the big ships.
152819Z Bullpups away. Both Osas sunk.
154507Z A Hind returns and starts attacking the torpedo boats. Skarv is hit first, and sunk. The Hind then goes after Tjeid.
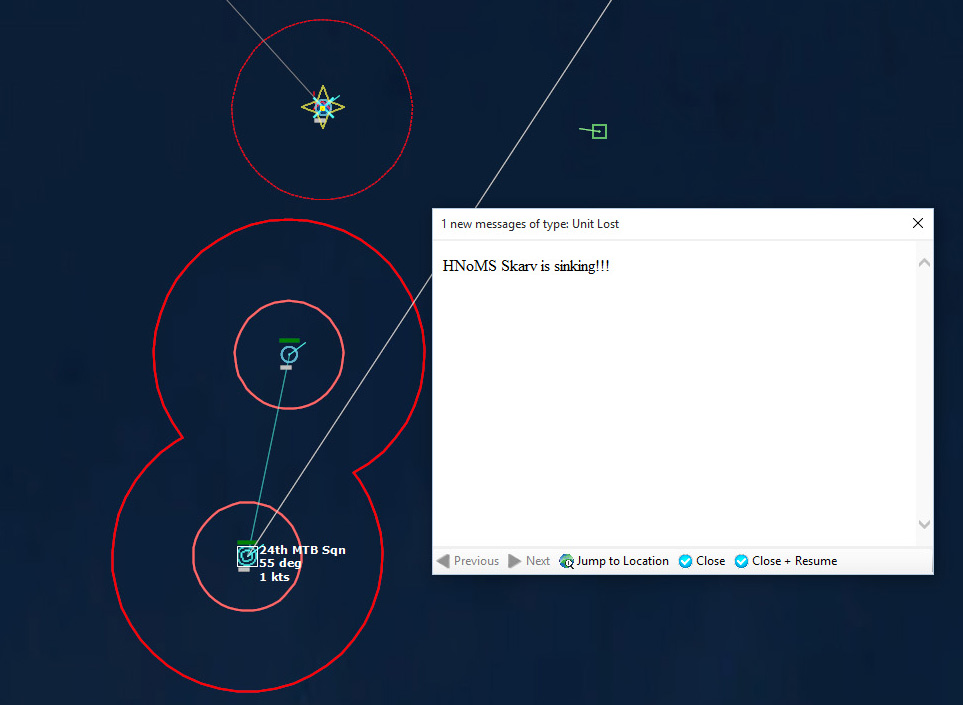 Skarv is sunkRF-5 goes after the Hind. It closes in, and destroys it with its cannon.
Teist and Tjeid close in on the surface ships.
162317Z Teist launches a salvo of four torpedoes against the Otmenny. R-1 launches Styxes at the Teist. Teist’s last torpedo destroys the Otmenny, but it is then hit by a Styx and is lost. Tjeid is hit by a Styx as well and sinks. However, that means R-1 is out of missiles, leaving the 21st MTB Sqn able to close in on the main fleet.
172602Z R-1 closes on 21st MTB Sqn, so Snogg fires a single Penguin at it, sinking it.
175743Z 21st MTB Sqn closes to within range of the Zhdanov and the Stroiny. Penguins away. Four are targeted on the Zhdanov, while three are targeted on the Stroiny.
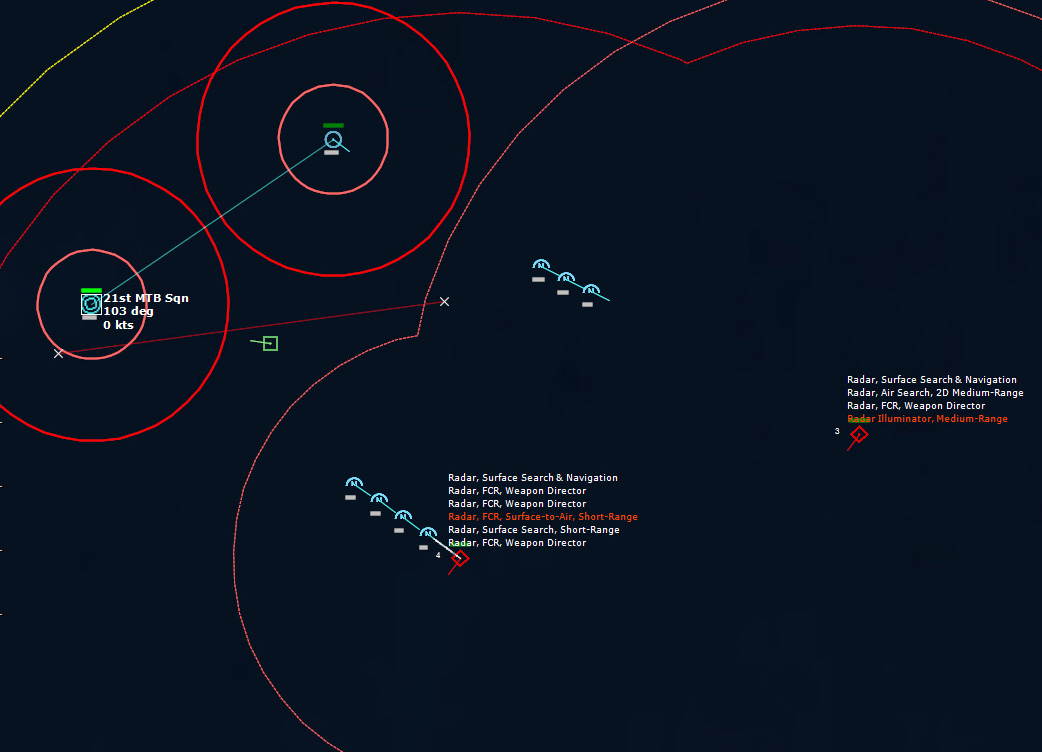 Penguins away.
Four Penguins hit the Zhdanov, while only two of three hit the Stroiny. Out of missiles, the Rapp and Snogg leave the area.
182311Z It takes a while, but Stroiny sinks.
183654Z The Zhdanov is spotted holding its position off the coast.
204306Z The pilots must be tired. Bullpup 1 launches but then immediately aborts, landing his aircraft. Bullpup 2 launches and attacks the Zhdanov, but both his Bullpups miss. Bullpup 3 is armed with 4 Mk82s, and despite being ordered multiple times to attack the Zhdanov, strikes the Spokoiny instead...misses with all four bombs, and then is shot down.
August 21, 1975 003755Z. Succumbing to a fire, the Zhdanov sinks.
043400Z Bullpup 1 attacks and sinks the Spokoinyy.
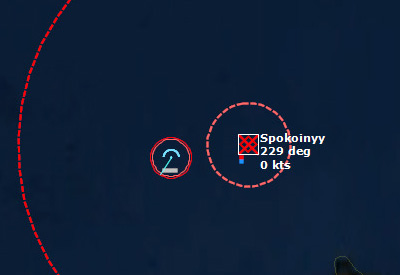 The Spokoinyy sinks051006Z Bullpup 1 attacks and damages R-163 with Mk82s.
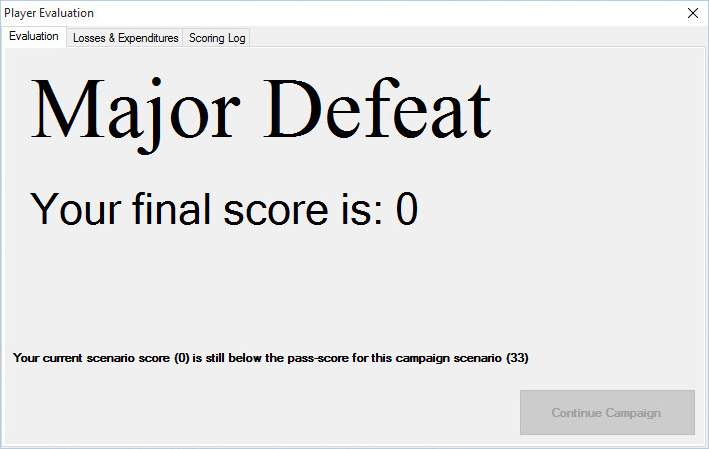 Huh?And then, the scenario suddenly ended...in a Major Defeat? [The end of scenario popup showed a Major Defeat. This is really strange, as I destroyed all the amphibious vessels. It makes me wonder if there was a bug in the scoring]
SIDE: Soviet Union
===========================================================
LOSSES:
-------------------------------
2x BDK Ropucha I [Pr.775]
2x BDK Alligator [Pr.1171 Tapir]
2x Ka-25Ts Hormone B
2x SDK Polnocny C [Pr.773]
1x EM Kotlin SAM [Pr.56K Spokoinyy]
4x RK Osa II [Pr.205U]
3x RK Osa I [Pr.205]
3x Mi-24A Hind A
1x EM Skoryy Mod [Pr.31 Besshumny]
1x BPK Kashin [Pr.61]
1x KU Zhdanov
1x SKR Kotlin [Pr.56 Spokoinyy]
EXPENDITURES:
------------------
30x SA-N-1b Goa [M-1M/P Volna-M/P, 4K91 / V-601]
17x 130mm/58 Twin HE Burst [2 rnds]
2x SA-N-4a Gecko [9M33]
59x 57mm/70 Twin HE Burst [2 rnds]
21x 25mm/80 Twin Burst [20 rnds]
10x SS-N-2b Styx [P-15U]
120x 45mm/85 Quad Burst [8 rnds]
201x AK-230 30mm/65 Twin Burst [50 rnds]
11x SS-N-2a Styx [P-15]
6x PK-16 Flare [TST-60U]
8x AT-2 Swatter B [9M17M Skorpion-M]
256x S-5K 57mm Rocket
2x Generic Flare Rocket [Single Spectral]
SIDE: Neutral Shipping
===========================================================
LOSSES:
-------------------------------
EXPENDITURES:
------------------
SIDE: NATO
===========================================================
LOSSES:
-------------------------------
4x F-5A Freedom Fighter
1x F 300 Oslo [Dealey Mod]
3x P 960 Storm
1x RF-5A Freedom Fighter
1x F 310 Sleipner
1x P 980 Snøgg
3x P 343 Tjeld
EXPENDITURES:
------------------
14x AGM-12B Bullpup A
16x Mk82 500lb LDGP
4x Mk20 Rockeye II CB [247 x Mk118 Dual Purpose Bomblets]
24x RB 12 Penguin Mk1
8x RIM-7H Sea Sparrow
24x 76mm/50 Twin Frag Burst [2 rnds]
51x 40mm/70 Single Breda Burst [4 rnds]
9x 20mm M39 x 2 Burst [80 rnds]
80x 76mm/50 Twin HE Burst [2 rnds]
33x 40mm/70 Single Bofors Burst [4 rnds]
12x 20mm/80 Twin Oerlikon Burst [20 rnds]
4x Mk9 Straight-Runner
May 26, 2017
COMMAND: Northern Inferno Scenario 2: Goblin on the Doorstep
 Introduction
With the outbreak of hostilities 7 days ago, the British ballistic missile submarine (SSBN) HMS Revenge has just completed a quick turn around, and is proceeding out of Faslane Naval Base to get back to sea.
Fully loaded with Polaris A-3 SLBMs, she has now been tasked to resume her nuclear deterrent patrol close to UK waters but still in range of her assigned targets.
Intel suggests that her passage to her patrol area may be compromised, as numerous COMINT intercepts have made reference to Soviet diesel and nuclear-powered submarines close in to the western UK coast; no doubt trying to corner and sink the Revenge before she makes it out to open sea.
The UK's independent strategic nuclear force must be protected at all costs. To this end all other assets, hardware and men alike, are expendable.
HMS Revenge (S27)Orders for Cmdr NATO Forces
Situation HMS Revenge has departed Faslane Naval Base to take up her patrol station. Soviet Submarines previously reported in the area still remain unaccounted for. Additional ASW forces have been deployed to protect HMS Revenge's transit to her patrol station.
Enemy Forces Intelligence and sighting by fishing boats indicate a number of Soviet SSK and SSN's are in and around northern Scotland. Their intention is likely to intercept and sink the Revenge.
Friendly Forces
RAF Kinloss
206 Sqn (Nimrod MR.1) RNAS Prestwick
814 Sqn (SeaKing Mk1) HMS Revenge SSBN
UK SSBN Escort Frigates: HMS Leander FFH, HMS Plymouth FFH, HMS Matapan Aux FF
Mission
Protect HMS Revenge at all costs. All other assigned forces are expendable.
Execution
1. Using Nimrod MPAs, conduct barrier operations around patrol area.
2. Sea King ASW Helos to dip ahead of HMS Revenge and sanitise the area using active/passive sensors.
Command and EMCON
Command: HQ Northwood
EMCON: Alpha-Limited Emissions
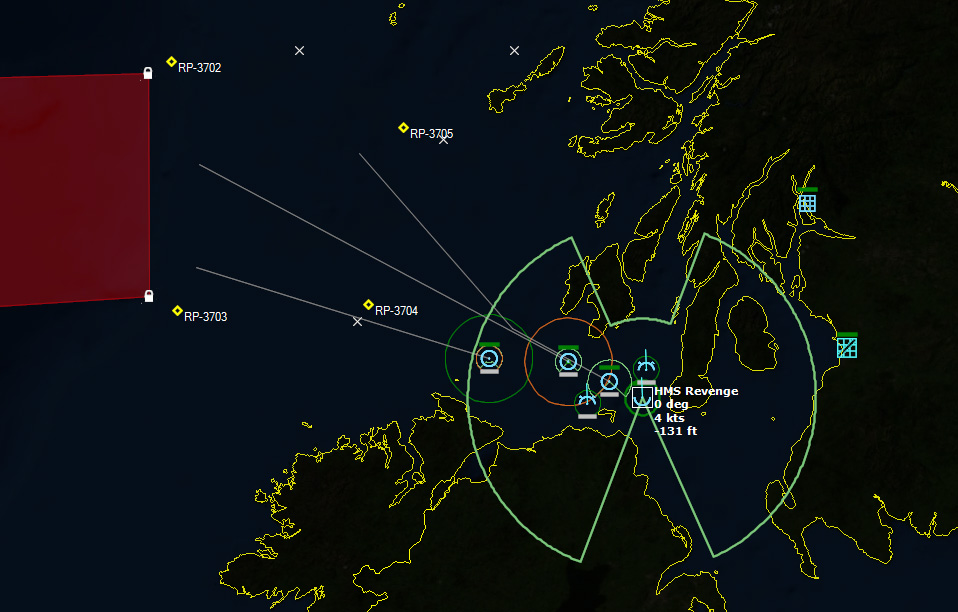 HMS Revengeneeds to safely transit to its patrol area (marked in red)The Nimrods from Kinloss will patrol outside the SSBN Patrol Area, while the Sea Kings from Prestwick will patrol near the area. The three Naval vessels, HMS Leander, Plymouth, and Matapan, will clear the path ahead, sonars pinging full blast. HMS Revenge will follow.
  HMS Leander221000Z The sea is filled with commercial fishing traffic, which is an expected complication.
230617Z Torpedoes in the water, 279 degrees, 0.5nm! HMS Leander detects two torpedoes heading for her. Leander turns hard to starboard in an attempt to evade the target, but is hit and sunk.
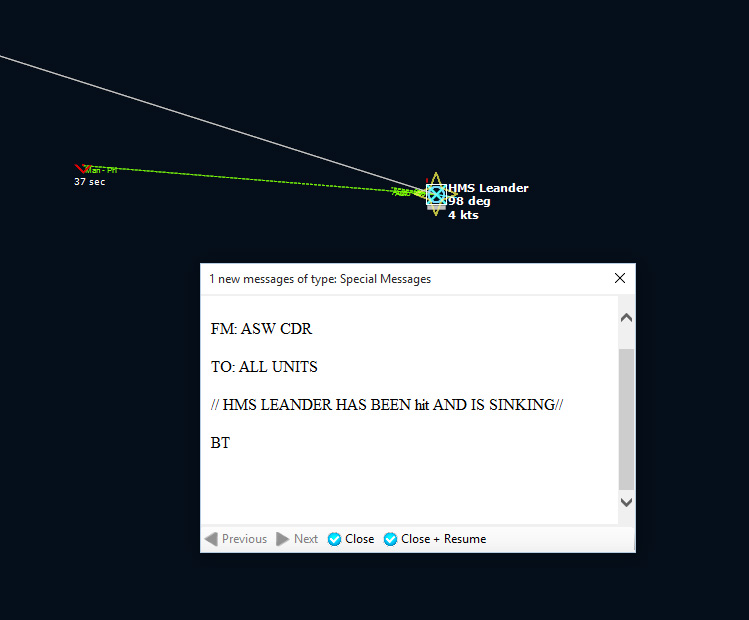
A Sea King is immediately sent to the area in an attempt to prosecute the submarine that took out the Leander.
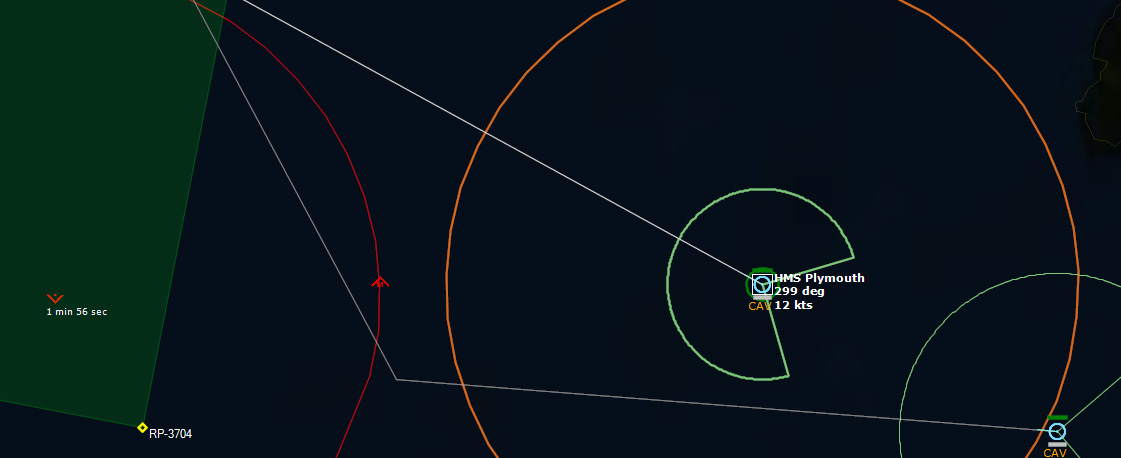
230813Z Vampire! Vampire! HMS Plymouth detects an incoming cruise missile, 270 deg for 12nm. Plymouth activates jammers.
230834Z Vampire! Another cruise missile is detected inbound to Plymouth.
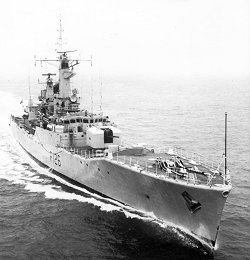 HMS Plymouth230834Z Vampire! A third cruise missile is inbound. Plymouth launches a Sea Cat to defend itself.
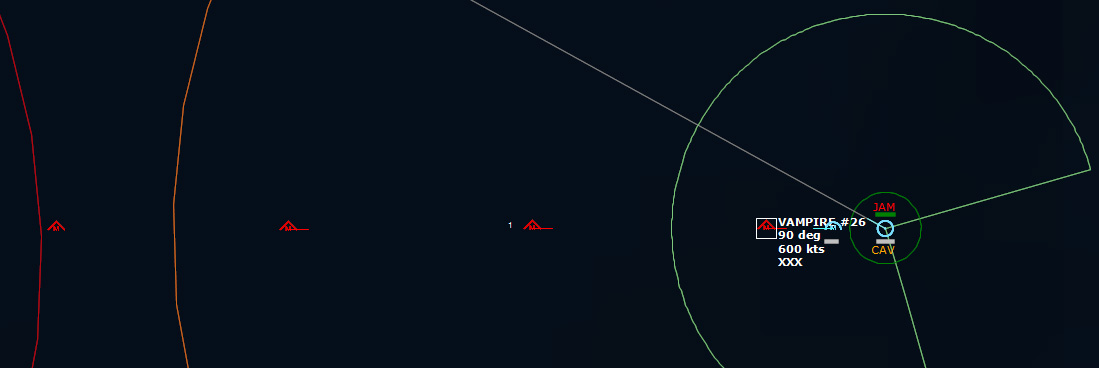
230914Z The first Sea Cat misses its target. A second Sea Cat is launched, but at the second Vampire. A fourth Vampire is detected inbound. Plymouth is in deep trouble.
230923Z The first Vampire hits the Plymouth and sinks her.
232401Z Another submarine contact is detected. HMS Matapan, the sole RN ship in the area, launches its Wessex ASW helicopter to prosecute the contact.
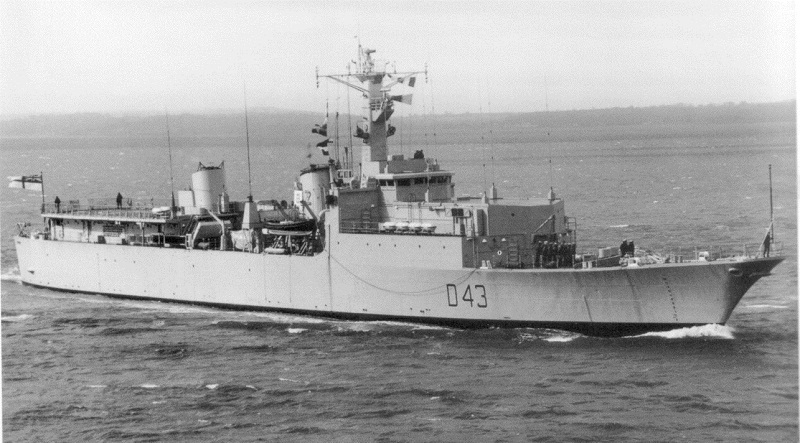 HMS Matapan
In the meantime, a sonobuoy from one of the patrolling Nimrods detects a submarine, and begins prosecution of the contact.
232625Z Nimrod 3 drops on Goblin 30.
232751Z Matapan’s Wessex drops on Goblin 31. The Wessex then hovers and lowers its dipping sonar, localizing the target.
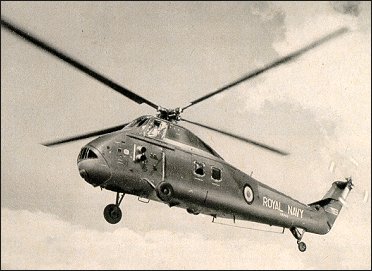 Westland Wessex ASW Helicopter
233951Z The Sea Kings have localized Goblin 25--the submarine which sunk the Leander and the Plymouth. It drops two torpedoes, one of which hits, but does not sink the submarine. The sub is almost certainly out of action, but we’ll have to make sure.
234048Z The Nimrods drop another torpedo on their contact...and impact it. The sonar sounds strange, however. It is speculated that the target is a Biologic: Tuna Fishes of all things. We cannot afford mistakes like this.
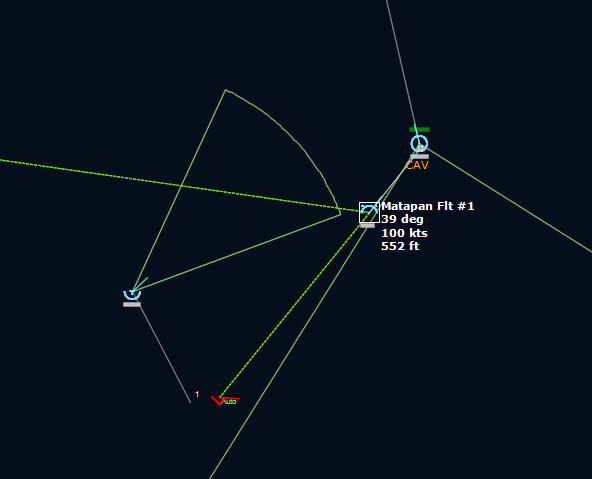
234221Z Matapan Flt 1 drops on Goblin 31, which is painfully close to the Matapan.
234545Z Goblin 25 is sunk by depth charge.
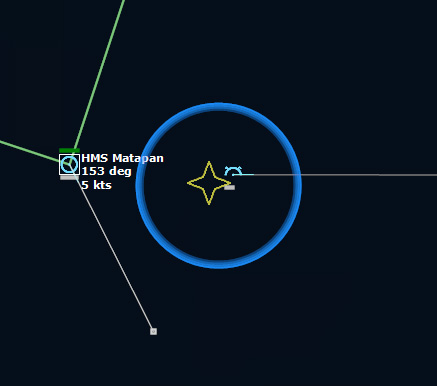
235954Z Goblin 31 is sunk by depth charge dropped by the same Sea King (#5). Good work.
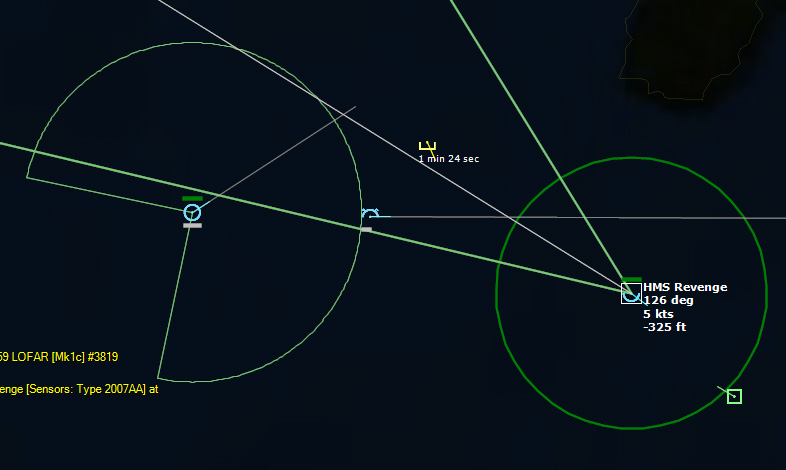
August 15, 1975 000143Z Another contact, this one between the Matapan and the Revenge. A Sea King is dispatched to prosecute. Things are a bit sticky.
Meanwhile the Nimrods have picked up another contact as well.
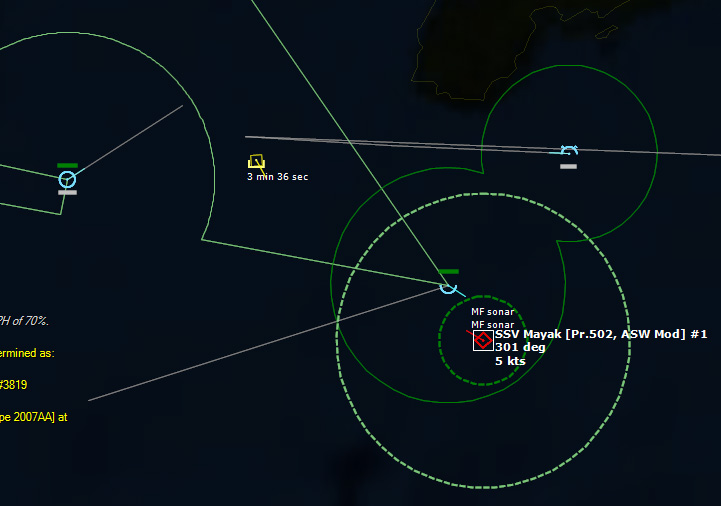
001441Z What the…? A new contact, Skunk 1, is identified as hostile as a SSV Mayak, an intelligence gathering ship. Treachery! The Soviets must have sneaked this guy in. Frankly, I should have expected this. Of course, I have no assets to counter it.
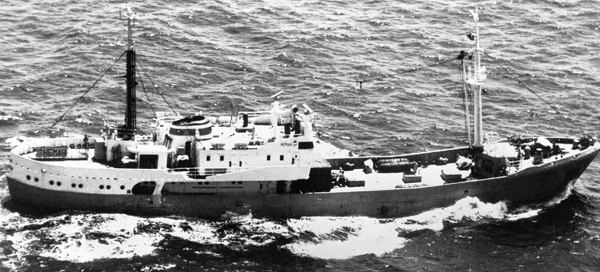 SSV MayakRevenge hugs the bottom of the ocean.
 001806Z Torpedo in the water! Goblin 32 launches against the Revenge. Not good. Revenge attempts to evade, staying as close to the bottom as possible. My attempt to force it to evade the Mayak was a bad mistake.
001949Z The Sea King drops on Goblin 32, damaging but not destroying it. In the meantime, Revenge, hugging the bottom still and driving at 25 kts, is within weapon range of the Intelligence ship, which fires some depth charges. The situation is a tiny bit tense.
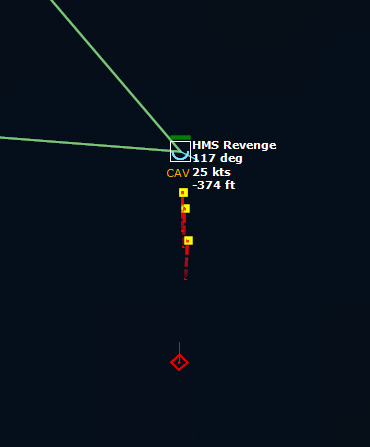
002004Z This may be it…
002026Z Fortunately the depth charges miss. Revenge turns north to evade the Mayak.
002208Z Revenge is hit by a depth charge. Crap. Several systems are damaged, including its active sonar array and the Nuclear Reactor itself. Over the next 20 minutes, Revenge is subjected to relentless depth charging by the SSV Mayak. Near misses damage the passive sonar arrays, destroy two torpedo tubes, and damage a third. Flinching under the unceasing explosions, the crew of the Revenge work feverishly to repair the damage.
005442Z A pair of torpedoes launched at Goblin #32 hit and sink it. This is good news, but the Mayak continues to be the biggest threat.
The Revenge tries to creep away, and eventually the depth charging ceases. By 020000Z some of the damage to the Revenge has been repaired, including the damage to the reactor.
Mayak continues to be a threat, and the problem is that there are few weapons available to damage it. Matapan eventually launches its Wessex armed with four AS.11 missiles, which are small missiles that have no hope of sinking the Mayak, but perhaps it can distract it for a while.
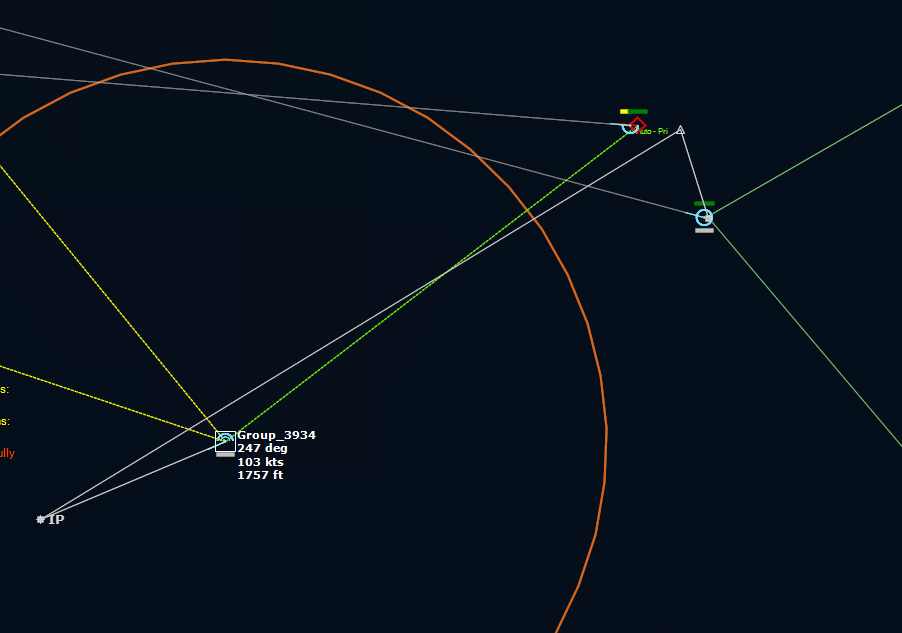
Two of the missiles fail to impact, but two succeed, doing some superficial damage to the Mayak.
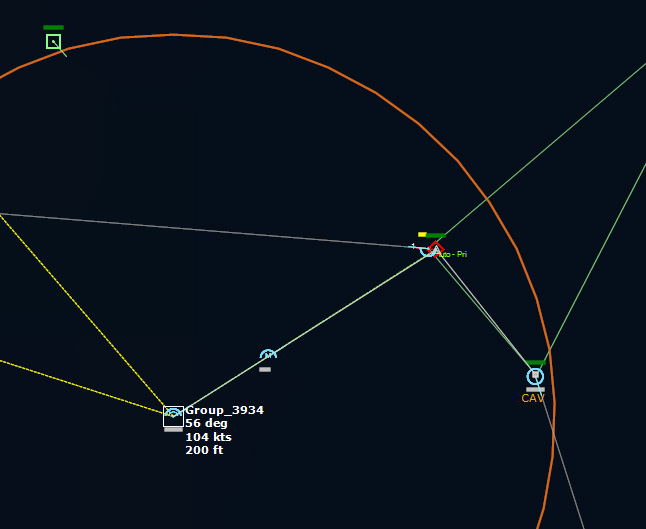
A second ship enters the area and begins launched depth charges towards the Revenge, clearly this is another ship like the Mayak.
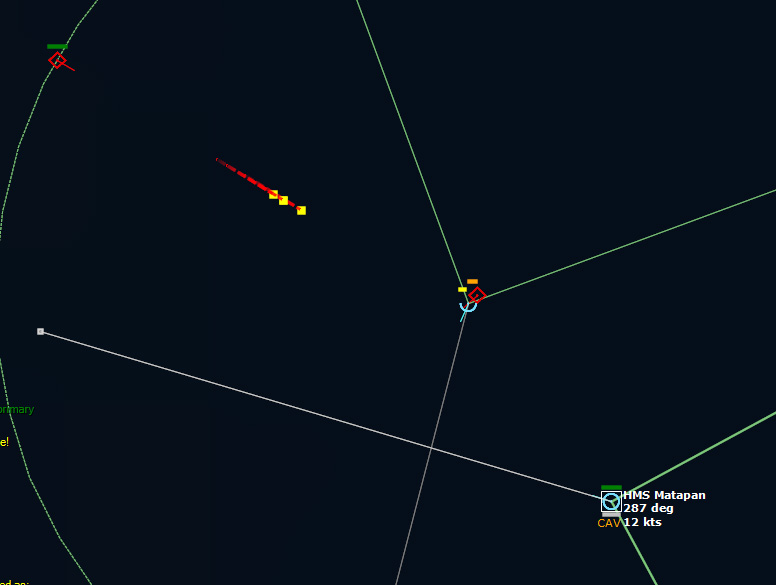
Depth charges impact around the Revenge.
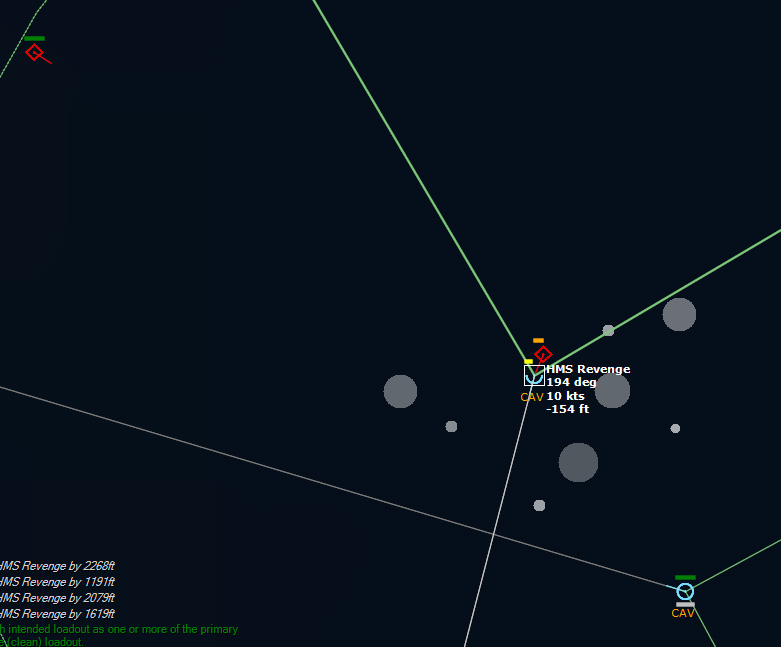
Matapan guns its engines in an attempt to disrupt the attack, while the Revenge attempts to slip away. Matapan suffers some damage from the proximity of the depth charges.
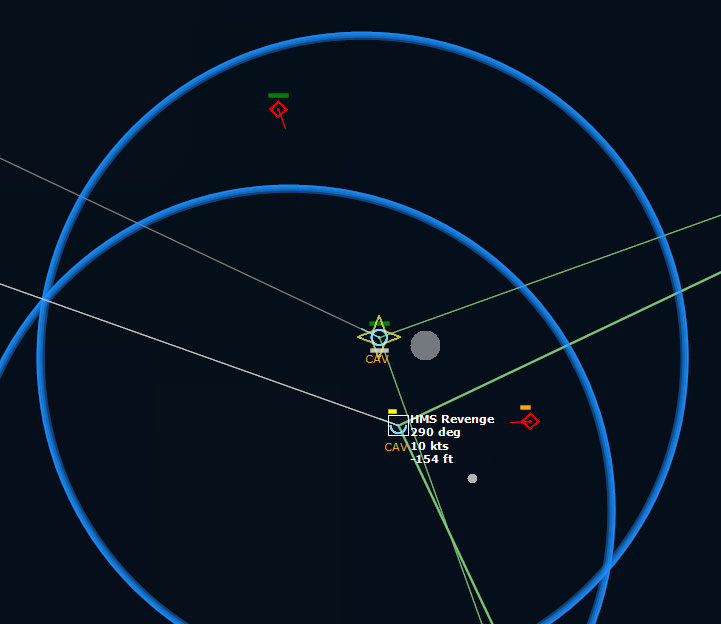
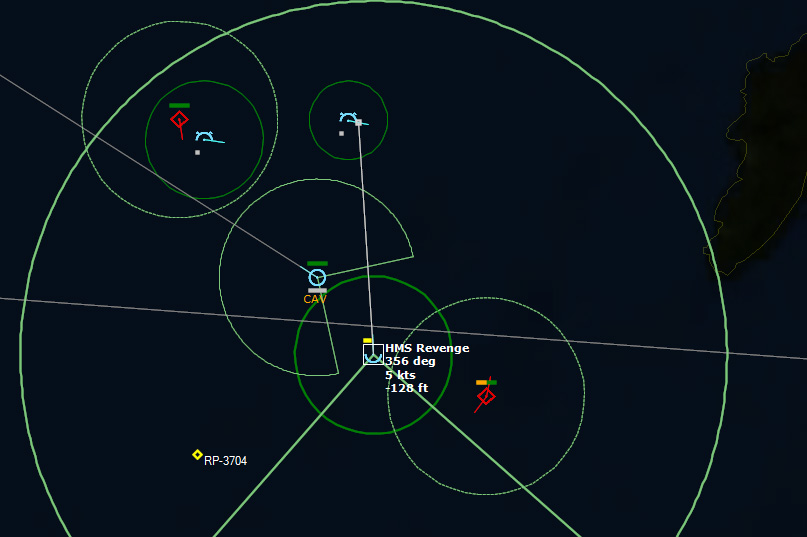
Revenge begins to pull away fom the Soviet vessels, and begins to make a run for it. Unfortunately, a new submarine contact, Goblin #35, is detected a mere 4nm away! Torpedoes in the water! Revenge snapshots a torpedo at the soviet submarine, goes to flank speed and runs.
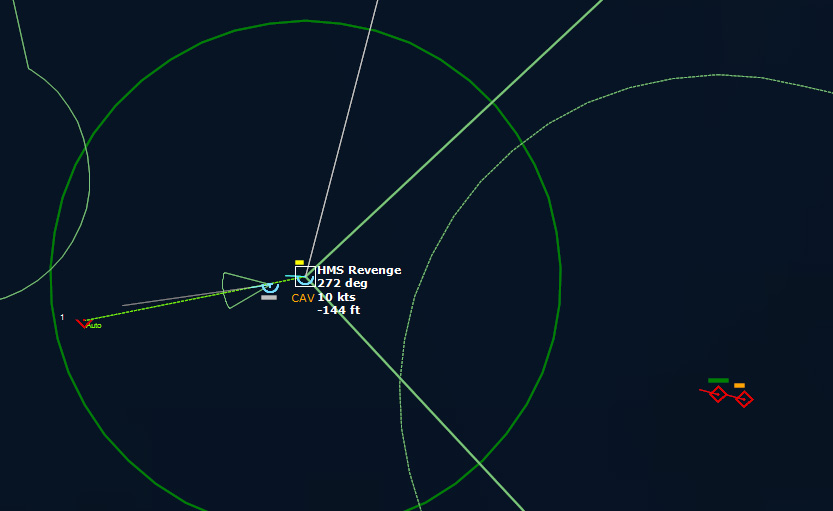
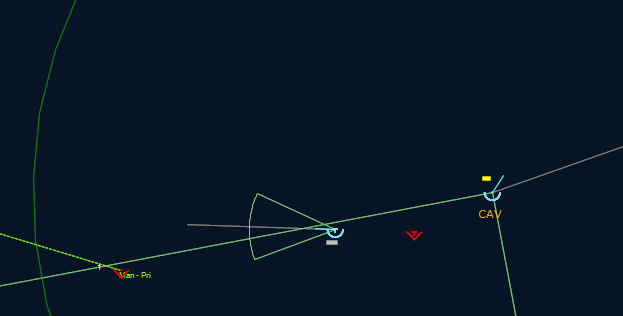
A Sea King arrives on the scene and drops depth charges on the submarine contact and fortunately, kills it.
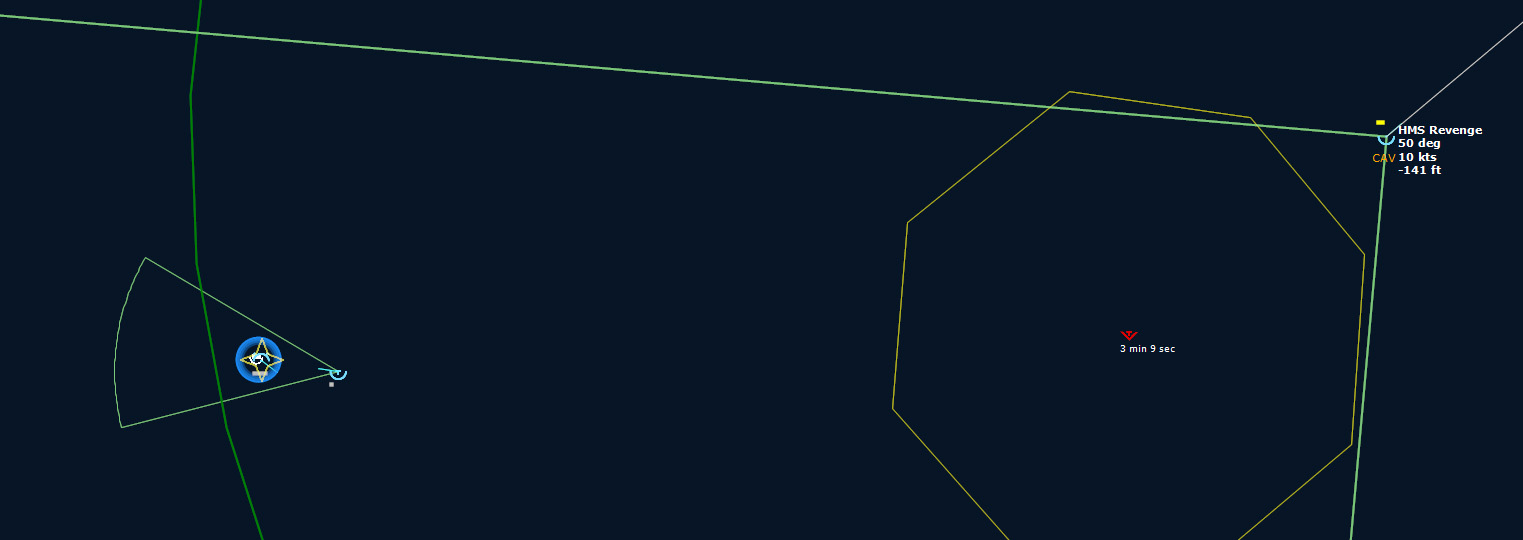
055108Z The Soviet torpedo runs out of energy, and the Revenge survives by the skin of its teeth.
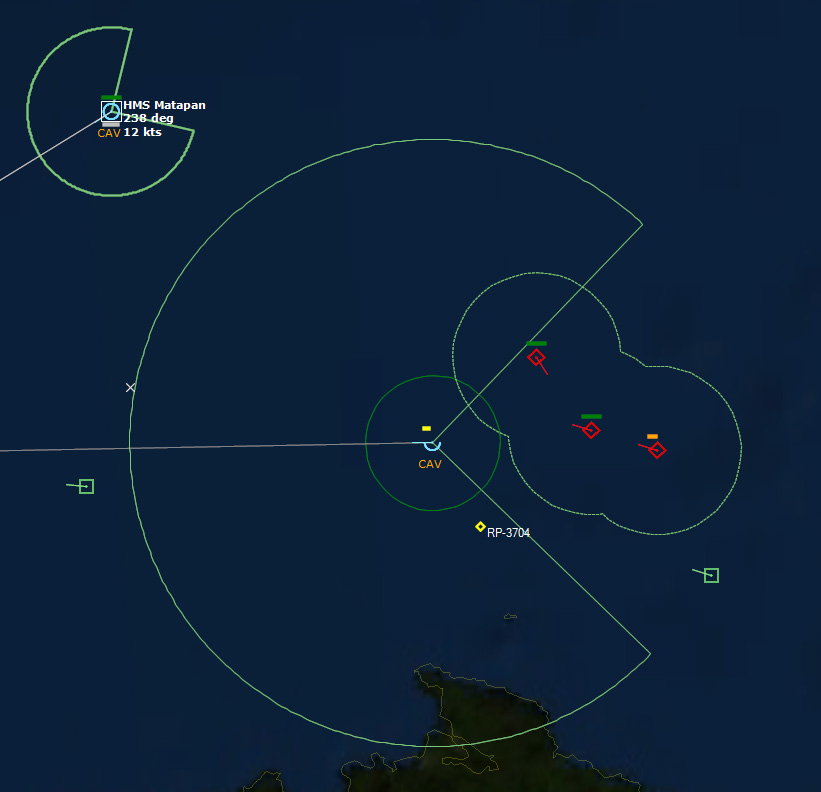
By this time most of the surface contacts are behind the Revenge, so the captain decides to race to the patrol area. Speed is increased in the hopes of opening the distance. Matapan keeps an eye on the contacts.
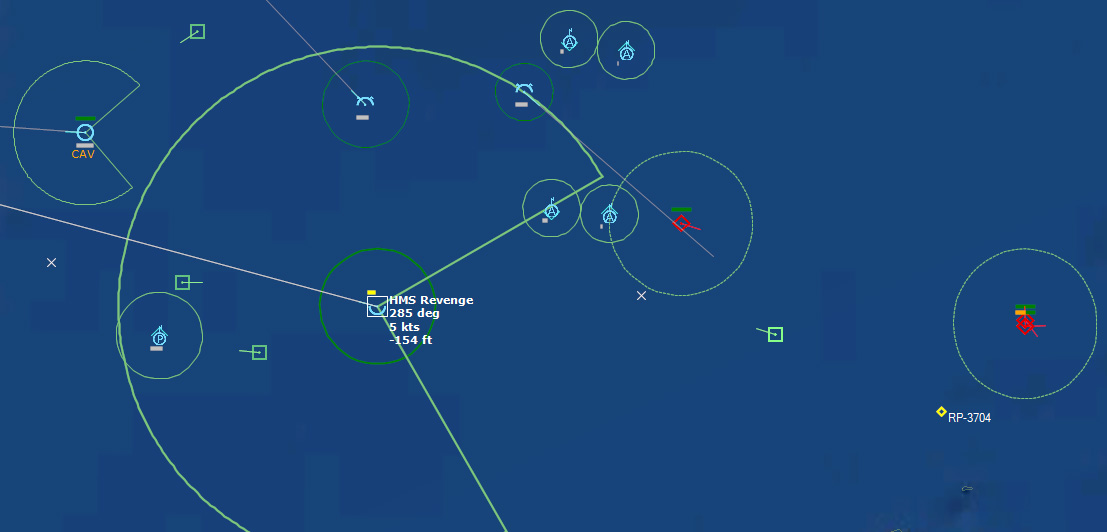
The next twelve hours are quiet, but tense.
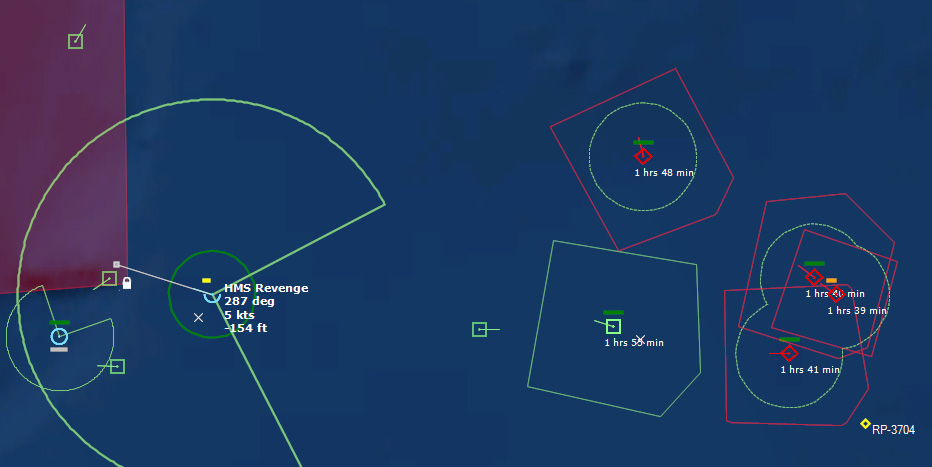
174002Z Finally the Revenge arrives on station.
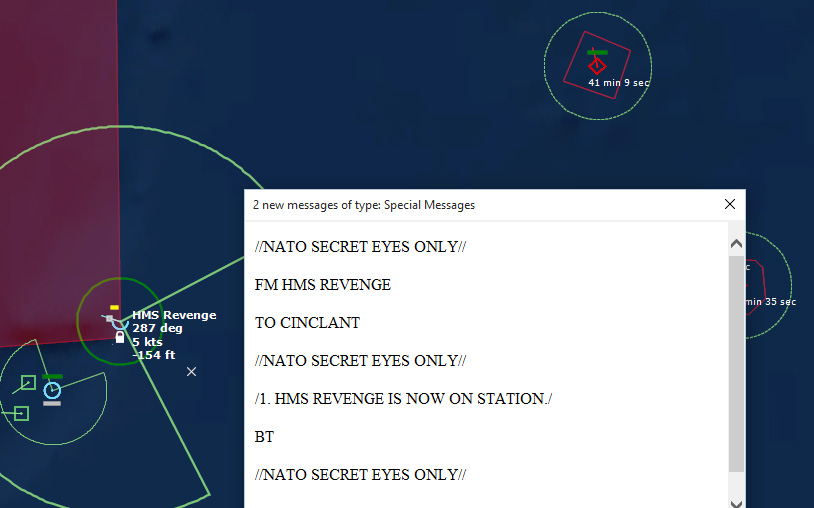
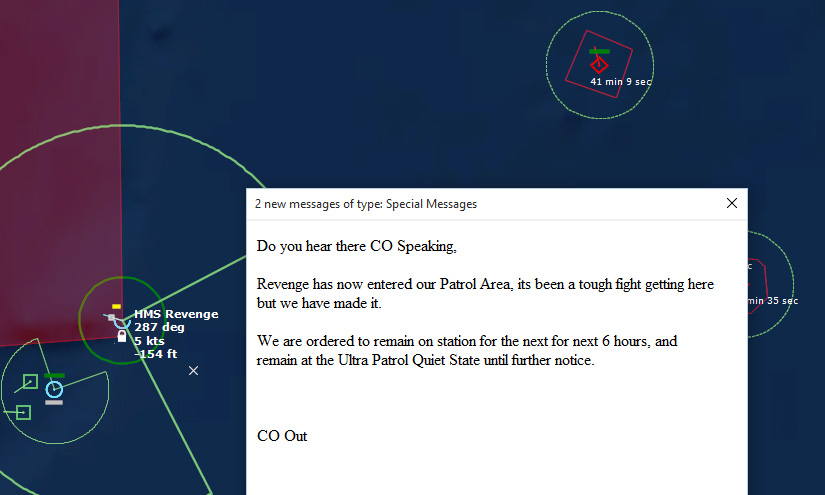
234000Z And several hours after that, the mission is complete.
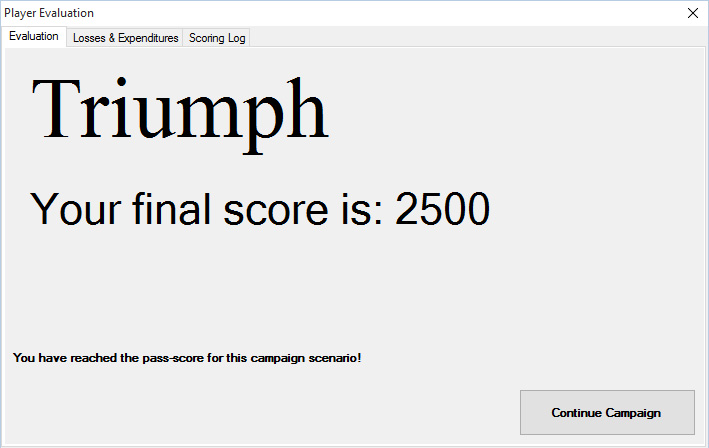 SIDE: NATO
===========================================================
LOSSES:
-------------------------------
2x Wasp HAS.1
1x F 109 Leander [Type 12I Leander Batch 1, Ikara]
1x F 107 Rothesay [Type 12M]
1x Wessex HAS.3
EXPENDITURES:
------------------
2x SSQ-947 Julie Active Range-Only [AN/SSQ-47]
199x Type 17054 Active Directional [Mk1c]
99x Type 17053 Passive Directional [Mk1c]
76x AN/SSQ-47 Julie Active Range-Only
2x Sea Cat Mod 1
2x 114mm/45 Mk6 Twin HE Burst [2 rnds]
2x Corvus Chaff [Distraction]
2x Corvus Chaff [Seduction]
2x Corvus Flare
302x Type 30059 LOFAR [Mk1c]
13x Mk46 LWT Mod 2
4x Mk11 Depth Charge
2x Mk44 Mod 1
4x AS.11
1x Mk23 Grog
SIDE: Soviet Union
===========================================================
LOSSES:
-------------------------------
1x PLARK-661 Papa [Anchar]
1x PL-641B Tango [Som]
1x PLA-671 Victor I [Yorsh]
1x PL- 613 Whiskey V
EXPENDITURES:
------------------
3x SET-65M Enot-2 [NATO ET-80A[76]]
4x SS-N-7 Starbright [P-70 Ametist]
5x Generic Acoustic Decoy
76x RBU-2500 Salvo [16 rnds]
1x SET-65 Enot [NATO ET-80A[67]]
SIDE: Biological
===========================================================
LOSSES:
-------------------------------
2x Biologic Tuna Fishes
EXPENDITURES:
------------------
SIDE: Neutral Shipping
===========================================================
LOSSES:
-------------------------------
EXPENDITURES:
------------------
May 24, 2017
COMMAND: Northern Inferno Scenario 1: Opening Moves
This is the first AAR for COMMAND: Modern Naval/Air Operations: Northern Inferno.NATO vs WARSAW PACT
August-October 1975
While shadowing a Soviet Echo II in the Gibraltar Straits, the Frigate HMS Ashanti was sunk with heavy loss of life. In London, the Prime Minister laid the blame for the incident squarely on the Soviet shoulders and has asked the Soviet Premier for an apology and appropriate reparations.
Meanwhile, the Soviet Politburo has accused the Royal Navy of dangerous violations of international maritime law, and has labelled the incident as "tragic but unavoidable". Both sides have placed their naval forces on full alert.
In the Norwegian Sea, STANAVFORLANT (Standing Naval Force Atlantic) has sailed from Faslane and taken a war footing in vicinity of Jan Mayen Island, and assumed an ASW posture. Shortly after receiving news of the Gibraltar incident, all NATO Forces have assumed the Second Degree of Readiness and are now preparing for war!
Opening Moves
Date/Time: 07 August, 1975 / 21:30:00 Zulu
Location: Norwegian Sea
Playable Sides: NATO
Duration: 3 days
While shadowing a Soviet Echo II in the Gibraltar Straits, the Frigate HMS Ashanti was sunk with heavy loss of life. In London, the Prime Minister laid the blame for the incident squarely on the Soviet shoulders and has asked the Soviet Premier for an apology and appropriate reparations.
Meanwhile, the Soviet Politburo has accused the Royal Navy of dangerous violations of international maritime law, and has labelled the incident as "tragic but unavoidable". Both sides have placed their naval forces on full alert.
Soviet fighter, attack, and bomber reinforcements have arrived in large quantities on the Kola Peninsula, boosting the already formidable force normally based there. The most fearsome new addition is two Backfire regiments of the Soviet Strategic Air Armies, operating a total of sixty bombers. The Backfires will be tasked with supporting the Northern Fleet's push into the Norwegian Sea, adding awesome striking power to the Northern Fleet Naval Aviation's existing three Badger regiments.
In the Norwegian Sea, NATO's STANAVFORLANT (Standing Naval Force Atlantic) has sailed from Faslane and taken a war footing in vicinity of Jan Mayen Island, and assumed an ASW posture.
Shortly after receiving news of the Gibraltar incident, all NATO forces have assumed the Second Degree of Readiness and are now preparing for war. Is war really unavoidable?
Gameplay Tip: NATO's underwater surveillance network (SOSUS) will rapidly flood you with a large number of underwater contacts, cluttering your map. Don't panic! Not all of them are enemy submarines. Give the SOSUS operators a little time to start identifying neutrals, biological etc. The colour of these contacts will turn green. You can use this time to start arranging your air patrols, give orders to your forces etc. Once you begin having positive classifications of "greens", filter them out right click on each desired contact and select "Filter out". This will remove almost all visual information about the contact from the map except for its icon and thus allow you to focus on investigating and prosecuting the possible enemy submarines.
Situation CINCLANT has directed the multinational task force STANAVFORLANT to move into the Norwegian Sea at high speed, in response to the Soviet Forces deploying in the area.
Enemy Forces P-3 Orions on ASW sorties in the Norwegian Sea indicate that Whiskey-, Zulu- and November-class submarines are located in the vicinity of Jan Mayen Island. It is reported that these submarines are deploying to set up a patrol line to the South of Jan Mayen to intercept any NATO shipping.
Friendly Forces
STANAVFORLANT
TU 603.01.01: HMCS Algonquin DDH, FGS Lubeck FF, USS Mispillion AO TU 603.01.02: NRP Almirante Coutino FF, USS MacDonough DDG TU 603.01.03: HMCS Fraser DDH, HNoMS Bergen FF TU 603.01.04: HMS Bacchante FFH, HNLMS Van Nes FFH Andoya
333 Sqn (P-3B Orion MPA) NAS Keflavik
VP-26 (P-3C Orion MPA) 201 Sqn Det (Nimrod MR.1)
Threat
Foxtrot SSK - Torpedoes
Whiskey V SSK - Torpedoes
Zulu IV SSK - Torpedoes
Juliett SSG - SS-N-3 Shaddock, Torpedoes
Victor II SSN - Torpedoes
November SSN - Torpedoes
Charlie I SSGN - SS-N-7 Starbright, Torpedoes
Tu-95RT Bear-D MRRMission
STANAVFORLANT has been ordered to prevent the Soviet submarines from entering the North Atlantic area via the Greenland, Iceland United Kingdom Gap (GIUK Gap).
Execution
1. STANAVFORLANT is to patrol the designated ASW-patrol areas and prosecute all Soviet submarines. Areas allocated are "ASW Patrol Area 1" and "ASW Patrol Area 2". COMSTANAVFORLANT is to divide his forces as required to patrol areas.
2. Land based air assets to assist STANAVFORLANT in assigned patrol areas.
Command and EMCON
Command: HMCS Algonquin CTG
EMCON: Alpha - limited emissions
August 7, 1975, 213000Z The first thing to do is set up patrols. Patrol Area 1 is a rectangular area in the Greenland Sea that encompasses Jan Mayen. P-3 Orions and a Nimrod out of Keflavik would patrol it from the air, while TU 603.01.03 and 04 would patrol it by sea.
Patrol Area 2 was an irregular area to the east of that to the Norwegian coast. P-3s out of Andoya would patrol that, as would TU 603.01.01 and 02.
213030Z As expected, the SOSUS arrays pick up a lot of contacts. It will take some time to classify them into threats.
213700Z Two of the many contacts have been type classified as SSNs. One is close to TU 603.01.04, which moves to intercept, while the other is in open water in Patrol Area 2. A P-3 is tasked to investigate.
214221Z Multiple contacts have been type classified as SSs, SSGs, and SSGNs:
SSG: 1
SS: 5
SSGN: 1
SSN: 2
Things are getting busy out there…
214500Z
NATO
EYES ONLY
DTG : 072130Z AUG 75
PRECIDENCE : FLASH/
FM : CINCLANT
TO : COMSTANAVFORLANT
INFO : 333 SQN
//NATO SECRET EYES ONLY//
1. ALL UNITS ASSUME A WAR FOOTING.
2. ONE HOUR AGO A NATO P-3C WAS SHOT DOWN IN THE VICINITY OF BANAK BY SOVIET MIG-23 FLOGGER.
3. ANY SOVIET AIR / SURFACE / SUB-SURFACE UNIT IS NOW CONSIDERED HOSTILE.
4. THE USE OF NUCLEAR DEPTH CHARGES, SURFACE TO AIR MISSILES IS AUTHORISED.
// NATO SECRET EYES ONLY //
This development makes things a bit more interesting…
214831Z Several contacts are type classified as Biologics, which helps the situation a bit, and narrows down the number of targets to prosecute.
Dragon 11, a P-3B Orion, launches a torpedo against Goblin 25, which is an unknown contact. It turns out that Goblin 25 is a Biologic… Nice going guys. Getting a little jumpy?
215404Z SSN 15 is classified as a PLA-671RT Victor II [Syomga]. First confirmed hostile target.
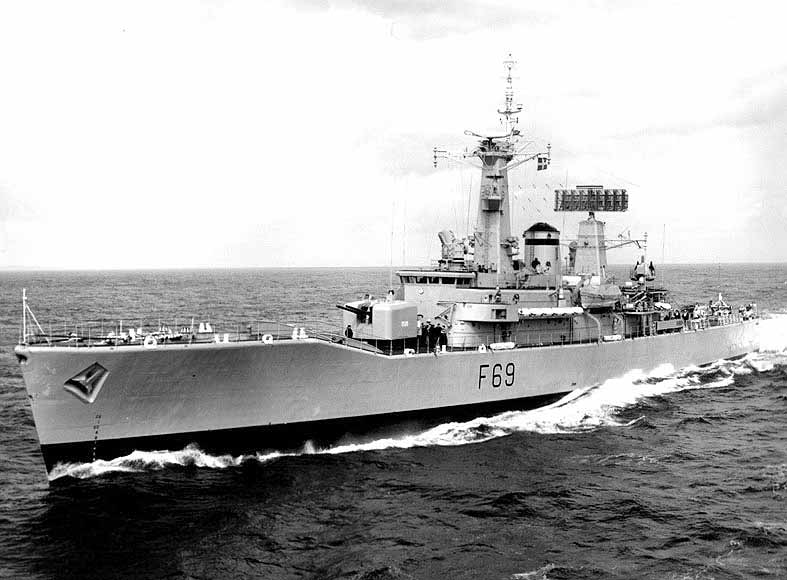 HMS Bacchante 215416Z SSN 18, near TU 603.01.04 is classified as a PLA-627A November [Kit]. HMS Bacchante launches a Wasp (Bacchante Flt 1) to attack the contact with depth charges.
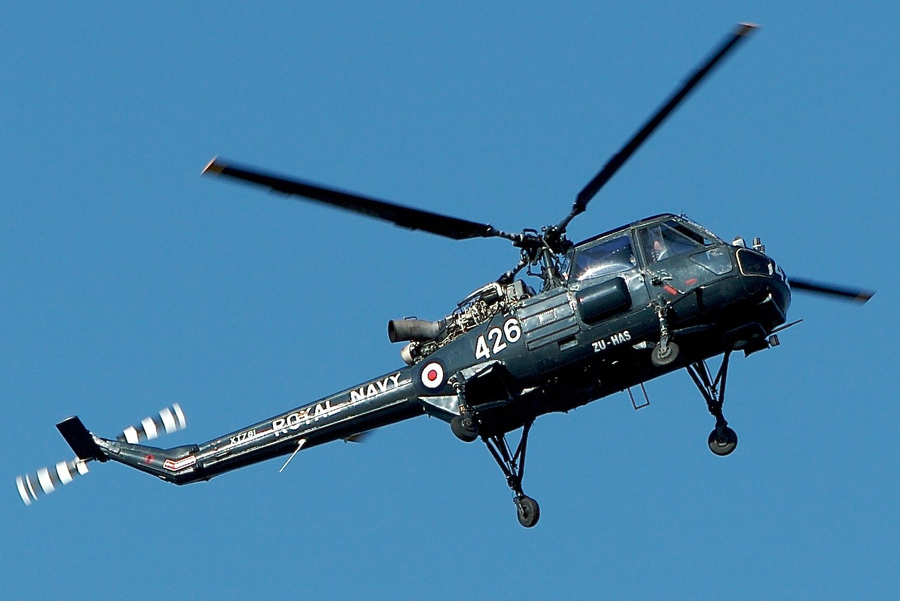 Westland Wasp ASW Helicopter 220021Z SOSUS classifies multiple contacts, two Zulu IVs, two Foxtrots, one Juliett, one Whiskey V, and one Charlie I [Skat].
 TU 603.01.01 and TU 603.01.03 both launch helos to intercept the closest targets. TU 603.01.02, without any aircraft, continues to close in its target, a Zulu IV.
220300Z Bacchante Flt 1 approaches its target, November 18.
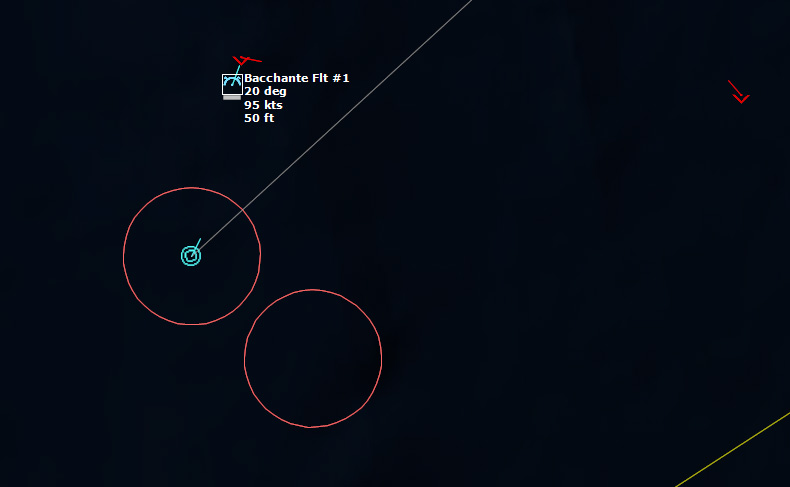
220421Z Bacchante Flt 1 sinks its target with a depth charge.
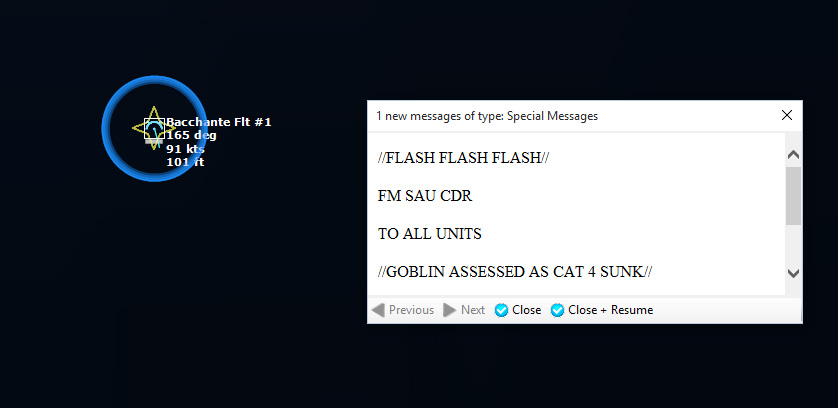
220800Z Algonquin Flt 1 approaches its target, Foxtrot 8. Algonquin Flt 1 launches a Mk 46 LWT Mod 1 torpedo, which hits the Fotxtrot. The Foxtrot is damaged, but not sunk, so the Algonquin Flt 1 launches another torpedo to make sure. The second torpedo hits, and finishes it off.
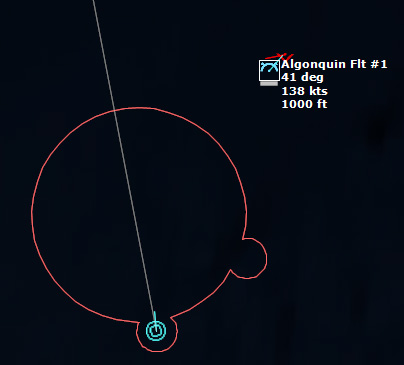
221126Z Fraser Flt 1 approaches its target, a Whiskey V. Two torpedoes later, and the Whiskey V is sunk.
221401Z Most of the detected Soviet submarines do not have missiles, and so can safely be attacked by surface assets, but two, the Charlie and the Juliett, are missile capable, and therefore it would be prudent to tackle them with airborne assets. Unfortunately, the Charlie is very close to TU 603.01.04. Bacchante Flt 1 still has a Mk11 Depth Charge, however, and is moving to engage the Charlie.
222225Z Bacchante Flt 1 sinks the Charlie with its depth charge. One of the major threats has been eliminated.

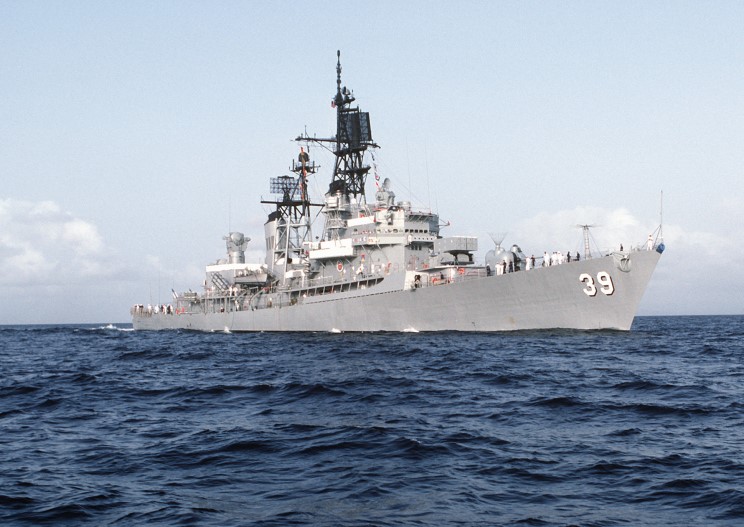 USS MacDonough 223155Z USS MacDonough gets into range of a Zulu IV contact, and launches a RUR-5a Mod 4 ASROC RTT [Mk46 Mod 2] at the contact, near maximum range. The torpedo damages the submarine, but does not destroy it, so the MacDonough fires a second ASROC. The Charlie responds by diving deep and fleeing, and the second ASROC misses. The MacDonough, which had previously changed course to evade any retaliation, now turns back to continue prosecuting the target.
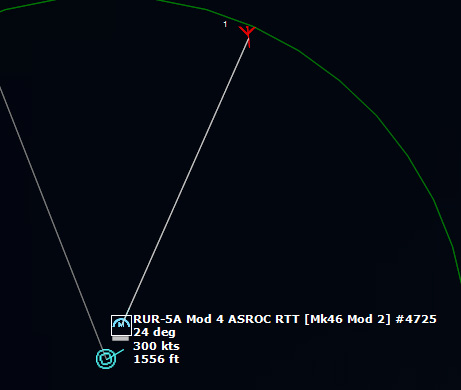
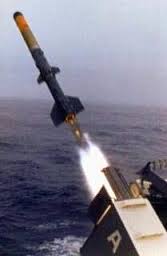 ASROC launch 223847Z The third ASROC Mk 46 hits the target, sinking it.
223951Z HMCS Algonquin and FGS Lubeck detect a pair of bogeys bracketing the group to the east and west. The bogeys appear to close in. So far the contacts are detected by passive sensors only. The Algonquin waits in ambush for the bogey to get in range before turning sensors on.
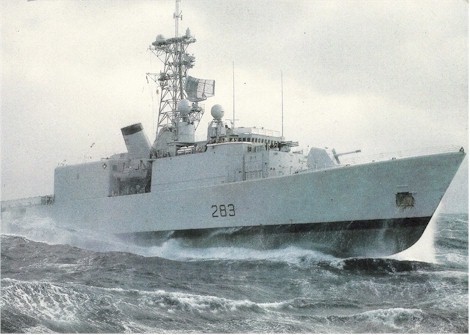 HMCS Algonquin 224346Z The Bogeys are getting too close for comfort, and are approaching the groups. Time to declare them hostile. The bad news is, both bogeys are flying at 36,000 ft, which is above the range of the Algonquin’s Sea Sparrows. Bogey 28 flies by the Lubeck and continues on, while Bogey 27 flies over the USS Mispillion, then the Lubeck, and continues to circle the group.
 230600Z Assuming that the bogey that had earlier buzzed the Lubeck was still enroute, USS MacDonough waits in ambush, and then switches its radars on. Contact! The target is declared hostile.
230620Z MacDonough launches a RIM-67A SM-1ER at the bogey. The first missile misses, but the second brings down the target, identified as a Bear-D.
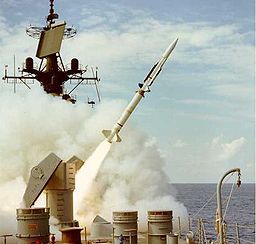 RIM-67A launch
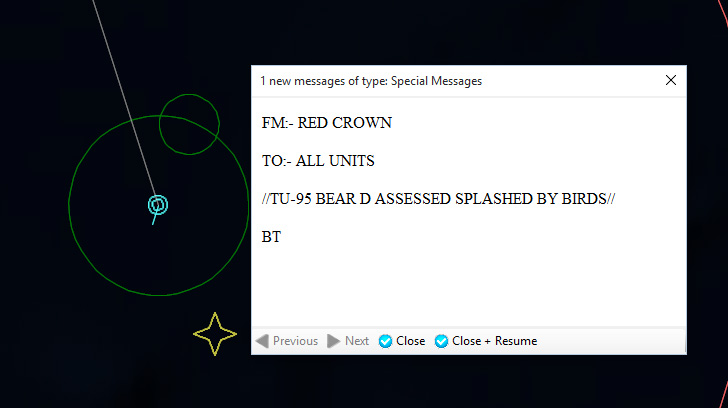
A pair of P-3B Orions close in on the Juliett and begin dropping sonobuoys.
232111Z The Juliett is localized and the attack begins. Torpedo away! The first torpedo damages the Juliett, but the second, third, and fourth miss. Finally, the sixth torpedo sinks the Juliett.
233622Z In the meantime, another P-3B Orion attacks a Zulu IV, damaging it with a Mk46. A follow-up attack finishes it off.
The NATO ASW assets have done their job, sinking six Soviet submarines, reducing the threat in the Greenland Sea considerably. But the war has just begun...
Major Victory
Final Score: 700
SIDE: Soviet Union
===========================================================
LOSSES:
-------------------------------
1x PLA-627A November [Kit]
1x PL-641 Foxtrot
1x PL- 613 Whiskey V
1x PLARK-670 Charlie I [Skat]
2x PL-611 Zulu IV
1x Tu-95RT Bear D
1x PLRK-651 Juliett
EXPENDITURES:
------------------
9x Generic Acoustic Decoy
2x Generic Chaff Salvo [4x Cartridges]
SIDE: NATO
===========================================================
LOSSES:
-------------------------------
EXPENDITURES:
------------------
3x AN/SSQ-41A Jezebel LOFAR
4x Mk46 LWT Mod 2
2x Mk11 Depth Charge
11x Mk46 LWT Mod 1
19x AN/SSQ-41B Jezebel LOFAR
3x RUR-5A Mod 4 ASROC RTT [Mk46 Mod 2]
2x RIM-67A SM-1ER
May 23, 2017
COMMAND: Northern Inferno
 I have been a fan of the game COMMAND: Modern Naval/Air Operations since it was released in 2013. In addition to the scenarios provided with the original sim and others created by the community, now there are two sets of DLC, Northern Inferno detailed a set of Cold War scenarios in 1975, and Chains of War, a conflict in the Far East in the present day.In the posts that follow I hope to present after action reports (AARs) for each of the scenarios in the campaign, similar to previous ones that I have done. Be advised: there will be spoilers galore.
Some of the AARs will be longer and more detailed than others, as some scenarios (fleet actions and air operations) might be be more conducive to narrative writing than scenarios that are pure anti-submarine warfare (ASW). Either way, I hope that the AARs to follow will give you a taste for what it's like to play COMMAND.
Northern Inferno (Description below is from the item description on the Matrix Games website)The year is 1975, the Cold War is omnipresent and beneath the veneer of détente the tension between the two superpowers irreversibly escalate towards the ultimate confrontation.As an at-sea "accident" results in the sinking of a Royal Navy frigate and the Warsaw Pact is mobilizing, events rapidly spiral out of control. The world is plunging towards another global conflict - but this time, there will be no post-war recovery, only nuclear disaster.Do you have what it takes to stand up to Soviet/WP forces and avert Armageddon?Command: Northern Inferno is a stand-alone game that uses the latest version of the Command: Modern Air/Naval Operations (CMANO) engine. It also serves as a DLC for existing CMANO owners.For the first time after the release of the most realistic and accurate modern warfare simulation, the developer, Warfare Sims, has created a fully-fledged campaign expansion that encompasses 15 scenarios across one of the most thrilling and intense moments of recent history.While the campaign is fictitious, every single part of this electrifying set of scenarios has been meticulously researched to deliver an entirely new experience to please both novice players and experts.


![[image error]](https://4.bp.blogspot.com/-Zghr1POtHkQ/WSHpyB_BfAI/AAAAAAAAgD0/pV1yJT2sdgcdaOoHIrH56HjGBcjV9hchgCLcB/s1600/4-Barents%2BSea%2BBoomers%2B24%2B080000Z.jpg)
![[image error]](https://2.bp.blogspot.com/-JPUi1F46oJs/WSMQMQiCyJI/AAAAAAAAgKg/HMNsHoE91-obsKpow63vrmvU6tHDdoaYwCLcB/s1600/Uss_tunny.JPG)
![[image error]](https://4.bp.blogspot.com/-awjL-cLbpiU/WSHsjWYBVmI/AAAAAAAAgEI/-yZ2iisqi5QMLApsm7zp5QiRbcBpWGLcgCLcB/s1600/4-Barents%2BSea%2BBoomers%2B24%2B100000Z.jpg)
![[image error]](https://2.bp.blogspot.com/-Uxwe4ydeGtw/WSHtFVrAq4I/AAAAAAAAgEQ/oNJ1yCaIcE8_5Jlxgg2xLrv1ww_EMsMnQCLcB/s1600/4-Barents%2BSea%2BBoomers%2B25%2B%2B001253Z.jpg)
![[image error]](https://2.bp.blogspot.com/-LKLbhgPnCwM/WSHtK0yWaeI/AAAAAAAAgEU/loLRGdvI_64QvxLENUI22hl_W-lKoJmKQCLcB/s1600/4-Barents%2BSea%2BBoomers%2B25%2B002220Z.jpg)
![[image error]](https://3.bp.blogspot.com/-Tw1dq2IcNFA/WSHtT8KAqLI/AAAAAAAAgEc/cOEoUBgaKtcldYlY7V0rKMxjyHWJn-xQQCLcB/s1600/4-Barents%2BSea%2BBoomers%2B25%2B002418Z.jpg)