
Dan Eldredge's Blog, page 3
July 14, 2017
COMMAND: Northern Inferno Scenario 8: Damn the Torpedoes Part 3
 A NATO convoy is headed across the Atlantic to a safe haven in the English Channel. The convoy is absolutely vital--it must get through. The primary threat is from submarines, and undoubtedly there are a lot of them. In the first day of the mission, I lost the frigate USS Pharris early on to a cruise missile attack, but I repaid the favor by sinking several Soviet submarines.
Then, overnight, things got worse. An air-raid sank two ships of the convoy, and then as the sun rose over the convoy, things went from bad to much, much worse. A larger air raid struck, sinking several more ships and the USS Lexington itself, the flagship of the convoy.
Yet there are still seven ships in the convoy left, and I still need to make a dash to safety. The problem is that there is still over 500nm to go to safety.
I know, wishful thinking.
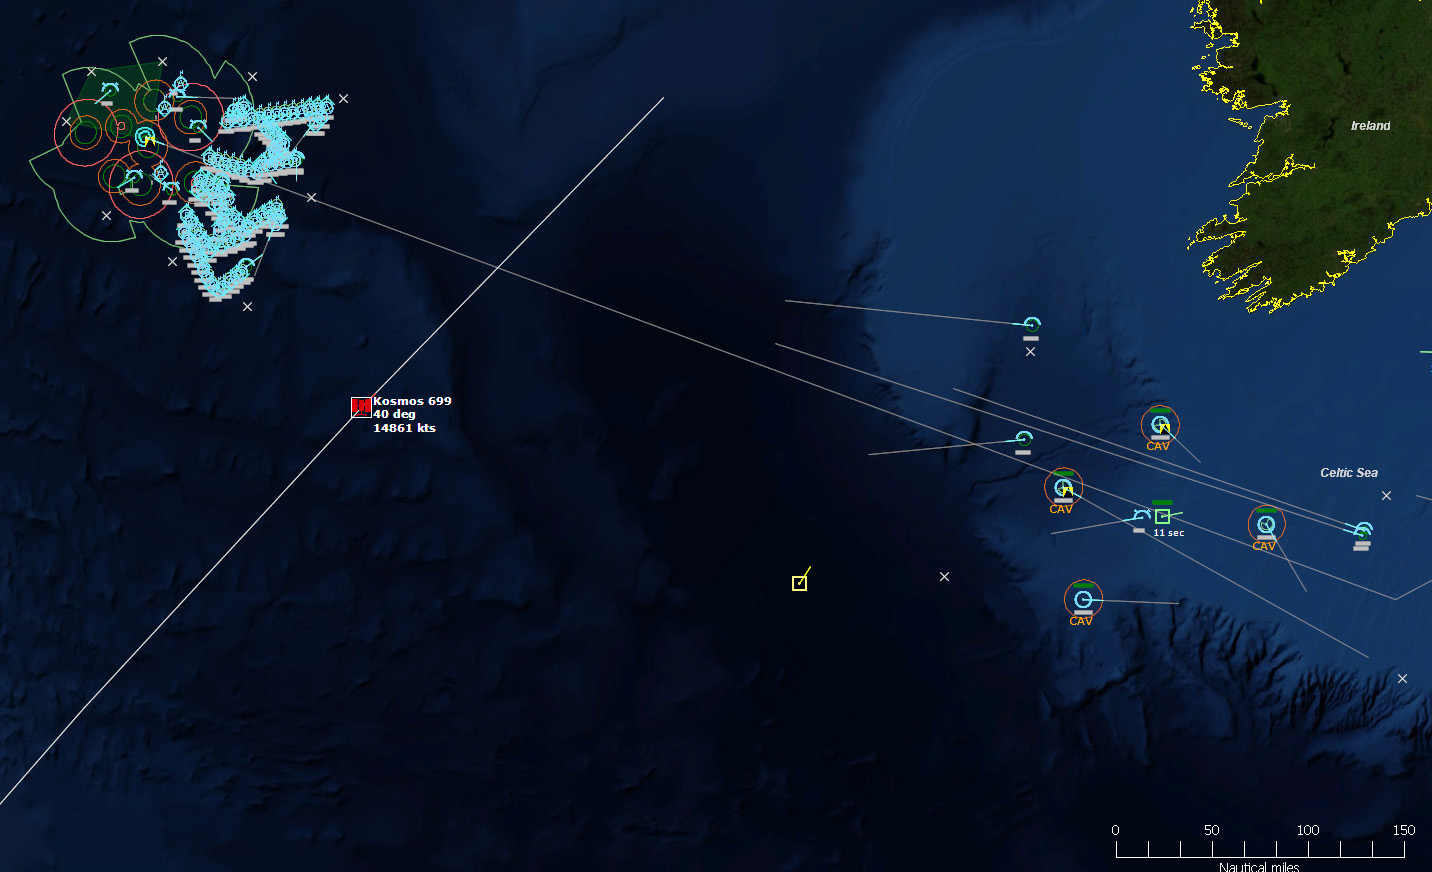
Within minutes a Soviet satellite passes overhead, providing imagery that will no doubt make the Politburo cackle with glee.
A submarine is detected in the sea lane, and my dwindling assets maneuver to prosecute. And then, HMS Tartar detects a cruise missile launch.
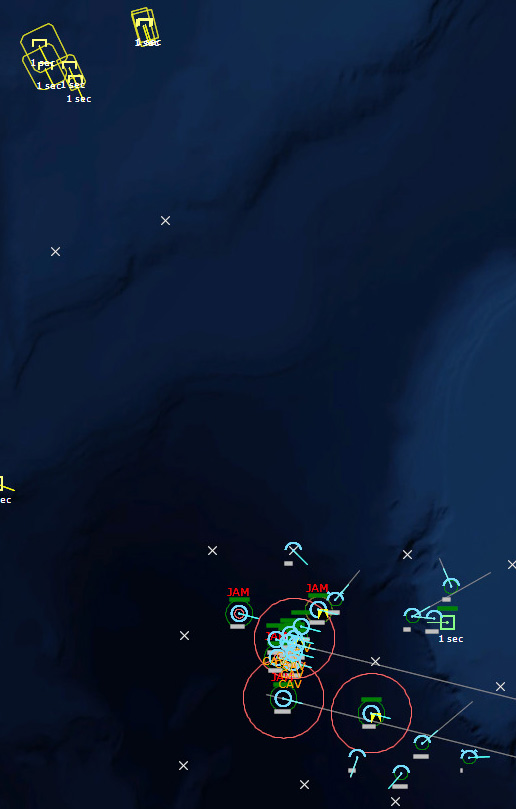
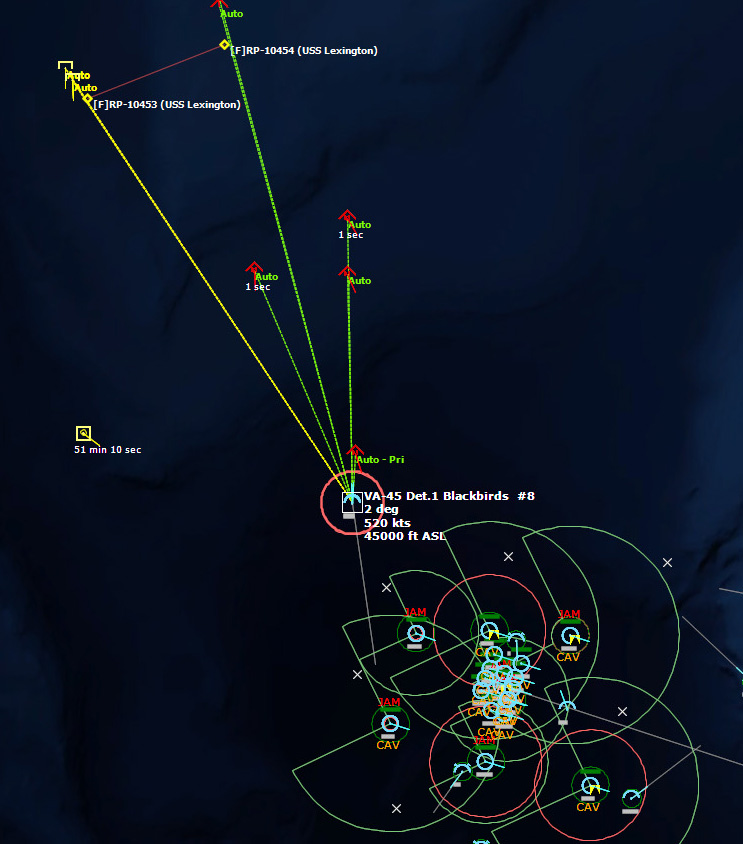
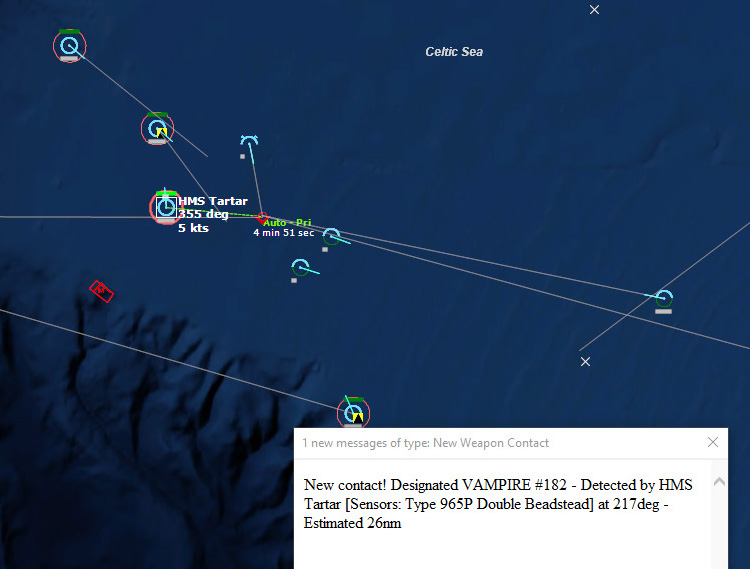 At the rate they're going, the Soviets are going to sweep the Atlantic clean...Seconds later, it is detected that there are in fact six Vampires inbound to HMS Tartar and HMS Jupiter.
 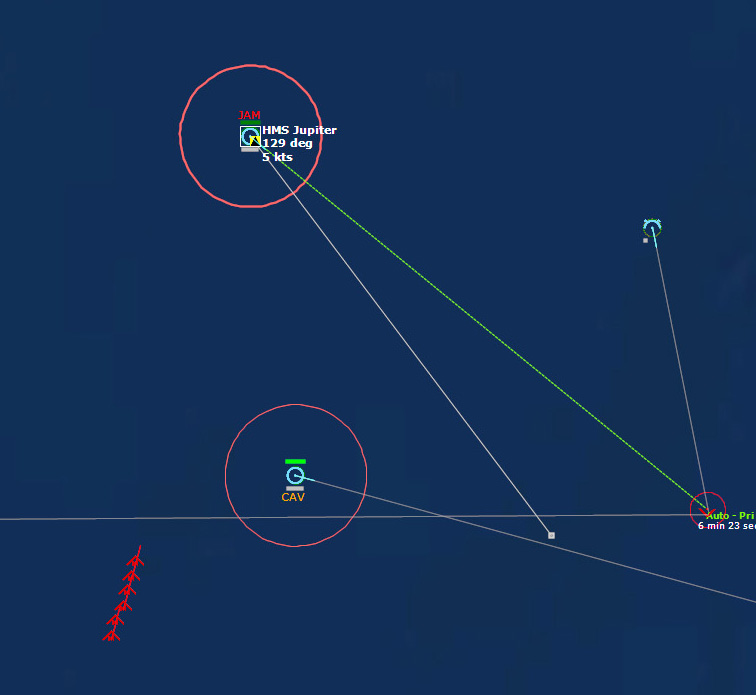 Vampires...againThe missiles appear to be heading towards HMS Jupiter. Jupiter has Sea Cats, so that means it will likely be able to defend itself against...one missile? Maybe? If I'm lucky?
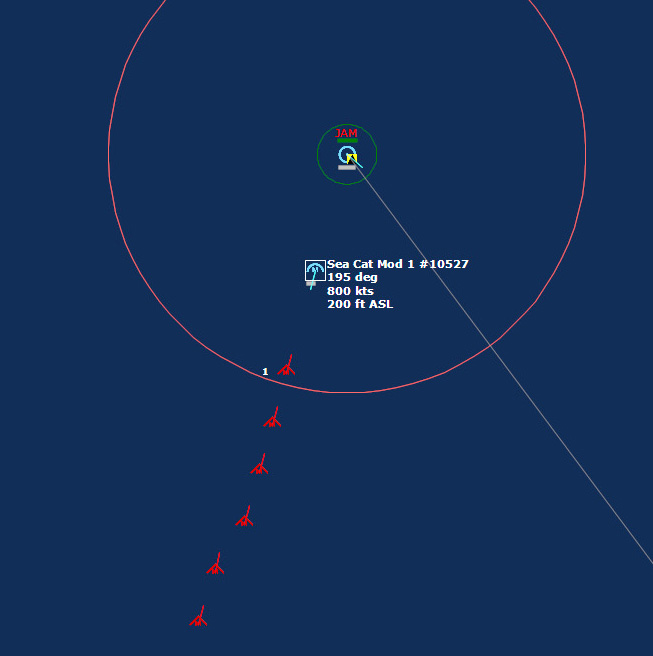 HMS Jupiter launches a Sea Cat to defend itselfUnsurprisingly, the Sea Cat misses. Jupiter subsequently fires three more Sea Cats, all of miss by a mile, and then fires its 114mm guns, which also misses.
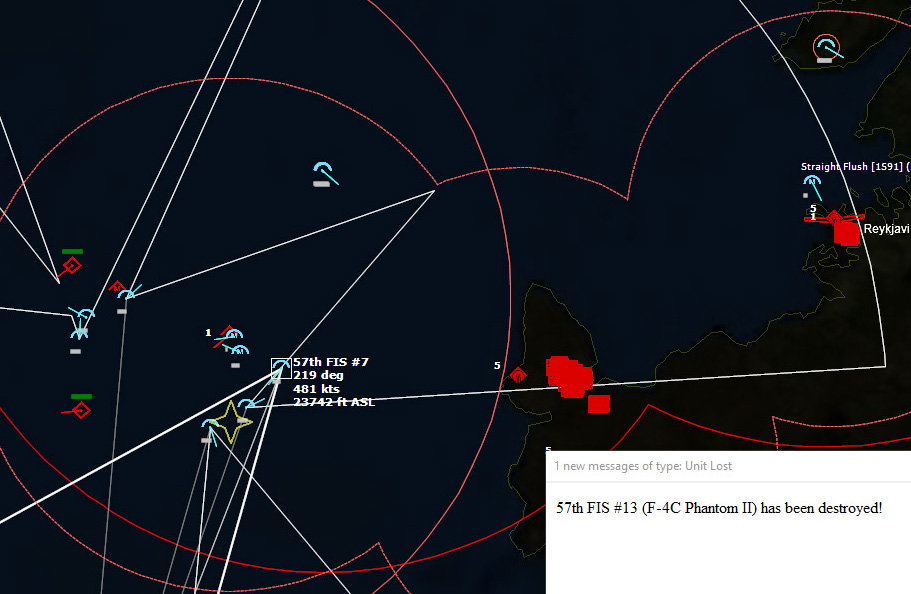
  HMS JupiterAnd yet, the first SS-N-9 Siren misses the Jupiter, and the second malfunctions. Naturally, Jupiter's luck runs out and the third missile blows it out of the water.
Two more Vampires are detected, headed in the general direction of HMS Tartar, but they pass off the ship's bow.
093942Z One of the Sea Kings from the Lexington, out of fuel, crashes into the sea.
095724Z A Whiskey V SSK is sunk. Seven subs down. The minor victory is a hollow one.
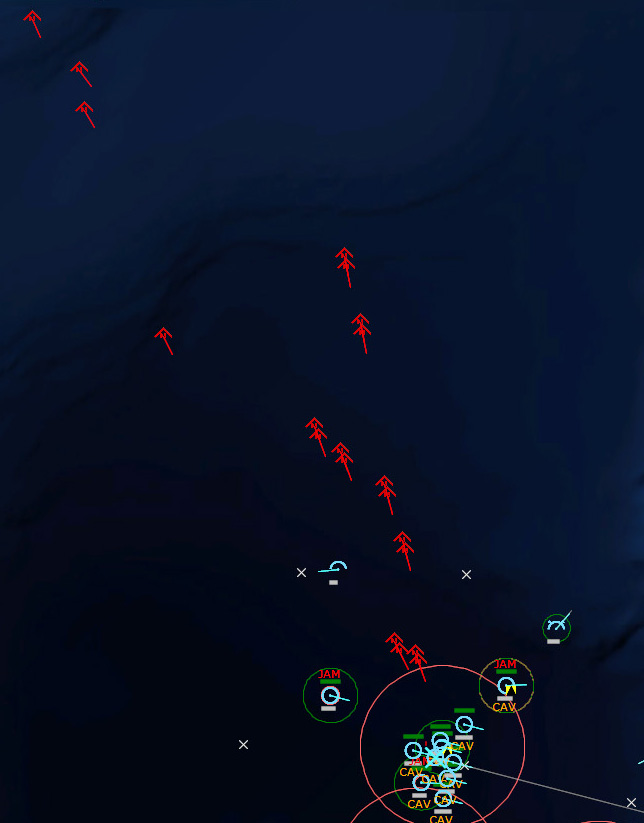
100716Z And then the E-1B Tracer detects another air raid. Six aircraft, probably Backfires again. If so, they can launch twelve more Kitchens and completely wipe out the convoy. I wouldn't be surprised if there was an entire regiment of Backfires on Iceland. Certainly at least 12 are present. Whoever provided the intelligence for this mission needs to be shot.
 The last hopes of the convoy are dashed100916Z Four more Backfires are detected. Raid count is now ten.
100956Z Raid count is now sixteen.
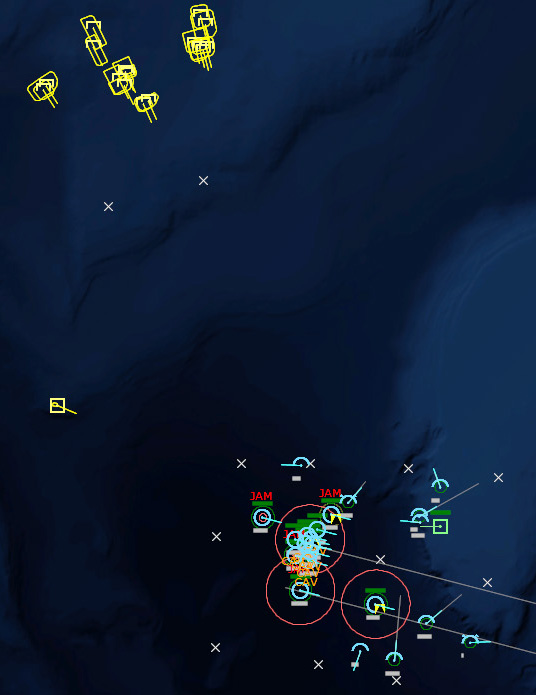 Raid count is sixteenI had been kicking myself for not being more proactive. I should have had my CAP stationed at least 200nm out along the axis to Iceland to intercept any inbound raids, despite the fact that my Skyhawks would not be able to remain on station for long and there would be inevitable gaps in coverage, not to mention the fact that I couldn't expect a two Skyhawk CAP to stop a regiment of Backfires by itself. I might have stopped the first raid, perhaps damaged the second raid, but this? Now I realize that there's absolutely nothing I could have done to stop this. Sixteen Backfires means thirty-two Kitchens, which means they can sink my convoy four times over. What a joke.
The Vampires begin to streak in, Kitchens all.
(As a quick aside, I get a notification that a Nimrod at RAF St Mawgan is out of ordnance. The mission isn't even half over, and I'm already running out of weapons?)
The first vampire flies over the USS Orleck, and it surprisingly runs out of energy. But there are eighteen Vampires in the sky now.
Missile count is now twenty.
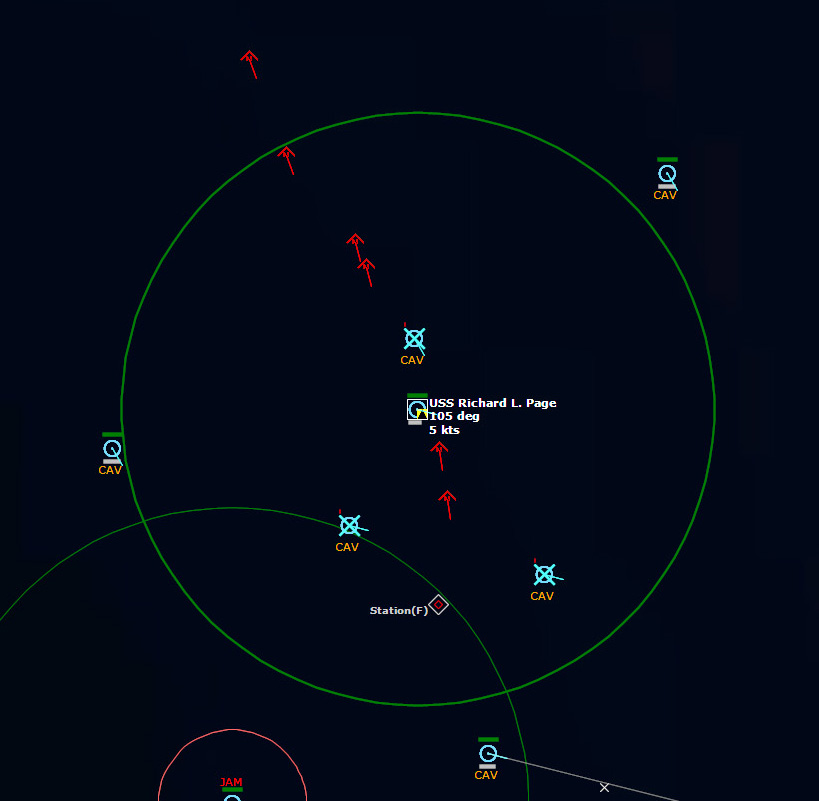
101826Z The next Vampire descends, heading for a tanker, the BP British Envoy. Amazingly, USS Richard L. Page opens fire. I do not have high hopes for the missile hitting. The angle is poor, and so is the SAM.
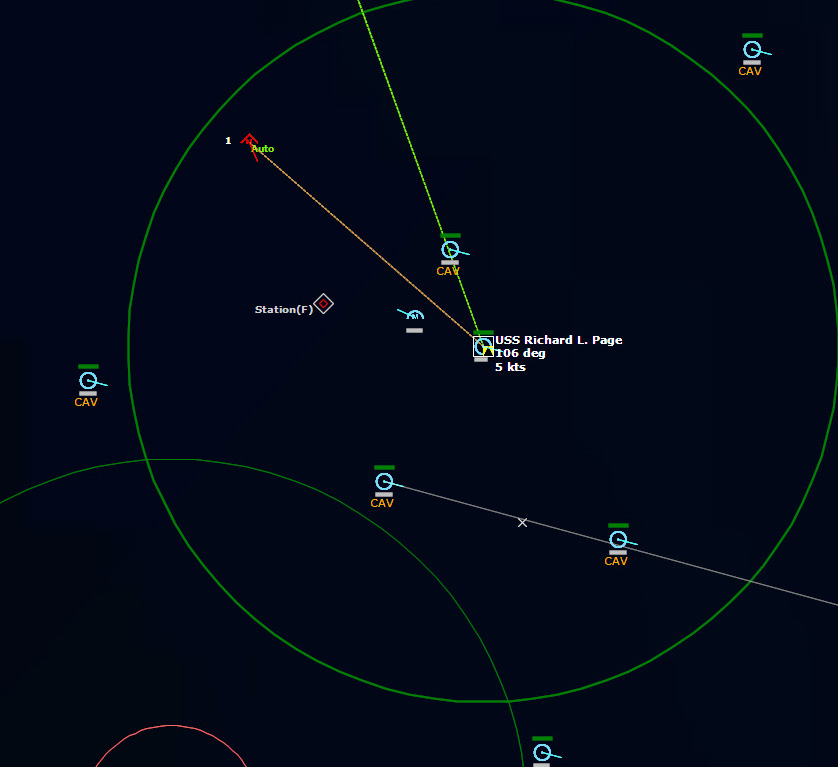 USS Richard L. Page tries desperate to defend the convoyPredictably the RIM-66A SM-1MR Blk IV misses.
The AS-4 Kitchen hits the British Envoy, causing heavy damage.
Richard L. Page fires a SAM at the second inbound missile, and misses again.
British Envoy is hit and sinks.
More Vampires are being launched, and even after several hit, the missile count is still twenty.
 It's an unending unstoppable stream of deathAs four Kitchens fly over the Richard L. Page, it managed to get off two shots, but both miss by a mile.
BP British Pride dies next.
Missile count is nineteen as three missiles are launched to replace the four that took out British Pride.
SS Atlantic Conveyor explodes as two missiles hit her.
 The Vampires just keep piling upMV Bright Field is targeted by five AS-4 Kitchens. The first three run out of energy and crash into the sea two miles short of hitting her. But it doesn't matter. The last two blow her to smithereens.
SS Aegean Breeze explodes.
One AS-4 Kitchen decides to put Richard L. Page out of its misery, diving straight down on the frigate and exploding it.
At this point there are only two ships from the convoy left, the MV Camelot and the MV Clipper Sun. There are five utterly useless escort ships, but the Kitchens are smart enough to ignore them. And there are fourteen Vampires still inbound.
Two Kitchens head for the MV Clipper Sun, and destroy her.
With few options left, the remaining Vampires start searching the ocean for something worthy of their attention. They pointedly ignore the escorts, after all, it's not like they're threats. Despite this, one decides to target the Charles F. Adams, and amazingly, the destroyer's jammer succeeds in spoofing the missile.
Two Kitchens focus on the MV Camelot, and just like that, the entire convoy, that is, every single ship in it, is destroyed.
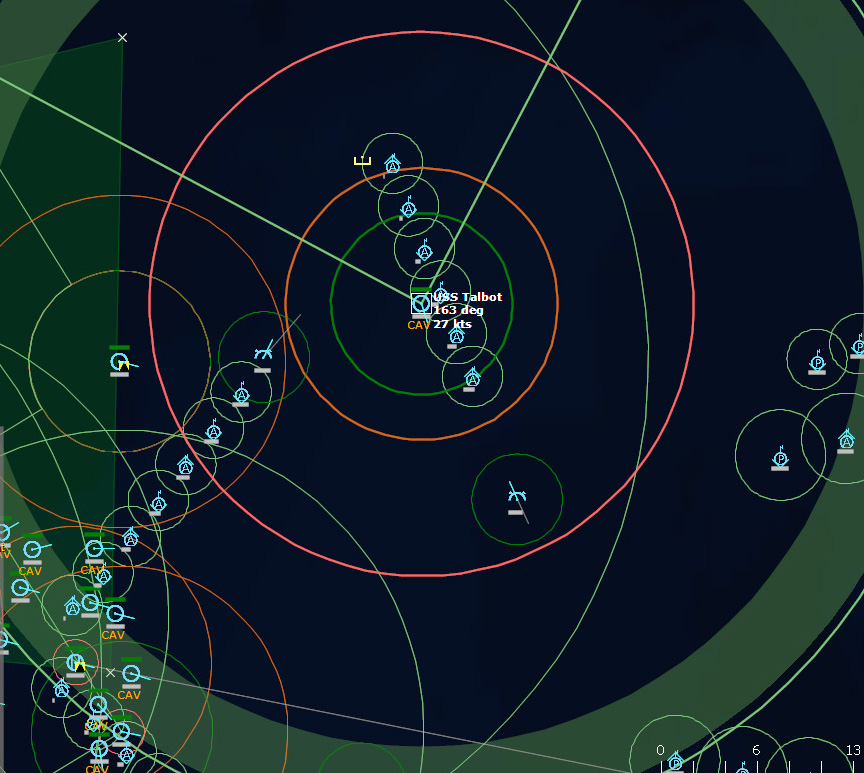
 The convoy that simply must get through...doesn'tA single Vampire targets USS Talbot and the Talbot shoots it down with a RIM-66A, the first hit of the day. Too little too late.
USS Charles F. Adams has two Kitchens targeting it, and it fires a total of seven RIM-66As, all of which miss. One of the Kitchens then malfunctions, and amazingly, the second Kitchen is taken out by a 5-inch gun at extreme close range. The Adams leads a charmed life...too bad it could not help any of the ships it was supposed to protect.
Soon after, another Sea King crashes into the sea, out of fuel.
140427Z A Zulu IV SSK is sunk, but it is essentially meaningless.
234718Z The luck of the USS Charles F. Adams runs out, as out of nowhere it is hit by a torpedo. ASW assets are scarce now.
September 20, 1975 0847Z The surviving ships from the convoy, USS Talbot, USS Barry, USS Valdez, and USS Orleck, all make it into the safe haven. Soon after, the HMS Talbot detects Backfires inbound, over Ireland, no less. I guess I RAF is all busy elsewhere.
I do have a pair of A-4s ready to intercept, but predictably, they're both near Bingo fuel and will not be able to. It looks like the war is going badly enough that the UK cannot protect even the British Isles from enemy bombers, which now fly over it with impunity.
 Backfires over Ireland without a care in the world...And with that, I'll call this disaster of a mission over.
Disaster
Your current score is -1330
Conclusions
This mission was a classic example of how if you make a mistake, you pay for it hard. My mistake in this case was interpreting my Intelligence, in this case the mission briefing, too literally: This is what I read:
Even though there are no strike aircraft on Iceland at present, Badger and Bear MPAs are thought to be using the airfields as a staging base for deep recon and surveillance into the Atlantic. Submarine threat is the main problem...
I interpreted this as: "Focus on the sub threat. I might have to deal with a few recon Bears, and perhaps a Badger will launch a handful missiles at me, but the key thing I have to worry about is those Bears getting a fix on my position and calling in the subs to swarm me."
But I didn't notice the fine print lurking further down in the briefing (emphasis mine):
Enemy Forces
Air: Tu-95 Bear (recon), Tu-22M Backfire (strike), Tu-16 Badger (Recon and ELINT versions)
The briefers sneaked those Backfires in there! First they say "there are no strike aircraft on Iceland at present" and then they casually slip in that Backfires are a threat, and hide the mention between two recon planes. I suppose the intel guy could try to weasel out of it saying that what he told me was technically true, and that the strike aircraft weren't on Iceland at present (i.e., mission start), but were merely en route from the Kola peninsula. They landed, refueled, and launched the strike as soon as my location was pinpointed. I guess.
In any event, enough complaining. My fear was that the recon craft would update the subs about my position, and I wasn't even thinking about a threat from strike aircraft. so I decided to keep my emissions quiet, as I didn't want to broadcast my position and make their job easier. This turned out to be a mistake, as very soon after the scenario started, a Bear appeared directly over my fleet. Soon after that, two satellite passes nearly overhead made me think that the game was up. Therefore there was no harm in sending up my AEW aircraft, not that it made any difference. And then, starting late at night, the Backfires started showing up. (I didn't even realize they were Backfires at first, I thought they were Badgers! But then when the massive raid showed up, I finally figured it out)
I had already put enough work into the AAR that I wasn't about to redo it until I "get it right". If I screw up massively, then the AAR will show it. But what I should have done in this mission was read the briefing more carefully, then been more aggressive with my air defense. I should have parked my CAP at least 200nm north of my fleet, with the AEW nearby, and taken out every recon plan I detected. My fear was that if I put my AEW, the Soviets would then know where my fleet was by the reasoning: "it's right behind the AEW, duh." But I guess just knowing the location of the AEW isn't enough information to launch a strike--at least for Command's AI, so I would have been well advised to have had the AEW up there from the beginning.
I do have to say that as this mission began to fall apart, I was feeling bitter, thinking that the mission was impossible. Prior to the scenario I was feeling that I was at least somewhat knowledgeable about naval warfare, and this was a wakeup call.
Command is a simulation and its scenarios are designed to explore real world problems--not be "fair." And it teaches you some severe lessons. If you want to survive, you can't take anything for granted. You need to do it right, every single time, or you will pay the price.
Post Script: I replayed the mission seven times before I finally succeeded. In one of those attempts I succeeded in shooting down no less than twenty Backfires, and I still lost. In the end, I had to station my E-1B Tracer 450 miles north of my convoy, and the A-4s flying CAP 230 miles out. No recon plane got within 250 miles of my convoy, and the Backfires were still showing up. So then I discovered that there was not one SSV Mayak intelligence ship, but two. I destroyed one over 200nm away from my fleet, but the second one came within 100 miles...and the Backfires came and wiped me out. Again. So I had to resume from a previous save, deliberately seek out the SSV Mayak, and kill it much farther out. Only then was I able to continue without the Backfires showing up. How the Mayak detected my emissions-quiet fleet from more than 100nm away is a mystery to me.
By comparison, the submarines were a non-issue. The name of the scenario should have been "Don't Get Detected," rather than "Damn the Torpedoes." What torpedoes? Ultimately this scenario taught me the harsh lesson of "Never trust Military 'Intelligence'" and "Kill everything within 200nm of you, if not farther."

Losses and Expenditures (from original play through)
SIDE: Soviet Union
===========================================================
LOSSES:
-------------------------------
3x Tu-95RT Bear D
3x PL- 613 Whiskey V
1x PLA-671RT Victor II [Syomga]
1x PLARK-670 Charlie I [Skat]
1x PLA-627A November [Kit]
1x SSV Mayak [Pr.502, ASW Mod]
1x PL-641B Tango [Som]
1x PLARK-675 Echo II
1x PL-611 Zulu IV
EXPENDITURES:
------------------
4x SS-N-7 Starbright [P-70 Ametist]
2x 23mm AM-23 x 2 Burst [50 rnds]
1x 23mm AM-23 x 2 Burst [50 rnds]
4x Generic Flare Salvo [4x Cartridges, Single Spectral]
1x 53-57 Pattern [NATO 53-56]
21x Generic Acoustic Decoy
16x SS-N-3a Shaddock [P-6, ASM]
50x AS-4 Kitchen A Mod 2 [Kh-22M ASM]
8x SS-N-9 Siren [P-120 Malakhit]
6x 53-65K WH
SIDE: NATO
===========================================================
LOSSES:
-------------------------------
2x SH-2D Seasprite
1x FF 1052 Knox
3x E-1B Tracer
2x Commercial Tanker - General Purpose [20,000t DWT]
2x Commercial Container Vessel - Panamax [4,500 TEU, 65,000t DWT]
3x Commercial RO/RO Vessel [18,000t DWT]
1x FF 1040 Garcia
2x Commercial Dry-Bulk Carrier - Handymax Size [45,000t DWT]
18x S-2G Tracker
6x A-4E Skyhawk
8x SH-3D Sea King
1x CVS 16 Lexington
1x Wasp HAS.1
1x F 12 Achilles [Type 12I Leander Batch 3 Broad Beam]
2x Commercial Tanker - Large Range 1 [75,000t DWT]
1x FFG 1 Brooke
2x Commercial LNG/LPG Tanker [18,000t DWT]
1x DDG 2 Charles F. Adams
EXPENDITURES:
------------------
1015x AN/SSQ-47 Julie Active Range-Only
552x AN/SSQ-41A Jezebel LOFAR
128x AN/SSQ-50B CASS
48x AN/SSQ-2 Jezebel LOFAR


July 13, 2017
COMMAND: Northern Inferno Scenario 8: Damn the Torpedoes Part 2
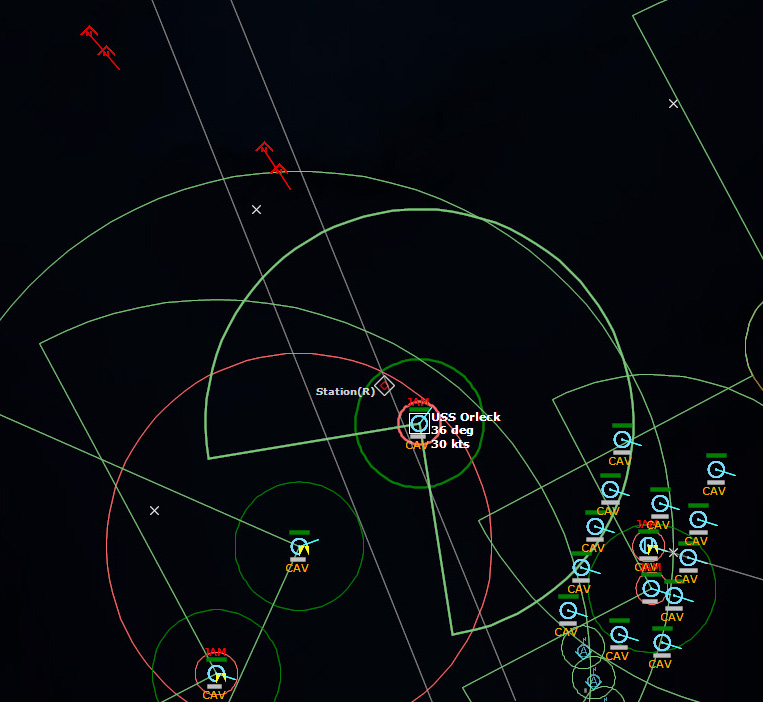
In Part One of this Scenario, a NATO convoy is headed across the Atlantic to a safe haven in the English Channel. The convoy is absolutely vital--it must get through. The primary threat is from submarines, and undoubtedly there are a lot of them. In the first day of the mission, I lost the frigate USS Pharris early on to a cruise missile attack, but I repaid the favor by sinking four Soviet submarines. But there is a long way to go still, some 730 nautical miles. The first day is over, now my convoy must make it through the night.
 USS Charles F. Adams opens fire on the Mayak with its 5-inch gunsBefore the first shells even have a chance to hit, the E-1B Tracer above the convoy detects Vampire launches to the northeast.
 Vampires detected!As the Charles F. Adams pounds the Mayak, the Vampire contacts firm up, and they appear to be heading towards the convoy on a bearing of 234. The closest ship along that bearing (235) is Charles F. Adams itself, which is on the far side of the convoy. Soon contact with the Mayak is lost, and a Sea Sprite is dispatched to do BDA.
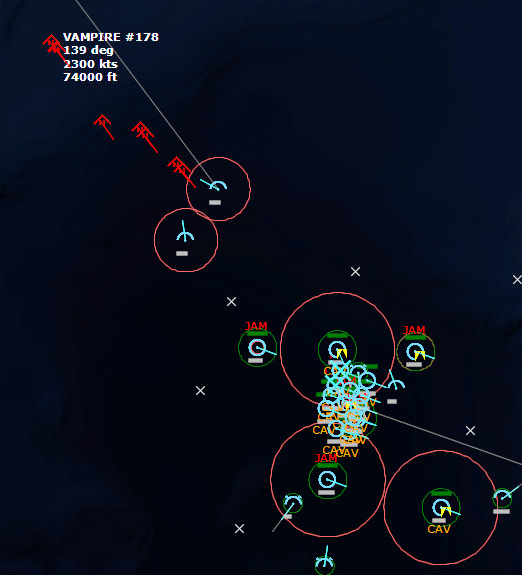
0250Z An airborne contact is detected far to the north, about 180nm out, and I suspect it's another Bear, but then it launches cruise missiles. Those cruise missiles seem to be moving awfully fast, and then I see that they're going at 2300kts at 74,000 feet.
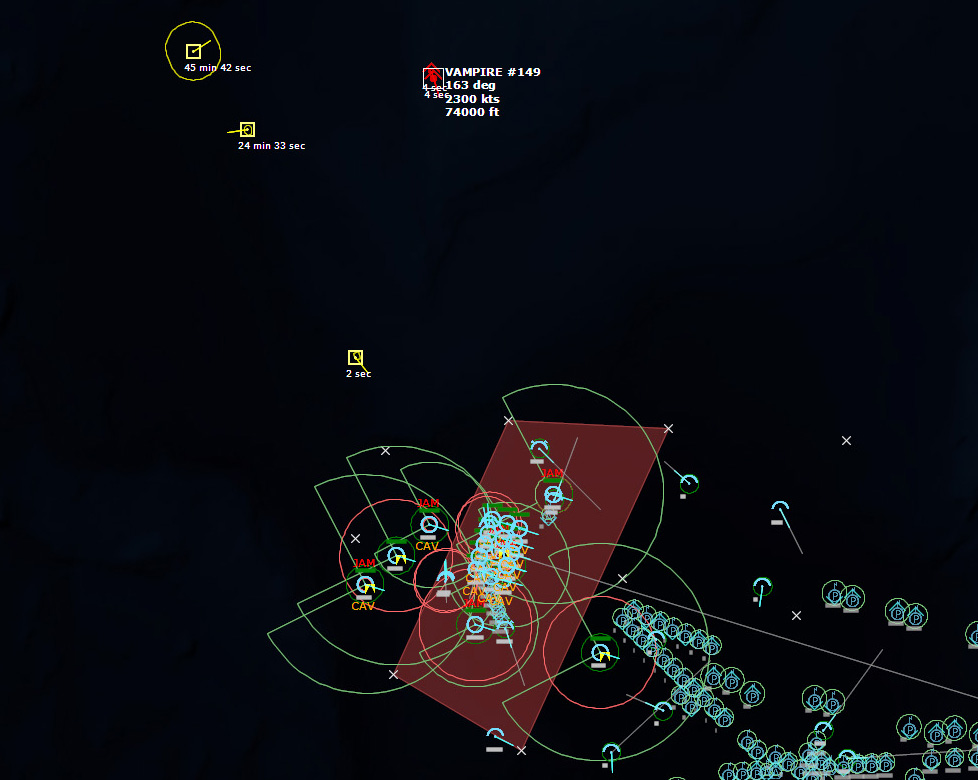 2300kts? This has me worried.I hope they're not nuclear. I scan the database and determine that they are AS-4 Kitchens. By this time the missiles change course and are heading almost due south, straight for the convoy. Not good. My A-4s are moving to intercept, but I seriously doubt they can do anything to missiles that are this high and this fast. There's a good chance that 2 ships in my convoy are doomed.
 Two AS-4 Kitchens inbound, and I have essentially nothing to stop them.In retrospect I could have stationed the USS Richard L. Page to the north, and maybe I still will do so, but I have serious doubts that the RIM-66A SM-1MR Blk IV would be up to the task of taking out a Mach 4 cruise missile.
The Kitchens move inexorably towards the convoy. The Kitchens begin their terminal dives and zoom by the helpless A-4s like they aren't even there. Even if the A-4s could get into a good firing position, the AIM-9H Sidewinder has a top speed of 1475kts...which has no hope of catching a 2300kt missile.
The apparent target of the Kitchens is the SS Alpha Germania, and "fortunately", both Kitchens appear to have targeted it, which may spare another ship the same fate.
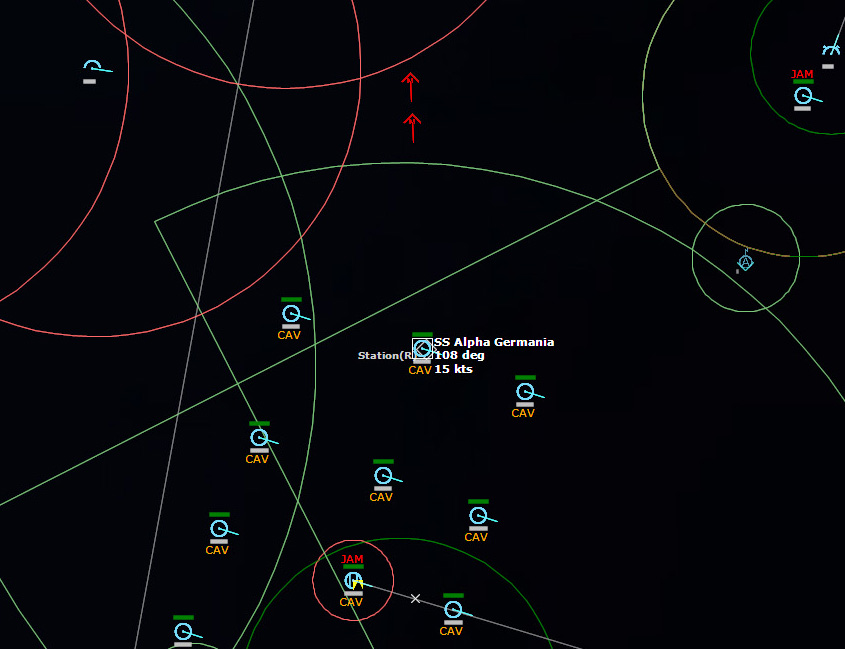 The Alpha Germania is doomed
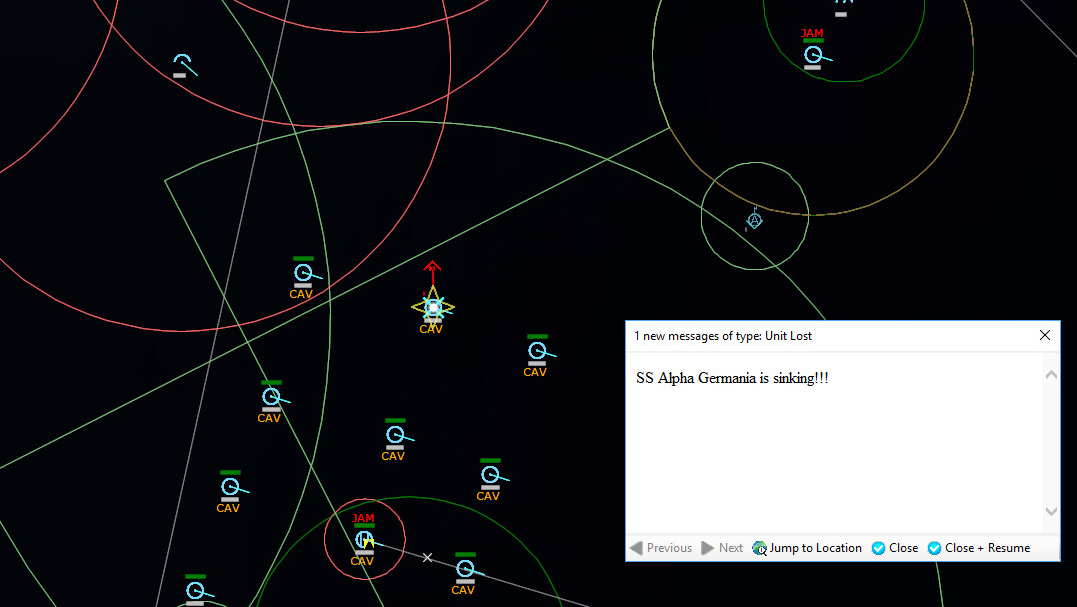 Alpha Germania sinksThe second AS-4 Kitchen, its target destroyed, self-destructs.
USS Richard L. Page maneuvers to act as goal keeper over the convoy. And then, two more bogeys are detected inbound. They are almost certainly more Backfires (originally I thought they were Badgers), flying in to dump more unavoidable AS-4 Kitchens my way.
 Two more Bogeys detectedAs expected, the bogeys soon launch cruise missiles. Their profiles indicate that they are more AS-4 Kitchens. Four vampires are inbound, which means I just lost two more ships.
USS Orleck and USS Richard L. Page are along the bearings of the inbound Vampires, so I hope that they might sacrifice themselves to save the convoy. The escorts are expendable. The convoy is not.
A few moments later the Vampires make course corrections. It's possible that the USS Orleck is the target for all four missiles.
 The Vampires streak in
The first two vampires ignore Orleck, and appear to be targeting the Edith Maersk instead. The second pair are still aimed at Orleck. The second pair does not begin their terminal dive, however, and so will likely ignore Orleck and take out another ship instead.
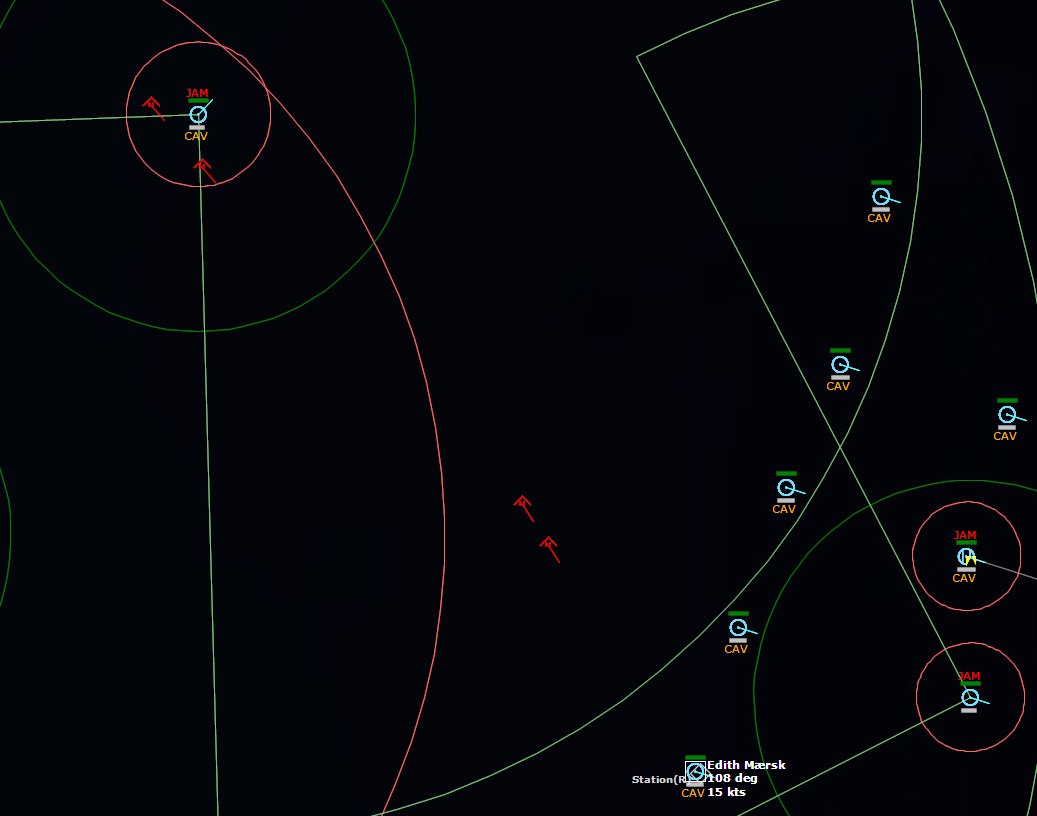 The Vampires ignore the Orleck and head towards Edith MaerskThe first Kitchen malfunctions and fails to hit the Edith Maersk. The second impacts the ship and delivers severe damage.
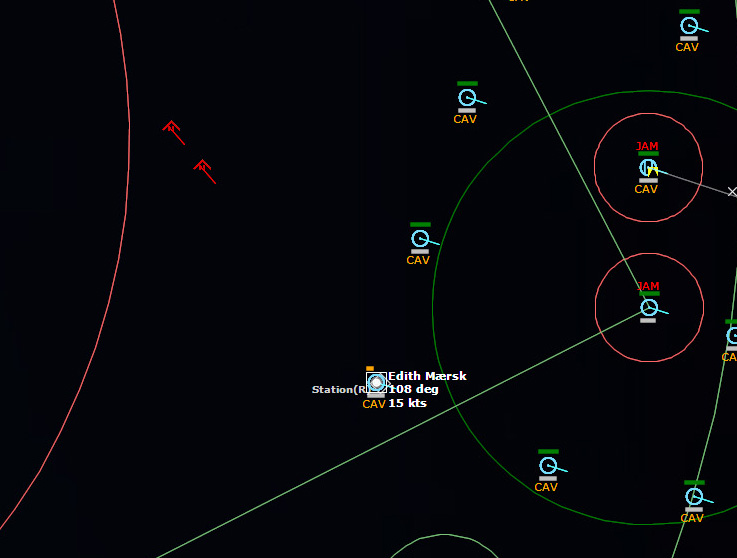 Edith Maersk is hitEdith Maersk loses its engines and is both on fire and is flooding. One way or the other, it's doomed. Then the second pair of missiles arrive, and the first of the pair sinks the Edith Maersk. The last missile self destructs.
 All I can hope for is that there are no more Badgers on the way.
Dawn arrives and the rest of the night has been quiet. About 600nm to go.
074928Z USS Talbot detects a submarine contact to the south. A pair of S-2G Trackers move in to prosecute.
 USS Talbot detects a submarineThe first torpedo dropped on the sub is spoofed. The second torpedo flat out misses. The third damages the submarine. By now, there are three S-2G Trackers flying overhead, and an Atlantique is closing in to hopefully finish the job. The Atlantique's first torpedo hits the sub, again damaging it.
081800Z A sonobuoy in the midst of the protected sea lane, some 200nm ahead of the convoy detects another submarine. My ASW assets have their hands full.
084308Z Eighteen seconds but 175nm apart, two Soviet submarines are sunk, an Echo II SSGN south of the convoy and a Whiskey V SSK farther along the protected sea lane. Submarines five and six are down.
085426Z It is not long before another submarine is detected, this one, dead center in the protected sea lane, 160nm ahead of the convoy.
 USS Richard L. PageAnd then what I feared happens. USS Richard L. Page detects two bogeys approaching from the northwest. They are almost certainly Badgers or Backfires again, ready to launch more unstoppable anti-ship missiles at the convoy. The A-4 Skyhawks on CAP immediately head off to intercept, but the contacts are 200nm away, and I will not be able to intercept them before missile launch. As expected, seconds later the Vampires are detected.
And then I detect two more bogeys, farther west and heading south, but the primary problem is the initial four Vampires launched at the convoy.
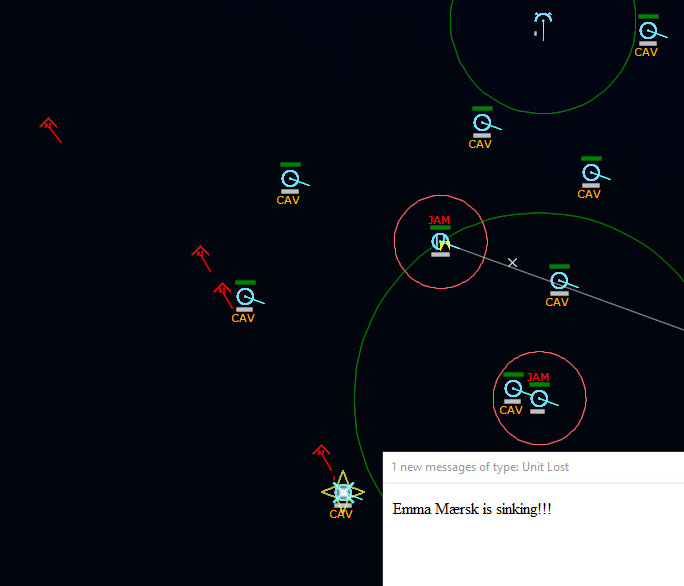
 Four more Vampires are inboundThe first Vampire I assumed was heading for the MV Sygna, a Dry-Bulk Carrier, but the missile soars right over it and goes for the Emma Maersk, a Container vessel. Unsurprisingly, the Emma Maersk is hit and has major flooding, so it is almost certainly lost. And now, more vampires are detected, and again, there's nothing I can do to stop them.
 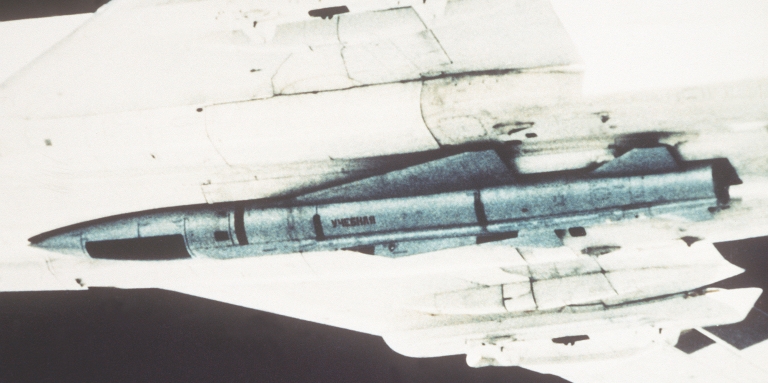 AS-4 Kitchen on a Tu-22M BackfireSo much for all the briefing's talk about "Submarines are the main problem."
There are eight Vampires inbound now, and I have only ten merchant ships left. One of the Vampires appears to be targeting the USS Koelsch, so at least there's a silver lining.
SS Bow Pioneer, a Tanker, explodes in a huge fireball.
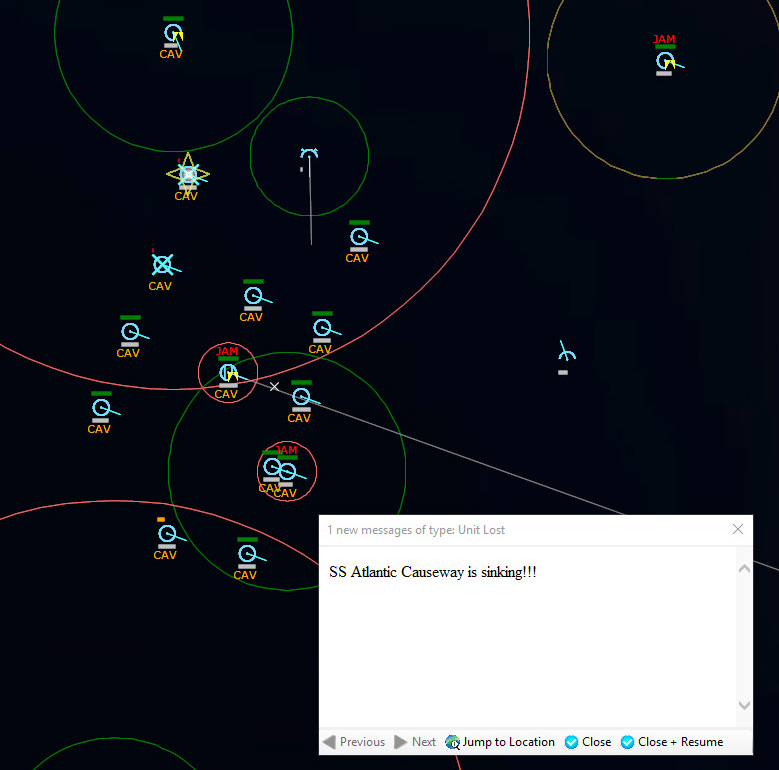
SS Atlantic Causeway, a RO/RO Vessel, is next to die.
 The convoy is utterly helpless in the face of Backfire air raidsUSS Koelsch is destroyed next.
More Vampires are detected inbound, so even though three were expended sinking ships, there are still eight of them closing in, every single one of them, an invincible AS-4 Kitchen.
 I fear I'm going to lose every single ship...Eight Vampires inbound. I have eight ships left in the convoy, not counting the severely damaged Emma Maersk.
 The Turkey Shoot continues. Emma Maersk fortunately(?) is targeted by two more cruise missiles and finished off.
 More and more ships are killedOne Kitchen self-destructs, leaving six that search for new targets. One runs out of energy before finding another target, but another targets MV Sygna, a Dry-Bulk Carrier, severely damaging it. A second Kitchen hits it and destroys it.
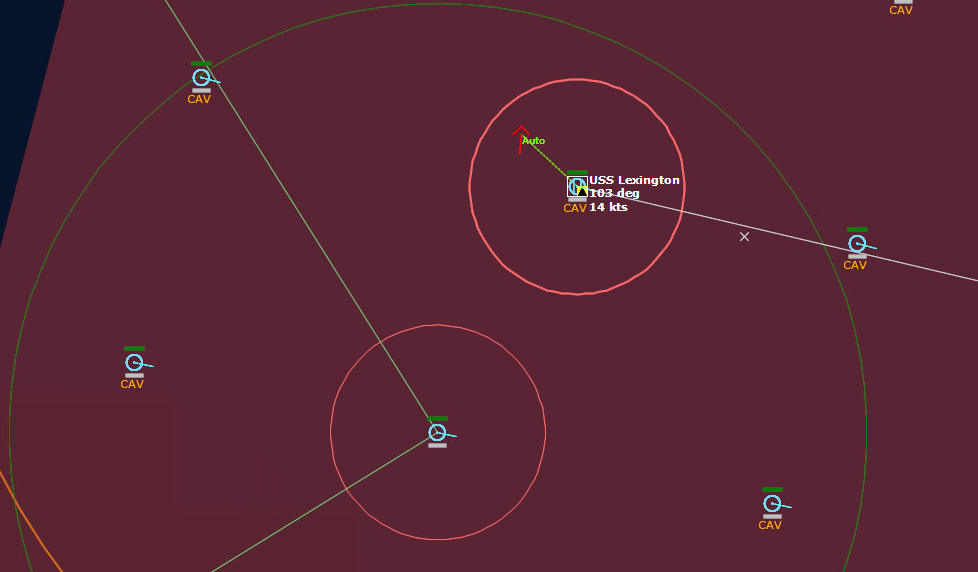
Three Kitchen left, and they appear to be going after the Lexington herself.
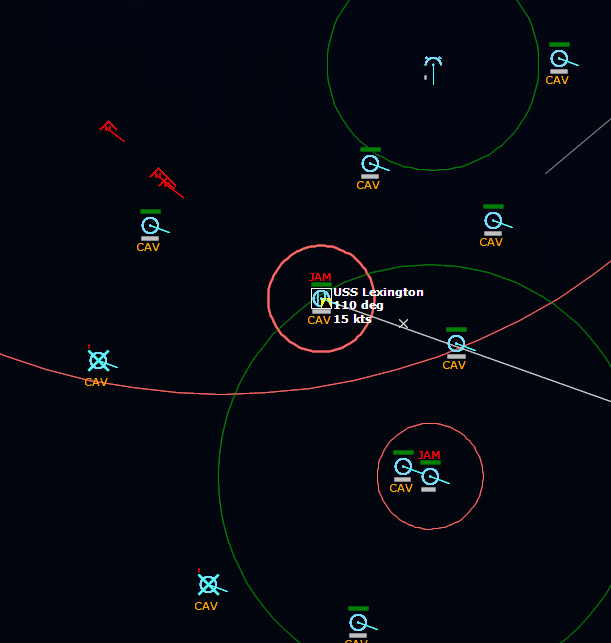 USS Lexington may be toast...In the grand scheme of things, Lexington is worth less than the convoy she's "protecting," but it's clear that she hasn't been much protection at all.
Lexington is hit by two Kitchens in rapid succession and completely destroyed.
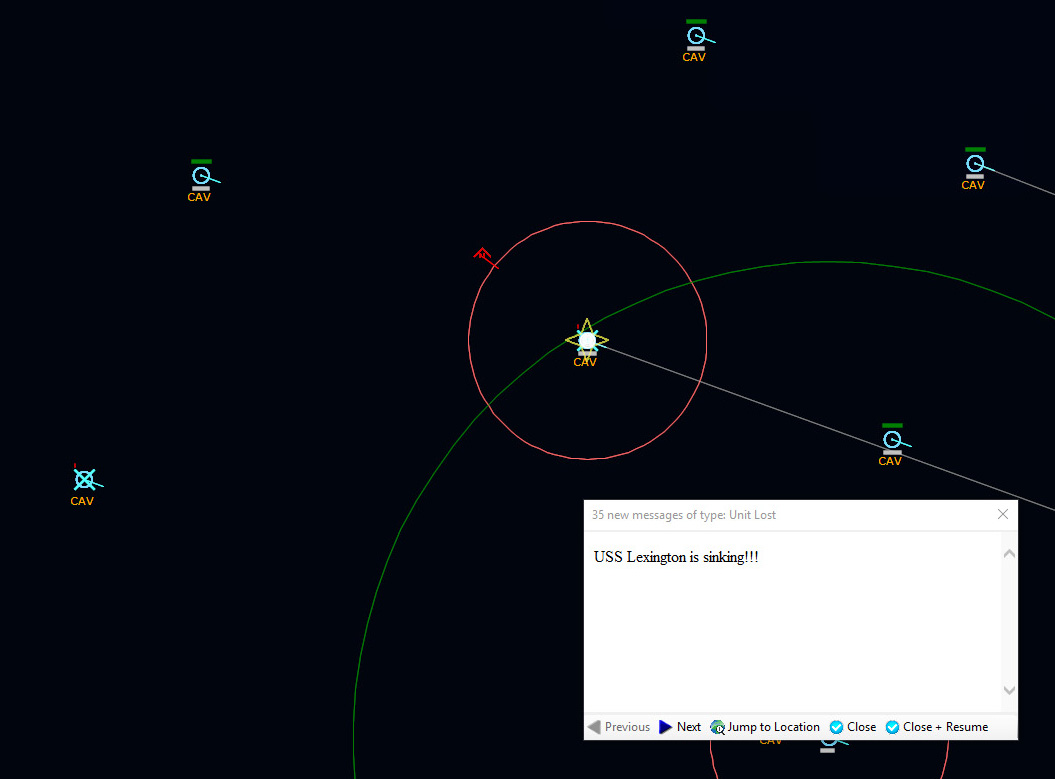 USS Lexington is lostThe last Kitchen promptly self-destructs.
It is difficult to overstate what a disaster this is.
To be continued...
July 12, 2017
COMMAND: Northern Inferno Scenario 8: Damn the Torpedoes Part 1
IntroductionThe Soviet Union has warned NATO that any further reinforcement of Europe "will dramatically escalate the situation". The Red Banner Fleet deployed most of its submarines before the conflict erupted; as a result, the surviving ones are now well-placed to interdict NATO shipping in the Atlantic LOCs (Lines Of Communication).
With Iceland still in Soviet hands, even after strikes by the Oriskany CVBG, the airfields are still in operation after Soviet engineers repaired them.
A large, vital convoy is currently approaching Europe with cargo, container ships as well as oil tankers.
The US 2nd Fleet with NFR (Naval Fleet Reserve) units has managed to assemble a motley collection of escorts together including the training carrier USS Lexington with an air group thrown together with reserve squadrons of S-2 Trackers and SH-3 Sea Kings.
The Royal Navy has spared 4 escorts from the Home Fleet to cover the Western Approaches. RAF will also be deploying Nimrod MPA as long-range ASW cover and Sea Kings from RNAS Culdrose when in range; STANAVFORCHAN and MCM 3 groups are also patrolling the South-Western Approaches and English Channel areas.
This convoy must get through, period. Nothing less will do.
Orders for Cmdr NATO Forces
Situation
With Iceland's airfields back online, the situation is becoming dire for NATO. Even though there are no strike aircraft on Iceland at present, Badger and Bear MPAs are thought to be using the airfields as a staging base for deep recon and surveillance into the Atlantic.
Submarine threat is the main problem: a unknown number of Soviet submarines had sortied south before the outbreak of hostilities, and with the severe degradation of SOSUS their positions are unknown at present.
NATO still requires fuel, ammunition and stores from CONUS to Europe, so a fast convoy is en route protected by the venerable aircraft carrier USS Lexington, now re-rolled from training carrier duty to her new role as ASW flagship.
Enemy Forces
Subsurface : Multiple SSK, SSN, SSGN, SSG
Surface : Unknown
Air: Tu-95 Bear (recon), Tu-22M Backfire (strike), Tu-16 Badger (Recon and ELINT versions)
Friendly Forces
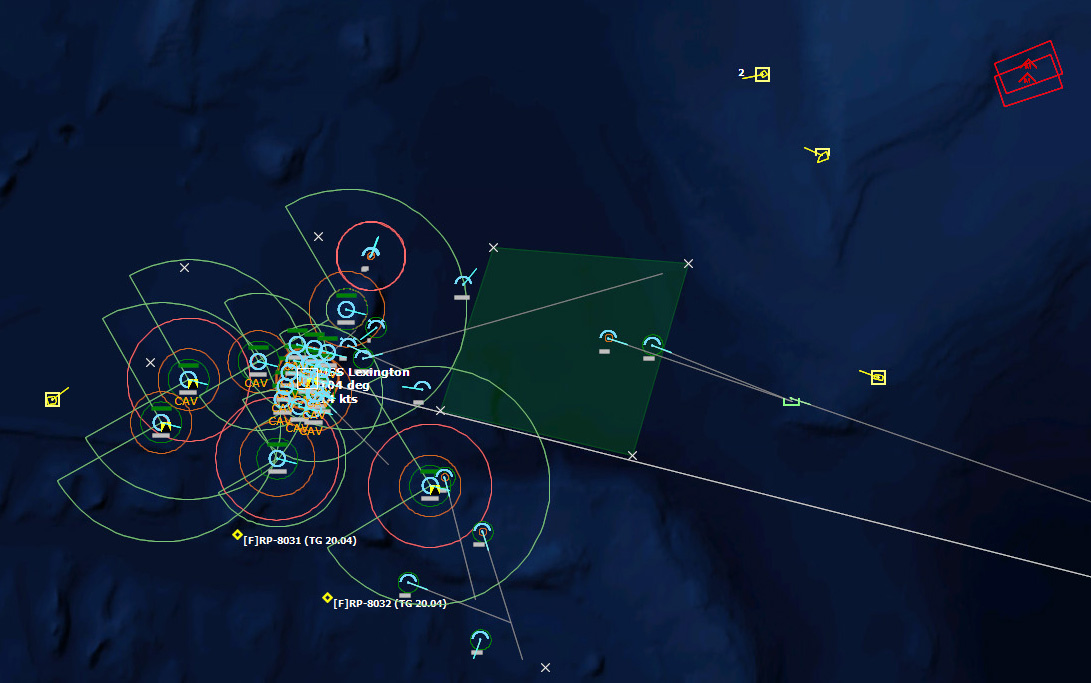
TASK GROUP 20.04: USS Lexington CVS, USS Charles F. Adams DDG, USS Barry DD, USS Orleck DD, USS Richard L. Page FFG, USS Talbot FFG, USS Koelsch FFH, USS Pharris FFH, USS Valdez FFH.
1st frigate squadron: HMS Tartar FFH, HMS Brighton FFH, HMS Salisbury FF, HMS Jupiter FFH.
MCM 3 Squadron: HMS Glasserton, HMS Shoulton.
STANAVFORCHAN: HMS Kirkliston, FGS Paderborn, HNLMS Gemert, BNS Bovesse.
RAF St Mawgan: 201 Sqn (Nimrod MR.1)
RNAS Culdrose: 820 Sqn (SeaKing HAS.1)
Lann-Bihoue: 23F (Atlantque 1)
Mission
Safely escort the fast convoy to area "Safe Haven" in the English Channel.
Execution
1. Using shore-based ASW assets, conduct aggressive ASW patrols in relevant areas .
2. USS Lexington's air group to provide close- and medium-range ASW coverage on transit to area "Safe Haven" in the English Channel.
Command and EMCON
Command: USS Lexington
EMCON: Alpha-limited emissions
September 18, 1975, 0900Z
The convoy has 840nm to go to make it to the safe haven in the Channel.
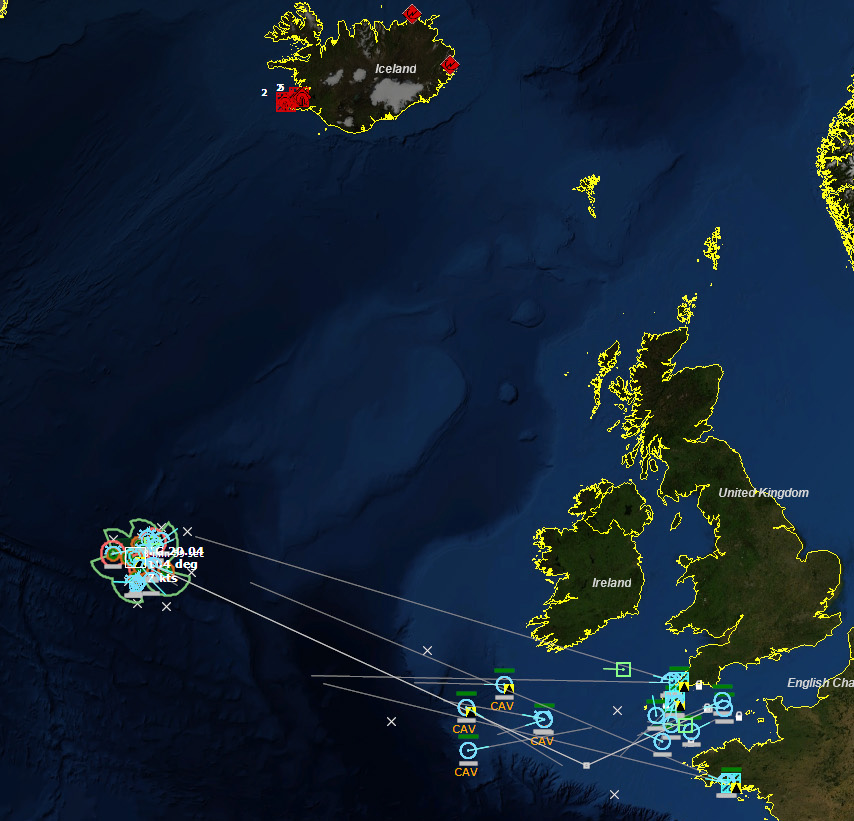 It's a long way to the English ChannelI set up ASW patrols around the convoy, and also set up patrols in a sea lane towards the Channel. The Nimrods and Atlantiques will patrol a long stretch between the convoy and the British surface ships. The British surface ships will patrol another region in the Celtic Sea, and Sea Kings out of RNAS Culdrose will patrol the area between the Safe Haven and the British Surface ships. Once the patrols are set up, it's time to sit back and stare at the screens.
I am reluctant to send up an AWACS aircraft over the convoy, as it might just alert the Russians to my position, so for now I'll keep my AEW aircraft quiet for now. This may be a mistake...
0941Z Contact. The first sub-surface contact is made, northwest of USS Talbot. A Sea King and a Sea Sprite both maneuver to investigate.
 ContactThe Sea King drops a Mk46 Torpedo on the target, then identifies it to be a False Target. Patrols are resumed.
1007Z A Soviet satellite flies overhead. The weather over the convoy is moderate cloud cover and heavy rain, so it's possible that the satellite will not detect it. I decide to keep a "wait and see" approach to launching my AEW aircraft.
 A Soviet satellite passes overhead103123Z Here we go. Vampire detected by USS Pharris. Almost certainly submarine launched.
 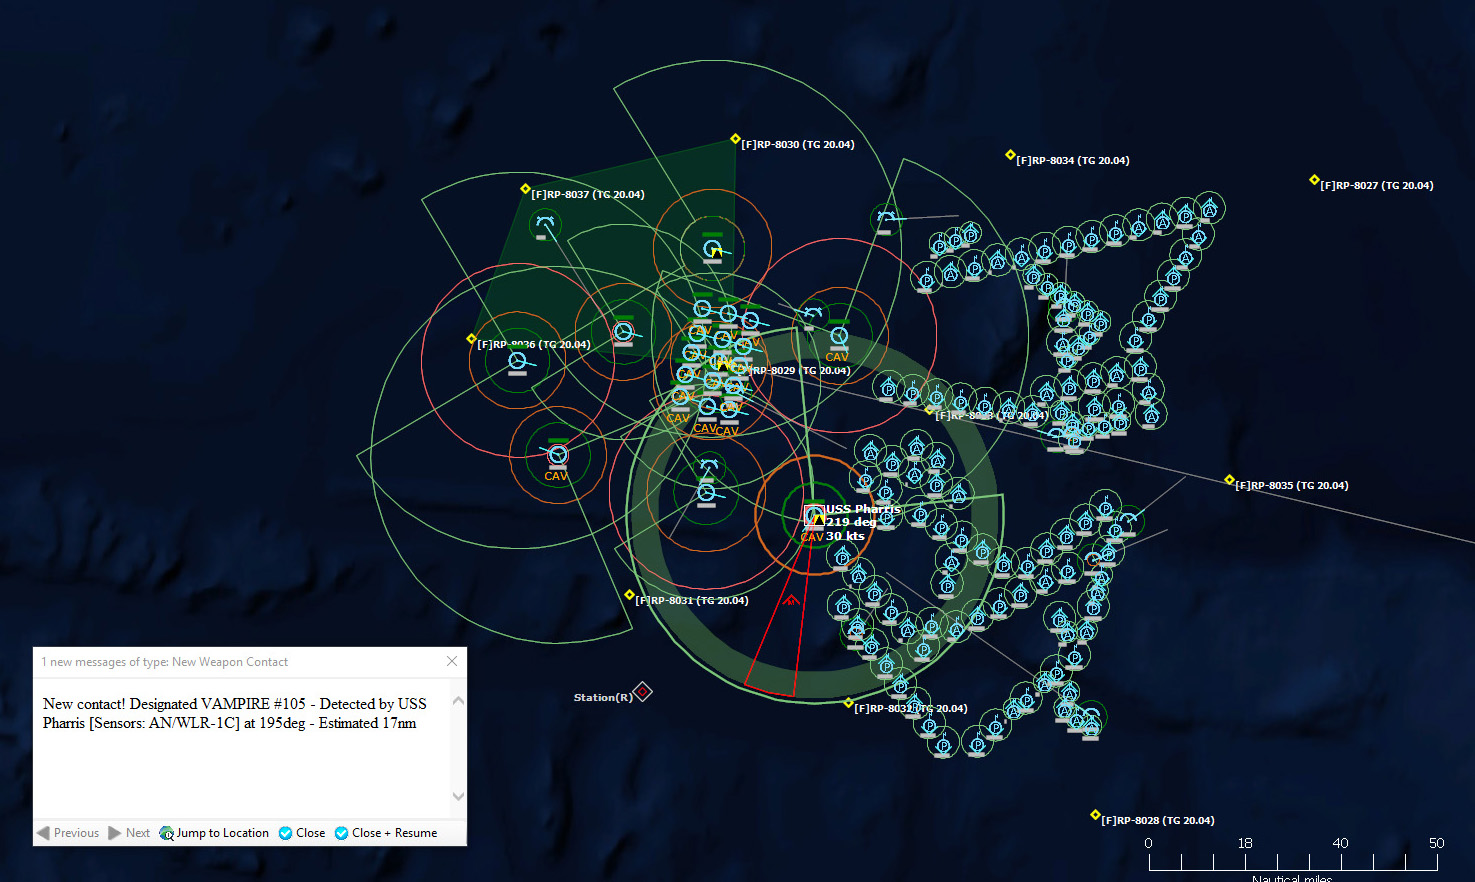 Damn the torpedoes, or damn the cruise missiles?103128Z Cruise missile count is four, and they are close to Pharris. It looks like the frigate is toast. I immediately set up my AEW patrol. I doubt it would have helped here though--I might have been able to detect the cruise missiles earlier, but I seriously doubt I'd have been able to do something about them.
 Four vampires inbound on the nearly defenseless USS Pharris103136Z USS Pharris is hit by the first missile and sinks. The other three vampires passed over the wreck of the Pharris and continue on for nearly ten more miles before running out of energy and crashing into the sea. I send a S-2G Tracker to investigate the region where these might have come from.
103624Z To my utter astonishment, my E-1B Tracer is shot down, right over the convoy and less than five miles from the Lexington!
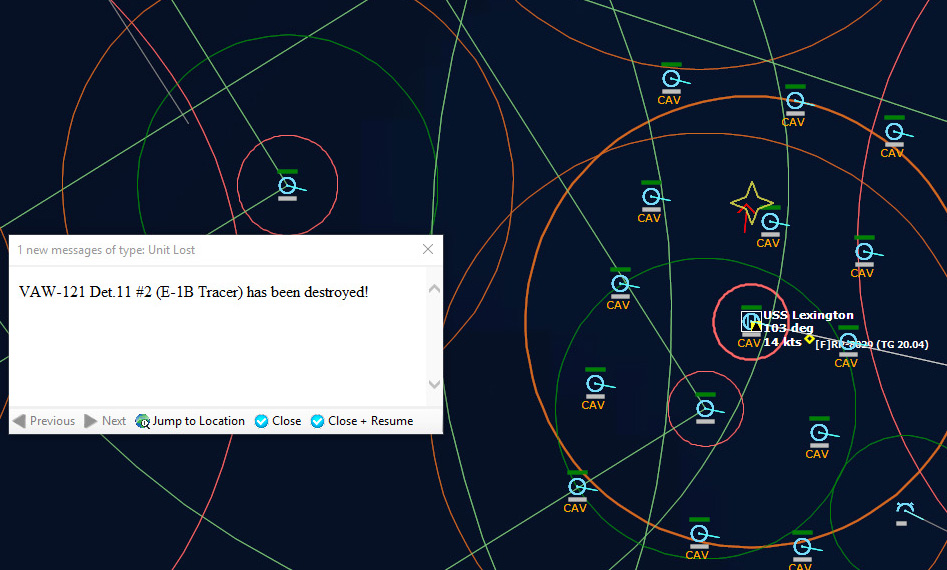 The E-1B Tracer is shot down right over the convoyThe shooter is no less than a Tu-95RT, flying at 1500ft! Somehow the Tracer flew close enough, and behind the Tu-95RT, and got shot down for its trouble. And I didn't spot the contact until now...this is embarrassing.
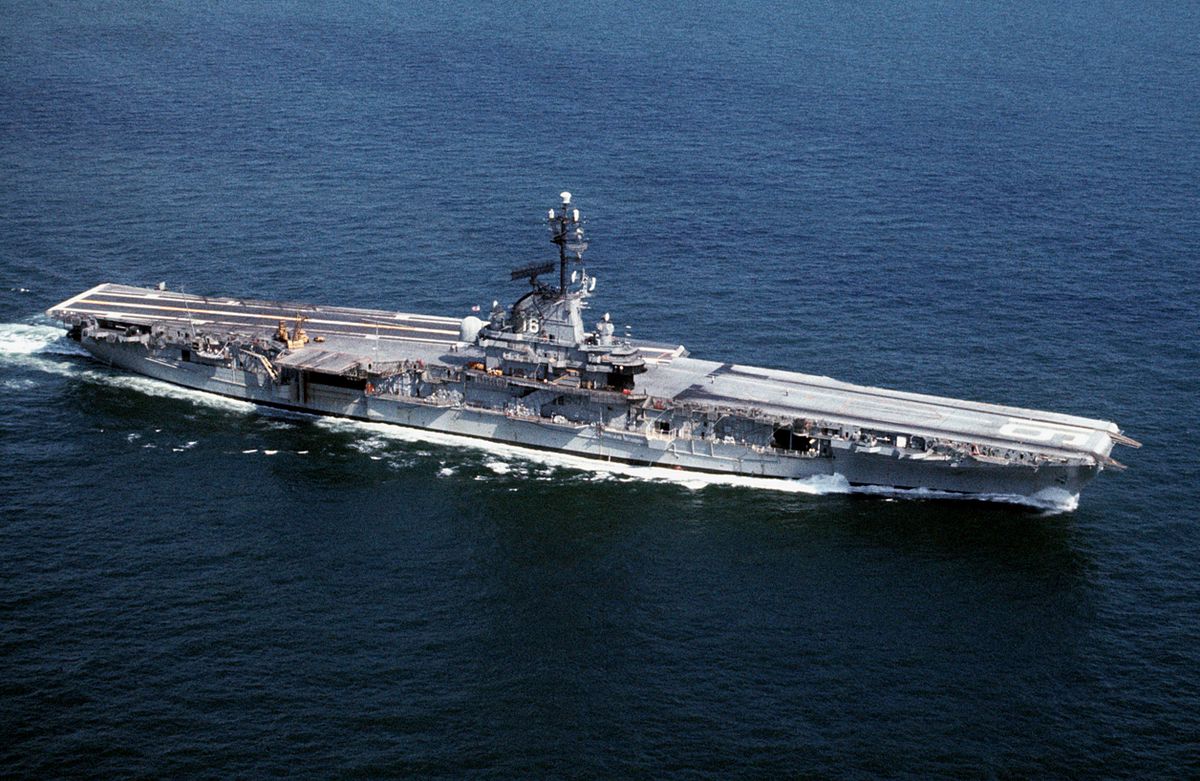 USS LexingtonNaturally the Tu-95RT is flying right overhead, and not within the AA envelope of any of my ships. I scramble some A-4s from Lexington and light off the group's radars. No point in hiding anymore, they know where we are.
The Tu-95RT Bear wanders close to the USS Lexington of all ships, which opens fire with its 5-inch guns.
 USS Lexington fires on the BearThe Tu-95RT continues on unperturbed, passing out of range of the Lexington and into range of the USS Barry, a Forrest Sherman-class destroyer, which opens up with its 5-inch guns.
Seconds later, the first A-4 takes off from Lexington, immediately breaks right and launches a Sidewinder from an altitude of 350 feet.
 The A-4 opens fire on the BearThe Sidewinder tracks the Bear and destroys it.
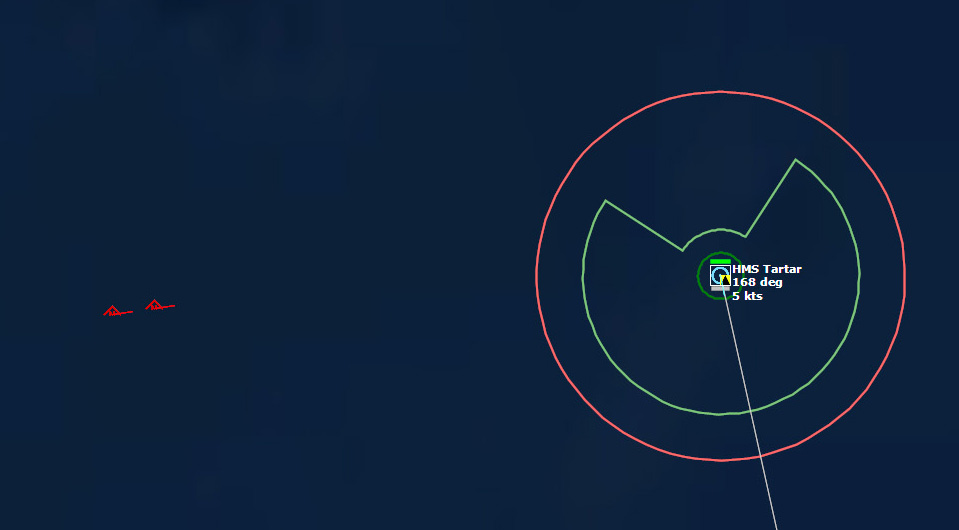
110122Z HMS Tartar detects and underwater contacts and engages it with a Mk10 Limbo ASW mortar. The mortar misses, and a minute later, Tartar detects a torpedo in the water. Amazingly, the torpedo misses the Tartar, which continues to close in on the target, apparently only some 200 meters away. After passing over the submarine and turning away, Tartar launches another mortar salvo. This one is a dud and does nothing. Tartar's third mortar shot, five minutes later, is on target and sinks a Whiskey V SSK, and suffers some minor blast damage because it is so close. One sub down.
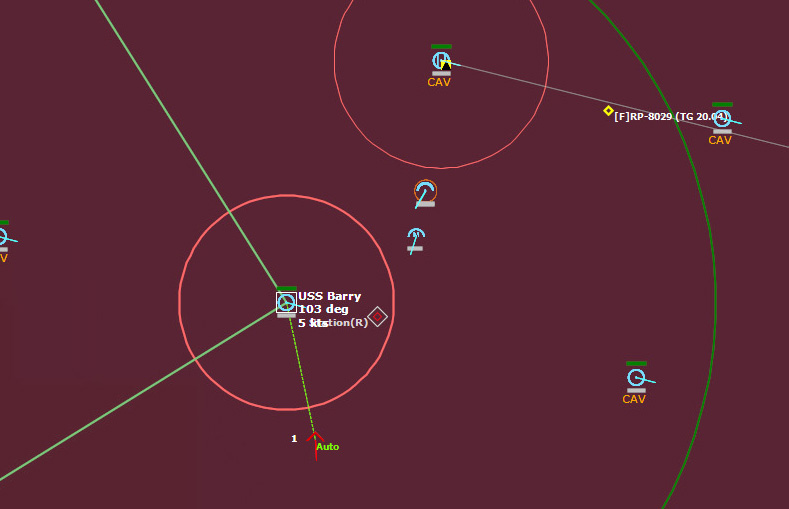
 S2-G Tracker122742Z VS-24 Duty Cats #12, a S-2G Tracker, gets a MAD contact directly in the path of the convoy.
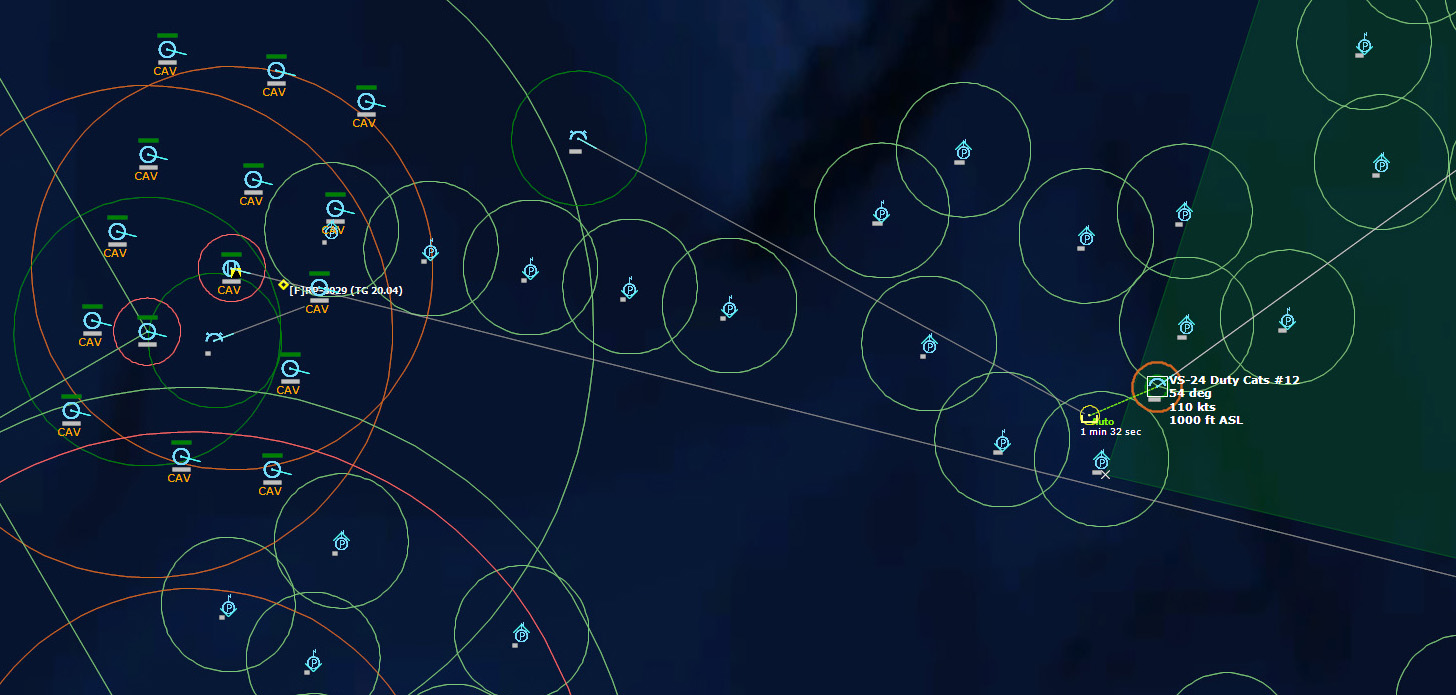 Duty Cats #12 detects a submarine contactDuty Cats #12 drops a Mk 54 Depth Charge, but misses. The second depth charge is closer, but still does not damage the submarine. The submarine increases speed and maneuvers, and the third depth charge misses. The Tracker has only one left.
The last Depth Charge misses as well, and the Tracker is Winchester, but now a Sea Sprite, Valdez Flt #1, arrives on the scene.
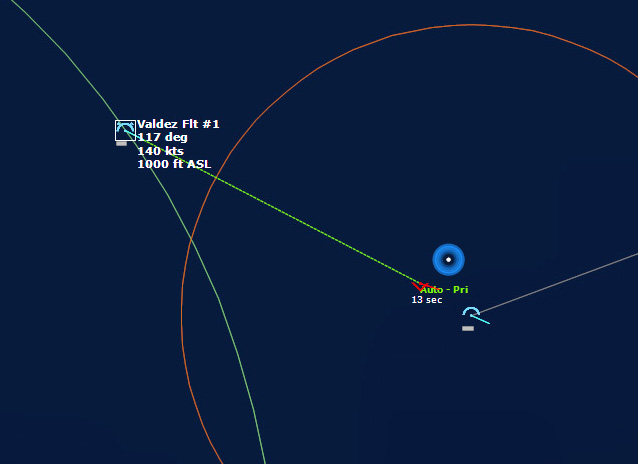 Valdez Flt #1 arrives to take over prosecution of the contactValdez Flt #1 drops its Mk 46 torpedo. The submarine's speed has increased to 13 knots, but that's not enough. The Mk 46 closes in at 45 knots. The torpedo impacts the target, but it is not immediately clear how much damage is done. Duty Cats # 25 arrives and launches its own torpedo, which quickly acquires the target, again hitting it. Finally, Duty Cat #25's second torpedo impacts and sinks the submarine, which is identified as a Victor II SSN. Two subs down.
1313Z A bogey is detected north of the protected sea lane, likely another Tu-95RT. No emissions are detected, and as it is some 200nm away, I decide to ignore it for now.
133141Z Vampire! Vampire! Missiles detected, bearing 070, estimated 178nm. Naturally, that bearing is one where I have essentially no AA assets. I hope those missiles are headed somewhere else...
 Vampires!A few more sweeps of the E-1B Tracer's radome, and it appears that the two Vampires at headed due west, which would take them far to the north of the convoy. In fact, they appear to be headed towards the unidentified surface contact northeast of the convoy, Skunk #116. The missiles close in and attack Skunk #116, it turns out that they were both SS-N-3a Shaddocks, and Skunk #116 is a Commercial Dry-Bulk Carrier. Both Shaddocks miss 55ft and 60ft respectively.
 134401Z More vampires detected! Apparently the submarine that shot at the Commercial Carrier is firing more missiles. I feel bad for him, but at least it's not me that's being fired upon! Eventually the two Vampire contacts are lost, and the fate of the Commercial Carrier is unknown.
150620Z USS Koelsch detects a submarine contact to the southwest of the convoy, some 30nm miles away from it. A Sea King is dispatched to prosecute.
 Sea KingsThe Sea King wastes no time and drops two torpedoes on the contact, which is identified is a Charlie I SSGN--quite possibly the same one that took out USS Pharris. The submarine is quickly sunk. Three subs down.
A bogey is detected moving south west of the convoy, and the two A-4s flying CAP are tasked to intercept. Likely it is another Bear. The Bear proves elusive in the clouds, and seeing as the A-4s have no radar, they are forced to rely on the Mk1 Eyeball to find it. Eventually they do, and a Sidewinder takes out the Bear.
1638Z Another Soviet satellite passes overhead.
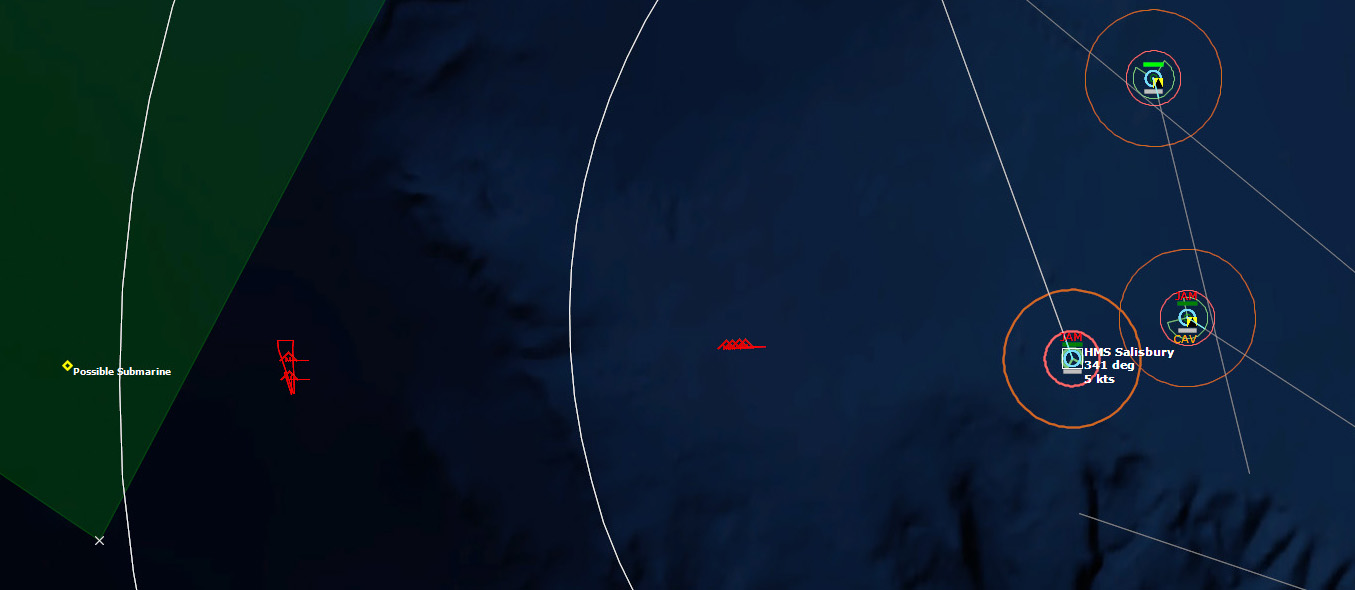
164734Z Vampire! Vampire! HMS Salisbury detects a pair of vampires to the west.
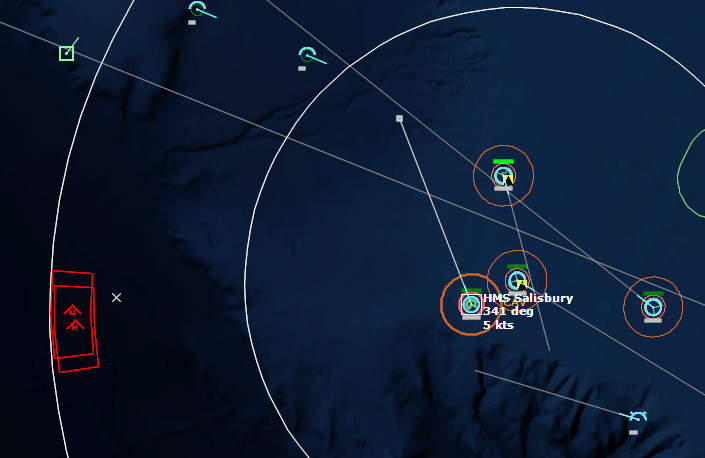 HMS Salisbury detects two VampiresVampire! More vampires are detected, now four of them, and they're inbound. The British ships have point defenses, but that's about it. A Nimrod is dispatched to the detection location in the hopes of detecting the launching submarine.
The Vampires close in, and more are detected, It appears that a second salvo is on the way.
 Multiple vampires inboundThe first salvo of Vampires may have been launched bearing only, as they are not headed directly towards Salisbury. Or perhaps they were targeted at HMS Brighton beyond.
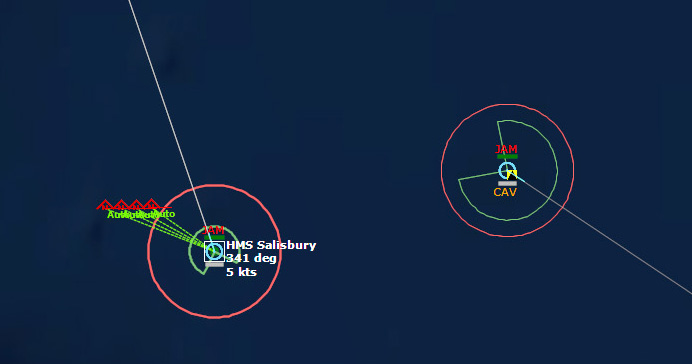 The Vampires close in...but what is their target?The four vampires pass harmlessly 2.65miles off the Salisbury's bow, still 20,000 feet up. Then one by one they alter course, apparently heading for the Brighton.
 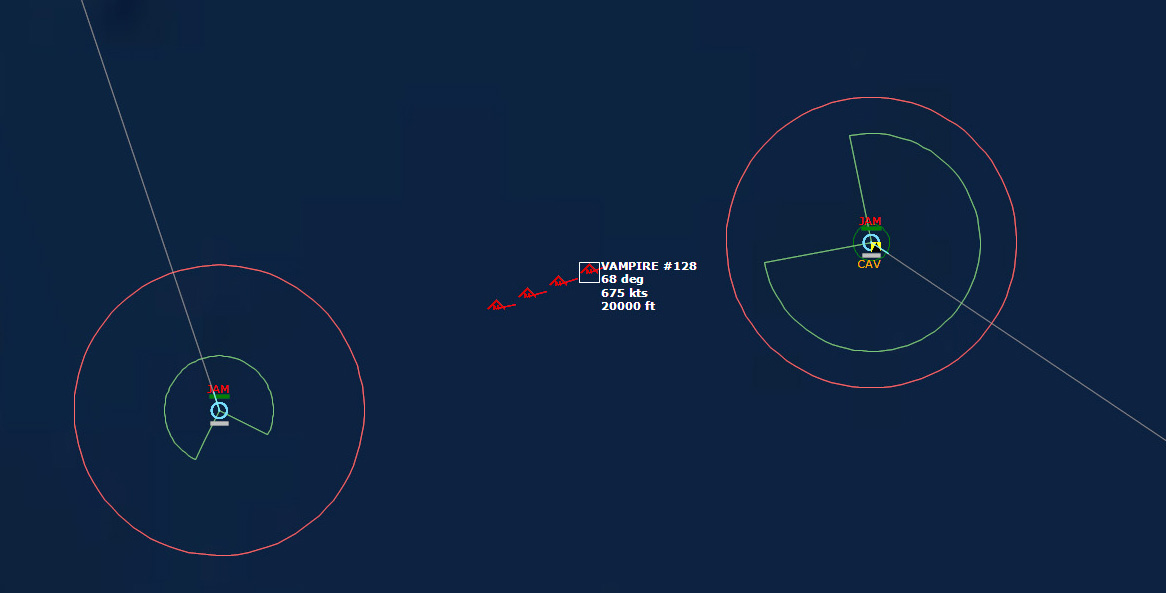 The Vampires choose another target.The Vampires' course keeps changing as if they are jinking or perhaps searching for a target. They begin their terminal dives, but are not quite headed towards Brighton either. The missiles pass 2.32 miles astern of Brighton. The missiles descend to 30 feet, and continue on their course.
 HMS SalisburySalisbury detects more vampires inbound. The second salvo passes astern of Salisbury at a range of nearly five miles, possibly on a course to attack HMS Jupiter. The third salvo heads more northerly, potentially against HMS Tartar. The possible strategy becomes clear: the submarine fired bearing-only shots at each of the four British ships. Against Salisbury and Brighton, the bearing wasn't good enough. It remains to be seen how good the aim will be against Tartar and Jupiter.
Contact with the Vampires headed towards Jupiter are lost. HMS Tartar, however, is still threatened. The Vampires appear to have a good bearing.
 The Vampires close on HMS TartarBut again, as they descend, the missiles wander off astern and miss. That was close.
The Nimrod dispatched to investigate the area liberally covers it in sonobuoys but no contacts are made.
Meanwhile, USS Koelsch detects another submarine contact, and Koelsch's Sea Sprite investigates. Also to the southwest, the A-4s of the CAP investigate another airborne snooper.
The A-4s take out the snooper, which as expected was a Tu-95 Bear D.
Koelsch Flt #1 drops a torpedo on the contact, and hits it, but submarine is not sunk. Winchester, the Sea Sprite is forced to leave the area. A Sea King sets a course to follow-up the attack.
The Sea King arrives and drops a torpedo...and a November SSN is sunk. Four subs down.
As night falls over the Atlantic, the convoy suffered the loss of one escort, the USS Pharris, but sunk four submarines in return. It still has a long way to go until safety, some 730 nautical miles.
To be continued...
July 10, 2017
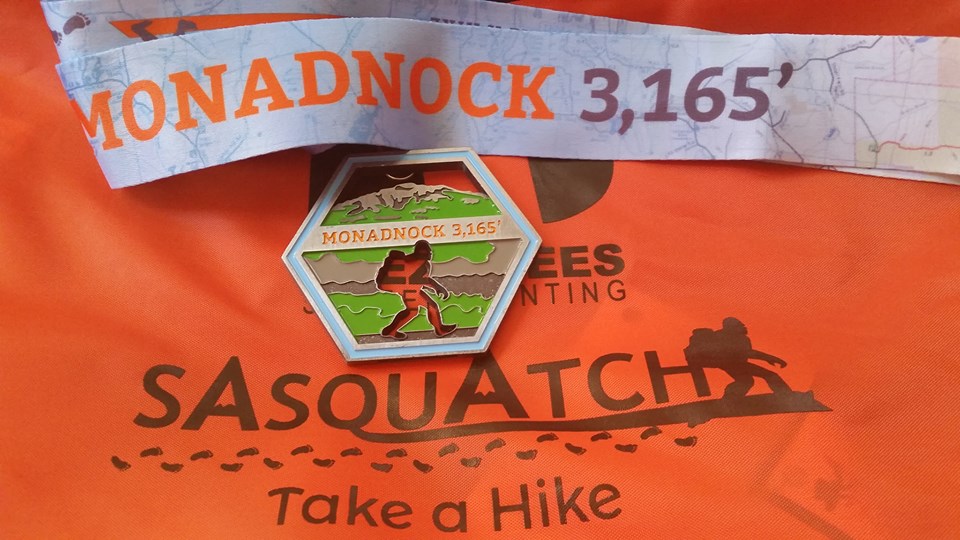
Sasquatch Hikes Mount Monadnock 2017
 May 20, 2017
After the ignominious end to my OCR season last year, I was looking for "easier" events to go to this year. I took my daughter to the BoldDash Winterdash, but so far that was it.
Then I heard about Sasquatch Take a Hike. It's inaugural event would be a timed hike up Mount Monadnock in New Hampshire. Mount Monadnock is relatively close to home, and I had always wanted to climb it, so this "race" seemed like a good excuse to do it.
It was the same weekend as the Bonefrog event, which I did in 2015, but did not feel fit enough to tackle this year. I was planning on going alone, but then my friend Jane decided to join me, so we would hike up the mountain together.
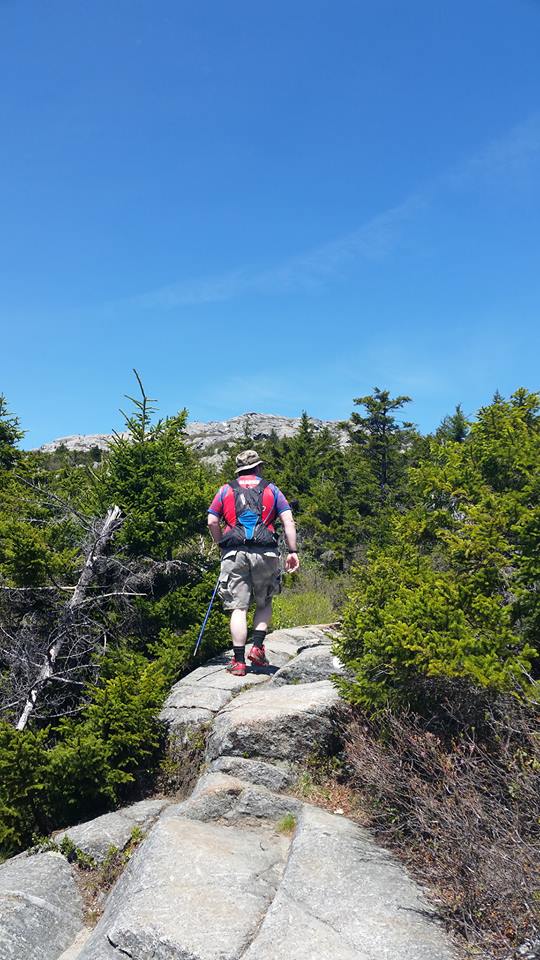
 Up the rocky trailThe "race," as it were, was just a timed hike up the mountain. I wasn't interested in "racing" per se, but just hiking up the mountain and enjoying the scenery. In many of the OCRs I have done in the past that have been on mountains, the views can be spectacular, but you're always tired and don't have much time to enjoy the views.
The race planners had it set up so that racers would start every few minutes on the trail in singly or in small groups so as not to clog the trail, which we would have to share with other hikers. When we arrived we got our bibs and a back of goodies, including a t-shirt, water bottle, and trail map. Plenty of snacks were provided for free, including some from Panera, Vermont Smoke and Cure, and some homemade trail mix.
We did not have to wait and were able to start hiking right away. We hiked up White Dot trail, and on the way back down we would take White Cross trail. The first half of the 2 mile hike up the mountain was mainly a wooded trail sloping up the mountain but broken up by some very steep sections where you had to scramble up rocks.. There were plenty of other hikers on the trails, but things never got very congested.
Quickly my lack of fitness make itself apparent as I lagged behind (as I always do on climbs), but that just gave Jane more time to look around and enjoy the scenery while she waited for me.

After making to the top of many of the steep sections, there were overlooks where you got great views.

At roughly the halfway point up the mountain, the trail breaks (mostly) out of the trees, and becomes mostly walking on the rock face of the mountain itself, involving a good amount of scrambling. The rock face itself was interesting, as long veins of white marble ran through the massive granite monoliths.
[image error] Summit still far away (the peak in the distance left of center)When we reached the summit, there was a sizable crowd there, having little picnics all over the summit.
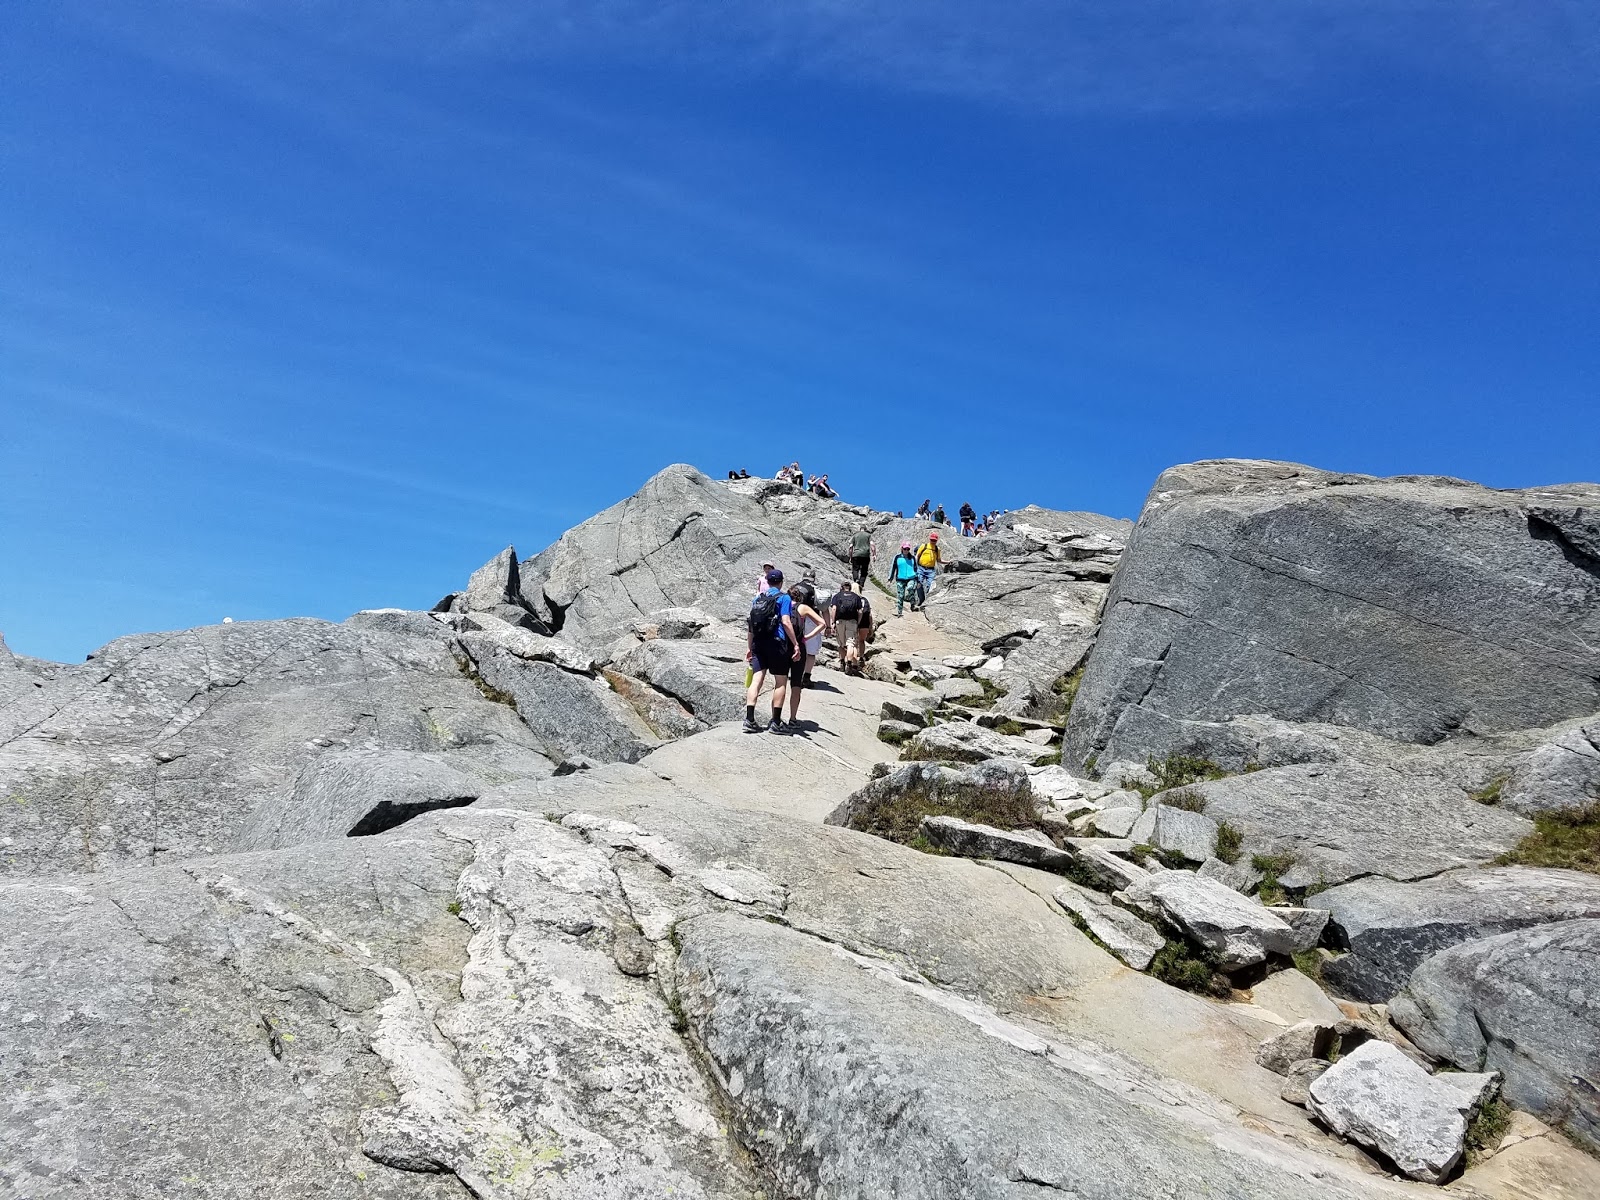
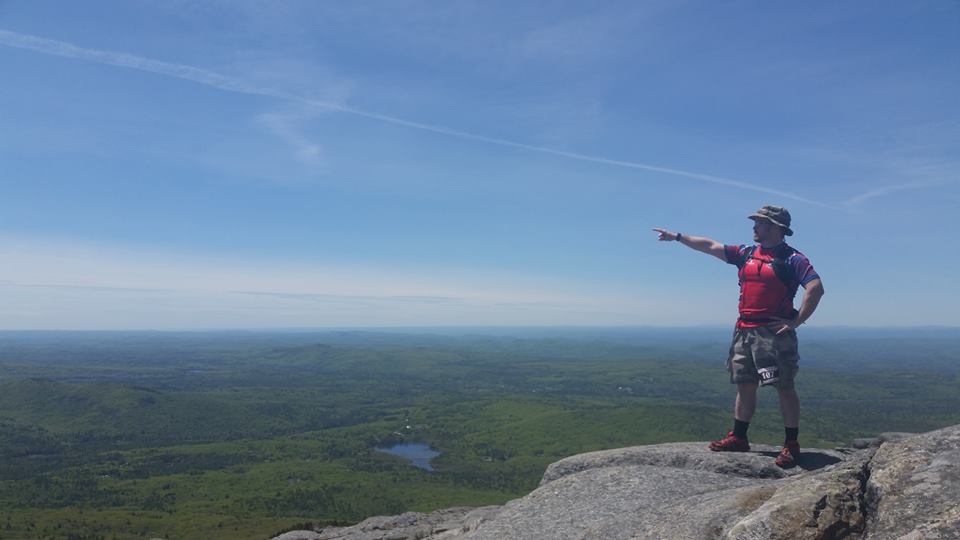
It's bare rock up there, so there was plenty of room to find a spot to sit. Jane and I took some pictures, had some snacks, and took in the view for some twenty minutes before heading back down.
 At the summitNot that this was very much of a "race", my time was recorded as 1:39, my place overall was 37/150, and 21/44 in men's.
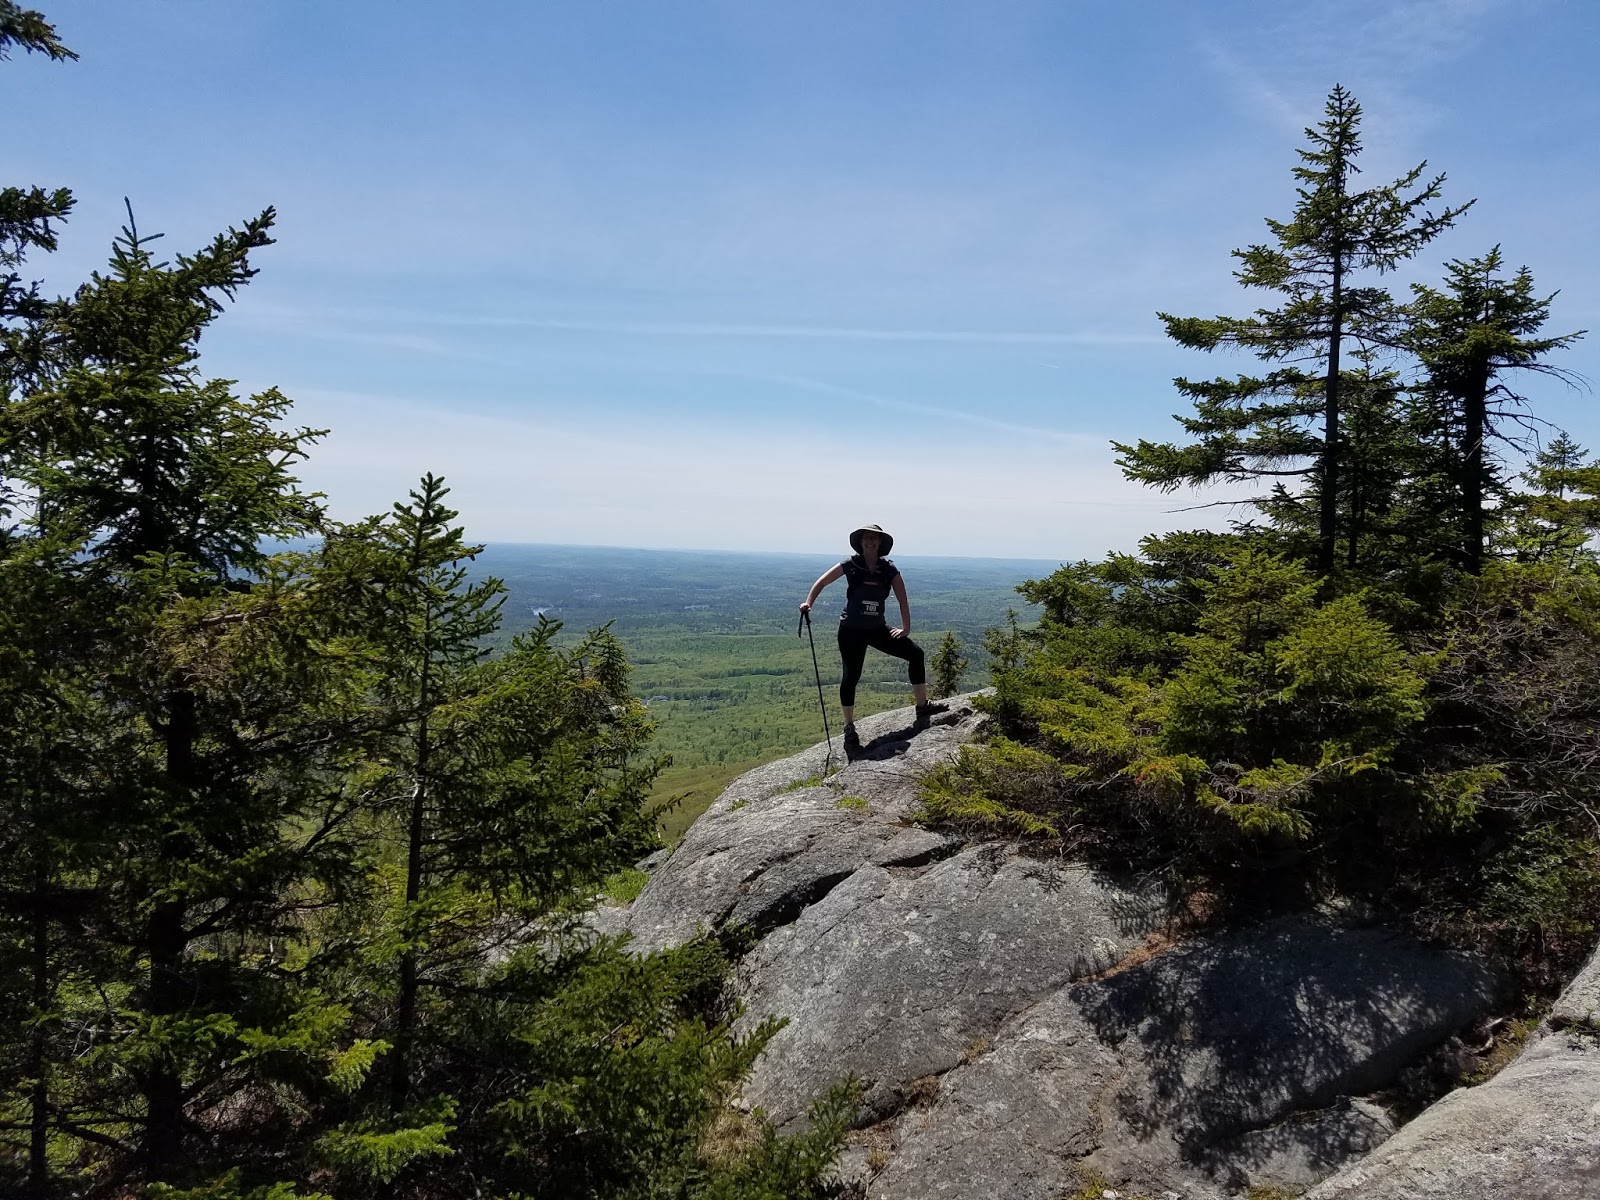
[image error] Just below the summit on the way downOn the way down we took a different trail, the White Cross trail, which is less steep, but no less pretty, and we got a lot of good views to the south.
 Time for a little goofing off too
 And some more photo ops
[image error]
More photo opsAll in all, the hike was low key and fun, and the "race," as it were, was a good excuse to spend a beautiful day on a hike. Not that you should need an excuse to go on a hike, but it was that little bit of extra motivation to go out for the day and enjoy it.
And some more photo ops
[image error]
More photo opsAll in all, the hike was low key and fun, and the "race," as it were, was a good excuse to spend a beautiful day on a hike. Not that you should need an excuse to go on a hike, but it was that little bit of extra motivation to go out for the day and enjoy it.
June 30, 2017
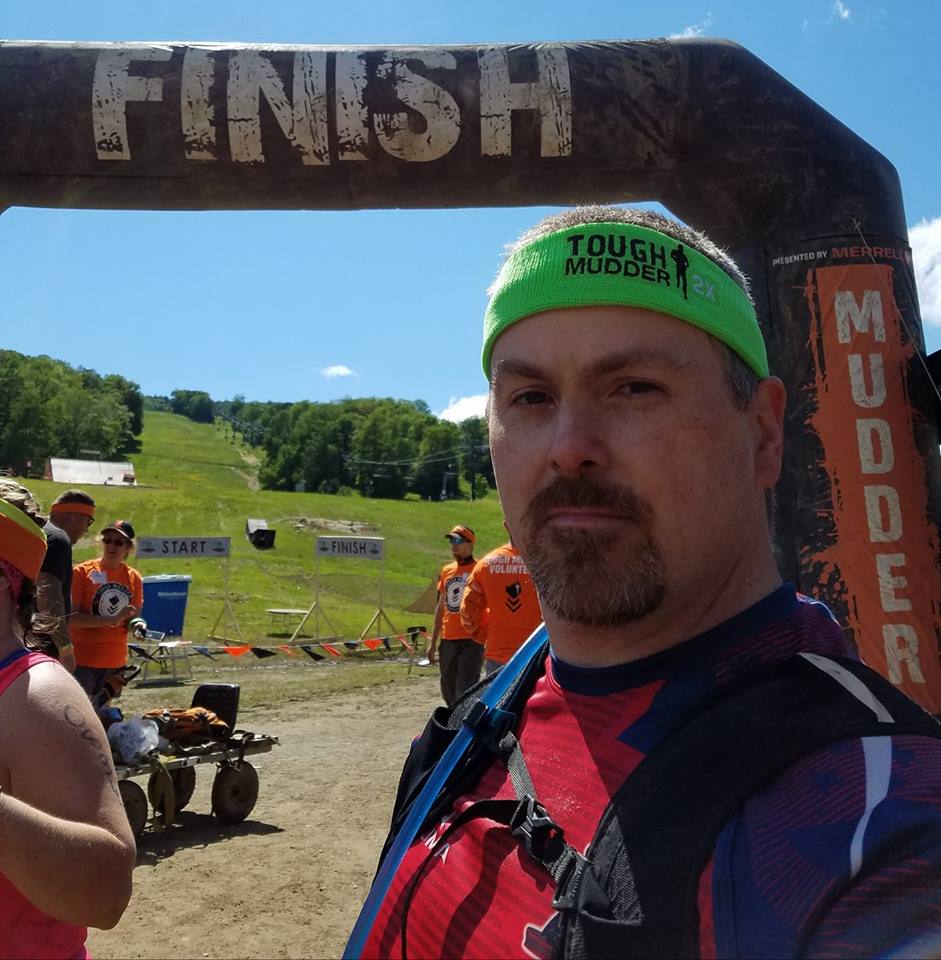
Tough Mudder New England 2017
 June 25, 2017
I did my first Tough Mudder (TM) in 2015, and I had a lot of fun. It didn't take me long to sign up to go again for both TM New England and TM Northeast in 2016. Unfortunately neither race panned out. In general, 2016 did not turn out to be a good racing year for me, and Samurai Sprint was my last race of the year. (the exception being the two family races I did with my kids)
I transferred my 2016 registration to this year, and I needed the motivation to get into shape and hopefully get back into OCRs regularly. As usual, the training was not to be, so I ended up going into this race out of shape, again. Since as far as I knew, my friends weren't going to this one, so I figured I'd have to do it alone. The downside, of course, is that you have no one to run with, but the upside was that I wouldn't be holding anyone back by how slow I am.
But fortunately I ran into some fellow members of the New England Spahtens, and we would run (walk?) the race together. We spent the wait for our race time arguing about who was slower. The racers would be Mama Hen Sandy Rhee (who lives up to her nickname), the two Amys with their matching blonde hair, telephone pole-impersonator David with his Go-Pro camera, and his friend Phil, who at 61 is a badass. Sandy had done the race on Saturday, and was thinking she wouldn't do it this time, but we convinced her to go with us and she obliged.
Tough Mudder is a popular race, and Saturday is the most popular day to run it. My first TM was on a Sunday, and after that experience and this one, I think I'll always do Sundays. The atmosphere is laid back, the obstacles are not crowded, and as such there are few waits. I can take my time and enjoy the experience without feeling rushed.
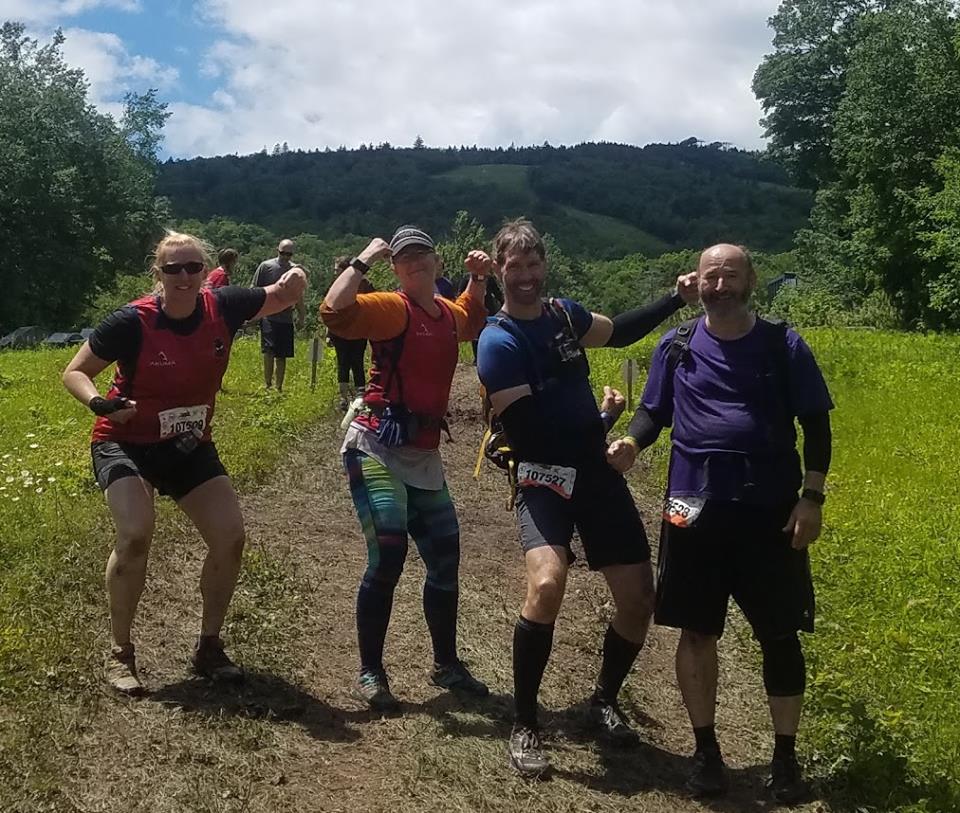
 Phil, me, David, Sandy, Amy, and AmyMy start time was 9:00am, but as a group we were still waiting for some one. We divided ourselves between the slow and the fast groups, and the fast group went ahead while the slow group (me included) waited, and therefore we didn't start until 9:30. TM stated that start times would be strictly enforced, but on Sunday things are less strict as there were far fewer racers.
Waves left at 15 minute intervals, and as I wasn't looking forward to the intro, as I remember it dragged the first time I did a TM. This time, however, it wasn't so bad, and we were off right on time at 9:30. The trail meandered a short ways up the mountain, and as I expected, I lagged behind on the upslopes, but my team kindly waited for me. Back down the mountain and to the first obstacle, Quagmire, which is a simple pit dug out of the ground filled with muddy water. Climb in, wade through waist deep water, and wade back out.
Soon after that was Berlin Walls, which was a simple wall climb, perhaps 10 feet high. It had a step on it, so I was able to get a leg up by boosting myself on it so I was able to climb over without any help.
 "Climbing over without any help" doesn't necessarily mean "easy."Back up the mountain to Swamp Stomp, which was a walk through a thigh deep muddy water pit that had some logs barring the way so you had to watch your footing.
Farther up the mountain to Underwater Tunnels, which was in a small pond. You had to get in the water which was about 4 feet deep, wade to the "tunnel", which was really just a floating barrier perhaps three feet wide, swim under it, and then on to two more tunnels. The water was colder than expected, and most people cringe at the cold water and try not to get wet (despite the fact that we all have to dunk under). When faced with these obstacles, I just try to plow through them as fast as possible to get it over with. So rather than wade through it, I ended up swimming and got through pretty quickly.
Immediately after Underwater Tunnels was the Hero Carry. Sandy carried me the first quarter of the way, and I carried her to the halfway point, and then she carried me to the finish. I offered to do the last quarter, but she was't having it and powered my considerable weight to the end.
 Sandy carries me through the Hero CarryA short climb and then back down to Balls to the Wall, which was a wall with a knotted rope hanging from the top. The wall was tilted a few degrees towards us, which made it a bit harder to scale the rope as you couldn't use the wall itself as much to take up some of your weight. Going down the far side is much easier.
 On the mountainMore climbing up the mountain, and then down a long ways through a very steep, very muddy, very technical wooded section. Despite my trail running shoes, I slipped several times and it was slow going. This was easily the most technical part of the course, matching if not surpassing part of the Killington Spartan Beast I did in 2015.
A meandering climb back up the mountain to Devil's Beard, which is a net stretched across the ground that you have to go under. Many people opt to crawl under the net, but I found that there's just enough slack in the net to walk under, albeit very hunched over. I let the net slide over my back and plowed my way through it, going through relatively quickly.
Farther up the mountain to the highest point we would reach that day (which was only maybe 2/3 of the way up Mount Snow), to Ladder to Hell. It is a ladder with four rungs made of wide planks, spaced several feet apart. The only difficult part is the transition over the top, which can be tough for people who are afraid of heights.
 Looking Tough!Back down the mountain to Reach Around / Stage 5 Clinger. The Stage 5 Clinger is for Legionnaires only, so while I qualified to do it, it looked to be a little much for my upper body strength, so I opted for the Reach Around. it consisted of a ladder angled towards you by about 30 degrees. You had to climb that and maneuver your way up onto a platform above. The ladder itself was easy; it was the transition to the platform itself that was hard. I struggled a bit--it's at the edge where you cling on with a deathgrip, hoping you don't slip, but I managed to get onto the platform ok. Phil slipped at the top and fell to the woodchips below, but he brushed himself off and kept right on going. David and Sandy both conquered Stage 5 Clinger, while me and one of the Amys did the Reach Around. The other Amy was racing with a broken thumb, so she can be forgiven for skipping this one.
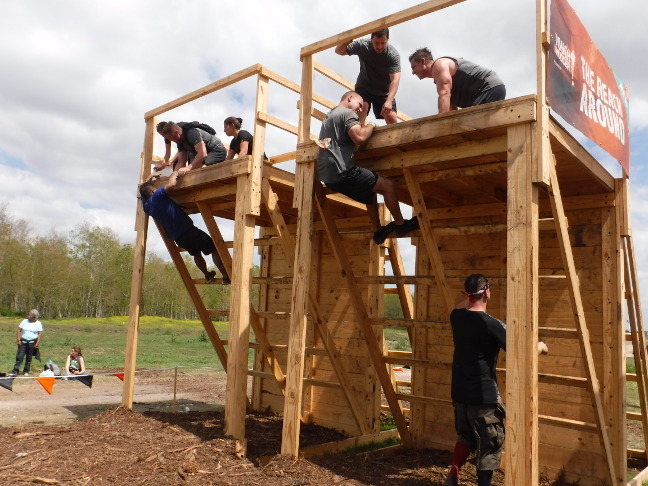 Reach AroundNot far after this was Birth Canal 2.0 / Black Hole. Essentially you have to crawl underneath multiple tarps that are filled with water to the point where they nearly touch the ground. With the weight of the water and it sloshing around, it makes for a difficult crawl. The difference between the Birth Canal and the Black Hole is that the Birth Canal's tarps are clear, so you can see where you're going, whereas the Black Hole's tarps are opaque, so you have to crawl through in darkness. I went through Black Hole, and it wasn't all that bad. I thought the Birth Canal from my first TM was tougher.
Soon after was the funnest (most fun?) obstacle of the race: Block Ness Monster. It consisted of a pool that was probably between four and five feet deep, crossed by a pair of large rectangular blocks on axles that rested a little above the surface of the water. You had to get over the freely rotating blocks with assistance from your teammates. In essence some people turned the blocks on their axles while others grabbed on and rolled their way over the top. This was a lot of fun, both from the perspective of helping people over and riding over yourself. Our group was having so much fun that we stayed with this one, helping people over until no one else was in sight.
 The Block Ness MonsterFollowing Block Ness Monster was another teamwork oriented obstacle, Everest 2.0. This is a slippery quarter pipe where people have to run up the slippery slope as far as they can while people at the top try to grab them and pull them up before they fall. David made it up by himself. On my first attempt up this one, I got up farther than I expected, and I missed grabbing the offered hands of people up top, so I slid back down. My second attempt up was much better, and I was pulled over the top without a problem. Amy with the broken thumb attempted a run, tripped, and did a somersault so smoothly we all thought it was intentional. We spent a while helping people up that one, and there was a lot of good teamwork involved, so it was a lot of fun.
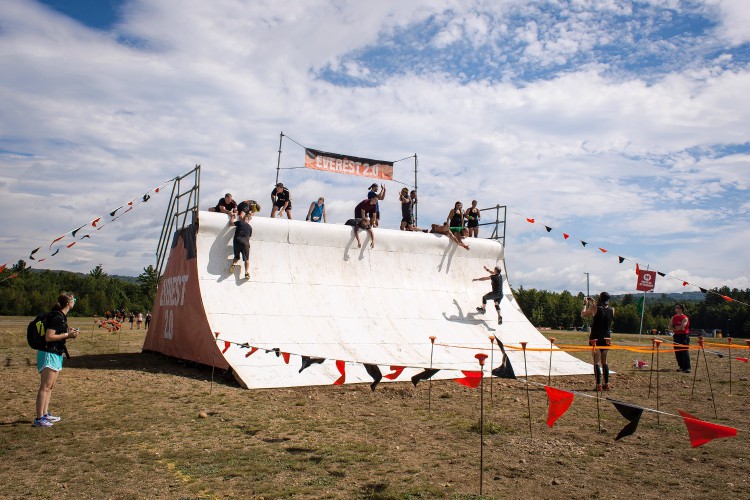 Everest 2.0Following this was a long walk before we reached Mud Mile 2.0, which was a series of muddy water filled trenches followed by little berms made of the dug out dirt. We waded through this one and then marched another long distance to Kiss of Mud 2.0. Here we had to low crawl through the mud under barbed wire. Fortunately the crawl was relatively short. Through most "muddy" obstacles this far we didn't get too muddy (relatively) as there was plenty of water that washed off the excess mud. This time, however, there was little water, and we were covered in mud by the time we got out.
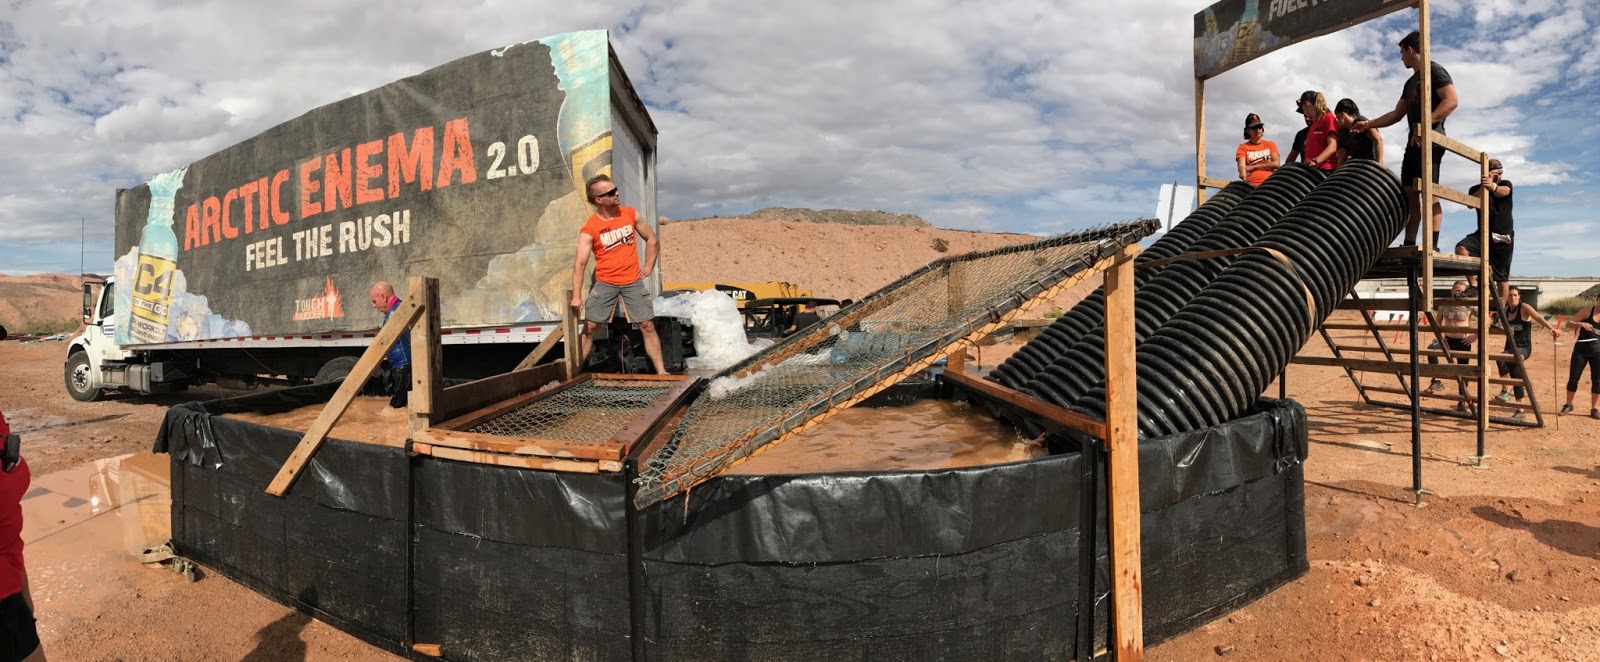
A relatively short slog down to the bottom of the mountain to Arctic Enema the Rebirth. This is one of the more mental obstacles, as you go down a slide into icy water, getting fully dunked, and then under a wide barrier with only a few inches of breathing space in it. The original intention of the obstacle was to go down the slide headfirst, but they changed that quickly for safety reasons. Since we were near the tail end of the race, by the time we got to it, they were nearly out of ice, so the water, while very cold, wasn't as cold as it could have been. I went down and through and out relatively quickly, not nearly as chilled as I was expecting to be.
 Arctic Enema the RebirthFollowing this was Funky Monkey the Revolution, which is a set of climbing monkey bars, followed by a horizontal wheel and two vertical wheels that are free to rotate, and then a handing longitudinal bar that is free to swing on chains. All of this over electric green-dyed water about four feet deep. In my first TM, I got perhaps three rungs up the monkey bars before falling. This time I did much better, as my grip has improved, and I made it to the horizontal wheel, swung around on it, then grabbed for the first vertical wheel, slipped and fell. So I didn't complete it, but I'm happy that I made some progress on it. Both Sandy and David made it across, while the rest of us did our best but didn't quite complete it.
 Getting farther than I expectedFollowing this was Augustus Gloop / Snot Rocket. This consisted of going into water, muddy of course, then climbing up the inside of a nearly vertical pipe with makeshift hand/footholds (not enough to quite call it a ladder). On top of that, there is water cascading down on you from above like a waterfall.
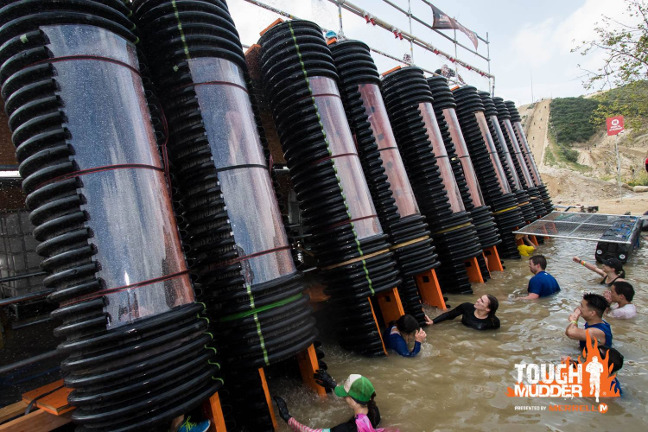 Augustus Gloop (near) and Snot Rocket (far)This turned out to be one of the most mentally challenging obstacles for me, if only for a moment. The water was colder than I expected, so there was the shock of that as soon as I got in. Then to the pipe, where I was expecting a ladder and not the handholds.
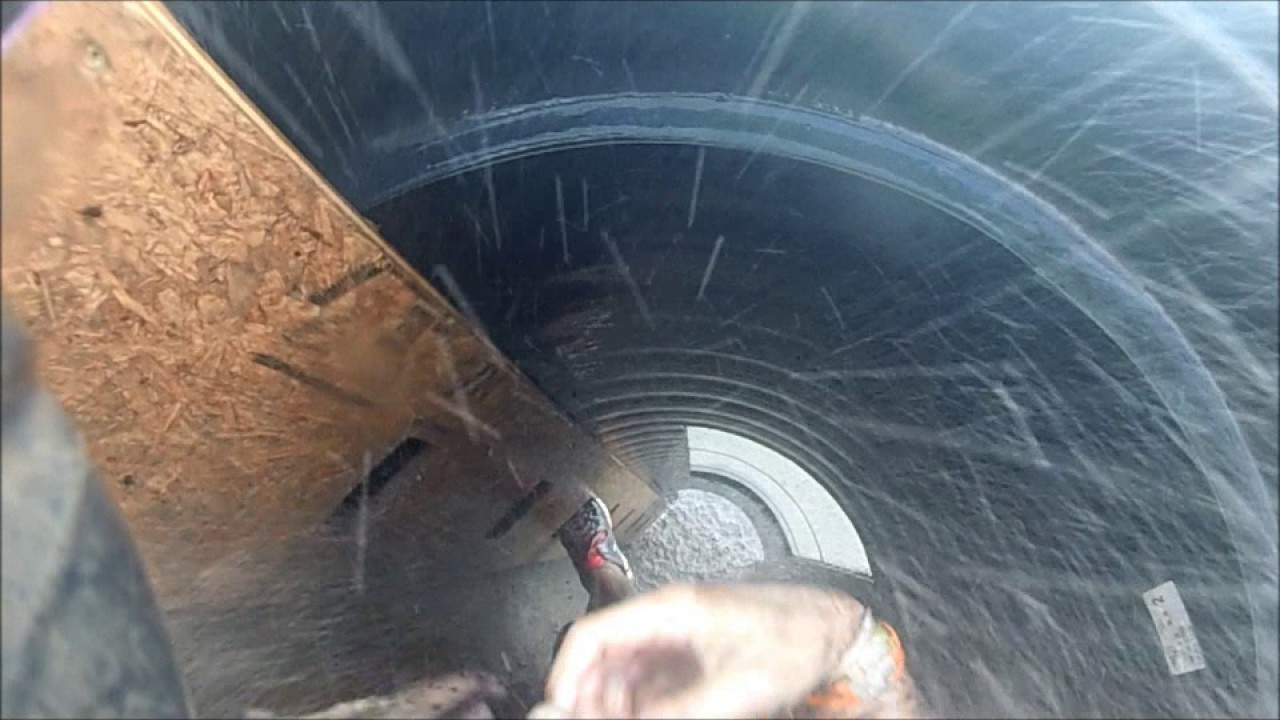 Not quite a ladder on the inside...I climbed upwards into the water, which felt ice cold, and as I climbed, the water got stronger, and eventually completely blinded me. For a second or two I felt "trapped" in the pipe with the icy water pouring onto to my head so hard that I couldn't see. But almost immediately after that moment of panic I reached the top and got out, but afterwards I was felt freezing--even more than I was after doing Arctic Enema, and it took a while before I warmed up.
At about this time we caught up to "Darth Vader," the nickname for a veteran who had recently had his right leg amputated. He was being helped through the race with a team of runners that pulled him along on a wagon, with him walking over some of the parts that were too technical for a wagon to cross. Once again it showed how the TM community (and by extension the OCR community) come together to help each other out.
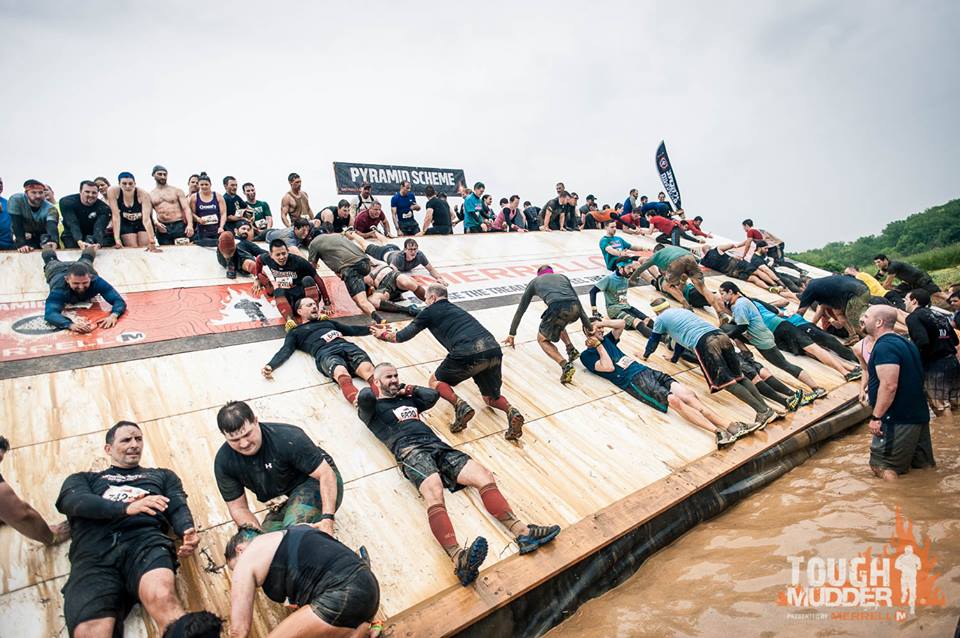
A short walk brought us to Pyramid Scheme, which is another teamwork-based obstacle like Everest 2.0, however this one is not a half pipe but a flat sloped slippery wall, perhaps at a 45 degree angle. The standard strategy is to form a human pyramid on the slope that others climb up to the top. Fortunately there was a rope assist where you did not need to climb far on people to reach. After some effort we managed to get everyone up.
 Pyramid SchemeAnd then, were reached the final obstacle(s), Electroshock Therapy and Kong. Kong was a set of rings over a long drop onto an inflatable mat, for legionnaires only. With my arm strength and loose shoulders, I opted to do Electroshock again (which was my plan all along). Electroshock consists of a fifteen yard or so walk through a foot of water with dozens of hanging electrified wires that zap you as you brush past them. Typically people run though it, cringing and trying to minimize any contact with the wires. Some groups link arms and go through together. At my first TM, I went through it at a good clip, expecting every single wire to be electrified, so it was almost a letdown when I only got a few zaps, and those weren't as hard as I was expecting either. This time I was determined to be a little "tougher", so rather than rushing through it, I went through at a walking pace, determined not to flinch at the wires. I think I got half a dozen shocks, none of them that bad, the worst being a zap on my left quadriceps that caused my leg to jerk and stagger my pace. But I kept going, and at the end I extended my arms to catch more wires on the way out.
 Finishing Electroshock
After waiting a bit to cheer on my teammates who were doing one or the other, we crossed the finish line and race was over. I got my second TM headband, this one bright green.
 At the finish lineAll in all, this race was a lot a fun. When I showed up, I was expecting to run alone, and it would be been "ok", but running with a group of people: Sandy, Amy, Amy, David and Phil, made it a whole lot better.
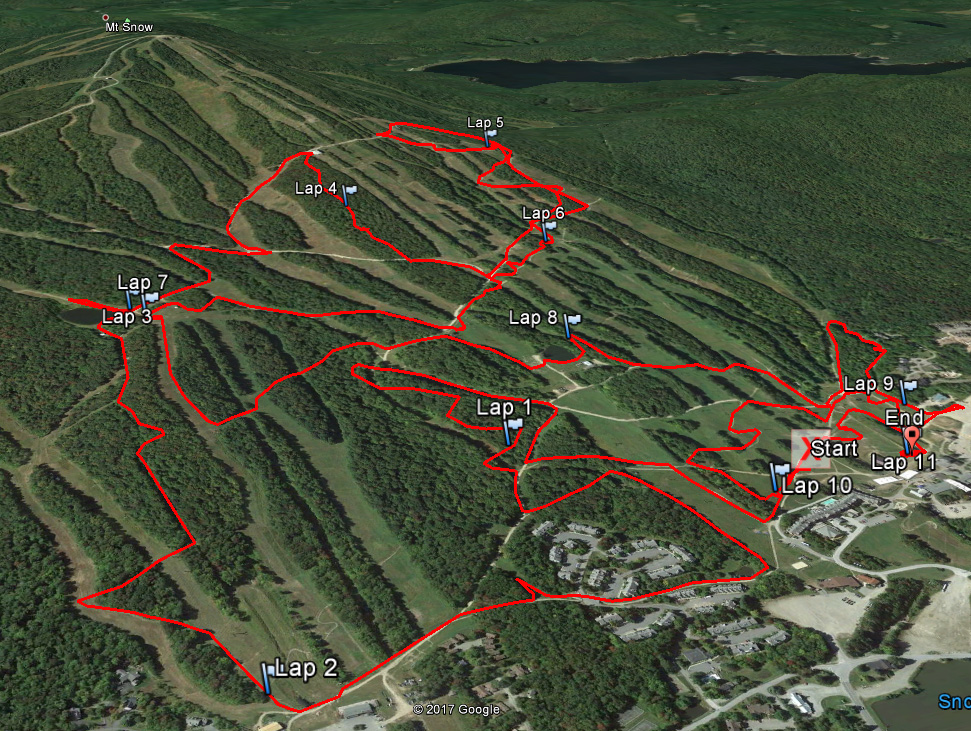 GPS map of Tough Mudder New England 2017. My GPS measured it as 10.67 miles in 5:47:17.Before doing this race I was eyeing doing others, including Savage Race in July, and Warrior Dash and a Tough Mudder in August. I wanted to see how this race went before I signed up for others. Now that I've done it though, I definitely want to go ahead and try these other races. On to the next one!
June 29, 2017
COMMAND: Northern Inferno Scenario 7: The Mighty "O" Part 4
 In Part One of this series, I did the mission planning for the Alpha Strikes against Soviet-held Iceland by the USS Oriskany CVBG along with USAF assets out of Greenland. In Part Two I began the mission, and immediately had to deal with multiple attacks from Iceland by Soviet Forces. In the meantime my USAF Fighter Sweep was refueling and preparing to attack, with the SEAD units behind it, and the B-52s behind them, tasked to destroy the runways. In Part Three my fighter sweep arrived on station, resulting in a furious air battle west of Keflavik.
And now my strike aircraft are starting to arrive over Iceland. Time to dish out some pain.
ICELAND
September 12, 1975 0416Z Flight Poker 41, a pair of F-105G Thunderchiefs, came into range of the SA-6 Gainful battery at Reykjavik. The flight lead thumbed his trigger, releasing the AGM-45B Shrike. "Poker 41, Magnum! Magnum!"
To the west, near Keflavik, a pair of MiG-23M Flogger Bs launched several missiles, one at the F-105Gs closing on Keflavik, and two more at the F-4Cs of the fighter sweep that were moving to intercept.
The Thunderchiefs of Flight Jimmy 10 dodged the inbound missile, and Knight 41 launched at Sidewinder at the Flogger. "Fox Two!"
One of the Apexes found its mark, destroying Knight 71.
 Fighters maneuver all over the sky as to the east, a Shrike closes in on the SA-6Seconds later, a SA-N-4A Gecko launched from one of the Nanuchkas took out Knight 62.
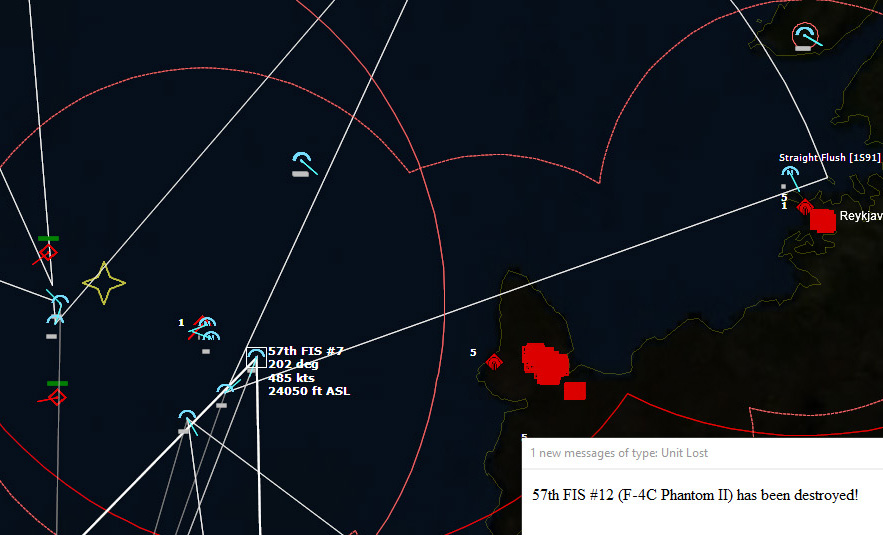 Knight 62 is shot down by a SAMFinally the two Floggers were shot down, but the F-4Cs still in the area were by this time critically low on both fuel and missiles, and set a course for the tankers. En route the F-4Cs passed over the pair of Nanuchkas, and were forced to dodge SAM after SAM launched by the Soviet vessels, but none were hit.
Multiple Shrikes impacted the ground near the SA-6 Gainfuls. They were successful in that they shut down the radars, or at least frightened their operators enough so that they would shut them down, but the launchers themselves were still there.
F-105Gs had been dispatched to take out the Long Track Radars at Iceland's perimeter. The northern pair had destroyed one, and with two Shrikes left, one of the Thunderchiefs diverted south to use them against SA-6s.
The remaining SA-6 radars, Straight Flushes, went silent, leaving the Thunderchiefs with no targets.
 USS Oriskany0427Z A pair of F-8J Crusaders from VF-191 Satan's Kittens launched from Oriskany, the first of many aircraft to begin the strikes against Keflavik.
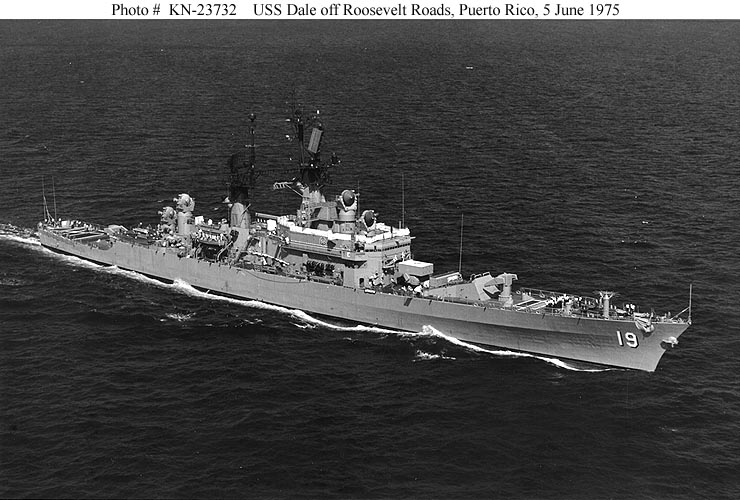 USS Dale, shortly before hostilities broke outUSS DALE
0430Z "Vampire! Vampire!" called out the CIC talker aboard Dale. "Multiple missiles inbound." The Nanuchkas had gotten close enough to launch their anti-ship missiles at the Oriskany group. USS Dale was in a good firing position, and had thirty-three SAMs remaining. Captain Jones stared intently at the scope, watching the anti-ship missiles close in.
Six minutes later, Dale began firing RIM-67A SM-1ERs.
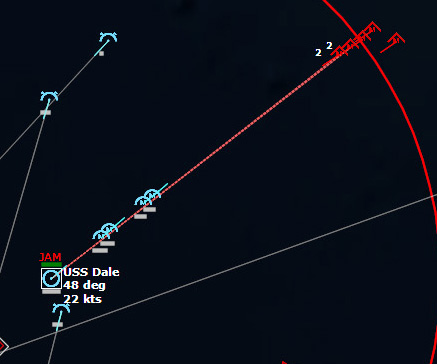 USS Dale launches SAMsFourteen RIM-67As later, and all five SS-N-9 Sirens were shot down. The second wave of Sirens were still closing in. Four minutes later, Dale opened fire once more. Three more Sirens were eliminated, and Dale's magazines were down to twelve SAMs. And then another wave of three Sirens were detected.
Each Nanuchka Corvette was armed with six SS-N-9 Sirens, and Captain Jones estimated that this was likely the last salvo they could deliver. The captain was focused but confident. Dale's twelve remaining SAMs should be sufficient to take them out. But after that?
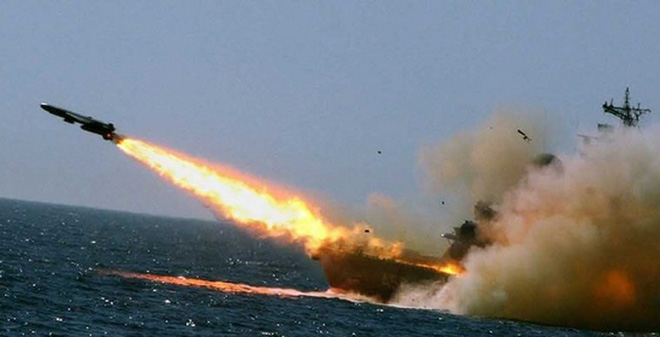 SS-N-9 Siren launching from a NanuchkaDale fired again on the three inbounds, launching a pair of missiles at two of them. The launchers swiveled again to reload. The SAMs succeeded in taking out the two SAMS heading towards Oriskany, but there was one Siren left, apparently heading towards the Dale itself. Dale was down to six SAMs. The next pair of SAMs missed, and now Dale was down to four.
 The Farragut-class destroyer USS Dewey, miles to the southwest of Dale, launched a pair of its own SAMs to assist.
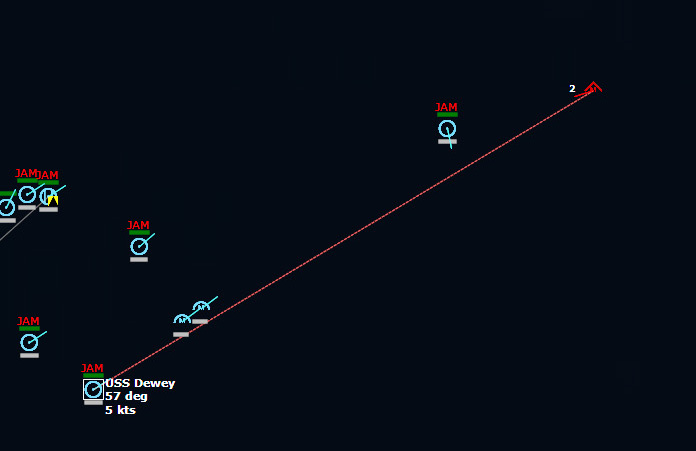 USS Dewey opens fire to defend USS DaleThe RIM-67A SM-1ERs streaked in at 1290kts, but the SS-N-9 Siren was much closer to its target.
Captain Jones watched the plot, willing the SAMs to move faster. Time was running out. If the missiles couldn't do it, the 76mm guns would try to shoot it down, and there were the Dale's chaff rockets, but those were defenses he did not want to rely on.
Dale opened fire with its 76mm guns in a last ditch effort to shoot down the missile. It got off two shells.
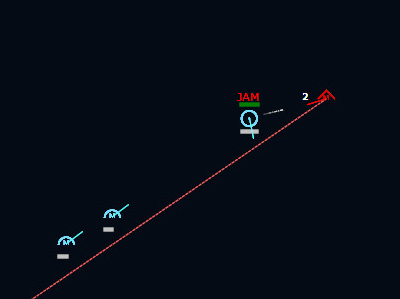 It's a race to the Dale, and one that the Siren looks to win.044930Z The crew tensed as the final seconds ticked away, and every man they remained at his post as the missile streaked in and hit Dale's port side amidships at Mach One. The 840kg warhead detonated, and the ship exploded in a fireball that lit up the night. The two RIM-67As fired from Dewey soared overhead, a fraction of a second too late to save the sinking cruiser.
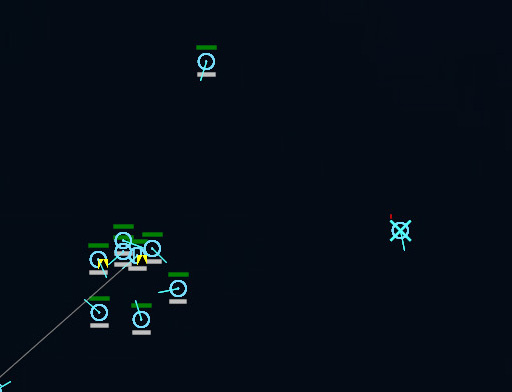 USS Dale sinksThe radio chatter died down to silence for a full minute. Any thought of enthusiastic banter was long gone, as each man focused on his job at the moment, pushing away any thoughts of the over four hundred men they had just lost with the Dale.
The SEAD flights of both the Oriskany and those F-105Gs that still had ordnance closed in on Reykjavik and Keflavik, but the Straight Flushes remained silent. The pilots of the inbound strikes hoped they had the sense to stay that way.
050120Z Four A-7s, armed with AGM-62B Walleye IIs, launched from Oriskany as Flight Zombie 24, their target the Ammo Dumps at Keflavik. Soon after, four more A-7s, launched, their targets the hangars and fuel tanks.
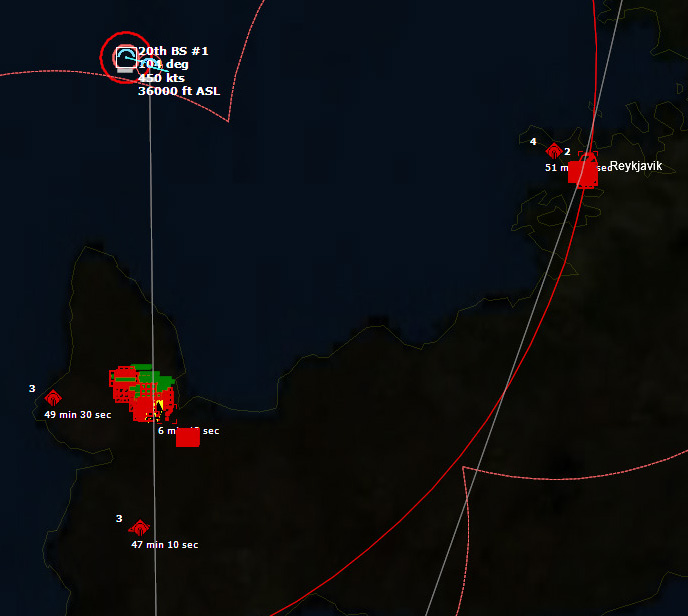 B-52s approach ReykjavikThe Shrike-armed aircraft circled the area, prepared to pounce on any radars that lit up. The B-52s of Flight Speed 6, closed to within SA-6 Gainful range of their target, Reykjavik's runways.
 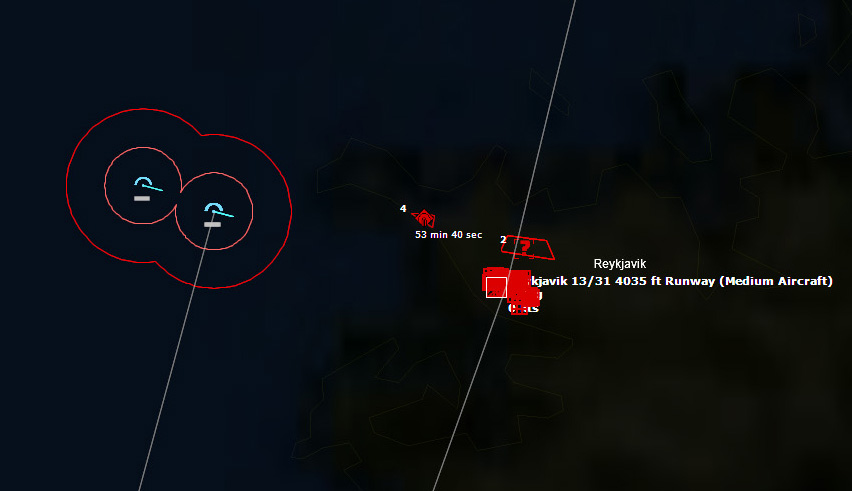 Flight Speed 6 approaches to within 4nm of Reykjavik
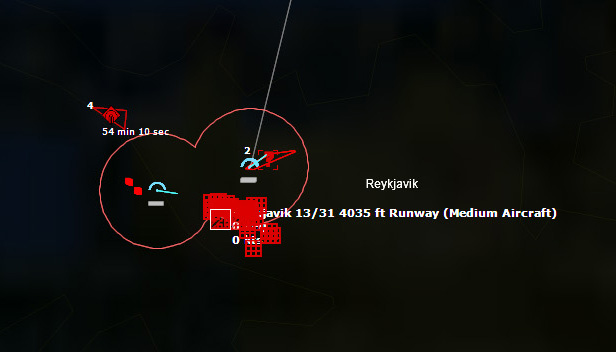 Bombs away!
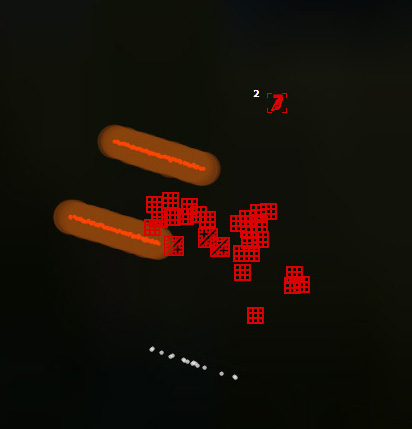 The bombs impact the airportThe B-52s approached Reykjavik completely unmolested, dropped their bombs, and flattened the airport.
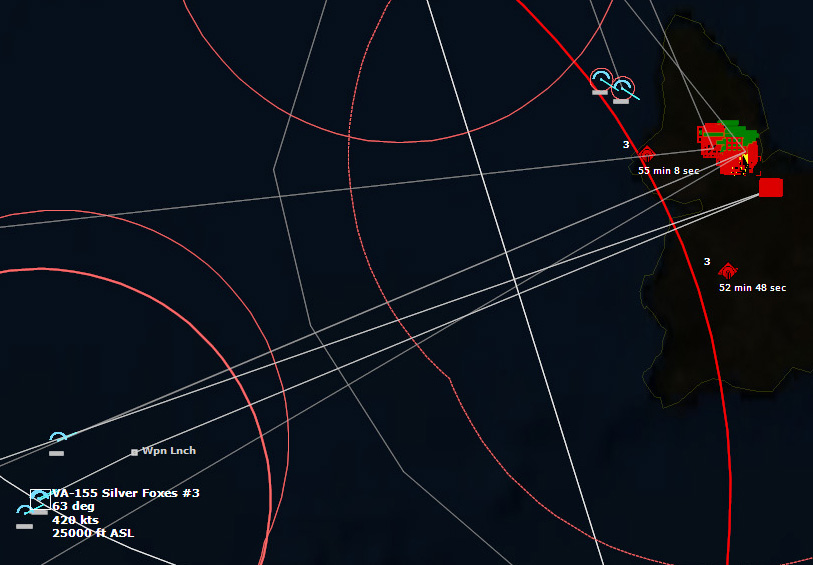 The second flight of B-52s approach Keflavik, while to the SW the A-7s close in on their own strike missionsAt almost the same time, the B-52s dropped their bombs on Keflavik as the A-7s released their Walleyes. The bombs would impact first.
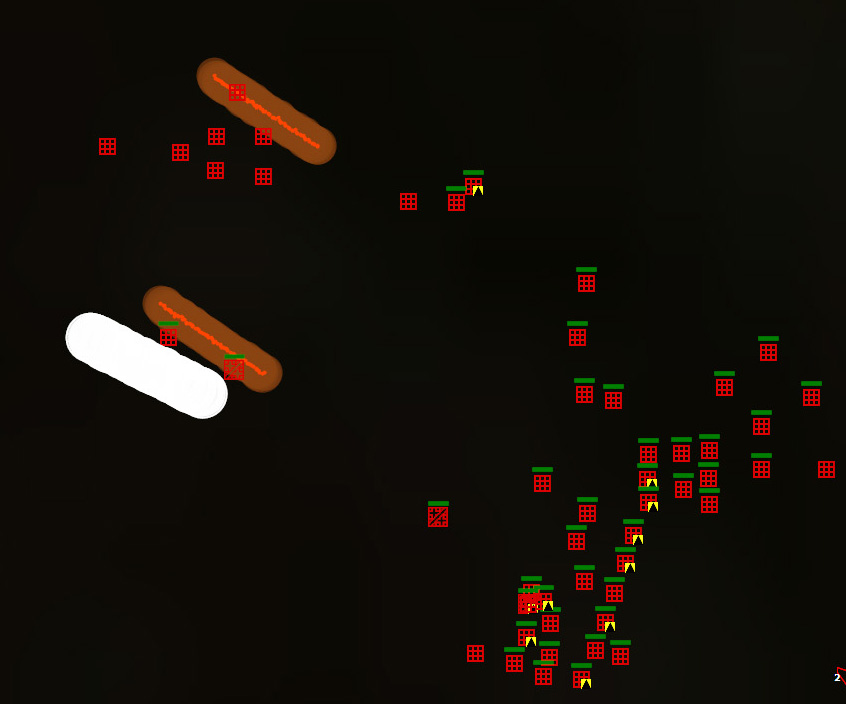 The bombs impact Keflavik, putting a runway out of action
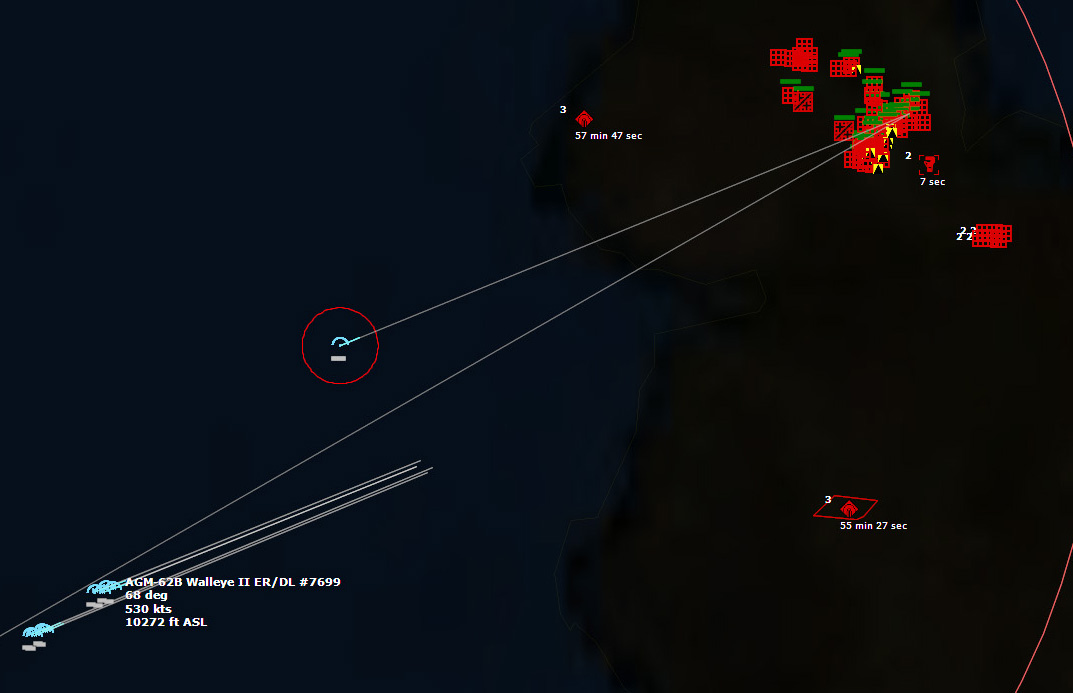 An A-7 flies in low to attack the hangars while Walleyes slowly glide into their targets.
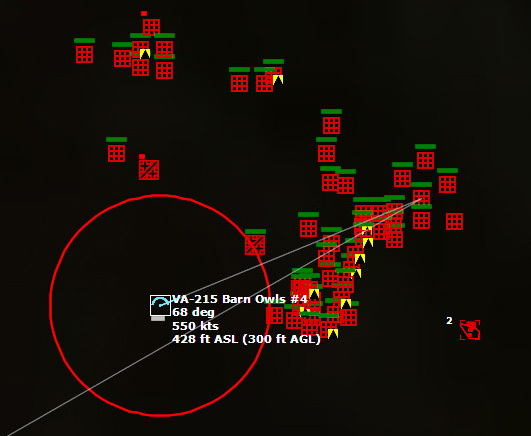 Barn Owls #3 and 4 go in hotOne of the hangars exploded, destroying the Flogger and the Fencer inside. A ZSU-23-4 Shilka opened fire on the A-7s as they departed the area. One of the A-7s was hit and slammed into the ground, too low for the pilot to eject.
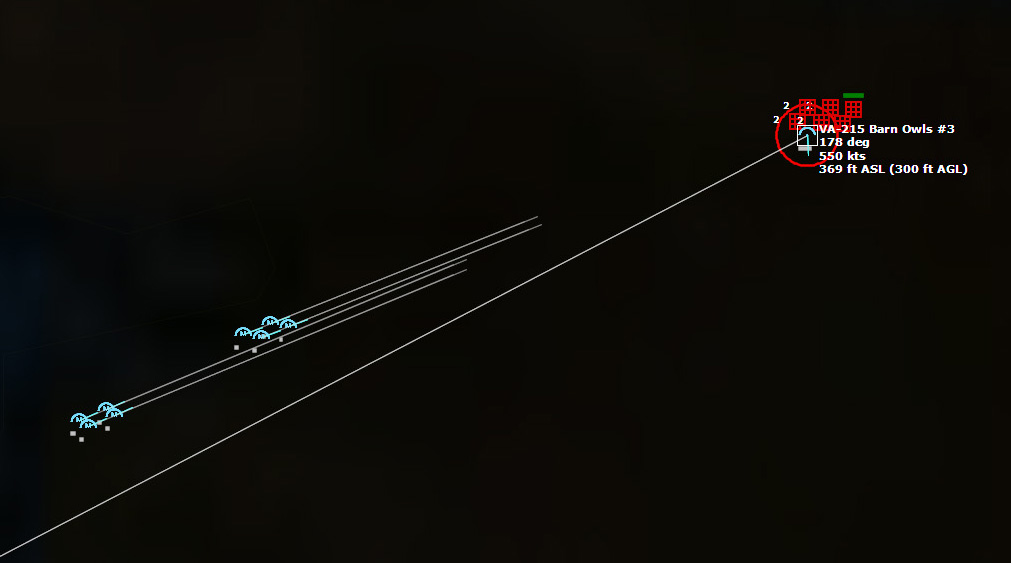 The A-7 passes over the Walleyes' targetThe surviving A-7 rocketed over the Ammo dumps at 300 feet AGL at 550 knots as the Walleyes glided in, seconds away from impact.
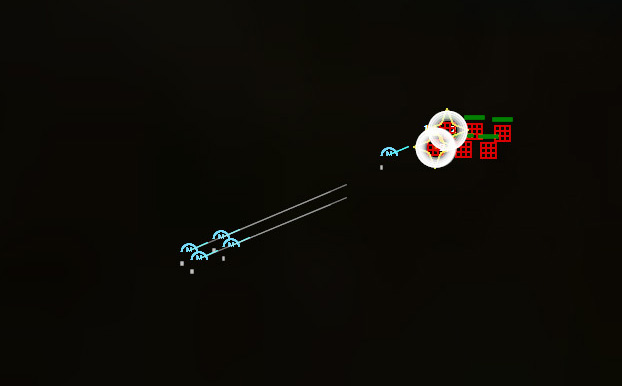 The Walleyes strike their targetsThe second wave of A-7s moved in, and one was shot down by an SA-7b Grail.
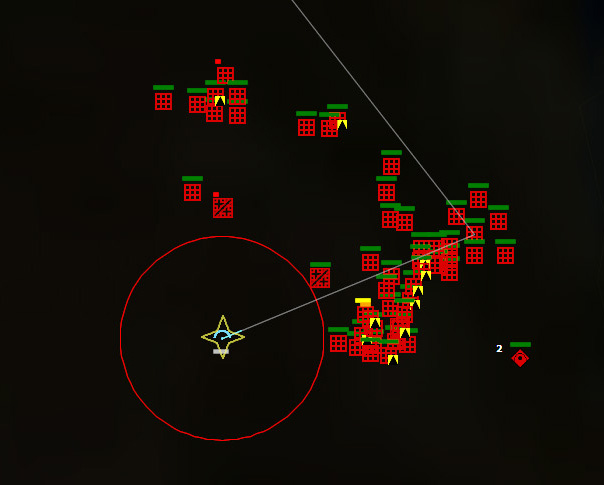 An SA-7b Grail takes out one of the A-7sThe second A-7 dropped its cluster bombs and damaged another hangar. Soon afterwards the second B-52 strike on Reykjavik arrived on target and dropped their bombs.
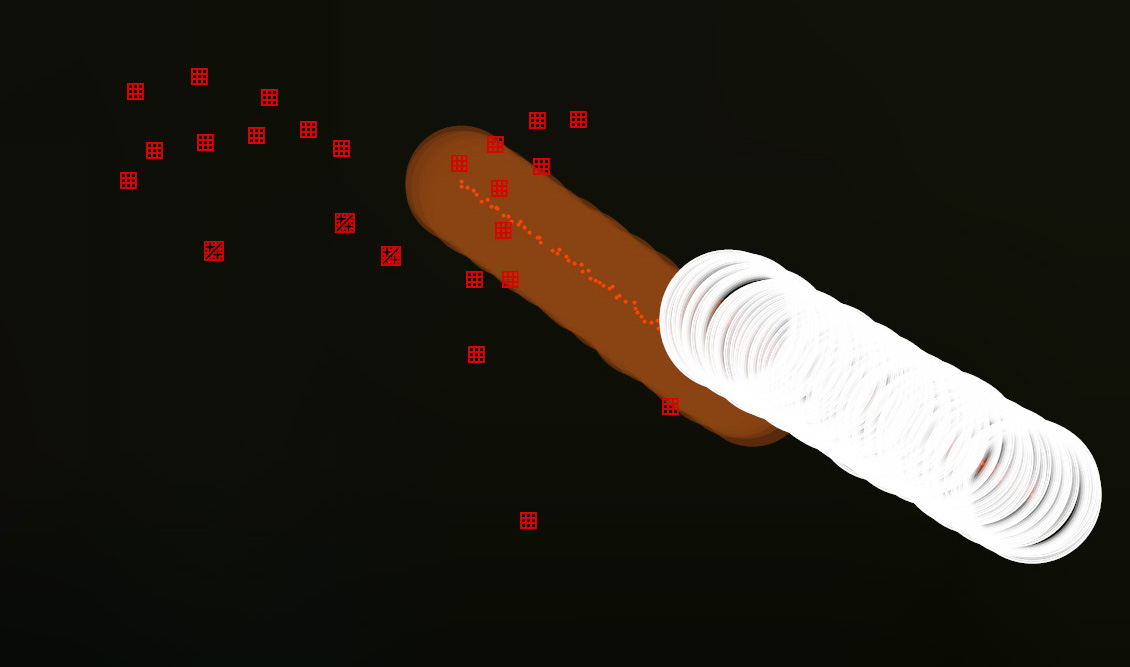 The second bombing of Reykjavik airportThe bombs destroyed the control tower and two massive fuel tanks. Minutes after that, the second B-52 strike upon Keflavik made their bombing run, devastating the area further. On the follow-up strikes, two more A-7s are shot down over Reykjavik, but the Ammo bunkers were hit again, as were the fuel tanks at Keflavik. There were two Nanuchkas still closing in on the Oriskany group, but as their SSMs were expended, they were not a significant threat. SAR operations for any survivors of the sinking of the USS Dale were begun in earnest. The mission was a success, but the cost was higher than anticipated.
Minor Victory
Score: 950
Conclusions
While my basic plan came off without a hitch, I did make some serious mistakes, the primary one being that I allowed the Nanuchkas get within firing range of my Task Unit, and it cost me the USS Dale. How did this happen? When I created the mission for my task group, I forgot to uncheck the "Investigate contacts out of patrol area" box on the Mission Editor. This meant that as soon as the hostile surface contacts were detected, the Oriskany group charged full speed ahead towards them in the hopes of conducting a surface engagement. This meant they left their patrol area and closed the distance, bringing them within range of the Nanuchkas. It's entirely my own fault because I noticed that they were going the wrong way, but I was so focused on the Air-to-Air engagements and my own strikes that I couldn't be bothered to investigate why the Task Unit was moving somewhere I didn't want them to, and then correct it. I also could have neutralized the Nanuchkas as I had Shrikes to spare at this point, although I was shepherding them to use against radars around my targets. I also assumed that should the Nanuchkas get within firing range, the Dale would deal with the SSMs easily enough. And, truth be told, it should have. It had several SAMs left, but just ceased firing when the Dewey opened fire behind it, despite having what I thought was a better chance of shooting down the missiles. After I lost the Dale, I reran that final missile engagement several times to see if I could better analyze exactly why Dale was hit. But every single time, it survived no problem. The only time it was hit was the first time I had ran it--bad luck, I guess.
This episode illustrates the nature of Command--if you forget a minor thing--if you forget anything, it can have dire consequences. Granted, in the real world, a savvy Executive Officer might have said, "Sir, are you sure you want to leave the patrol area and charge those Nanuchkas? I mean, we'd do better just to stay put," rather than blindly following my incompetent orders.
But that's the thing about Command being a realistic simulation: it teaches you lessons.
SIDE: Soviet Union
===========================================================
LOSSES:
-------------------------------
25x MiG-23M Flogger B
13x Su-24 Fencer B
2x Be-12PL Mail
3x Vehicle (Straight Flush [1S91])
2x SA-6a Gainful [2P25] TEL
4x Radar (Long Track [P-40])
2x 23mm ZSU-23-4 Shilka
1x PL-641 Foxtrot
2x Be-12PS Mail
1x A/C Hangar (2x Medium Aircraft)
1x Building (Control Tower)
2x AvGas (150k Liter Tank)
EXPENDITURES:
------------------
12x SSC-1 Sepal [P-35V]
14x AS-9 Kyle [Kh-28]
2x AA-8 Aphid [R-60T]
28x AA-7 Apex A [R-23R, SARH]
12x SS-N-9 Siren [P-120 Malakhit]
24x SA-6a Gainful [9M336]
18x SA-N-4a Gecko [9M33]
40x 23mm ZSU-23-4 Shilka Burst [50 rnds]
11x SA-7b Grail [9M32M]
18x SA-9b Gaskin [9M31M]
SIDE: NATO
===========================================================
LOSSES:
-------------------------------
1x F-8J Crusader
4x F-4C Phantom II
1x CG 16 Leahy
4x A-7B Corsair II
EXPENDITURES:
------------------
40x AN/SSQ-47 Julie Active Range-Only
74x RIM-67A SM-1ER
1x 20mm Mk12 x 4 [100 rnds]
2x AIM-9G Sidewinder
1x AIM-9H Sidewinder
60x AIM-7E2 Sparrow III
16x AIM-9J Sidewinder
20x AGM-45B Shrike [ARM]
3x Mk46 LWT Mod 2
5x Generic Flare Salvo [3x Cartridges, Single Spectral]
2x 76mm/50 Twin Frag Burst [2 rnds]
2x Generic Chaff Rocket
792x M117 750lb GPB
16x AGM-62B Walleye II ER/DL
36x Mk82 500lb Snakeeye
12x CBU-59/B APAM [717 x BLU-77/B Dual-Purpose Bomblets]
SIDE: Biological
===========================================================
LOSSES:
-------------------------------
EXPENDITURES:
------------------
June 28, 2017
COMMAND: Northern Inferno Scenario 7: The Mighty "O" Part 3
 In Part One of this series, I did the mission planning for the Alpha Strikes against Soviet-held Iceland by the USS Oriskany CVBG with USAF assets out of Greenland. In Part Two I began the mission, and immediately had to deal with multiple attacks from Iceland by Soviet forces. In the meantime my USAF Fighter Sweep was refueling and preparing to attack, with the SEAD units behind it, and the B-52s behind them, tasked to destroy the runways.
 So far I've fended off the attacks with the loss of a single fighter, and now it's my turn to strike.
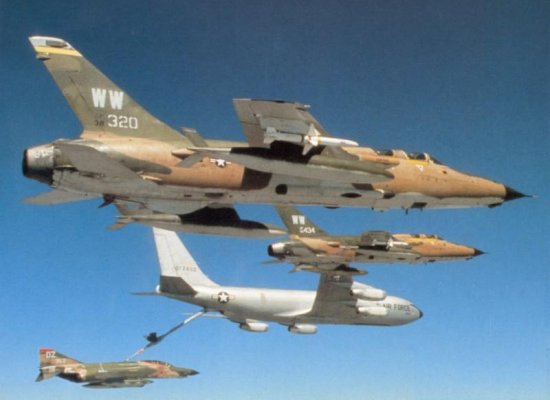 An F-4 Phantom refuels while a pair of F-105s wait their turnTo their south, the Oriskany CVBG had come under constant attack by cruise missiles launched from Iceland and from an attack of Su-24 Fencers. It would be an hour before its own strikes would take off to coordinate the attacks with those of the B-52s.
OVER THE DENMARK STRAIT
033307Z "Contact. Su-24 Fencer Bravos, two-ship, bearing 105 for 230 miles."
"Warning Star, Knight 11, roger. We'll be busy." In the lead F-4C, Major Rogers guided his Phantom towards the Floggers flying a Combat Air Patrol south of Keflavik. Now there were Fencers too. Get rid of the Floggers first, and if they had missiles left they'd take out the Fencers. "Anything, Hickory?"
In the backseat of the F-4C, Colonel Jackson had his eyes glued to the scope. "Not yet."
"Knight 1, Warning Star. Fencer count is now four."
 Su-24 Fencer"Contact," Jackson announced, "Buck, I got two Floggers, Bearing 115, 50 miles, Angels 36."
"Roger, Knight 12, Knight 11, weapons free. Engage."
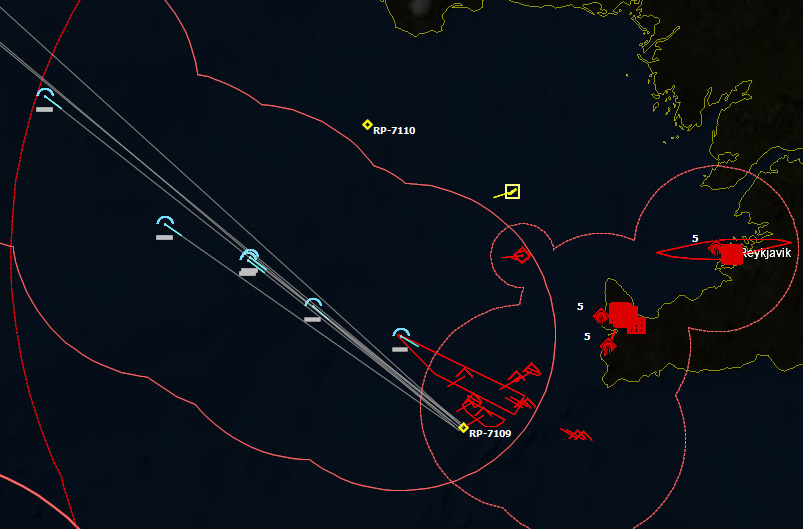 The F-4s close in on the Soviet aircraft"They've launched! Missiles inbound, break right!"
Knight 12 slammed his F-4C hard over to avoid the inbound missiles. The first AA-7 Apex missed the wildly maneuvering fighter, and then the second missed as well. Knight 12 turned in hard, and then locked onto the first Flogger. "Fox One! Fox One!" The first two Sparrows missed, and Knight 12 fired a second pair.
"Missiles inbound!" called Knight 12's backseater.
"Apex inbound! Break left!" Jackson yelled, and was immediately slammed into his seat as Buck yanked on the stick and pulled the F-4 into a 5-gee turn.
"Fox Two!" Knight 12 called out. Missiles were all over the night sky as the fighters violently turned, afterburners flaring in the darkness.
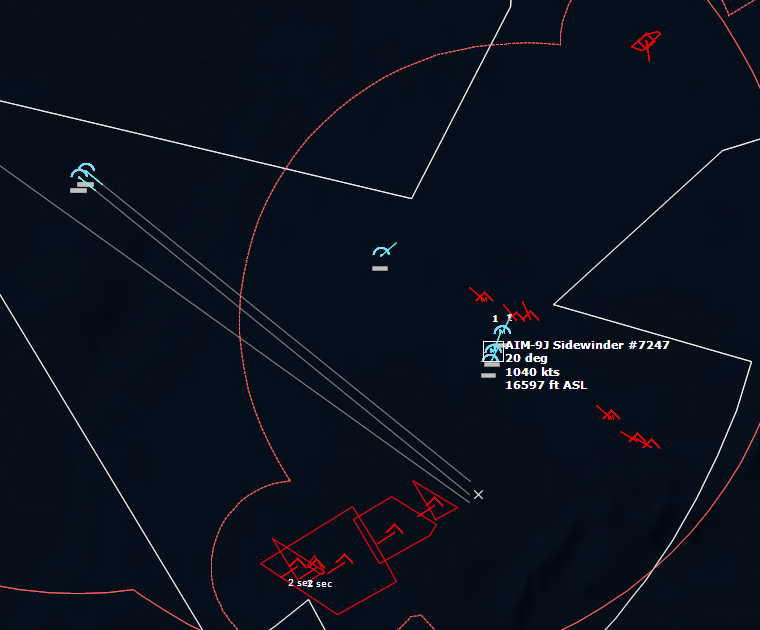 Missiles fill the sky"Splash one!" Knight 12 called out. And then, a few seconds later, "Splash Two!" The first two MiGs were down. Two missiles were still tracking Jackson's fighter, but without their parent aircraft to provide radar guidance, they both lost lock and fell harmlessly to the ocean. Knight 12 still had an Apex closing in on it, and dodged hard, but the missile impacted the fuselage, tearing the fighter apart.
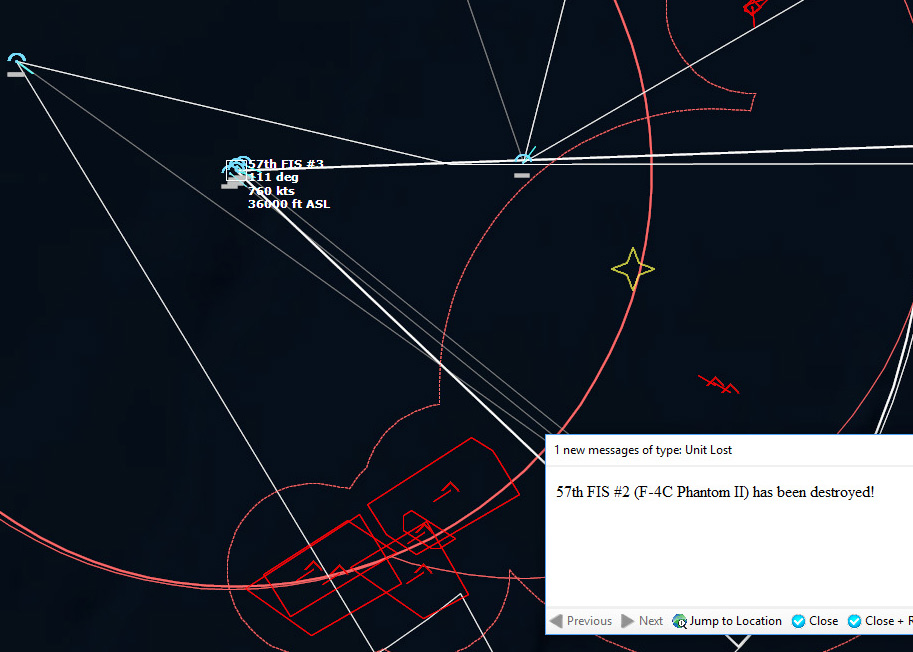 Knight 12 is destroyedMajor Rogers turned back into the two remaining MiGs, realizing that if Knight 12 hadn't taken out the two Floggers, the pair of Apexes that had been chasing him could have still tracked and probably blotted him from the sky. His wingman had saved his life, and now he was determined to get his revenge on the two Floggers.
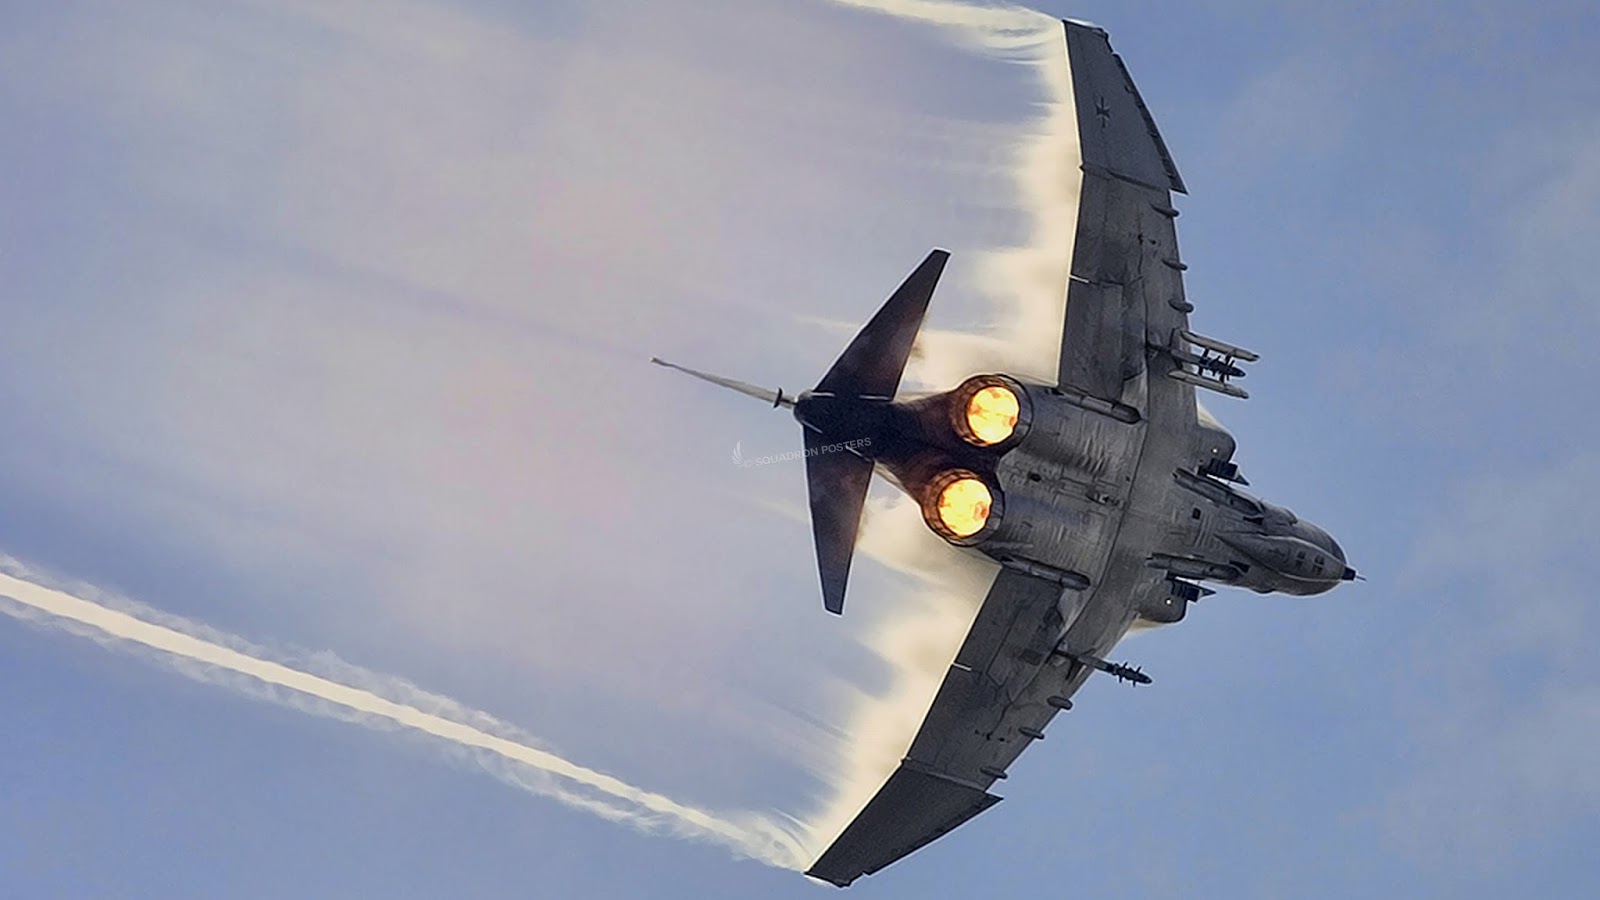 An F-4 turns hard on afterburnerTwo the south, the Fencers launched their anti-radiation missiles at the Oriskany group.
"Missiles inbound, break right!" Jackson yelled, and Rogers slammed the stick over again. This time they were on their own.
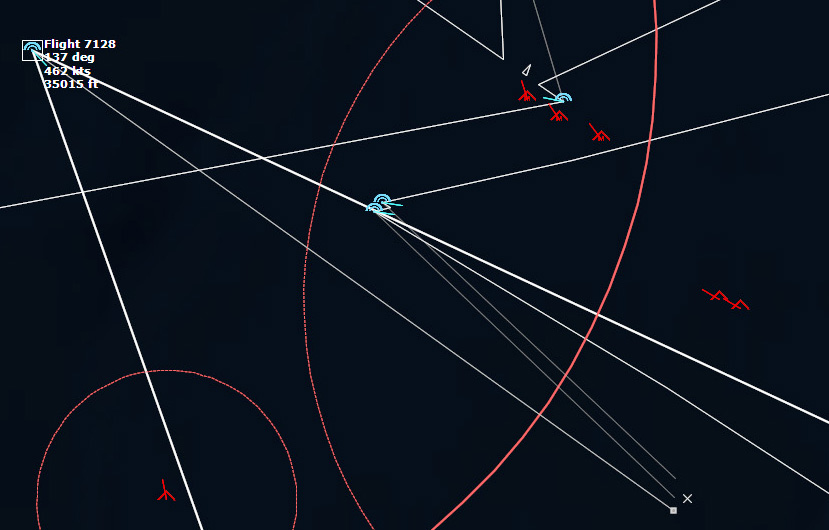 Colonel Jackson has three missiles inbound...this is it.All three missiles soared by the Phantom and missed.
And then two more Phantoms arrived.
"Knight 32, Fox One! Fox One!"
"Knight 22, Fox One! Fox One!"
"Splash Three!"
Only one MiG left, thought Major Rogers, as he finally achieved firing position. "Fox One! Fox One!" The first Sparrow took out the Flogger, and Jackson breathed a sigh of relief.
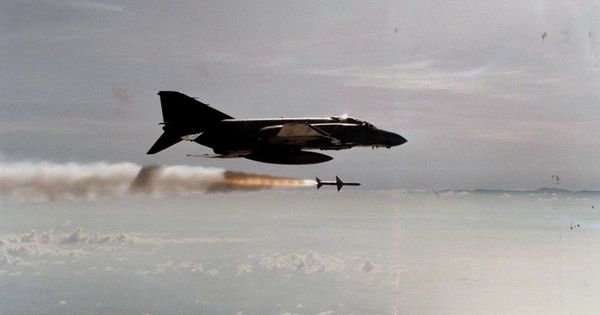 An F-4 Phantom launches a SparrowMeanwhile, to the west, Knight 41 and 42 were calling their own shots as they fired at the Fencers. One by one they took down the attack aircraft, which had all already launched their missiles.
"Knights, Warning Star, be advised, more bogeys detected at Keflavik, count four, Flogger Bravos."
The new flight of Floggers launched at Knight 51 and 52. Both Phantoms dodged wildly and the four missiles missed. As they attempted to get into firing position, Major Rogers lined up and fired a pair of Sparrows. One impacted a Flogger, splashing it. Two down, he ticked off the kills in his head.
To the east, Knight 22 launched Sidewinders at the rear pair of Floggers. Those Floggers launched Apexes at the approaching Knights 31 and 32. Again, missiles filled the night sky, searching for their targets.
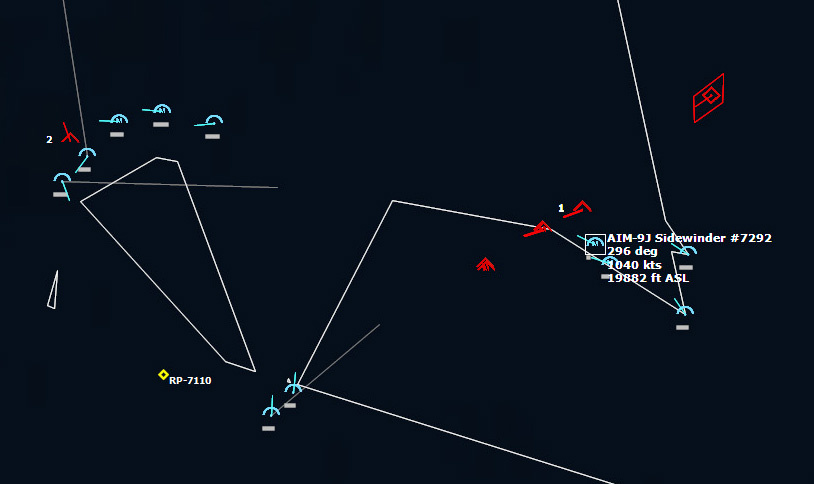 Missiles fill the sky again"Splash One MiG!" announced Knight 52.
 "Splash One Flogger!" called Knight 22.
The four missiles headed for Knights 51 and 52, their launching aircraft either destroyed or maneuvering such that it was unable to illuminate their targets, all missed.
Colonel Jackson studied his scope, and it was clear. In the quiet moment, he needed assess who was still capable of fighting and who needed to RTB.
"Knights, Knight 11, say status." One by one the fighters called in their weapons and fuel states, and Jackson determined that he and Knights 21 and 22 would get on the tankers to refuel. The rest of the squadron would continue to patrol in case more Soviet aircraft took off. They would break off to refuel as necessary. The lead F-105Gs of the SEAD strikes were inbound. Glancing at the mission clock, Jackson noted that if anything, things were ahead of schedule.
040248Z "Contact, Bogeys over Keflavik," came the warning from the Warning Star. And a moment later, Bogeys are classified as Flogger Bravos, two ship, and Fencer Bravo, four ship.
The Phantoms converged on the new contacts, and soon missiles were in the air. Knights 51 and 52 broke right to evade the four missiles headed their way.
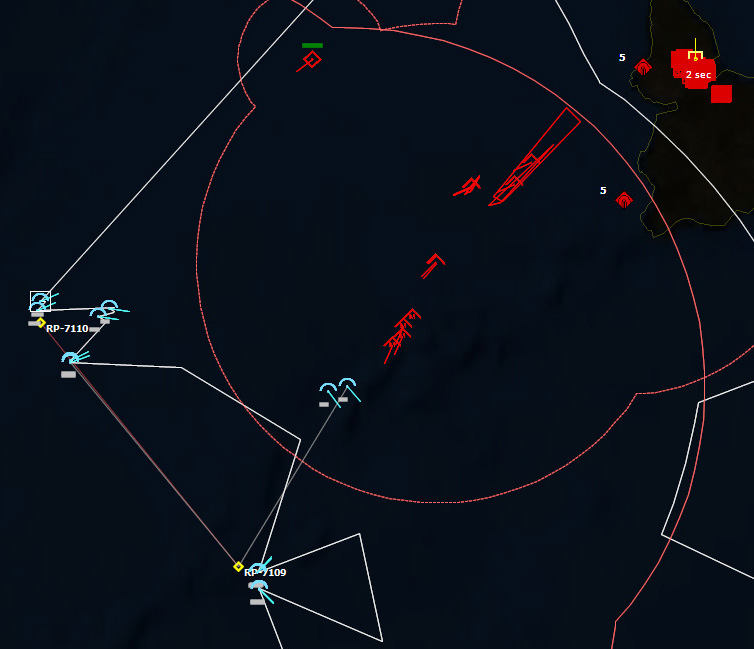 Knights 51 and 52 turn to evadeAll four missiles missed, and the two Phantoms turned back in towards their targets. "Fox One!" Knight 51 called out, launching his first Sparrow. "Fox One!" he called again.
 "Fox One!" called his wingman, targeting the other Flogger.
"Knights, Warning Star, more bogeys detected over Iceland."
"Splash One Flogger!" called out Knight 51, and Knight 52 called out his kill seconds later. The two MiG-27M Floggers were down, and now the Phantoms swarmed the Fencers.
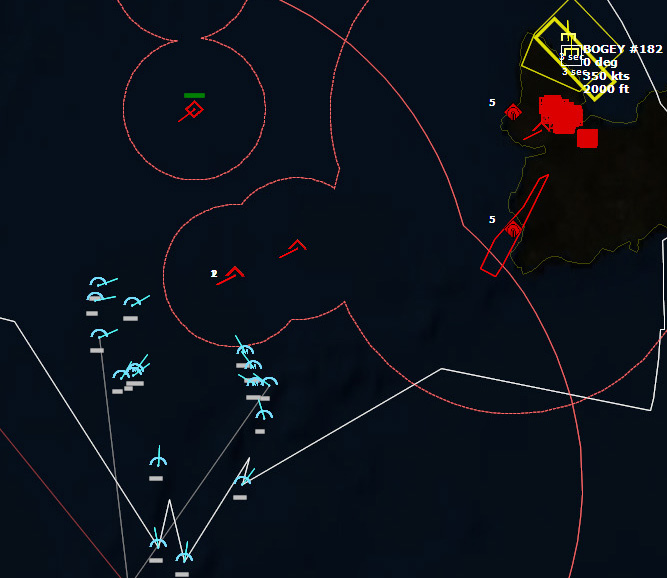 The Phantoms swarm the FencersIn short order the Fencers were all shot down.
Four more Floggers took off from Keflavik, two heading north, while two headed southwest. Knights 31 and 32 took care of the northern pair, while Knights 41, 42, 81 and 82 engaged the second. After dodging several radar-guided missiles, Knight 42 was shot down by an AA-8 Aphid.
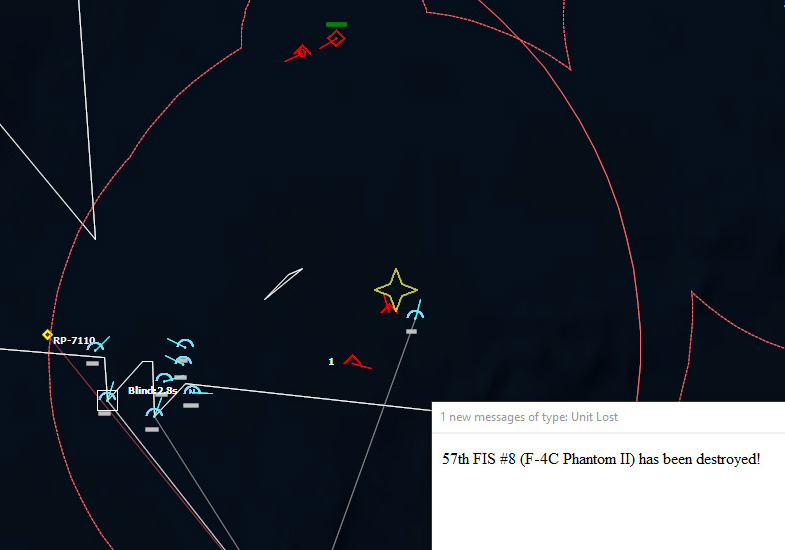 Knight 42 is shot downAlmost unnoticed in the dogfighting above, a MRK Nanuchka far below launched an anti-ship missile towards the Oriskany group. The Phantoms began to fire Sparrows to take it out.
As the F-105Gs close in on Keflavik, two more MiG-23M Flogger Bs were detected lifting off from Keflavik. The F-4s were starting to get low on missiles, but then, the Soviets must surely be getting low on fighters.
To be continued...
June 27, 2017
COMMAND: Northern Inferno Scenario 7: The Mighty "O" Part 2
In Part One of this scenario I did a lot of math, calculating fuel expenditures and flight times, in the hopes of generating an Air Tasking Order where I could coordinate my strikes. I'm sure I made some mistakes, hopefully none of them critical, but fortunately this is a simulation and real lives are not at stake. All that's left is to set up all the missions and see how good my calculations were.My biggest concern is that I'll somehow screw up the refueling, as that isn't my strongest part of Command, so I'm sure that this will be a learning experience. (Note: In my planning I assumed that refueling takes about thirty minutes, when in reality it takes closer to five)
Undoubtedly, I made some mistakes in my calculations, but we'll see just how badly the plan falls apart because of it. On top of that, no plan survives contact with the enemy, so we'll see how well my strikes actually play out.
The sudden appearance of Soviet submarines or surface units could throw a wrench into my plans as well, so I'll have to be on the alert for them too.
All the planning is completed, so now begins the mission.
SONDRESTROM AIR BASE
 Sondrestrom Air BaseTaxi lights from dozens of aircraft strobed on the tarmac in the dark of the night as dozens of aircraft maneuvered along the taxiway to the eastern end of the airbase's lone runway. The F-4Cs of the 57th Fighter-Interceptor Squadron, "the Black Knights of Keflavik," were first in line. The 57th FIS had been stationed on Iceland when the war had broken out, and had been chased away by the Russians, and now they would take the first steps in taking it back.
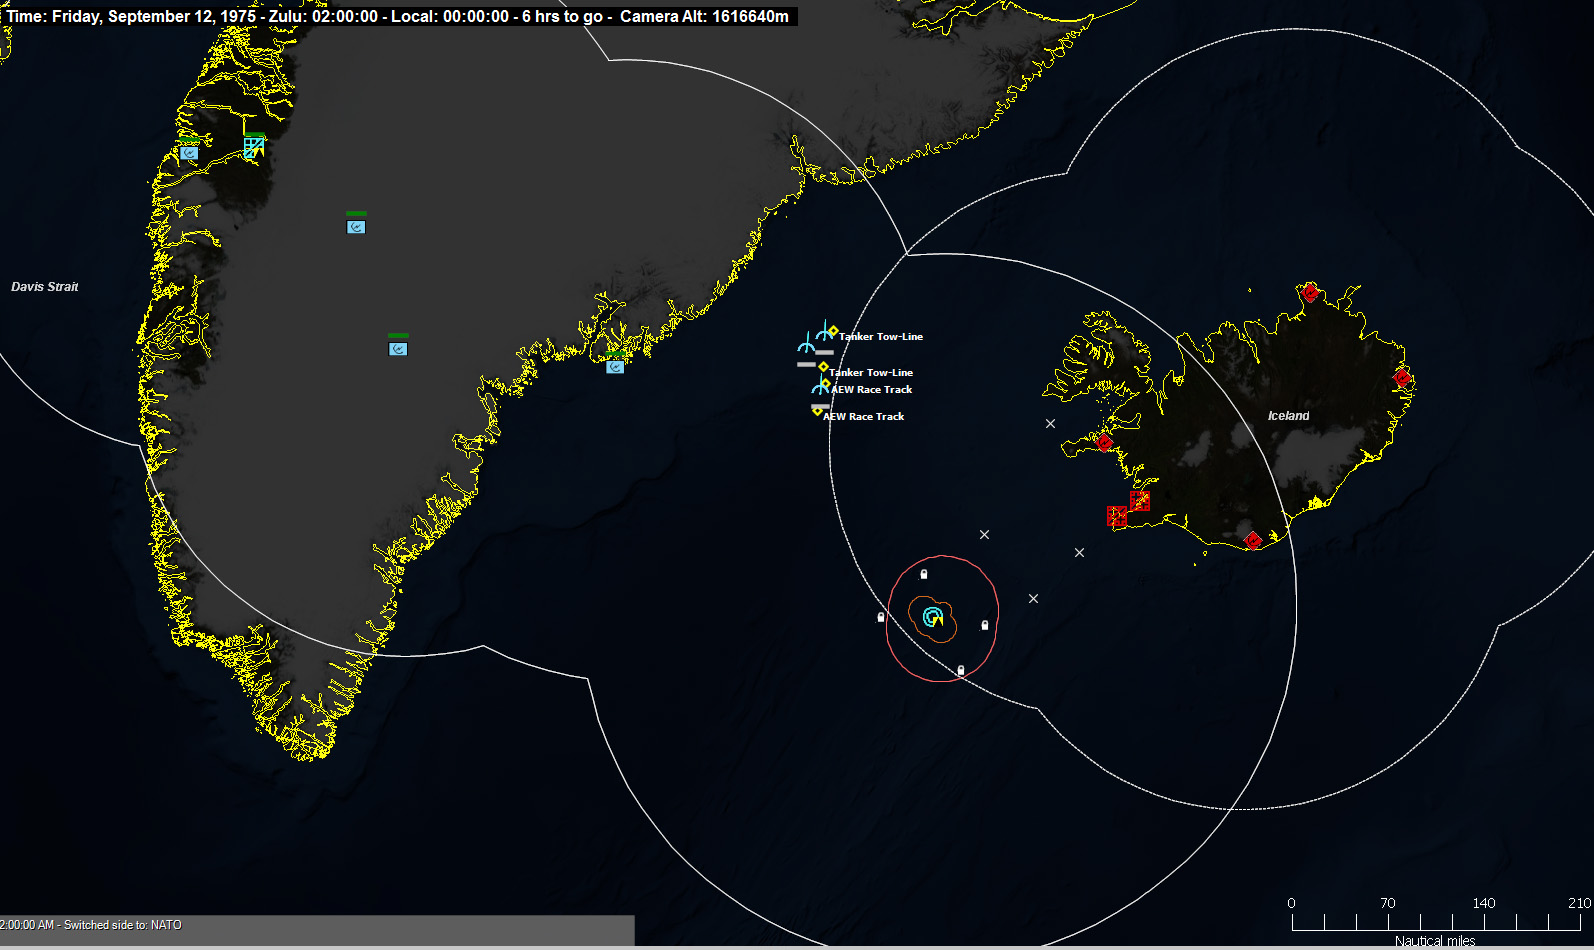 The Oriskany Task Unit is just off the Iceland coastBehind them were the F-105G Thunderchiefs of the 561st Tactical Fighter squadron, Wild Weasels, tasked to take out the air defenses of the Soviet forces on Iceland. And behind them were the B-52Ds of the 20th Bombardment Squadron, the "Buccaneers." Their job was to destroy the runways at Reykjavik and Keflavik, stopping the Soviets from using them to resupply their forces.
 F-4C Phantom II from the 57th Fighter-Interceptor Squadron
In back seat of the lead F-4, Colonel George "Hickory" Jackson was eager to get airborne, and watched the seconds tick down until mission start. As squadron commander, for this mission he served as both Weapon Systems Officer (WSO) and Mission Commander.
"Ready, Buck?" he asked his pilot.
"Affirm." replied Major Mike "Buck" Rogers.
Jackson thumbed his mike switch. "Knight 12, Knight 11, say status."
Knight 12, his wingman, wasjustt off his right wing. In the darkness he could barely see into the F-4C's cockpit, its crew dimly illuminated by the instrument panels.
"Two, ready for departure."
"Sondrestrom Tower, Knight 1, Flight of two, ready for takeoff, runway 28."
"Knight 1, Sondrestrom Tower, position and hold."
"Position and hold, Knight 1."
Major Rogers nudged the throttle quadrant forward, and he and his wingman maneuvered their aircraft into position on the runway. Right as the clock hit 0202 Zulu time, the tower came back on, "Knight 1, cleared for takeoff, proceed without delay. Good hunting."
As one, Knight 11 and 12 advanced their throttles to full military power and the two F-4Cs rolled down the runway. Rogers eased back on the stick and they were airborne. He let the aircraft increase speed to three hundred knots and then eased it into a right turn, bringing it back to a course of 089.
The mission had begun.
DENMARK STRAIT
0205Z 230 miles from Keflavik, an EC-121 H Warning Star Airborne Early Warning and Control aircraft flew a racetrack pattern, watching for activity over Iceland. It had picked up emissions from multiple SA-6 Gainful SAM batteries around Keflavik and Reykjavik, marking their locations for transmission to the SEAD aircraft that would be raiding in a few hours. It also picked up several aircraft over Keflavik, and soon classified them as MiG-23M Flogger Bs.
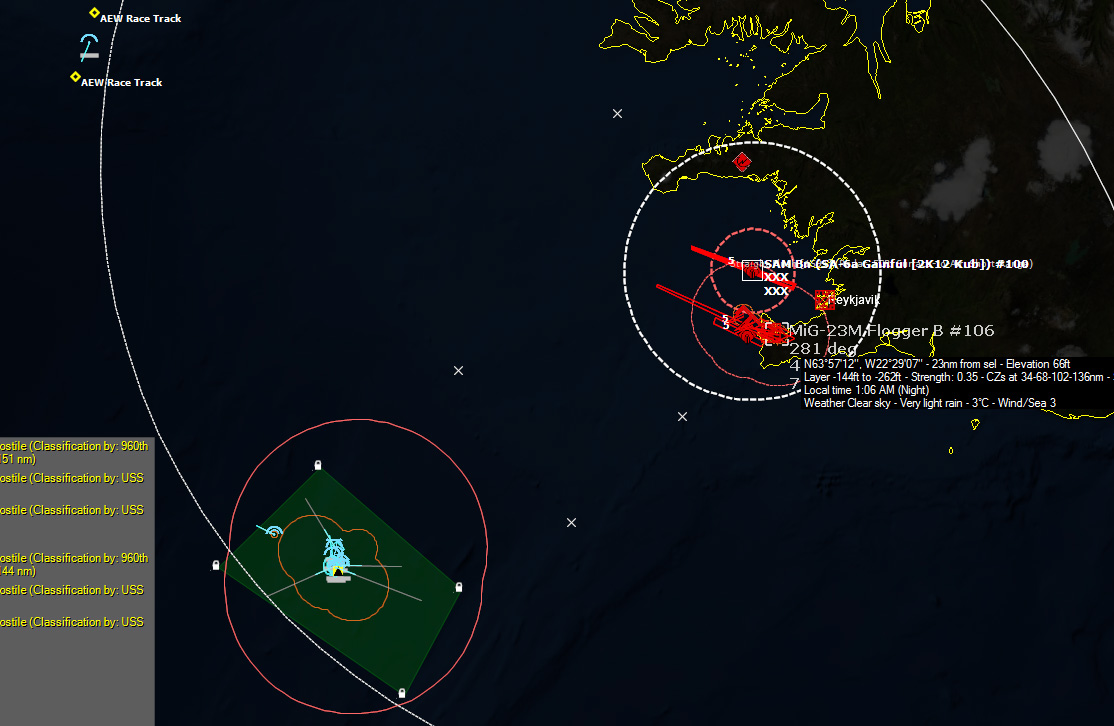 The US AEW aircraft detects hostile aircraft over IcelandLikewise, over the Oriskany Group, an E-1B Tracer from RVAW-110 was clawing its way skyward, radars active. Detecting the apparent inbound raid, it radioed warning to the Oriskany group. The ships were already radar active. The pilot began to turn to the south, as the last thing he wanted to do was interpose himself between the missile ships below and the inbound fighters.
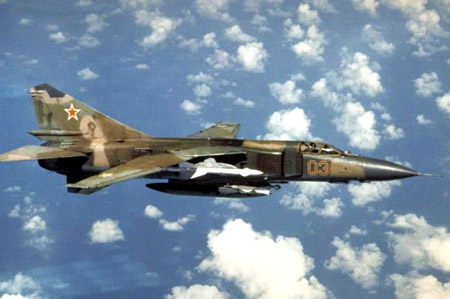 MiG-23 FloggerAboard the USS Dale, Captain Jones listened to the CIC talker announce the threats. "Raid One is four aircraft, classified as Flogger-Bravos, 060 for 80 miles, 920kts closure. Weapons Free." A second group of MiG-23Ms appeared to be heading west, although not directly at the EC-121H Warning Star, and was likely a CAP defending Keflavik.
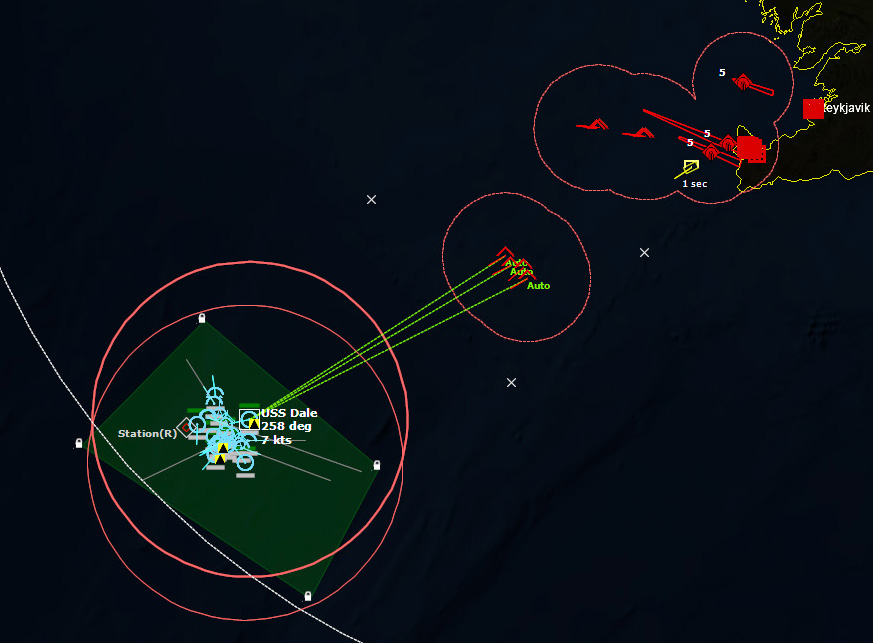 Raid One closes in on the Oriskany Task Unit"Raid One 060 for 40 miles. Weapons free. Birds away!"
On the USS Dale, the aft Mk10 Twin Rail missile launcher unleashed a pair of RIM-67A SM-1ER guided missiles, which locked onto to northern pair of MiGs. Immediately the rails reset and the mount swiveled back to the magazine to reload. Seconds later the forward launcher sent off its pair of missiles.
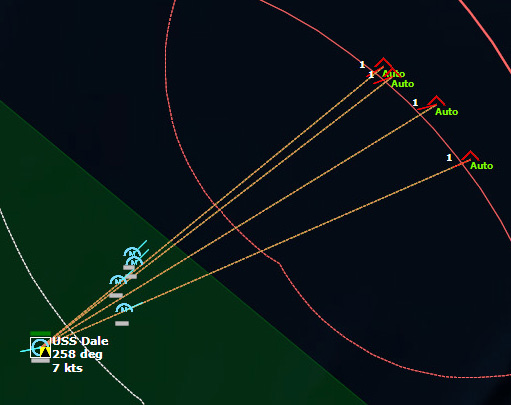 Birds away!The MiG-23M pilots detected the inbound missiles, and began to maneuver to avoid them. The first pair of SM-1ERs closed in. One MiG-23M dodged the SAM, while the other was blown out of the sky.
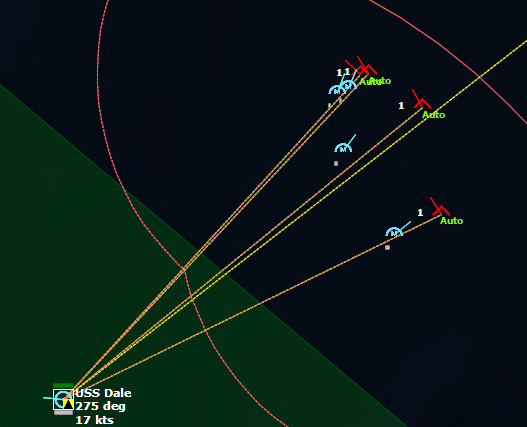 The MiG-23M Flogger Bs attempt to dodge the SAMsThe second pair of SAMs missed its targets, and Dale launched a second salvo. The second salvo killed two more of the MiGs, leaving a single one left. The two F-8J Crusaders flying CAP over the group seized the opportunity to close into Sidewinder range.
 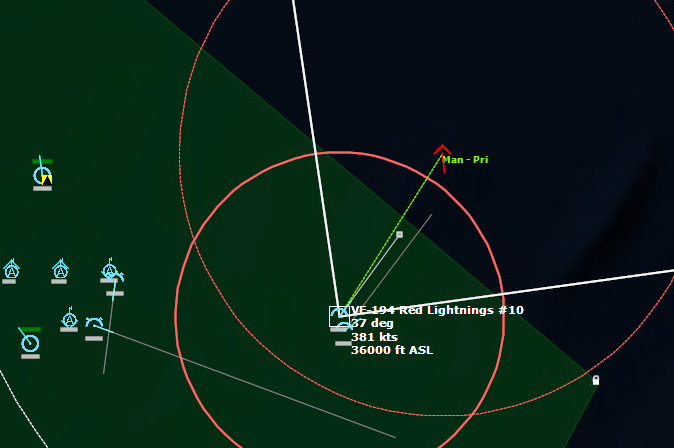 The CAP moves in to finish off the last MiG.The fighters rocketed past each other at over 1000kts, and then engaged in a turning fight. Dale, however, was not yet done, and fired one more SAM, which threaded its way through the dogfight to nail the MiG.
 022130Z "Contacts, MiG-23M Flogger Bravos, four-ship, designate Raid Two. 060 for 100 miles, 920kts closure."
Captain Jones scratched his chin. What were they doing, sending only four MiGs at a time? One group of four Floggers patrolled back and forth in front of Keflavik, while the new group closed in on the Oriskany group at high speed. The Dale's launchers would again be busy.
022550Z "Birds away!" Dale's launchers went active again, launching at the inbound Floggers.
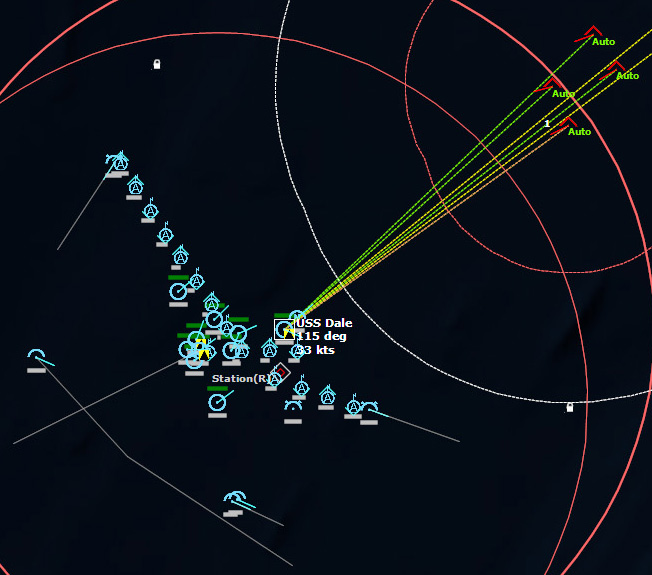 USS Dale launches s SAM at the second inbound raid.
USS Dale went three for four on the first salvo, and then killed the last MiG with a followup SAM. The Leahy-class cruiser was performing well, shooting down eight Floggers for the cost of thirteen SAMs.
FIREBIRD 2
023043Z "Vampire! Vampire!" called the Radar/Intercept Controller aboard the E-1B Tracer above the Oriskany group, "Bearing 062, estimated 162 miles."
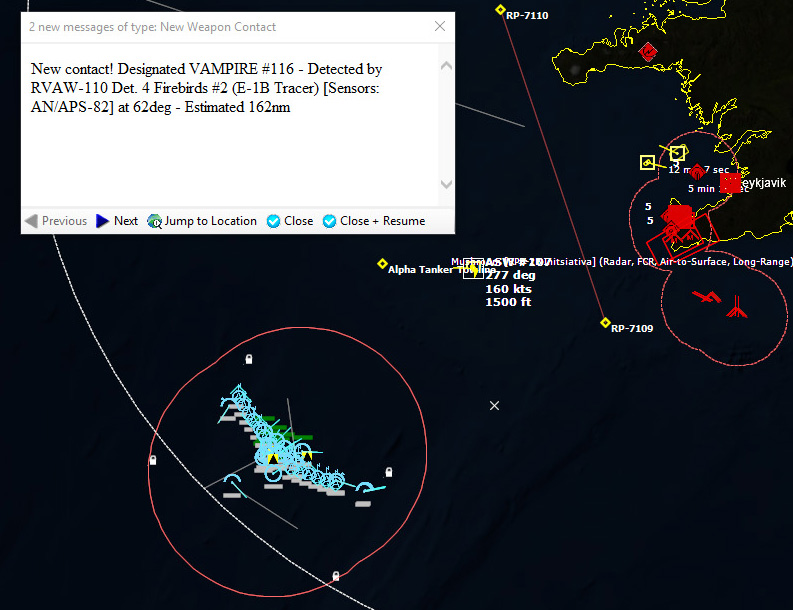 Vampires detected over Keflavik"That's over Keflavik," noted the other controller. "What are they shooting at?" Inwardly he thought hard, could they be surface launched cruise missiles? Ballistic missiles?
"Vampires are climbing through angels 15, 675kts. Vampires are inbound, bearing 062 for 158 miles."
USS DALE
"Vampires are leveling off at angels 20."
Captain Jones nodded, watching the plot. "Classify them."
A moment later, a tech called out, "Possible classification on Vampires, SS-N-3 Shaddock or SSC-1 Sepal."
They were land-based, Jones thought, so that made them Sepals. He tightened his lips. They could be standard anti-ship missiles, or they could contain 350kT nuclear warheads. Considering how free the Soviets had been with their nukes so far in this war, there was a very real possible that these were nukes as well.
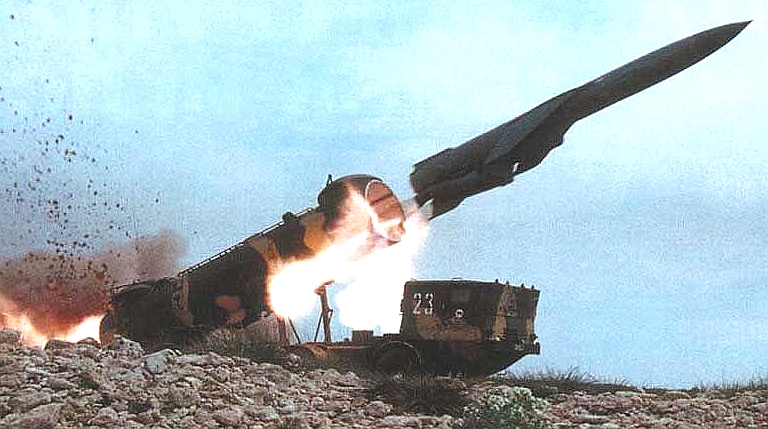 Sepal launchJones watched the plot as the vampires closed in, approaching the Dale's SAM envelope at just over Mach 1. At a range of 35 miles, Dale launched a pair of SAMs at each inbound missile.
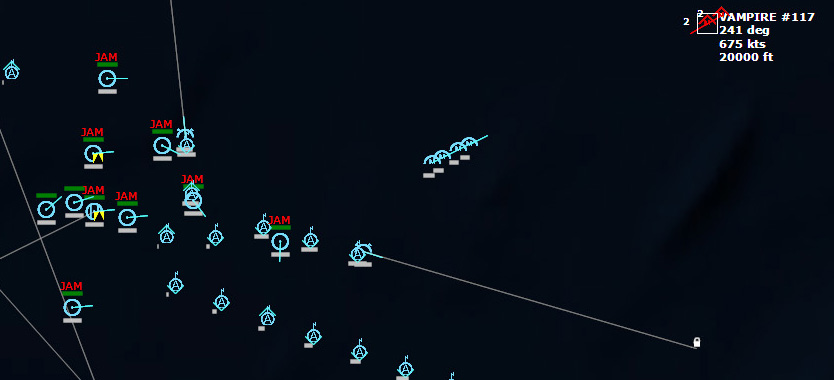 Dale launches a pair of SAMs at each inbound missile.Unlike the Floggers, the missiles did not turn away in an attempt to evade the SAMs, and the SM-1ERs shot both down easily.
FIREBIRD 2
024105Z "Vampire! Vampire! Bearing 054, estimated 155 miles. Looks like another pair of cruise missiles."
"They'll be launching these all day."
"Let's hope they run out of them before we run out of SAMs."
OVER THE DENMARK STRAIT
024807Z "Contact, multiple bogeys detected over Keflavik, classified as Su-24 Fencer Bs, count five."
USS DALE
The CIC talker relayed the report from the Warning Star over the Denmark Strait, but Captain Jones had other things to worry about, as Dale had just launched SAMs at the incoming cruise missiles. One by one the SAMs rose up and took out the two missiles.
"Vampire, Vampire, " Another salvo of cruise missiles was inbound.
USS ORISKANY
"Fencer Bravo raid count is five, inbound at 567kts, 060 for 105 miles,"
"Send the CAP to intercept."
"The CAP is just beginning refueling operations, sir."
"Launch the alert fighters, then."
Two minutes later, Lightning 204 and 205, a pair of F-8J Crusaders from VF-194, the Red Lightnings, launched from Oriskany's catapults and headed northeast on afterburner.
"Vampire! Vampire! The Fencers have launched missiles! Count six, bearing 061 for 86 miles. Altitude three-zero feet, speed 1150 kts."
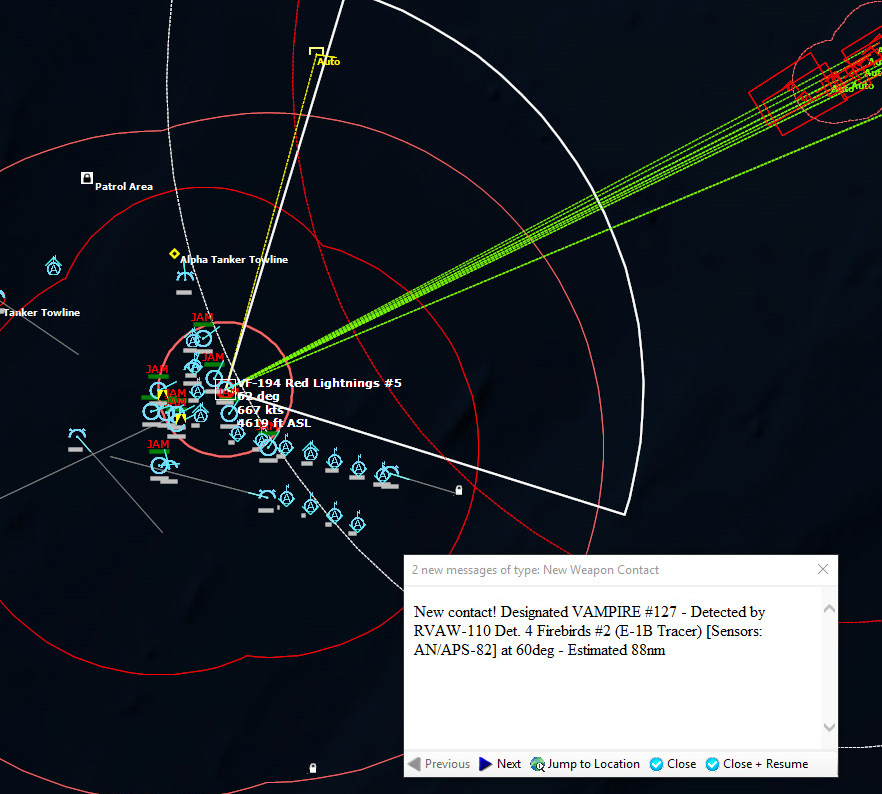 Just as the Oriskany launches interceptors, the inbound Fencers launch missiles.025635Z Lightning 205, one of the F-8J Crusaders, dropped down to 300 feet ASL to go after the inbound vampires, and just as he he was closing in, he saw them disappear off his radar in rapid succession. "Alpha Bravo, Lightning 205, Vampires have splashed." Having been fired at max range, the cruise missiles had run out of fuel and crashed into the sea.
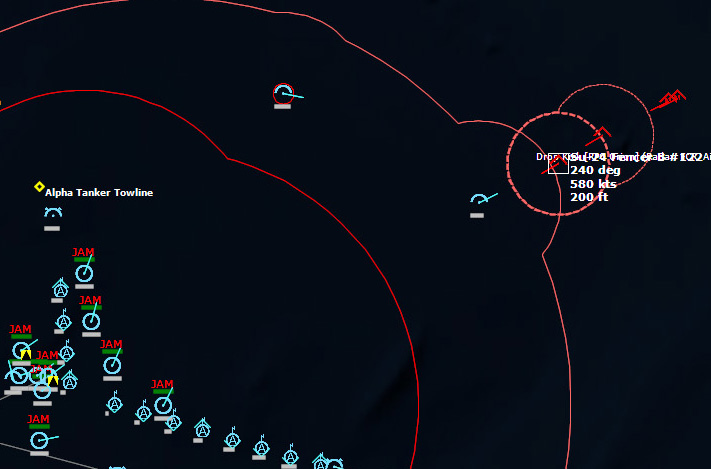 Lightning 205 closes in on the Su-24 FencersThe Crusader pulled hard to port and maneuvered to engage the Fencers. "Lightning 205, engaging Fencer, Tally ho! Guns! Guns! Guns! Splash One!" The Crusader broke hard starboard to go after a second Fencer, and then saw an inbound missile, no doubt fired by the third Fencer.
 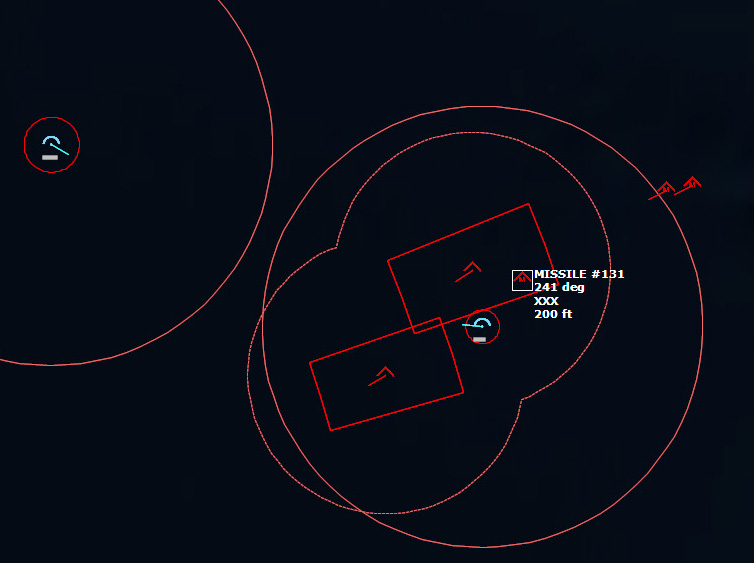 Lighting 205 detects an incoming missile"I'm hit! I'm hit!" The AA-8 Aphid impacted the F-8J, sending it corkscrewing into the sea with no time for the pilot to eject.
Lightning 204 closed in on afterburner from the northwest, descending rapidly. 30 miles to the southwest, USS Dale began firing SAMs.
"Fox Two!" Lightning 204 called out, as it achieved missile firing position behind the rear Fencer. An AIM-9G Sidewinder shot off the rail, tracking the Fencer.
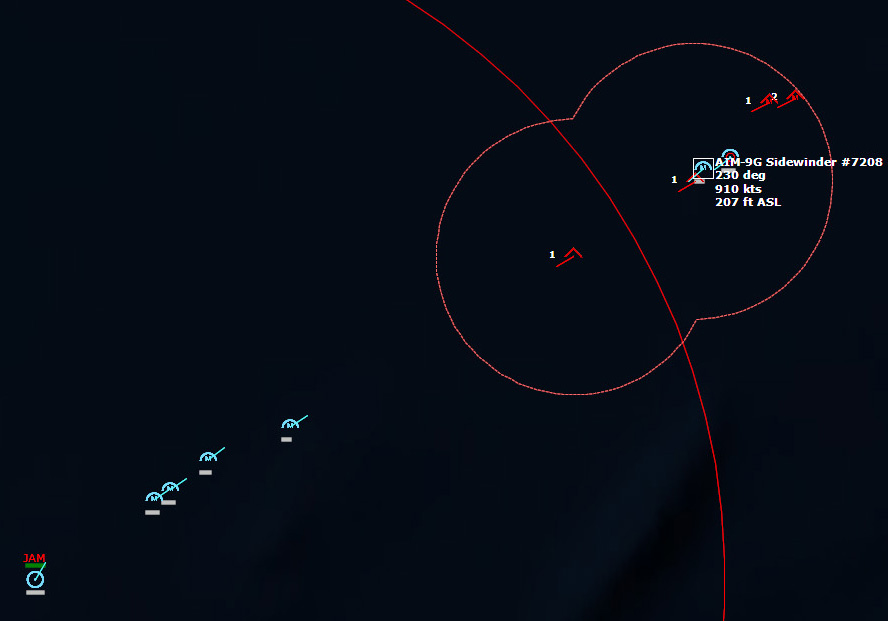 "Fox Two!""Fox Two, Fox Two again!" Lightning 204 called as the first Sidewinder missed and he launched again. This one tracked its target and destroyed the Fencer.
Dale's SAMs took out the last Fencer and the two inbound cruise missiles. Soon after, a further two cruise missiles are detected launching from Keflavik. This salvo would take more SAMs, but again, USS Dale would take them out. And again, another salvo was launched.
OVER THE DENMARK STRAIT
0305Z The F-4Cs of the 57th FIS began to arrive at the tankers, and began topping off their fuel tanks. Once refueling operations were complete, they would take the fight to the enemy, and destroy every Soviet aircraft they could find.
 The 57th FIS begins refueling operations0310Z Colonel Jackson's fighter detached from the KC-135, his refueling complete. The Colonel sent the coded burst transmission to the Warning Star, which went active with its radar. The hunt was about to begin.
To be continued...
June 26, 2017
COMMAND: Northern Inferno Scenario 7: The Mighty "O" Part 1
 Introduction
 After the initial shock of Iceland being taken by Soviet amphibious and airborne Forces, NATO has resolved to destroy any airfield infrastructure which still remains intact. The initial Soviet attack was conducted by surgical strikes conducted by Badger bombers launching air-to-surface missiles aimed at radar sites and air defences, carefully avoiding to destroy aviation facilities, as it is believed they will be required for their own aircraft and as a staging post for Badger and Backfire bombers.
With the facilities captured largely intact, and damaged assets having been repaired by Soviet army engineer units, Soviet naval aviation will be able to conduct long-range recon and strike sorties into the Atlantic shipping lanes. Unless NATO shuts Iceland down.
Situation
Following the capture of Iceland, Soviet Naval Aviation has now established a presence at Keflavik including the 14th Fighter Regt (MiG-23M Flogger B) and the 143rd Bomber Regt (Su-24 Fencer B) with associated tanker support. No AEW Aircraft have been identified so far.
Initial recon overflights have assessed that the airfield will be fully operational within two days.
The Oriskany CVBG with Carrier Air Wing 19 embarked has been allocated to pre-emptively take down the airfield using "Alpha Strikes".
Oriskany is an old ship having started her career in WW2, Korea and more recently Vietnam but still has one good fight left in her, "The Mighty O" is now in position with the rest of her strike group along with assets from Sondrestrom and Thule Air Base.
 Recon imagery of NAS KeflavikEnemy Forces
Air : MiG-23 Flogger fighters and Su-24 Fencer strike aircraft.
SAM / AAA : SA-6 Gainful, SA-7 Grail, SA-9 Gaskin , ZSU-23.
Surface : Unknown.
Sub-Surface : Unknown.
Friendly Forces
Sondrestrom Air Base:
20th BS (B-52D Stratrofortress) 561st TFS (F-105G Thunderchief) 57th FIS (F-4C Phantom) 38th TRS (RF-4C Phantom) Thule Air Base
334th ARS (KC-135A Stratotanker) 960th AEWCS (EC-121H Warning Star) TASK unit 20.03: USS Oriskany CV, USS Dale CG, USS Dewey DDG, USS Semmes DDG, USS William R. Rush DD,USS Voge FFH, USS Robert A. Owens DD, , USS Lang FFH,USS Truckee AO, USS Butte AE.
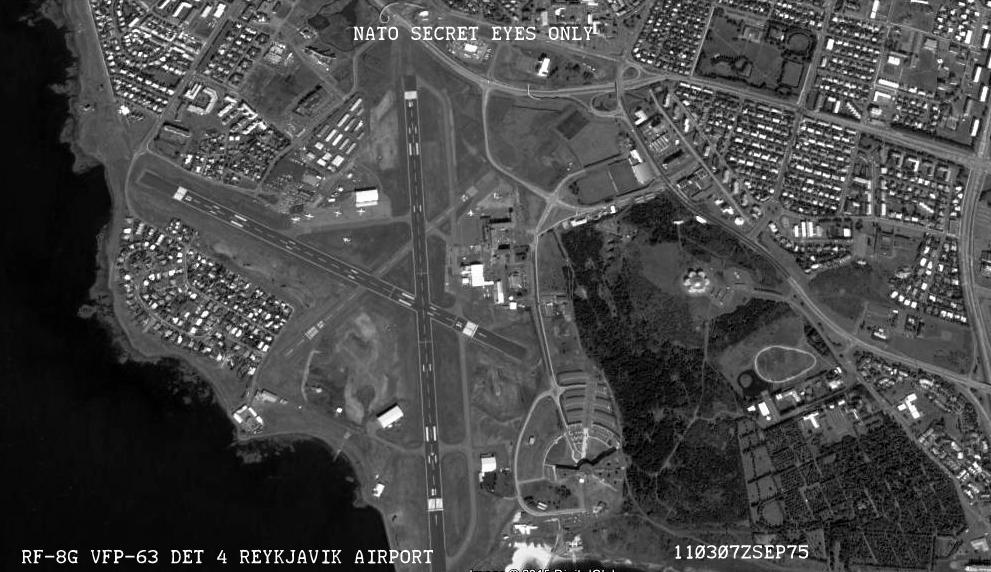 Recon imagery of Reykjavik airportMission
1. B-52Ds to conduct strikes on all runways at Keflavik and Reykjavik.
2. F-105Gs to conduct SEAD on radar and SAM sites.
3. Oriskany CVBG to conduct Alpha Strikes on hangers, fuel depots and ammunition dumps.
Execution
1. Coordinate your "Alpha Strike" with USAF Forces in Greenland to maximum effect for the destruction of Soviet aviation facilities.
2. Oriskany CVBG has the ability to launch two "Alpha Strikes" in two hours, USAF Forces can only manage 1 strike due to limited assets available.
Command and EMCON
Command: USS Oriskany
EMCON: Alpha-limited emissions
September 12, 1975, 020000Z
I suppose I could just wing it and launch everything at Iceland, dealing with any threats as they come, and trust in the invincible might and power of the United States, and the inexhaustible supply of pilots, airmen and sailors, and be confident in victory.
But no. I want to try to do this "right," in the sense that I will plan a coordinated strike (as the mission briefing dictates), and attempt to accomplish the mission with a minimum of casualties. As I have multiple types of aircraft at wildly separated airfields and the Oriskany, I'll have some serious planning to do.
The Air Tasking Order will go something like this:
Recon/Fighter Sweep
38th TRS (4 A/C) (RF-4C Phantom) (Recon)
57th FIS (16 A/C) (F-4C Phantom) (Fighter Sweep)
SEAD (SEAD around Keflavik and Reykjavik, and also the radars stationed around Iceland)
561st TFS (F-105G Thunderchief) (12 A/C) (SEAD)
Runway Strike Package
20th BS (B-52D Stratofortress) (12 A/C) (Strike)
Facility Strike Package (Hangars, Fuel Depots, Ammo Dumps)
VA-153 Blue Tail Flies (A-7B Corsair II) (4 A/C) (SEAD and Buddy Stores)
VA-155 Silver Foxes (A-7B Corsair II) (4 A/C) (Ammo Dumps)
VA-215 Barn Owls (A-7B Corsair II) (4 A/C) (Hangars/Fuel Dumps)
VF-191 Satan's Kittens (F-8J Crusader) (4 A/C) (Strike Escort)
VF-194 Red Lightnings (F-8J Crusader) (4 A/C) (Fleet CAP)
VFP-63 Eyes of the Fleet (1 A/C) (RF-8G Crusader) (Recon/BDA)
I need to plan how long it will take each Flight to reach their targets, and I need to take into account takeoff, forming-up time, re-fueling if necessary, and the cruise speed of each Flight.
Sweep Package
16 F-4C Phantom
8 Flights of 2 a/c
Fuel Consumption
Internal Fuel: 5315kg
2x 370 USG Drop Tank = 18.8min each
1x 600 USG Ddrop Tank = 30.4min
Takeoff: 2min * 118.65kg/min = 237.3kg
Formup: 2min * 63.28kg/min = 126.56kg
Climb to 36k ft: 2min * 56.02kg/min = 112.04kg
Cruise to Tanker location: 475nm at 480kts = 60min * 31.71kg/min = 1902.6kg
Total fuel expended to reach tankers = 2378.5kg
Fuel needed from tankers = 2378.5kg * 16 = 38056kg
30min to top off fuel at tankers : 30min * 25.36kg/min = 760.8kg
On station: 230 miles * 2 = 460nm * 480kts = 57.5min * 31.71kg/min = 1823.3kg
+ 2min Afterburner at 191.92 kg/min = 383.84kg
Total fuel expended to return to tankers: 2207.14kg
Additional fuel expended to return to base: 1902.6kg
Total fuel expended to get home: 4109.74kg
Time to Target
Total time to get over the target: 2min(takeoff) + 2min(form up) +2min(climb) + 60min(to tanker) + 30min(refueling) + 28.75min(on station) = 124.75min.
SEAD Package
12 F-105G Thunderchief
6 Flights of 2 A/C
Fuel Consumption
Internal Fuel: 3180kg
2x 450 USG Drop Tank = 22.8min each
1x 650 USG Drop Tank = 33min
Takeoff: 2min * 103.28kg/min = 206.56kg
Formup: 2min * 48.86kg/min = 97.72kg
Climb to 36k ft: 2min * 37.26kg/min = 74.52kg
Cruise to Tanker location: 475nm at 480kts = 60min * 27.66kg = 1659.6kg
Total fuel expended to reach tankers: 2038.4kg
Fuel needed from tankers = 2038.4kg * 12 = 24460.8kg
30min to top off fuel at tankers: 30min * 22.12kg/min = 663.6kg
To Target and back to tankers
Flight Radar NW: 212nm; 112nm (14min at 480kts) * 27.66kg/min + 100nm (12.5min) * 37.26kg/min + 212nm (26.5min) * 27.66kg/min = 387.24kg + 465.7kg + 733kg = 1585.94kg
Flight Radar NE: 353nm; 253nm (31.6min) * 27.66kg/min + 100nm (12.5min) * 37.26kg/min + 353nm (44.125min) * 27.66kg/min = 874.056kg + 465.7kg + 1220.49kg = 2560.246kg
Flight Radar SE: 422nm; 322nm (40.25min) * 27.66kg/min + 100nm (12.5min) * 37.26kg/min + 422nm (52.75min) * 27.66kg/min = 1113.3kg + 465.7kg + 1459.065kg = 3038.08kg
Flight Radar SW: 340nm; 240nm (30min) * 27.66kg/min + 100nm (12.5min) * 37.26kg/min + 340nm (42.5min) * 27.66kg/min = 829.8kg + 465.7kg + 1175.55kg = 2471.05kg
Flight Reykjavik: 252nm; 152nm (19min) * 27.66kg/min + 100nm (12.5min) * 37.26kg/min + 252nm (31.5min) * 27.66kg/min = 525.54kg + 465.7kg + 871.29kg = 1862.53kg
Flight Keflavik: 243nm; 143nm (17.875min) * 27.66kg/min + 100nm (12.5min) * 37.26kg/min + 243nm (30.375min) * 27.66kg/min = 494.42kg + 465.7kg + 840.17kg = 1800.29kg
Flight Radar SE will have the longest trip, and so will have expended 663.6kg + 3038.08kg = 3701.68kg, so they will be thirsty for fuel on the return leg.
Time to Target
Flight Radar NW: 2min(takeoff) + 2min(form up) +2min(climb) + 60min(to tanker) + 30min(refueling) + 26.5min(on station) = 122.5min.
Flight Radar NE: 2min(takeoff) + 2min(form up) +2min(climb) + 60min(to tanker) + 30min(refueling) + 44.125min(on station) = 140.125min.
Flight Radar SE: 2min(takeoff) + 2min(form up) +2min(climb) + 60min(to tanker) + 30min(refueling) + 52.75min(on station) = 148.75min.
Flight Radar SW: 2min(takeoff) + 2min(form up) +2min(climb) + 60min(to tanker) + 30min(refueling) + 42.5min(on station) = 138.5min.
Flight Reykjavik: 2min(takeoff) + 2min(form up) +2min(climb) + 60min(to tanker) + 30min(refueling) + 31.5min(on station) = 127.5min.
Flight Keflavik: 2min(takeoff) + 2min(form up) +2min(climb) + 60min(to tanker) + 30min(refueling) + 30.375min(on station) = 126.375min.
Fuel required from Tankers: 38056kg + 24460.8kg = 62516.8kg
Each Tanker currently: 70102kg to Bingo fuel; + 2hrs loiter and refueling at 65.31kg/min * 7837.2kg
70102-7837.2 = 62264.8kg fuel available for refueling operations each
Fuel needed for OCA Package = 38056kg (19028kg per tanker)
Fuel needed for SEAD Package = 24460.8kg (12230.4 per tanker)
62264.8kg - 19028kg -12230.4kg = 31005.6kg remaining per tanker after initial refueling operations.
2 hours loiter during mission = 7837.2kg, so will have 31005.6kg - 7837.2kg = 23168.4kg fuel remaining each for any return-leg refueling operations.
Fuel required for both OCA and SEAD flights to return home, assuming all are Bingo fuel = 30min Loiter (refuel) + 60 return leg:
OCA Flight = 760.8kg + 1902.6kg = 2663.4kg * 16 = 42614.4kg
SEAD Flight = 663.6kg + 1659.6kg = 2323.2 * 12 = 27878.4kg
Total Fuel required for return leg (if all a/c are Bingo Fuel) = 70492.8kg
Fuel available from tankers = 31005.6kg * 2 = 62011.2kg
This means I can't refuel everyone on the return leg if there is an emergency and everyone is out of fuel. Therefore I must make sure that my tankers themselves have relief, so I'll need to launch replacement tankers that will be on station when I need them.
Runway Strike Package
The B-52s will not require refueling during the mission, so all that needs to be calculated is their travel time to target.
6 Flights of 2 a/c each
Flight Reykjavik: 730nm at 450kts = 97min + 2min takeoff + 2min form up = 101min
Flight Keflavik: 715nm at 450kts = 95min + 2min takeoff + 2min form up = 99min
Facility Strike Package
The distance to target is only 150-175nm, and the strike radius for my A-7Bs is 425nm (Shrikes), 550nm (Walleyes), 610nm (CBU-59/b APAMs), 600nm (Mk82 Snakeeyes), so I have plenty of fuel for my strikes, so there is little need to do all the fuel calculations.
Target List: Keflavik:
8 A/C Hangars
6 AV Gas Depots
6 Ammo Dumps
Reykjavik:
3 Hangars
3 AV Gas Depots
1 Ammo Shelter
VA-153 Blue Tail Flies (A-7B Corsair II) (4 A/C) (SEAD and Buddy Stores)
VA-155 Silver Foxes (A-7B Corsair II) (4 A/C) (Ammo Dumps)
VA-215 Barn Owls (A-7B Corsair II) (4 A/C) (Hangars/Fuel Dumps)
All flights will require 2min (takeoff) + 2min (formup) +
150nm to target at 415kts = 21.6min (Keflavik) = 25.6min total
172nm to target at 415kts = 24.9min (Reykjavik) = 28.9min total
So I have information on my own strike packages now, so now I need to think about threats.
They have MiG-23 Floggers, which have radar-guided missiles, so they will be the primary target of my F-4C Phantoms.
SAMs and AAA include the following:
SA-6 Gainful (15nm max range, SARH)
SA-7 Grail (10nm max range, IR)
SA-9 Gaskin (19nm max range, IR)
ZSU-23 (0.3nm max range, AAA)
Most of these assets will be around Keflavik and Reykjavik, and the SA-6 is the only radar guided SAMs, so I'll have to take those out with my Shrikes; the others I'm mostly just going to have to deal with as they come.
Beyond that, there's are surface and subsurface threats to think about. I will set up the standard ASW patrols around my CVBG, and keep my eyes open for surface threats.
So the next thing to deal with is planning out each strike so that they arrive in the proper order.
So a more detailed tasking order is now as follows:
Air Tasking Order (ATO)
0200Z
Oriskany
AEW RVAW-110 Det. (1 A/C)
CAP VF-194 Red Lightnings (2 Flights of 2 A/C)
Sondrestrom
Sweep 57th FIS (F-4C Phantom) (16 A/C) (TOT: 0405Z (1st Flight) 0437Z (Last Flight)
Thule
AEW 960th AEWCS
334th ARS (2 A/C)
0235Z Sondrestrom (Flight Rebel 19)
SEAD 561st TFS (F-105G Thunderchief) (2 A/C) (Flight Radar SE) (TOT: 0512Z)
0237Z Sondrestrom (Flight Quest 94))
SEAD 561st TFS (F-105G Thunderchief) (2 A/C) (Flight Radar NE) (TOT: 0457Z)
0239Z Sondrestrom (Flight Poker 41)
SEAD 561st TFS (F-105G Thunderchief) (2 A/C) (Flight Radar SW) (TOT: 0457Z)
0241Z Sondrestrom (Flight Killer 79))
SEAD 561st TFS (F-105G Thunderchief) (2 A/C) (Flight Radar Reykjavik) (TOT: 0448Z)
0243Z Sondrestrom (Flight Jimmy 10)
SEAD 561st TFS (F-105G Thunderchief) (2 A/C) (Flight Radar Keflavik) (TOT: 0449Z)
0245Z Sondrestrom (Flight Wild 45)
SEAD 561st TFS (F-105G Thunderchief) (2 A/C) (Flight Radar NW) (TOT: 0447Z)
0319Z Sondrestrom (Flight Speed 6)
20th BS (B-52D Stratofortress) (3 A/C) (Strike) Flight Reykjavik 1 (TOT: 0500Z)
0325Z Sondrestrom (Flight Hydra 85)
20th BS (B-52D Stratofortress) (3 A/C) (Strike) Flight Keflavik 1 (TOT: 0504Z)
0331Z Sondrestrom (Flight Shark 24)
20th BS (B-52D Stratofortress) (3 A/C) (Strike) Flight Reykjavik 2 (TOT: 0512Z)
0337Z Sondrestrom (Flight Lancer 80)
20th BS (B-52D Stratofortress) (3 A/C) (Strike) Flight Keflavik 2 (TOT: 0516Z)
0425Z Oriskany
VF-191 Satan's Kittens (F-8J Crusader) (4 A/C) (Strike Escort) (TOT: 0452Z)
0429Z Oriskany
VA-153 Blue Tail Flies (A-7B Corsair II) (4 A/C) (SEAD and Buddy Stores) (TOT: 0456Z)
0500Z Oriskany
VA-155 Silver Foxes (A-7B Corsair II) (4 A/C) (Ammo Dumps) (TOT: 0527Z)
0504Z Oriskany
VA-215 Barn Owls (A-7B Corsair II) (4 A/C) (Hangars/Fuel Dumps) (TOT: 0531Z)
(Follow-up Strike)
0508Z Oriskany
VF-191 Satan's Kittens (F-8J Crusader) (4 A/C) (Strike Escort) (TOT: 0537Z)
0512Z Oriskany
VA-153 Blue Tail Flies (A-7B Corsair II) (4 A/C) (SEAD and Buddy Stores) (TOT: 0541Z)
0516Z Oriskany
VA-155 Silver Foxes (A-7B Corsair II) (4 A/C) (Ammo Dumps) (TOT: 0545Z)
0520Z Oriskany
VA-215 Barn Owls (A-7B Corsair II) (4 A/C) (Hangars/Fuel Dumps) (TOT: 0549Z)
Looking at this ATO, from 0405Z to 0600Z, things are going to be very busy over Iceland. My Times on Target are estimates; we'll see how this plays out in practice and see how well my planning was.
That's enough planning...now I need to set up the missions, and execute.
To be continued...
June 21, 2017
COMMAND: Northern Inferno Scenario 6: The Grey Ghost from the East Coast
IntroductionReminiscent of WW2, two Soviet Sverdlov-class cruisers have been sighted by neutral shipping transiting through the Denmark Straits and are hell-bent on getting into NATO's shipping lanes for some commerce raiding. Keflavik airfield has sustained heavy bombing by Badgers launching heavy missiles at the airfield facilities, so no land based recon / surveillance is available at present. The majority of the radar sites in the vicinity have been destroyed, as well as the local SOSUS station. USS Newport News, "the Grey Ghost from the East Coast" (a name she was given during the Vietnam War), is the last 8"-gunned cruiser in service in the US Navy. She was due to decommission in June 1975 but due to tensions increasing in Soviet and NATO relations, and of course with the outbreak of war, her mothballing was postponed. She has now deployed to counter the Sverdlov threat, her escorts a mixture of old and new. Her task: to seek and destroy the Soviet cruisers and their escorts.
Can the Grey Ghost and her group stand up to the Soviet raiding party?
Situation
Two Sverdlov cruiser groups have sortied into the Atlantic, and present a threat to unescorted merchant shipping. The only NATO "heavies" in the area is the Newport News cruiser/destroyer group which was until recently on a NFR (Naval Fleet Reserve) training cruise.
Air assets are limited to shipborne helicopters from your escorts, and aircraft deployed in Greenland.
Enemy Forces Two Sverdlov cruisers, Kotlin, Skory, SAM Kotlin and Kashin destroyers with associated tanker support.
Submarine and air threat is assessed as unknown, so expect some possible visitors.
Friendly Forces
TU 20.01 : USS Newport News CA, USS Henry B.Wilson DDG, USS Manley DD.
TU 20.02 DESRON 28 NFR : USS Cone DD, USS Mullinnix DD, USS Myles C. Fox DD, USS Vogelgesang DD.
Sondrestrom Air Base : VP-26 Dragons (P-3B Orion) Thule Air Base : 960th AEWCS (EC-121H Warning Star)
Mission
Seek out and destroy the Soviet cruiser forces. The Sverdlovs are your highest priority.
Execution
Using air assets to good use, conduct a sweeping search of the area and engage all detected hostiles with your surface units.
Command and EMCON
Command: USS Newport News
EMCON: Alpha-limited emissions
 Initial positions in the Denmark Strait120300Z I set up air patrols using P-3Bs from Sondestrom, Warning Stars from Thule, and Newport News’s Sea Sprite. I also set both Task Units on patrols as well.
  USS Newport News122016Z Contact. The Sea Sprite detects a surface contact.
 122615Z A new airborne contact is detected, which is soon IDed as a Ka-25Ts Hormone B. The Sea Sprite, after confirming that the first surface contact is not a threat, heads to investigate.
The second airborne contact is a Ka-25BSh Hormone A. Both contacts converge on the Newport News.
 Contacts125250Z Henry B. Wilson fires SAMs at one of the helos. It takes 5 RIM-66A SM-1MR Blk IVs, but the helo (Ka-25Ts Hormone B) is finally shot down. The second helo closes in, apparently oblivious to the danger.
 Henry B. Wilson launches SAMs at the inbound helos130000Z Henry B. Wilson fires at the second helo.
130131Z Contact. Newport News detects a surface contact--probably the source of one of the helos.
The Sea Sprite heads to investigate, but I will be more judicious in its approach.
130304Z Again, it takes five SAMs to shoot down the second helo.
Three surface contacts now. And then another.
 Multiple surface contacts131131Z Multiple surface contacts, and now a submarine contact. Just what I needed. The subsurface contact cannot be friendly, so I mark it hostile immediately.
 Two surface groups and a submarine contact...141047Z Crap. Another submarine contact. What is this? The second contact is IDed as an SSN. The P-3B Orion is approaching, and I intend to drop a lot of sonobuoys soon…
 141703Z The SSN is IDed as an PLA-627A November [Kit]. It’s travelling at 30 kts, which is crazy.
142436Z I pinpoint the November with sonobuoys, and Manley fires an ASROC. The November was moving at flank speed, but now has dropped to 15 kts, and is apparently sailing in circles.
The ASROC lands too far away, so the Henry B. Wilson fires one.
 USS Henry B. WilsonIn the meantime, I wasn’t paying attention, and my AEWCS Warning Star flies too close to one of the surface groups and is fired upon. Great.
 My Warning Star gets too daring for its own good142702Z It is shot down.
The third ASROC is fired, and this one lands close enough to attack. The torpedo hits, 50% penetration. Henry B. Wilson fires again, and sinks the November. Whew.
150339Z Christ...the goblin is determined to be Biologics. Insane. Manley goes to full and moves to rendezvous with Newport News.
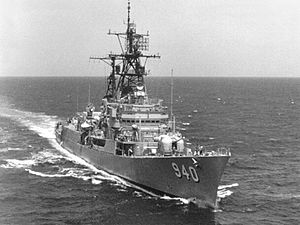 USS ManleyI try some maneuvering to isolate one enemy group from the other, but it proves difficult. As I see them launch a helo, I decide to charge in with both of my groups. There is an enemy sub in the area, so I will have to be careful.
 Never mind the maneuvers, just go straight at them!161530Z Henry B. Wilson shoots down another Hormone.
161601Z Vampire! The fix the Hormone got before it was shot down must have been good enough for a missile launch. Incoming ASM!
Another vampire!
Henry B. Wilson fires SAMs at the inbounds. Fortunately the shots are accurate and both inbound Styx missiles are shot down. In the meantime, the P-3B Orion launches Mavericks at the ships in this group. None of them are IDed as a CL, so both must be in the other group.
The P-3B is shot down, but manages to hit two of the ships, the Altay and the Byvaly.
Henry B. Wilson fires on the second wave of Styx, and takes them out, expending 6 missiles. It has 18 SAMs left.
 Taking out inbound SAMs164114Z The battle lines are drawn.
 The battle lines are drawn164526Z Torpedo in the water!
 164550Z USS Manley opens fire on the nearest vessel, the Oberegayuschiy.
Torpedo in the water! It looks like the Oberegayuschiy launched torpedoes ahead of it, potentially unguided.
 Soon after Manley opens fire, torpedoes are detectedNope, definitely guided.
Manley sends splashes all around Oberegayuschiy, then hits 3 times. A spread of torpedoes is detected leaving the Sverdlovs, which have been identified as the Murmansk and the Aleksandr Nevskiy.
Newport News, Henry B. Wilson, and Mullinnix all open fire on the Oberegayuschiy.
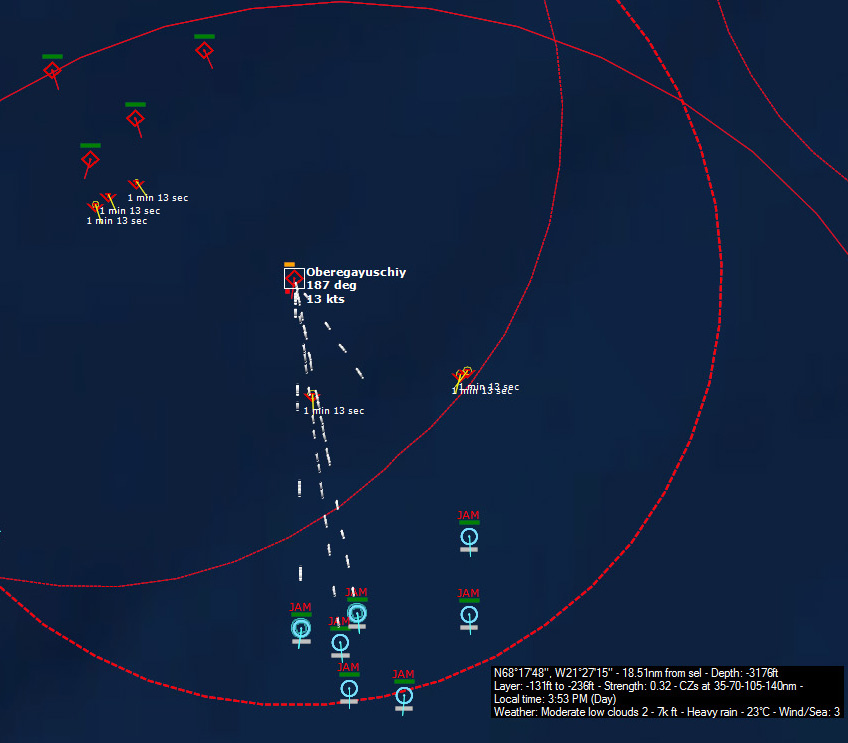 The American ships gang up on Oberegayuschiy
The torpedoes run out of energy, so the American ships turn around for another go. Newport News gets within range of the Oberegayuschiy and sinks her.
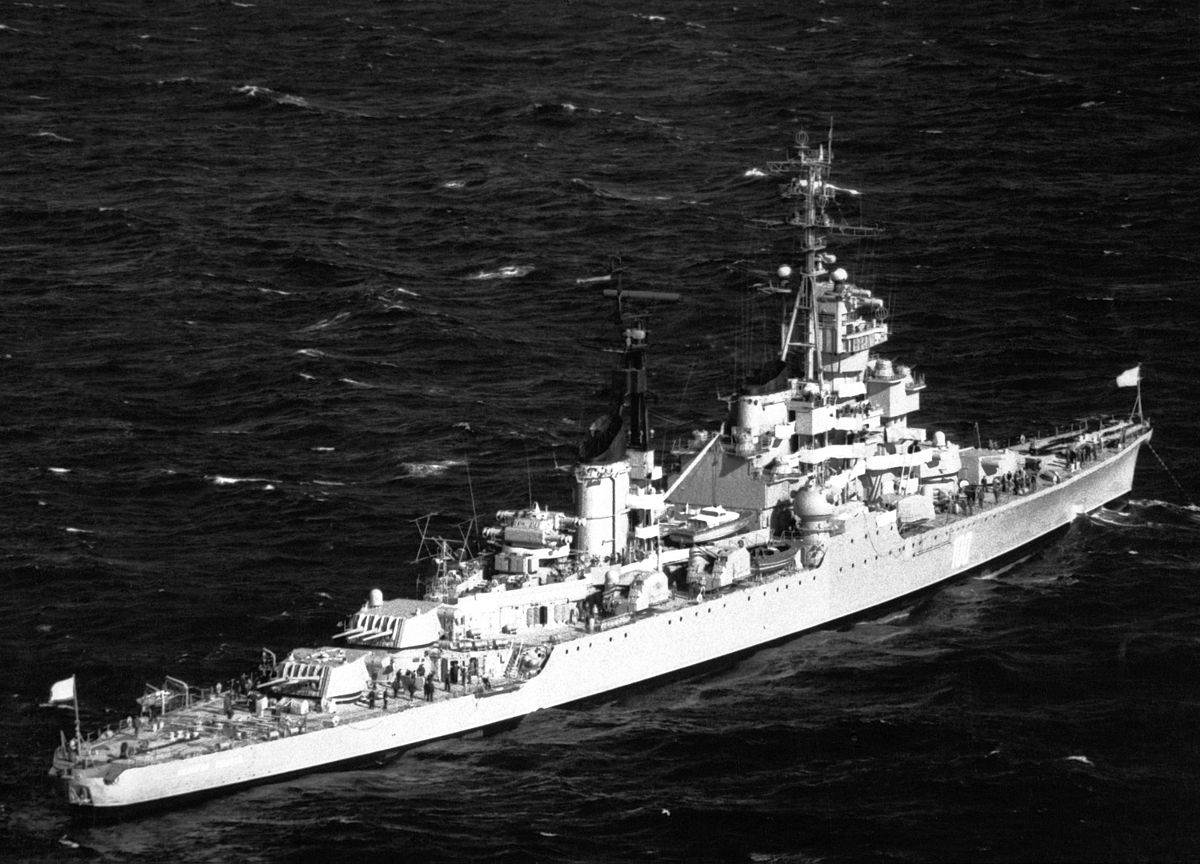 Sverdlov-class cruiser171917Z Newport News opens fire on the Aleksandr Nevskiy.
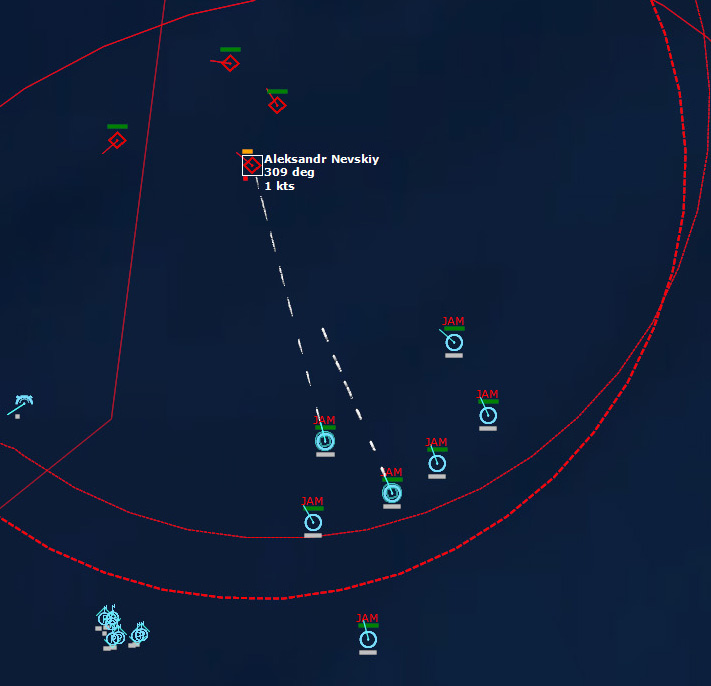 Firing on Aleksandr NevskiyNewport News pounds the Nevskiy, without any retaliation whatsoever.
173441Z Newport News fires upon Murmansk as well.
173726Z Alesandr Nevskiy is sunk. All ships turn their attention to Murmansk.
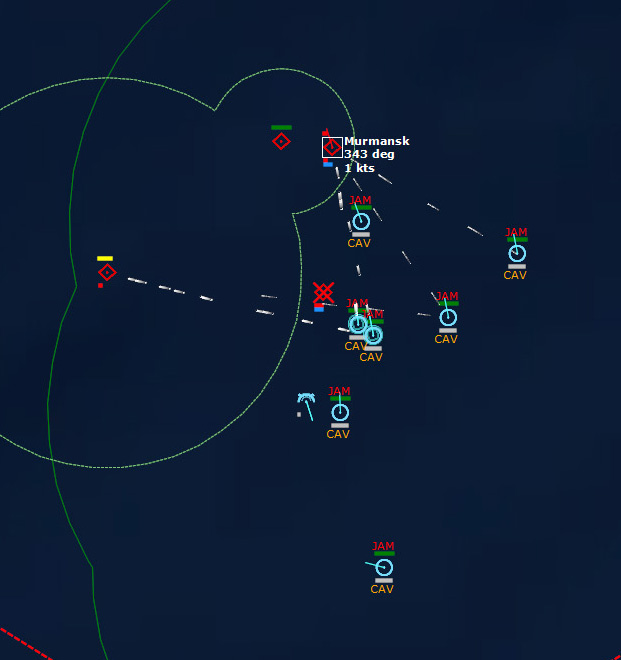 With the Aleksandr Nevskiy sunk, it's time to focus on MurmanskOstryy puts up the only resistance, firing its 57mm gun against the Manley, rather ineffectively.
The Murmansk opens fire on the Myles C. Fox, lightly damaging her. As the US ships close in, a few are very lightly damaged, but then the Newport News sinks the Murmansk at point blank range.
SIDE: Soviet Union ===========================================================
LOSSES:
-------------------------------
2x Ka-25Ts Hormone B
1x Ka-25BSh Hormone A
1x PLA-627A November [Kit]
1x EM Skoryy Mod [Pr.31 Besshumny]
2x KR Sverdlov [Pr.68bis]
EXPENDITURES:
------------------
5x SA-N-1b Goa [M-1M/P Volna-M/P, 4K91 / V-601]
2x Generic Acoustic Decoy
4x SS-N-2c Improved Styx [P-15M]
4x 130mm/58 Twin HE Burst [2 rnds]
27x 45mm/85 Quad Burst [8 rnds]
6x 53-65K WH 211x 57mm/81 ZIF-71 Quad DP [6 rnds]
25x 100mm/70 Twin HE Burst [2 rnds]
36x 37mm/63 Twin Burst [20 rnds]
SIDE: NATO
===========================================================
LOSSES:
-------------------------------
1x EC-121 K Warning Star 1x P-3B Orion
EXPENDITURES:
------------------
22x RIM-66A SM-1MR Blk IV
9x AN/SSQ-41B Jezebel LOFAR
15x AN/SSQ-47 Julie Active Range-Only
4x RUR-5A Mod 4 ASROC RTT [Mk46 Mod 2]
1x Mk46 LWT Mod 2
2x AGM-65B Maverick EO
470x 127mm/54 HE-CVT [HiFrag]
354x 127mm/54 HE-PD [HiCap]
354x 127mm/54 WP
455x 203mm/55 Triple
1657x 127mm/38 Twin HE-PD Burst [HiCap, 2 rnds]
468x 76mm/50 Twin HE Burst [2 rnds]
SIDE: Biological
===========================================================
LOSSES:
-------------------------------
1x Biologic Tuna Fishes
EXPENDITURES:
------------------
SIDE: Neutral Shipping ===========================================================
LOSSES:
-------------------------------
EXPENDITURES:
------------------


![[image error]](https://3.bp.blogspot.com/-vn5LHyrJcLs/WWBMF6JTCrI/AAAAAAAAiIA/8F2HBBXnFq4CQuyYU79Xpcwc8hVSA5pKgCLcBGAs/s1600/20170520_112529.jpg)
![[image error]](https://2.bp.blogspot.com/-2vBvAqcK9gs/WWBNIR_szdI/AAAAAAAAiIM/GRRoa4QIfLEIrBqSisQ0-MvlAIlLACVwwCLcBGAs/s1600/20170520_163031.jpg)
![[image error]](https://3.bp.blogspot.com/-NhZ50cN1LCg/WWBNmwuXArI/AAAAAAAAiIY/eCDSKL-dj9Ikvpjr4ta7YOB2XDn8XLaIQCLcBGAs/s1600/18582176_10100482635845750_3507137087523845340_n.jpg)