
Mike Vardy's Blog, page 89
March 9, 2015
Get Some Pomodoro Power
Are you one of those people who takes a look at the projects you currently have in progress and wonder how on earth you are going to work your way through them? Do you find yourself looking at your to do list and deferring projects into the future on a regular basis.
I hear you, I promise.
I’m managing a large number of projects at the moment, both domestic and business-related, that cannot be allowed to stagnate. The hats I wear are as follows:
I’m an IT contractor (ideally full-time but that’s not always the case) I write for my own website at SoliamSays.com I create content for Productivityist as well (helping out with Productivityist Coaching is on the horizon there, too) I’m studying for professional IT certifications I study productivity religiously with the 50,000 feet view to changing careers I’m a husband I’m father to three daughters I’m a homeownerAll of this means I regularly have many projects on the go at once.
We have all been in the situation where we will dedicate ourselves to a particular project, enjoy the pleasure and euphoria that surrounds getting it completed, only to have that bubble burst by the realisation that you have neglected to work on something else that has now reached an equal, if not higher level of importance. You then start working on that, yet cannot throw yourself into it fully, as the fear is always in the back of your mind that there is something else you should be doing, something that has a greater significance.
And so the snake begins to eat itself.
In order to manage this situation, I rely on two things (and regular readers of my blog will be raising their eyebrows, saying “I know already – just get to them”) and they are OmniFocus and The Pomodoro Technique.
What Is It?
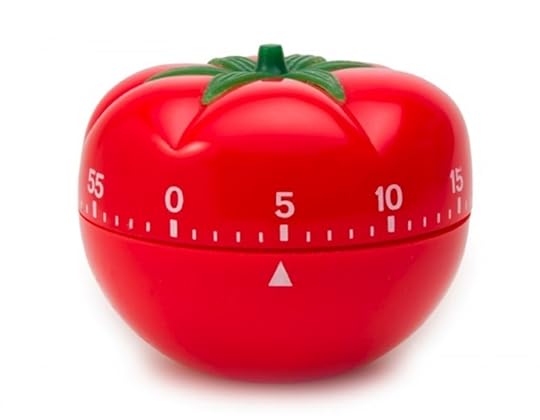
The Pomodoro Technique was created by Francesco Cirillo during the late 1980’s. Strange title, I know! It is named after the small tomato-shaped timer that was first used by Cirillo when he was a university student. It works on the principle that frequent breaks will increase mental agility.
I’ve been a long time admirer and user of The Pomodoro Technique. In essence, if you decide to utilise it, you are going to break down your day into half hour chunks, or ‘pomorodos’. A pomodoro consists of twenty-five minutes focused work followed by a five-minute break. That break can be filled with whatever action you like. Being a caffeine addict, my five minutes is usually filled with stretching my legs while I put on another brew.
The amount of work that can be completed in that pomodoro is quite staggering, especially the first time you complete one. With my MacBook on Do Not Disturb, my phone set to only allow calls from VIPs and my Zen Spotify playlists cranked up, I can achieve in one pomodoro what could ordinarily take me a couple of hours, especially if I work in an office environment.
There are times when it doesn’t suit. For example, when I’m working on a consultation at a client site, I can’t expect them to fit in with my ‘alternative’ work regime. They are a customer and I need to do what I can to keep them. No, The Pomodoro Technique comes into play for me when I am at home and I have a direct influence on my surroundings, both animal and mineral.
Right now, The Pomodoro Technique is going into overdrive for me due to the sheer scope of my workload – and I think that is where it actually comes into its own. This is how I am working:
Find out what’s going on
Firstly, everything that you have going on at the moment needs to be collected. The whole lot. Every deliverable you know that you have an obligation to deliver needs to be extracted from that spaghetti junction you call a brain and laid out either on paper or digitally.
Identify
Next, work out that next action that needs to be taken in order to move the project on. This could be anything from responding to an email, researching the contents of a website or making a phone call.
Rinse and repeat, rinse and repeat, for all of your projects, just work out what you need to do to move that project on. All of a sudden you will enjoy a brief moment of clarity. Where you used to see a brick wall, you now actually see past that next task and you can envisage a path to the project’s completion. Once you have this vision, write down what needs to be done, calculate what those actions are going to be.
That’s very much entrenched within the Getting Things Done methodology created by David Allen and I live by this approach because it has proven itself to me.
Pomodoro Power
Once you have the actions within your project defined, you are in a position to define your pomodoro chunks and let rip with your Pomodoro Power. Circumstance permitting, I will try to spend at least one, twenty-five minute period, moving each of those projects forward.
Admittedly there are times when you have you have to prioritize one over another, however, no system is completely foolproof and in my current situation, this definitely works a treat. It is so much easier to squeeze a twenty-five minute session related to a project into your evening, for example, then to tell yourself you are going to work on a project, only to procrastinate because you don’t have any idea how to really move it forward. Twenty-five minutes is just long enough to get some excellent results without growing bored with the task you are doing.
Being able to work this way makes me happy, safe in the knowledge that the most important areas in my life are being progressed. As said, it doesn’t suit everybody but that is what makes the world of productivity so interesting and exciting – there are methodologies and ways of working for everyone, you just have to find them.
The post Get Some Pomodoro Power appeared first on Productivityist.


March 6, 2015
Why Small Wins Can Make Or Break Your Productivity
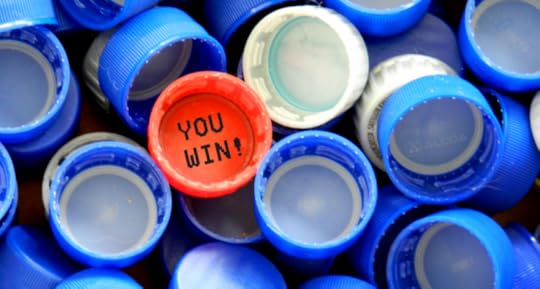
One of the reasons productivity experts suggest that you break down tasks into their smallest components is so that you can wrap your head around them better, allocate the proper amount of time to deliver quality results, and complete them in a way that allows the large task (which is, in reality, a project) to be completed in stages. You make measured progress with every small task you complete, and that is what gives you the small win. These small wins give you that boost of confidence that you’re making forward progress, which is essential if you want to perform at a high level. Working on tasks that are both big and small allow you to shift gears based on your energy levels and resources available, which means you can make measurable progress that is consistent. Essentially, by garnering small wins and larger wins, you are doing both quantitative and qualitative work.
Too often we focus on the big stuff that we’re trying to get done. When we come up short, we give ourselves a hard time. I’m not suggesting that you shouldn’t strive to achieve on a high level, but what I am suggesting is that you step back and celebrate the small wins because they go a lot further than you’d think in making or breaking your overall productivity and performance.
But you need to make sure that you don’t constantly seek small wins because on their own they can slow your productivity to a crawl.
Email inboxes are filled with small wins. Every time you check or send an email, you are doing something. Often that something is very small, but it is something. So it’s a win – and a small win at that. If you were to spend all of your time in email you could rack up a ton of small wins…but the price of those wins could be costly. Sure, you’ve achieved “Inbox Zero” (a term that has been co-opted and corrupted from what it originally meant) but other larger tasks were left by the wayside along the way.
Why? Because the road to victory with those tasks was much longer and not nearly as frictionless. Email is a hotbed of small wins, but if you do nothing but spend all of your time there (or keep it close at hand with automatic notifications and the like) then you’ll have a much tougher time putting the bigger wins to bed.
When it comes to professional sports, there are going to be elite teams and there are going to be the also-rans. But even the elite teams can get beat if they don’t execute the fundamentals every game and play at their best. The also-rans can come in and steal one on them – and they often do. You don’t want to be an also-ran. You want to be elite. You want to make sure you play the game with a balanced approach, able to handle whatever comes at you at all times. When an elite team plays a lesser team, it’s expected that the elite team will win. When they play another elite team, it’s expected that both teams will be challenged and whoever plays better and catches the most breaks will come out on top. Execution is the key in both instances. Doing the small and big stuff…and doing it well.
Go for the small wins but don’t use up all of your energy on getting them. Save some for the big wins. In fact, go after one big win before even seeking out small wins. That’s what will make you an elite player, allowing you to deliver better overall productivity and performance every single day.
The post Why Small Wins Can Make Or Break Your Productivity appeared first on Productivityist.


March 4, 2015
Review – BusyContacts for OS X
The Contacts application in OS X has been largely ridiculed by users and reviewers alike for a long time now. It has been accused of being clunky, outdated and technically deficient with synchronisation problems being reported far more often than Apple would like. Even with the visual improvements made in Yosemite, the synchronisation problems have left people in general looking for alternatives.
Well, just as they gave us an alternative to the Calendar application with BusyCal, those talented individuals at BusyMac have gone and cracked it again with the release of BusyContacts.
So what have they been able to feature in this release that sets it above the competition?
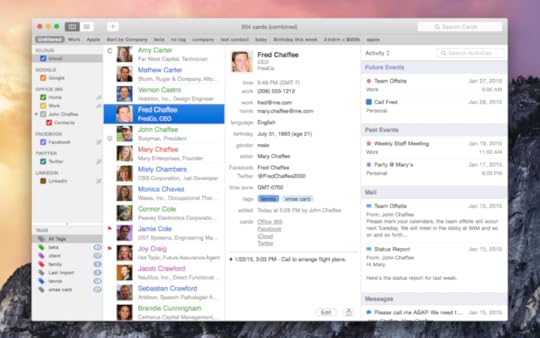
Smart Filters – I love Smart Mailboxes in the native Mail client which means I adore Smart Filters in BusyContacts. You can filter contacts, create saved searches and save your own customisable views. Tags – Some people love tags, others cannot abide them. I fall into the former category. You can colour, group and filter contacts with the use of tags, splitting them into family, work, company groups etc. Activity List – I’m so impressed with this part. In Card View, the right-hand pane will show all activity with this contact. Calendar information, recent emails and messages are all available to be seen and you can filter these to your liking. In List View, the pane moves to the bottom right-hand corner of the screen.

When you open the application for the first time, users of BusyCal will be very familiar with the interface. BusyMac have stuck with a format that works. It’s got to be easy on the eye to make people want to dive into it and they’ve achieved that. All available contact lists are on the left-hand side. These lists are populated automatically based on the current configuration in System Preferences -> Internet Accounts. If you have Contacts configured to sync there, they will appear as an option by default in BusyContacts. You can, of course, add more accounts via the Accounts section in the Preferences pane.
The level to which you can customise the columns and fields that are being presented is really quite impressive. The option is also there for you to create up to ten custom columns which again, lends itself very nicely to being integrated as a CRM application.

Backing up the database is automatic and configurable via the preference pane. Simply choose location, frequency and number of backups to keep and you are off and running.
For those looking to collaborate with these address books, BusyContacts also allows you to share address books with read/write privileges or read-only through Exchange and other CardDAV servers.
BusyContacts has been in development for a long time, with the public beta announced last summer. Quite simply, it shows. BusyContacts is a lesson for all developers who feel the need to get their product out of the door as quickly as possible. It oozes both care and class with every feature you see and after the critical success of BusyCal, BusyMac have another winner with BusyContacts.
It’s not cheap, that’s for sure. Currently $49.99 on it’s own, although if you are a BusyCal customer you can get it for $29.99 (both together for $79.98 but I’m sure you can do that math). It’s worth every cent though in my mind, no question.
BusyMac has conquered the Calendar and Contacts market for OS X. I’m excited because I think there is definitely scope for scalability with how these applications can work together to give us a different level of service. There is a real potential for these products to be used as a CRM tool for small businesses with a few extra features installed and it would be interesting to know if this is a direction BusyMac are looking towards.
When the native Calendar app was criticised on OS X, we had BusyCal. When Contacts was under scrutiny, we received BusyContacts.
What I wouldn’t give for BusyMail!
BusyContacts is available here.
The post Review – BusyContacts for OS X appeared first on Productivityist.


March 2, 2015
Choose Your Conventions Wisely

I ran on the treadmill for an hour. Why did I stopped at the hour mark? Because that’s when the treadmill stopped the workout. If a workout was for seventy minutes, I probably would have gone that long. I also could have turned it on again. The only thing that stopped me from running more was my convention.
Conventions are all around us, and something we’ve highlighted here in the Cookie Method of Productivity post, but it’s worth a deeper look to set up and think about. Conventions will guide our actions and rather than not choose any conventions, we can choose conventions to guide us in the right direction. Good conventions will eliminate a choice and bring focus to one thing.
 This idea isn’t new, The Pomodoro Technique is one example of why this works. Pomodoro is Italian for tomato and the technique comes from the Italian tomato timer that you can set.
Most suggest setting it for 22 minutes and working head down on central work during that time. This number works well because it’s an amount of time most people can spend on deep thinking, but it works for another reason too, it’s on the timer.
It could be 21 or 23 minutes just as easily. For some people it will be longer for a project at work or writing a piece of fan fiction. For other people and other situations it will be shorter, like when you are learning something new. The time doesn’t matter in absolute terms, it matters in relative ones – what convention helps you do your best work? Here’s three ideas to start building your own conventions.
Begin with the end in mind. This Steven Covey wisdom is just as true here as anywhere else. If you are trying to write a book, then the 22-minute pomodoro technique may not be a good fit. New York Times Bestselling author A.J. Jacobs said that it takes him thirty minutes just to get warmed up for writing. His convention is to write something – anything – for that amount of time and after that start on what he really wants to get done.
For my run on the treadmill, one hour was a bit of a poor choice. My ultimate goal is training for an upcoming marathon and I need to run a certain number of miles rather than a certain number of minutes.
Begin to experiment. Rachel Aaron wrote a wonderful little book about writing more where she began question when she did her best writing. She “embraced her inner geek” and began to fill out spreadsheets that included when, where, and how much she wrote. She soon figured out that her best time wasn’t in the morning, but was in the afternoon, at a coffee shop, and for more than three hours at a time.
For Aaron, the work was asymmetrical. Her first hour yielded 100 words, her second 250 words, her third 550 words. The more she worked, the more work she got done – up to a point. Aaron couldn’t write for 12 hours at a rate of 20,000 words per hour, but she only found this change in output by experimentation. Her convention became to set up in a coffee shop in the afternoon with her wi-fi turned off.
Remember that all solutions are custom solutions. The internet is great for giving advice, especially with number involved. 10,000 hours, 22 minutes, inbox 0, 9 tips for a better, more productive, happier, enthusiastic, fulfilling life. Whew. Remember that conventions have to be customized to be correct. There’s nothing that works all the time for everyone. Even here, where we feature app reviews, we don’t think you need all these apps. The only apps you need are the ones that make your best conventions for working in.
Setting up good conventions will go a long way to getting better work done.
Let me know in the comments what conventions you use to be most productive.
Updated 3/2. The original post listed David Allen rather than Steven Covey.
The post Choose Your Conventions Wisely appeared first on Productivityist.


CommentsThanks. Had DA book on my desk and confused them. Post is ... by Mike Dariano“Begin with the end in mind” is something Stephen Covey has ... by Khürt L. Williams
February 27, 2015
How Preparing For Vacation Can Lead To A Proactive Life
I’ve spent the last couple of weeks planning for an extended vacation with my family. This is the first time in over four years that we’re doing something this big (or extended) and it’s the first time I’ve taken any sort of vacation since starting to work for myself.
It’s a bit nerve-wracking.
But I need the time away and I need it to be restful, so I knew I had plenty to do beforehand that would allow me to really take the time off and enjoy the trip with my wife, children, and extended family. What I didn’t realize at first is that the preparation for this trip would lead me down the path to a more proactive life in general.
Looking AheadI sat down and took a look at all of the things we do here at Productivityist and what would need to be done in advance in order for me to take two full weeks off. When I first examined everything, here’s what I came up with:
10 blog posts 2 newsletters 2 podcastsThe first item started at me right in the face. Ten blog posts is a lot. I didn’t think it would be possible to get them done along with everything else and deal with any Productivityist Coaching clients during the time leading up to vacation. Even with the help from additional contributors I didn’t think it was going to be done well…if achievable at all.
So I decided to examine something different.
I looked at how Productivityist could deliver quality content 5 days a week and not overtax itself in the process. I also knew that we were all working on other offerings that could progress much faster if we scaled down the blog post frequency. Then I looked at what other sites with blogs were doing in terms of posting frequency, especially those that also offered other types of content such as podcasts and newsletters.
That’s when I came up with a new content strategy. One that wouldn’t just help me properly prepare for time away from Productivityist, but also allow for growth and scale to happen in other areas of the business. Here’s what I came up with:
Monday: Blog post Tuesday: Podcast Wednesday: Blog post Thursday: Newsletter Friday: Blog postThis new strategy is far more achievable, and also allows for content to be delivered in some form or another every weekday. We also discussed the idea of making Wednesday a “review post” of sorts, which is what we’ve been delivering the past few weeks. This theming of days falls in line with how I like to work anyway, so I’m all for it.
Now my workload before leaving on vacation looks like this:
6 blog posts 2 podcasts 2 newslettersTo be fair, I’ll only have to write two blog posts as the remainder will be written by some of the other contributors. Amy (my assistant) knows when these posts are supposed to be scheduled, so she’s on top of that. So once I’ve written those two blog posts, my work on the blog portion of Productivityist is done.
Getting AheadI know I will probably write some stuff while away. I’m a writer first and foremost, so while I won’t feel the pull of the “Publish” button as much, I’ll still get some ideas out of my head and into something more tangible. In fact, by doing so I’ll be proactive as I have two weeks’ worth of posts already set to go. Frankly, I like that idea. So I’ll keep doing my best to stay that far ahead of the curve going forward.
One podcast episode has already been recorded. All that needs doing is the editing, which is on my plate this time around. The second episode won’t take as long to put together, and it will be recorded two days before we leave. So the plan is to edit the first episode before I record the second, and then have both ready and waiting to publish two days prior to my departure.
The newsletters are another matter altogether. Why?
Because I’m not doing them.
In the newsletter that went out this week I explained in a callout text box that I’ll be away for the next two weeks so the newsletter will be on hiatus until I get back. I knew that with the time I had at my disposal that the quality of these newsletters might be compromised, so rather than ship them I am going to take a break from them. I know doing so will benefit everyone involved.
So my workload is now down to two podcast episodes, which will be in the can and ready to go right before I leave. And I already have the episode for the week when I return recorded, so editing it when I get back isn’t going to put me too far out. Plus, I’ve got interviews lined up and episodes already in the works through to the end of April as a result of this vacation preparation.
The last thing I’ll do before leaving is email any clients, letting them know I’ll be away. I’ll also set up AwayFind on my email accounts to indicate when I’ll return, giving myself a gap day or two to settle in when I return.
Staying AheadI’m living more proactively and that means I’ve tailored my task apps, Todoist and Asana, to fit that lifestyle as well. My filters in Todoist are now showing me tasks in my different modes (writing, planning, etc.) 30 days out. I’ve got projects lined up in Asana for the Productivityist team that only existed as ideas in Evernote until recently.
So by looking ahead I was able to adjust what I needed to do, really honed honed in on what ought I to do, and set myself up for the things I want to do down the line. Clearly these things are going to be different for you, but when you break down the “need to do” stuff in advance and do it, then the stuff you ought to do gets clarified (either you do it or you don’t). This practice allows you to ultimately do the things you want to do – whether it is enjoy a restful vacation, write that book (or those books) you’ve been meaning to get to, or anything else that has been cast aside because you weren’t proactive enough to give them the time and space they needed.
My Small Sabbaticals set the tone for all of these things initially, but this vacation preparation – knowing I’ll be away for two weeks – took everything to a whole new level.
And it’s a level I’m absolutely loving because it gives me more time, more freedom, and more of everything else I enjoy.
What steps have you taken before going on vacation to make sure you have a restful time while away and a less stressful time when you return? I’d love to hear what you do in the comments below.
The post How Preparing For Vacation Can Lead To A Proactive Life appeared first on Productivityist.


February 25, 2015
Review – Mail Pilot 2 for iOS
Mail Pilot has been a popular email management application since it was released as a Kickstarter web application in September 2012. It is the brainchild of Alexander Obenauer and Joshua Miles who wanted to find a way of being able to reimagine how email is handled within our modern workflows and uses. It has evolved gradually since then and is now available on all of our Apple devices.
This month marks the introduction of Mail Pilot 2 on iOS and I have been using it regularly since release in order to try to give it the most complete review possible. Email is incredibly important to me because, try as I might, I cannot escape the fact that it seems to be integral to my communication workflow. Some say that the introduction of more unified messaging tools is going to mean that we will be hearing the death knells of email soon – however the amount of applications being released over the last few months tells a very different story. I can certainly point to the (almost) excellent Outlook application that has just made it’s way to iOS.
Let me start by telling you what my pre-Mail Pilot setup was. On OS X, I’m generally swapping between Airmail 2.0 and the native Mail.app. The reason for this is, I’m desperate for Mail.app to be a success for me! I’m currently reading a fantastic book by Joe Kissell – Take Control of Apple Mail and I’m hoping that by the end of this I will be sold on Mail.app once more. Airmail 2 gives me the interoperability out of the box with applications like OmniFocus, Fantastical and Evernote that I crave in an email application. However for the purposes of this review I decided to spend a few weeks using Mail Pilot so that I could test the sync features with its iOS counterpart and immerse myself in what, I am told, is a great experience.
For iOS, I’m now down to one application and that is Dispatch. I use this, once more, because of the built-in integration with other productivity applications. However, Mail Pilot 2 has proved to be an interesting alternative.
So let’s kick it off with services.
If it’s an IMAP email account, Mail Pilot 2 will have you covered. It is currently able to support Google, Yahoo, Outlook.com, AOL, iCloud and any other standard IMAP account. Multiple accounts are supported although I found the interface to start looking a little unwieldy once I had more than three configured. For reference, I configured two Office 365 accounts for the review with no issues as well as a Gmail account.
As you would expect from an application such as Mail Pilot 2, security and privacy are taken very seriously. Mail Pilot 2 will only connect with your email server to send and receive messages. There is absolutely no use of third-party products or accounts.
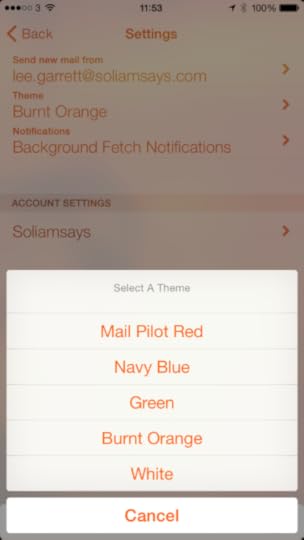
Onto presentation now and visually, Mail Pilot 2 is fantastic. I like using applications that look pretty. This may seem superficial however when you order a meal at a restaurant, you are told that ‘the first bite is with the eye’ and I expect the same standards with the applications that I use. Mail Pilot 2 ticks these boxes with some lovely built-in themes that are subtle on the eye. If you used Mail Pilot, you will know what to expect. The standard has merely gone up a notch. I love the check circles (there is something about square check-boxes that sets me on edge I’m afraid) and the layout is as simple as it needs to be. Top marks.
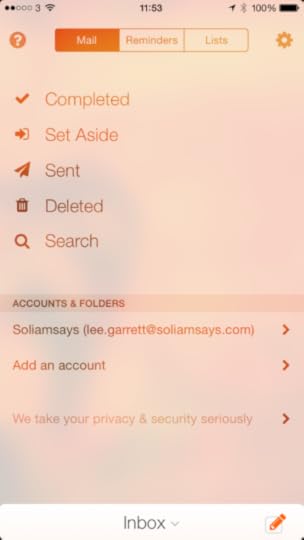
On to functionality and this is where we need to talk about exactly who the Mail Pilot applications are targeted at. If you are one of those people who are prone to using your Inbox as a to-do list, then Mail Pilot was made for you. You do not mark emails as read, you mark them as complete and that’s a really important to consider. When I dive into that theory a little bit more, I actually quite like it. Just because you have read an email, doesn’t mean to say that it has actually been processed effectively and the change in terminology from Read to Completed is starting to resonate with me. By default, swiping to the left you mark the message as complete and swiping to the right allows you to set a reminder for the message. The slower the swipe, the longer you can set the reminder value for, up to a maximum of 3 days (portrait mode) and 7 days (landscape mode). This is nice. One feature I like about the new Outlook app is the ability to be able to simply push emails away until you are ready to see them and this functions in pretty much the same way. This is a trend in email applications that is much-needed and good to see.

If you hold your finger on the message, you have a few more options. A flick to the left will mark as complete, a flick downwards will delete, upwards will place the message in a folder simply called Set Aside (not a procedure I’m keen on in general but I see the benefit for things like newsletters and generic reading) and a flick to the right will place the message into your most recent List. A List in Mail Pilot 2 can be very much likened to a folder where you will keep messages related to a certain project or function. Again, this isn’t something I use regularly because I rely heavily on an applications ability to search rather than my ability to file effectively, however I’ve used it for the purpose of this review and found it to actually improve the last project I worked on. The list was not permanent and I made a point of moving all messages to my archive folder once complete, however it definitely improved my ability to retrieve a message relating to an in progress project.
It’s especially good on the OS X version because there are simple, one key shortcuts for Set Aside, Reminder and List which mean that you can cut through your Inbox in minutes. The iOS gesture control for individual messages however is as good as I’ve seen and I would say it ranks alongside Dispatch for ease of use, if not on interoperability with other applications.
One big problem I had – and I know I am not alone in this – is the gesture control to present your Inbox. You need to swipe down from the top middle of the screen. That’s right, in almost exactly the same place as Notification Centre. This was frustrating me almost to the point of uninstall for the first couple of days, however I persisted and trained myself to find the gesture’s sweet spot. Now, I rarely pull down Notification Centre by mistake however I am a patient man needing to sensibly review an application. I wonder how many people will have given up and asked for their no quibble refund?
This is a shame because Mail Pilot 2 is built on the premise that your email is always available, with your inbox always one swipe away. I’m hoping that there will be a way for the developers to work on this. I should also note, that I tested this on an iPhone 6 as opposed to a 6+. My thumb was just able to reach that part of the screen however I’m sure it wouldn’t have been so easy on the larger device.
Attachments from cloud storage providers is covered. iCloud, Google Drive, Dropbox are available for use – the popular Box.net is not however, nor OneDrive from Microsoft which, with their new storage options for Office 365 subscribers, is disappointing.
As well as the problem with swiping down to present your Inbox, I’m afraid to say that I noticed some other glitches with using the application as well. On the iPad, when using it in horizontal mode, the application had a tendency to crash when I was trying to add attachments. This seemed to be predominantly when trying to add from my Camera Roll as opposed to from any storage providers, however this is something that should be dealt with on the first update. Scrolling too could sometimes be glitchy when reading threaded messages.
There are no native push notifications which is surprising for an email application. Don’t get me wrong, for me this makes no difference whatsoever as I try to deactivate all notifications as part of my workflow anyway, however some people need to have these notifications enabled.
All in all, Mail Pilot 2 for iOS is a decent improvement on the first version, with largely intuitive controls and wonderful presentation.. There are, however, quirks that need to be ironed out and this makes me question the price. This is not a cheap application, coming in at $9.99 (with a sale price of $7.99 currently) and this is definitely going to be a barrier of entry for a lot of people.
I would be interested to see what happens with the next update and whether any of the glitches above are rectified. If not, the emergence of free applications like Outlook, as well as the extra functionality provided in applications like Mailbox, Dispatch and Boxer, will make these applications look a lot more attractive.
The post Review – Mail Pilot 2 for iOS appeared first on Productivityist.


February 23, 2015
3 Ways To Break The Email Habit And Improve Mental Focus

I have a confession to make—I’m a bit of an email addict.
As a self-employed freelance writer, checking email is directly connected to my work. My thoughts would scream, “Do I have another job to do? Is there an update on that project?” As a result, the first thing I would do every day is check my email.
Then I’d check again twenty minutes later. And then follow up many more times during the day. Finally, I noticed things were actually getting worse.
I found myself lacking in mental focus and checking my email more and more. Fortunately, I read Productivityist founder Mike Vardy’s new book with Jeremy Roberts called Do Better With Asana. The book was eye-opening in how it explained the email problem, which I didn’t expect. I thought it’d be more of an “unofficial” Asana manual. But it turned out to be more than that.
After reading the book, I started applying the concepts presented regarding email. Now instead of being reactive and prioritizing tasks due to email, I am now proactive with my work through Asana.
However, this shift did not happen overnight. Do Better With Asana was really my tipping point which gave me the final push I needed to help change my approach. Here are three steps you can take if you struggle with email:
Admit you have a problem. I know that sounds a little cliche, but it is true. Admit what you are doing is not working. There is no shame in this–you just found out what didn’t work. Once you know there is a problem, then you can work on a solution. Consider dropping the smartphone (at least for a little while). This change does not have to be permanent; even just taking a couple of weeks off can help. This may not be necessary for everyone, but this is a great way to have instant clarity. I did this over a month ago and I’m glad I did. I just use my phone now with wifi only. Besides, do I really need to check email if I’m out for dinner with my family?) I’ve realized I don’t. Setting boundaries is a great way to develop discipline. Schedule designated times to check email. I prefer to check email four times now: once in the morning after I know what tasks I’m doing, once in the afternoon, once after lunch, and once in the evening. Sure, there are some days where I check it a little more than that, but no longer am I checking email countless times a day. A shift toward intentionality makes all the difference.The best part about this new approach to email is that I’m no longer dependent on having one specific piece of paper with me. Now I can access my projects from my desktop, tablet, or mobile device with Asana and not use email as a means to determine what to do next. I know the specific tasks I have to do and in what order. Asana is a fantastic tool that can completely change how you view email and project management. Even if you run a “one man operation” like I do.
What is your approach with email? How do you avoid spending too much time in your inbox? Leave a comment below and let’s start a conversation.
The post 3 Ways To Break The Email Habit And Improve Mental Focus appeared first on Productivityist.


February 20, 2015
3 Ways To Create Start Dates In Todoist
One of the biggest pain points that Todoist users have is the lack of start dates in the app. To be fair, not many of the task management apps out there have starts dates. And those that do have start dates don’t have the scalability that Todoist offers in terms of features and platform ubiquity. If you’re a fan of David Allen’s Getting Things Done methodology, then start dates are going to be something you’ll want. And while Todoist doesn’t offer them in a dedicated field, you can make start dates happen in Todoist – and without the use of external apps or services to boot.
I’ve experimented with three ways to achieve start date functionality in Todoist, and while none of them are perfect…they do the trick.
1. Use the Reminder function (and don’t set a due date)This one is a great way to create start dates, but it does need you to be disciplined about what date you can begin a task.
Todoist allows you to create reminders for tasks either by location or by time. In this case, you’ll want to use time-based reminders so that they’ll ping you on a date and time rather then where you might be located. To use reminders as start dates, don’t create a due date for the task but create a time-based reminder instead. Be disciplined and realistic about when you want that task to first appear, and then when it does remind you to start working on the task you should either flag it for completion or assign it a due date.
The one drawback to this method is that you’ll either get emails or mobile reminders regularly if you have multiple tasks starting on a day. But let’s face it – you’re probably getting email notifications anyway so at least these ones are serving what you decide to work on versus what others decide you should work on. One other thing you may want to do is pick a consistent time to be prompted by reminders so that you only need to think about start dates rather than start times. I choose 9:30 AM as my start time as that’s when I’m usually through my morning routine and am ready to move forward on my tasks for the day.
(If you want to be sure that you see these, you can always assign them a priority flag as well. That way you can create a filter that shows anything you’ve tagged to start later.)
2.Use Priority Flags and FiltersThis one is a little less complex to set up, but also relies on you conducting a regular review. But you should be doing that anyway, right?
I tend to use the P1 flags for the three tasks I must get done on that particular day (My Three Absolutes) and my P3 flags for repeating tasks that I don’t want to see fall through the cracks and yet don’t have a time assigned to them. The P2 flags are designated for important tasks, both dated and undated, which is why they are so useful to use for start dates for anything that isn’t urgent (or absolute) but important. In fact, all of the priority flags are useful to use as start date triggers…if they’re set up correctly.
What you need to do is to create at least two filters. One should be for tasks that are attached to a flag type (P1 through P3) and another should be the same but with a date modifier as well. Here are some examples I use:
Important (Query: P2) Important – Next 10 Days (Query: P2 & 10 days) Important – Next 30 Days (Query: P2 & 30 days)As I mentioned earlier, P2 is the flag I use for important tasks so I want to make sure those have some form of start date so I can make measured progress on them over a longer period of time. I use all three of the above so I can not just see tasks that are important and not dated, but those that I have dated over a 10 day period and a 30 day period. These filters allow me to be proactive with this deeper work. The majority of my important tasks start with no date attached – this blog post would be an example. But once I reviewed this filter and decided it was time to write it, I gave it a due date that was far enough away that I was able to slowly work on it and finish it before the due date (6 days beforehand, to be precise).
This method also allows me to take care of all of my important tasks far enough out so that I can do things like take a vacation and my regular small sabbaticals.
3.Use Due Dates as Start DatesThis is the least desirable of the three, but it takes the least amount of technical effort to do. Why? Because you just need to turn off Todoist Karma so that you’re not “penalized” for having overdue items. You also need to make sure you avoid any filters that have “od” or “overdue” in the query.
I used this method for a long time, but I really like what Todoist Karma offers me in terms of momentum and reward. I also don’t want to impose limits on what Todoist can do that aren’t already there (and, yes, Todoist does have its limits). It’s better for me to think outside the box with the existing features Todoist offers and make them work in my quest for start dates than try to fit a square peg into a round hole.
A slot for start dates may come to Todoist in the future. But until it does, I’ve managed to make what Todoist has work for me and create start dates with a little ingenuity and forward thinking.
And now you can too.
I’d love to hear whether or not you think start dates in Todoist are important to you. And if so, how do you make them happen? Leave a comment below and let’s start the conversation.
The post 3 Ways To Create Start Dates In Todoist appeared first on Productivityist.


February 18, 2015
The Productivityist Podcast: Everything Is A To Do
I’m not a fan of the term “have to” do. When someone tells me that I have to do something, I get my back up. I know there’s no maliciousness attached to the term “have to” but the phrase repels me all the same.
Now if you were to say that I “need to” do something, that’s different. There is something about the way that term resonates with me that adds some level of connection that “have to” doesn’t. In fact, “have to” disconnects me from the task far more than “need to” does. “Need to” indicates to me that it’s something that will benefit me by doing. “Have to” indicates to me that it’s something that will not benefit me by doing (at least on the surface) but still needs doing.
This week on the podcast Michael Schechter joins me and four-time guest Patrick Rhone to have a candid discussion about the things you have to do versus the things that you want to do, among other things. You can listen to the podcast below.
If you enjoy The Productivityist Podcast, then you can subscribe using the links below to get new episodes delivered to your every Wednesday:
iTunes
Stitcher
RSS
I always have a great time chatting with these two gentleman. I hope you enjoy – and better still, benefit from – what we talked about this time around.
The post The Productivityist Podcast: Everything Is A To Do appeared first on Productivityist.


February 16, 2015
How I Use A Paper Fortune Teller To Decide My Next Project

Remember paper fortune tellers?
You probably do, but you may not know them by that name. Here’s what they are and what they (traditionally) do:
A fortune teller (also called a cootie catcher, chatterbox, salt cellar, or whirlybird) is a form of origami used in children’s games. Parts of the fortune teller are labelled with colours or numbers that serve as options for a player to choose from, and on the inside are eight flaps, each concealing a message. The person operating the fortune teller manipulates the device based on the choices made by the player, and finally one of the hidden messages is revealed. These messages may purport to answer questions (hence the name) or they may be activities that the player must perform. – Wikipedia
My daughter and her friends use them at school to tell each others’ fortunes. My son came home from pre-school with one as well. And it got me thinking:
“What if I used a paper fortune teller to help me choose my next project?”
There are all kinds of ways out there to bring your next idea or project to life. Justin Jackson has used his podcast Build and Launch to tell the story of building and launching one small product every week. The podcast may not be a trigger for him, but it’s certainly a trigger for his audience. The IDEA Criteria is one way to evaluate an idea before turing it into reality, but if you’re an idea machine and many of those ideas are project-worthy, then you still can face overwhelm when trying to narrow things down. Theming will take you pretty far in terms of an overarching theme for your months, but when it comes to specifics you could get caught up in project paralysis (I know I have).
There are several things I want to build – and I want to build them as soon as possible. All of them are viable and have passed through The IDEA Criteria with flying colours. Many of them fall under the theme for this month. But, as David Allen has famously said, “You can do anything, but you can’t do everything.”
So I left choosing the next project I’d work on to chance.
I didn’t want to simply flip a coin, because I’d have to do a ton of coin flipping with all that I’ve got on my radar. But a paper fortune teller would work. Why? Because I could have to 8 options available to me and only one would make it out alive (for now). Building the paper fortune teller is simple:
I fold a square piece of paper accordingly so that the paper fortune teller is prepared. I write down 4 colours on the to flaps (I chose green, orange, blue, and red). I write down the numbers 1 through 8 on the interior. I write down 8 project names underneath those interior flaps.Then I have someone else hold and change the paper fortune teller (this time it was my daughter) by using the following directions:
They ask me to pick a colour. Then they spell out the word and use their fingers to change the paper fortune teller with each letter. They ask me to pick a number. Then they use their fingers to change the paper fortune teller that amount of times. They ask me to pick another number. Once I choose, then they open the corresponding flap and tell me what project I chose based on my selections.And that’s it. I now have my next project lined up.
You can take things to the next level with this if you want and migrate the colours from your paper fortune teller over to your digital task manager – or even a paper notebook. Here’s how you can do this for three of the more popular task management applications out there:
Todoist: You could use red, dark blue, light blue, and white for your colours on your paper fortune teller. Then once your project is revealed, simply use the corresponding priority flag colour to highlight anything associated with that project. You could also simply pick 4 of the colours Todoist offers for Projects as your starting colours for your paper fortune teller and then give your next project that colour as an identifier (although you may want to make it distinctive from any other project colours you have already active in Todoist). Asana: In Asana you can choose colours for projects, so simply use one of those colours on your paper fortune teller and be sure to create your next project with that colour so it stands out. You could also have a tag called “PFT” to identify anything associated with your paper fortune teller project if you want. Trello: Label colours in Trello will help you here as well. Just match them up with your paper fortune teller’s and be sure to allocate anything associated with that next project with that Trello label.(You can even make this work in Evernote. Just put the final number you chose in the front of the notebook name of your next project so it move to the top of your other notebooks.)
As for paper notebooks, just find one that either matches the colour you chose or simply put it underneath your paper fortune teller in a visible area of your workspace. That way you’ll know that everything in there is related to your next project.
There are other ways to get “unstuck” when you’re facing project paralysis (using Unstuck’s Tip Cards or listening to the UnStuckable podcast are great options), but I loved the idea of leaving things to chance and having fun with it along the way. I know this method won’t work for everyone’s work life, but it can be used for some of your more personal aspirations even if it doesn’t apply to entrepreneurial pursuits. You could use a paper fortune teller to help you:
Choose your next vacation spot Decide your next major purchase Start reading one of the books on your reading list Finalize your decision on what app to use for somethingThe idea behind using a paper fortune teller to decide my next project was at first nothing more than a new and fun way to get me moving forward with it. Now I may just use it every time I feel stuck on what project to do next. Why? Because it was effective, efficient, and delivered results – qualities I want my next project to have in spades.
So grab a piece of paper and make yourself a paper fortune teller to have at the ready for the next time you’re not sure what project to work on next. It may not be the most conventional way to make a decision, but it makes one happen…in a very fun and unexpected way.
The post How I Use A Paper Fortune Teller To Decide My Next Project appeared first on Productivityist.


