Marc Spagnuolo's Blog, page 76
June 23, 2015
Cutting Thin Strips at the Table Saw
Resawing thin stock and cutting thin strips is typically the domain of the bandsaw. And while I consider the bandsaw to be an essential shop tool, not everyone has one. Furthermore, because the bandsaw leaves a somewhat rough surface behind, you’ll need a way to smooth that thin stock before you can use it. So it’s probably worth considering an alternative option that kills two birds with one stone: utilizing a more common tool that results in a smoother cut. So let’s look at a few ways you can use your table saw to cut thin strips.
First, the Problem!
Why can’t we just set our table saw fence for 3/16″ and run the piece through? The primary reason is safety. With so little space between the fence and the blade, it becomes difficult to effectively push the stock past the blade and kickback can easily occur. So the key is to find a way to either push the stock through safely, or simply push the reference stop to the LEFT side of the blade instead of the right.
Solutions
Fancy Push Blocks
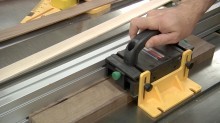 If you happen to have a MicroJig GRR-Ripper, you already know that thin stock isn’t much of an issue. This nifty push block holds the off-cut securely and pushes it safely past the blade. The unit comes with the ability to rip strips down to 1/4″ and a special add-on is available for strips at thin as 1/8″. If one were so inclined, a shop-built solution could also be devised that accomplishes something similar.
Thin Strip Jig
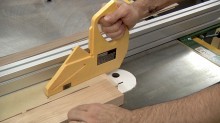 Here’s a super simple jig made from a piece of MDF or plywood scrap that features a hook glued onto one end. That hook is there to push the stock through the cut safely. Once you have the jig made, simply set it against the fence and adjust the fence so the gap between the blade and the jig is the desired strip thickness. Put the stock against the jig and make sure it’s fully-seated in the hook and carefully push it through the saw. So simple yet so effective. The only downfall of this technique is that you’re somewhat limited in the size range of stock. If the board gets too large or too long, it can be difficult to control safely.
The Left-of-the-Blade Stop
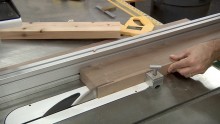 While putting the off-cut strip to the left of the blade is definitely safer, you’ll have to re-adjust your fence each and every time to get multiple strips of the same thickness. If we have a stop in place to help index the cut, the process becomes easy and repeatable. You can use something as simple as a piece of scrap wood clamped to the table, but my preferred stop is a magnet. A simple MagSwitch magnet will do the trick quite nicely. With the stop in place, all you need to do is put your workpiece against the stop and carefully nudge the fence in place on the right side. Just be careful not to accidentally push that magnet out of position. This is my favorite method primarily because it’s easy to set up and doesn’t pose any limits on the size of the workpiece or the size of the resulting strips.
Other Options
 While not discussed in the video, there are shop-made and commercial jigs available that fit into the left miter slot of the table saw. They can be adjusted for various thicknesses and they work quite well. So if you plan to do a lot of this, it’s not a bad idea to build or buy a jig.
Interested in an alternative way to surface and smooth thin stock? Check out this video!
The post Cutting Thin Strips at the Table Saw appeared first on The Wood Whisperer.
Planing Thin Strips
 Without a doubt, the best tool for surfacing thin stock and planing thin strips is a drum sander. But given the fact that even the smallest and most basic units cost over $700, it’s not a tool everyone can justify having in their shops. Thankfully, there’s a great alternative: the planer. But don’t run out to the shop and start planing veneer just yet. Most planers aren’t very happy running stock that’s less than 1/4″ in thickness. Once the wood gets that thin, it becomes very light and flexible and there’s a good chance it’ll be sucked up into the planer blades which will quickly turn your fancy planer into a wood chipper.
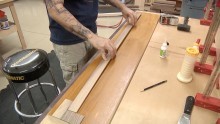 Thankfully, with a little additional support, we can safely run thin stock through the planer for veneer, bent lamination, or anything else requiring surfaced material under 1/4″. All it takes is a shop-made sled consisting of a piece of 3/4″ plywood (or any sheetgood), and a couple thin pieces of solid stock that act as a stop. Using CA Glue, I attach the small strips to one end creating an L-shaped stop. The grain should run front to back for best results. Once the stops are attached, consider coating the surface of the sled with finish to seal the surface. The rough-sawn strip can then be dropped onto the sled with one end nested in the L-shaped stop. The other end gets a small dab of CA Glue in order to prevent lifting at the front. After planing, use a putty knife to pop the strip off the sled. If you sealed the surface, the glue shouldn’t do much damage.
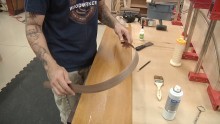 So how far can you take this process? I did a test run with my sled and I was able to achieve a thickness that’s pretty close to commercial veneer! But I did cheat a little since my shellac sealer was still just a bit tacky. That gave the strip full support across the entire length which definitely skewed my results. For practical purposes, I wouldn’t go too much thinner than 1/8″ with this technique but you’ll have to test for yourself to find the lower limit.
Are you interested in learning how to cut thin strips using your table saw? Check out this video!
The post Planing Thin Strips appeared first on The Wood Whisperer.
Support
Even though The Wood Whisperer has been around for nearly ten years, we’re still the same small family business we’ve always been and we rely heavily on community support for our success. If you like what we do and you want to see more of it, please consider helping us out by one or more of the means listed below. The Wood Whisperer team truly appreciates your support!
By using our affiliate links to do your shopping, you’ll get great deals on the stuff you need while the vendor kicks a few pennies our way. Shop your favorite stores like Amazon.com, Rockler.com, HighlandWoodworking.com, ShopWoodworking.com, and more.
If you like what we do on the free site, you’ll LOVE what we do in the Wood Whisperer Guild. When you’re ready to get into the nitty gritty details of higher-end projects, purchase a project course from the Guild.
Buy my book Hybrib Woodworking or pick up a T-shirt, hat, or coffee mug!
While we prefer you buy something from us, we will happily accept direct monetary support. Donations in any amount are always appreciated.
The post Support appeared first on The Wood Whisperer.
June 22, 2015
Sam’s Tropical Wood Roubo Workbench
This project is nothing special as most woodworkers have built a Split Top Roubo Workbench or just any woodworking workbench. I recently completed my workbench and have published my work on lumberjocks.com . I also have a blog which will bring you step-by-step throughout the entire process of me crafting this workbench. </>
This hand crafted Split Top Roubo Workbench took me about 25 months to complete which included 12 months for wood drying time and bench parts gathering. It was based on a plan by Benchcrafted and my tail vise is of Benchcrafted as well. The wood material used for this workbench is a type of tropical hard wood namely Meranti Wood, which is found here in Malaysia. The finish is a simple linseed oil. During the crafting process of this workbench, minor mistakes were made and corrected.
Well, do take a look at my Split Top Roubo Workbench and leave a comment and tell me what you think. My Next project will be a Maloof-inspired rocker chair using a Meranti wood. I think it will be the first Sam Maloof rocker in tropical hardwood.
The post Sam’s Tropical Wood Roubo Workbench appeared first on The Wood Whisperer.
June 18, 2015
Michael’s Theater Room Table
As a fairly new TWW Guild member, let me simply say that Marc has inspired me…his unique way of presenting information that is easy to understand and thoroughly enjoyable to watch makes him a most excellent teacher!
This is my first piece of woodworking ever. I built this table for a friend based on a sketch he gave me. Before this project, I had never owned a table saw, router, planer, jointer, band saw, or Domino. And I certainly had never cut a single board foot of exotic wood! Watching every one of Marc’s videos (yep, I’m a TWW junkie) over the last three months gave me, not only the courage to tackle woodworking as a potential retirement income booster, but also the skills necessary to possibly succeed. I even taught myself SketchUp so I could formalize my friend’s drawing and then proceed to build his table to those plan specifications. In fairness, I have been a professional photographer and graphic designer all of my life.
All the joints are tongue and groove or floating tenon with the addition of four saddle joints where the lower stiles meet the foot rails. The top mount brackets are elongated to allow for wood movement and the protection is General Finishes satin EnduroVar–four coats lightly sanded between. The wood in the body and top is Ambrosia Maple and the frame is Peruvian Walnut. The drawers are Peruvian Walnut and Curly Maple and they move on under-mount BluMotion slides from Rockler.
The table’s cantilever top covers a bamboo trash can while keeping the can mostly out of sight. This table sits between my friend’s front two theater chairs and houses a plethora of remote controls, i Pads, chargers, magazines, etc. Just in case anyone might be curious about its odd design.
I look forward to many more years of edutainment from TWW!
The post Michael’s Theater Room Table appeared first on The Wood Whisperer.
June 16, 2015
Aaron’s Office Credenza
A friend inherited an old walnut desk that was painted white. After refinishing the desk they wanted another piece of furniture to match the desk for an office setting. I determined the desk to be built during the Edwardian period which influenced many of the design factors such as the upper glass doors and the veneered panels on the lower doors. We did choose to back off a few design factors like muntins and escutcheons on the doors as those would have “dated” the piece and not fit the friend’s décor.
The case is solid walnut with usage of poplar as a secondary wood for the drawers and in areas that were not visible to the eye. What made this project so much fun was its use of “firsts” for me in my woodworking experience. The side trim was attached using dovetail keys to account for the solid wood panel movement, the use of veneer on the lower cabinet door panels, shellac as a finish in the internal compartments, and knife hinges. I have built many other pieces of furniture prior to this attempt based on plans in magazines–but never had designed a piece from scratch. I see this project as a testament to value of the online woodworking community as I would have never attempted this project without the resources available on The Wood Whisperer site.
The finish is Mohawk Wiping Stain – Medium Brown with General Finishes Arm-R-Seal gloss and satin in the fashion Marc teaches in his book. I finished the finish with Briwax dark brown wax.
For my first furniture commission this was a very fun and challenging project.
The post Aaron’s Office Credenza appeared first on The Wood Whisperer.
June 11, 2015
Sam’s Garage Woodshop
In the summer of 2014, my wife and I thought we’d give home ownership a try. Amazingly, we hit all the must-haves on our checklist and I started prepping for moving the shop out of our rental’s basement.
I pre-built some 30 brackets for hanging dust collector ducting and pre-fabricated the hardware for two lumber racks. After moving, I upgraded the garage lighting by installing 11 light fixtures, each with four T8 daylight bulbs (33 watt/2500lumen). Next was the dust collection, and a lot of time sealing air-gaps with metal tape and drilling for pop-rivets. In my obsession to reduce dust, a box fan combined with a furnace filter was even mounted near the dust collector on the ceiling to further reduce fine particles that the dust collector misses. The fan turns on whenever the main light switch is on and the dust collector is on a remote operated outlet. Also, a cyclone pre-separator is one of the upgrades slated for this Fall. The two lumber racks are constructed of 1.25” angle iron and Douglas fir 4x4s and have exceeded my expectations for capacity. One advantage of the 4x4s is that they sit on the concrete sill so the wall studs are relieved of any load bearing.
One neat feature is in-floor heating throughout the house and garage provided by an outdoor wood burner. I enjoy some recreational math from time to time and was able to calculate our wood burner at about 47% efficient at turning wood into heat; which is actually really good for this type of system. This allows me to heat the workshop to 65°F without a noticeable effect on firewood consumption. Another benefit to in-floor heat in the garage is a nice warm and dry floor. We get a lot of snow in Marquette, Michigan, and the family hauler that shares my garage space brings a lot of that slush into the garage. This added water led me to purchase some neoprene cord protector/concealers and use silicone caulk to create barriers to channel the snow-melt away from my shop and into the floor drains. A dehumidifier also runs year round to keep the humidity stable.
All of the large machines were acquired from my Godfather, who had purchased them over 10 or more years. He sold them at a reasonable price and passed on a great hobby to me. If not for my Godfather I’d still be several years away from putting a shop together. Getting a whole shop at once also allowed me to invest in improvements, and every machine got a tune up. The router table got the most love, and received an Incra positioner mated to the fence, under-table dust collection, a quick-change collet, and a new frame for the table. From there I constructed zero-clearance inserts for table saw and miter saw and started getting into sharpening. The last and most significant upgrade was a helical cutter head for the planer.
The main workshop is separate from a side room that I use for glue-up and finishing. The workbench is a beam and base type detailed in a Fine Wood Working Magazine article and has been superlative for its ease to build and versatility. One side of the beam is homosote and the other is melamine. The tool cabinet is the pride of the wood shop and features dovetails, raised panels, shouldered tenons, mortised hinges, a bunch of magnets, and some nifty bit-blocks. With the snow melting and my winter projects wrapping up, I added some up-high shelving, organized tools and supplies, and vacuumed (it looked so nice afterwards I thought I’d take a few photos so I remember where everything goes).
With a warm and dry shop, bright lighting, clean air to breath, and tuned-up machines, I’ve been more productive than ever. My wife also appreciates the fine woodworking that is starting to fill our house, especially the black walnut TV stand built this past January…now if I could just find another ol’ timer with $1/bd ft. black walnut for sale.
The post Sam’s Garage Woodshop appeared first on The Wood Whisperer.
June 9, 2015
Tristan’s Master Bath Cabinets
With a summer off last year and tools to get my hands dirty, I decided to build my parents a new set of bathroom cabinets to replace the existing 30+ year old ones. With only a few well-trained months at school, it was all I needed to get started.
I choose maple and cherry because I absolutely love contrasting woods and these are perfect pairs. The cabinets were built to match the others and were increased to match the standard size of 21″. The drawer cabinet was also widened. A new addition of upper cabinets was added.
The carcass is constructed of 3/4 maple veneered particle board with a 3/4 cherry face frame constructed and attached with pocket screws. Dados and rebates holds it all together. The shelves are also maple with a cherry solid edge. The back is just white melamine.
I decided to build the face frame down to the floor to be different. There is a 4″ by 4″ toe kick with a cherry face.
The upper cabinet is 8″ x 24″ instead of 12″ x 30″ found in kitchens. It was too tall for the bathroom and too wide for the toilet overhead. A maple crown down on the tablesaw finished it off.
The doors are shaker styled with a 1/4 cherry veneered panel with a maple frame around it. The door is edged with a chamfer router bit. The drawers are done the same way. Simple frame and panel construction. The drawer box is joined with box joints.
The drawers have 18″ soft-closing slides while the hinges are Blum’s compact soft-closing hinges. The doors have a 1/2 overlay. The drawer pulls and knobs are on order.
The counter top is a 4×8 sheet of MDF cut out to match the wall and then finished with a Formica top and cherry edging. The edging was cut from a 10′ board for a continuous grain pattern around the counter top.
The cherry was first stained with shellac and then the entire project was finished with Mohawk’s waterborne pre-cat lacquer via HVLP.
Wallpaper, paint, a new lightning system and a mirror is all that remains. The last photo is the “before” shot.
This was my first solo project and my first set of real cabinets. It was also my first trip to a lumber yard. A lot of firsts for me. I turned 19 when I installed these. I am proud to call myself a cabinetmaker at 19!
The post Tristan’s Master Bath Cabinets appeared first on The Wood Whisperer.
June 7, 2015
Shaping a Maloof-Inspired Sculpted Rocker Spindle
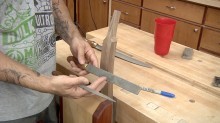 This year, I finally decided to take on a Maloof-Inspired Sculpted Rocker and we’re building it right now in the Guild. One of the most elegant parts of the chair is the contoured back, consisting of seven sculpted spindles. In this video, I show you exactly how I shape those spindles using two rasps: a Combination Rasp (#5/#9) and a Small Modeler’s Rasp (7″, #13) rasps. If you’re looking for a nice “starter set” try this Auriou Rasp Set. Keep in mind, Auriou rasps are pricey and there are other brands out there like Nicholson that could save you a few bucks.
Because I don’t consider myself very artistic, I make extensive use of guidelines whenever I do my sculpting. For the spindles, one simple guideline will do the trick. The line is drawn on the side about 1/8″ down from the front surface. I can then crown the front of the spindle to that line and follow that up with a heavier roundover that terminates at the same line.
 Not only am I systematic in my layout, but my rasp technique as well. Before I actually try to create any sort of round surface, I start by making a flat chamfer. The chamfer removes the bulk of the material and gives me a reference point I can use as a starting point for the final round shape.
This systematic approach is especially helpful when you need to create more than one of something, as is the case here when I have to create seven spindles. They all need to look the same and for me, a systematic approach is the only way to accomplish that.
 The final detail I put on the spindle is a sculptural one: a round tenon. The end of the spindle is worked to a rough square first, then a rough cylinder. I then use Veritas Tenon-Cutters (1/2″ and 3/8″) to create a perfect round tenon. These tenon cutters work just like a giant pencil sharpener and the results are surprisingly good!
Obviously, there’s a lot more to building this chair than just the shaping of the spindles, so if you’re interested in step-by-step instructions, check out the Wood Whisperer Guild.
The post Shaping a Maloof-Inspired Sculpted Rocker Spindle appeared first on The Wood Whisperer.
June 6, 2015
Chat
HelpChat ClientsRules and PoliciesShop Cams
Chatroom help
If you aren’t familiar with IRC chat, here are a few commands that you might find useful. These commands are entered into the chat room box where you type your messages. Commands will NOT be seen by other people in the chat room as the system can tell the difference between a regular comment and a command. If you are confused by these commands, you can simply copy/paste the examples below and substitute in the appropriate information.
Change Your Nickname
/nick desired nicknameWhen you enter the chat, you will be given a generic name “woodfan***”. To change your nickname use this command. Keep in mind, this does not reserve your nickname permanently. For that, you need to register. Example: /nick WoodStud
Register Your Nickname
/msg nickserv register password emailUse the /nick command above to set your nickname. Then, register the nickname by using this command, associating it with your email address and requiring your password. If you are uncomfortable with copying and pasting commands, you might prefer to simply register using this web form. But it is much faster to do this using the registration command. Example: /msg nickserv register woodrocks77 name@domain.com
Logging In (Identifying)
/msg nickserv identify nickname passwordAfter you register, you might find yourself in the chat room with a generic name at some point. To log in using your registered nickname, use this command. Example: /msg nickserv identify WoodStud woodrocks77
Note: If you have already used the /nick command to set your nickname then you only need to type “/msg nickserv identify password”
Other Stuff
/msg recipient your private message – Send a private message to a specific person.
Example: /msg Dave Where are your pants? would send a private message to Dave saying “Where are your pants?”
/me Your message referring to yourself – Make a self-statement.
Example: /me wishes Dave were wearing pants! would post a message publicly that says “WoodStud wishes Dave were wearing pants!”
/quitLeaves the chat. You will need to use this command in the live page’s chat to login to the pop-out chat window with your registered nickname.
Chat Pop-out
Click on the Pop-out Chat button to open a new resizable chat window. You will need to logout from the main live page’s chat to use your registered nickname in the pop-out window. The new chat pop-out is not linked to the live page and operates as an independent entity. Feel free to leave it open to keep in touch with other people on the live page.
Chat Clients
If you are constantly getting kicked out of the chat room or you just can’t get things to work properly, you might consider trying a Chat Client. One of the great things about IRC chat is that you can use any number of desktop/mobile chat clients to access the chat room. Here are a couple of recommendations.
There are two pieces of information you will need to get any of these chat clients to work properly. The Network is irc.thinstack.net and the channel is #woodwhisperer.
PC/Linux: mIRC, HexChat,
Mac: XChat, Colloquy
iOS: Colloquy
Browser Plugins: ChatZilla
HexChat Instructions
This will assume you have already registered an account with thinstack the network woodwhisperer chat is on. If not then go to www.thinstack.net and register one.
Select the appropriate option for you, for example if you run 64 bit windows 64 bit version of the program.
Install all the default options and let it run after the install is finished
The screen that opens is the login information. in this information you will set your nickname, network and passwords.
After setting your desired nickname there you click add in the networks section. name it what ever you wish I named mine woodwhisper.
click edit this will bring up a dialog box select the servers section and change the one there to chat.thinstack.net/6667
check the connect to selected server only
type in connect to favorite channels #woodwhisperer
then put your password you registered into NickServ Password
click close
Highlight the network you wish to connect to and click connect
Once you are connected a dialog will ask you if you want to joint a channel but you already set it to join the woodwhisperer channel
so uncheck show dialog at the bottom and click close
(Thanks Joseph)
Colloquy App Instructions
Open Colloquy. It should start you in the “Connections” tab (at the bottom).
Tap the + sign in the upper left to add a new connection
Tap the “IRC Connection” button
You are now in the “New Connection” window. Fill in the form as follows:
Description: TWW
Address: irc.thinstack.net
Push Notifications: turn on if you want them. (I leave them on.)
Nickname: enter the name you want to use in the chatroom
Real Name: put whatever you want here
Connect at launch: On
Join Rooms 1. Tap this option,
On the next screen, tap the “Add Chat Room” button
Chat Room: woodwhisperer
Password: leave blacnk
On the upper left, tap the “Join Rooms” button
On the upper left, tap the “New Connection” button
Allow multitasking: On
On the upper-left, tap “Connect”. A few moments later, you should see a list of “Colloquies”. Click “woodwhisperer” and start chatting.
(Thanks Andrew)
Chatzilla Instructions:
Download and install the Chatzilla Firefox Add-on.
Click Tools > Chatzilla
When the window pops up, click on IRC in navbar, then click Join Channel.
Put irc.thinstack.net into the Network box and click Join.
It may take a minute or two to connect to the chat server, so be patient. After you see some text go by and the connection is confirmed, proceed.
Click on IRC in navbar, then click Join Channel again.
Put #woodwhisperer in the Channel box, and then click Join.
You are now logged into the chat room and you can change your nickname if you desire using the instructions at the top of this page.
To make sure Chatzilla opens to the WoodWhisperer channel automatically at startup, click IRC > Open This Channel At Startup.
Chat Room Policies
The Rules
The sole purpose of this chat room is to facilitate woodworking discussions between woodworkers. The chat room is self-managed by its users. Please be courteous and respectful to other users. Be polite, family-friendly, and don’t be disruptive. Also we recognize that users may chat about other things than woodworking, but in order to avoid disagreements, we would kindly ask you to refrain from discussing religion and politics.
Anything not covered here, is up to the channel founder’s and operator’s discretion, please respect their requests.
You may be kicked, muted, or banned for any of the following:
* Arguing with Moderators & Admins
* Any disruptive behavior
* Objectionable language
* Sexual comments
* Channel spamming or flooding
* Flaming or trolling
* Harassment or abuse of other users
* Being “annoying”
A Note For Our Younger Members
Over the years, we have had numerous young and energetic budding woodworkers enter our little community. While we encourage you to get involved in the conversation, you must understand that this is not your average chat room. Most of our participants here are 30+ years old, and the mood of our chat room is very relaxed and mellow. If you keep this in mind, you just might find yourself with numerous mentors who are willing to help you along in your pursuit of the craft. If you are pushy, obstinate, or offensive, you won’t get very far with this crowd. And please be aware that if I receive multiple complaints from other members, you will be banned from the chat room. If you were directed to this page by another member because of something you said, this should be considered a “friendly warning.” If you aren’t 100% clear on any of this, please contact me and I will be happy to explain it to you.
Disclosure
Every word typed in our chat room is logged, and that includes Private Messages. But understand that we have no desire to read these logs. The ONLY reason we open the logs is for conflict resolution. But its important for you to know that everything you type is recorded.
The shop cams can be found here. Thanks to Indigogyre in the chatroom for building the page.
The post Chat appeared first on The Wood Whisperer.


