Marc Spagnuolo's Blog, page 78
May 5, 2015
Turned Owl Protecting Treasures
There are only a few viewer submitted turning projects, so I thought I’d add one to the list :) This one is not really my design. When I was still very active on my Facebook page I had this fun idea. Instead of doing boring giveaways like all the other pages do to thank their followers and attract new people, I thought I would make the competition a little bit more fun. Last Fall I announced a giveaway but the visitors who wanted to participate had to design a Halloween themed project and submit it.
The design with the most “Likes” after a predefined period of time would win, and I would then make the design out of wood for the winner. That was a fun challenge, not knowing what they would come up with. So this Owl came out as the “winning design”. My turn to make something that looked like the drawing.
Turned body and eyes, and a bit of basic swinging around with a carving knife for the rest of the parts. I added some trays so it could be a functional jewelry box.
It turned out pretty well and the design was so popular that didn’t take long before I was busy making an entire Owl family.
This was a very fun project, not that difficult and the very basic carving gives it a nice touch in my opinion. I find that especially younger people think of woodturning as a boring craft. And I get that because a lot of projects that cross my eyes have this “old” look about them. So I try to make things that attract younger people, and particularly this Owl turned out to succeed in that mission. Still a small step in saving the art though since woodworking as a hobby or art is dead here in Belgium.
The post Turned Owl Protecting Treasures appeared first on The Wood Whisperer.
May 3, 2015
A Maloof-Inspired Sculpted Rocker
The Sculpted Rocker Guild project starts next week and there’s an elephant in the room. I should probably address him.
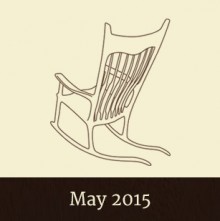 I have no problem admitting that I had/have serious reservations about doing this project in the Guild. When you build a sculpted rocker, in nearly every case, you’re doing your best to emulate the one and only Sam Maloof. His rockers (and other works) are admired by woodworkers and non-woodworkers alike. This is probably why this was the most requested project since the Guild’s inception.
I knew I didn’t have the time to develop my own patterns for this project so I reached out to fellow woodworker Charles Brock, who sells plans and DVDs on how to make his interpretation of a sculpted rocker. I licensed the plans for use in the Guild and will do my best to show folks how to make the chair with the level of detail we apply to every Guild project.
While this may have covered my butt with Brock, it doesn’t do much for the folks at the Maloof shop. After all, even after paying licensing fees I will eventually make a profit from a Maloof-inspired design. I have great respect for the Maloof family and craftspeople that keep the name and brand alive today. As you can see, my desire to bring this challenging project to my audience conflicts with my personal ethics. From my perspective, it’s just not a black and white issue. So, what am I to do?
Starting retroactively in April, I’ll be donating 10% of our direct revenue from the Sculpted Rocker plans to the Maloof Foundation. The Maloof Foundation’s mission is: “to perpetuate excellence in craftsmanship, encourage artists and make available to the public the treasure house the Maloofs lovingly created.” Located in Southern California, the organization does great things for the community and the craft and it should be on your short list of woodworking destinations to visit.
To be honest, I’m still trying to process all of this and the eventual repercussions. I always try to be honest and fair not only in my personal life but my business life as well. Even if the patterns we’re using in the Guild came from a third party, there’s no denying where the original inspiration came from and the best thing I can think to do is simply share the profits.
Perhaps the Maloof people will see it as an empty gesture. I hope not. Either way, I’ll be sending them money twice a year. If you already purchased the project or a bundle containing the project, a portion of your purchase is currently sitting in the Maloof Foundation’s Paypal account. If anyone wants to donate directly to the Foundation, you can do so by clicking the little red “Make a Donation” button at the top of their home page.
Thanks for listening.
The post A Maloof-Inspired Sculpted Rocker appeared first on The Wood Whisperer.
April 28, 2015
David’s iPhone Stand
You know when several things get in your way often enough it’s just time to deal with whatever impedes your progress. Well, I have a personal iPhone 4S and a business iPhone 5S and I carry both just about everywhere most of the time. When I get to my desk I typically just set them down in front of me. Within a minute or two they’re either covered with a piece of paper or just plain in my way.
I had been wanting to practice my bookmatching and binding so I came up with an idea and carried it out on this little project. I picked out a small piece of Flame Walnut and Curly Maple, along with some Birdseye Maple and Macassar Ebony veneer and set about designing the guitar shape.
Once I had the guitar shape cut, I made a little accessory for my Dremel so I could cut the rabbet for the binding I made out of veneer. Then I heated a small black pipe and bent the veneer to fit the guitar shape and when the shape was good, I glued it on to the Walnut. For the rosette I also made a Dremel accessory so I could route the groove for the inlay around the sound hole.
The base is Curly Maple and I basically cut away everything that looked like it didn’t belong on the base, trying to keep it light and airy but not dainty or frail looking. It kind of took on a Star Trek look, but it works for the piece. The entire piece is finished in Nitrocellulose lacquer.
It was a fun build and I hope y’all enjoy!
The post David’s iPhone Stand appeared first on The Wood Whisperer.
April 26, 2015
Chris’ Dad’s Cherry Urn
I’d like to share the urn I built for my father with The Wood Whisperer community.
My father jumped into woodworking when I was a kid and had me in the shop with him as much as possible. We settled into the woodturning subculture, but dabbled in “flat” woodworking. For a number of years he did the juried craft show circuit in the NJ/PA area selling his wares.
Dad had big plans to build a cherry 4 post bed for him and mom. Twenty years ago he acquired all the lumber, but that was as far as it went. Last year Dad passed away after a long illness. We thought it would be fitting if I built his urn. I decided to build matching urns for Dad and Mom out of the cherry that was supposed to be their bed.
After months of trying to settle on a design, I came up with what you see here. I went with mitered corners with contrasting ebony splines. The lid is a table saw cut raised panel with an ebony inlay. The interior was lined with one of Dad’s old flannel shirts (Dad was a Norm fan). The finish is Danish oil with 4 coats of wipe on poly.
This project definitely put my skills to the test, but the process went flawlessly. I was only able to pull this project off thanks to the skills and design inspiration I gained from countless “internet woodworkers” who take the time to share their knowledge with the rest of us.
The post Chris’ Dad’s Cherry Urn appeared first on The Wood Whisperer.
April 18, 2015
Jim’s Oriental Jewelry Box
This is a jewelry chest I made for my wife last year for our anniversary using some leftover wood from a blanket chest I had made for her the previous year. The exoskeleton and roof are made from white oak and are held together by the black walnut tenon keys. The whole assembly can be broken down. Here is a video of me assembling it.
The only glue used in this project was on the half blind dovetails on the drawer inserts. The drawer fronts are quartersawn white oak, and the sides and inlays are black walnut. The characters on the front are Japanese Kanji and translate to “Everlasting Love”. The drawer inserts are made from oak, MDF and foam, and I covered most everything in velvet. All of the mortises are cut by hand and if I counted correctly, there are 52 through mortises and 4 blind tenons. For the finish, I wiped on several coats of amber shellac. One mistake I made was on the overall size, it stands 17 1/2” tall, 15 1/2” wide and 11 1/2” deep, and because of the large size, my wife now believes I need to buy her more jewelry so she can fill the excess space!
The post Jim’s Oriental Jewelry Box appeared first on The Wood Whisperer.
April 17, 2015
Mirror Frame Pt. 2: Rabbets, Clips, & Finish
Download the Plans: SketchUp File | PDF
The Rabbet
Before cutting the rabbet for the mirror and back panel, you’ll want to have all materials on-hand. Glass cutters will generally hit your dimensions +/- 1/8″ so it’s good to know the exact measurements before you make your cuts, just in case you need to make some modifications. The thickness of the material is important too since 1/4″ plywood is always less than 1/4″.
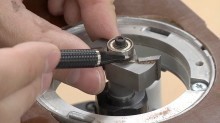 To cut the rabbet I use a typical bearing-guided rabbeting bit. The bit produces a 1/2″ wide rabbet and the depth is controlled by the depth setting of the router itself. When cutting the rabbet, you might have to hang the frame over the edge of your workbench if the router bit is making contact with your bench surface.
Shop-Made Clips
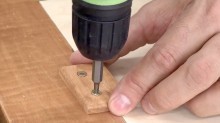 To hold the mirror and back panel in place, we’ll need some low-profile clips. These can be made with wood and the idea is that they screw into the frame while over-hanging the mirror area. Two per side should do it. While I used scrap from this project, you can use any wood you like as this will never be seen. For the sake of continuity, I like to use the same species as the rest of the frame. Some day, someone will pull that frame off the wall and marvel at my willingness to waste high quality wood on something so trivial. And my mission in life will be complete! The clips won’t actually be attached until after the finishing process but it’s nice to have them made ahead of time.
Matching a Finish
I’m not a huge fan of staining. It’s messy and sometimes unpredictable and I prefer to let the wood do what it does naturally. But there are lots of times when a stain is necessary, like when you need to match existing cabinetry. Fortunately, the mirror doesn’t have to match the cabinets exactly and I feel comfortable taking a slightly “lazier” approach. I’m just going to use off the shelf stain to get as close as I can, and count on the dim lighting and physical separation from the cabinets to disguise the differences.
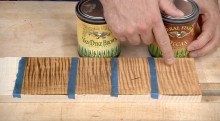 The finish schedule I use looks like this: Stain, Finish, Glaze, Finish. The stain is General Finishes Water-Based Stain (Pecan). The finish is Sherwin Williams CAB Acrylic Lacquer (Medium Rubbed Effect). The glaze is General Finishes Glaze Effects (Van Dyke Brown). In short, the process involves first raising the grain. This is something you should do any time you’re using water-based products. I then apply the stain, followed by two coats of the lacquer finish. The surface is then sanded very lightly with 320 grit paper and the glaze is applied. The glaze isn’t meant to absorb into the wood like a stain. Instead, it finds all of the nooks and crannies and pore pockets and deposits color for a more aged appearance. From there I apply several more coats of lacquer until I’m happy with the finish. Oh and don’t forget what I refer to in the video as my “secret sauce.” Prior to the final coat, I wet-sand the surface to level the finish. I then apply a very dilute coat of lacquer (80% lacquer thinner/20% lacquer) to the surface. The result should be an acceptable finish right off the gun. If you want to do some more post-processing on the finish, check out out this video on Rubbing out a Finish.
Hanging
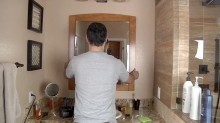 There are a lot of different ways to hang things on a wall. I’m particularly fond of the strength and flexibility of a French Cleat system so I thought it would be cool to use one for this frame. But instead of shop-made cleats, I’m using aluminum Eagle Clips (Z-Clips). These clips are strong and super low-profile and I think they’re perfect for hanging a heavy mirror such as this. And keep in mind that the mirror is only half of the hanging arrangement. The other half happens on the wall. So if you don’t happen to have studs in the right locations, you’ll want to use the appropriate drywall anchors capable of supporting the weight of the frame.
Thanks for watching and I hope you make yourself one or two of these mirrors. The best projects are the ones you use every day!
Helpful Links
General Finishes Water-Based Stain (Pecan)
General Finishes Glaze Effects (Van Dyke Brown)
The post Mirror Frame Pt. 2: Rabbets, Clips, & Finish appeared first on The Wood Whisperer.
April 16, 2015
Ken’s Basement Retreat
I’ve always had interest in woodworking, but alas family and career got in the way of seriously allowing me to pursue many projects. I’ve had a rudimentary shop for 9 years with the basic tools – Craftsman TS, Formica counter bench top, etc. Then, Christmas of 2013, my teenage daughters bought me a mortising machine that I always thought I wanted (drilling square holes would be neat!). That ignited a passion in me for woodworking that continues to grow. I love learning about techniques and project ideas online. Marc’s website impacted me greatly (thanks Marc!). And if you look real close, you might just see some Wood Whisperer influence in my shop;). Ironically, the HF mortiser my kids got me really was not very good and has since been sold on Craig’s List, but I’m so happy to have gotten it because it led me onto this path.
A few months back I finished the Roubo split-top bench – what a project! I used a Ryobi lunchbox planer and Delta 6″ jointer for that project (you can still see them in the shop–they will be going on Craig’s list soon). Both machines have been replaced recently with a Hammer A3-31 helical head jointer/planer (great machine!)
Having a smaller shop, I have to rely on nearly all of my machines being mobile. I’ve positioned all of the tools around the perimeter of the room to allow the middle of the floor to stay open for the tool I need to work with to be rolled out. As space is a premium, I also had to become creative with storage. The over-under pull-out vertical drawers work great for storage.
A list of tools I have include a ShopFox TS (with Marc’s torsion box top assembly table built a bit higher to act as an outfeed table), Hammer jointer/planer and band saw, Festool Kapex miter saw, as well as track saw, routers, sanders and Domino, Rigid oscillating stationary belt sander, HF bench drill press and dust collector (yes Harbor Freight–sorry), Jet drum sander, ShopFox shaper and an Excalibur router table with a 3hp Porter Cable motor.
Last summer I also got into lumberjack mode. I live on 12 acres of woodland and have lots of nice mature trees around. I purchased a Hudson sawmill and cut an Ash tree into 4/4 and 8/4 planks that are air drying right now. They are going to be used to build my wife’s new kitchen next winter. I plan on building a kiln dryer this summer to accelerate the process and sterilize the wood. Lot of other species of trees around here.
The post Ken’s Basement Retreat appeared first on The Wood Whisperer.
April 13, 2015
Seth’s Pirate Chest
For at least an entire week leading up to my son’s 6th birthday, I was up until midnight, or later, working to finish this pirate chest for him. I realized that I put incredible restrictions on myself by trying to hide a project from my kids. My son wants to be involved in everything I do in the shop (which I love), but if I’m hiding it from him I can only work on it once he is in bed. Of course, that means that the rest of the kids in the neighborhood are also asleep, so definitely no loud saws can be used.
Anyway, it was a labor of love that he will hopefully treasure for many years to come. I looked at a bunch of pictures of pirate chests, but didn’t find any plans that I liked. So, this chest was completely designed by me. I was a little bummed that I ran out of time before I was able to put in the false bottom “secret compartment,” but maybe that can be a post-mod.
It’s made out of pine with red oak trim (stained with dark walnut). Construction is simple glue and screw, but the trim hides all of that. I used masonry nails on the trim to give it that old-style look. Hardware was not exactly what I had envisioned, but it’s what I could find. I did find a really cool old-timey skeleton key lock off of Amazon, though, and he LOVES that!
I am pretty new to the woodworking hobby, so this project gave me TONS of learning opportunities. It also gave me reason to buy a few more tools and that’s always a good thing!!
Oh yeah, before I gave it to him I sketched out a really simple treasure map. I hid the chest in the backyard and just gave him the map and the keys in an envelope. It was a lot of fun helping him find the treasure. Then…the look on his face made it worth all of the effort!! Priceless!
The post Seth’s Pirate Chest appeared first on The Wood Whisperer.
April 9, 2015
Mirror Frame Pt. 1: Design, Half-Laps, Assembly, & Curves
Download the Plans: SketchUp File | PDF
We recently had a little work done in our bathroom and in the process we removed the large wall-spanning mirrors. Being the superhero husband I am I immediately promised Nicole that I would replace them with a couple of nice framed mirrors. A record-setting six months later (which is at least a year ahead of schedule by my clock), here we are building the frames.
This project is fairly simple but even simple projects can feature fine details. This video will show you everything you need to know in order to build one for yourself. I recently promised that I would be returning to my roots of detailed videos on the free site and this project is an example of me making good on that promise. This video is pretty much filmed in the same style our Guild videos are filmed.
Designing in a Space
 Using blue tape, I like to experiment with different designs on the actual wall where the mirror will live. There’s really no better way to determine the appropriate size and shape of the mirror. If something doesn’t look right, simply adjust the position of the tape and try again. Once the overall dimensions are determined, we can easily round up or down to whole numbers making our life a bit easier in the shop. A design like this does have some room to play with the numbers.
Ditching Design Rules
While design rules certainly have their place and we should all pay attention to them, there are just some cases where those rules don’t much matter. This is one of those times. I want this mirror to fill out a particular space and the dimensions of that space are set in stone. So I’ll simply make my frame look as good as it can within that space primarily going by eye, as opposed to looking toward a theoretical “best” measurement.
Half-Lap Joinery
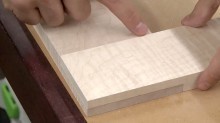 Never underestimate the half-lap! When most people think of basic frames, they immediately go to miters. But without reinforcement, miter joints are quite weak and unless the design would really benefit from the visual effect of a miter, I’d much rather use a half-lap joint. Half-laps provide us with a ton of long grain glue surface and require no reinforcement to achieve their strength. Furthermore, this particular design lends itself very well to half-lap joinery. The joints are cut at the tablesaw with a dado stack and finessed at the workbench.
Optional Design Details
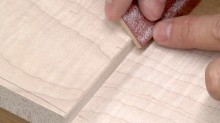 When joining boards, I’ve seen some designs where the joint is actually accentuated with a roundover or groove. This certainly won’t appeal to everyone but I think the effect is cool. It makes each piece of the frame pop and gives it much more visual interest. Although my joints are tight, I suppose one might be able to use this technique to hide some less than perfect joinery too. But I’ll deny it if you ever tell someone I told you that!
Creating a Curved Template
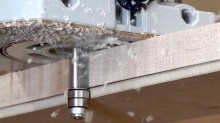 The full-size drawing can actually be used to create a template for the curve on the top rail. If you only have one frame to build, you can certainly skip this step and instead simply draw the curve on the frame itself. Since I have to build two of these frames, I’m creating a template first and then using that template to flush trim my frames to final shape.
Planing Edges Flush
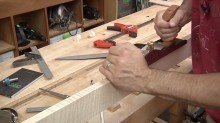 To aid in clamping and assembly, all of our parts were cut 1/16″ oversized in width. Now it’s time to remove that extra material for a nice flush appearance on all edges. The easiest way I find to do this is to use a hand plane. Since the wood is heavily figured, I use my bevel up jack plane with a 50 degree blade to plow through the tough figured grain with zero tearout.
Helpful Links
Lee Valley Drawing Bow
Double-Sided Tape
Spiral Flush Trim Bit
The post Mirror Frame Pt. 1: Design, Half-Laps, Assembly, & Curves appeared first on The Wood Whisperer.
March 30, 2015
Let’s Slow Down, Shall We?
 Many of you have been with us since our 2006 beginnings. You’ve seen me evolve from a fresh-faced youth to a salt & pepper father of one (and one on the way) with a few more stress lines in his face than before. You’ve seen me move my shop no less than three times and you gave me your full support when I authored my first book nearly two years ago. We’ve been through a lot together! I’m sure you’ve also seen how the videos have changed over time. The original long-form detailed videos have become the stuff of The Wood Whisperer Guild and the free site gets much faster-paced project videos at a lower rate than in the past. While I’m doing my best to remedy the obvious LACK of video content on the free site (only so much I can do at this point), I am in complete control over the quality and composition of the videos I DO have time to release. Which brings me to the primary point of this long-winded post: I’m excited about the next project!
I have some spare time before the next Guild project in May and I’m trying to get some honey-do items off my list. Nicole and I have been without bathroom mirrors for a few months now and it’s time to design, build, and install two custom mirrors. I guess a mirror frame might not be all that exciting but what I’m particularly stoked about is my confident return to detailed videography. Over the last few years, the trend in online woodworking videos has moved toward pandering to the lowest common denominator in hopes of higher numbers and viral sharing. To clarify, I don’t mean “lowest common denominator” in a derogatory sense. I mean it quite literally as the largest group of people who might have an interest in watching a project go together. Much respect to the folks that enjoy that work and succeed at it, but if I’m being honest with myself, it’s just not the kind of content I want to produce.
So while the free site videos will always feature a faster pace and a little more aggressive editing than Guild videos, I will no longer give in to the temptation to simply run the video at 10x speed and call it done. I won’t be skipping important details because I think I’ll lose viewers. Instead, I’m going to show my bathroom and how I decided on the sizing of the mirror. I’ll show how I make the templates and sketch out the full-scale drawing. And then we’ll actually make the thing and install it. Will it be a 10 minute video or a 30 minute video? Who knows! It’s done when it’s done and it will take as long as it takes.
I don’t really read YouTube comments anymore so I won’t be there to hear people yell at me because the video is too long or because I talk too much or any other such drivel. In the mean time, I hope the folks who have come to expect high quality and detailed instruction will be happy with what I continue to produce here at TheWoodWhisperer.com. Those people are my primary audience and those are the people I hope to please with my content, even if it means accepting lower overall numbers and less exposure for my work. If non-woodworkers, armchair woodworkers, DIY’ers, makers, weekend warriors, or anyone else who discovers us on the internet happens to find the information useful or entertaining, then that’s just gravy. As always, all are welcome!
As one of the first online woodworking video producers, I’ve been part of this ever-growing and evolving online woodworking community for nearly a decade. As I watch shows come and go, it becomes something of a challenge to know which trends to follow and which ones to buck. I have been soul-searching and flip-flopping on this issue for a couple years now and it has become crystal clear to me that this is where I want to be and this is the kind of content that’s in my heart and mind. It’s really a matter of coming to terms with my place in this ecosystem and not being distracted or swept into the prevailing current. But I must tell you as a video producer with a mind for marketing, it’s no small feat to ignore the trends that would guarantee me more viewers and ultimately more money. But I’m in this for the long haul and I want to be a part of your woodworking journey for years to come. The only way I know to do that is to show you everything I know while providing opportunities for us to learn from one another.
So I hope this post puts a smile on your face and you’re looking forward to this return to old form. There will still be plenty of room for classic TWW nonsense too but we’ll no longer skimp on the important details that help make you a better informed woodworker. Let’s get it on!
The post Let’s Slow Down, Shall We? appeared first on The Wood Whisperer.


