B.A. Fegles's Blog, page 19
August 22, 2016
Did you know Types of Content That Get You More Backlinks
You may not pay attention to backlinks as you do to other elements of your website, but you should know they are the third most critical factor which can influence search engine rankings. In order to push your website ahead on Google, the backlink has to look natural and to have the highest quality possible, and the best way to generate such backlinks is to trigger content marketing.
At the same time, developing the right marketing strategy requires efforts and time, but it is one of the rare tricks that can solve the search engine optimization issue permanently.
1. Use lengthier posts and include useful information: informative is not enough! Your posts need to be super informative, and provide valuable content concerning the topic you intended to write about, and finally provide a solution for your readers’ problems.
2. Go beyond conventional word counts and use social media: In our time, it is just impossible to ignore the impact social media has on our content marketing strategy, as it can generate most of our views, make our brand more credible, and involve more users. Eventually, our content will become more exposed than we expected, and there will be high-quality backlinks.
3. Include listed content in your posts.
4. Provide infographics
Trying to build backlinks is not an easy process, and you have to adopt the perfect approach and have the patience to see it in action. As with everything else, you won’t always be in control of it, but what you can do is manage your content properly, which is the most important part of the task.
The meaning of content
Observed through the prism of website marketing, content represents a readable, watchable, or hearable material. Basically, content goes far beyond your posts – it includes your videos, imagery, web copies, downloads, apps, and everything else there is to be seen on your website. If people can see it or use it online, then it qualifies as content.
Why is content so important?

Traffic reasons: When trying to understand the connection between content and traffic, search engines play almost no role. Good content drives traffic by simply attracting visitors, which usually approach a website for one of the following purposes:
a. Discovering socially shared content. Once the content is shared on a social network, more users have access to it and are more likely to open it than someone who got a recommendation from a related website to do so. For you, that means more traffic.
b. Attracting quality links. The better your content becomes the higher quality links it will attract, or appear instead in trustworthy locations users wouldn’t oversee. Still, you have to be careful with content-driven links because they must be relevant and look natural, instead of few stuffed and spammy-like ones.
Content types

You’re probably thinking that things can’t become more complicated with content, but we have one more important warning to make: content is not all about the things you’ll be writing about, but also about the way how you structure it, and the media format you use to present it to your audience. It is exactly that will determine how your users will accept it.
There are posts that were deliberately structured to be shared on social media, but that’s not the best way to go to attract backlinks. They may engage users in the initial phase, but that’s how the story ends – there are no backlinks to be followed.
On the other hand, there are posts that make your influencer relationships much more valuable.
What matters in both cases is to know exactly what you want to achieve, and to know your audience by heart. Generalizing, we’d say people simply adore list posts, but you may be writing on niches that require infographics instead.
When talking of infographics, we shouldn’t forget to mention how popular they’ve become in recent years, and that they are more and more applied for any type of content. Being relatively new, infographics triggered an entire wave of fascination, and proved able to produce even better backlinks that list posts do, and that was something not too many people expected.
There are many readers, bloggers, influencer, and simple hobbyists interested in your work, but you have to know how to attract and keep their attention. If you want more links, make sure you’re delivering content people genuinely care about.
Online video stories (commercial-like)

Commercials are not people’s favorite type of media, but that counts only for the TV. According to marketers, there is a specific ads category that can be distributed online, and which people love, such as authentic video stories that don’t persuade people to buy something, but share experiences instead.
High-quality imagery is compulsory
Do we even have to say this? Note that by attaching images to your posts, you’re not only pleasing users with a nice view but giving bloggers something they could use.
Once the image goes viral, inform bloggers about it, and let them know they are free to use it as long as they give you the credit for it, and include a link to your website. Obviously, there must be plenty of them, and they must have high quality and be absolutely relevant to the niche you’re writing about.
The best course of action is to make your own photos, particularly for the so-called mini infographics, industry stats, lists, and so on.
Stats are the future
Ever wondered why experienced bloggers are such stats fans? It is because using particular statistics enables them to link their posts to sources, and once there are enough stats on all topics, their blog becomes a reference (as research studies are, for example).
The most powerful strategy is obviously to conduct personalized research, as useful and intriguing results may result in hundredths of links.
Controversial topics

Controversy is a knife with two blades, but if applied correctly, it can become an effective strategy to garner backlinks. It can be especially useful when treating trendy topics people want to know more about, assuming you’ve chosen the side of the story you want to support, and collected enough arguments for the purpose.
Sharing controversial content is another serious risk, as it can lead to negative feedback and hurt the image and perception of your brand even before you’ve driven the desired traffic. Therefore, be especially careful with controversy topics, and skip libelous and biased statements when wording them.
Whitepapers and case studies
Whitepapers and case studies are very powerful, but also time-consuming backlink generation means. They will require you to do extensive research and develop a successful strategy, but in case you manage to obtain the result you want, they will do miracles for your website.
This list of content types is obviously not exclusive, and there are many surveys, polls, games, apps, and similar technologies that could be mentioned. Still, we prefer leaving it this way because we know what human imagination is capable of, and we see no limits to as how far creativity and technology can go.
Resource collections in the service of blog traffic
Resource collections encompass articles prepared with two critical ingredients: longer preparation times and special attention on the quality of their content. As you already know, good posts are those that manage to collect multiple similar resources, as for instance tools, apps, or services, providing at the same time corresponding links where those can be downloaded by users.
Tip collection articles
What is certainly a traffic booster is an advisory article written by an expert in a certain field, able to discuss a topic in depth and provide helpful suggestions for the readers. Webmasters are especially fond of these articles and backlink to them much more often.
A single well-explained trick in the post
Instead of doing small talk on numerous topics you know little about, focus on a single one you’ve mastered, or provide a solemn, yet very useful piece of advice. Use the trick for new and poorly researched topics, as this will almost certainly result in more traffic.
Still, have in mind it is of vital importance to explain that topic and to include as much information about it as possible.
Breaking news posts

We all know how difficult it is to keep pace with news, and you can hardly ever be the first to know something before it goes viral. At the same time, we can all agree this is the best way to swim out of the vast blogosphere sea, and to be noticed.
In case luck smiles one day, and you get to report breaking news, make sure you deliver it in the best possible way to attract more readers.
Once the scoop is made, share your post on social networks, and relate it to blogs/posts that deal with similar issues.
Include interviews with known people
Including popular and authoritative figures in your article is one of the most interesting and easy ways to drive traffic, as you are already counting on the fact there will be many readers interested to read about these people’s experience (even when they know absolutely nothing about your blog!).
You may also like:
Best SEO practices and trends for 2016
File Permissions: What are they, and how can they secure your website?
Tips And Tricks For Your WordPress Blog’s .htaccess File


August 18, 2016
Did you knowBest SEO practices and trends for 2016
Volatile is the word that can describe the SEO industry the best, as there is a new breakthrough making us reanalyze our priorities each month. Let’s see what we should expect in 2016:
Keyword research
Keyword research didn’t change much since last year; since it still refers to discovering words and appropriate phrasing for promoting businesses and products.

There are many efficient strategies to achieve this:
– There are many keyword research tools you can use to pick up the most popular and not that hyper-competitive phrases: Ubersuggest, Keyword Planner, Searchmetrics, SEMrush, and so on.
– Going deeper into your website analytics to distinguish those keywords that are already driving traffic and helping you close sales. Thanks to this data, you can think of other related keywords, or build more content that contains those terms.
– Analyzing competitors’ highest ranked pages to select the keywords they’ve targeted for your own website.
– Choosing long-tail keywords, as those are the most popular and naturally persuasive ones.
One thing is definitely true: Google is growing in sophistication and has started analyzing keywords from the prism of user intent, which is why you should always look for the most relevant themes and topics to structure content around them. For instance, let go of the old good habit of selecting one phrase and writing about it, and think of what the audience would really like to read.
On-page SEO

As relevant reports indicate, the average word count when it comes to content should be somewhere between 1,140 and 1,285 words. It is because writers are required to comprehensively cover the topic they’re discussing, rather than scratching the surface with technicalities everybody knows.
Relevant terms: These terms will support your content, proving that it is indeed relevant to the topic you’ve mentioned. Therefore, relevant terms are your best bet to signalize to Google that you’re delivering quality, and deserve to be ranked well.
Relevant terms can also be proof words/phrases, and such must be present when optimizing content for SEO purposes. In all other cases, they are used together with the primary keywords in order to cover the topics, as ‘Google’ does, when talking about ‘Panda’, ‘SEO’, ‘ranking’, and so on.
Keywords through the content: Keywords are not only meant to be included in titles, and you can safely use them in subtitles, introductory paragraphs, or even conclusive ones.
Internal links, on the other hand, refer to the total sum of links to be found within the content and are less important than the optimization of your entire linking structure.
Meta tags and headers: If you take a look at some of the most popular websites, you will see that almost all of them include a meta description and an H1 tag. The meta description is important for content ranking, as it is a kind of ‘ad copy’ which appears in the searching results, while H1 tags are much more unique and descriptive, and help everybody understand you’re your content is about.
Mobile optimization: While mobile optimization was almost of no importance in the past, today it is a vital ranking factor which can make or break all of your SEO efforts. You have to make sure your design is mobile responsive or to create a separate mobile app for the purpose.
Loading times are also very important since the highest ranked websites are those that load quickly regardless of the devices used to open them. In fact, mobile leading times are currently the most important ones to focus on.
An appropriate structure for you content: Content must be organized in a logical way, and that’s important both for search engines and users.
Mobile SEO
Just recently, Google confirmed what we all suspected: mobile search has finally taken over the traditional one, which means that every website which alienates users with the lack of mobile-friendly content will be taken from the scene.
There are many priorities to be considered here: users are accessing the internet on the go, which is why you should present them content structured in a way which they can understand. Short posts with bulleted lists, the same as sharp contrasts and large fonts can be really useful for the purpose.
Then, if your mobile-optimized website has ads to display, remember that you must include fewer than the ones on the desktop version, as that’s the only way to keep loading times low.
Building links

Building links and exchanging them with webmasters is an old school trick that seems to seize in 2016. You habit to create links, submit those manually to web directories; post other links on Web 2.0 articles where there is no editorial review, or spamming on forums is simply no longer accepted.
Taking experienced businessmen as an example, you’d see that building links won’t do the SEO magic for your website, and what is worse – it can cause Google to rank you lower or to penalize the site.
Still, you can make use of the so-called implied links, which are in fact citations and non-linked mentions taken into account by ranking algorithms and can therefore make your website more valuable in the SEO sense of the word.
That’s why we recommend you to stay aside from building links and pay more attention to the quality of your content instead.
Guest blogging is another good strategy you can use to inbound content and which also helps with targeting new audiences.
What is extremely popular and effective is creating a buzz about your content on social media, and sending the so-called social signals by sharing content on multiple platforms.
The more your content is read, liked, shared, or mentioned, the more people will visit your website and read your posts. Still, you have to remember that Google doesn’t consider Facebook/Twitter likes and shares to be as effective as links.
Use videos. As a user, yourself, you know videos engage the audience in a more powerful way, and unless you incorporate it into your modern marketing strategy, you’ll find yourself falling behind competitors.
Social and website content is about to be united, since social media is receiving more real estate on each SERP, and is, therefore, becoming equally important as website content.
For you, this means being able to get higher ranking for social posts based just on the keywords you’ve used, and gaining indexability for more than one platform.
Body copy
The way on-page SEO is right now, the critical ranking factor is first and foremost content. At the end of the day, it is content what people are looking for on your website and the only way your brand can provide value for them.
Knowing this, you should try your best to make content more valuable and unique, and to relate it to what they may be searching for.
First of all, you have to find the most appropriate and long-tail keywords to use, and to think of answers for them. The algorithms of our time are perfectly able to understand when you’re using keywords purposefully, and when you’re simply stuffing them to make the post count, and that’s exactly what they’re going to indicate to users when determining whether your site is relevant and worth of visiting.
Appropriate titles for your pages
The body copy is the reason visitors come and stay on your website, but for the purpose, you have to assist them to find what they are looking for.
The ideal tool for that is page titles, being the essential components inventing user decisions, and inspiring them to click on your site when displayed on the SERP. Crawlers will also appreciate page titles in order to determine how relevant your website is for the search query where it qualifies.
Page descriptions
The same as page titles, descriptions (called also meta descriptions) are among the most important factors to help your website appear in the SERP and rank higher than the others.
Headlines
It is perfectly fine to add headlines other than your page title and to include them in the text body (usually denoted as H1-H6). This is another procedure the crawlers use to differentiate your keywords and to highlight them.
Imagery
You may not really expect it in 2016, but imagery still plays the role of an important SEO asset, which websites often neglect and under-utilize. 2016 made searches much more visual and is trying even harder to deliver amazing and brand-related visual content while the visitor is deciding which website to open. This can either be the drawback or the one-time opportunity for your website to become more popular, so make sure you optimize images with keyword text.
You may also like:
File Permissions: What are they, and how can they secure your website?
Tips And Tricks For Your WordPress Blog’s .htaccess File
12 Tips to Create a Breathtaking Portfolio With WordPress

August 15, 2016
How To’s & TutorialsHow to write SEO-Friendly URLs for your WordPress site
Applying SEO-friendly URL structures is one of the easiest and most popular SEO optimization strategies.
Thanks to solid and well-constructed URLs, the indexation of your website can become as easy as a pie, but unlike one would expect, there are many websites which are still using suboptimal and incorrect links.
Choosing the most SEO-friendly and appropriate URL has been debated numerous times, and has therefore been in the focus of the digital marketing industry for many years.
Most of the time is devoted to the SEO factors, as for instance primary keyword inclusion and making combinations to arrive at the perfect URL structure.
What we’re trying to do in this article is to observe some of the main URL elements, and explain how to achieve perfect and highly-ranking structures.
Bringing together the ‘www’ and ‘non-www’ domain versions
As always, your domain will be indexed in the search engine with two the most important versions, namely the ‘www’ and the ‘non www’ one. It is far better to consolidate both of them, and there are many ways to achieve that. What we will discuss, however, is the most common practice.
What SEO professionals do in this case, is to redirect to the first, then to the second version of the website (or in the opposite order) using 301.
It’s true – most of us would ask why worrying about different domain versions is so necessary, but consolidating them is the key to making sure that all backlinks will point to the same version, and will display all information correctly.
If you feel like trying out a more professional way than 301 redirect, you can proceed by explicitly establishing a link between the versions, ideally using canonical tags or Google Webmaster Tools.
Including keywords

Keywords are the king of SEO, and the main ones among them must be included in the URL of your website. In fact, that’s the fastest and easiest way to optimize your posts.
So why would people skip using keywords? Most of the time, they’re afraid not to over-optimize, and that’s, in fact, a genuine risk.
While including an important keyword in the URL structure of a particular blog post can be the smartest optimization trick you’ve ever performed, it can also look a bit superficial and unnaturally stuffed.
Unless you can find a really smooth and unforced way to include the keyword, it might be better to skip it.
Canonicalizing several URLs directing to the same content
It doesn’t even have to be multiple URLs – even if you have two of them, you should canonicalize them through the classic 301 redirect process, or use a rel=canonical in case you want to preserve both versions and make them slightly different (for instance, providing users with print-friendly pages of the website).
Obviously, it doesn’t have to mean that the search engine will penalize you for having duplicate content (as long as you’re not duplicating all the time), but what could happen and harm your search traffic potential is the splitting of your rank signals.
What we’re trying to say is that it is much better to have the rankings of page A and page B canonicalized and earn more visits, than letting them rank separately.
Work more on readability
When users can read and understand a URL, that’s a good and clean one, and keywords have nothing to do with it.
Optimization of URLs comes only later when the owner wants to make sure users will click on that blog post and read the content rather than simply understanding what it is about.
In fact, search engines are in a constant development process, and they are relying more and more on the behavioral and data signals coming from users in order to identify the right position of any web page.
At the end of the day, it is an engagement that rules the process, and readable URLs have a lot to do with the engagement.
What has to be achieved is that the user will know that clicking on a link can redirect him in a certain place, thus he will be motivated to click it. It basically means that readable URLs are user-friendly URLs, and such can generate more targeted traffic than you ever imagined.
Short works better than long

If we had to generalize, we’d advise you to keep URLs shorter rather than longer. By short, we don’t expect you to cut content radically and to introduce 40-character URLs, but an average of 50-60 characters that are easy to read and understand.
In case you’ve been working with 100+ ones, it may be the time to rewrite those and to make the most of their value.
This is not a specific Google/Bing requirement – in fact, search engines are completely enabled to process lengthy URLs without necessarily considering them as less valuable than the shorter ones, but what can be a real trouble in the case is compromised user experience.
Long URLs affect usability, unlike shorter ones that easily copied/pasted, parsed, embed, and shared on social media, and may, therefore, improve the amplification of every post, pin, tweet, email, and so on both directly and indirectly.
Stop words are not essential
When titles and headlines include some stop words (but, and, of, a, and so on) you don’t have any need to include them in the URL. If you want you can do it, but most owners decide to skip them in order to keep their URLs shorter and easier to read.
Consider both length and readability, and try to make the smartest decision for your website.
Take a look at whatever post you like: odds are good that there will be no stop words because it is much simpler to get the point of something that has been presented in that way, together with the benefit of having the URL shorter than usual.
Overdoing and repeating keywords make your website look pointless and spammy
Think of yourself as the user: how do you feel about URLs where the same words are repeated multiple times? Most searches dislike this practice to the extent of avoiding the website completely and choosing a most trustworthy one instead.
It may sound counterintuitive, but repeating the same keywords won’t improve search rankings: Google and Bing are no longer relying on simple algorithms to rate websites based on the number of times a particular keyword appears in a URL, but will rather grant you a click for a simplified, single-matching keywords URL.
Matching titles and URLs

The simplest way to optimize your SEO is to make the connection between titles and URLs clearly visible. Matching the URL to the post it contains is one of the most important SEO factors, and there is a good reason for it.
The practice is popular and preferred right because users are informed what type of content you’re going to provide them by simply looking at the URL and the keywords it contains. A mismatch between the URL and the title is among the most frequent bounce reasons, and should, therefore, be avoided.
When it comes to the search engine, you should know that they have the same expectations as the users themselves. They follow the content of the URL to guess what your content may be about, and classify your pages accordingly.
Building expectations is the ultimate purpose of having a URL at all, which is why titles and URLs should contain the same keywords.
Conclusion
As it is clear by now, it is not rocket science to optimize your website and make it more usable. The tips you should follow refer to readable and user-friendly URLs which resemble a clear connection to the content displayed on the pages. In addition, you can rethink your keyword strategy and focus on using them in the most appropriate way.
Still, when including keywords, try to avoid over-optimization as Google may consider your website as spammy, and users may skip opening it for the same reasons.
Search engines are no longer the same – they evolved massively in past years, and are currently smarter than ever before. Overdoing and repeating keywords don’t help your traffic generation efforts, the same way it won’t help search engines to find you, or users to become interested in your content.

August 11, 2016
How To’s & Tutorials10 WordPress Tricks For The Functions.php File
Among other themes in your WordPress folder, there is the most powerful of them all: the functions.php file. As you can already guess from the name, this file contributes to some of the unique functions of your WordPress installation, even if added as a plugin to your already existing theme. What it does is to allow you to override or modify critical WordPress features without having to drill deep and tackle core files. If used appropriately, functions.php can make your WordPress amazing and fortress-firm. At the same time, it will accelerate development by simply collecting all codes under one roof.

As expected, there is a multitude of incredible tricks and best practices to help you make the most of your WordPress functions.php file, and this article reveals the most wanted among them.
1. Customizing your dashboard logo
In case you’re designing a client’s theme, you can use this file to be the perk. What it takes is to paste this code inside the file:
//hook the administrative header output
add_action('admin_head', 'my_custom_logo');
functionmy_custom_logo() {
echo '
';
}
2. Disabling WordPress search
When working with WordPress as your CMS, you don’t really need the search function, and you can use functions.php to remove it from your design. Searching will still be possible, with the difference that there will be no sidebar for the function. This is the code you should use for the purpose:
functionfb_filter_query( $query, $error = true ) {
if ( is_search() ) {
$query->is_search = false;
$query->query_vars[s] = false;
$query->query[s] = false;
// to error
if ( $error == true )
$query->is_404 = true;
}
}
add_action( 'parse_query', 'fb_filter_query' );
add_filter( 'get_search_form', create_function( '$a', "return null;" ) );
3. Using RSS to control the availability of your posts
The most common error of all bloggers is that publish their posts right after completing them, and they start catching errors just after a minute or two. That’s why posts should be delayed at least 5 or 10 minutes, and be published on the RSS only after it is confirmed that there are no errors. In order to do it, add the following function:
functionpublish_later_on_feed($where) {
global $wpdb;
if ( is_feed() ) {
// timestamp in WP-format
$now = gmdate(‘Y-m-d H:i:s’);
// value for wait; + device
$wait = ‘10′; // integer
// http://dev.mysql.com/doc/refman/5.0/e...
$device = ‘MINUTE’; //MINUTE, HOUR, DAY, WEEK, MONTH, YEAR
// add SQL-sytax to default $where
$where .= ” AND TIMESTAMPDIFF($device, $wpdb->posts.post_date_gmt, ‘$now’) > $wait “;
}
return $where;
}
add_filter(‘posts_where’, ‘publish_later_on_feed’);
4. Customizing excerpt length
Excerpt length is intuitively capped at exactly 55 words, which puts an obstacle to the flexibility designers want and expect from WordPress. In order to customize excerpt length you should use the following function:
functionnew_excerpt_length($length) {
return 100;
}
add_filter('excerpt_length', 'new_excerpt_length');
5. Disabling RSS feeds
The RSS feed is not absolutely necessary for static WordPress websites, so in case you’re designing one you can consider disabling it with the following function:
functionfb_disable_feed() {
wp_die( __('No feed available,please visit our homepage!') );
}
add_action('do_feed', 'fb_disable_feed', 1);
add_action('do_feed_rdf', 'fb_disable_feed', 1);
add_action('do_feed_rss', 'fb_disable_feed', 1);
add_action('do_feed_rss2', 'fb_disable_feed', 1);
add_action('do_feed_atom', 'fb_disable_feed', 1);
6. Enabling a featured image function
According to the codex, a WordPress author can use the featured image function to pick representative images for his pages, posts, or post categories.
In order to enable the functionality, copy the following code and include it in the functions.php file:
add_theme_support( 'post-thumbnails' );
Most of the time, it is WordPress that defines thumbnail sizes, but we could also take matters in our hands and define sizes ourselves. No doubt most designers would be impressed by this option!
Take a magazine website as an example, where all featured images appear at least in 3 different sizes. The largest one, for instance, can be used for most recent posts, medium ones for less important posts, and a small one that will appear in other necessary locations.
You should use the add_image_size() function to instruct WordPress to make few copies of the featured image, and adjust them to the predefined sizes.
In order to do it, add the following code to the functions.php file:
// For regular size
add_image_size( 'regular', 400, 350, true );
// For medium size
add_image_size( 'medium', 650, 500, true );
// For the largest thumbnail
add_image_size( 'large', 960, '' );
Loading jQuery from Google CDN
// Smart jquery inclusion
add_action( 'init', 'jquery_register' );
// register from google and for footer
functionjquery_register() {
if ( !is_admin() ) {
wp_deregister_script( 'jquery' );
wp_register_script( 'jquery', ( 'https://ajax.googleapis.com/ajax/libs...' ), false, null, true );
wp_enqueue_script( 'jquery' );
}
}
7. Removing the security information of your WordPress version
// remove version info from head and feeds
functioncomplete_version_removal() {
return '';
}
add_filter('the_generator', 'complete_version_removal');
Restricting backend access to menu functions depending on usernames and role permissions
You can use this function to deactivate individual access to the admin menu, based on the permissions assigned to that particular username:
{
$restricted = array(__('Posts'),
__('Media'),
__('Links'),
__('Pages'),
__('Comments'),
__('Appearance'),
__('Plugins'),
__('Users'),
__('Tools'),
__('Settings')
);
end ($menu);
while (prev($menu)){
$value = explode(' ',$menu[key($menu)][0]);
if(in_array($value[0] != NULL?$value[0]:"" , $restricted)){unset($menu[key($menu)]);}
}// end while
}// end if
}
add_action('admin_menu', 'ah_remove_menus');
8. Adjusting the excerpt word length
As we already said, the usual excerpt length is 55 words, but you can always overwrite it with the following snippet:
functionnew_excerpt_length($length) {
return 150;
}
add_filter('excerpt_length', 'new_excerpt_length');
9. Showcasing dynamic copyright data in the footer space
Many websites neglect the importance of updating their copyright data, or include simply the current year because that’s the only thing the WordPress feature allows them to do. As often as it happens, this doesn’t qualify as a best practice, as patterns similar to © 2012 to 2016 look much prettier and more professional for websites that want to maintain their reputation. You’re supposed to do nothing else, but to add a simple code snippet to the functions.php file:
/* - */
functionah_dynamic_copyright() {
global $wpdb;
$copyright_dates = $wpdb->get_results("
SELECT
YEAR(min(post_date_gmt)) AS firstdate,
YEAR(max(post_date_gmt)) AS lastdate
FROM
$wpdb->posts
WHERE
post_status = 'publish'
");
$output = '';
if($copyright_dates) {
$copyright = "© " . $copyright_dates[0]->firstdate;
if($copyright_dates[0]->firstdate != $copyright_dates[0]->lastdate) {
$copyright .= '-' . $copyright_dates[0]->lastdate;
}
$output = $copyright;
}
return $output;
}
10. Upgrading your author profile with author fields
The best thing about WordPress is that adding is just as simple as removing. We’re going to share one truly important code you could use to add input boxes to the author profile:
functionah_new_contactmethods( $contactmethods ) {
// Add Twitter
$contactmethods['twitter'] = 'Twitter';
//add Facebook
$contactmethods['facebook'] = 'Facebook';
return $contactmethods;
}
add_filter('user_contactmethods','ah_new_contactmethods',10,1);

August 8, 2016
How To’s & Tutorials9 Ways to Improve Your WordPress Blog
The idea and purpose behind blogging are amazing, but as if this was not enough, many bloggers decide to step out of the box and to do something more with their blogs than just adding posts in chronological series. The main purpose of such innovative approach is that bloggers are aware that new posts will overcome old ones regardless of their quality, and that’s actually the core of their problem.

They keep adding new articles to the already overwhelmed archive, and simply waste an incredible amount of good content instead of tagging it to keep it alive. This is the worst thing a blogger could do to his users: wasting their time and attention, and failing to provide the necessary advice; so it comes as no wonder that such blogs experience low page views and a high bounce rate.
Let us suggest a few very effective strategies you could adopt to improve such situations:
1. Edit the sidebar on your blog
Remember that the sidebar on your blog is probably the most important section you have. It is because the sidebar appears on every page the visitor opens, the landing page being one of them. Sidebars are included in every blog, but the problem is that people misinterpret their function –they fill them with junk, slap newest (but not always relevant) posts, suggest opt-in forms, attach social media badges, repeat their logos for the hundredth time, and many similar practices that are probably coming to your mind now. There is not a less painful way to call these practices than what they really are: unreasonable mistakes.
If there is one thing to learn from this, it is the following: The more items your sidebar contains, the less relevant each of them will become, and you’ll end up confusing your visitors.
2. Use the featured area for posts other than the recent ones
We understand that this is a common and recognized practice, but the reason why people tag recent posts as features is that they want to stay on the safe side of the line. While this can be the easiest and most comprehensive concept for active blogs, it can reveal all the flaws of rarely updated ones.
Take a second to think about it: You have a variety of creative opportunities to use featured space for, and you’re still adding nothing but recent posts. Why not underlining old and good ones instead?
It is a single stone to kill two birds: you get to showcase quality content, and it makes your blog appear much more active and involving. Still, noteworthy posts from the posts are not the only ones to consider for the category: you can also choose the most popular ones and to include them.
3. Create a section for popular posts
Each blogger has a set of posts he’s confirmed generate the most traffic, and he considers them to be the ‘killer posts’ that need to be mentioned everywhere, linked to everything and featured extremely well on all social engines.
Highlighting such posts is quite simple using featured space, but you could also go a step further and design a specific ‘Popular’ section accessible through the homepage.
4. Create a section for related posts
Once users land on your blog to read a particular post, the best way to keep them there and to encourage them to explore is to provide a set of related posts. The concept is fairly simple, and usually requires nothing more but to install an extra functionality plugin.
This being said, a related posts section can be nothing but useful to your blog, be it a clean list of popular posts or an entertaining and an eye-catchy section with images and descriptions.
5. Take advantage of the Next/Previous feature

Consider this issue from a reader’s perspective: he’s finished reading the post, and wonders where to go next, especially if he encountered content he enjoyed. Unless you’ve provided him with a customized previous/next feature, he won’t know how to continue, and will rather leave your website to browse for similar blogs.
6. Include an author bio in your posts

Readers like familiarizing with the authors of good content, so consider including a short author bio at the end of each post. Take care of the length, but avoid being too explicit at the same time. There are many small avatars that can make the bio look amazing, so try some of them.
7. Make the most of your categories

A sad but general conclusion that can be made from blog success ratings is that categories are seriously underestimated. There are only a few bloggers out there that know how to make the most of their categories, while all others are missing on some serious benefits.
To start with, what you see on most blogs is a sidebar list of categories, hopefully with a link that leads to them.
Links are already an improvement, but statistics show that’s not the preferred pattern of users when navigating towards a category. Why is it so? What may be a reasonable explanation is that category pages are rarely used in the first place.
Another problematic issue is that category pages are most of the time sorting posts chronologically, which does little, if something, to showcase the importance of these posts. What you get in the end is a confused visitor that wanders around broad categories without a clue of what he’s looking at.
There is a much better way to handle categories. You are the director of your blog’s interactive power, and you should start by guiding users towards highlighted and featured posts, and making sure those posts are properly organized in groups and subcategories.
Another issue that can become a serious problem is visitors’ general perception of categories as useless pages that provide a poor experience, but you can address this problem by enhancing category display on the sidebar, and adding featured posts for each of the categories. The approach is quite new but does manage to improve the experience and to push you out of the box.
An additional tip: It is not only categories you can use to organize posts – tags are cut for the purpose as well!
8. Improve the searching experience
Another obstruction for users to explore your content and access older blogs is that you don’t give them proper search functionality. Many bloggers believe it is the way search is configured in their blog that is slowing progress, but sitting with arms crossed won’t help them.
Just to be more precise: there are two types of limitations of the default search function: the search parameters of the platform are too poor and basic, and keyword phrases are not highlighted to help users understand why they are actually included.
The good news is that Google site search provides a multitude of plugins and similar alternatives that can fix this problem.
Finally, as technical as it may be, search becomes a design issue sooner or later. Unfortunately, most templates were designed with sideline search bars which are incapable of urging users to engage with them and are therefore of no good to bloggers who want to see uses exploring.
What could be done instead is to look for a better position for the search function, maybe even the center of the page.
9. Creating a detailed ‘About Us’ page
‘About Us’ is the most frequently opened page on any blog, the homepage being the leader of the group. It is also the one that will preserve your reputation, so take a look at some good examples to configure it properly. The more professional it looks, the better because visitors bounce any page that looks overdone or unfamiliar. Your goal is to motivate users to subscribe, and that’s certainly impossible without a decent ‘About Us’ page.

August 5, 2016
How To’s & TutorialsUltimate Guide: How to Optimize your WordPress Slugs
WordPress slugs are nothing but words and short sentences we use to describe our posts, categories, tags, and pages on the website, in the result of which those become an integral part of our permalinks, and explain content to our users.
Let’s say that the name of your post is “My Post In WordPress”, the slug will consequently be “my-post-in-wordpress”.
Post Slugs use the title of your post to generate slugs automatically, but won’t be automatically transferred to the URL if you don’t enable them to: substituting ”%postname” with its placeholder within the custom structure.
The importance of permalinks and slugs
Analysts in the sector identify hosting as the heart of every website, which makes permalinks and slugs its skeleton. They put the basis and form your website’s outline, critical both for visitors and engines that have to deal with your website.
To be more precise, permalinks and slugs are your content’s digital address, the one visitors have to use to access your posts.

They typical WordPress permalinks have a multitude of numbers and question marks, which gets a bit messy unless you’re the admin. However, this is not only relevant for the end users, but for the search engines that would otherwise struggle to find your website based on the messy information you’ve provided them with.
Default slugs are somehow better, because the system uses all of the words on that page or page titles, and removes shorter ones (the, a, an, etc) to build permalinks.
That would mean that default slugs are perfect if there wasn’t for two big problems:
1. The first is that these slugs are too messy and long;
2. The second is that the system can lose certain words that may be of relevance to your post.
Why would you let the system build your slugs and permalinks, knowing that the priority is to stay focused on human’s mind? You need to make permalinks motivational and catchy so that the user will open the post and read the rest. Clean URLs, however, are nor relevant and useful only to users search engines find them more beneficial too!
You can also use the posting page to change a slug: all you need to do is to click on the Quick Edit button (somewhere under your post). What you will see is a small editor window where all post slugs can be edited (other things too).
The slugs of categories and tags
Not only posts have slugs on your website, but other categories as well. Therefore, if users click on some of the categories our post is related to do, they will land on a page where all posts under that category are included.
Then, Categories/Tags slugs can also be altered. WordPress gives us what is the basic category slug (in case we haven’t created one) and we apply the very same method as with posts to change them and to save the changes.

How could we create slugs for our categories from scratch? We should go to Posts, then Categories, and use the WordPress dashboard. In order to add a new category, we should think of a creative name, type it in, and use the underneath field to add the new category. In order to save the changes, we should confirm the procedure by clicking on the Add New Category button.
The form will be the same in both of the cases, as long as you’ve typed the category/tab name in, or entered the slug you want. Remember that slugs need to be written in lowercase letters, without spaces but dashes instead.
How can you optimize your WordPress slugs?
WordPress wouldn’t have such varying levels of effectiveness if it weren’t for the large spectrum of ways to accomplish every single task. Said more simply, you have a choice to make things, make them right, or make them perfect. The decision is up to you!
This being said, we’re going to discuss some of the best practices when creating slugs, which is one of the simplest WordPress To Dos, but at the same time one you can’t afford the luxury to mistake.
Using hyphens instead of stop-words
By stop-words, we mean short ones, like ‘a’, ‘an’, ‘the’, etc., and we advise you to avoid them because the search engine is programmed to ignore them. It will surpass them both as indexing entries and search query results.
Using hyphens (-) is very WordPress-like, and you’re supposed to use those instead of under cores (_). Even Google can confirm that’s the right thing to do.
Keeping slugs short and packed with the most significant keywords
If you want readers to remember the slug, keep the URL short and keyword-relevant (including maximum 5 related keywords. According to Google, short, yet descriptive slugs are the best way to go.
Thinking like your users
Think of keywords users would normally type on their search engines, and you will push your slug a step forward for the search engine to discover it. As an example, users are likely to type “How to back up Gmail’, and Google knows it, so it groups content in accordance with it. In fact, Google offers the assistance of an admirable AdWords tool that suggests the best keyword ideas for your post, and while you will find plenty of them to choose from, we advise you to keep with few most relevant ones. Keeping things simple can never fail!
Cleaning the trash regularly to avoid duplicates
When you create a new page/post, you see there a number 2 on the end of it, and the reason for that is that the slug already exists somewhere, and WordPress is warning you about it. Having two posts/pages with the same slug is not allowed, which is why the ugly 2 will remain there until you think of something more creative.
Still, you don’t have to jump from one edge to the other, think of something slightly different (a closely related post or one what hasn’t been published yet) and WordPress will accept it.
You will be surprised to see that WordPress doesn’t allow even the names of posts/pages that have already been deleted, and the reason for it, is that they are still stored in your trash archive. Select all of them using the bulk editor, and empty the trash afterward. This way, you will still get to use old slugs without WordPress reporting it to be a problem.
Thinking before posting

After you’ve published a page/post, there is no sense in changing the slug. The content, title and even Meta description can be changed, but the permalink will require a 301 redirecting page in order to take visitors to the old URL, and in case you can’t fix it, it will report a perpetual 404 error. Still, if you consider that changing the permalink is an absolute must, let us share a simple HTA Access procedure that will keep 404 errors off the scene:
Redirect 301 /old-post-slug/ http://example.com/new-post-slug/
As you can see, doing it is fairly simple: you need to call the redirecting directive, change its status to permanent 301, and replace the newly suggested slug with the old one. After that, all requests will be redirected to the slugged URL, instead of the new one.
There is one more important thing to remember: Old slugs cannot be deleted!
The reason for that is that removing them can cause SEO momentum loss, meaning that you won’t rank as good as before, and users will most probably land on error pages instead of the right ones.

August 1, 2016
DiscoverFile Permissions: What are they, and how can they secure your website?
Ownership and file permissions rarely have a place in the focus of WordPress security discussions, which makes sense if thinking about hacker intrusion and security plugins. What many users don’t know is that those plugins would be useless if the file permissions are not set up in the right way: that’s exactly the gap intruders use to bypass your security measures!

Additionally, setting up WP ownership and permission settings can prevent numerous problems from arising, such as error messages while uploading an image in the library. Therefore, you have to know how to do this accurately.
How to recognize file permissions
When talking about file permissions, you have to distinguish between the two existing categories: Actions and User Groups.
By Actions we refer to the action of your files and plugins, which are:
Reading – it allows you to see the content of the file
Writing – it allows you to change the content of the file
Executing – it allows you to access the file in a prescribed order, or to run the scripts/programs it contains inside.
The User Groups are the following:
User – the owner of the website (you)
Group – users other than the owner, who can access the files (you get to choose those among the members of the site)
World – anyone using the internet to connect with your website and to access the files.
Permissions refer to ‘who can do what’, so think of them this way. The digits inside correspond to the ‘who’ part of the above-mentioned statement.
The first digit
Indicates what can be done by the users of the owner’s account
The second digit
Indicates what can be done by other users account in that group
The third digit
Indicates what every user can do (including random visitors)
In order to calculate the digits, you have to know the specific value prescribed to each possible combination:
0 – no access at all
1 – executing
2 – writing
3 – writing and executing
4 – reading
5 – reading and executing
6 – reading and writing
7 – reading, writing and executing
As you can see, the biggest possible value of the final number is 777, meaning that everyone (you, the group, and the world) can do everything with the file (read, write, and execute). The lowest one, on the other hand, is 000, but you will hardly ever need to use that one. The most common one is 444, meaning that all files can be read, but not changed or subjected to execution.
Try to remember these values, or at least to note them down, because you will need them each time when you want to correct your file permissions.
What could also be relevant to you is to know that the 777 value is a dangerous one: it means that everyone has access to your content, so avoid using it. 444s, on the other hand, are not ideal either, because putting it everywhere will make the website completely unusable.
The important part is to find and use the correct permission mode. To make things clearer, make a list of users and roles you want to adjust. Think who is supposed to do what, and consider all contributors and administrators and the capability they should have. For instance, contributors should be enabled to add and modify content, but not to add/remove plugins at the same time.
Administrators, on the other hand, should be capable of doing everything, even if that means changing the website completely. You must determine the roles in advance so that you can build proper permission models, not that much because of content and themes, but because of the files and folders which are critical to your overall presence on the web.
So, which are the permissions you should use?
If you’re a creative site owner who liked to set up pages of his own, you’re running a serious risk of incorrectly set permissions. If not sure about them, check them, and choose the right ones instead.
Remember that you will have to adjust the permissions for each plugin, because they all have different purposes, and require different capacity depending on the hosting setup.
When running a personal server, few WordPress Codex guidelines are perfectly enough:
Keep all files at 644.
Keep all folders at 755.
Keep wp-config.php at 600.
The .htaccess file is a different case because the value of its permissions depends on whether you want WordPress to access it in the case of automated updating. The best thing is to keep it at 644 or to switch to 604 in order to make it more secure.
Modifying file permissions with the cPanel
If your file manager is included in the cPanel, you should consider the following steps to check/edit the permissions for each file or directory:
1. Log into the cPanel account.
2. Look for ‘File Manager’, and open the file/directory that needs adjustment.
3. Select ‘Change Permissions’.
4. A popup will appear, and inside you can check/modify the permissions by ticking/unticking the box next to each action. Once done, confirm on ‘Change Permissions’ and the settings will be saved.
Modifying file permissions on your FTP site (via FileZilla )
In case you’re using an FTP program, you can change/modify permissions easily on your own web server. This is how:
1. Connect the FTP client to the web server, and look for the file that needs to be checked or monitored.
2. Open FileZilla, right-click on the file and select File Permissions to see the attributes of that file. Note that the terminology can be different (that depends on the FTP you’re using). A dialog box named ‘Change File Attributes’ will appear.
3. Calculate the value, and put the exact number in the text field named Numeric Value.
4. Confirm with OK, and the new permissions will be saved in the file.
Modifying file permissions via command lines
Those of you who have SSH access to their hosting accounts can benefit from the possibility to modify file permissions using the chmod method. The chmod is more suited for professional users, so in case you’re not one, look for tutorials to familiarize with it first. The reason for such precaution is that setting up incorrect permissions can take your website offline.
Keeping each file/folder from the wp-content directory writable is important, so try other alternatives before you get to this one. In case you go for this one, edit the directory, and replace DIR with a folder where you’ve written:
chmod -v 746 DIR
chmod -v 747 DIR
chmod -v 756 DIR
chmod -v 757 DIR
chmod -v 764 DIR
chmod -v 765 DIR
chmod -v 766 DIR
chmod -v 767 DIR
In case some of these commands turn out un-writeable, try again, this time using ‘R’ instead of ‘v’. If the result doesn’t change, change the permission values to 777s.
Common risks
Many WordPress users go for 777 straight away, without thinking how this can affect the security of their website. The common reason for doing it is saving time, as 777 solves any uploading problem right away.
Still, don’t forget that 777 is wide-open access, and it makes your website vulnerable to every possible attack. Following the guidelines we mentioned instead won’t be difficult, and it will still lead you to far safer results.
Some plugins, however, will request 777, and you’ll have to insert it (at least temporarily). In cases like this, keep the value at 777 as long as necessary, but switch back to the original one once the thing is done.

July 28, 2016
Did you knowTips And Tricks For Your WordPress Blog’s .htaccess File
Are you familiar with your WordPress install .htaccess file? This file is probably one of the most important configuration tools you could use to adjust the server settings to your needs, and to improve the performance and security of your website.

.htaccess stands for ‘Hypertext Access’, meaning that the file is subject to editing with a set of commands you could use to enable/disable functionality and widgets supposed to safeguard your website from hacker attacks, spammers, and similar threats.
Sometimes, the features are basic redirects looking to access a particular outer file, but sometimes they are more advanced and refer to content password protection or hotlinking prevention.
The .htaccess file can be found in the Multisite network (the root of the website), with a period in front of its name to insinuate that it is a hidden file and that you won’t get to see it unless you’ve confirmed the option.
In the WordPress case, .htaccess is applied to ease the creation of pretty permalinks, and will be automatically created once default URL settings are disabled. The file provides plenty of options for the users, as for instance adding rules which block unwanted visitors, or the popular 301 redirects.
As you can see, there is much more to .htaccess than permalinks. In fact, its strongest side is probably the capacity to reinsure your website, and protect it from hackers, spammers, and other unauthorized visitors.
In this article, we’ve summarized several important .htaccess snippets you could use to reaffirm the security of your website. Together with the main ones, we’ve included few additional ones we believe would be useful to you.
A tip for .htaccess beginners
The critical thing to do is to protect the .htaccess file before editing it, because of which we recommend you to back it up. Use the FTP client to connect to the site, and download the file to your device. If things don’t turn out the way you expect them to, you can always upload the original version of the file.
First of all, enable the visibility of your hidden files, and make sure the FTP client has all necessary permissions to perform this action. In case the .htaccess file is missing in the website’s root folder, you will have to create it a blank text one, and name it as .htaccess. Make sure you’ve written the name right, and try not to forget the period in front of it. When done, upload it to the root folder.
A secure .htaccess file
Before you consider any remodeling of your WordPress setup, make sure you’ve secured your .htaccess file. It is enough to insert the following shortcode, and the file will be safe from any unwanted external access. The code takes care of the sensitive characters in the file’s name, so even if you try to secure a file named .hTACcesS, the precaution will still apply.
orderallow,deny
deny from all
satisfy all
Protecting the wp-config.php
The same code can be used to protect all important WordPress files, but in case you want to protect the wp-config.php file, you should use this code:
orderallow,deny
deny from all
Hiding Directories and disabling public viewing of the WordPress installation
One of the things that make WordPress so popular is the ability to restrict public access and browsing of the directories, which you could do by inserting a simple piece of code inside the .htaccess file:
Options –> Indexes
This is supposed to block the access both to the main directory and its subdirectories, namely to any location where the change has been made.
Banning questionable IP addresses
In case you’re dealing with unusual and suspicious IP requests, you can use the IP address blocking option to prevent access to your website. All it takes is to open the .htaccess file and to add the following code:
orderallow,deny
deny from xxx.xxx.xx.x
allow from all
Using the .htaccess file to block image hotlinking
Hotlinking is a good tactic since it links your images with your website’s URL whenever they’re shared on other websites. Most often, hotlinking is used on discussion forums and community portals, but even by some website owners that make the mistake of enabling images to be removed from their posts without any intervention.
Hotlinking can be just as bad as it is good, meaning that it can slow the website down, but also increase the bandwidth expenses you’ve agreed about with your hosting provider.
Disabling hotlinking is not a good idea, but you can restrict it by allowing solely your website to change and execute imagery. For the purpose, copy the code below, and add it to the .htaccess file so that no one but you will get to hotlink your images. Meanwhile, don’t forget to replace the URL in the code with the one of your websites. Finally, confirm the disabled hotlinking choosing forbidden/custom image options.
RewriteEngine on
RewriteCond %{HTTP_REFERER} !^$
RewriteCond %{HTTP_REFERER} !^http(s)?://(www\.)?yourwebsite.com [NC]
RewriteCond %{HTTP_REFERER} !^http(s)?://(www\.)?google.com [NC]
RewriteCond %{HTTP_REFERER} !^http(s)?://(www\.)?feeds2.feedburner.com/yourwebsite[NC]
RewriteRule \.(jpg|jpeg|png|gif)$ – [NC,F,L]
Blocking include-only files
As a WordPress user, you’ve probably come across files that have no purpose and you never use. These files can be blocked or hidden by simply adding this code to the .htaccess file:
# Block the include-only files.
RewriteEngine On
RewriteBase /
RewriteRule ^wp-admin/includes/ - [F,L]
RewriteRule !^wp-includes/ - [S=3]
RewriteRule ^wp-includes/[^/] \.php$ - [F,L]
RewriteRule ^wp-includes/js/tinymce/langs/. \.php - [F,L]
RewriteRule ^wp-includes/theme-compat/ - [F,L]
Banning someone from your website
If you know the IP address of a malicious party, you can completely ban them from your website using the snippet below. For example, you could ban someone who always leaves abusive comments or someone who has attempted to access your admin area.
orderallow,deny
deny from 123.456.78.9
deny from 987.654.32.1
allow from all
Redirecting URLs
301 redirects are important because they allow users to be noticed by search engines, and to inform them that the URL has been definitely transferred to another location. You can use them to redirect a post, page, folder, or even to replace your entire website.
Basically, you should use 301 redirects whenever the URL is altered, for instance when changing the domain or the permalink structure of the website or the page slug (my-article becomes myamazingarticle).
Everything that needs to be done is to add a Redirect 301 line followed by the previous location, and then the new one. This is how the final result should look like:
Redirect 301 /oldpage.html http://www.yourwebsite.com/newpage.html
Redirect 301 /oldfolder/page2.html /folder3/page7.html
Redirect 301 / http://www.mynewwebsite.com/
Protecting the website from script injections
This is a more advanced feature, but that doesn’t mean you won’t be able to use it. WP Recipies shared a way to use the .htaccess file; it can be used to prevent malicious code injections in the PHP files.
What hackers do when they land on your website is trying to make changes to both WordPress GLOBALS and _REQUEST variables with the aim to inject the malicious code inside them. The next code will help you prevent them from doing so, as it enables your server to refuse the change:
Options FollowSymLinks
RewriteEngine On
RewriteCond %{QUERY_STRING} (|>) [NC,OR]
RewriteCond %{QUERY_STRING} GLOBALS(=|[|%[0-9A-Z]{0,2}) [OR]
RewriteCond %{QUERY_STRING} _REQUEST(=|[|%[0-9A-Z]{0,2})
RewriteRule^(.*)$ index.php [F,L]
Conclusion
These tips and rules are the basics of WordPress protection, being at the same time your best insurance against hackers looking to change your settings to their advantage. Still, bear in mind that the changes are only the beginning, and you need few additional steps to bolster security. No website out there is 100% safe, which means that as hard as you try, there will still be something more to do.
Using the .htaccessfile is among the first and best practices to add some extra security. At the same time, it provides users plenty of room to experiment their own way and to choose the tools that can enhance their security.

July 25, 2016
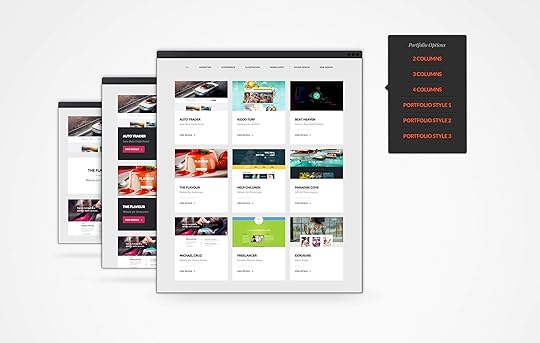
Did you know12 Tips to Create a Breathtaking Portfolio With WordPress
Is creativity an essential factor in your industry? Are you designing, developing, or creating whatever type of art? If the answer is yes, you’re already short on time to build an outstanding portfolio website and to go a step ahead of your numerous competitors. That’s, of course, in the case you don’t already have one.

Nowadays, when the Internet is gaining speed and developing solutions we could never even think of, striking out of the common communication pattern is essential to every business. It doesn’t matter who you are and who you’re working for – you have to make your work accessible to more clients, and to showcase the uniqueness of what you’re doing!
Let’s see how the internet and its most powerful building platform called WordPress can help you build a breathtaking portfolio website.
1. Think of the purpose first
Before you jump on the bandwagon and start designing, think which is the purpose of creating a portfolio website at the first place. What are you trying to achieve?
The goals usually coincide, due the fact that everyone plans what he wants to achieve, and focuses on becoming more competitive. These are the four most frequent portfolio goals:
Finding a job
Generating leads/boosting sales
Building a brand/Improving the reputation of an already existing one
Networking/Participating in a community
2. Choose an appropriate theme
Even a basic WordPress theme is enough to respond to your needs, but it won’t take you to the most eye-catchy solution ever. The theme has to be beautiful and powerful and to showcase the content in an attractive manner.
Free themes can do the work if you’re just starting, but don’t expect that much extra functionality or advanced customization features like the ones of premium themes. Upgrading to a pro version is a key factor for a professional appearance. You can find in the ThemeFuse collection many outstanding portfolio themes for creative professional, artists, creative business or anyone else aiming to showcase their work in high quality.

3. Consider plugins
Changing the theme on an already built WordPress website is not always a good idea because it requires both complete redesigning and advanced knowledge so that you won’t mess up the entire functionality of your website. What sounds much better is to add plugins, where the choice is almost unlimited.
With the proper plugins in hands, you can transform only one section, and make the website look like a new, amazing product that integrates flawlessly with your overall design.
4. Showcase your art
This is probably common sense, but it is still important to mention: you should settle for nothing less than an attractive website which can show off the best of your work in an engaging manner. While this stands as the first and foremost portfolio website activity, you’d be surprised by how many people fail to do it properly. And it is not because they forget to attach images, but rather because they choose unattractive layers or odd navigation methods, and push visitors away even before they’ve actually seen their work.
Our massive, multipurpose theme The Core offers multiple types of Portfolio showcases, with 2, 3 or 4 columns as well as different styles and types of displaying the portfolio blocks, like landscape, portrait or square. Also, the category options include the possibility to set up an icon for each category, so you can easily design your eye-catching portfolio.
5. Use HD images
Being a portfolio website, it has to boost with quality images that draw attention at first sight. To be even more honest, the quality of those images will be decisive for the success of a website. That’s why we advise you to present HD (high definition) photos and to choose appropriate sizes and colors which match the overall style of your website.
6. Mind your content
Putting more and more of it won’t help, so you should choose wisely. Few nice photos with a great title will do a better job than tenths average ones, so give you time to go through everything you have to display. If you are not blown-minded, users won’t be either, so let common perception do the job. On the other extreme, don’t let your specific and thinned taste defeat the common understanding of beauty, and choose the pieces everyone would like instead of those you prefer.
Mind relevance to: you’re entering a specific field, and your posts need to resemble that. If you’re writing, use publications or projects you’ve participated in. If you’re designing, attach images of your designs and creations. Scientists on their behalf publish lab reports, the same as accountants publish the financial analysis. That should tell you everything.
Finally, write a short description for each of the samples, just to help users familiarize with the context. This is especially important for projects, where we advise you to highlight the problems that project solved, and how it benefited your clients.
7. Round up a number
Nobody can tell you how many samples to include. My personal say would be 10 to 20, but that’s just for the sake of not exaggerating and letting users defocus. Still, if you’re a baby photographer, the more – the merrier! It simply depends on the nature of your business.
The sad truth is that not all of your samples will be seen (no visitor has enough time for that!), so focus on the best ones and try to lead attention towards them.
8. Make navigation more intuitive
Not even the greatest portfolio website will become popular if visitors are struggling to navigate it. Keep it easy and simple, and don’t let users be discouraged by complex menus and uncommon navigation methods. The artsy part is reserved for the samples, so don’t make experiments here: we know it is tempting, but the point is still to make work visible, the same you’d do in a real gallery.
9. Prioritize and categorize your work: that’s the secret!
This is the best thing you can do for your online portfolio, and the furthest you can go: from here on, work is going to start to sell itself. The critical decision is the first one when you compare and choose the pieces that are going to be displayed. In terms of categorization, try to be as professional as you can: Graphic designers, for instance, should divide their work as logos, posters, brochures, flyers, etc.
Last reminder: The ‘stars appear the latest’ scenario is not applicable here!
10. Update it regularly
Updating and refreshing will without any doubt surprise visitors, you will be impressed by how much effort you invest to keep your website ongoing. It doesn’t have to be a huge change: edit few images, change the color or add an attractive sidebar. Users will appreciate it!
11. Share your story
The ultimate goal of displaying your work is being contacted by impressed viewers, who will ideally browse for more information about you and your activities. Make sure that contact information is easily accessible, and include compulsory social network links for them to follow. Write a short, but comprehensive description of your background, capabilities, and expertise, or share everything you think is relevant for prospective customers to know. Don’t forget, your online portfolio speaks of you just as much as it does of your work, so make it look clean and convincible.
12. Don’t compromise on loading speed

Not everything is about what users see on your portfolio website: the quality of their experience accounts for a large part of their positive impression, so don’t let them wait for the pages to load. The general truth is that viewers don’t have time, and will describe your website as a non-recommendable one just because they waited one second more than usual. People are harsh, so do the necessary to accelerate your website’s speed in advance. Check out our FREE ebook to discover best practices and tips to improve your page speed score.
Putting together a portfolio is important for creating an outstanding online presence and showcasing you work in style, and using WordPress to build it is definitely one of the best tools.

July 21, 2016
How To’s & Tutorials7 Ways to Protect Your WordPress Website Against A Hack
Unfortunately, there is no way to protect a WordPress website or a blog from hackers 100%, since hackers are more than determined to surpass any obstacle, and find gaps to push their way through your system as hard as you’re trying to prevent them. What you can do, however, is to make them go through the needle’s ear to do it.
One thing you can rely on is that the hacker will eventually give up, and start looking for a website that pays off more.
This article aims to suggest a few strategies you can use to ‘mask’ your website in front of hackers.
1. Avoid defaults
For the good or the bad, WordPress offers various ways to sign up and to use it, and your role here is to avoid defaults when choosing a hosting plan or handling domains and installation.
Defaults are already known to hackers, and most of the brute-force attacks they’ve performed in the past were a result of easy-to-guess domains, that didn’t even take the time to discover. It doesn’t mean that you have to drill for details – simply provide the least website information possible, and you’ve already given them some hard time.
This is something you probably know, but please don’t use the default names and passwords you were given while creating your account, especially not for creating and managing content. Change them to something more specific, and do it right after you’ve signed for the package and installed it.
Adjust default details even if you were able to create them yourself (basically, there were no defaults and you chose your login information), since you can never know whether your hosting company gave access to them to external servers and other parties.
2. Isolate your WordPress database, and protect it

If there is one place where you can see all website information, it is the database. It contains a lot of information, which makes it almost irresistible to hackers.
To be completely franked, databases are easy to break in, due the fact that the automated codes for SQL injections are used to run all websites and blogs on your server, meaning that the hacker would get instant access to all information you possess.
The way codes are made, the minimum you can do is to use an individual database for each site/blog, and to let separate users manage them. The good side is that you can revoke every database privileges at any point of time, except maybe the right to read or write from the users who are installing the plugins and writing your content. Still, we don’t recommend you to withdraw all permissions, because changing the original scheme will require all privileges to be at stake.
Renaming the database is also a good practice, or at least changing its prefix and letting hackers misaim their attacks. It won’t mean that your database is completely safe, but rather that a compromised database won’t necessarily endanger the entire WordPress installation. You should also rename your database (by changing its prefix) to misdirect the hackers aiming their attacks on it.
3. Regular backup
Once again – let’s not dilute ourselves and believe that hackers won’t be persistent enough to get inside our systems. You may have skipped the basic security protocols so far, but the moment to rethink them is already here.
The best thing to do is to backup information regularly so that you could reset security once the threat appears. Afterward, you will be able to restore it easily, upload your data, and change the password to continue working after only one day.
Manual backup is your best and most secure option unless you’re using one of the best hosting companies which offer extra backup space without a fee. The last two versions of your websites will be enough, but you have to keep them outside your server to prevent hackers from reaching them.
4. Don’t even think of setting file permissions to 777 (not even for an hour)!
Setting file permissions to 777 is not serious, to say at least. 777 should be avoided at all costs because they represent completely open access and lack of any directory permissions for all users, which doesn’t really exclude hackers. Beginners often make this mistake, because they find it easier or forget to change it as time goes by. It is already too late!
777 are extremely dangerous since you’re allowing everyone to see, alter, or remove your files. Your website simply becomes an open house, where hackers can easily take a tour, install backdoor, or simply compromise all of your information.
5. Update WordPress regularly
Depending on your package, you might be lucky enough to have your WordPress version updated automatically. In most of the cases, however, you will have to do it yourself. Instead of jumping around excited about the new features, take care of the Security and Maintenance notes first.
WordPress updates are somehow knives with two blades – they eliminate the security vulnerabilities from the past, and bring new ones on board. The cool functionalities are there, but they bring a long list of security flaws we often fail to consider.
If we don’t update in time, we’d even be risking not fixing the ones from our previous versions. The worst part about not updating and getting hacked is that you will have nobody else to blame but yourself. Hackers love lazy website owners, so don’t give them the pleasure of using your lack of attention.
6. Use the most complex passwords you can think of

Passwords are a cliché when it comes to security threats, but there are passwords where both hacker attacks and good security precautions begin.
We don’t blame you for being one of those people who hate memorizing long and complex passwords, and use shorter and easier ones instead, but we are warning you that you’re making hackers’ job seriously easier.
The rule is simple: safe passwords need letters, numbers, and other valid characters in unusual combinations to make the hacker give up. Even dramatic approaches such as ciphers and algorithms are not exaggerated. If nothing else, longer passwords take more time to decipher, so make use of them.
Another recommendation is to avoid personal data in passwords because that makes hackers’ job more than easy. Single words should be excluded as well (even if they are long), the same as a plain letter or a plain number passwords. All of them are known patterns which simply put your website on disposal for every hacker.
7. Secure the admin files
WP-admin files are meant to be accessed by a single person, or two people the most. In order to restrict access, try using the .htaccess file to assign the directory to the only IP addresses concerned.
In case your IP address is static and you use the same computer to blog, you’ll have the advantage to be the only person able to access admin files by default. Multiuser blogs, however, should govern access and choose a range of IPs to assign to it. Apache’s documentation available on mod_access can help you do this in only a few minutes.
All you have to do is to copy this code and to paste it in the .htaccess folder (not the root one):
# deny access to wp admin
orderdeny,allow
allow from xx.xx.xx.xx # This is your static IP
deny from all
This code will stop browsers from accessing whatever file in the sensitive directories, and will show them only “xx.xx.xx.xx” which represents your hidden IP address. You can perform the same action in an even easier way, by simply adding a password to the .htaccess file.
If you run a WordPress website, you should definitely perform all the steps mentioned above to secure it against hackers.