
Andrew Macarthy's Blog, page 13
December 7, 2017
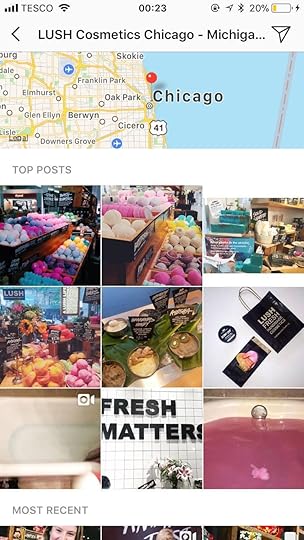
How to Create And Use Instagram Location Tags to Drive Customers to Your Business
When browsing Instagram, you'll notice that many people's images, videos and stories are tagged with specific locations - most often their business name or locale. Tagging your Instagram posts with a location can be a great way to increase exposure for your business. In this post, I'll explain how and highlight specific examples for you to try.
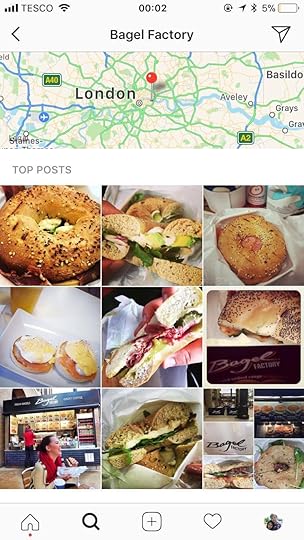
The benefits of tagging your location in InstagramOne of the biggest reasons for tagging your business' location is Instagram is that Instagram offers, in its search, an aggregate view of all posts that have this location tagged, similar to what it does for hashtags. When people are searching on Instagram for cool stuff to do or interesting places to go in a certain spot, there's a chance your business will appear, along with all the photos and videos tagged there - both by you, and your customers. How's that for encouraging people to visit you?
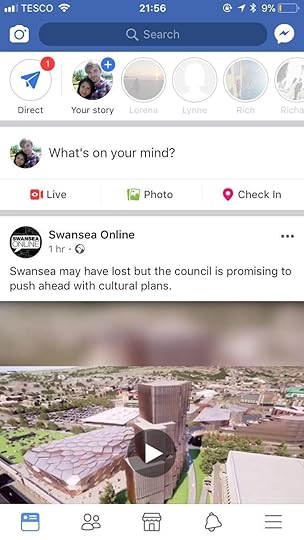
Similarly, another benefit of tagging a location to your business that it'll start to appear in the Places and Nearby Places sections of Instagram & Facebook - another chance for people to find your business when they're looking for something local to them.
How to Create An Instagram Location TagAlthough you can use a location tag in Instagram to get your business in front of people in a certain city or specific area (e.g., Chicago, or Cameden in London), you ideally also want the exact physical location of your business - and its name - to be one, too.
if you already have a Facebook Page for your business, then chances are your business will already appear as a location choice on Instagram. However, if you can't find your business when trying to tag a location to your Instagram posts, you'll need to create one for it... using Facebook. Since Facebook owns Instagram, a lot of its data is shared and this is what'll happen here. You'll create a location (or Place as its called) in Facebook and that will later appear for use on Instagram.
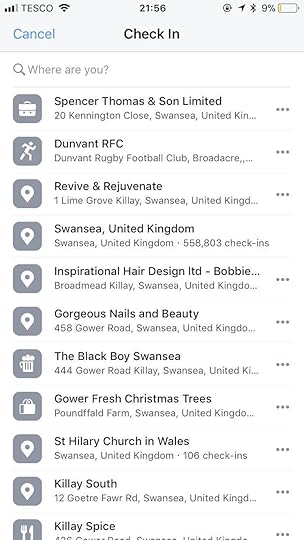

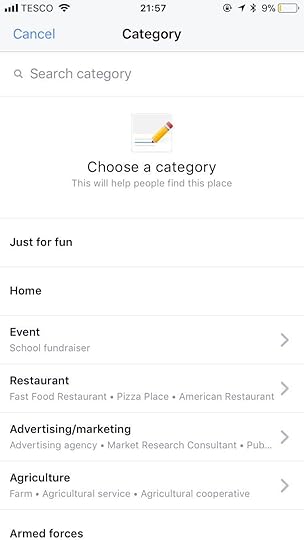


To start, make sure you are physically located at your business and fire up the Facebook mobile app (the main app for personal use, not Pages).
You should now, in theory, be able to select your Location inside Instagram when creating a post. Anecdotal evidence (including in my own experience) suggests that the process of your location appearing inside Instagram is not instant, so do be patient.
Note: You can also use a public Facebook event as a location. Just like a location, you can tap the event name to view all photos and videos shared publicly at that event or location.
Instagram Location Tagging Strategies for BusinessWith your Instagram location now setup, with a bit of effort - like posting and tagging the location regularly, and encouraging patrons to do the same - you should start to see results. On top of that, let's look at a selection of strategies that use location tagging to boost your business:
Location Stickers in Stories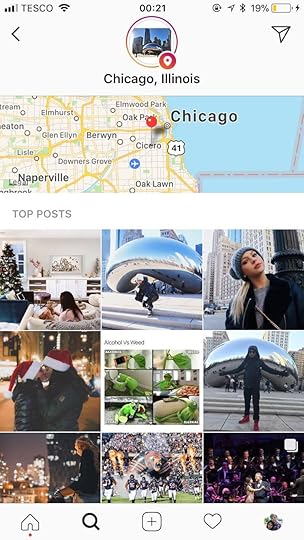
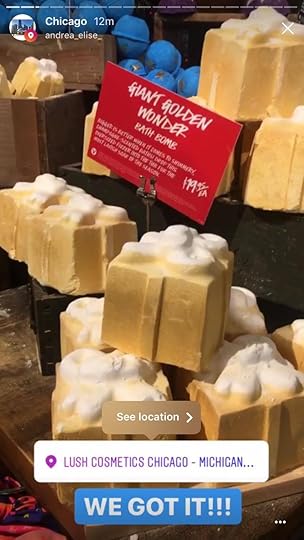
Instagram Stories lets you add an interactive, digital sticker to photos or videos that are based on your location. When the sticker is tapped, the user will be redirected to the search results page and will be able to learn more about your business by viewing all posts that have been tagged with your location - another opportunity to convert Instagram users into new customers.
How to add a location sticker to your Instagram story:
After creating your Story, tap on the sticker icon, which looks like a square smiley face, at the top of the story screen and select the location sticker option.Type the name of the location you want to use and select a corresponding name from the list that appears. You can then rotate, resize, or move the location sticker, as well as add text to your story, for example, and once you are done with editing, click Next to upload your story to InstagramInteract with location postsWhen your physical store location has a tag in Instagram, it is wise to keep on top of its (and other local location tags) as much as possible. The area surrounding your business may have a plethora of content your brand can use to further engage users.
Encourage sharing content to your location or hashtagPromote your location and encourage users to share content to it. You could even run an Instagram contest to get users to engage more with your location. Set out the rules and make sure entrants tag your specific location correctly. Where Stories are concerned, be sure to encourage your customers to tag your location in them with a sticker!
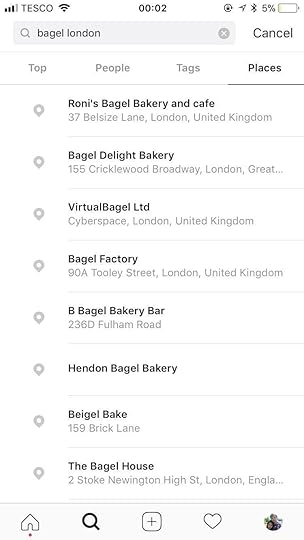
Use your location to find local influencersDigging into the people who interact with your location and those surrounding it is a savvy way to find people who you might be able to partner with to promote your business. For example, imagine you want to get the word out about a new product launch or upcoming event, and you want to find local people - Instagram influencers with a sizeable, engaged audience - who might be the right fit to help you promote it. In the Instagram search bar, ensure the Places tab is selected and type in your location. Browse through the results to see which users would be a good match for your brand, then DM to see if they might be interested in partnering with you.
Don't forget hashtag locationsAlthough this post is more over about tagging a whole Instagram post with a location, utilizing ordinary descriptive hashtags on Instagram (e.g. #coffeeaddict, #mondaymotivation, #redvelvetcake) can give your content more visibility - but you can also use hashtag locations like #london or #miami to give your content the chance of being suggested to people who are near you.
Over to youDo you make the best use of location tagging on Instagram for your business? Will you be putting any of the strategies above to use? Let me know in the comments below!

Andrew Macarthy is a social media consultant and the author of the #1 Amazon Web Marketing Bestseller, 500 Social Media Marketing Tips.
Buy 500 Social Media Marketing Tips
Amazon US: http://www.amazon.com/dp/B007L50HE6
Amazon UK: http://www.amazon.co.uk/dp/B007L50HE6
Follow Me:
http://www.facebook.com/500socialmediatips/
http://www.pinterest.com/andrewmacarthy
http://www.twitter.com/andrewmacarthy


October 12, 2017
How to Make Custom Frames for Facebook Stories to Promote Your Business in Photos and Videos
Do you want to visually brand your Facebook Stories and profile photos to promote your business, and let your fans and customers in on it, too?
With the Facebook Camera Effects platform and its Frame Studio feature, you can design a custom frame that overlays your Facebook content - videos, photos, and profile photos. Frames are a creative way for people to have fun and show their support for you and your business.
In this post, you’ll discover how to use Facebook Camera Effects to create Facebook frames for your business. Designing and publishing your frame is easy. Let's take a look at the process, step-by-step:
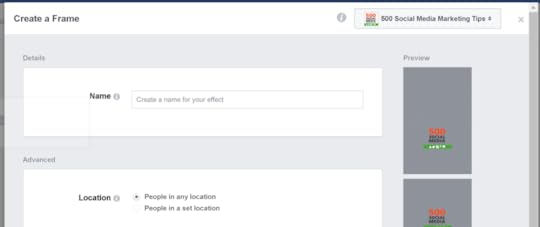
To begin, visit Facebook's Camera Effects Platform page and click "Create a Frame":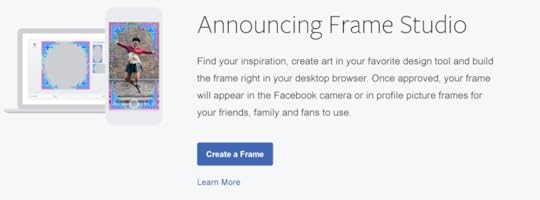
Here's the Frame creation tool. The best first step is to assign an owner to the frame you create (your personal profile or a Facebook Page) which will make sharing it easier later on. Choose it from the Select Owner drop-down menu:
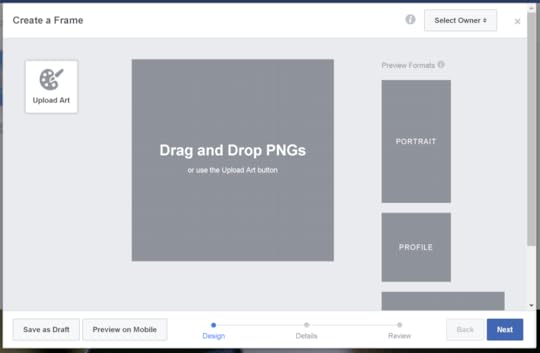
Next, click Upload art or drag and drop one or more .PNG file into the template. Use the handles to change the size and drag the images around into position.
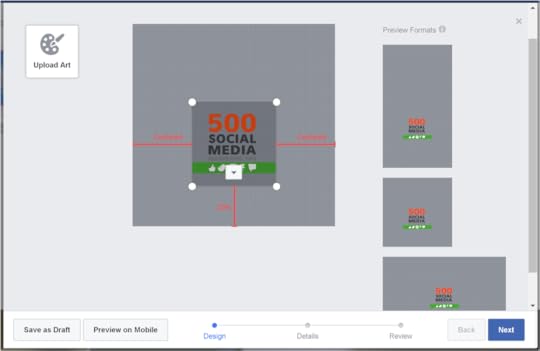
Here are a few tips to help you design a successful frame:
Use an image editor like Photoshop or Canva to create the elements of your frame. Each element must have a transparent background.Keep it simple. Remember, people will most likely be viewing your frame on a mobile display so intricate designs won't translate as well. Position your art around the edges to frame the photograph - a frame should compliment a profile photo or Facebook camera photo, not dominate or obscure it.Uploading images will cause the preview windows for mobile (portrait and landscape) and profile photo to update. Use these as a reference to amend and optimise or frame design: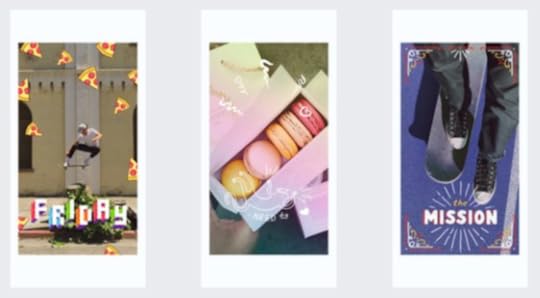
The examples above show the kind of effect that you can achieve, and how placement is crucial. As you'll notice from my own example from now on, its size and placement could have been improved!
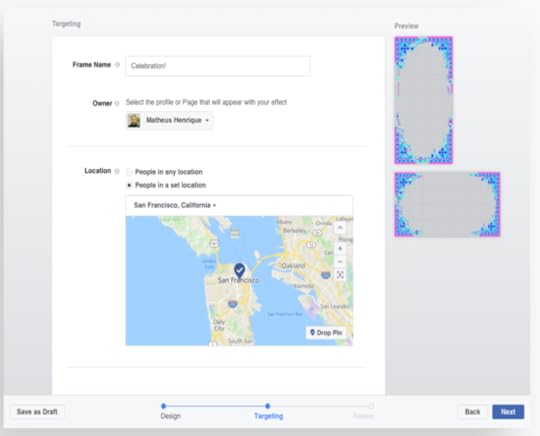
With your design complete, hit Next and give it a name so that it can be searched for by you and fans later on: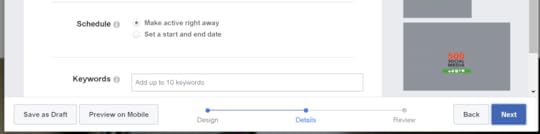
By default Facebook Frames cab be used by anyone. However, the Location option (not available to me at the time of writing, but shown below) means you can set your frame to be triggered when a user is at a specific location, such as at your business or event:
By the way, if you don't want others to have the ability to create frames at your business' location (potentially overshadowing or sabotaging your efforts!), here's what you need to do:
Click Settings in the top right of your Facebook Page.From General, click Page Location for Frames.Click next to Page Location for Frames to manage who can create frames at your business' location.Click Save Changes.Next, tell Facebook if you want your frame to be available as soon as it is approved, or if you'd rather delay the start date. Last, add up to 10 keywords to help people find your Frame in future:
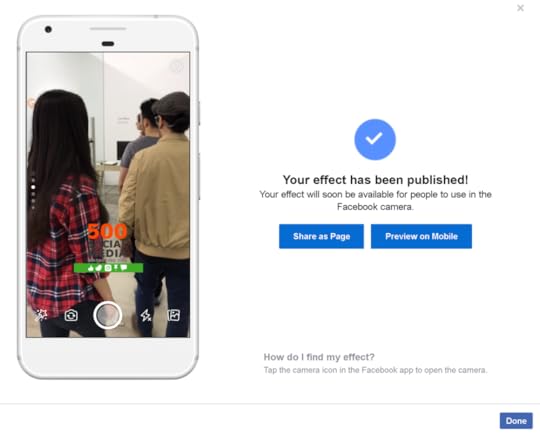
On the next page, you'll get one last chance to look over your Frame before you publish it.

Once you hit Publish you'll have the chance to share it to the followers on your Page immediately if you wish.
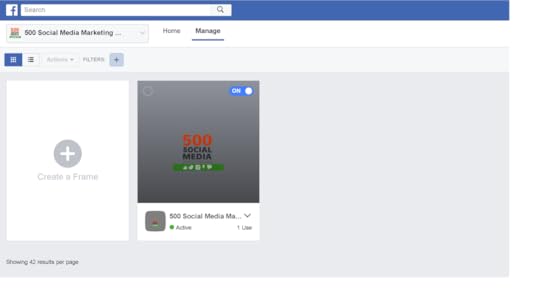
You will now also be granted access to a hub to manage your Frames; to toggle them on and off, duplicate,preview on mobile, etc.
Click on any Frame for sharing options: a link that will send a push notification to people's phones, and a button to share the frame within a post on your Facebook Page:
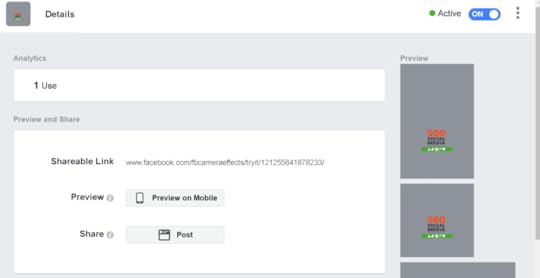
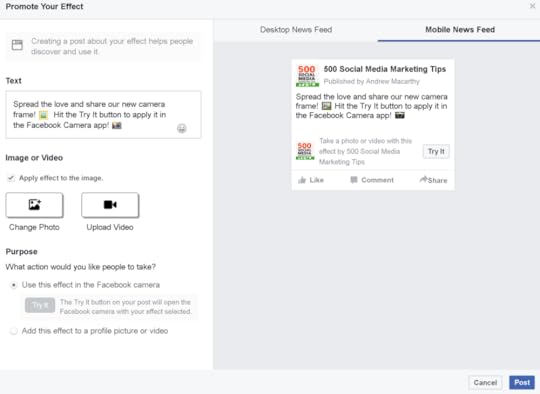
When you share the frame to your Page, you'll be able to write some text to promote it, and accompany it with a photo or video. A "Try It" button will appear next to the post (previewed in the right-hand pane) for users to tap or click. The last option here lets you decide whether to share the frame within the Facebook camera or as a profile photo overlay:
That's about it for the creation process, which, by the way, you can also perform via your Facebook page directly. In the status update section on desktop, click the "Create a post with your frame" button:

From here, you'll be able to choose an existing frame or upload a new one. You should also be able to manage your frames from the Publishing Tools section of your Facebook Page, but this was not yet available when I tried.

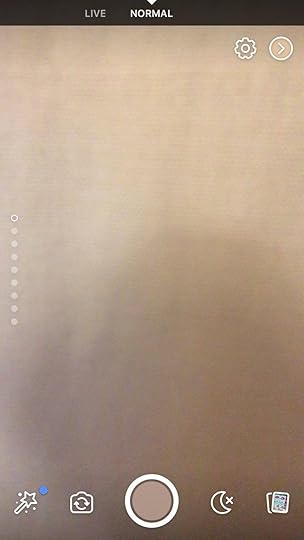
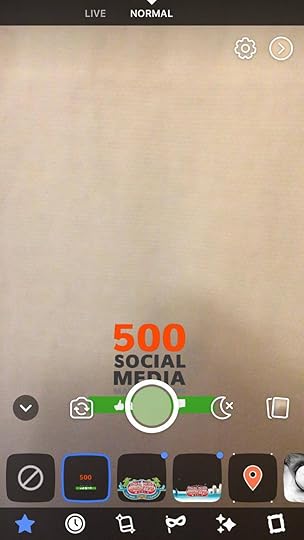
And here's how adding the frames look in practice via Facebook Stories. When a user opens Facebook Stories after receiving a notificiation, they can tap the magic wand and select your frame.

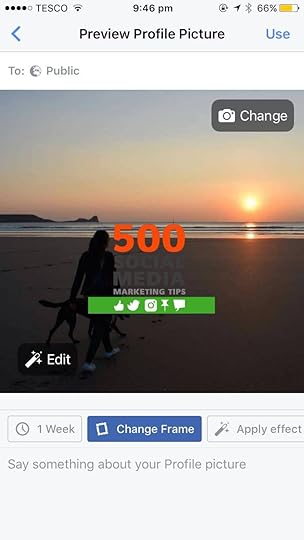
If a user is adding a frame to their profile photo on mobile, they'll receive a notification too.
On desktop, they can:
Go to www.facebook.com/profilepicframesClick your profile picture in the bottom left and select your PageSearch for a frame by entering the frame's name, the creator's name or related wordsChoose the frame you want to use from the resultsClick Use as Profile PictureWhich is why naming and listing your frame with keywords is so important.
Over to youWill you be using Facebook Frames as a way to promote your business and encourage fans to do the same? Let me know your thoughts - and share your results - in the comments below!

Andrew Macarthy is a social media consultant and the author of the #1 Amazon Web Marketing Bestseller, 500 Social Media Marketing Tips.
Buy 500 Social Media Marketing Tips
Amazon US: http://www.amazon.com/dp/B007L50HE6
Amazon UK: http://www.amazon.co.uk/dp/B007L50HE6
Follow Me:
http://www.facebook.com/500socialmediatips/
http://www.pinterest.com/andrewmacarthy
http://www.twitter.com/andrewmacarthy
October 3, 2017
The 7-Step Guide to Create Irresistible YouTube Video Thumbnails (With Examples)

The 7-Step Guide to Create Irresistible YouTube Video Thumbnails
It's weird to think it now, but in the early days of YouTube, the option to upload a custom thumbnail did not exist. And even when they were introduced, implementing one was not widely seen as crucial to the success of a video. But now, with 400 hours of video uploaded to YouTube every single minute, an effective thumbnail can be the difference between your content's success or failure.
In this post, I'll explain the 7 steps you need to create compelling YouTube video thumbnails, to help deliver increased viewership, engagement, and subscribers, but just before we get to that, some context:
Why Compelling YouTube Thumbnails Are So Important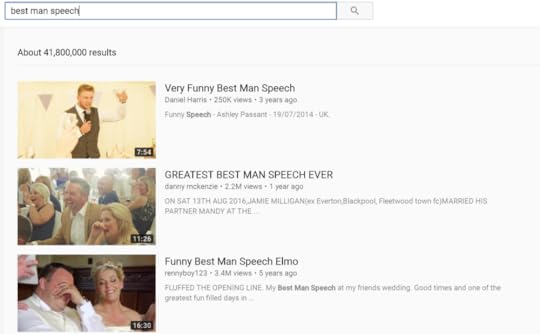
Along with a title, your video thumbnail will usually be the first thing people see when they come across your video on YouTube, either in search or in other areas of the site where it might be offered up for suggestion. A thumbnail acts as a miniature marketing poster, and effective thumbnail attracts a viewer's eye to your content and compels them to click through to watch. You've got a split-second to do it, or they'll be watching someone else's video.
In Youtube's own words, thumbnails require an "art director's eye for branding and shouldn't be an afterthought." Thumbnails and titles work together as an important part of your video's metadata and help build anticipation of your content, while accurately representing what it's all about.
What is boils down to is this: When your title and thumbnail encourages a viewer to click through and watch a video - especially if they watch all of it - that tells YouTube that your content is delivering on what it promises. The longer people watch your videos, the more YouTube may surface your content versus that of the competition. If they immediately click away - because your title and thumbnail are misleading, then you're likely to see the opposite.
How to Design Effective YouTube Thumbnails90% of the best-performing videos on YouTube use custom thumbnails, so designing and uploading one that will maximise the impact of your video is crucial. Here are a number of tips to help you do just that:
1. Have an idea before you shootAs obvious as it is that you will plan the sequence, shots, script, etc. of a video before you shoot it, make the potential thumbnail a part of that process, too. Think about what the thumbnail might be before you hit record and, if it's pertinent, look for and grab that shot (video screenshot or still photo) - or a few potential options - during filming.
If the content of your video isn't naturally visually compelling (meaning that you can't get that perfect thumbnail shot), a visually dynamic thumbnail, perhaps even posed, can be the key to getting people to click and watch.
2. Consider how your thumbnail will look at different sizes
Thumbnails show up in different sizes and formats all across YouTube and outside of the platform and on different devices, so it's important that your thumbnail looks good whether it is big or small. One easy way to test this before you upload is to zoom in and out of your thumbnail after you have finished putting it together. Does it appear to pop off the page whether it is large or small, on desktop and on mobile?
By the way, when you create your thumbnails, YouTube recommends a resolution of 1280 x 720 pixels. The file size needs to be under 2MB.
3. Use visually compelling imagery
As I mentioned in the introduction above, it might be that you only have a split-second to help a viewer decide whether to watch your video or not, and your thumbnail will have a big part in that decision. Thumbnails that consist of visually compelling imagery, that are well-framed and have good competition, are always going to stand you in good stead.
In addition, think about how you will incorporate colour and branding (hues that contrast against the white of YouTube's background work well) and what emotion you want to illicit in people to encourage them to click - happiness, curiosity, anger, etc. Where the latter is concerned, featuring a close-up face is a good way to tease the mood of a video.
Thumbnails that use a text overlay are also popular. Think about how the composition of text, colours used, and font choice will engage viewers, and whether the expectation that the thumbnail generates matches what the video actually delivers. Give viewers a sneak preview without being click-baity.
4. Ensure your thumbnail stands out against others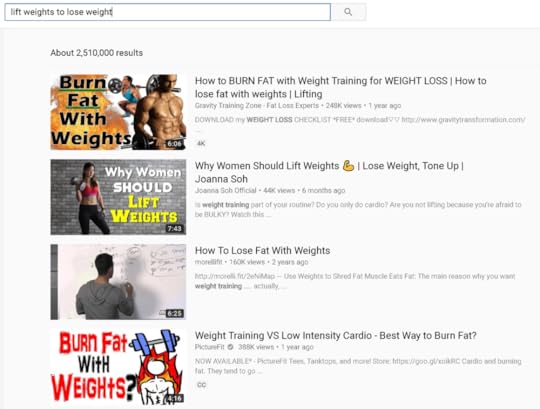
From a branding standpoint, this one is really important. If your thumbnails of your competitors jump off the page more than yours when they are returned in search, those videos are going to be watched more. Here's where a quick spy on the competition will come in very handy: perform a search on YouTube for specific videos or channels similar to the topic of those that you plan to film, study the existing thumbnails, and think about how you can build yours to get noticed when yours competes directly.
The examples above, believe it not, were the first results to appear when I searched "lift weights to lose weight." There's a real mixed bag of thumbnails there and, I'd say, none of them really hit it out of the park. Depending on the topic and niche of your videos, there is ample opportunity to convincingly outdo existing competitors in the thumbnail game; to make your video the must-click content in search results.
5. Consistent thumbnails can boost branding and views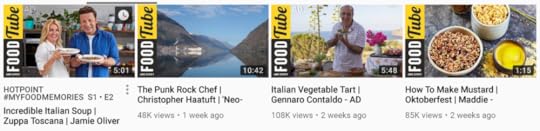
While the main imagery of each video thumbnail should be able to stand alone, a smattering of consistency can help to drive brand awareness and help viewers identify your videos within search, recommendations, or their subscription feeds. If necessary, go back and update old videos with new, refreshed thumbnails. As well as delivering a consistent look and feel to your channel, you may also help to boost views on older content - the new thumbnail making it a more attractive proposition, especially to uploads from an era where high quality thumbnails were not an important consideration for creators.
6. Pair great thumbnails with catchy video titles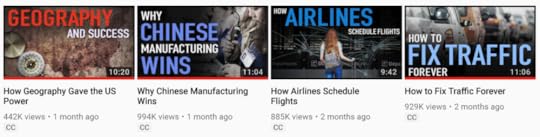
As much as this post is about making compelling thumbnail images, I can't neglect to stress how important it is to pair your thumbnail with a catchy, accurate title - not misleading or clickbaity. Like thumbnails, the best titles accurately represent content, but can also be creative and tease what viewers will see if they click. YouTube recommends that you keep titles concise (60 characters), with the most important information up front, and to double-check that your titles don't get cut off in suggested videos, search results and mobile.
7. Use YouTube Analytics to see monitor performance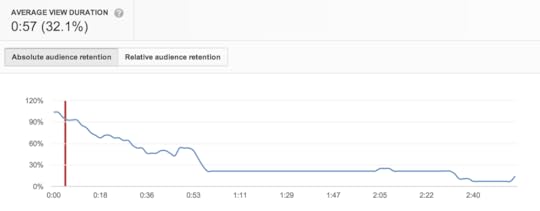
image credit: MWP Media
The Audience Retention report within YouTube Analytics can help reveal if your thumbnails and titles are delivering on expectation, by showing you if viewers watch your videos the whole way through or click off soon after they begin playing. High audience retention means that you're doing a good job - your titles and thumbnails accurately represent the content and viewers are happy - whereas poor results mean that you should consider re-jigging titles and thumbnails to see if you can improve viewer retention.
If your thumbnails and titles are really way off the mark, viewers might even voice their displeasure in the video comments!
As well as A/B testing thumbnails on YouTube over time, another method to discover which thumbnails most resonate with your audience is to promote the video with Facebook ads. Use at least two different thumbnails with an element in each changed, and see which performs best.
Over to youHow much do you think about YouTube thumbnails and the impact they will have on your videos' attractiveness and the chances of it being watched? Will you be putting any of the tips above into practice?
Let me know in the comments below!

Andrew Macarthy is a social media consultant and the author of the #1 Amazon Web Marketing Bestseller, 500 Social Media Marketing Tips.
Buy 500 Social Media Marketing Tips
Amazon US: http://www.amazon.com/dp/B007L50HE6
Amazon UK: http://www.amazon.co.uk/dp/B007L50HE6
Follow Me:
http://www.facebook.com/500socialmedi...
http://www.pinterest.com/andrewmacarthy
http://www.twitter.com/andrewmacarthy
The 7-Step Guide to Create Irresistible YouTube Video Thumbnails
September 22, 2017
How to Setup Buyable Pins to Sell Products Direct on Pinterest
How to Setup Buyable Pins to Sell Products Direct on Pinterest
Do you pin products to Pinterest to promote items on your website or store? How would you like to sell products directly within Pinterest? Buyable Pins let you do just that. In this post, I'll explain everything you need to know about Buyable pins, how to set them up, and how to make the most of them.
Buyable Pins are a special kind of pin that let customers buy your products without ever leaving Pinterest. Buyable Pins are marked with a blue price and "Add to Bag" button, so people can easily spot them all over Pinterest—in search results, in related Pins and on your business profile.
What are the benefits of Buyable Pins?
What are Buyable Pins, and what are the benefits?
Buyable Pins work seamlessly across mobile and the web, so you can make the sale whenever someone is ready to buy. When a customer orders (using credit card or Apple Pay), all order and payment information will be sent to you for processing. You still get to handle shipping and customer service the way you always have, and Pinterest doesn’t take a cut from your sales.
In short, Buyable Pins, in allowing customers to discover and buy your products right from Pinterest, reduces friction and improves conversion, resulting in a seamless ecommerce experience.
How to Setup Buyable Pins for Pinterest
At present, Buyable Pins are currently only available to a select group of retail partners and U.S. merchants with Pinterest business accounts. However, if you use one of the commerce platforms listed below, you will have the opportunity to apply to use Buyable Pins today.
Before you apply, you must first:
1. Create a Pinterest business account (go to https://business.pinterest.com/) and sign up), or convert your personal account to a business account.
2. Review and adhere to Pinterest's Buyable Pins guidelines, that include selling the appropriate product, setting your profile up right, and promising stellar customer service. Follow this link for the full rundown:
It's definitely worth making sure these two factors are all in order first, otherwise your application may fail. After you’ve applied for Buyable Pins, you’ll receive an email from your e-commerce platform on the status of your application. Click on any of the links below for more specific information about applying for Buyable Pins through each platform:
BigCommerceSalesforce Commerce CloudShopifyHow to add Buyable Pins to Pinterest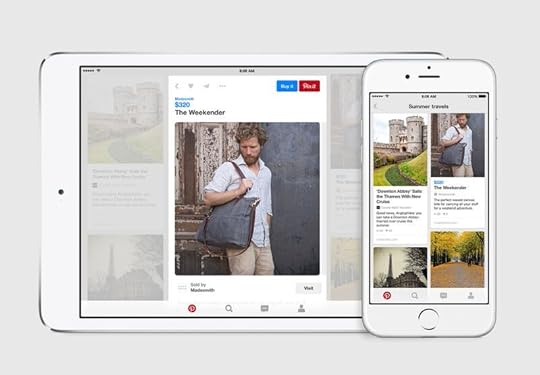
Once your store has been approved for Buyable Pins, you'll be able to start adding products to Pinteres via a protected products board (pinterest.com/YourUsername/_products). This board is hidden from public view, only you will be able to access it.
If you don't see a protected products board when going to this URL, make sure the website on your Pinterest account settings matches the primary domain you set on your e-commerce store. This board will contain all your Buyable Pins and is hidden from your profile. If you don't see them straight away, don't worry - Pinterest says it may take 3-5 days for your Pins to appear as Buyable.
The easiest way to start pinning products to your Buyable pins board is with the Pinterest Save button for browsers - available at https://about.pinterest.com/en/browser-button. When you're on a product's individual page, click the extension's icon and you'll get a pop-up allowing you to pin it direct to your profile.
As mentioned above, although customers will not be able to see your protected product board, pins from your products board are eligible to be surfaced in search results and people's home/category feeds. Do not edit or delete the products board in any way, as this will break the sync between Pinterest and your e-commerce platform, and any new products you add to your store will not automatically update on Pinterest. This board will update every 1-2 days with any new products you add to your store.
How to get Buyable Pins found - Best PracticesOnce you're all up and running with Buyable Pins, use these tips and tricks to get the most out of them:
Save Pins (especially your bestsellers) from your products board to your public boards, so anyone who visits your profile can see them, in addition to coming across them in search.Descriptive copy in your pins, boards, and bio can help you reach a wider audience through search.Sell a lifestyle—not just products. Build stories around your product pins, with your customer persona in mind.Use high quality product images and implement the Pinterest Save button on your product landing pages to encourage shoppers to save Buyable Pins to their own boards.If you need to update the URLs on your Pins, create new Pins with the new URLS. Redirects won't work right and will break your Buyable Pins.Use Pinterest Analytics to learn more about your audience and how your product pins are performing.Just as you can with regular Pins, you can pay to promote your Buyable Pins. Depending on your goals, you can run engagement or traffic campaigns. Use Promoted Pins to reach your audience and boost sales.Over to youWill you be experimenting with Buyable Pins for your business? What tips do you have to make selling more successful on Pinterest? Let me know in the comments below!

Andrew Macarthy is a social media consultant and the author of the #1 Amazon Web Marketing Bestseller, 500 Social Media Marketing Tips.
Buy 500 Social Media Marketing Tips
Amazon US: http://www.amazon.com/dp/B007L50HE6
Amazon UK: http://www.amazon.co.uk/dp/B007L50HE6
Follow Me:
http://www.fa
cebook.com/50
0socialmediatips/
http://www.pinterest.com/andrewmacarthy
http://www.twitter.com/andrewmacarthy
September 7, 2017
August 1, 2017
How to Make Square Videos For Facebook Using PowerPoint (Free Animoto Alternative)
How to Make Square Video For Facebook Using PowerPoint (Free Animoto Alternative)
Do you want to create square videos for Facebook and Instagram, or other social networks?
In this blog post, I'll show you how to easily and quickly make and produce square videos using Microsoft PowerPoint - no video editing expertise required!
The end result is similar to that which you'd get using a paid tool like Animoto... but free!
Before we get to the tutorial, some background information...
Why your business should make square videosThe use of video in social media has exploded in recent years, but the one element that not many saw coming was that square video (along with vertical format - which I wrote about here) would come to be preferred by users and marketers alike - especially on mobile devices. No matter the screen orientation, square video fills up a lot of precious screen real estate. In fact, Facebook and Instagram even recommend square for use in video ads.
And if you're resources are scarce, square video can also work for you. As wochit puts it succinctly:
"The effectiveness of square regardless of the viewing scenario means that videos with 1:1 aspect ratios can work well across platforms. There’s no need to recreate the same piece for every channel, when you can simply hone in on a square format."
The following numbers show how and why square videos help to drive views and engagement on social media:

image credit: buffer / animoto
Square videos (1:1) take up 78% more real estate in the mobile news feed than landscape videos.When Buffer ran 10 tests with 60 different variations including square, landscape, and letterbox, square and letterbox video noticeably outperformed landscape video in terms of engagement and reach.Over several months in 2017, data from marketing agency Laundry Service revealed that view rates for square videos on Instagram were 28% higher than horizontal content. When looking specifically at view-through rates for the first 10 seconds of a video, 1:1 videos outperform 16:9 clips by 54%. Why PowerPoint is the Best Square Video Tool For Social Media
Let's address the elephant out of the room. Yes, I really am advocating Microsoft PowerPoint as a video creation tool for social media - hear me out on this one! Specifically, I'm talking about the type of social media video that mixes still images with an animated text overlay. For these sorts of videos - loved by news outlets and tons of other brands - it beats most current options out there for ease of use and accessibility.
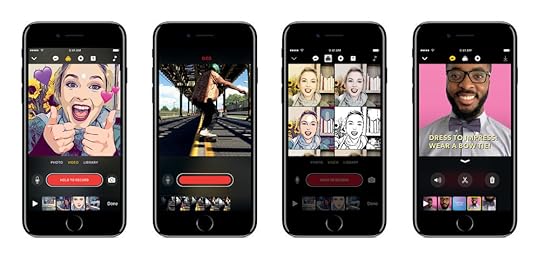
apple clips - no good for what we need
Millions of businesses - probably yours, too - already have access to Microsoft Office (and PowerPoint), and will already be familiar with how to use it. On the other hand, here's a brief run-down of alternative square video creation options out as I write this:
Video editing software like Adobe Premier supports square video creation, but is expensive and has a bit of a steep learning curve - we want quick and easy!iOS' main video camera does not currently support square video format.Instagram records square videos, but lacks text overlay and custom branding options.Apple's Clips app records square videos but editing and customisation is lacking.Vine app camera restricts videos to six seconds in length.Apps that convert landscape video to square video format often do not crop the original video as intended.Then there's online video-creation tools like Adobe Spark (currently landscape-only videos) and Animoto (monthly or yearly subscription running - potentially expensive).Note: I realise this isn't an exhaustive list and I'm sure there are other tools out there (especially mobile apps) that might offer a path to the same effect as I'm putting forward. However, I do like the fact that this method is PC-based. As much as a I love mobile for content creation, sometimes it's more efficient and pleasant to work on a big screen with mouse and keyboard.
How to Make Square Videos in Powerpoint: Step By StepIf I've convinced you enough to give this a shot, then let's go! For the purposes of these instructions, I'm using PowerPoint in Office 2016. Your version of PowerPoint might look a bit different, but the instructions will largely be the same.
1. When you open PowerPoint, visit the Design tab. Choose the Slide Size menu and click Custom Slide Size.
2. 1080 pixels by 1080 pixels is a good size for square video, so replace the measurement in both the Height and Width boxes with "1080 px". PowerPoint will automatically convert that number into cm or in.
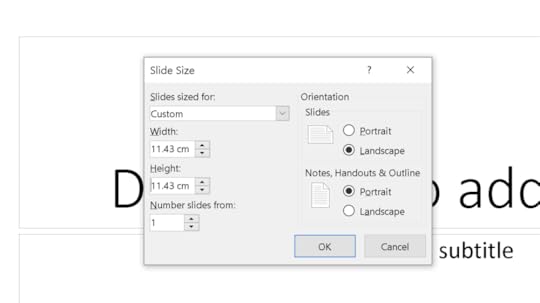
3. You'll see this pop-up next. I'm not sure either option makes a difference for what we want to do, so just hit Maximize.

4. Back in the main view, you now have a square slideshow canvas to work from:
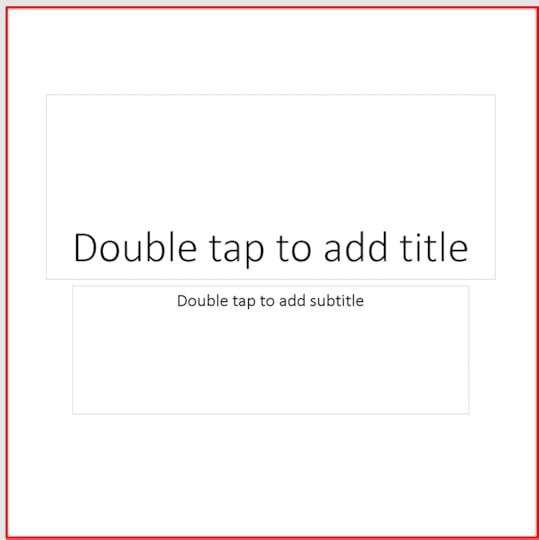
5. Now it's just a case of building your video slideshow slide-by-slide:

You can go with whichever style and branding you like. In this example, I've chosen to try an and emulate a video that you might typically see made using Animoto. So, we have a stock image (downloaded from Unsplash and a text caption.
Animoto and video editing pros add animation to both these elements, and we can mirror this in PowerPoint. Use the Grow/Shrink animation (plus or minus 10%,) to make the image zoom slowly, and the Fade In animation (Fast) for the text. If you are using the Shrink animation, increase the size of your image so that still fills the square layout when shrunk.
Crucially, the duration in seconds that you choose for the Grow/Shrink Animation will determine the length of time that each slide displays once the video has been created. So, make sure you leave enough time for people to read and digest the text caption. Most of my animations are set to run between 5-8 seconds.
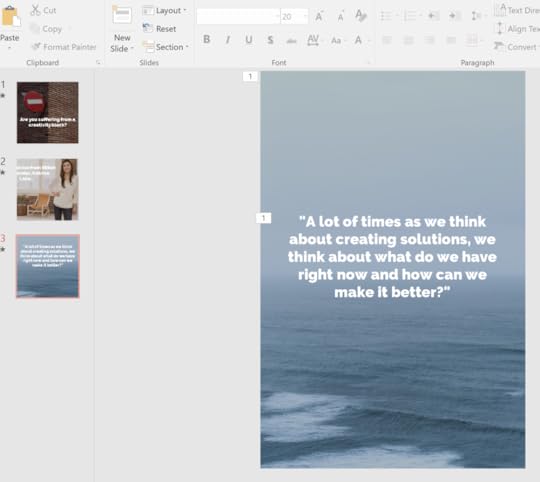
To make your life easier, duplicate the slides to keep animations intact. To swap out an image and keep the animation, right click the pic and choose Change Picture.
As you can see in the screenshot above, your image can cover the visible square slide completely, as long as the elements are in the correct place - everything beyond the square border will be ignored in your finished video. I also adjusted the brightness and contrast (select image > Corrections menu) to make reading the text easier.
6. Preview your video slideshowHit the Playback icon to view your video slideshow in full screen. If you set the Grow/Shrink animation to 15 seconds duration, the slideshow will take forever to play through and may look a little out of whack, but we can remedy this shortly.
7. Export your slideshow as a videoEveryone knows you can save a PowerPoint file to use as a slideshow, and you may have even shared one as a PDF - but did you know you can export one as a video?
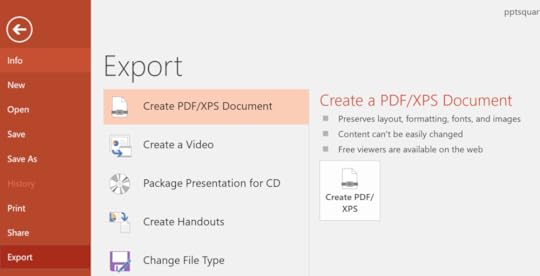
Go to File > Export, and choose Create a Video.
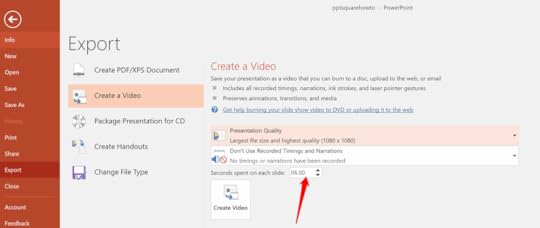
Select the highest resolution video from the Presentation Quality drop-down. See this Seconds Spend on each slide option? Ignore it. As mentioned earlier, the duration you set for the Grow/Shrink animation on each slide will ensure that every slide appears for the length of time that you want it to.
Hit Create Video and wait a short time while your slideshow is turned into an MP4 file that can be uploaded and shared on Facebook, Instagram (via the Dropbox app is how I do it) and anywhere else you choose! And now that you've done one video, you have a template that will enable you to quickly and easily create as many more as you like.
PowerPoint square video vs Animoto square video comparisonSo, how does a bog-standard square video from Animoto square up against a DIY PowerPoint effort? Judge for yourself below with two very similar square videos - first Animoto, then PowerPoint.
Animoto Square VideoPowerPoint Square Video
[Katrina Lake Photo Credit: MyTotalRetail -- Katrina Lake Quote: Entrepreneur]
Note: Upon uploading the PowerPoint video to YouTube, I was getting a spot of interference between each "slide", so I decided to include a brief Fade animation (0.20 seconds) between slides to hide it - which is why you might see a very slight pause before each slide animates. You may or may not have the same issue.
So, what do you think? I'll concede that the Animoto version has the edge - and that paid subscription gets you additional video creation tools. Full disclaimer: I have an Animoto subscription myself, which I used to make the Animoto video above, but I think my PowerPoint version stacks up pretty well as a free alternative.
Over to youWill you be giving my method of creating square videos in PowerPoint a go? What did you think of the end result? Let me know in the comments below!

Andrew Macarthy is a social media consultant and the author of the #1 Amazon Web Marketing Bestseller, 500 Social Media Marketing Tips.
Buy 500 Social Media Marketing Tips
Amazon US: http://www.amazon.com/dp/B007L50HE6
Amazon UK: http://www.amazon.co.uk/dp/B007L50HE6
Follow Me:
http://www.fa
cebook.com/50
0socialmediatips/
http://www.pinterest.com/andrewmacarthy
http://www.twitter.com/andrewmacarthy
How to Make Square Videos For Facebook Using PowerPoint (Free Animoto Alternative)
July 19, 2017
How to Make A Facebook Cover Video That Wows Visitors to Your Business Page
How to Make A Facebook Cover Video That Wows Visitors to Your Business Page
Do you want to create a video cover for your Facebook Page? In this post, I'll show you how.
Have you started to notice that certain Facebook Page covers are... moving? It's not your eyes playing tricks on you. Facebook began to test video covers in April 2017, and now the feature is rolling out to all Pages. Here's Facebook's explanation about the decision to introduce animated covers:
"We’re always looking for ways to help businesses create more engaging experiences and drive more rich experiences for their audiences. To do this, we’re testing the ability for pages to upload a cover video as the page cover.By making cover video available, we want to help you create more engaging interaction and drive more rich experience for your audience by letting you spotlight your creative content in one of the most prominent space: your Page cover."What are the benefits of a video cover on Facebook?
When a user visits your Facebook Page direct, the cover is the first thing they will see. They'll probably start scrolling for content, but that first image or video is a unique opportunity to share a positive first impression. Your Facebook cover tells people who you are, what you do, what you're like, and what your company is all about. A video cover can offer an even more immersive and engaging way to hook in viewers. You could:
Introduce people to your brand and its peopleShare your latest product offeringPromote an upcoming sale or event, etc.How to upload a Facebook video cover
Uploading a new Facebook video cover takes just a few steps, along with some tweaking to make sure it looks as good as it can be. You can choose to feature a previously-uploaded video or upload a new one. My preference would be to build and upload a video that is custom-made for your cover; one that will inspire fans and also meet Facebook's best practices (more on this below). Here's a quick step-by-step for both options:
Choose from Videos: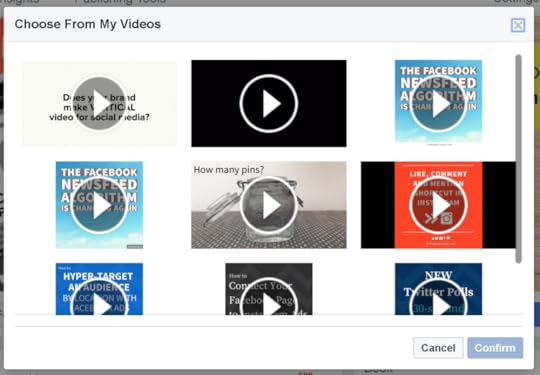
Hover over your cover photo and choose Change Cover -> Choose from VideosSelect a video that you have previously uploaded to your Page and click Confirm.Drag your video around in the cover area until it’s positioned as you like, then click Next.Use the arrows to through the video thumbnails until you find a thumbnail that you want to use as the first frame. Also choose here whether you want the video to loop or not.Click Publish.‘Upload Photo/Video’Hover over your cover photo and choose Change Cover -> Upload Photo/VideoSelect a video stored on your computer.Once it's uploaded, drag it to re-position the video up or down as desired and click Next.Scroll through the video thumbnails until you find a thumbnail that you want to use as the first frame. Also choose here whether you want the video to loop or not.Click Publish.Facebook video cover best practice and tips

Facebook recommends uploading a video with a resolution of at least 820 x 312 pixels, but 820 x 456 pixels is ideal.Videos can range in length from 20-90 seconds and you have the option to make them loop.When people visit your Page, the cover video will automatically begin playing.The video will play with the sound muted; there is a mute/unmute option in the lower right-hand corner of the cover video. Consider how your video will be received with and without audio.My first Facebook cover video
Here is my first go at making a Facebook cover video. It's a short, captioned trailer (no audio required) to advertise my book. The call-to-action encourages viewers to visit Amazon to learn more and purchase:
Of course, your trailer could take any form you wish. To make mine I simply created 10 still images in Photoshop ( with a size to match Facebook's optimum video cover resolution), whacked them in a video editor and added some suitable background music.
YouTube's video player doesn't really convey how the cover looks on Facebook in practice: here's a quick look at how it appears on desktop and mobile views:
I'm sure what happened to the justification of the text in the Desktop one. No amount of repositioning seems to fix it - maybe a bug with Facebook's upload tool (others, it seems, have had the same issue) - but it'll do for now.
It will be interesting to see how a video cover performs versus a static image, and how much, ultimately, it will help brands reach their social media goals.
Over to youWill you be uploading a video cover to your Facebook Page? Let me know and share your own examples in the comments below!

Andrew Macarthy is a social media consultant and the author of the #1 Amazon Web Marketing Bestseller, 500 Social Media Marketing Tips.
Buy 500 Social Media Marketing Tips
Amazon US: http://www.amazon.com/dp/B007L50HE6
Amazon UK: http://www.amazon.co.uk/dp/B007L50HE6
Follow Me:
http://www.fa
cebook.com/50
0socialmediatips/
http://www.pinterest.com/andrewmacarthy
http://www.twitter.com/andrewmacarthy
July 6, 2017
How to Instantly Turn Blog Posts And Articles Into Engaging Videos For Social Media
How to Instantly Turn Blog Posts And Articles Into Engaging Videos For Social Media
Have you ever wondered how your favourite brands and news sites turn their blog posts and news articles into stylish video for social media, and wondered how they did it? It's probably a combination of:
Dedicated writersVideo editorsProfessional softwareAnd lots of time and money!If you're short of any of those but still want to get in on the ever-growing social video game, here's a walkthrough a tool called Lumen5. It helps you to turn any blog post or news article into a video for social media in just a few quick steps.

Best of all, at the time of writing, Lumen5 is free to use, so let's take a look!
After signing up, visit your dashboard. You'll see all the videos you've made so far and the option to create a new one.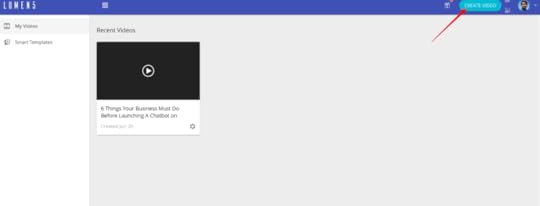
Copy and paste the link to the blog post or news article you want to turn into a video and click Create.

Next, you'll see a storyboard - a sequence of the text captions that will appear in your video. Click on the text on the left to add text to each "slide" of your video. Short sentences are best: Lumen5 will let you know if you need to trim your wording down, or you can split it into separate slides.
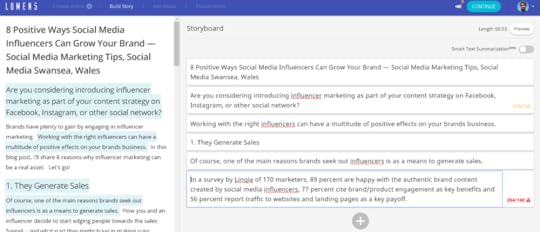
Drag and drop the captions in the right pane to re-order them if you need to. You can also click the "+" sign to any new, custom text. For optimum results, Lumen5 offers this advice:
Most articles have many points but videos have a hard time conveying all that information. Pick one topic and shape your video around it.Each slide lasts about 5 seconds, so keep your storyboard under 90 seconds for best results.Try to keep each slide under 10 words. Remove unnecessary parts of the sentence and choose your words for maximum impact!Instead of making one long video, consider splitting up a big topic into multiple videos.Try to keep your videos around 1 minute! Shorter videos are more effective than longer ones.Here's how my storyboard looks with a bit of text editing. My sentences are often longer than 10 words, but it seems to work okay still in my experience.
After your text is prepared, it's time to pretty up your video. Lumen5 will suggest background images and video based on your article's keywords, but you're free to upload your own or search for others. Simply drag and drop the images onto your slides.
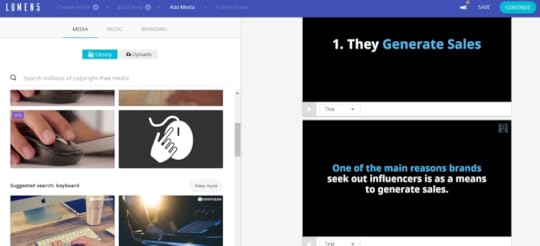
Finding an image for every specific point can be hard, so think a little more broadly. For example, rather than search for "blogging", try "typing" instead!
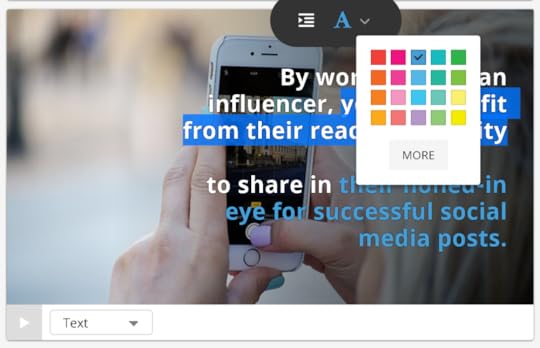
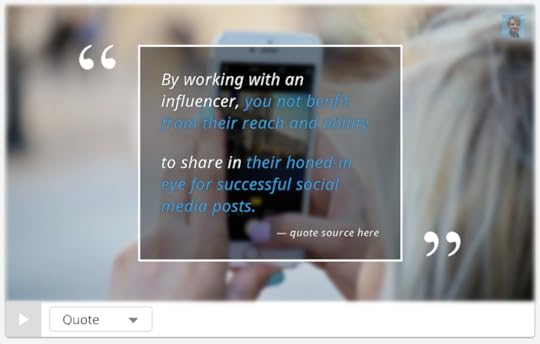
As well as background images, there are a couple of options to edit the look and feel of the text in your slides. Click to change the text justification, highlight colour, or change the text into a quote or title (larger font).
No video would be complete without music, and there are plenty of free tracks to use under the Music tab. Click the play button to preview any track, and double-click to select it.

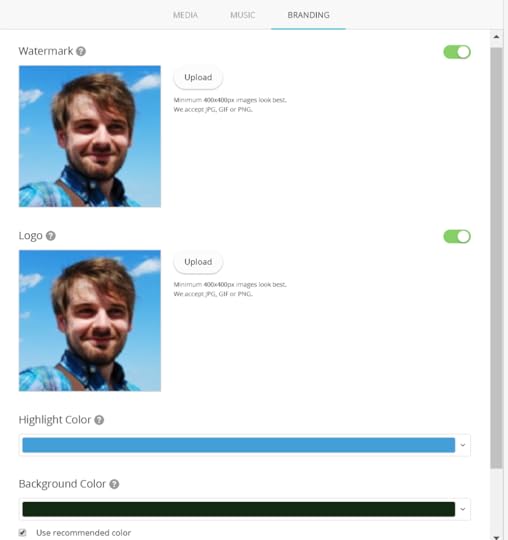
The Branding tab gives you a few final options for adding a logo to your video, and to select a message to add to the final slide. You can also change the text highlight and background colour all in one go.
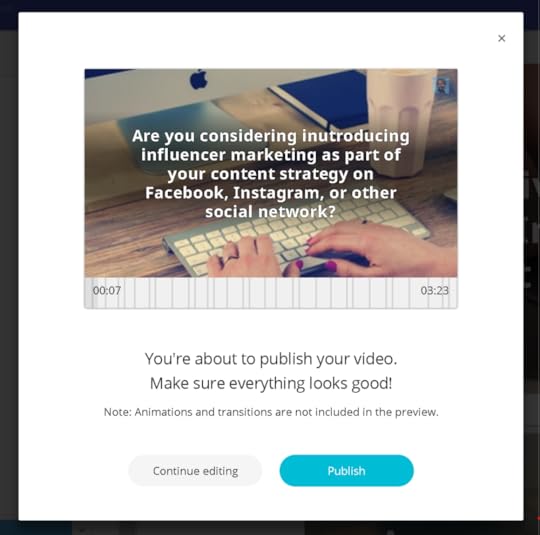
When you're done, click continue to watch a preview of your completed video. If you're happy, click Publish and wait for it to render. Otherwise, head back to the edit to make more changes.
When your video is ready, it will be available in your dashboard. Click on it to download and share on social media!
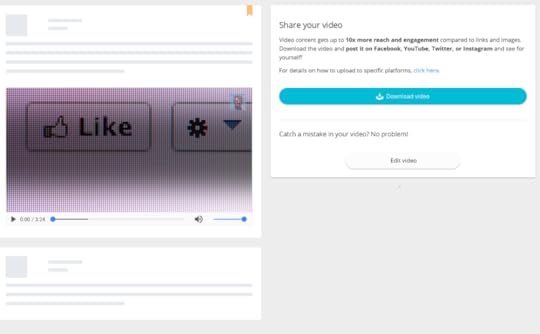
Lumen5 Video Example
Here's a quick example of what can be achieved with Lumen5. Be aware that this was my first effort, thrown together very quickly to discover the bare bones working of the tool. With a bit more time and effort, you can make something much more slick!
Over to you
What do you think of Lumen5? Do you think it will be useful for your business? Let me know in the comments below!

Andrew Macarthy is a social media consultant and the author of the #1 Amazon Web Marketing Bestseller, 500 Social Media Marketing Tips.
Buy 500 Social Media Marketing Tips
Amazon US: http://www.amazon.com/dp/B007L50HE6
Amazon UK: http://www.amazon.co.uk/dp/B007L50HE6
Follow Me:
http://www.fa
cebook.com/50
0socialmediatips/
http://www.pinterest.com/andrewmacarthy
http://www.twitter.com/andrewmacarthy
June 20, 2017
6 Things Your Business Must Do Before Launching A Chatbot on Facebook Messenger

6 Things Your Business Must Do Before Launching A Chatbot on Facebook Messenger
Chatbots - a service, powered by rules and sometimes artificial intelligence, that your customers interact with via a chat interface - have come a long way over the past couple of years, from basic robo-helpers embedded into websites, to more human-like helpers central to aiding with customer service on social media. Rather than a complete turn-off, nowadays, many people actually enjoy interacting with them:
“Many businesses already have phone trees and they do work though most users get grumpy using them. Text based response trees are much easier and faster and that is what I expect a lot of early bot interactions to be. Sometimes with ability to chat with a live person.” — Josh Elman, Partner at Greylock
Chatbots can be integrated with e-commerce platforms, allowing you to monetize your social media accounts - including Facebook Messenger. Chatbots are changing the way customers interact with brands and because decent chatbot technology is still new, building a chatbot now means a strategic advantage over the competition.While I would never advocate trying to pretend that your chatbot is an actual human assistant, the following tips will ensure that it delivers your customers a highly satisfying experience.
If you're wondering if your business needs a chatbot or not, here's one compelling reason:Chatbots can give your customers a more personalised experience than, say, a website FAQ, without the need to hire additional staff. If your customers tend to message you outside of office hours at a time when you either can't, or don't want to reply yourself, then a chatbot can help to fill that gap.
What's more, evidence suggests that mobile users are spending more time than ever in messenger apps, even more than on social networks:
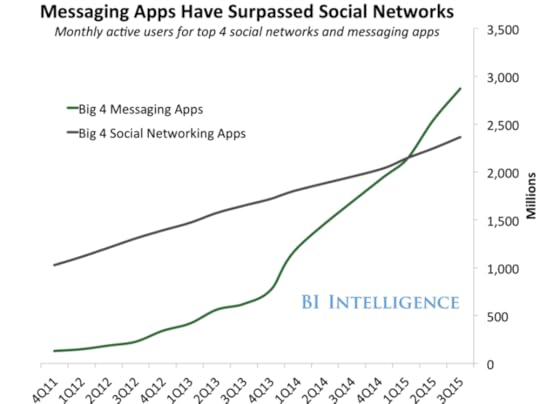
“People are now spending more time in messaging apps than in social media and that is a huge turning point. Messaging apps are the platforms of the future and bots will be how their users access all sorts of services.” — Peter Rojas, Entrepreneur in Residence at Betaworks
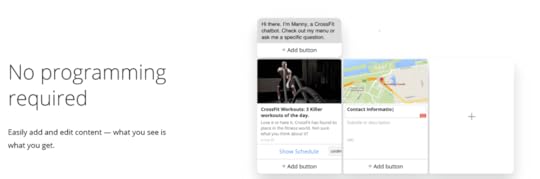
The simplest way to create a chatbot (even if you have no programming experience) is to use a build-it-yourself platform. Popular tools include Chattypeople and Chatfuel, both which include free options.
Now you know how chatbots can benefit your business, and you're raring to go, don't do anything before you read the following advice - essential to get start your project off on the right footing!
1. Decide the aim of your chatbotWhen you know what the core business purpose of your chatbot is before you build it - one thing it will do really well is best if this is your first time building one - you'll be in the best position to deliver one that serves your customer's needs well. Do you want it to answer common customer service questions, filter people through to your website to make a purchase, or offer product recommendations? etc. Whatever your objectives, it’s important to have an objective that you can collect data against and use as a baseline for optimisation. Many chatbot services allow you to create "goals", and optimise content flows and re-engagement strategies to ensure sure that you’re driving people to your desired outcomes.
2. Choose between guided responses or AISome chatbots integrate artificial intelligence to converse by letting customers type freely and using keywords to guess what they want to achieve - and learning all the time. As impressive as this can be, the technology isn't perfect, which can lead to a frustrating user experience. For many brands, chatbots that make use of guided responses are more than adequate. Guided responses ask users simple questions (often with multiple choices) and ask them to type a predetermined response. By keeping communication between customer and chatbot structured in this way, customers are much more likely to follow along successfully.
One very wise thing to do is have your chatbot, in its welcome message, clearly outline what it is capable of, i.e. please answer using the words or options provided, not type in full sentences. What's more, unlike a typical Help site with tabs, links and buttons, or real human conversation, users will, chatbot users may initially be faced with an unfamiliar blank screen. Help them out by setting up automatic prompts, so your chatbot can proactively provide options to get your clients started.
3. Mindmap your chatbot in fullIt's important to plan the conversation flow of your chatbot carefully. That way, you'll spot any initial black spots before you go live, show clients and colleagues how the chatbot will function in principle, and be able to test and tweak it over time more easily. Conversation trees map out all the user journeys through the conversation. They can be built in mind mapping software like Xmind, or even in a program like Microsoft Powerpoint. When your bot is newly-built, it doesn't need to be everything to everyone. By setting expectations and starting small, you can learn from your audience’s behaviour and slowly develop new versions with improved functionality.
4. Work on the small-talkOnce you've got the main flow and structure of your chatbot's conversation down, have a think about the small words, phrases, and quips that will give it personality and help keep your customer onside.
Keep language simple and concise, avoiding any jargon.Don’t use gender-specific pronouns, as you never know who’s on that side of the interface.Create witty replies for unsupported topics so that the bot doesn’t appear dumb, and the user is encouraged to try something elseAdd a variety of canned replies to make the conversation more human-like, e.g. what's your response to "tell me a joke" or "you suck" going to be?Adding emoji, photos, and other media where apt is a good way to make your bot stand out.5. Test your chatbot to breakingNever ever think about rolling your chatbot out without a slew of testing, both behind closed doors and in the real world. Rope in the help of colleagues, friends, and dedicated fans to provide you with honest feedback as a means to improve the experience before a full launch. Ask users to make a note of the last comment and/or failed responses to help fine tune your library of responses.
In spite of thorough testing, failure will occur! Just accept that a bot is going to get stuck at some point or another in a conversational user experience. The best way around it is to plan for it and make the broken experience as pain-free as possible. In situations where the conversation hits a dead-end, show users that you understand their pain and offer human intervention as seamlessly as possible - tell them how and when to get in touch, or how you can get back to them.
6. Tell people about your chatbot!At a minimum, you will need to let people know the bot exists to get customers on board. Promote it wherever you prompt people to ask for help (on your website, receipts, email signature, etc.). In addition, consider some public promotion of it before launch.

Andrew Macarthy is a social media consultant and the author of the #1 Amazon Web Marketing Bestseller, 500 Social Media Marketing Tips.
Buy 500 Social Media Marketing Tips
Amazon US: http://www.amazon.com/dp/B007L50HE6
Amazon UK: http://www.amazon.co.uk/dp/B007L50HE6
Follow Me:
http://www.fa
cebook.com/50
0socialmediatips/
http://www.pinterest.com/andrewmacarthy
http://www.twitter.com/andrewmacarthy
June 5, 2017
4 Questions You Must Ask to Help Find the Best Social Media Influencer For Your Business
When you’re looking for an influencer to partner with on social media, finding the best fit for your business is essential if you're to get the best bang for your buck. The ideal influencer tends to have three key abilities: the ability to grow an audience (often off their own back), the ability to create engaging content, and the ability to distribute it effectively. When you’re on the hunt, here are four questions that you must ask so that you can spot a potential influencer, and quickly gauge whether they'll be right for you:
1. How many people follow, and how engaged are they?Although the size of a potential influencer's audience is important to a degree (follower count is a good start because you need to know you're working with someone who actually could help you reach your own target audience and 100 followers ain’t gonna cut it), it's worth nothing that a large following does not necessarily equate to strong influence. Instead, you need to consider how engaged their audience appears to be, or you risk throwing money down the drain.
Signs to look out for include the number of likes, views, and comments, particularly in relation to the overall audience size. On sites where follower and following numbers are displayed (like Instagram and Twitter), check to see how many people they are following vs how many follow them. Not only is it easy to buy a fake following on these sites, but one can manufacture a large “following” simply by following thousands of other accounts, who will often follow back.
For example, an influencer with 20,000 followers and 500 comments per post (2.5% comment rate) could generate you a better return on investment with someone who has an audience of 200,000 and only 100 comments per post (0.05% comment rate). Obviously, there are a lot more factors to consider (click-through rate being a major one), but it's worth remembering that a handful of smaller influencers with high rates of engagement could generate you a much better return on investment than chasing just one big fish, who might even be phoney.
Would a local influencer work better?
Depending on your business and target audience, it might not be a bad idea to start small and local to get some quick wins under your belt with nearby influencers before you tackle the middle and top tier influencers, who often have national or international audiences. Local influencers may not have a massive following (yet), but a small and engaged local audience is just as valuable as a big international one.
The appeal of influencers to fans and brands alike is their great content, so taking scope of a potential influencer's social feed is easiest way to give you a feel for if they'll be a good fit. Consider questions like:
· Do their posts follow a specific theme, either subject or color-wise?
· Will their output fit seamlessly with your brand and appeal to your target audience?
· Do they post consistently? How often?
· At what time of day do they post? If not local, will your target audience be active on social media to see?
3. Have they worked with brands before?Scan through the profile of a potential influencer for signs that they have worked with brands before. Uncovering recent examples is a great way to give you a feel for the way that an influencer might want to operate when it comes to working with your company - are other brands similar to yours? What kind of promotions have they run? Is the relationship long-standing or a one-off? Furthermore, a glance at a sponsored post's engagement levels (particularly versus the influencer's ordinary content) can provide a surface-level insight into how the promotion has been received.
4. Can you contact them easily?Most influencers will be well aware that brands may be on the hunt for an opportunity to work with them. As a result, you'll often find a dedicated email address at which to direct your enquries. A quick scan of the contact details on their social media bio or About section should give you a good indication that they're open to collaborating. Many larger influencers also set up personal websites, with examples of past brand collaborations, more detailed information about how they can support your marketing goals, and sometimes even their rates - always worth hunting these down if available.
Over to youSo, do you think you could spot an influencer at first glance now? It's important to be able to distinguish a digital influencer quickly and easily so you can find the right people for your campaigns and capitalize on their reach among consumers in your target demographic.

Andrew Macarthy is a social media consultant and the author of the #1 Amazon Web Marketing Bestseller, 500 Social Media Marketing Tips.
Buy 500 Social Media Marketing Tips
Amazon US: http://www.amazon.com/dp/B007L50HE6
Amazon UK: http://www.amazon.co.uk/dp/B007L50HE6
Follow Me:
http://www.fa
cebook.com/50
0socialmediatips/
http://www.pinterest.com/andrewmacarthy
http://www.twitter.com/andrewmacarthy


