Seth Apter's Blog, page 95
July 4, 2013
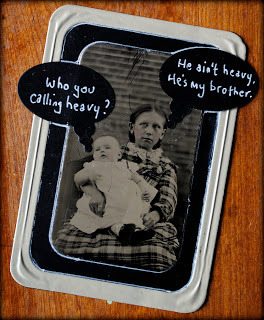
Heavy
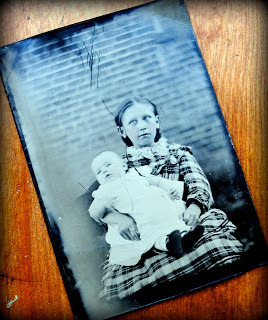
As I have looked over my collection of vintage tintypes from the late 19th century, I have been struck by the fact that rarely is anybody ever smiling. Perhaps that is not surprising given the long posing-time necessary for early photographic processes. No doubt though, the models had a very full inner dialogue going -- as can be seen in this very rare, captioned tintype:

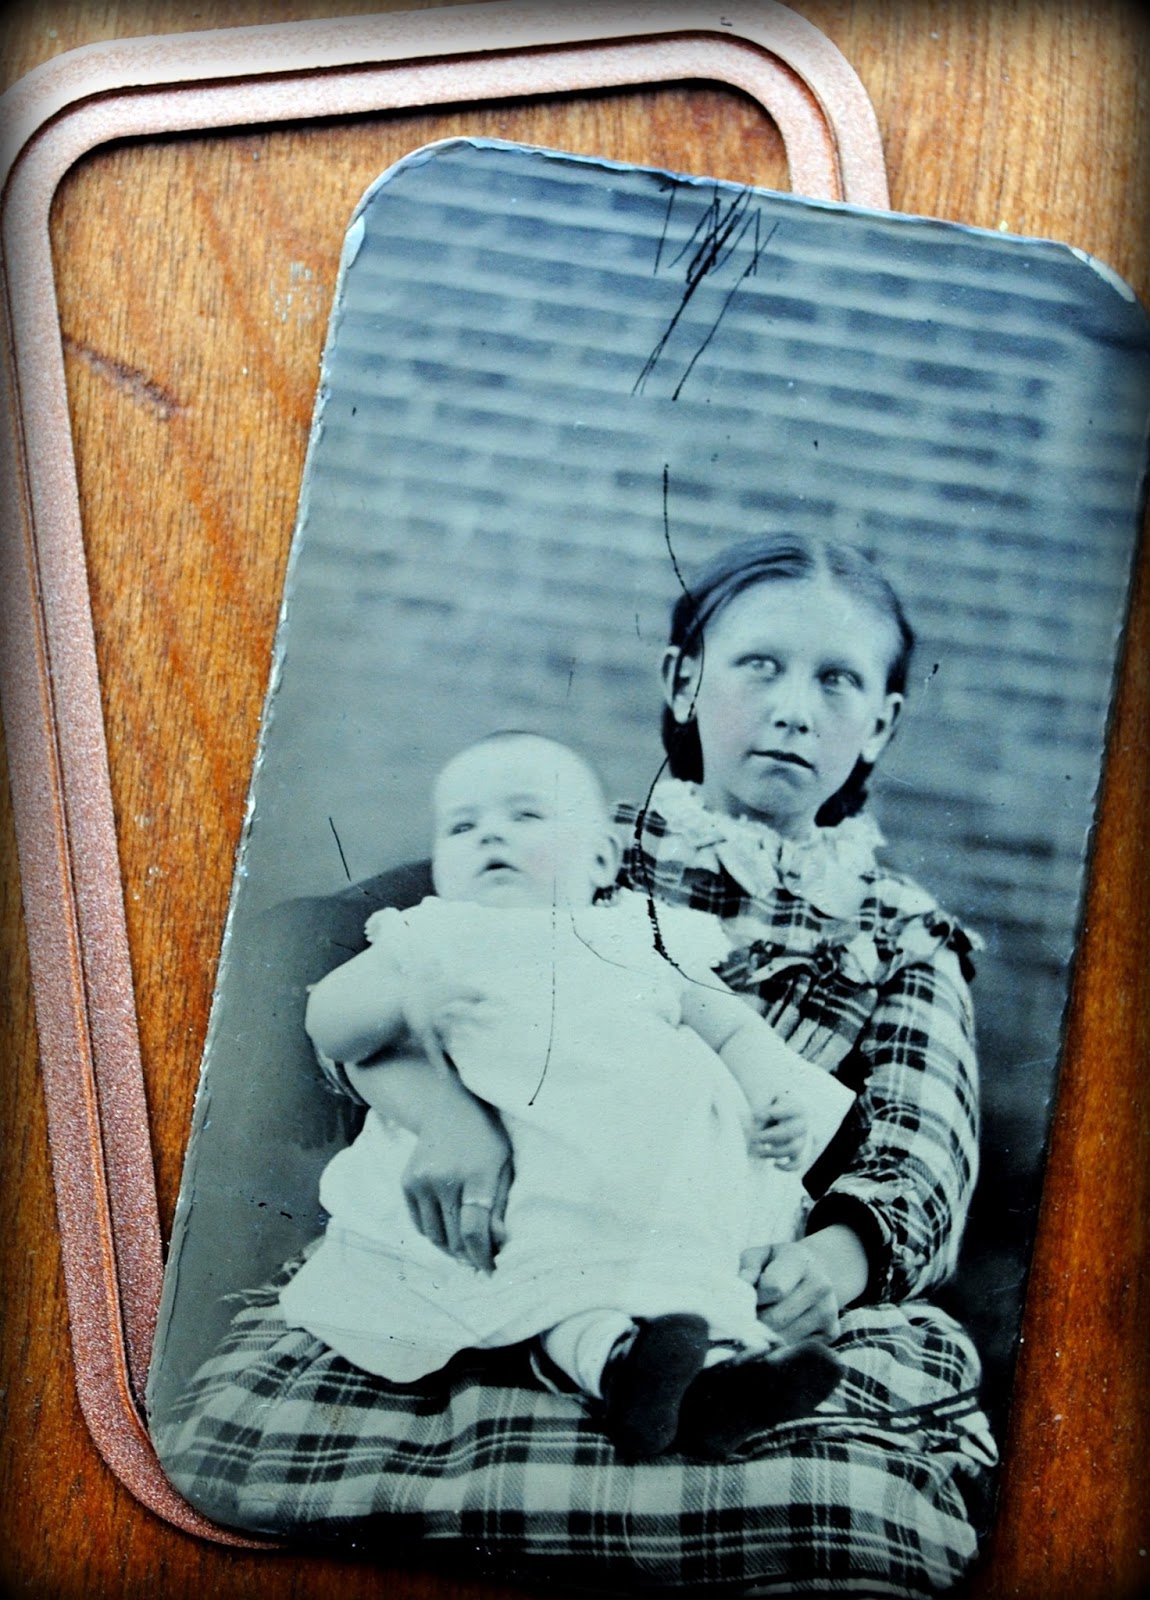
I started with a tintype of what looked to me like a big sister holding her little brother. They both look like they would rather be playing.
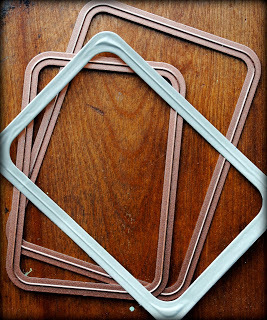
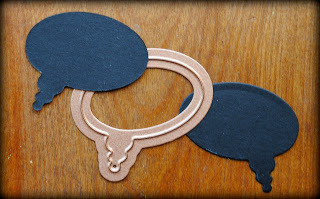
I used Spellbinders Curved Matting Basics B dies to shape the tintype,
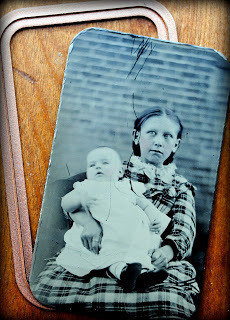
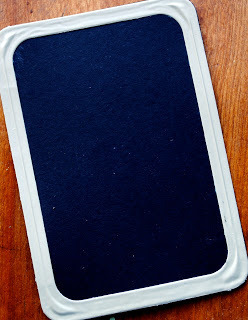
...create a background from black cardstock,

...and cut a frame from a piece of Spellbinders Precious Metals foil.
Putting all the pieces together made the perfect substrate for the tintype.
Next I cut out two speech bubbles from Spellbinders Say What? die set.
And last but not least, I channeled their thoughts.
-----------------------------With special thanks to The Hollies
Thanks also to all of you who visit my blog. And especially to those who have taken the time to read through this entire post and tutorial. I am offering this piece as a giveaway to a randomly selected reader who leaves a comment on this post by end of Day Monday 7/8. Please be sure I have your email address so I can contact you if you win.
-----------------------------Supply List
Spellbinders Paper Art Supplies:
MMM-001 SpellbindersTM Artisan X-plorer® MachineS4-398 SpellbindersTM Shapeabilities® Say What?S5-172 SpellbindersTM Nestabilities® A2 Curved Matting Basics BF-012 SpellbindersTM Precious Metals Premium Craft Foils
Other: card stock, adhesive, gel pen

I started with a tintype of what looked to me like a big sister holding her little brother. They both look like they would rather be playing.

I used Spellbinders Curved Matting Basics B dies to shape the tintype,
...create a background from black cardstock,

...and cut a frame from a piece of Spellbinders Precious Metals foil.

Putting all the pieces together made the perfect substrate for the tintype.

Next I cut out two speech bubbles from Spellbinders Say What? die set.

And last but not least, I channeled their thoughts.

-----------------------------With special thanks to The Hollies
Thanks also to all of you who visit my blog. And especially to those who have taken the time to read through this entire post and tutorial. I am offering this piece as a giveaway to a randomly selected reader who leaves a comment on this post by end of Day Monday 7/8. Please be sure I have your email address so I can contact you if you win.
-----------------------------Supply List
Spellbinders Paper Art Supplies:
MMM-001 SpellbindersTM Artisan X-plorer® MachineS4-398 SpellbindersTM Shapeabilities® Say What?S5-172 SpellbindersTM Nestabilities® A2 Curved Matting Basics BF-012 SpellbindersTM Precious Metals Premium Craft Foils
Other: card stock, adhesive, gel pen


July 3, 2013

June 29, 2013
Abswaxtes Bild
Last month I had the pleasure to spend two-plus weeks traveling through the Pacific Northwest, teaching workshops, exhibiting my work, and meeting many of my online art friends. It was an unforgettable adventure and I am just now beginning to sort through all my photos and memorabilia.
I already posted here about my collaborative exhibition with Roxanne Evans Stout at Illahe Studios and Gallery in Ashland, Oregon. Since the exhibition closed, Roxanne has officially become a gallery artist and I am happy to report that Illahe is also continuing to exhibit several pieces of our collaborative work. If you are in the area, feel free to have a look.
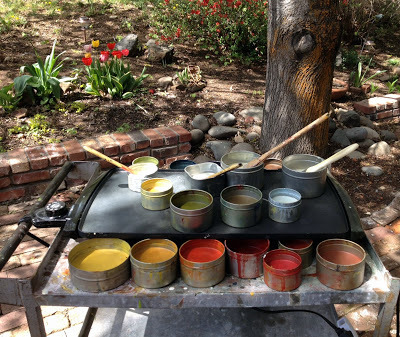
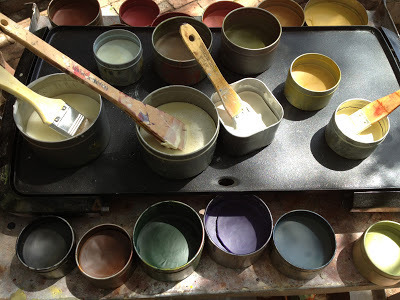
I stayed in Southern Oregon for several extra days and spent time both exploring and arting with Roxanne. One memorable day was spent in her garden, working with encaustics. This was my first time playing with wax and I have to say, Roxanne was a great teacher. I made three pieces on rough hewn-wood, including this one...
Abswaxtes Bild
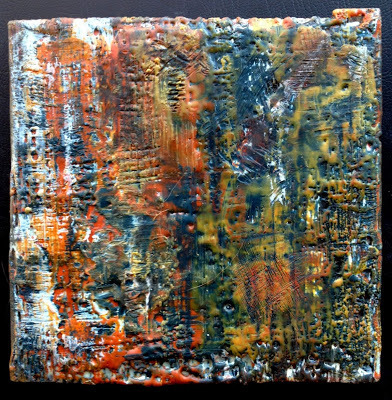
In spending a bit of time with this piece since I have been home, I realized that I may have been unconsciously channeling one of my favorite artists: Gerhard Richter. He is a contemporary German artist whose wide-ranging style runs from photorealism to colorful abstract oils. I sense a connection between the piece I made and some of the pieces in his series Abstraktes Bild (translation: Abstract Picture/Image). Do you see it as well?
Gerhard Richter

Gerhard Richter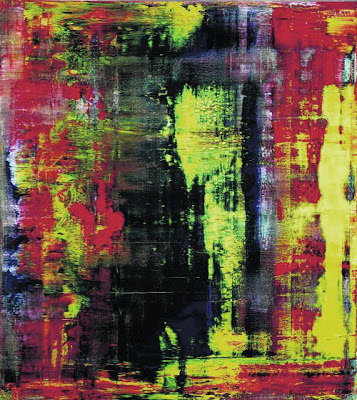
The above piece from Richter, btw, was sold last year at auction by Eric Clapton for $34 million!
I really enjoyed working with encaustics and hope to again at some point in the future. For now, I can be satisfied with the memories of the materials and the process.
 Abswaxtes Bild
After arting, Roxanne took me on a tour of the area. So many beautiful places and fun stops. My favorite, hands down though, was a visit to the Antique Warehouse in Klamath Falls.
Those of you who visit my Facebook Page may remember the following picture...
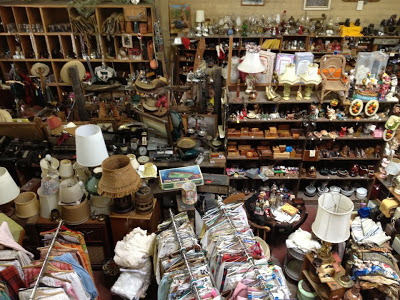
This is truly just one tiny section of what just might be the best spot on earth. My finds from there traveled with me back to NYC and are beginning to become part of new artwork, which will no doubt find itself in a future post.
I already posted here about my collaborative exhibition with Roxanne Evans Stout at Illahe Studios and Gallery in Ashland, Oregon. Since the exhibition closed, Roxanne has officially become a gallery artist and I am happy to report that Illahe is also continuing to exhibit several pieces of our collaborative work. If you are in the area, feel free to have a look.
I stayed in Southern Oregon for several extra days and spent time both exploring and arting with Roxanne. One memorable day was spent in her garden, working with encaustics. This was my first time playing with wax and I have to say, Roxanne was a great teacher. I made three pieces on rough hewn-wood, including this one...
Abswaxtes Bild
In spending a bit of time with this piece since I have been home, I realized that I may have been unconsciously channeling one of my favorite artists: Gerhard Richter. He is a contemporary German artist whose wide-ranging style runs from photorealism to colorful abstract oils. I sense a connection between the piece I made and some of the pieces in his series Abstraktes Bild (translation: Abstract Picture/Image). Do you see it as well?
Gerhard Richter

Gerhard Richter

The above piece from Richter, btw, was sold last year at auction by Eric Clapton for $34 million!
I really enjoyed working with encaustics and hope to again at some point in the future. For now, I can be satisfied with the memories of the materials and the process.

 Abswaxtes Bild
After arting, Roxanne took me on a tour of the area. So many beautiful places and fun stops. My favorite, hands down though, was a visit to the Antique Warehouse in Klamath Falls.
Those of you who visit my Facebook Page may remember the following picture...

This is truly just one tiny section of what just might be the best spot on earth. My finds from there traveled with me back to NYC and are beginning to become part of new artwork, which will no doubt find itself in a future post.
June 25, 2013
Time Will Tell

This piece and today's tutorial was inspired by the concept of passing time. We are in the middle of hot and sticky days in NYC -- and it is still only June. It always strikes me as funny how in the hot NYC summers people are often complaining about the heat and wishing it were winter. And equally in the freezing days of January, people are often wishing for a hot August day. Some recent experiences have showed me that we would all do better to be in the present and make the most of what we have at any one moment.
That being said, icy colors and imagery rules the roost in this time piece.
I started out with a 4" x 4" cradled wood panel.

To this I added a coat of black gesso and some silver ice details care of a favorite clear stamp and my silver Encore ink pad from Tsukineko -- which I have to say is by far the best metallic ink I have ever used.

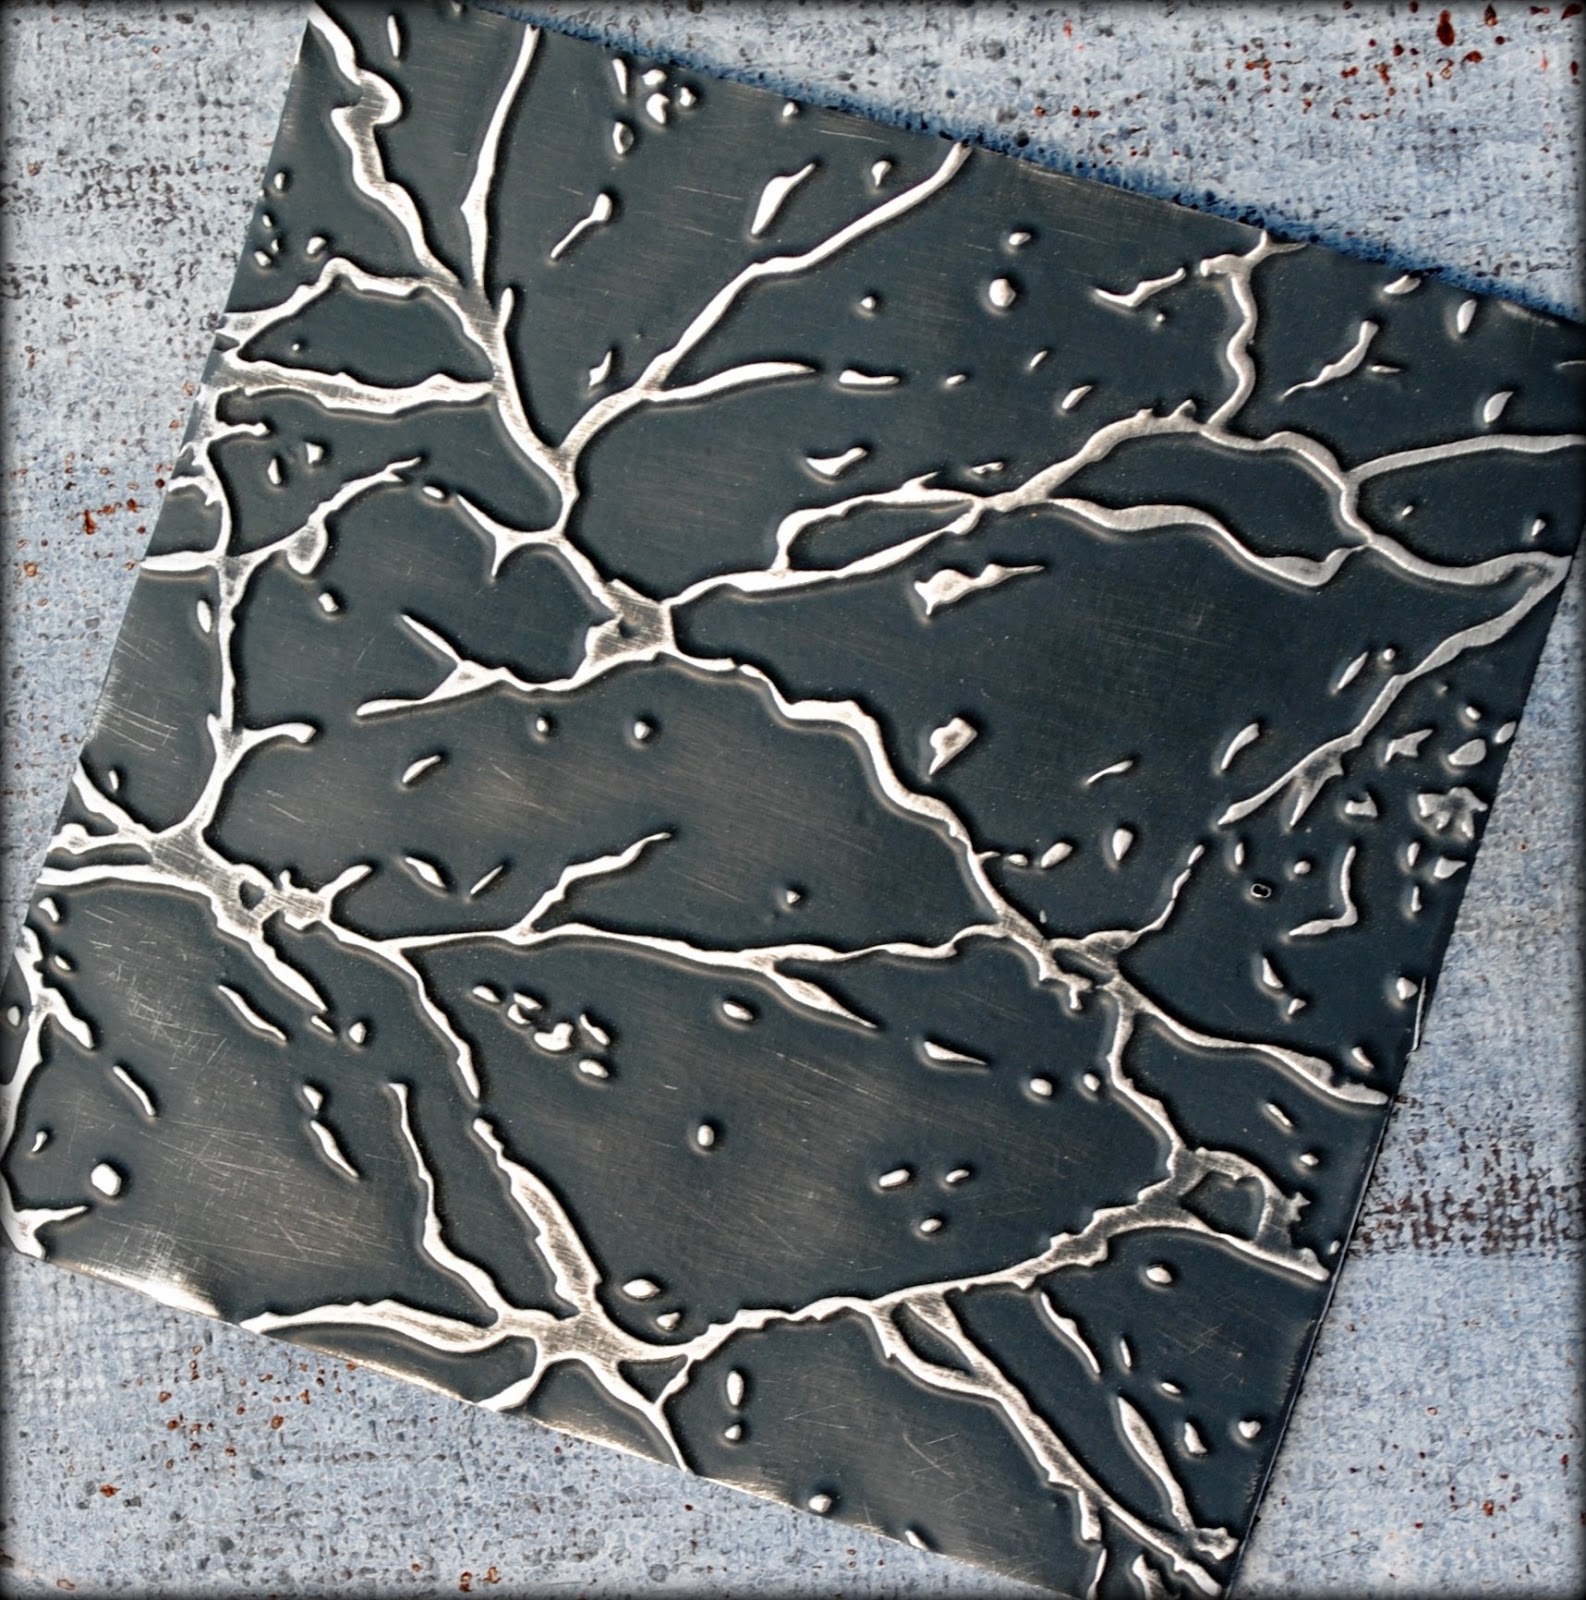
My winter wonderland continued with a slice of Precious Metal foil from Spellbinders and their Crackle texture plate, which reminds me of cracked surface of a frozen lake.

Look at the deep emboss that this texture plate makes in the foil...

...made even more icy by lightly sanding the raised surface with a sanding block.
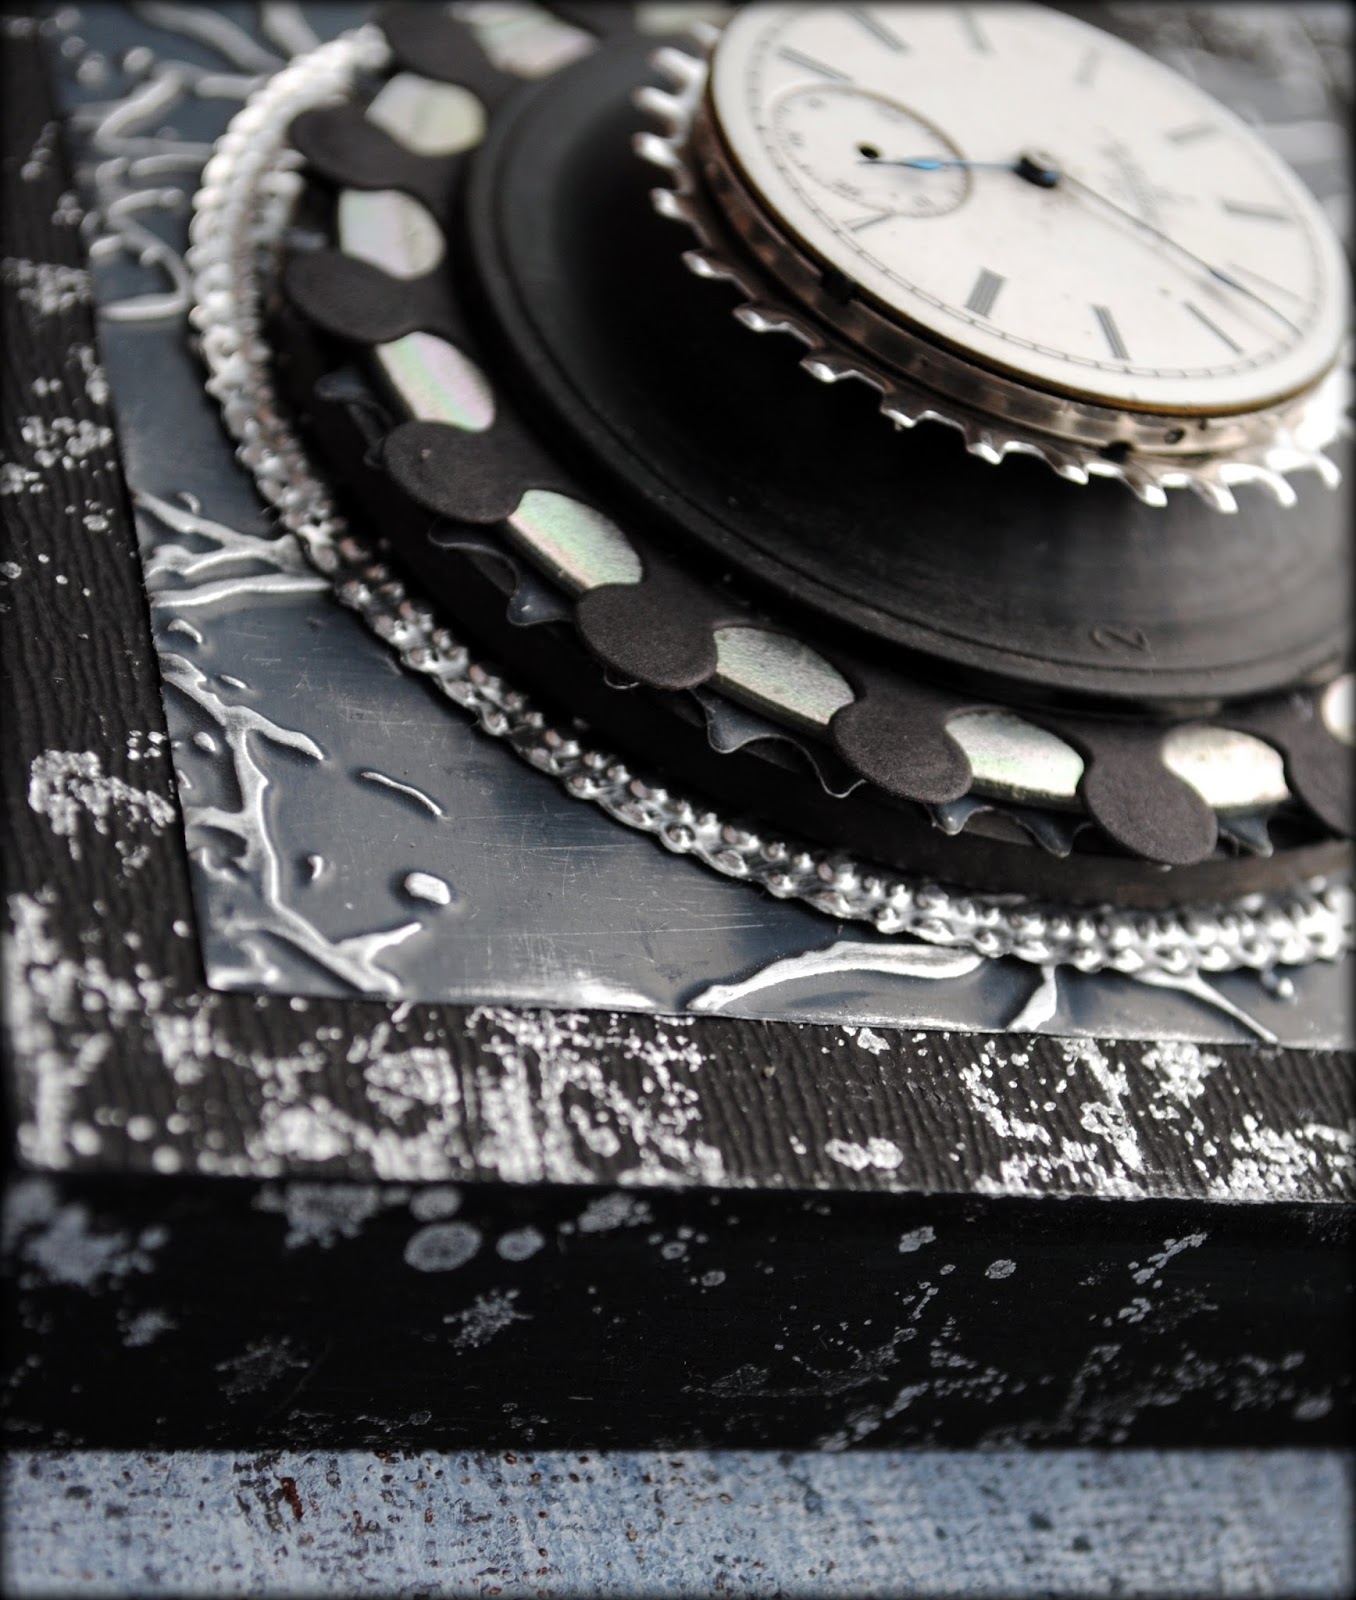
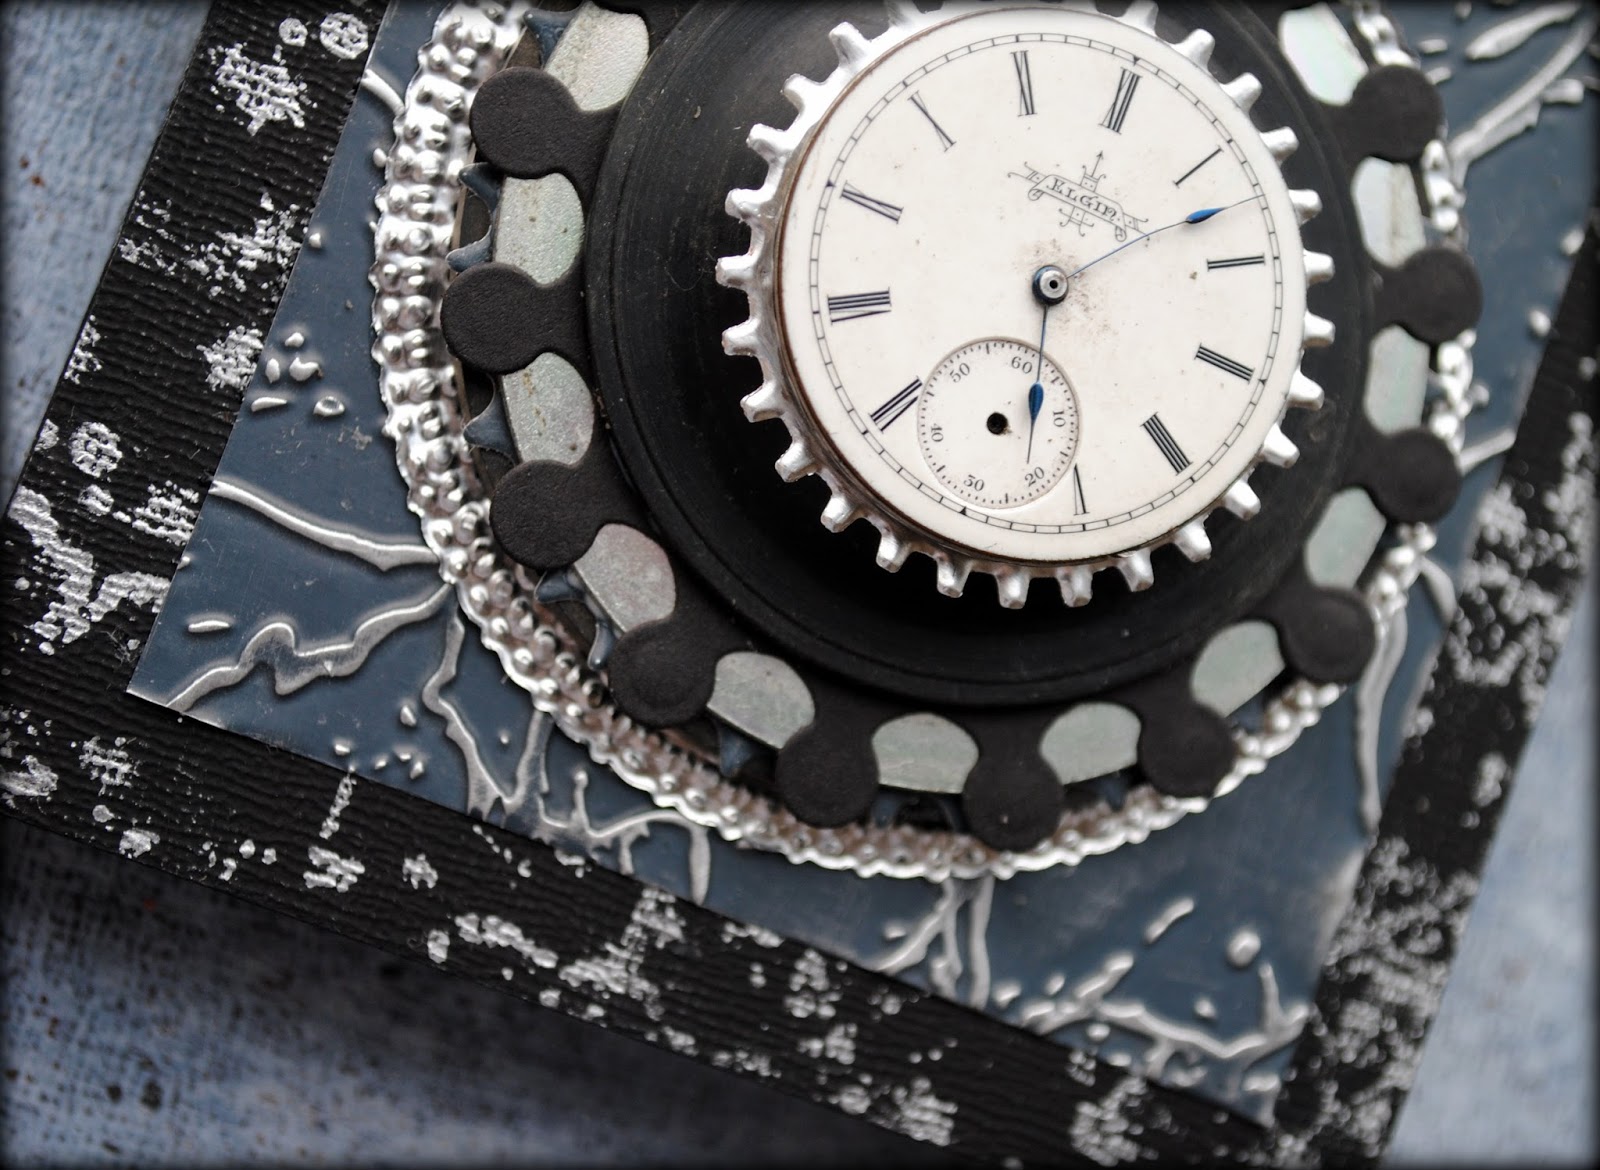
Time for the details. It all started with this vintage watch face, which I paired with a die cut silver foil shape.

I dug into my stash of Spellbinders dies to find more circular shapes, applied to different foils and card stock -- and graded in size.

I couldn't leave out a bit of metal and rubber sourced from the hardware store -- definitely one of my most favorite places to find mixed media supplies.

To complete the piece, I adhered the Crackle foil to the surface of the panel and started stacking - from large to small diameter. In time, my ode to the cold weather came together.


-------------------------------------
Supply List
Spellbinders Paper Art Supplies:
GC-001 SpellbindersTM Grand Caibur® MachineMT1-004 SpellbindersTM Media Mixage Texture Plates CrackleF-012 SpellbindersTM Precious Metals Premium Craft Foils Assortment S4-390 SpellbindersTM Nestabilities® Imperial Gold Majestic Elements Gold Circles OneS4-302 SpellbindersTM Nestabilities® Decorative Elements Crown CirclesS5-048 SpellbindersTM Shapeabilities® Sprightly Sprockets
Preferred Promotional Partners: Tsukineko Encore Ink Pad
Other: cradled wood panel, gesso, paint brush, clear stamp and mount, card stock, hardware, sanding block, adhesive, vintage clock face
June 18, 2013
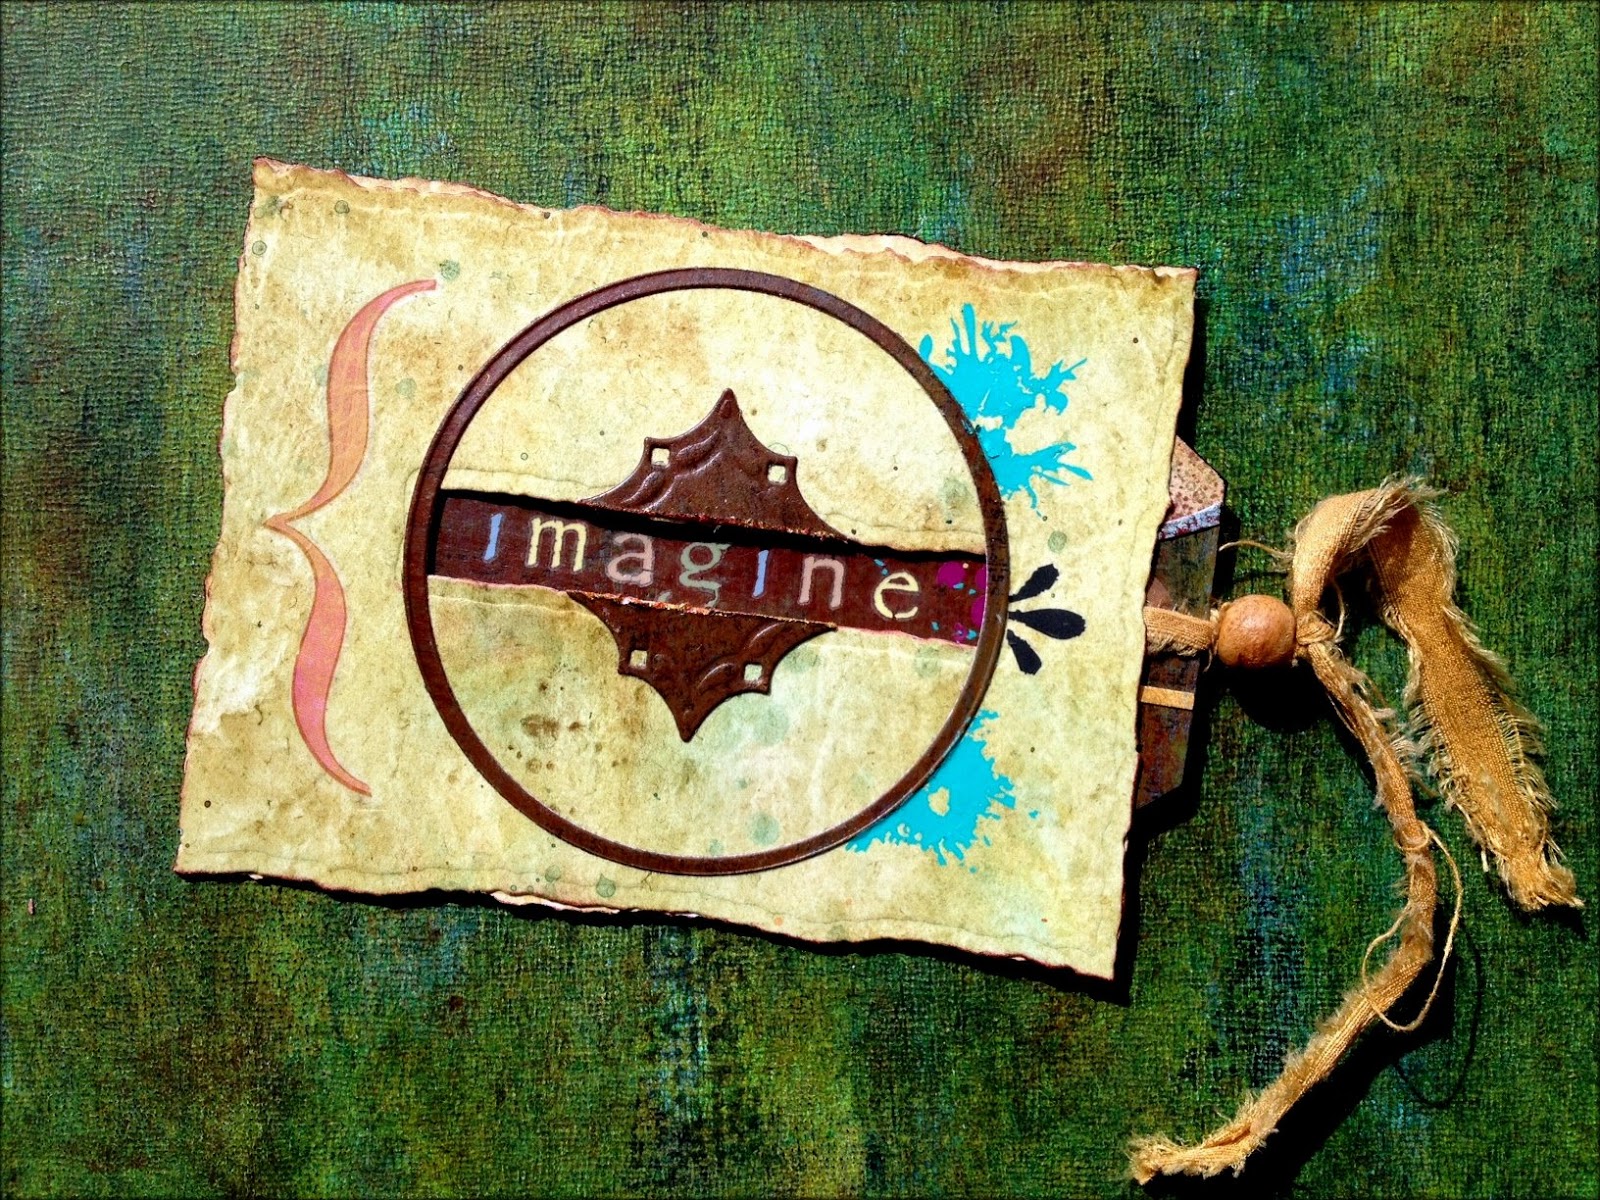
Imagine
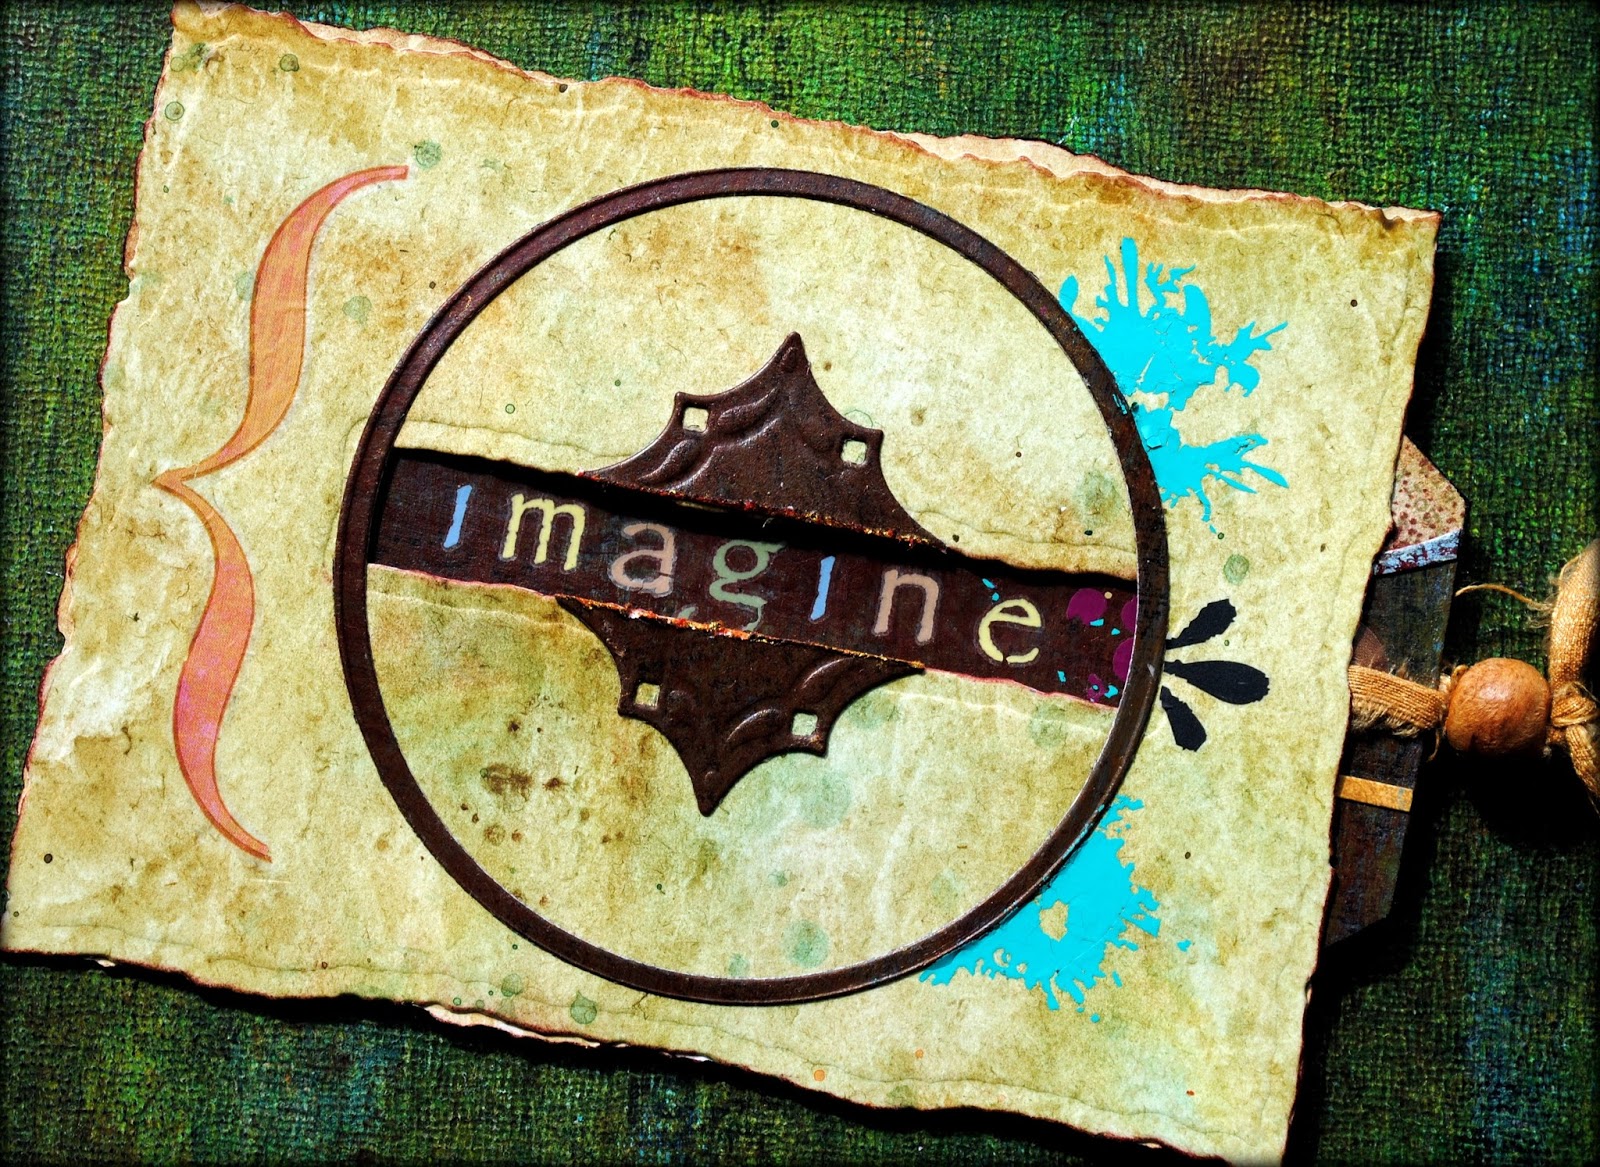
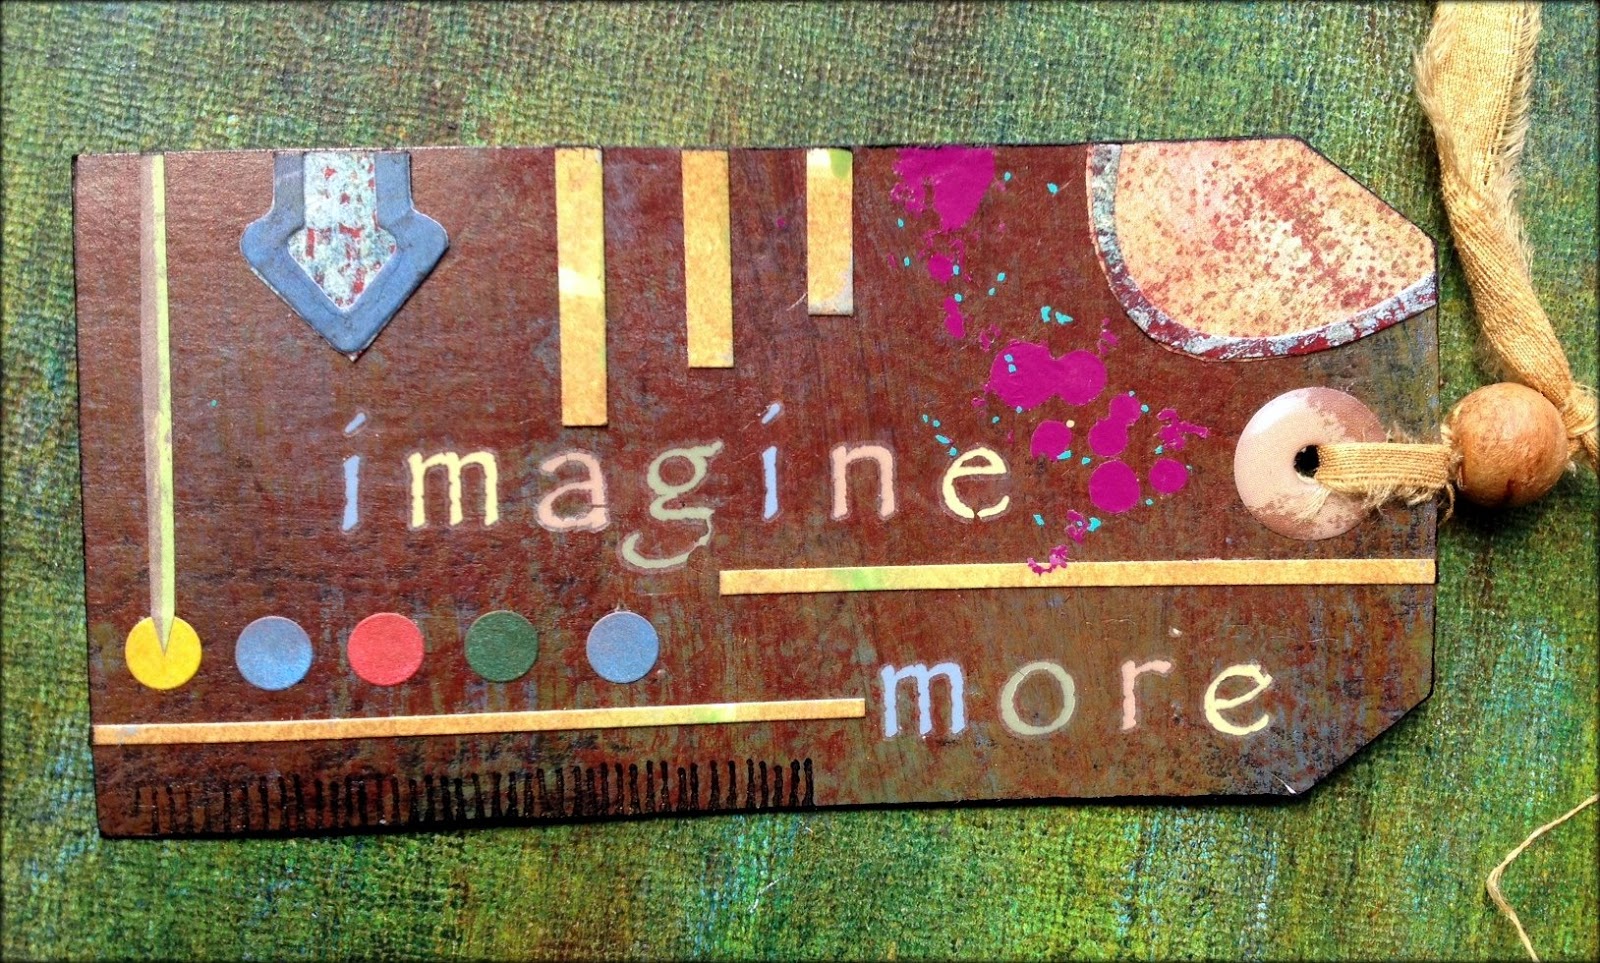
Today's project and tutorial was inspired by a tag. While completing the background pages for a journal quite a long time ago, I painted this tag as a way to use up the extra paint on my palette. It had been lost in one of my many piles but today was the day for it to take center stage. I embellished it with some stickers, fabric and a bead and was ready to go...
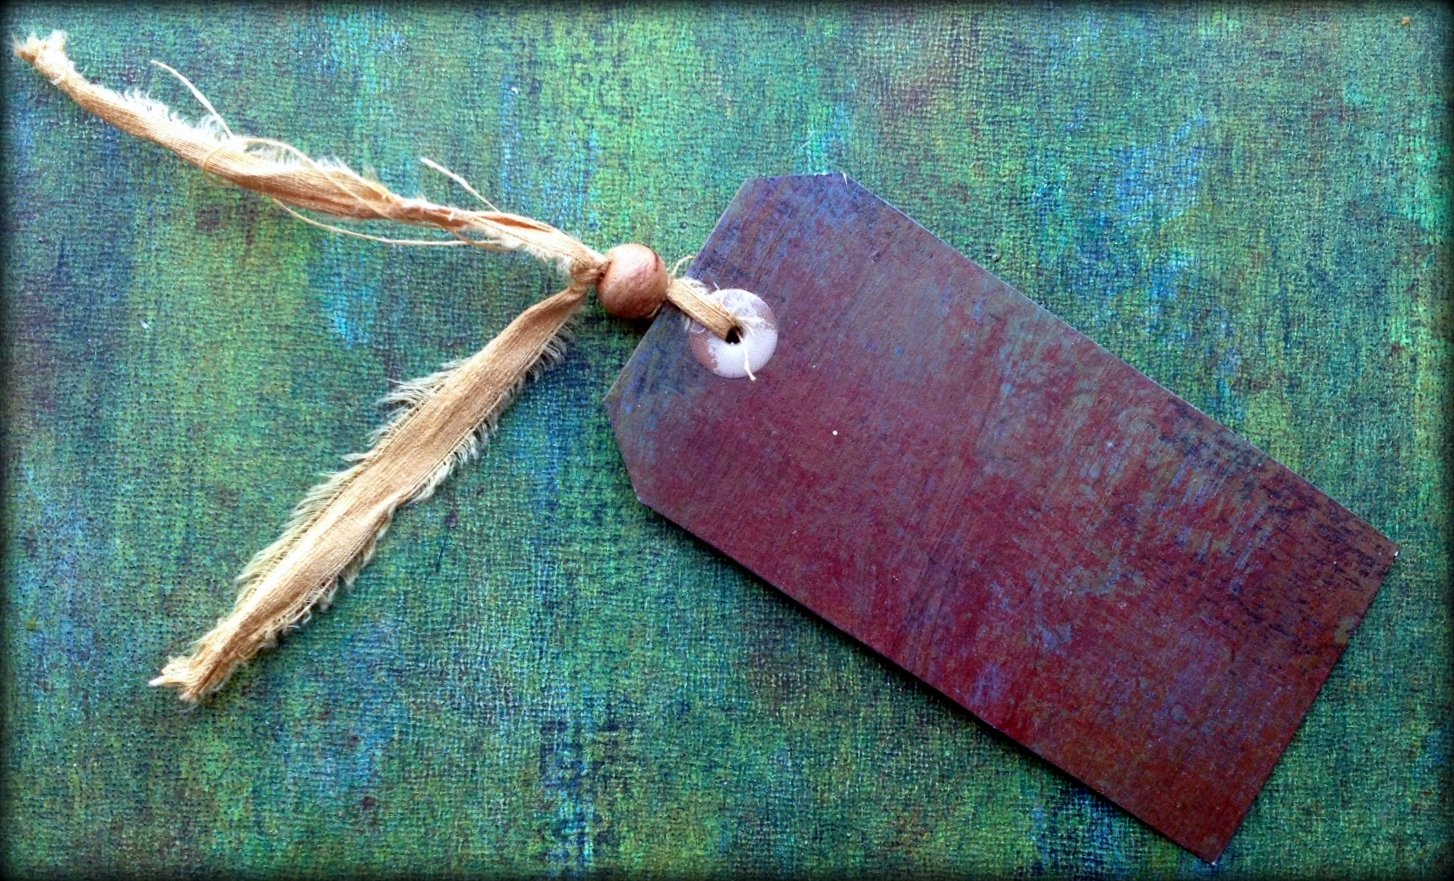
I started by completing the tag using the usual suspects: hand painted paper cut to size, rub-ons, stickers, rubber stamps, and a very cool arrow cut from Spellbinders You Are Here die cut set.
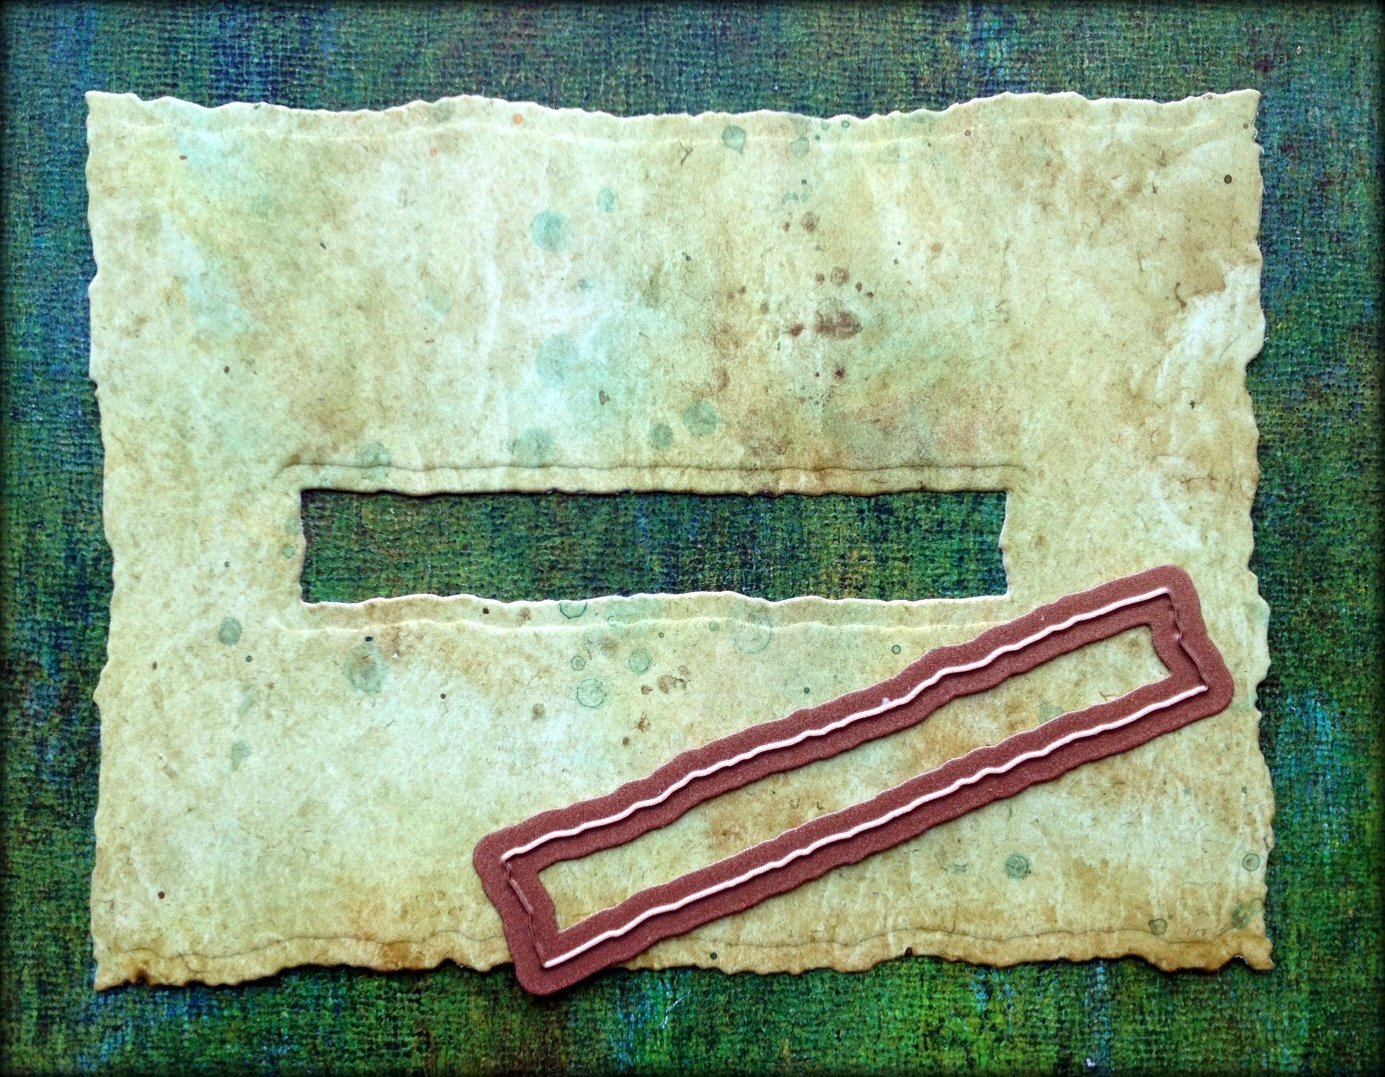
My next step was to make a pocket with a viewfinder for the tag. After all those months stuck in the middle of a pile, I thought this tag had earned a proper home. I started with some hand-painted paper from my stash.

I cut two pieces, approximately 5" x 3.75", using Spellbinders Distressed Edges die cut set.

Next I cut a "window" into one of the pieces using another die from the same Distressed Edges set. The area that was cut out was strategically picked based on the design on my tag.
Using my tag as a guide, I placed three strips of double-sided tape on the back side of the uncut piece of paper as a way to create a pocket for the tag.
Following that, I removed the backing from the tape and pressed both piece of paper together to form the pocket to hold the tag.

To embellish my pocket, I started by inking the edges of the pocket and the window to add a bit of contrast. I then continued by using a hoop that I created using hand painted paper and two dies from Spellbinders, one from Standard Circles Large and one from Standard Circles Small.

My next embellishment, which I cut down the middle, was from Spellbinders Botanical Swirls and Accents die cut set. It was made with more hand painted paper and centered on the pocket on either side of the window.

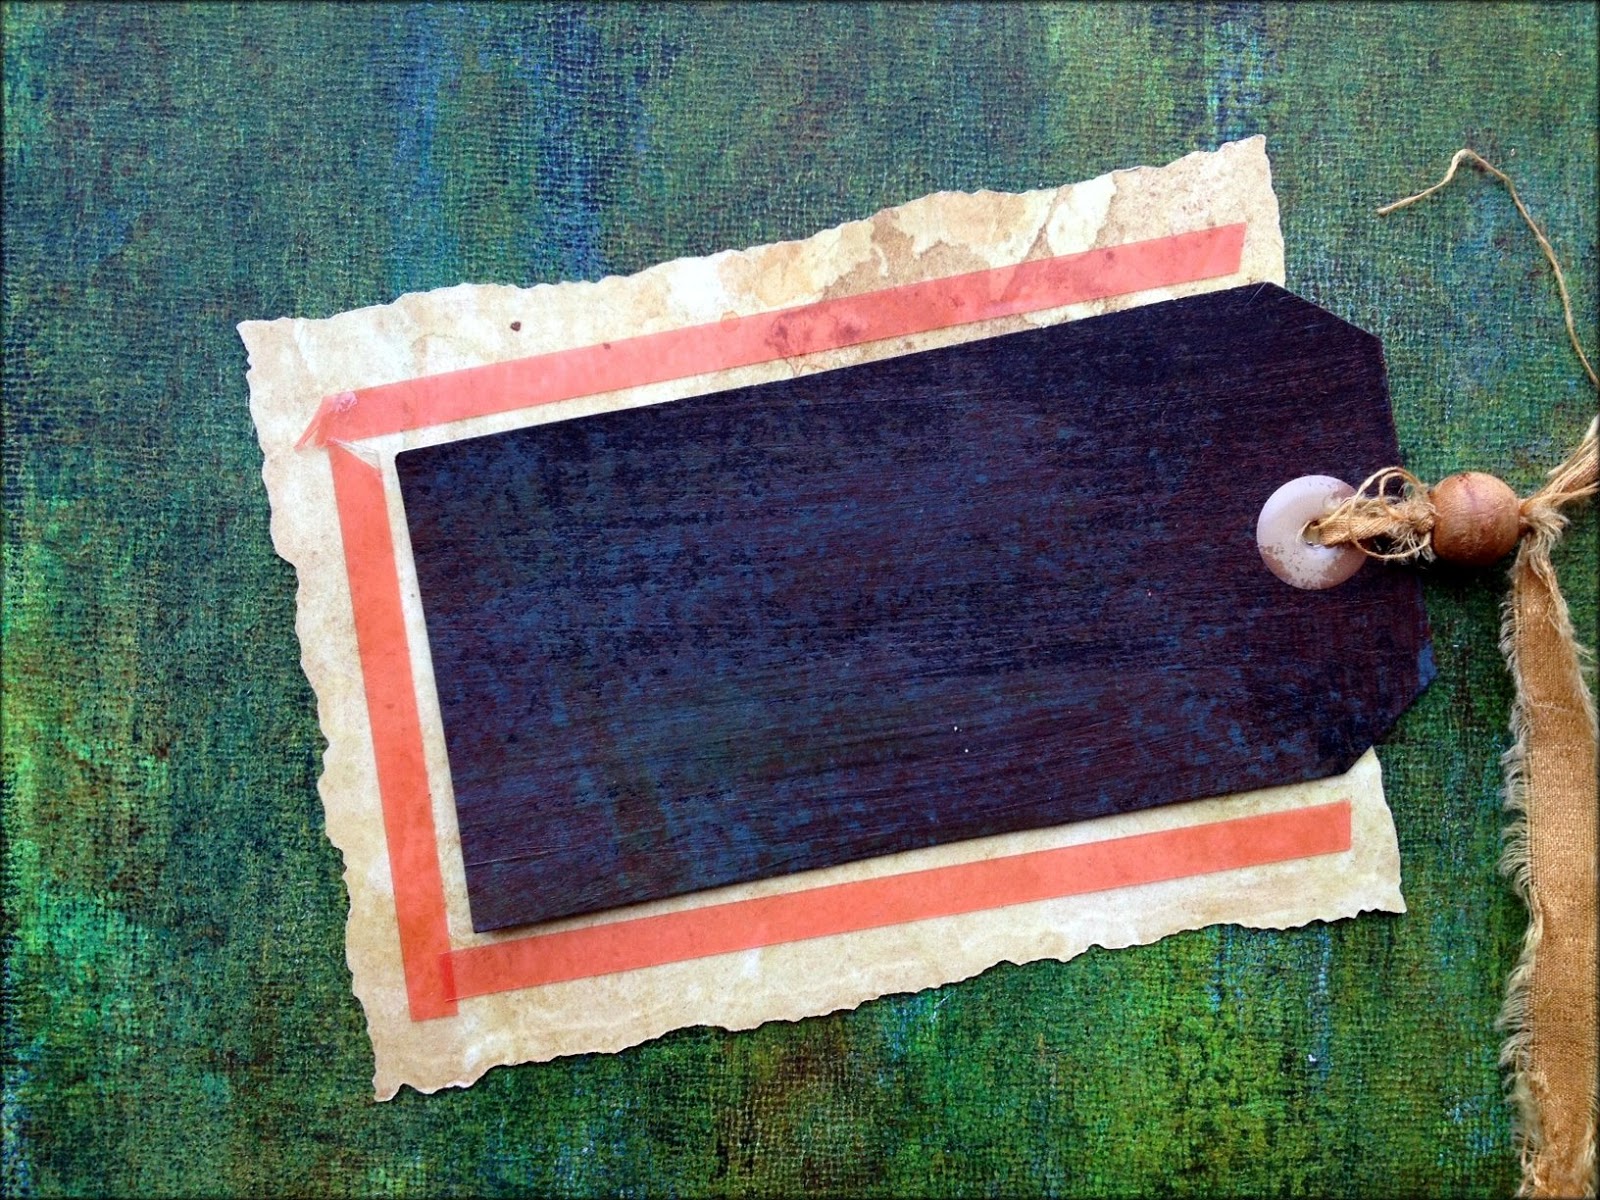
I wanted to keep the pocket on the simple side, so that the focal point was the view of the tag through the window. To that end, I ended a few additional rub-on designs to complete my project.
Supply List
Spellbinders Paper Art Supplies:
GC-001 SpellbindersTM Grand Calibur® Machine
S5-174 SpellbindersTM Nestabilities® A2 Distressed Edges
S5-396 SpellbindersTM Shapeabilities® You Are Here
S4-114 SpellbindersTM Nestabilities® Standard Circles Large
S4-116 SpellbindersTM Nestabilities® Standard Circles Small
Preferred Promotional Partners: Tsukineko StazOn ink pad
Other: watercolor paper, acrylic paint, acrylic medium, paint brush, pan pastels, sponge, spray ink, pencil, rubber stamps, rub-ons, stickers, fabric stamp, bead, adhesive, scissors, double-stick tape
June 16, 2013
Mixed Media Bloopers
Who doesn't love a good blooper?
When I filmed my video on dimensional stenciling for the June issue of Art Lessons from Cloth Paper Scissors, the first take was...well, let's just say a blooper was born. And here it is. Eight seconds that didn't make the cut:
Sending thanks to Michele Luxenberg for both filming this video and laughing at with me during take #1!
June 14, 2013
Still Talking
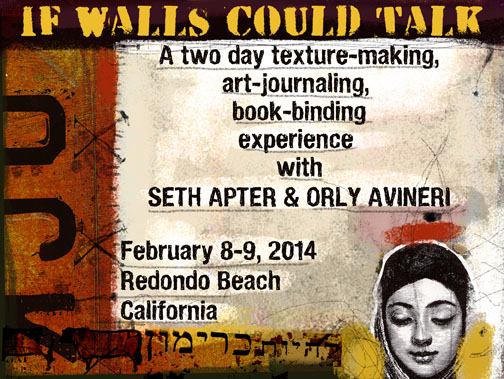
My 2-day, collaborative workshop with Orly Avineri called 'If Walls Could Talk' scheduled in Los Angeles, CA from 2/8 to 2/9/14 has filled up.
We have decided to offer this workshop a second time, earlier that same week, in San Diego from 2/4 to 2/5/14. Please consider signing up early if you are interested.
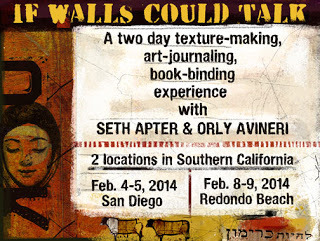
Join us on a two-day, texture-making, art-journaling, book-binding experience...
In this workshop, we will start by creating pages of walls, reflecting our histories, as we build up these solid surfaces with layers, textures, colors, and marks. This will be followed by each of us adding to the pages our own personal narrative, which will surface through the addition of words and images. By the end of day 2, we will be ready to literally tie our individual stories together as we each bind our own books, thereby creating the most intimate of personal dossiers.
Space is limited.
For information and to sign up please contact Orly:orlyavineri@gmail.com
June 13, 2013
If Walls Could Talk
We can all be found somewhere on the same dirt road, kicking up dust, gradually revealing, feverishly working toward finding new ways to form and mature. We build substrates from which we obtain our creative nourishment and the courage to inscribe our visual stories...constantly seeking where everything outside of us ends and where we begin.

Join us on a two-day, texture-making, art-journaling, book-binding experience...
In this workshop, we will start by creating pages of walls, reflecting our histories, as we build up these solid surfaces with layers, textures, colors, and marks. This will be followed by each of us adding to the pages our own personal narrative, which will surface through the addition of words and images. By the end of day 2, we will be ready to literally tie our individual stories together as we each bind our own books, thereby creating the most intimate of personal dossiers.
Space is limited.
For information and to sign up please contact Orly:orlyavineri@gmail.com
June 12, 2013
Digging for Gold

Digging for gold! This post is my own contribution to the Buried Treasure collaboration. Links to each and every participating artist can be found in the previous post on my blog.
This online collaborative process has been held on my blog since 2009. If you want to see what I "dug up" in prior years, you can follow these links:
2009
 Revolution
2010
 Handbook
2011
 As Night Falls
2012
 Billboard
---------------------------
My choice of post for 2013 was not easy. And in the end, breaking my own rules, I have chosen to link to one post and to re-post a second. Artist prerogative! The thread that links these two posts is community...
First, a link back to a post that first went live on in March 2009. I asked the question that I think is always on the minds of bloggers: just who is it that visits our blogs? The post itself was very brief. The beauty is in the response: 75+ comments answering the question. Well worth a read or a re-read. Wonder if these comments would still hold true today?
---------------------------
My re-post focuses on collaboration, something near and dear to my heart. I chose one of my many collaborative art projects that I completed in 2011 with Bridgette Guerzon Mills and Jen Worden (who no longer has a blog). Called Contexture, it stills reflects my art aesthetic. And I love the fact that I used these pages to experiment and have noticed that several different "techniques" have found their way into artwork that I have completed since.
 Front Cover
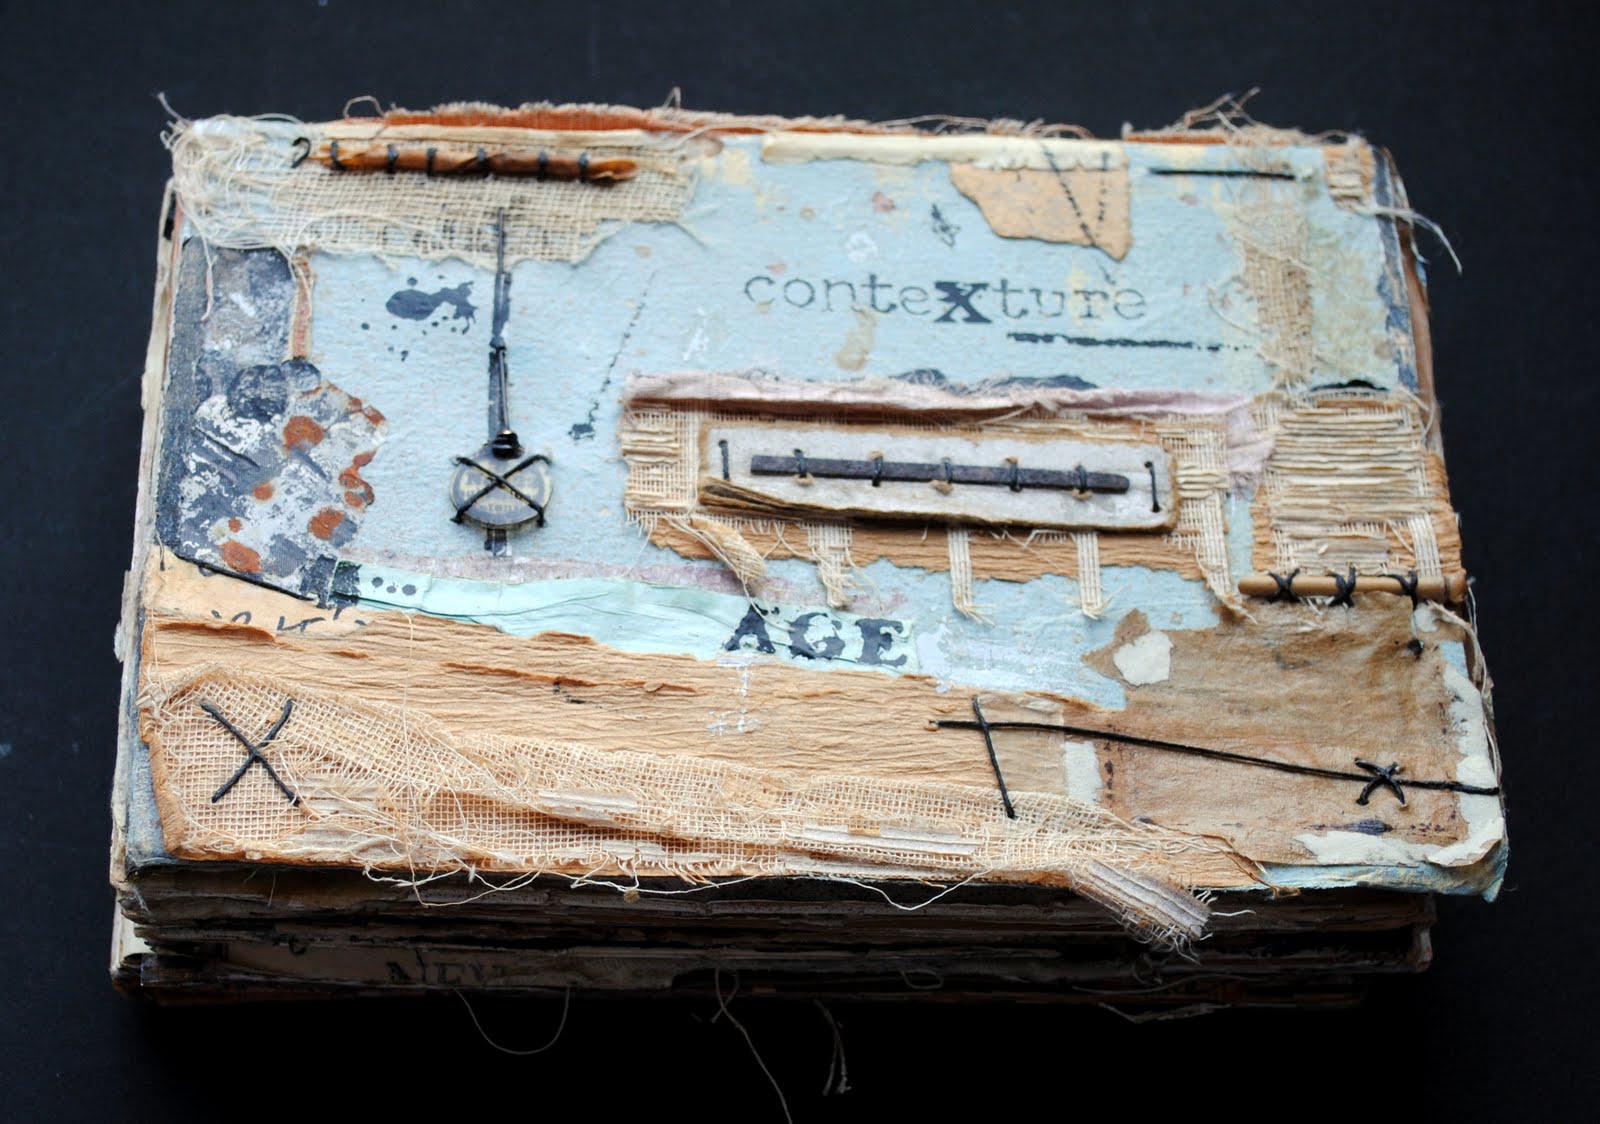

 Back Cover
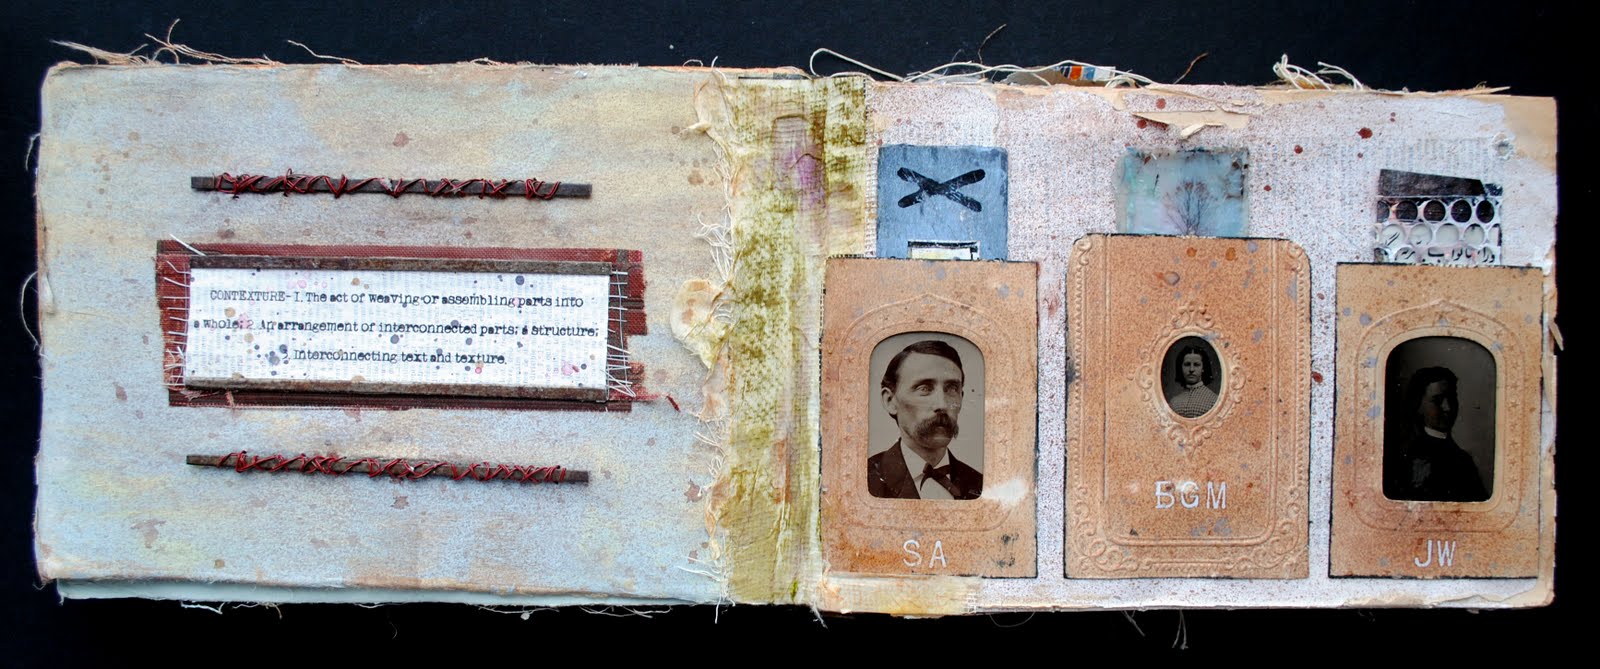 Sign in page
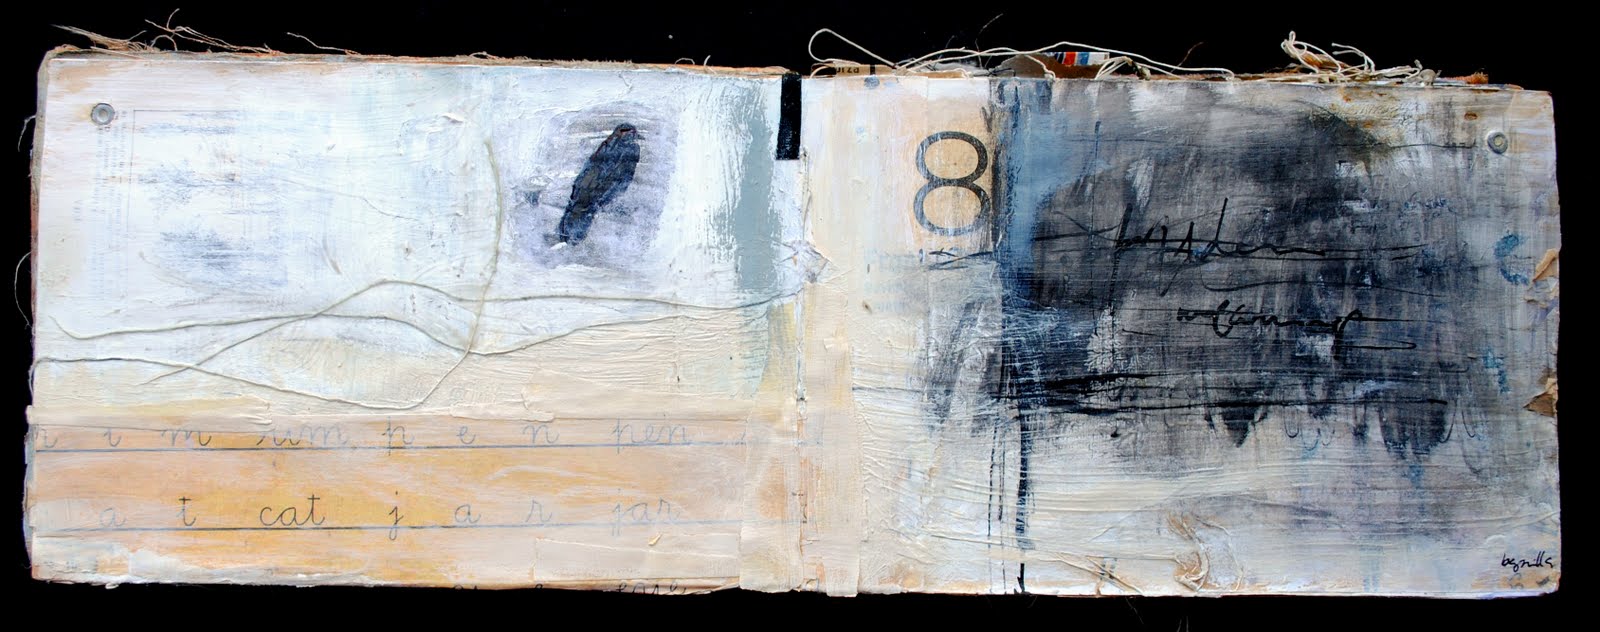 Bridgette
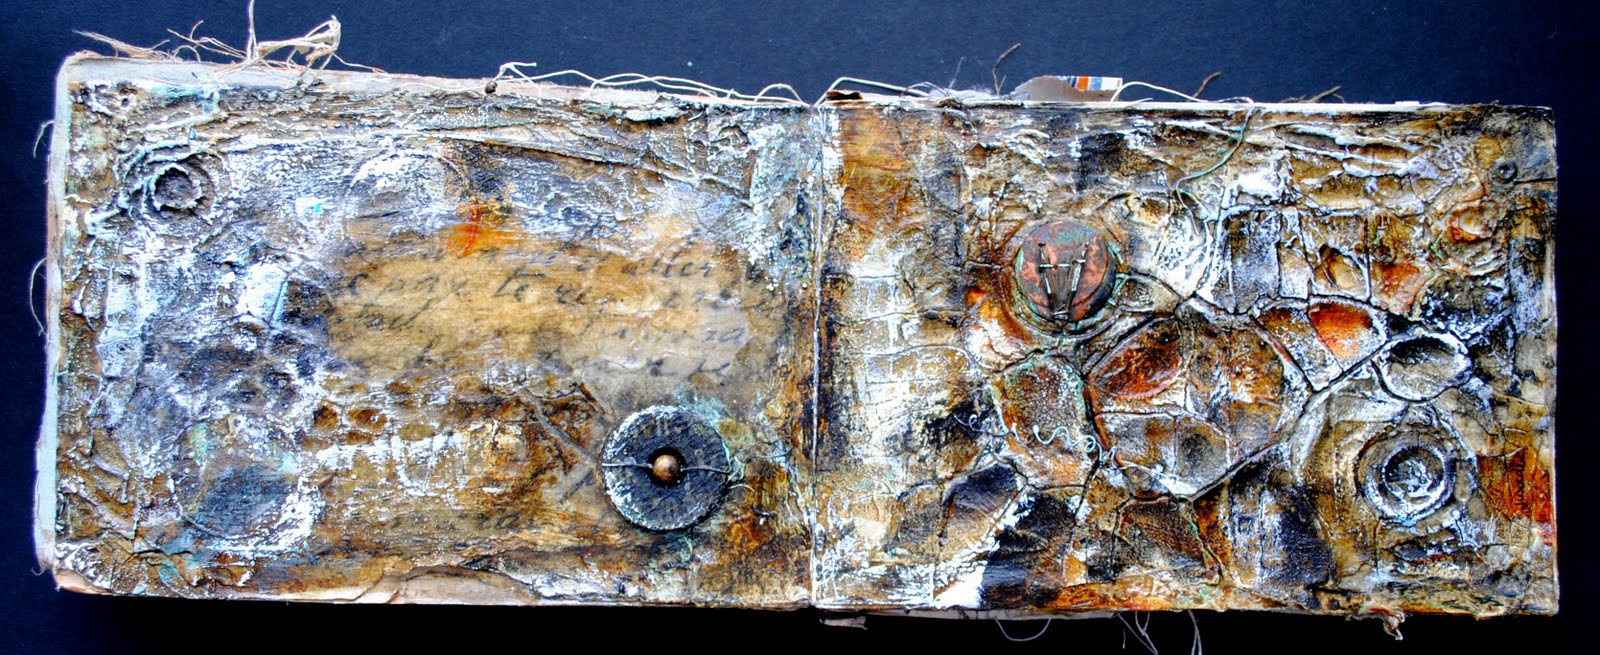 Jen
Jen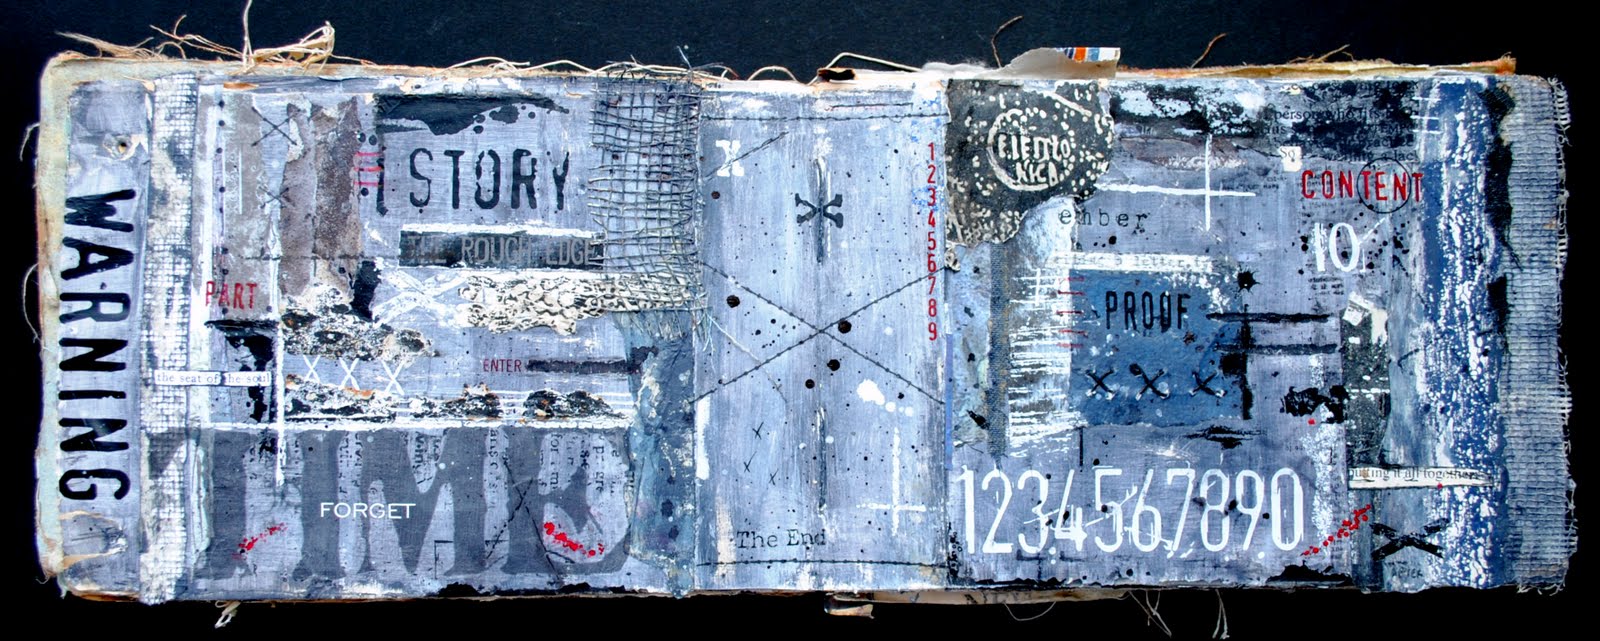 Seth
Seth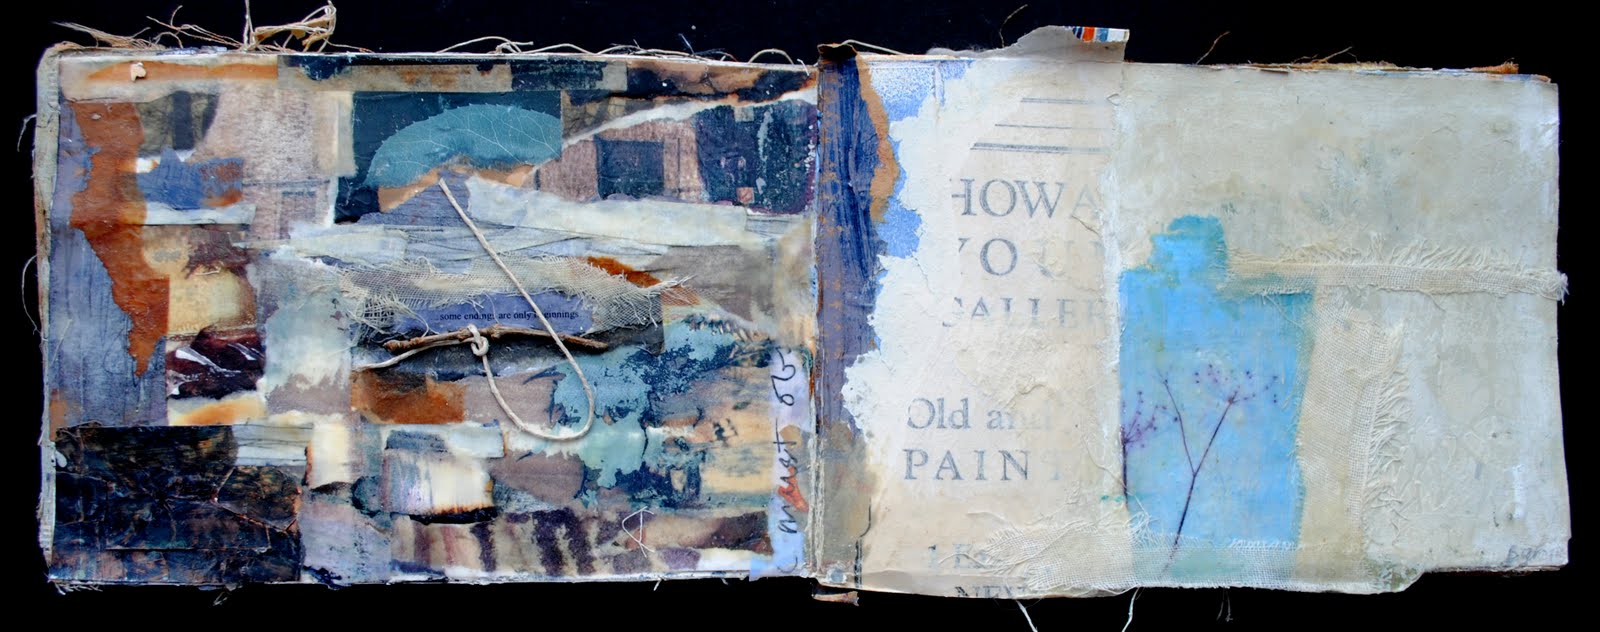 Bridgette
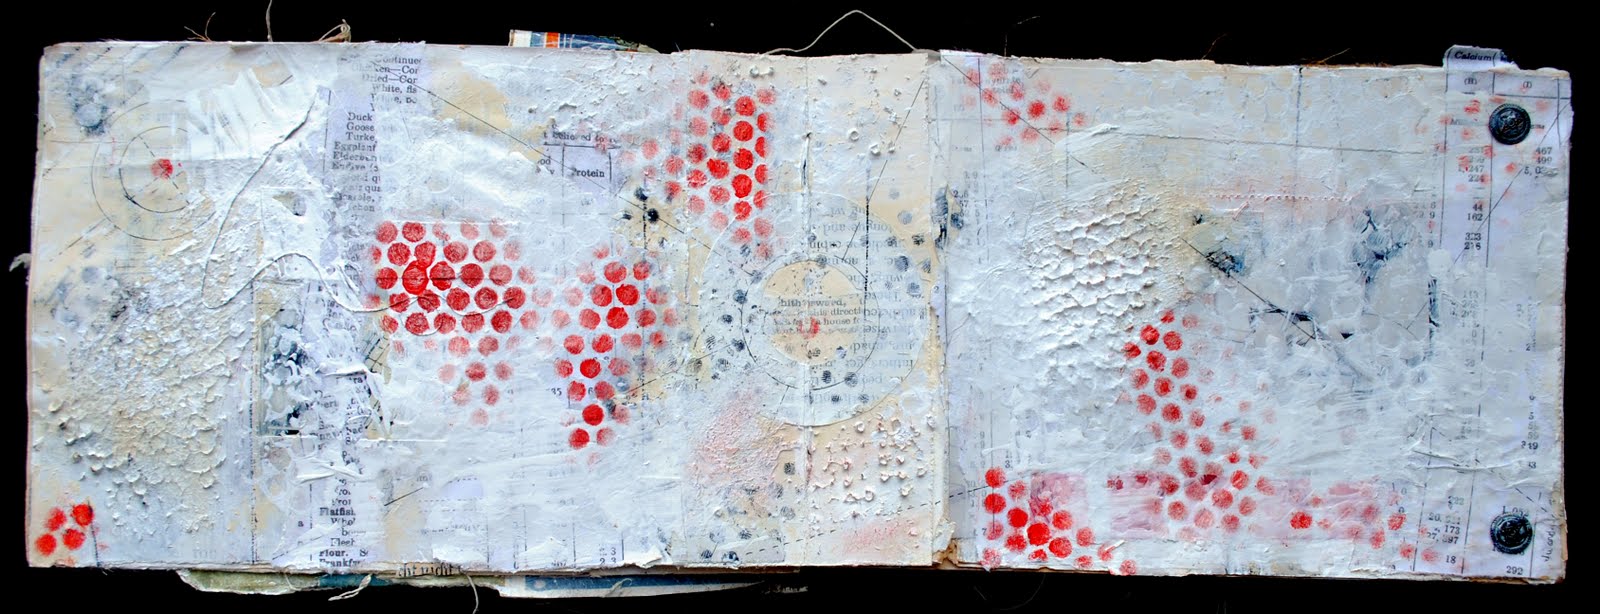 Jen
Jen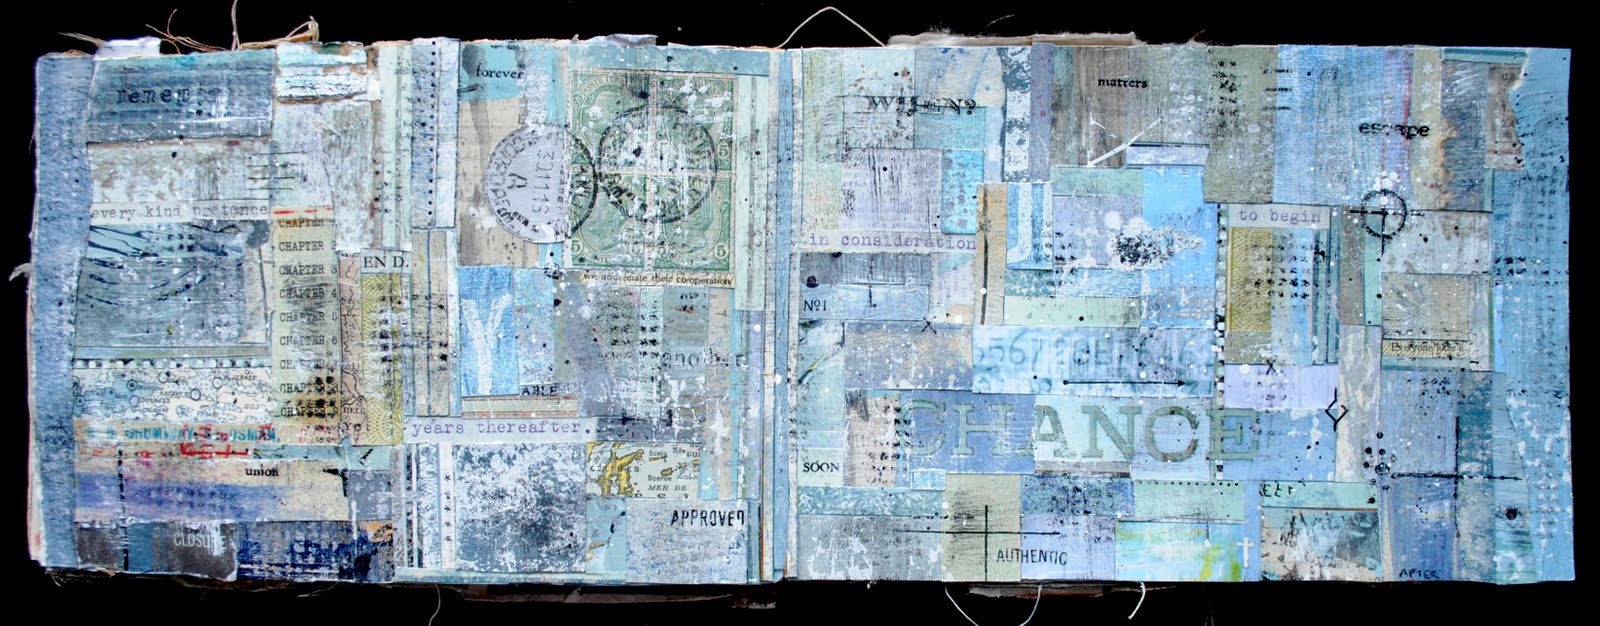 Seth
Seth Bridgette
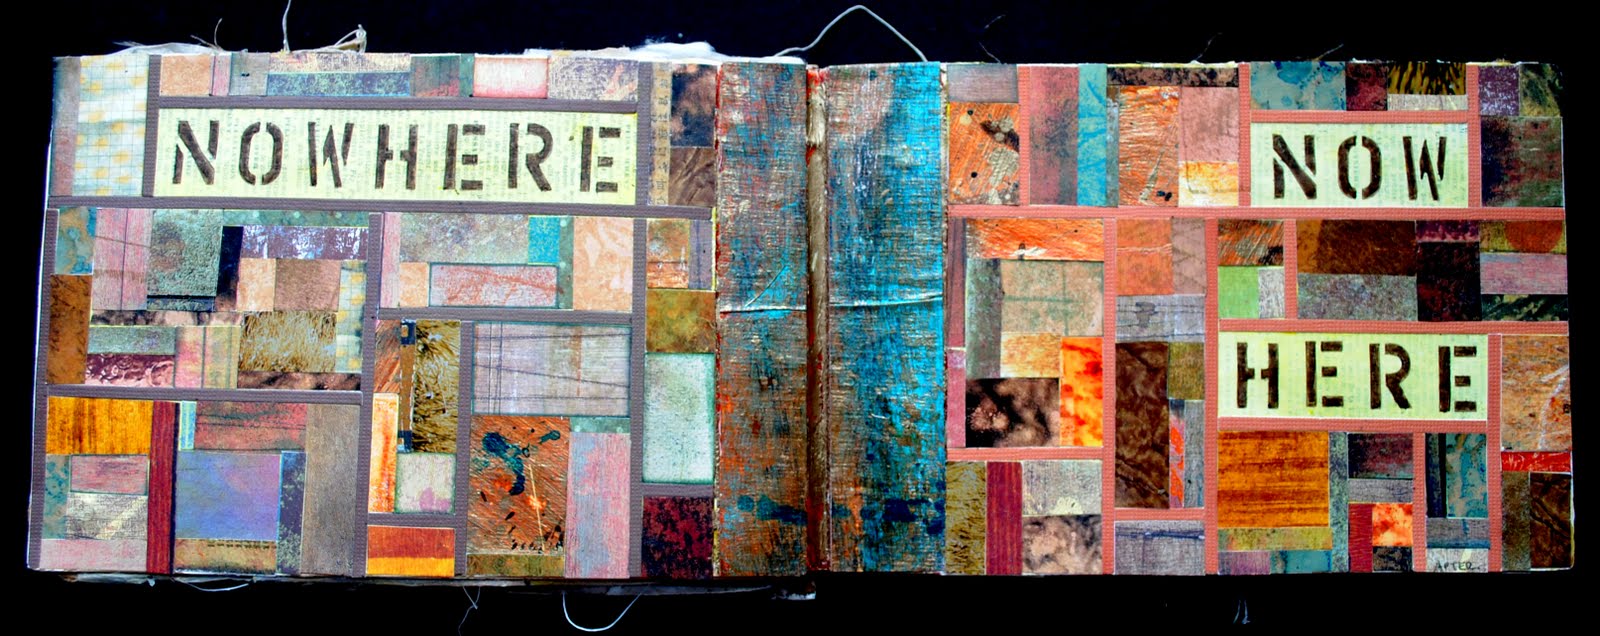 Seth
Seth Seth
Seth Seth
Seth Seth
Seth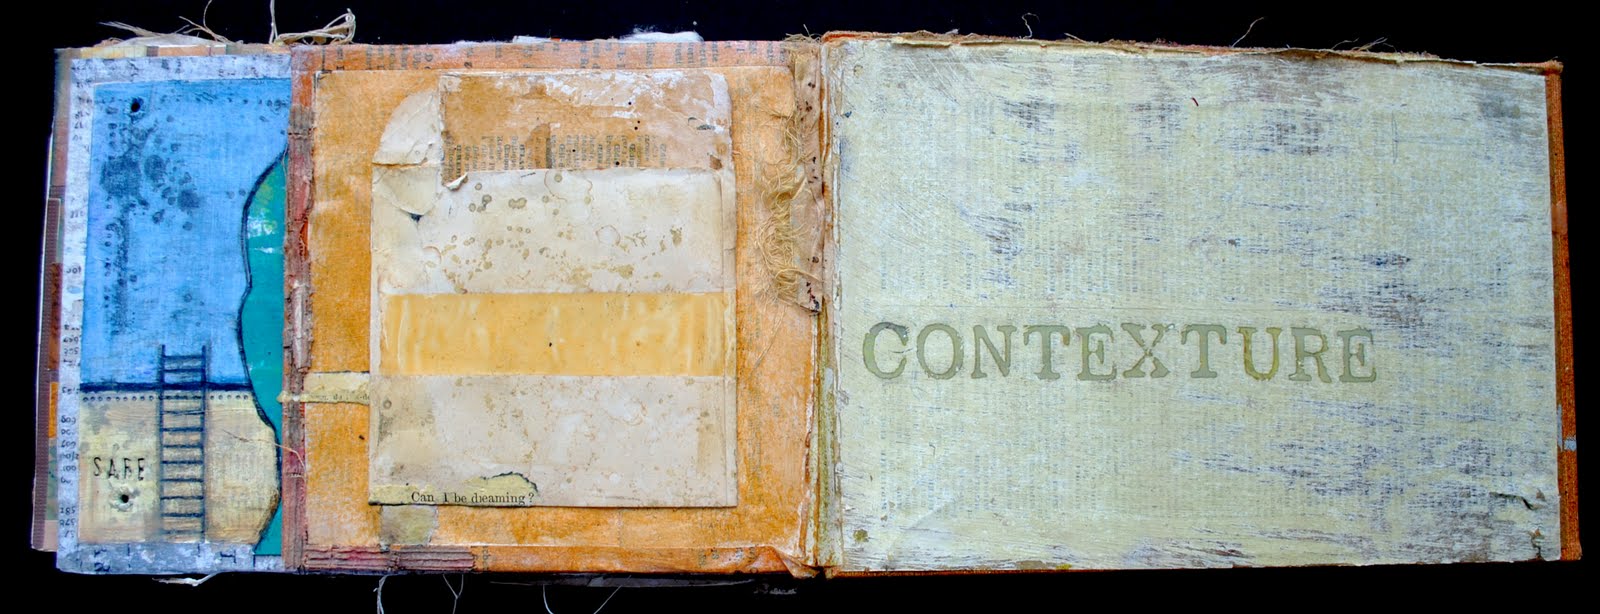 Seth
Seth
Buried Treasure 2013
 Welcome to Buried Treasure: an online, collaborative project that invites art bloggers to go into the depths of their blogs and dig for buried treasure. Each participant was asked to repost one (or more) or their favorite posts from their own blog. There are so many brilliant artists out there but so little time to explore all their work fully. This gives us all an opportunity to see highlights from posts we may have missed from so many of our favorite bloggers!
Click on the links below to go to the blog posts of the participants. Please check back here often as I will be updating this list continuously as more people post. The links are numbered so you can keep track of what you have seen. Believe you me, this will take you more than one sitting. Please note that I will soon add a link to this post from my sidebar so that these links will always be easily accessible!
If you are a blogger on a treasure hunt and you do not find your name on the list, please email me and I will add your link. And it is not too late to join in. I will be adding links until Sunday, July 16th. So if you are interested in digging for treasure on your own blog, click here for the details.
1. Sooner or Later
2. Marjie Kemper Designs
3. memesartplace
4. Claudine's Art Corner
5. teresa jaye is here to play!
6. Beanie Mouse
7. Lesley Riley
8. Ragzedge Arts
9. A Colorful Journey
10. Art in Real Life
11. Donna-Marie's Designs
12. Jo Murray - Art
13. Crafting the Sacred
14. Annette's Creative Journey
15. Cathy Michaels Design
16. Stamping Sue Style
17. Art Matters
18. Cerulean
19. ScrapperMaya
20. Bunny's Girl
21. Creativity in Motion
22. Altered Book Lover
23. Every Little Thing
24. Jacki Long
25. Ginny Merett, Artist
26. A Paper Bear
27. Lump, Bump and Clump!
28. La Dolce Vita
29. Shari Sherman! art & inspiration
30. figure art by Juana Almaguer
31. The Magic, Miracles and Joy of an Artist
32. {all at sea}
33. Artistic Craft Dabbler
34. Living an Authentic Life
35. Cheryl's Excellent Adventure
36. Ink Haven -Adventures with Words
37. Textile Seahorse
38. Tabitha Lenox....
39. Rita Vindedzis
40. Artful Digits
41. Dharma Kharma Arts Blog
42. Stampin with Julie
43. Splashes of Watercolor44. Walkin on the Bad Side45. HeARTworks46. Bolton House
47. Art and Soul
48. Paperie Petals
49. Queenies
50. Julie B Booth Surface Design
51. Artful Xpressions
52. Altered by the Sea
53. Cinnamon Studio
54. Artjuvenation
55. Patti Sokol
56. Ella's Edge
57. Jessica Sporn Designs
58. Marcia Beckett
59. Everyday Ikons
60. Artsnark's Artifacts
61. Sandy's Piece of Heaven
62. Plucking Daisies
63. Adventures in the Fun Room
64. Helen Gwinn, New Mexico Artist