
Andrew Skurka's Blog, page 18
April 28, 2020
Should women hike solo?
It’s always been natural for me to be alone, including on the trail. Sadly, society has conditioned us to think that it is unsafe for women to recreate outdoors solo. This attitude is wrong and perpetuates negative stereotypes about women– hiking, running, and camping alone can be both safe and rewarding. So it’s time to put it to rest, if you’ve ever wanted to venture out on a solo outdoor adventure, I’m here to tell you that you can and you should.

For most of my childhood, I was left alone at the foot of the Grand Tetons in a three-room cabin with no running water. No, I wasn’t being held captive — it’s just how life was with divorced parents and a mountain guide for a father. When I was really young I had babysitters, but supervision was still minimal. Sometimes there were other kids to play with, but most of the time it was just me and my husky, exploring the woods and creek behind our cabin. Being alone in nature was just a natural part of life for me and still is.
Even though I have been on the trails solo for most of my life, I can’t count the number of times that I’ve been stopped and asked by other trail users if I was hiking alone and if I was okay. Friends have asked if I ever felt unsafe. Ex-boyfriends worried for my well-being and even suggested that I didn’t know what I was doing. While these comments and microaggressions may have come from a place of genuine concern, they were usually unwanted.

Solo Hiking Is Good For You
Something changes in me each time I hit the trail alone. While it takes more mental effort to go without a companion, my mood shifts and I instantly feel better as soon as I reach the trailhead. Research has proven to us that spending time in nature is good for our mental health, but something even greater happens when you hike alone:
Say buh-bye to self-doubt!
Most of the time our self doubt is mental, but it can also stem from society and media. With each step on the trail you are crushing your insecurities and disproving negative societal stereotypes.
Improve your skills!
When you’re alone, you have to depend fully on yourself, since you’re making all of the location, preparation, and navigation decisions. These are invaluable skills that are not as easily developed in a group.
Gain confidence and strength!
It takes strength, both physical and mental, to prepare for a trip that no one else will be on. Confidence and strength come from the preparation and completion of a successful outing.
Face your fears!
What are you afraid of? Bears, being cold, starving, heights? Without any distractions or assistance, hiking solo forces you to face these fears head-on.
Gain enhanced self-awareness!
When you’re doing something alone in nature you have the time to reflect on yourself and life without the distractions of other people. Hiking alone gives you a chance to clear your head and just let your thoughts flow.
How to Minimize Risk
I have rarely felt unsafe on the trail or found myself in a dangerous situation while hiking alone. But, like most things we do, there is an element of risk. I would argue that hiking alone as a woman is no more dangerous than a man hiking alone.
To stay safe, I always try to:
Notify someone of my plans and when I expect to returnKnow my limits and don’t push them in unfamiliar settingsCarry my cell phone and/or a satellite messengerStay alert, including by not hiking with with headphonesTrust my gut — if something doesn’t feel right, I turn around

Hiking alone doesn’t mean that you will dissolve any fears that you have — it’s more about facing those fears and not letting them limit you. Society feeds us loads of negative content all day long, from the news to expectations from the media on how a woman should be and act. Don’t let society dictate how you adventure – you are capable.
When we don’t try new things because of fear, we live a stagnant life, not moving forward and not reaching our full potential. So, I encourage you to give solo hiking a try. You might love it, or not — but either way at least you know that you tried.
The post Should women hike solo? appeared first on Andrew Skurka.


Why women should hike solo
It’s always been natural for me to be alone, including on the trail. Sadly, society has conditioned us to think that women shouldn’t recreate outdoors solo. This attitude is wrong and perpetuates negative stereotypes about women– hiking, running, and camping alone can be both safe and rewarding. So it’s time to put it to rest, if you’ve ever wanted to venture out on a solo outdoor adventure, I’m here to tell you that you can and you should.
For most of my childhood, I was left alone at the foot of the Grand Tetons in a three-room cabin with no running water. No, I wasn’t being held captive — it’s just how life was with divorced parents and a mountain guide for a father. When I was really young I had babysitters, but supervision was still minimal. Sometimes there were other kids to play with, but most of the time it was just me and my husky, exploring the woods and creek behind our cabin. Being alone in nature was just a natural part of life for me — and still is.
Even though I have been on the trails solo for most of my life, I can’t count the number of times that I’ve been stopped and asked by other trail users if I was hiking alone and if I was okay. Friends have asked if I ever felt unsafe. Ex-boyfriends worried for my well-being and even suggested that I didn’t know what I was doing. While these comments and microaggressions may have come from a place of genuine concern, they were usually unwanted.
Solo Hiking Is Good For You
Something changes in me each time I hit the trail alone. While it takes more mental effort to go without a companion, my mood shifts and I instantly feel better as soon as I reach the trailhead. Research has proven to us that spending time in nature is good for our mental health, but something even greater happens when you hike alone:
Say buh-bye to self-doubt!
Most of the time our self doubt is mental, but it can also stem from society and media. With each step on the trail you are crushing your insecurities and disproving negative societal stereotypes.
Improve your skills!
When you’re alone, you have to depend fully on yourself, since you’re making all of the location, preparation, and navigation decisions. These are invaluable skills that are not as easily developed in a group.
Gain confidence and strength!
It takes strength, both physical and mental, to prepare for a trip that no one else will be on. Confidence and strength comes from the preparation and completion of a successful outing.
Face your fears!
What are you afraid of? Bears, being cold, starving, heights? Without any distractions or assistance, hiking solo forces you to face these fears head-on.
Gain enhanced self-awareness!
When you’re doing something alone in nature you have the time to reflect on yourself and life without the distractions of other people. Hiking alone gives you a chance to clear your head and just let your thoughts flow.
How to Minimize Risk
I have rarely felt unsafe on the trail or found myself in a dangerous situation while hiking alone. But, like most things we do, there is an element of risk. I would argue that hiking alone as a woman is no more dangerous than a man hiking alone.
To stay safe, I always try to:
Notify someone of my plans and when I expect to returnKnow my limits and don’t push them in unfamiliar settingsCarry my cell phone and/or a satellite messengerStay alert, including by not hiking with with headphonesTrust my gut — if something doesn’t feel right, I turn around
Hiking alone doesn’t mean that you will dissolve any fears that you have — it’s more about facing those fears and not letting them limit you. Society feeds us loads of negative content all day long about how a woman should act.
When we don’t try new things because of fear, we live a stagnant life, not moving forward and not reaching our full potential. So, I encourage you to give solo hiking a try. You might love it, or not — but either way at least you know that you tried.
The post Why women should hike solo appeared first on Andrew Skurka.
When will our National Parks re-open?
This morning I received a coronavirus update for Rocky Mountain National Park from the concessions manager. The italics are mine:
In accordance with guidance from the White House, CDC, state and local public health authorities, the Department of the Interior and the National Park Service are working to gradually resume operations and access to national parks in a safe manner. The National Park Service will continue to work with state and local officials as these changes are implemented.
The health and safety of our visitors, employees, volunteers, and partners continues to be paramount. Our operational approach will be to examine each facility function and service provided to ensure those operations comply with current public health guidance.
Park staff are going through that decision and planning process now. At this time, it is unknown when the exact date of a phased reopening of Rocky Mountain National Park will occur.
Last week I received a similarly vague update from Yosemite, as well as a request for feedback from organizations with Commercial Use Authorizations (CUA’s). Again, italics are mine:
We are working on plans for a phased reopening. There is no start date as of yet.
I’m asking a few of our CUA holders to email me with information about what you plan to do when the park is re-opened to commercial use. As you know, [when] facilities and businesses begin to [re-open] they will be operating differently due to continued requirements to protect the public from exposure to Covid-19.
We are looking at ways to allow visitors to enjoy the park but keep exposure to a minimum. If you could take a few minutes to reply I’d appreciate it.
I’ve read news articles about the re-opening of other National Parks (e.g. Glacier), and all accounts seem consistent. Essentially, NPS is saying, “We’re figuring it out, but we’re not there yet, and your National Parks experience in 2020 will probably be different than what you’re used to.”
 A lush wildflower-filled meadow in upper East Inlet.
For the iconic parks in the Mountain West, the coronavirus outbreak has so far been inconvenient but not catastrophic — the start of peak summer traffic is still 6-8 weeks away. But like every organization, each park unit must rethink all its systems before it can reopen, including employee housing, entry fee collection, food and retail service, and backcountry permit pickup. And what will be done about high-use attractions like Bear Lake and the Mist Trail, where social distancing would ordinarily be impractical?
A lot of summer fun is dependent on the reopening of our parks — and a lot of livelihoods, too, including my own. I hope they figure it out soon, and figure it out right.
The post When will our National Parks re-open? appeared first on Andrew Skurka.
April 20, 2020
8-week course: How to plan your first trip, next trip, or dream trip
Successful backpacking trips are typically planned, not improvised. A thoughtful approach towards gear, food, maps, permits, travel, fitness, and skills will increase your safety margin and trip quality, and will actually create more potential for adventure — by solving foreseeable problems beforehand, you can respond fully to the true unknowns.
Can you plan all aspects of your first trip, next trip, or dream trip — and without making errors, taking too long, or forgetting key parts?
The post 8-week course: How to plan your first trip, next trip, or dream trip appeared first on Andrew Skurka.
Outdoor Women: How to Find Your Community
This is for the incredible women still seeking their outdoor community. I’ve been there too. This is the article I wish I’d found years ago to support my search for my own female adventure partners. Allow me to provide you with the map to your outdoor sisterhood. The destination is worth the journey.
When I moved to Portland, Oregon five years ago I experienced immense difficulty making new friends and finding a community. I met a few people but struggled to connect with them. I was curious about the new mountains and trails around me, but felt overwhelmed by the choices and hated feeling uninformed about the area.
I wanted to find other women with who I could explore the trails, grab a beer, or go skiing. I knew they were out there. In my time alone at home, I started to research women’s Facebook groups, where I first learned of Pacific Northwest Outdoor Women (PNWOW).
At first I was just a silent observer, too nervous to post anything or to attend events. But I eventually realized that if I never put myself out there, I would never make new friends. I went on a group hike and it changed everything for me.
While most of us were shy at first, connections were formed as soon as our boots hit the trail. The camaraderie felt with the other women restored the confidence I’d lost since moving to the Pacific Northwest. I soon applied to be a group ambassador to help plan and lead monthly events for women in the Portland area.
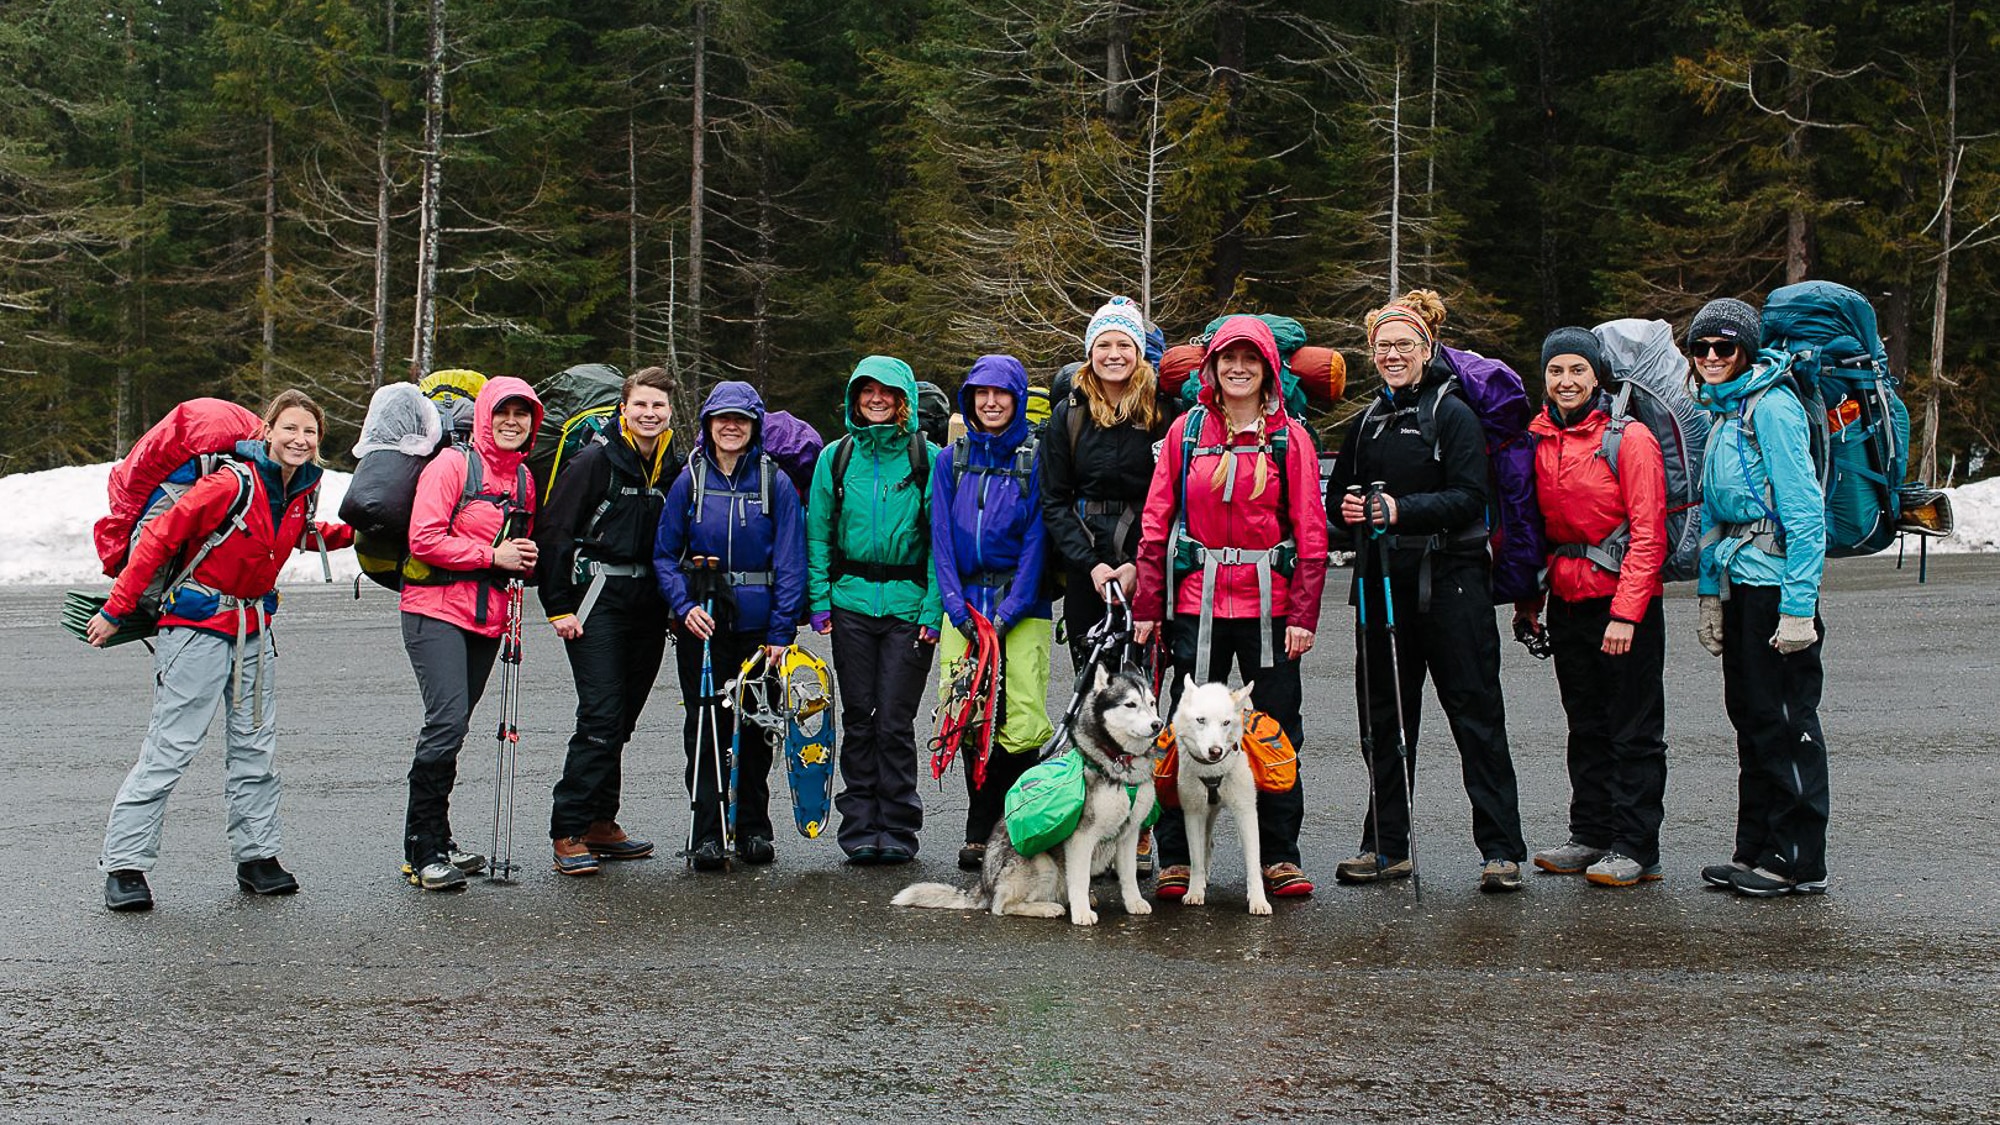 Photo: Nicole Wasko
Benefits of Female Adventure Partners
Why is it important to have female adventure partners?
On a practical level, a group of trusted partners enables us to share gear and the responsibilities of trip planning. It’s also great to know that someone has our back if we forget our headlamp or ibuprofen.
But the joy of a female adventure family goes well beyond the practical. The value of an empathic ear, a trusted partner to encourage you, and a similar set of goals in the outdoors knows no bounds. Other women are also more likely to enthusiastically participate in group sing-a-longs and embrace the wearing of on-trail tutus.
A recent study also concludes that the presence of at least one woman reduces the risk exposure of backcountry groups. This benefit is believed to be related to differences in communication styles, approach to risk assessment, and the experience objectives of men and women when outdoors.
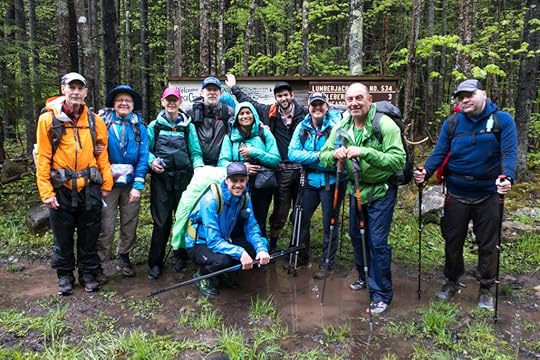
 Photo: Teresa Hagerty
Successful Adventure Dating
Finding your female adventure family is a bit like dating. I met my own adventure sister four years ago while leading an organized outdoor event. It quickly became clear that we shared a love of long two- and three-day day weekend adventures, terrible jokes, and mountainside sunrises. A healthy dash of stoke, a sense of wonder, and a spirit of enthusiastic positivity sealed the deal.
We have since gone on to climb six Cascade volcanoes, hiked countless miles, and laughed over innumerable post-adventure beers. Our risk tolerances, on-trail pace, and decision-making styles are compatible; and we know how to appropriately push each other towards our objectives. We show up, support each other through low-points, and share common Leave No Trace outdoor ethics. As this incredible piece offers, she is my unicorn.
My relationships with my outdoor lady crushers are as meaningful as my relationship with my romantic partner. These women are my treasured chosen family.
Here are some helpful tips to find your adventure family:
Say yes to new opportunities when they present themselves.Communicate honestly about your outdoor experiences.Discuss short- and long-term objectives. And,Start small to minimize pressure.

Leadership
Immersing myself in the rhythm of nature with other empowering women has transformed me in ways that I never thought possible. I still have insecurities, and I still doubt myself. But with each outing I have unexpectedly become a role model for other women, which has caused me to grow in turn — as it turns out, discomfort is actually one of the most fertile places for growth.
If you find yourself in a leadership role, it’s your responsibility to create an inclusive and welcoming environment for everyone. To do this, try:
Reaching out to people that are different from you,Hosting events that are accessible for all,Offering extra gear when needed, andProviding rides to and from trailheads as needed.
These are little things, but they can make a huge difference in getting people outside.
Resources
The search for the perfect fit can be overwhelming. This is normal — we all have to start somewhere. Consider starting with:
Women community groups like She Jumps and Alpenglow Collective; and,Guiding Services like Backcountry Babes and Chicks Climbing and Skiing.
Most regions have great volunteer-led community organizations, social media groups, and other online communities. I encourage you to explore options in your area. If you are a leader or member of one, feel free to plug your group in a comment below.
Please comment
How did you find your female adventure partners, and why specifically did you match up?What other women outdoor groups should be highlighted?
The post Outdoor Women: How to Find Your Community appeared first on Andrew Skurka.
April 14, 2020
Discuss: When & how will backpacking be safe & feasible again?
The COVID-19 pandemic has me heartbroken by the death toll, saddened by the widespread fear, longing for social engagement, deflated by its economic impact, fascinated by the science, and — most of all right now — simply anxious to return to a “normal” that more closely resembles the old one than the current one.
I’m jonesing for this return because mid-spring through mid-fall is my favorite half of the year. I’m also financially dependent on it: guiding trips during these months is my primary source of income.
As infection, hospitalization, and death rates appear to be peaking, there’s increasing national and regional debate about when and how to regain normality. Among my readers, I’d like to have a more specific discussion: When and how will backpacking be safe and feasible again?
 What will tomorrow bring? Pondering my future in the Yukon Arctic.
Safe & feasible
When I first drafted this post, the leading question only pertained to the safety of backpacking, which can be thought of in two equally important ways:
By backpacking, are you putting yourself at risk, because of your own vulnerabilities to COVID-19? And,By backpacking, are you putting others at risk, by becoming a vector for the disease?
But there’s also an issue of feasibility. Backpacking normally involves travel and public lands, and both are subject to a patchwork of public and private mandates, guidelines, and decisions. Since these positions may not perfectly or promptly mirror the safety risks, they must be navigated separately.
The future
At least by spring 2022, and probably more like 2021, and in some ways even in 2020, backpacking will become safe and feasible again. This point will have been reached when we have:
A vaccine, Effective medical treatments, and/orHerd immunity.
In addition:
Outbreaks of COVID won’t stretch the capacity of our medical infrastructure, like workers, PPE, beds, and ventilators; and,Testing and contact tracing is widely available and implemented, so that flare-ups can be quickly tamped down (“seek and destroy”).
Most people and policymakers will interpret this set of conditions as a green light to proceed fully with life as we once knew it.
The moment
As of mid-April 2020, we don’t check any of the necessary boxes:
We have no vaccine, rigorously studied treatments, or herd immunity; Medical resources are in short supply; and,Testing is relatively limited and slow, and our contact tracing systems haven’t been scaled up for a pandemic.
Leaders decided that the societal cost of inaction was too great, so since early-March in the US we’ve been subject to mass mitigation strategies that were painfully imprecise but ultimately effective. We were told to stay at home, and all things non-essential were closed or cancelled.
Under current conditions, it’s difficult to argue that backpacking can be done safely or that it’s even feasible.
As a case study, consider the circumstances under which I decided (or was forced, really) to postpone our guided trips in southern Utah that were scheduled to start on April 20th.
None of our clients or guides have been vaccinated or are known to be immune.We’re unaware of who and how many people have the virus in our hometowns and in the gateway towns of Escalante and Boulder.If we were to need medical attention — due to a condition related or unrelated to COVID — we’d be putting stress on an already overtaxed medical system. Many clients reside in states with stay-at-home mandates, and/or were prohibited from traveling by their employers.Utah requires that all out-of-state travelers complete a health declaration form when entering the state.Escalante Outfitters, which we use as a base camp, has closed its cabins, campground, and restaurant until further notice. And,Recreation access to the Escalante River canyons has been closed by Garfield County.
Barriers to backpacking elsewhere may be different, but the story is essentially the same. For example, all of Great Smoky Mountains National Park is closed, except for the parkway; the Pacific Crest Trail Association has asked hikers to stay off the trail; and the sheriff of San Juan County, Colo. implemented a “Locals Only” policy that prohibits access by outsiders to 220,000 acres of federal land. For similar reasons, I postponed our May trips in West Virginia, too.
 Under what conditions will you again feel safe backpacking with ten strangers?
The in-between
It would seem unlikely that the current restrictions will be lifted before there is spare medical capacity again, probably in May 2020 for most locations.
But it seems equally implausible that they remain in place until we have a vaccine or treatments, probably in 2021 — the economic cost would simply be too great. I’m skeptical that we’ll even wait for widespread testing and contact tracing, the timeline for which is unclear to me but which intuitively seems unlikely by, say, Independence Day.
So Americans will probably be presented with opportunities to normalize — like returning to work, attending religious services, using mass transit, dropping off children at daycare or maybe school, boarding an airplane, and going on a backpacking trip — while the risk is still present, elevated, and somewhat unknown.
COVID-19 is new, but cost-benefit decisions are not — we make them everyday, such as when we drive a car, eat at Five Guys, or hike in bear habitat. During this time, each of us will need to independently consider the risks and our risk tolerance.
Personally, I’ll soon be preparing our clients and guides for this phase, especially those joining us in Alaska in late-June and Yosemite in July. I remain hopeful that these trips will run, but I’m doubtful that I can eliminate all COVID-related risks by implementing new safeguards (e.g. masks, hand washing, group sizes, social distancing) or that I can secure an Abbot ID NOW device for pre-trip testing.
Your turn
Now let’s make this a discussion. I’m curious to know the circumstances under which you will feel safe backpacking again, and perhaps the context for or an explanation of your decisions. Specifically:
Are you working off a timetable or waiting for specific developments?What must be the messaging from government officials and/or health experts?What resources must be in place, such as spare medical capacity, widespread testing, contact tracing, effective treatments, or a vaccine?What behaviors would you expect and demand of others in your group or on the trail?What best practices would you expect of an organizations like guide services, hiking clubs, and meetup groups?
I expect comfort levels to reflect the nature of the trip. For example, under what conditions will you feel comfortable backpacking:
With friends or even strangers?In high-use areas and corridors like the Appalachian Trail or Angel’s Landing?In a faraway destination that requires air travel and motels?On ambitious and remote itineraries, such as a high route or the Alaskan bush?
Backpacking is unlikely to be the same in 2020, but some is better than none. I’d encourage you to be cautious and listen to the experts — our favorite trails, routes, and destinations will be there.
The post Discuss: When & how will backpacking be safe & feasible again? appeared first on Andrew Skurka.
April 13, 2020
How is backpacking different for women than men? Series intro
While reorganizing and streamlining the blog categories late last year, I found two lonely posts that demanded their own section — For women — and that also highlighted the need for more related content.
On this website I generally stick to subjects about which I’m an expert, so historically it’s been light on female-specific subjects and has lacked a female perspective. No matter how much time I spend in the backcountry with women — whether it be my wife, my guides, or my clients — I will never develop the same level of expertise in this area.
To help fill this content void and to provide a helpful and holistic resource for beginners and intermediates, today I’m launching a 10-part series about backpacking for women.
Series objective
At least some — and maybe most — elements of a backpacking trip are gender-neutral. For example, our sex does not influence the fuel efficiency of an alcohol stove, the direction of true north, or the odds of getting a John Muir Trail permit. So a lot of informational content about backpacking is equally applicable to all genders.
I wanted this series to focus on areas that aren’t gender-neutral, and gave the writers two guiding questions:
What unique concerns do women have about backpacking? And,In what ways is backpacking different for women than men?
Each installment covers one answer to these questions.

Installments
The first half of the 10-post series will be published on a weekly basis, and the second half will probably be a little slower.
Finding Your Community: Outdoor Sisterhood
Say “yes” to all opportunities presented to you, and use internet groups to find your people and encourage a more inclusive outdoor community.
Societal Challenges: Yes, I Can Hike Solo, Thanks
Societal norms should be broken to encourage more women to venture into the outdoors solo. We’ll talk about why people shouldn’t be worried about women being vulnerable in the outdoors.
Facing Your Fears: Wild Animals, Insects and Injuries
We explore skills and tools to manage and reduce the risk of these off-cited concerns so you can confidently hit the trail.
Facing Your Fears: Other People
What can you do if you experience inappropriate physical contact, verbal harassment, or discrimination while adventuring in the outdoors? Also, how can you safely have an impact if you witness harassment?
Women Specific Gear
How is women-specific gear actually different, and do you need it?
Fitness & Training for the Female Outdoor Athlete
Tips on training for outdoor endeavors both inside and outside the gym.
Feeding the Female Athlete: Nutrition for Outdoor Endurance
Trail food is not one-size-fits-all. We’ll explore how to plan backcountry meals, adjust “standard” meal plans, and fuel the female outdoor athlete for the long haul.
Women Specific Hygiene: Peeing, Pooping, and Menstruating on the Trail
Learn how to successfully poop in the woods, properly use a pee funnel, effectively manage your period, and care for your lady bits.
Dirtbag Gorgeous: Embracing Dirt Under Your Fingernails and On-Trail Self-Care
Women wear makeup for various reasons, and that’s okay. Let’s talk about why it shouldn’t matter if you adventure while wearing make-up or not.
Mentoring & Giving Back
The greatest gift you can give to the outdoor community is yourself. Inclusivity, encouragement, and empowerment for women in the outdoors starts with us. We change the world, and further the cause of equality in the outdoors, one woman at a time. It’s your turn.
The writers
Teresa Hagerty
Teresa is a Seattle-based hiker, backpacker, cyclist, climber, and glacier mountaineer. She brings over twenty years of experience in outdoor adventures and mentorship, and is founder of Cascade Mountain Adventures, a Pacific Northwest outdoor guiding service dedicated to women taking their first steps into outdoor adventure.
Cascade Mountain Adventures @pnwoutside
 Teresa on the summit of Mt. Rainier
Alexandra Lev
Alexandra Lev is a Portland, Oregon-based freelance writer and content developer. As a passionate outdoor adventurer and mental health advocate, it’s her mission to inspire others to connect with themselves, their communities, and the planet in a deeper way. When not writing about the outdoors or speaking about mental health issues she can usually be found skiing or hiking in the backcountry with her husband and their two Siberian huskies.
LuckyAlexandra.com@luckyalexandra

The post How is backpacking different for women than men? Series intro appeared first on Andrew Skurka.
March 31, 2020
Coronavirus: US- and state-level trends
This weekend I got frustrated by the lack of easy-to-find and up-to-date national- and state-level coronavirus trends. Specifically:
How many cases and deaths have been reported each day? And,What is the rate of change?
So I created my own, using data from the New York Times, which they’ve made publicly available on Github and update daily.
I know that a lot of very smart people — including statisticians, epidemiologists, and medical professionals, which I’m not one of — are researching coronavirus and developing robust models. But their raw data and findings aren’t necessarily updated daily or shared with the public. I’m also aware that mine is a very simple analysis, with no accounting for, say, the availability of test kits, undiagnosed cases, or hospital bed counts.
I’ve run numbers only for the US generally, and for states and counties that impact me most:
Colorado, Massachusetts, and Michigan, where I live and have family;Alaska, California, and Utah, where my business has seasonal operations; and finally,New York and Washington, which perhaps are harbingers for the country.
If you want other state data:
Make a copy of the Sheet;Duplicate any one of the state tabs, except Colorado, which sometimes includes manual data from our health department that’s not yet in the NYT data; and,Enter your state name in cell B1.
To keep your Sheet updated, the raw data must be downloaded from Github and imported. Or just come back here — I’ll be doing that almost daily.
For easier viewing, open this Sheet in a new window.
To edit this Sheet, create your own copy under “File.”
Analysis and questions
March 31
The IHME model suggests that the US will reach its peak on April 15; Colorado, two days later on April 17.
But I’m uncertain how they’re getting this result, at least for Colorado. For five consecutive days (March 26-30), Colorado has reported flat-line or negative growth in both cases and deaths. Under the current circumstances — in which few people seem to be going anywhere or interesting with anyone, at least in Boulder — it’s hard to imagine that a five-fold surge in cases is coming our way.
If a few days of additional data support the possibility that Colorado has flattened its curve, that raises the next question: How do we get out of this without igniting it again?
The post Coronavirus: US- and state-level trends appeared first on Andrew Skurka.
March 26, 2020
Recommended footwear for high routes, Alaska, and early-season conditions
What is the optimal backpacking footwear for high routes, Alaska, and early-season conditions? Each year I field this question from dozens of clients, so here I’d like to provide a list of proven winners (and a few losers). These recommendations are relevant to anyone planning a trip to similar locations or in similar conditions, whether it be private or guided.
Footwear is extremely personal, and what works for me or for another backpacker will not necessarily work for you. My recommendation is to try on a half-dozen pairs at a well stocked local retailer, or order multiple pairs from an online retailer and keep only the pair that fits and feels best.
Expected conditions
High routes, Alaska, and early-season conditions place very similar demands on footwear. Key requirements include:
Durable materials and construction, to withstand extensive abrasion from rocks and brush, plus perhaps constant wetness;Aggressive and sticky outsole, for good purchase on rock and vegetation, sometimes slick and often uneven;Semi-stiff underfoot carriage, for easier edging on steep slopes and sidehills, and for efficient kicking of steps in spring snow;Breathable/non-waterproof upper, so that they expel water quickly after creek crossings, dry out relatively quickly, and prevent the foot from overheating; and,Stability on uneven ground, by having a low-to-moderate stack height to lower the foot’s center of gravity.
 Gathering client feedback about their footwear choices while waiting for our bush plane at Circle Lake, Brooks Range, Alaska. Photo: Dave Eitemiller.
Recommended footwear
In order of approximate last width, from narrowest to widest:
La Sportiva Bushido II ($130, 10.5 oz) is my personal longtime favorite — it checks all the necessary boxes and has little room for improvement. However, it has a very narrow last — the narrowest in La Sportiva’s entire line, in fact — so it’ll be confining for those with average and wide feet. My full review.
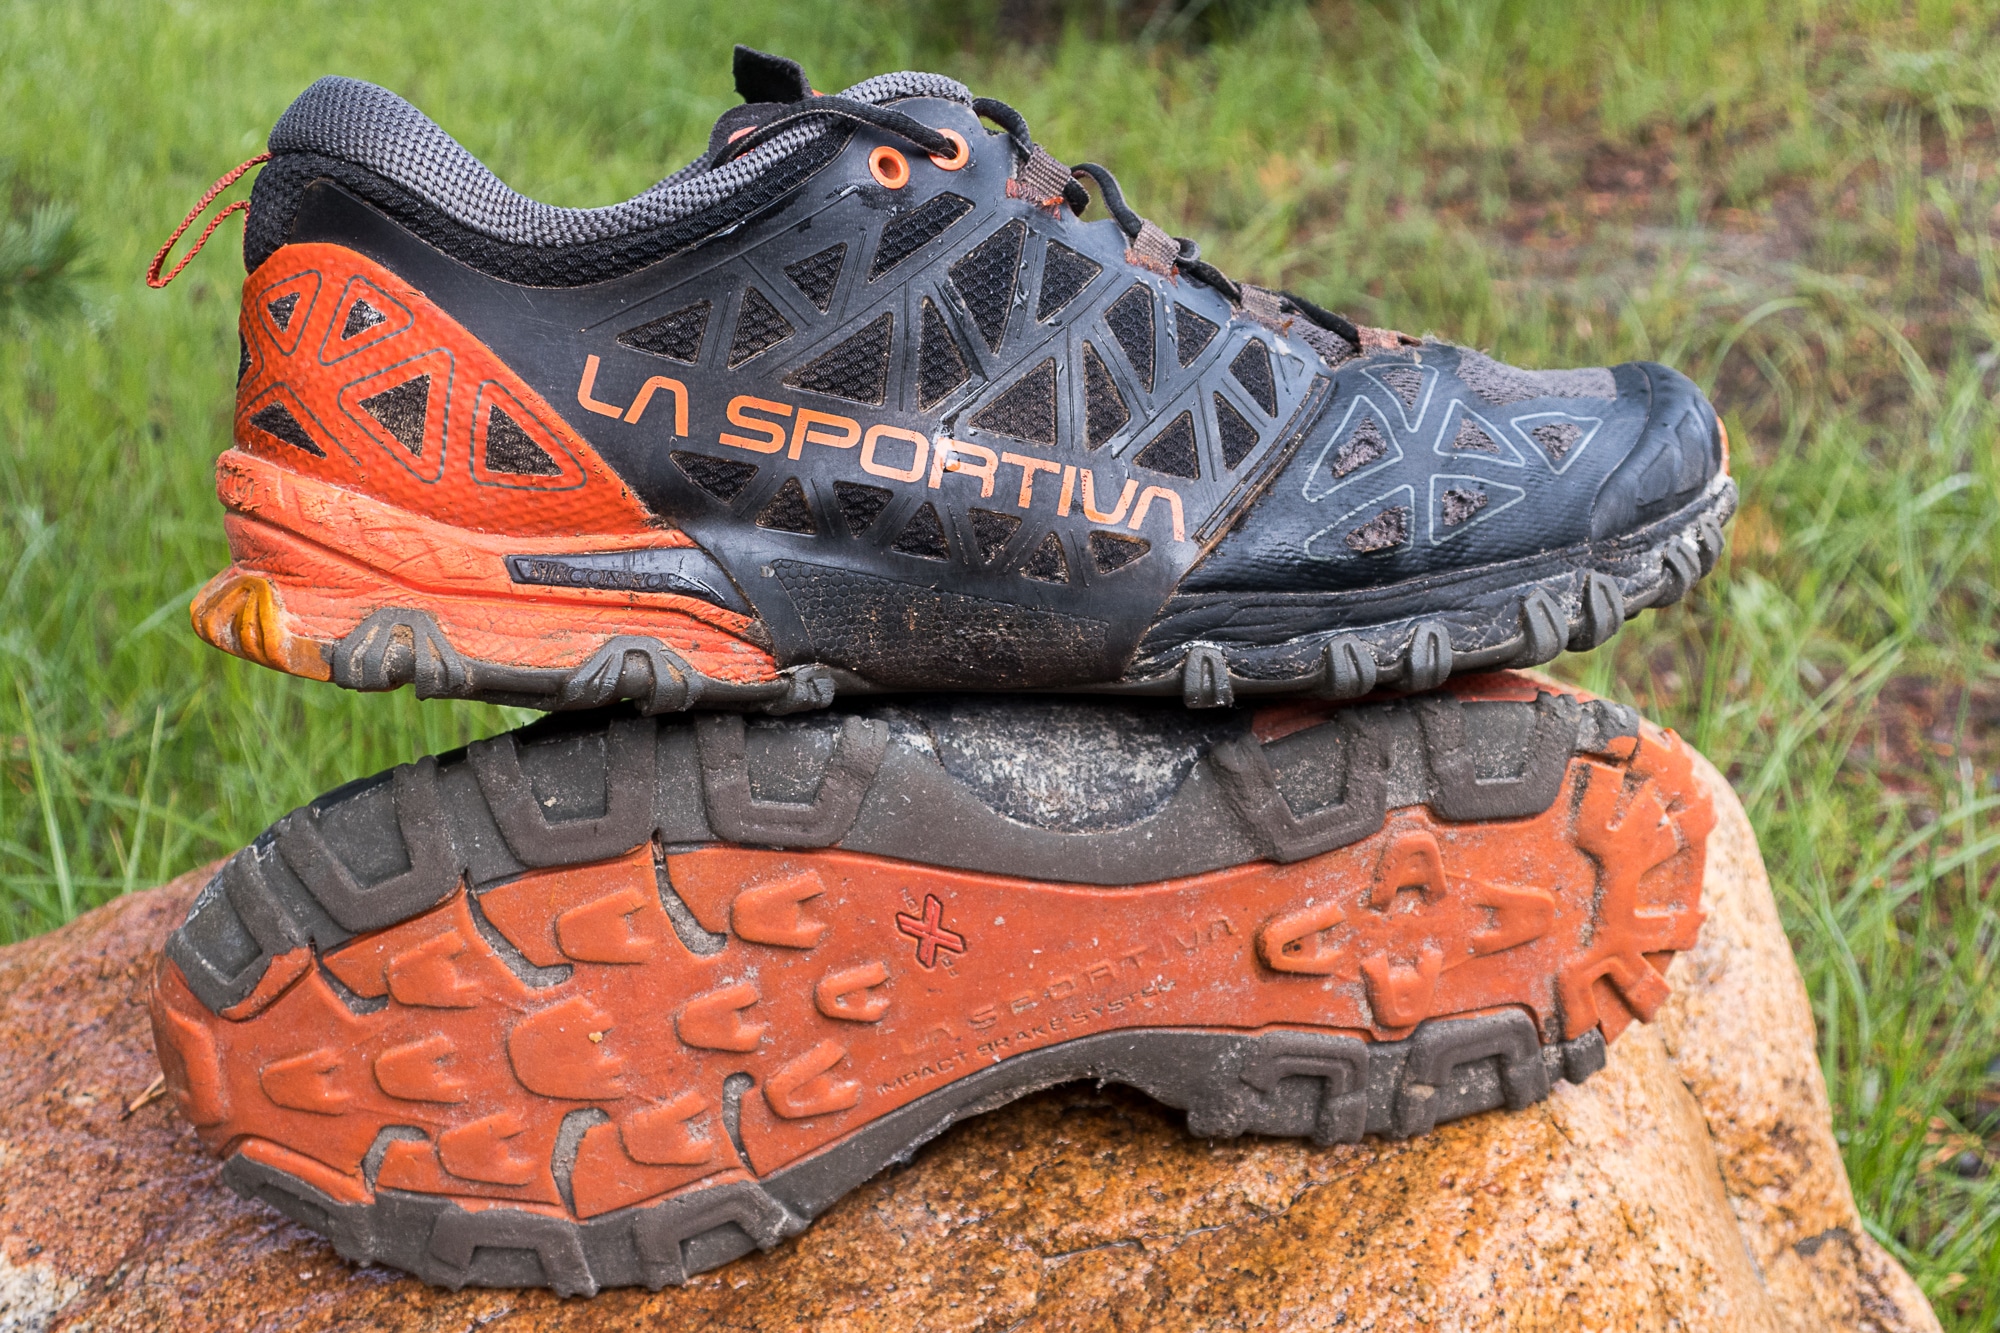 After 315 demanding miles, the Bushido II still had some life left. The uppers were mostly intact, and the outsoles had some rubber left.
Salomon X Alpine Pro ($160, 10.9 oz) is my second pick. Versus the Bushido, it’s more cushioned, less stiff, and a bit roomier. For me, it excels on adventure runs and trail hikes, less so for technical off-trail backpacking trips. But for many others, it will be more comfortable than the Bushido. The Quick Laces may fray in gritty environments. My full review.
 The Salomon X Alpine Pro is the most agile Salomon option. It’s marginally wider, more cushioned, and less stiff than the Bushido.
Salomon X-Ultra 3 ($120, 13 oz) is the top pick of Dave Eitemiller, one of our guides who has used them in Alaska and on high routes in the Winds, Yosemite, and Colorado Rockies. For him, the Bushido are simply too narrow. The X-Ultra 3 has an aggressive and hard-wearing outsole, and a durable upper with a bit more padding than the aforementioned models. Like the X Alpine Pro, they feature Quick Laces.
 The Salomon X Ultra 3 has an excellent outsole. This pair was used for the Wind River High Route and a hard 7-day trip in the Brooks Range, and still had life left.
La Sportiva Ultra Raptor ($130, 12 oz) fit and perform similarly to the X-Ultras. The upper feels almost boot-like, with a lot of structure and protection that can be can be unforgiving on feet if the fit is not quite right. The outsole is very sticky, but the smaller lugs wear quickly and are not as well suited for mud and vegetation.
 The Ultra Raptor are very durable and protective, but may be unforgiving on feet.
Salomon XA Pro 3D ($130, 13 oz) has one serious flaw: its insoles absorb water, and when wet they fold underfoot like an accordion. But this can be overcome, and otherwise they’re a good choice: they’re made well, and have good edging and traction. The fit is perhaps marginally wider than the Ultra Raptor and X-Ultra.
 So long as you replace the insole of the XA Pro 3D, they’re a fine selection.
La Sportiva Mutant ($135, 10.7 oz) are the least rigid of this group, and among the widest. The laces should be swapped out immediately (at least for the 2019 production pairs), but otherwise the durability is very good. The burrito-style lacing system was universally applauded — it creates a sock-like fit.
 The Mutant fit wide and are less rigid than other models, but they hold up well, have a sticky outsole, and fit like a glove.
La Sportiva Akyra ($140, 11.3 oz) is perhaps the burliest model on this page, with a very durable upper, very aggressive outsole, and very stiff carriage. It’s best suited for technical hiking and scrambling in drier environments — its dry time is exorbitantly slow. Fit is medium/wide. For more details, read this review from u/LowellOlson.
 Justin Simoni in the Akyra on Copper Mine Peak, one of the highest points on the Kings Canyon High Basin Route, looking across the Sierra towards Mt Whitney.
Prospects
The shoes below look and sound promising, based on paper specs and reader feedback (see the comments at the bottom of this page, and read this r/UL thread). But I’ll reserve judgement until using or seeing them in the field first-hand.
Altra King MountainInov-8 Trailroc and RocliteLa Sportiva AkashaScarpa Neutron
Lowa Innox Pro Lo ($175, 12.5 oz) is the most scaled-down version of the Innox, which is also available as a waterproof low-cut, mid-cut, and waterproof mid-cut. I recently received a pair, specifically to test them out for this application, but have no feedback yet.
Trail shoes that don’t make the cut
Conventional on-trail itineraries put both different and fewer demands on footwear. For example, more midsole cushioning and a wider toebox gives more all-day comfort, and the materials and construction need not be as bomber.
Altra Lone Peak 4.5 ($125, 10.5 oz) is the unofficial footwear of thru-hikers, who appreciate its extra wide toebox and generously cushioned 25mm stack height when putting in long days on well maintained trails. But the Lone Peak falters off-trail — the toebox is too wide for precise lateral control, and the midsole is too soft for holding edges. The Lone Peak 4.0 and 4.5 are more durable than their predecessors, but still lacking for these conditions.
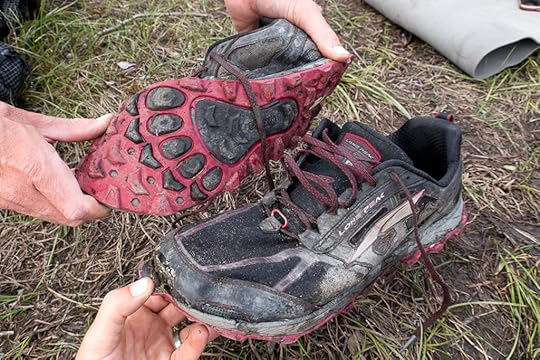 For off-trail terrain, the Lone Peak are too soft and too wide, and they still don’t have adequate durability. After one week in the Brooks Range.
La Sportiva Wildcat ($110, 12.4 oz) is the all-mesh sibling of the Ultra Raptor, with which it shares the same last and outsole. It’s a fine trail shoe and the pinch-free upper is more comfortable than that of the Ultra Raptor, but it’s abrasion-resistance is sub-par.
 The Wildcat, thrashed after just a week in Alaska
Brooks Cascadia 14 ($130, 10.7 oz) and Saucony Peregrine 10 ($120, 10.7 oz) are both time-tested trail running and backpacking shoes, but they’re less suitable for than other referenced models, lacking the durability and low-to-the-ground design. If you can’t find or test another model you like, stick with these, but don’t expect to wear them for another trip afterwards.
Leave a comment!
What shoes have (not) worked for you for high routes, Alaska, and early-season conditions?What models are you curious about that are not on this list? I’ll try to speculate, or perhaps another reader can chime in.
Disclosure. I strive to offer field-tested and trustworthy information, insights, and advice. I have no financial affiliations with or interests in any brands or products, and I do not publish sponsored content
This website is supported by affiliate marketing, whereby for referral traffic I receive a small commission from select vendors like Amazon or REI, at no cost to the reader.
The post Recommended footwear for high routes, Alaska, and early-season conditions appeared first on Andrew Skurka.
March 20, 2020
Assignment: Download maps in Gaia GPS for offline use
On most trips and in most locations, to navigate I rely primarily on my:
Paper topographic maps,Watch (good), ABC watch (better), or GPS watch (best), andMagnetic compass.
As both a backup and supplement to these tools, my smartphone has a GPS app like CalTopo (good) or Gaia GPS (better) along with downloaded map data for offline use.
Collectively, these four instruments constitute my navigation system. Some hikers may consider my preferences old-fashioned, since it’s increasingly common to navigate exclusively or primarily with GPS. But I value the reliability and efficiency of these more analog methods, and I appreciate the art of using them.
Assignment: Download maps in Gaia GPS for offline use
As part of our guided backpacking trips, clients are required to participate in an 8-part Planning Curriculum that prepares them for their trip and that can be retooled easily for their personal trips.
We run the Curriculum in Google Classroom, but I’ve opted to share this assignment publicly so that its 900 words are less unwieldy. Classroom — which seems designed mostly for a Gen Z audience — does not allow for style sheets, (un)ordered lists, bold or italic type, or embedded images.
Your assignment is to download maps in Gaia GPS for offline use. This will preserve the app’s functionality even in the backcountry without reliable cell service.
Benefits of a GPS app
A GPS smartphone app has two purposes:
1. It acts as a map library, just in case your printed documents are damaged (or lost) or if you unexpectedly hike off of them. And,
2. It has the same functionality you’d expect of a traditional handheld GPS — like pinpointing its location, and navigating to waypoints — but a GPS app is lighter, less expensive, and more user-friendly.
Download the app
To get started, download the Gaia GPS app:
App StoreGoogle Play
Create an account
To complete this assignment, you must have a Membership or Premium Membership, which cost $20 or $36 per year, respectively. Gaia has a Free account, too, but it does not allow for offline use.
So that you can complete this assignment (and maybe test out the app in the field), Gaia is offering a free 7-day Premium Membership to all of my readers. Thank you, Ashli!
To our clients, Gaia generously offers a free 6-month Premium Membership. Redemption instructions will be sent in Classroom.
These free trials do not require a credit card. If you wish to renew later, you’ll need to enter one. At that time, take advantage of these discounted rates.
Avoid doing this last-minute
If Gaia is new to you, give yourself about 30 minutes to complete this assignment.
To download map data, you’ll need a reliable internet connection with a high data use limit — meaning, in most cases, Wi-Fi. Don’t count on rural mobile data service or an overtaxed motel connection.
Download area
Determine the area you want maps of when you’re offline. Encompass your entire route, plus all prospective shortcuts and extensions. For a point-to-point itinerary, this zone will probably be long and narrow; for a loop, it’ll probably be more square.
If you must download a large area, it’s useful to have created a “box” beforehand using Markers or a Line, because as you zoom out it becomes difficult to identify topographic features on a 5- or 6-inch smartphone screen. With an obvious box, you can be assured that you are downloading the intended area.
 Zoomed out, it’s difficult to identify topographic features in Yosemite National Park
 By having created a “box” earlier using Lines or Markers, the intended download area can be more easily identified.
To make it easier for clients, I’ve created download boxes already:
In your smartphone browser, open this CalTopo map;In the top menu, select the wrench icon and then “Export GPX.”In the “2020 Trip” folder, select only your trip. Un-select all other exportable data.Press “Export” to download a GPX file.
You can complete these steps from a desktop computer, too. Then simply email yourself the GPX and download it to your phone.
If you are not a client, you have two choices. You can pretend like a client and repeat the steps above, or you can download an area that’s more relevant to you. For extra practice, you can create your own download box in Gaia beforehand.
Now, load this GPX file into Gaia GPS. You have two options:
In the app, select the (+) button in the top menu, and then “Import File.” Find the GPX file on the phone, and select it.Use a file system app (e.g. “Files” on Android) to find the GPX file, then open the file in Gaia GPS. I’m uncertain how to do this with iOS; with Android, click-hold the file and then hit the “share” button.
If you don’t see the track from the GPX file, click on the Layers icon in the upper-right and confirm that “Tracks and Routes” is turned on. Also, it helps if your screen is hovering over your trip location.
Select the download layer
With a basic Membership, only one map layer can be downloaded at a time.
With a Premium Membership, multiple layers can be downloaded simultaneously. However, the opacity settings at the time of download will be frozen. If you want to use the layers independently, they must be downloaded separately.
Touch the upper-right Layers icon, and select the desired download layer(s). You may need to dig into the map library for your desired maps — look under “MORE LAYERS.”
 With a Membership, only one mapping layer can be downloaded at a time.
 With Premium Membership, multiple layers can be layered and downloaded at the same time. However, the opacity settings are frozen.
For our clients, we most strongly recommend the layers below, so that your digital maps and printed maps (which we will give you at the trailhead) are identical.
20-04 Utah: USGS Topo 20-05 West Virginia: USFS 201620-06 Alaska: USGS Topo 20-07 California: USGS Topo 20-08 Colorado: USFS 2016 20-09 California: USGS Topo
Clients may also want:
Gaia Topo, which will load more quickly than USGS Topo and FS Topo layers because it’s vector-based, not raster; and,Trails Illustrated, since guides often carry them as small-scale overview maps.
For other readers and on other trips, it may make sense to download other maps, instead of or in addition to those I’ve already mentioned. For example, before elk hunting in Colorado I download the GMU and Public Access layers so that I remain on legal hunting grounds, plus perhaps the USGS Aerial satellite imagery so that I can more easily find clearings.
Download the maps
Finally, let’s download some maps.
Select the (+) button again from the top menu, and then “Download Map.” A pink-shaded box will appear. Move it and its corners to encompass the map area you want to download, maybe with the help of a guide box.
If you are low on storage space, you can reduce the zoom level. If not, keep it at level 15 for maximum resolution.
Hit the “Save” button, and name the maps (or use the default name).
 The map(s) within the pink-shaded area will be downloaded.
Check your work!
To confirm that your maps have downloaded successfully:
In the bottom menu, select the folder icon (“Saved”) .Pull up your saved Maps. Look under “All” or “Maps” in the top menu, between “Saved” and the triple-dot icon.Also, Gaia will push out a notification that your map download is complete.
Leave a comment
What questions do you have about downloading maps in Gaia?On what steps did you get hung up?
Disclosure. I strive to offer field-tested and trustworthy information, insights, and advice. I have no financial affiliations with or interests in any brands or products, and I do not publish sponsored content
This website is supported by affiliate marketing, whereby for referral traffic I receive a small commission from select vendors like Amazon or REI, at no cost to the reader.
The post Assignment: Download maps in Gaia GPS for offline use appeared first on Andrew Skurka.


