Mandi Ehman's Blog, page 47
August 22, 2014
The challenge of a minimalist wardrobe for kids
It’s the time of year when I start to dread the seasonal rotation of clothing. It’s still hot out most days, but fall is right around the corner and soon we’ll be experiencing an even mix of chilly days and hot ones.
Honestly, it takes me weeks to gear up for the “fun” of switching all five kids’ clothes because it’s such a big, overwhelming job.
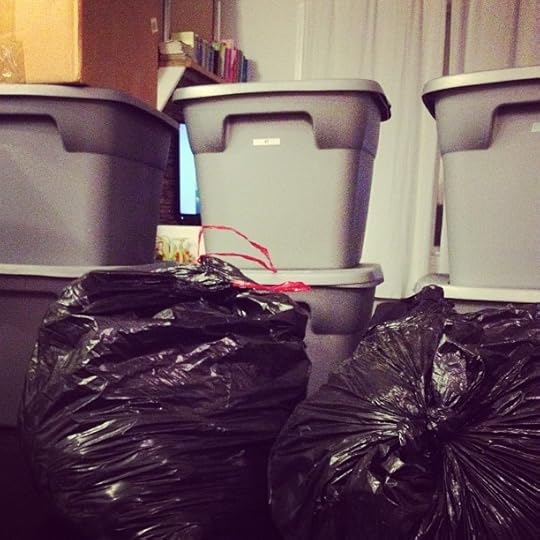
Several years ago, I discovered a simple trick that simplified the process a hundredfold: I sort clothes into gray bins by size (separate sizes for tops and bottoms as they get older), and each child wears clothes from their current bin. And only their current bin. I no longer try on outfits to see what fits except to figure out what size each child should be wearing, and I don’t mix-and-match out of several different sizes.
However, we try to stick to a minimalist wardrobe of 7-10 outfits for each of them, and one of the biggest challenges we still face is knowing which of the clothes in their bins they will actually wear.
For example, one of our girls would only wear dresses when she was 5 and 6 years old, while her younger sisters prefer shorts and t-shirts. That means all of the dresses she handed down are sitting unworn. That could change any minute, though, and I wouldn’t be surprised if the next season includes a completely new style for at least one of them.
True to the stereotypes, their preferences change often and without warning. I could require them to wear certain things – and occasionally I will — but I just don’t see the point in making it a battle. I rather like that they each have their own style and way of expressing themselves, and we have plenty of hand-me-downs to choose from.
While I’ve tried having them choose the outfits they want to wear at the beginning of the season, they are young and just discovering their likes and dislikes. They don’t know which items are comfortable or uncomfortable or which are destined to be their everyday favorites. (And truthfully, I am not very good at anticipating those things for myself!)
Whether we’re unpacking our own hand-me-downs or those from friends and family, I’m never comfortable sticking to my 7-10 outfits per child limit at the beginning because I know from experience that they will end up wearing the same 3 or 4 outfits over and over again and run out of clothes in between washes.
The last couple of times I’ve rotated their wardrobes, I’ve handled it a bit differently, and it’s worked so much better:
I still limit the number of items they each have (especially compared to the standard American wardrobe, I’m sure!), but I tend to start with more outfits rather than fewer. This is especially true because our seasons are fluid. We often end up with hot days in the fall and cold days in the spring, and we need a few outfits for the opposite season left out for that first month.
Over the weeks that follow, clear patterns emerge and I’m able to see who is sticking with skirts or dresses, which clothes they find uncomfortable or just don’t like, which outfits they say they love but never actually wear, and so on.
We then go through their clothes again, this time together, and choose 7-10 outfits that they really love and want to keep out. If they choose a lot of dresses, we end up with a few more outfits since those are only one piece and can’t be mix-and-matched like tops and bottoms. The rest of the clothes get packed in a bin and put back up in the attic so that they can be added back in for their younger sisters to choose from.
Does that sound like I’m creating more work for myself? It probably does, but it’s really simplified the process. I don’t feel the same stress to choose the “right” outfits in the beginning, and I count down the weeks until that second purge because it’s such a relief to pack up the extras.
And then everybody is able to enjoy the clothes that are left without piles to dig through or tons of extras that never get worn. Which makes it well worth the extra work!
How do you rotate seasonal wardrobes? Do you limit the amount of clothes you’re children have?

Mandi Ehman is the blogger behind Life Your Way. She and her husband have four beautiful girls plus one baby boy, and together they live, work and homeschool on a little slice of heaven in wild, wonderful West Virginia. Mandi loves coffee, chocolate, easy meals, beautiful things and minimalist spaces.
The challenge of a minimalist wardrobe for kids
© 2010-2014 Purple Martin Press, LLC | All rights reserved


 Related StoriesThe one-pile cleaning method for kidsGet the Ultimate Homemaking Bundle for 95% off. Plus $200+ in bonuses. PLUS a chance to win a Kindle Fire!Free Printable Chalkboard Labels


August 20, 2014
When productivity tools get in the way of actual productivity
I recently got a new iPhone. As I was choosing apps to download, I realized I’ve gotten to the place where I really just want the basics — social media, email, weather and driving directions, etc.
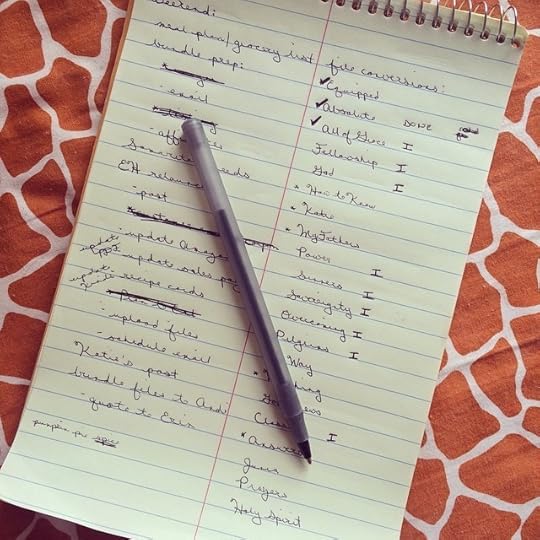
I’m a sucker for new technology, cool apps and fancy systems. I like to try them just to see what they’re all about and to discover where technology is taking us. But at the end of the day, my favorite productivity tool is still a notebook and pen. Sometimes I use a fancy Invite.l notebook and sometimes I stick with a classic Steno pad, but no matter how many systems I try, I always end up back at the notebook.
It’s tempting to think that finding the right app will solve all of my problems, but I know from experience that using electronic productivity apps and programs ends up feeling like more of a chore than a help.
The other day, Stephanie from Keeper of the Home shared a link from Michael Hyatt in our mastermind group. The post on the power of the minimum effective dose really resonated with me and my goals for my business this year, but as I got to the bottom, I chuckled at the irony of the free ebook offered at the bottom of the post, which features 99 tools and resources for your life. Ninety-nine tools…seriously? There is nothing simple or productive about using that many tools, and trying to juggle them certainly makes your life more complicated.
The truth, though, is that any productivity system can have the same effect. When we get caught up in being more productive — rather than doing the actual work — we often create more work for ourselves, not less.
Don’t get me wrong; I’m all about automation and taking time to get organized. But the system needs to be a tool used to achieve your end goal, not the end goal itself.
For example, have you ever seen the beautiful color-coded, sticky note calendars and schedules on Pinterest? I absolutely love them, and I’d love to have one. Except I know myself well enough to know that if I took the time to create something like that, I’d be over it by the time I finished.
A good productivity solution is enduring.
It doesn’t need to be updated or overhauled every couple weeks or even months.
It shouldn’t take hours to set up or cost a lot of money.
And it shouldn’t overcomplicate or fancify the simple task of getting things done.
Do you prefer pen and paper or an app for organizing your to-do list? Have you ever fallen into the trap of a fancy productivity system?
Mandi Ehman is the blogger behind Life Your Way. She and her husband have four beautiful girls plus one baby boy, and together they live, work and homeschool on a little slice of heaven in wild, wonderful West Virginia. Mandi loves coffee, chocolate, easy meals, beautiful things and minimalist spaces.
When productivity tools get in the way of actual productivity
© 2010-2014 Purple Martin Press, LLC | All rights reserved

CommentsPaper for me. Both for my daily agenda and for writing some of ... by randomrecyclingSo true! I am not a paper girl, though. I use Wunderlist ... by EmilyMy hubs is an IT guy so he is always trying to get me to be a ... by DianaA paper calendar that I buy at Dollar Tree and a good ol' pen ... by BethanyPaper is the only way to go for me. I tried my Google calendar ... by StacyPlus 2 more...Related StoriesHow to work smart, not hardThe Productive Morning Routine I Never ExpectedCharge What You’re Worth
August 19, 2014
My stress-free homeschool planning method
As the new school year kicks off, there’s been a lot of talk about homeschool planning in my circles, both online and locally, and I realized I’ve never really shared my stress-free planning method.
You see, I used to sit down once a week and lesson plan: deciding which lessons would be taught which days, how I would supplement them, how much we’d get done, etc.
The only problem? I’m not very good at anticipating what will come up in a given week and, inevitably, we’d end up going on a field trip or a playdate, struggling with a lesson or spending an entire homeschool day researching the natural habits of a slug.
And then the whole dang plan was off-kilter, especially if we had the audacity to go off schedule on Monday!
On the other hand, working without any plan at all left us floundering and wandering aimlessly. I would remember something I wanted to have the girls do and be frustrated that we hadn’t gotten to it.
Eventually, I discovered our current checklist system, which is a happy medium between detailed planning and aimless wandering.
You may have seen pictures of our checklists in other homeschooling posts, but here’s how those work:
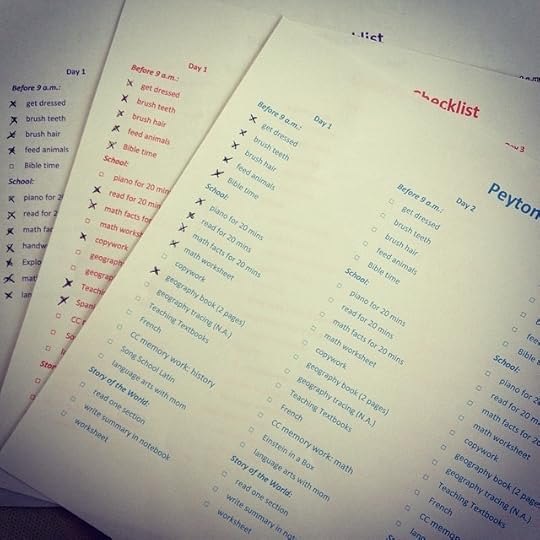
Each of the girls has a daily checklist of activities to complete. With these checklists, we all know what topics we need to cover each day, but there are no assigned page numbers, activities, etc. We simply work through those sequentially.
So, that means that the checklist says things like “Teaching Textbooks” and “read a chapter in Story of the World.” On Monday morning, assuming we haven’t tossed school aside so that the girls can forage berries in the yard or read a slave girl’s diary, we simply turn to the next chapter of Story of the World or Teaching Textbooks and start there. Sometimes the girls will write down which lesson they’re on; sometimes they just remember. The next day, they’ll move on to the next lesson, and so on.
Now, when I say I don’t preplan lessons, that’s not entirely true. I do copy the pages we’ll need for upcoming lessons and activities a week or two in advance (but if we don’t get to them that week, we simply hold onto them for the next rather than scrambling to adjust the lessons and wasting pages in the process).
I also pull out books related to upcoming topics so that girls can find those in one place rather than having to search through the shelves.
We don’t do a lot of other hands-on activities, but if we did, I would pull the supplies for those together in batches a couple of weeks in advance and then work through them when we got to the appropriate lesson.
I print the checklists in 4-6 week batches, adjusting them each time to include current chores, changes to our curriculum, and details (like North America for geography tracing).
At the girls’ current ages (our oldest is turning 10 this fall), I don’t worry too much about keeping detailed records of what they get done each day. If I felt like I needed to have that information or it was required by our state, I would simply right down chapters, books read, etc. on the checklists themselves and then save them.
You’ll also notice that the checklist is not labeled “Monday”, “Tuesday,” etc. but rather “Day 1″, “Day 2,” and so on. That gives us additional flexibility in our school week. We plan on a 4-day school week, and the girls have also been known to spend the evening working ahead on the next day’s work if they want to take an extra day off.
Doing it this way gives us the perfect blend of structure and spontaneity and eliminated a lot of the stress and guilt around planning that I was feeling before!
How do YOU plan each week?
(P.S. Download the checklist template here.)
Mandi Ehman is the blogger behind Life Your Way. She and her husband have four beautiful girls plus one baby boy, and together they live, work and homeschool on a little slice of heaven in wild, wonderful West Virginia. Mandi loves coffee, chocolate, easy meals, beautiful things and minimalist spaces.
My stress-free homeschool planning method
© 2010-2014 Purple Martin Press, LLC | All rights reserved
 Related StoriesWhat I really want my kids to learn this yearThe Two-Years-of-Kindergarten Approach for Fall BabiesWhy Memorization Gets a Bad Rap in Modern Education
August 18, 2014
5 ways to use instagram: more than just cool filters
The following post is from Lauren Rothlisberger of Get Me Geeky :

If you are not on Instagram you are missing out. For starters, your missing out on following me and Mandi. While we both have a lot of cute kids to show off, there is a whole lot to discover on Instagram. It’s hands down my favorite social media platform right now. It’s like Facebook without all the talking. To me it is walking around a museum looking at pretty art, instead of reading the newspaper. (For the record I think reading the newspaper is a good thing, just a little more mentally exhausting.) Here are five different ways to use Instagram, beyond the normal point, shoot, and edit. If you don’t know how to do that, experiment, it is a lot of fun to use.
Follow Your Favorite People
Everyone has their favorite bloggers or celebrity they love. Follow them! It is refreshing and often a glimpse into people’s personal lives in a much different way. With the exception of the people who seem to stage all their photos, generally I find these photos a relief. I want to see that others struggle to keep their house clean like I do.
Understand Hashtags
While everyone knows how to create a hashtag, I am not sure everyone really gets what they are about. First off they are a great way to express an underlying emotion, or funny side note. But they were originally intended as a way to “tag” something, making it easy to search. My point here is hashtags can be useful. For example, #homeschool will bring up any public image with that hashtag. It is a great insight into what others are doing in that category.
Do Research
Speaking of hashtags, they are good for random research or exploration. Recently I have really gotten into sewing. If I see a pattern I am considering buying I stick the name of the pattern in with hashtags and see what images pop up. It is so fun to see the variety of ideas people come up with using the same pattern. It also gives me a much better idea as to whether I would like to buy it or not. The reverse of this is being able to tag the person who created the pattern to show of your work with their concept.
Find Inspiration
I really love looking through magazines for ideas on house decorating and trying to keep up with fashion trends. (That last one is a real struggle for me). The problem, of course, is I have very little time to flip through magazines. Instead, I follow some of my favorite brands (West Elm) on Instagram. I get little mini magazine clippings dropped in my feed everyday. Just enough to feel inspired.
FlipGram
There are a lot of third party apps out there for Instagram. But my favorite to see people use is FlipGram. It allows you to load several pictures into a video. It is a fun way to show before/after or time progression. Think first and last days of school, or the first 12 months montage. How about you? What is your favorite way to use Instagram?

Lauren Rothlisberger blogs and consults over at Get Me Geeky. As a military wife and mom of three girls five years old and under, she loves focusing on technology and productivity and finding new ways to simplify her life. She recently started putting together MacMinis, which are easy to follow videos for Mac users, and also wrote an ebook, Evernote for Moms.
5 ways to use instagram: more than just cool filters
© 2010-2014 Purple Martin Press, LLC | All rights reserved

CommentsI love, love, LOVE using hashtags to find homeschool stuff! ... by StacyRelated StoriesTech Tools to Help You Declutter, Clean & OrganizeZubie: The Ultimate Road Trip AccessoryPaperKarma {iOS App of the Week}
August 16, 2014
Weekend reading: August 16, 2014
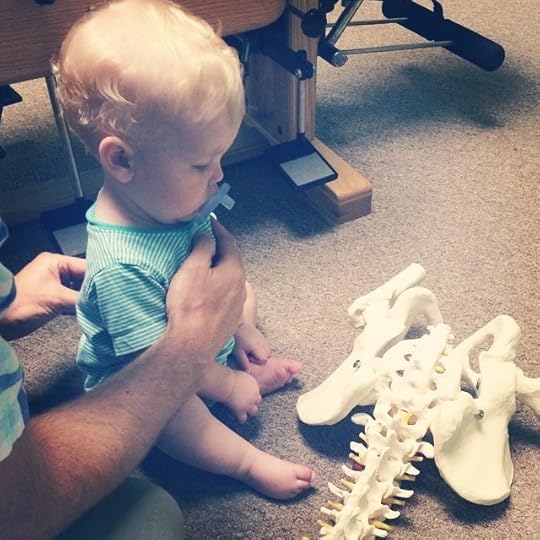
From Instagram: “We’re trying chiropractic care to see if we can help Jackson’s digestive issues. If nothing else, he loved the experience, which was fairly miraculous considering his aversion to strangers.”
Despite discontinuing solid foods and transitioning to all formula (to eliminate any variable in my diet, since we know he needs formula anyway for his weight issues), Jackson is still experiencing what we’re pretty sure are stomach aches every few nights.
I wasn’t sure how taking him to the chiropractor would go since he shies away from strangers, burying his face in my neck and holding on tight, but between Dr. Darrell’s great bedside manner and this fun spine, he was as comfortable as could be.
He crawled around, explored, sat still as Dr. Darrell examined him, and giggled through an inversion!
Technically, that was just our consultation, and our first appointment is next week, but he has slept solidly the first two nights following his appointment, so I am definitely intrigued.
Here are some of my favorite posts from this week. As always, check out what I’m reading and what I’m pinning to see the other posts that make me stop and think (or, you know, drool…). You’ll find new posts all week long!
This week has been an emotional one. Between the brutal killings and persecution of Christians by ISIS in Iraq, Robin Williams’ suicide and the protests in Ferguson, Missouri following the shooting and death of Michael Brown, emotions and opinions are running high. I’m sharing the posts that made me think this week, but before I do, be sure to read this post from my friend Lisa. It’s so important if we want to have any type of productive conversation about any of the tough issues.
Christians & Depression
The depressed Christian: why the dark night is no measure of your soul | SortaCrunchy
What the Church & Christians Need to Know About Suicide & Mental Health | A Holy Experience
#Ferguson
Black men post “thug” and professional pics side-by-side for powerful anti-media protest | 22 Words
Affected | Chookooloonks
Racial bias, police brutality, and the dangerous act of being black | Rage Against the Minivan
In which I have a few things to tell you about #Ferguson | Sarah Bessey
This Crazy, Beautiful Life
Have the hard conversations | Steady Mom
Give Me Gratitude or Give Me Debt | Momastery
A Life-Changing Challenge: Add One Compliment | Becoming Minimalist
Have a great weekend!
Mandi Ehman is the blogger behind Life Your Way. She and her husband have four beautiful girls plus one baby boy, and together they live, work and homeschool on a little slice of heaven in wild, wonderful West Virginia. Mandi loves coffee, chocolate, easy meals, beautiful things and minimalist spaces.
Weekend reading: August 16, 2014
© 2010-2014 Purple Martin Press, LLC | All rights reserved
 Related StoriesWeekend reading: August 9, 2014Weekend reading: August 2, 2014Weekend Reading: July 26, 2014
August 15, 2014
Learning to fight {and why we argue in front of our kids}

I’ve never really liked the advice that you shouldn’t fight in front of your kids.
While I agree it’s important to make sure children feel safe and secure, I’ve never viewed not fighting as the key to that security.
In fact, I think that hiding our fights can ultimately lead to more tension and fear, an inability to deal with conflict, and unhealthy relationships for our kids down the road. (And I was relieved to discover I’m not the only one who feels this way.)
That said, my Italian blood has not always made me the most appropriate fighter, and over the years we’ve had a few arguments that definitely crossed the line of appropriateness (verbally, not physically, which is another issue altogether).
On our trip to Florida earlier this summer, I started thinking about the progress we’ve made. Fueled by exhaustion from a 3:30am wakeup call and the stress of traveling with little ones, we had a few little spats on the way down. What I realized, though, is we’ve actually come a really long way and are able to handle and resolve disagreements much more effectively these days.
Here are a few of the things that have made a difference for us:
1. Share your feelings early.
We’ve gotten much better at this over the years (or at least I have, since I’m not sure Sean struggled with it the same way I did in the first place.) Rather than letting frustrations and resentments build, hoping he would figured out I was upset by osmosis, I’m much more likely to simply tell him I’m frustrated/hurt/upset. Once we acknowledge the hurt feelings, we’re able to work through it before it turns in to a big blow up.
2. Acknowledge the role of hormones.
Despite the cultural jokes and stereotypes, I don’t believe that PMS or postpartum depression or any other hormonal imbalance gives us the right to treat our spouse (or anyone) like crap. However, it does make a huge difference when Sean is able to see and acknowledge that it’s “that time of the month.” And honestly, his understanding goes a long way in helping me reset my attitude and make better choices.
3. Make physical touch a priority.
I have rolled my eyes at this advice so many times in the past, but it’s true: holding hands or touching in some way when we’re upset or angry really does build a physical bridge that helps us reach the point where we want to resolve the conflict. In some situations, a hug can completely diffuse it (and reveal the real source of the frustration), and in others it just reminds us of our love and commitment as we work through bigger issues.
4. Look for the root cause.
When Sean and I are arguing over every little thing, I’ll often say, “It doesn’t really feel like we’re connecting.” He’s not the biggest fan of those words, but we have also learned how to address feeling disconnected. For us, going to bed at the same time is a huge part of it, even though we’re home all day together. Finding time to really laugh together is another.
5. Keep trying.
As I mentioned, we’ve had a few arguments that went way beyond what is appropriate (in front of children or alone, quite honestly), and there we’re times that it felt hopeless: Why couldn’t we control our emotions? How would we ever do better? Were we scarring our kids for life?
For us, the key was to strive to do better each and every time. Although it would have been easy to throw our hands in the air hopelessly, we recommitted each time to finding better ways to fight, and I’m happy to say that it’s been many many years since we’ve had one of those.
These days, our kids may see us argue, get frustrated or even cry, but they also see us apologize, work through our frustrations and resolve the issues.
And I’m pretty sure that leads to true security.
Mandi Ehman is the blogger behind Life Your Way. She and her husband have four beautiful girls plus one baby boy, and together they live, work and homeschool on a little slice of heaven in wild, wonderful West Virginia. Mandi loves coffee, chocolate, easy meals, beautiful things and minimalist spaces.
Learning to fight {and why we argue in front of our kids}
© 2010-2014 Purple Martin Press, LLC | All rights reserved
 Related StoriesWhat a red dye sensitivity means for our familyWhy we’re teaching our kids to ask for forgivenessOn Gender Roles, Equality and the #BoyMom Hashtag
August 14, 2014
What I really want my kids to learn this year
Okay, girls, it’s almost here. The new school year. And it’s going to be a busy one. All four of you will be in school this year (and Jackson will be into everything!). We’ll be learning about American History — about the Declaration of Independence and the Revolutionary War, the Underground Railroad and Civil Rights, each of the States and all of our Presidents…and everything in between. You’ll have reading, writing and arithmetic, foreign languages and piano, handwriting and copywork.
But you know what I really want you to learn this year?
I want you to learn that:
Learning means discovering the world around you and how it works.
And it’s exciting!
Even when it’s hard work.
In fact, just because something doesn’t come easily to you doesn’t mean it’s not worth doing.
And sometimes you have to work hard because there’s hard work to be done.
But it’s also okay to focus your attention on the things that excite you and your energy on the things that fit your natural gifts.
Remember, no matter what you’re working on, having a bad attitude makes everything harder.
It also makes the people around you miserable.
And people come first.
In fact, showing others kindness is more important than showing them how smart you are.
I want to show you that:
It’s fun to learn together.
Because we all have something to contribute.
And when we work together as a team, we learn more, get the hard stuff done quicker and have more fun.
I know it sounds strange, but giving and serving others can be even more fun than getting and being served!
And that’s true whether you’re serving someone in our family or a stranger.
Also, working to the best of your ability is more important than how your work compares to someone else’s.
And when you show yourself trustworthy in the little things, you’ll be trusted with the big(ger) things.
Finally, understanding yourself and how you learn and work best is really helpful.
But we all live here and have to learn to make compromises.
Because people come first.
(I know I said that already, but it’s an important one…and one I’m still learning too!)
Here’s to a fantastic school year!
Mandi Ehman is the blogger behind Life Your Way. She and her husband have four beautiful girls plus one baby boy, and together they live, work and homeschool on a little slice of heaven in wild, wonderful West Virginia. Mandi loves coffee, chocolate, easy meals, beautiful things and minimalist spaces.
What I really want my kids to learn this year
© 2010-2014 Purple Martin Press, LLC | All rights reserved

CommentsI LOVE this. And, yes, these are the important things, the ones ... by Kara FleckI love this! It is so easy to get consumed with the 3 R's of ... by Heather @ My Overflowing CupRelated StoriesThe Two-Years-of-Kindergarten Approach for Fall BabiesYou Can Do It Too! {Encouragement and Resources for Homeschoolers}Why Memorization Gets a Bad Rap in Modern Education
August 13, 2014
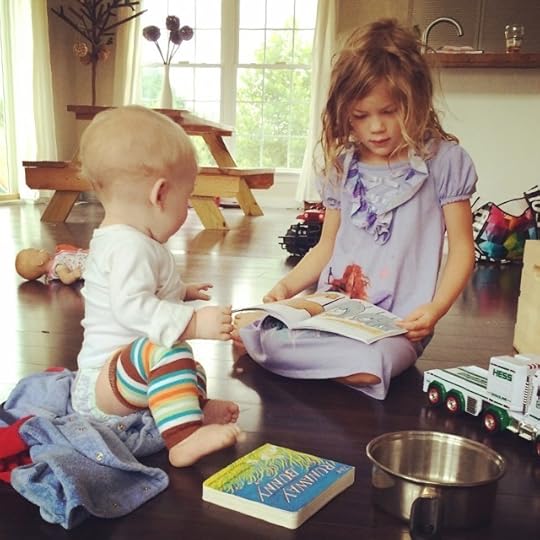
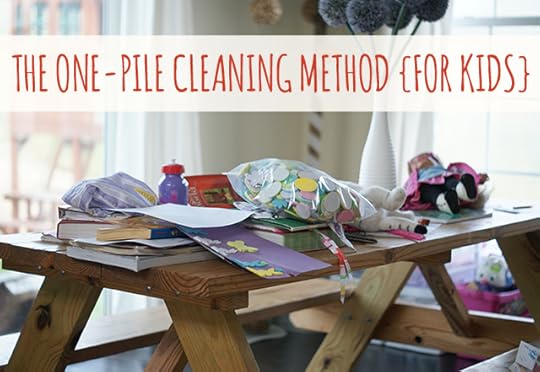
The one-pile cleaning method for kids
Despite carrying both Sean and my genes, sometimes our girls simply don’t see the mess around them.
It’s a scenario that all parents are familiar with: you ask the kids to clean their room, and then when you’re ready to check it, they insist it is clean even though there are approximately 381 things that still need to be put away.
For our girls, at least, it’s the things around the edges that just don’t grab their attention. If the center of the room is clean, they sincerely consider the room clean.
A few months ago, I discovered a simple method for helping the big girls see what needed to be put away without having to hover over them the entire time they clean.
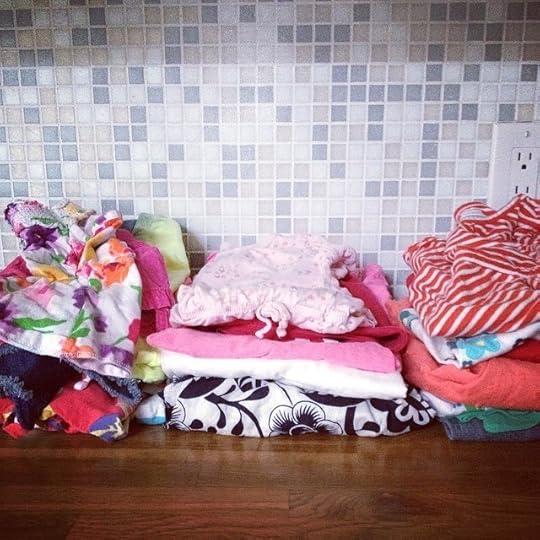
Introducing the “one-pile”.
It started one night when I went up to check on them before heading to bed myself. I may or may not have been slightly frustrated at the state of their room as I began pulling things out of the corners to the middle of the floor.
The next morning I told them that they could come downstairs as soon as the pile was put away. They were able to complete the task in no time at all — without feeling overwhelmed and unsure of what I was asking them to do — since the pile was clearly defined.
(Note: We do still occasionally have issues with them choosing to shove things in hidden corners and crevices rather than putting them away; that is an entirely different issue, though, and one that has consequences since it’s essentially lying.)
Although I don’t do it every night, the “one-pile” in their room has made a huge difference in getting and keeping their room clean.
Recently, I started doing the same thing in the kitchen. The girls use the kitchen all day for crafts, Legos, school and more, and I often find a variety of papers, craft supplies and toys spread throughout our main living area even after we’ve supposedly cleaned up.
One morning I grabbed everything that hadn’t been put away the night before and piled it on top of the kitchen table for them to take care of before they ate breakfast. And they did.
I try to only do one one-pile per day so that they don’t get overwhelmed, but everybody is happier when we use this method: The girls can clearly see my expectations and what needs to be taken care of, and I don’t feel like I have to micromanage their cleaning process. There’s no arguing about whether it’s done or confusion about what needs to be put away.
And that’s a win!
How do you encourage your kids to clean?
Mandi Ehman is the blogger behind Life Your Way. She and her husband have four beautiful girls plus one baby boy, and together they live, work and homeschool on a little slice of heaven in wild, wonderful West Virginia. Mandi loves coffee, chocolate, easy meals, beautiful things and minimalist spaces.
The one-pile cleaning method for kids
© 2010-2014 Purple Martin Press, LLC | All rights reserved
 Related StoriesGet the Ultimate Homemaking Bundle for 95% off. Plus $200+ in bonuses. PLUS a chance to win a Kindle Fire!Free Printable Chalkboard LabelsCelebrate Every Day with American Greetings Personalized Video eCards
August 12, 2014
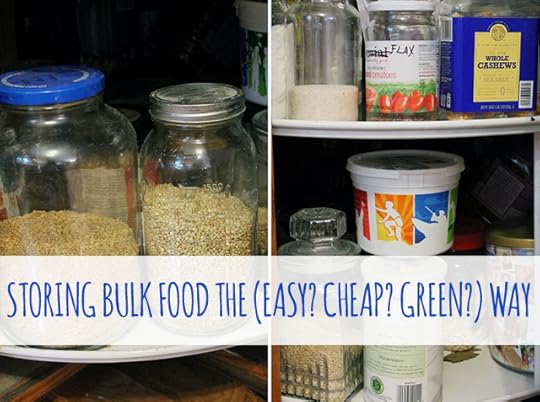
Storing Bulk Food the (Easy? Cheap? Green?) Way
The following post is from Katie of Kitchen Stewardship:
Buying food in bulk and preserving from your garden and farmer’s markets is as an awesome way to save money and capture maximum nutrition, but there’s even one more reason to love those frugal habits: they reduce waste and help save the earth, too.
A 25-pound bag of dried beans uses far fewer packaging resources than 25 one-pound plastic bags, and the cans and shipping weight/fuel saved by making your own beans from dry has to be significant. In my household, all the bulk foods I buy also save me numerous trips to the store, since I almost always have food in the house for plenty of meals without having to drive my van around and create pollution.
The last piece of the puzzle, then, is how to store bulk foods in the safest way possible, both to keep the food from spoiling or getting eaten by critters and to protect your family from potential leaching from questionable materials.
Readers often ask how I store bulk foods, and it’s probably not the best way to start a post but I’m going to be honest here: I really make it up as I go along and may not have the most efficient or perfect system. However – if you want to store your bulk foods frugally, I think you’ll find some nuggets of ideas in my basement. (You can do it “your way” in the true spirit of this site!!)
I buy dry goods in bulk from Country Life Natural Foods, including:
dry beans
oats
whole grains
nuts
dried fruit
starches and flours
honey and sweeteners
spices
For each of them, I have various ways to keep the storage organized, safe from mice and bugs, and easy to access.
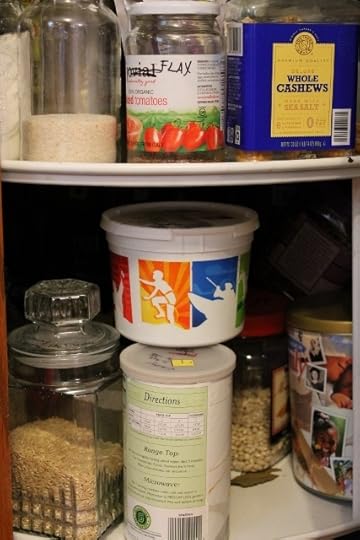
Welcome to my basement
I’ll take you on a little tour of our food storage “area” – pardon the lighting in the pictures as there’s really no great time of day for a basement and natural light!
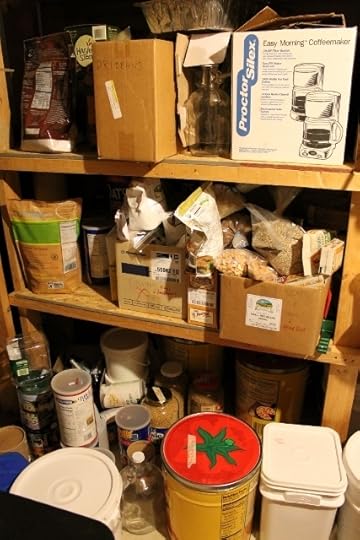
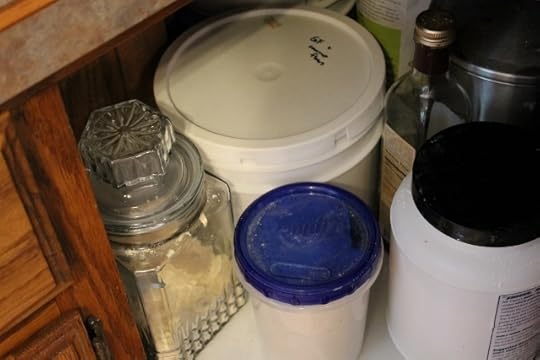
This is the whole scene, with some examples of very good and very bad food storage.
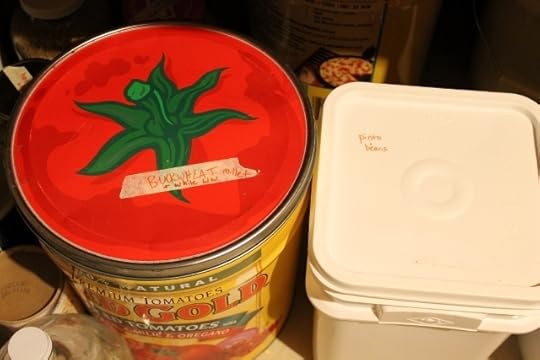
Most of the whole grains and beans come in large paper sacks, a perfectly safe material for my family’s health, but not exactly impervious to bugs and rodents. I prefer to sink those paper sacks into metal tins (like the Red Gold tins in the pictures, which were a freebie at some point – but you could also ask friends for the large popcorn tins that are so popular at Christmas time). I don’t worry about what the metal is made of because it’s not actually touching my food. Plus, as long as the bags fit inside the tins, I don’t have to bother with pouring and making a mess.
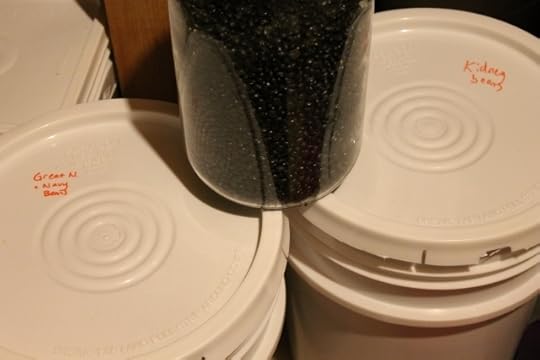
I have also purchased some plastic 5-gallon buckets designed specifically for food storage. They’re not cheap, usually $5-6 apiece, but they are food-safe plastic and protect the food well from rodents, insects or moisture. I generally pour my dry beans into them, and although plastic always has questions about leaching, I can’t imagine that much could leach into dry goods.
If you invest in the buckets, you must invest in the special opener as well. It’s possible to get into the buckets without one, but it takes about 5 minutes and no small amount of frustration and sore fingers!
I also have a number of reused/reclaimed buckets from 10-pound purchases of Real Salt, bulk honey, and bulk coconut oil. I love being able to repurpose them well and store things like popcorn, homemade fruit rolls, and sweeteners I don’t use all that often. I’ve heard that some bakeries will allow people to take the large plastic buckets that frosting comes in, but I haven’t been able to work that out yet.
I store some bags, particularly the 50-pound bag of oatmeal I’m known to invest in, in a large Rubbermaid tub. It’s possible pantry moths could get through it, and I’ve known mice to gnaw through them as well, but that was in a garage during a hard winter. It’s not a perfect solution, but at least the oats are safe from moisture and safer from critters. It’s the best I can do!
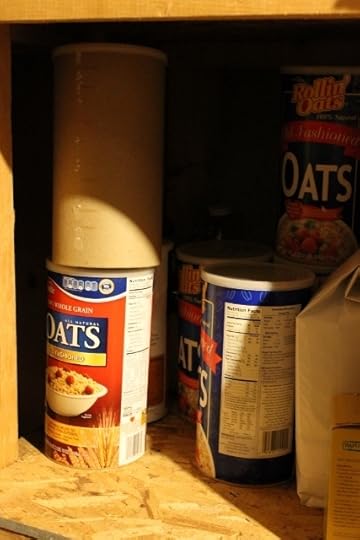
I store portions of oats for serving in the kitchen in old oatmeal canisters, which are certainly not safe from any of the three food disasters, but it’s a safe material, reused, free, and I’ve got to be able to access my oats without having to scoop from a huge bag every few days (we eat 5 cups at a time!) or purchase glass gallon jars at $6+ each. I only store them up off the floor, and any food on the floor is in thick plastic, glass or metal in case of a water problem in the basement.
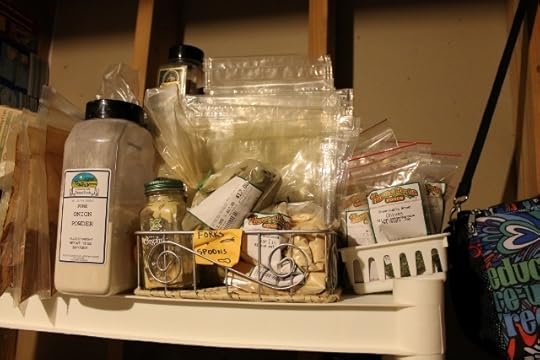
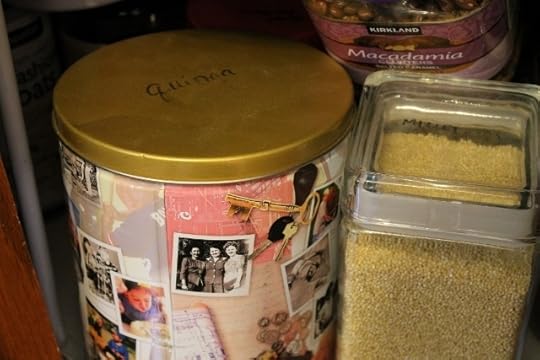
As for spices, I don’t repackage them until it’s time to refill my individual spice jars in the kitchen. I just try to organize them in alphabetical order so I don’t lose track of what I have – above are my two baskets, one for the wide bags from Penzey’s Spices and the other for the small one-ounce bags from our local health food store. I’ve never had a problem with longevity for spices, so I’m keeping my system for now.
The Big 3: Moisture, Rodents, Insects
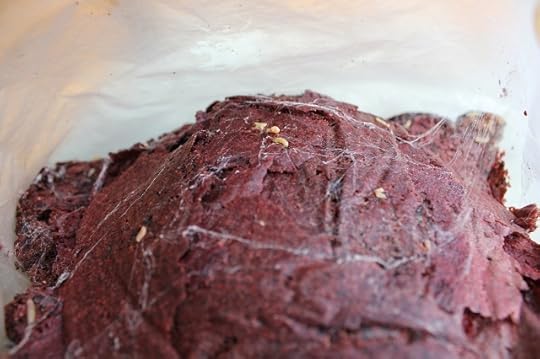
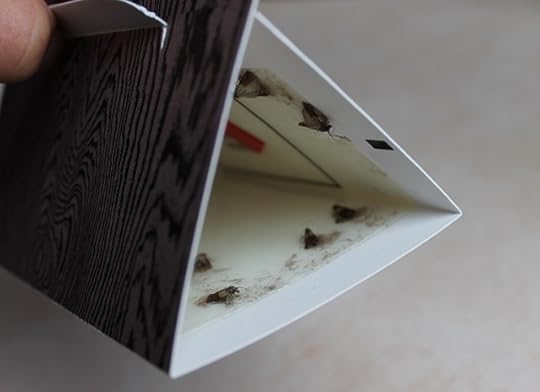
We had an experience I’d like to forget with some pantry moths last fall (above, my homemade dried strawberry fruit rolls and some visitors – feel free to cry with me!), and I learned that a plastic bag is not a safe place for food if you have that sort of infestation. After that, I reorganized a lot of my dry storage, particularly in the kitchen, so that moths couldn’t get into anything anymore.
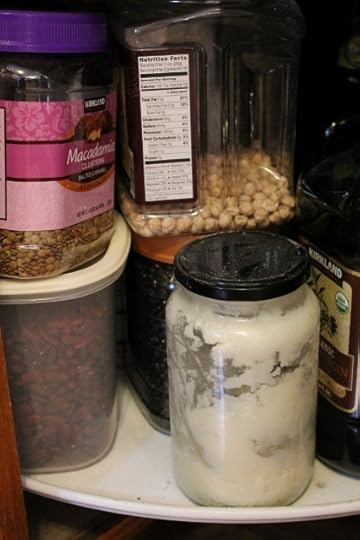
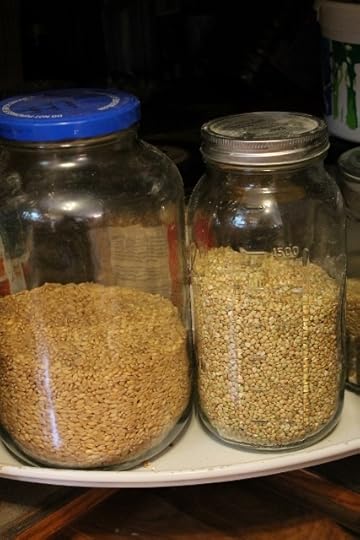
Now my dry beans and grains are all in glass jars, metal tins, or at the very least hard plastic containers with tight lids (rather than plastic bags). I source them from:
Empty glass jars (my honey used to come in half gallon canning jars, perfect for this purpose!)
Costco-sized candy or nut plastic containers with screw-on lids
Tins, but only when also in its own food-safe packaging
A few purchased glass gallon jars, an investment, but nice for whole grains/beans – if you can get people at potlucks to give you the glass gallon-sized pickle jars, it’s a great freebie!!
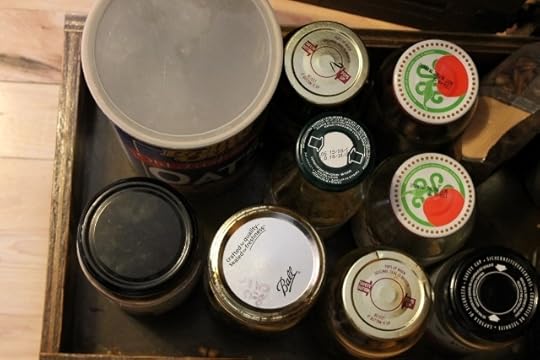
Our nuts and dried fruit for day-to-day access also got repackaged into glass jars, typically reused spaghetti sauce, applesauce, or tomato sauce jars. Not only are they safe from pantry moths, but they’re easier than zippered bags for my kids to open (and close!) and the shelf looks much more organized. I can easily tell when we’re low, and it’s not that big of a deal to refill jars. (They’re not labeled because it’s very easy to tell what is what from the side.)
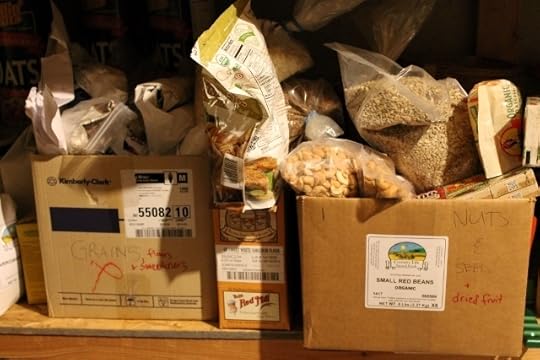
I don’t store everything very safely, I’ll admit. When dried fruit, sweeteners and nuts come in 5-pound bags, I tend to just pile them up in boxes in the basement labeled with the type of food inside (chaos, above). I try to keep nuts in the freezer whenever there is room. They’re in plastic, but I do freeze in glass jars for as many liquids as possible. I should get some more large plastic tubs and sink them all in there for optimal safety, but it’s just something I haven’t done yet.
I do keep a pantry moth trap in the basement and check it every time I go in the storage room. I figure if I ever find a moth in there, I’ll get scared and repackage everything and hope I’m not too late!
This is, of course, from my upstairs pantry where everything is under lock and key (i.e. hard plastic, glass and metal). Except for boxes of pasta. And bags of tortilla chips. If I repackaged everything, we’d never have time to eat!
To recap, when I’m storing bulk foods, I take the following in to consideration:
Price: Can I repurpose something I already have or get a container for free that someone else would throw away?
Impermeability: Glass and metal are the best defense against moisture and critters. Hard, thick plastic is next, and plastic bags aren’t a very good choice at all.
Ease of access: I need to be able to get into my food for regular use within seconds.
Safe materials: Glass and paper have no known health risks, some metals are rated very safe/non-leaching (stainless steel, for example), and plastic should be number 1, 4 or 5. Other recycle numbers have been proven to leach into food. All plastic should be seen as questionable, however, because we simply don’t know yet what we don’t know! I try to only store dry goods in plastic because liquids leach at a much faster rate.
If you’re buying in bulk and storing food, remember to label everything and keep track of what you have, both so that you don’t run out without being prepared and so you can use the oldest food first and never have to waste your investment.
Some helpful links for preserving your own from the harvest this time of year, a different way of having bulk foods on hand but usually just as helpful and economical:
Easy home canned tomatoes (avoid BPA-lined cans)
Canning basics (from someone who knows a lot more than I do!)
How to dehydrate fruit (this is so easy! You’ll love buying inexpensive fruit in bulk.)
How to dehydrate vegetables (if you’re running out of room in your freezer, dehydrated veggies are a super duper space saver to help waste nothing from your garden)
Preserving produce by freezing
10 things I always keep in my freezer
5 tips for freezing everything
How to store and freeze fresh produce, grains and more
More on long term storage techniques
Unusual Frugal Storage Methods
Tips for stockpiling “real food” — meats/proteins/fats, fruits and veggies, dairy products, grains
5 ways to preserve your apples (get ready for fall!)
Look for part two of this idea – how to store food using less plastic – next month when we discuss the refrigerator and how to store produce and leftovers as efficiently as possible.
Do you buy in bulk? How organized are you with your storage – and how safe from the “big 3″ food disasters?

Katie Kimball has been “green” since 5th grade when she read 50 Things Kids Can Do to Save the Earth. She remains slightly disappointed that she didn’t actually save the whole thing back then, but now that she has 3 kiddos counting on her, she keeps plugging away hopefully. Katie blogs at Kitchen Stewardship about real food and natural living and is the author of Healthy Snacks to Go and other eBooks, available for Kindle.
Storing Bulk Food the (Easy? Cheap? Green?) Way
© 2010-2014 Purple Martin Press, LLC | All rights reserved
 Related StoriesManaging your business’s slow seasonGiveaway: DiVOGA Cork Collection from OfficeMaxGiveaway: SodaStream Source Starter Kit
August 11, 2014
The updated Easy Homemade is HERE!
One of my main goals for this summer was to update the Easy Homemade ebook, adding all new recipes and kitchen tips to the existing collection.
Easy Homemade first launched exactly two years ago, and it’s sold more than 15,000 copies as other families learn the secret I discovered: cooking from scratch isn’t nearly as complicated or time consuming as we’ve been led to believe.
Whether you’re looking to cut your budget, control the ingredients in your food or simply improve your kitchen skills so that you don’t have to abandon a recipe when you discover you’re out of a key ingredient, this ebook is for you.
There’s no way around it, I am a kitchen dunce. Cooking does not come easily to me. {Seriously, I called my mom for help the first time I tried to fry an egg as a newlywed, and I regularly ask Shaina for help when I’m trying something new!)
But a surprising thing happened when I started writing Easy Homemade two years ago. As I got back to the basics of testing and trying from-scratch recipes, I began to better understand my way around the kitchen and why certain ingredients and steps are necessary.
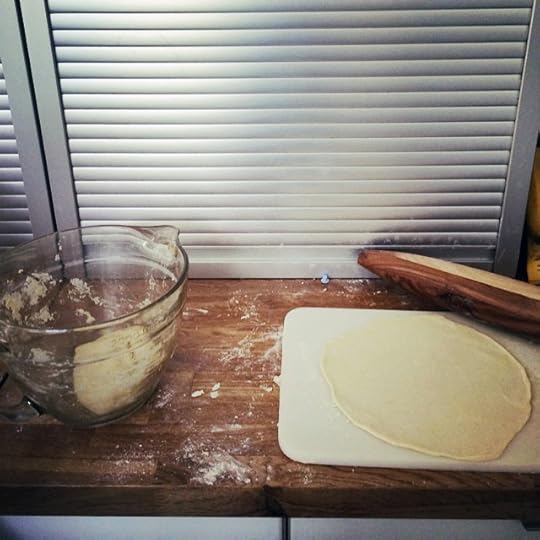
I’ll never be a gourmet chef, but these days my family raves about my homemade pasta sauce, tortillas and brownies, and I can almost always make a recipe work even when we’re out of something important.
The 2nd edition of Easy Homemade includes more than 30 new recipes and kitchen tips (for a total of more than 80 recipes!), including these:
eggnog
electrolyte drink
hot chocolate
hot vanilla
sweet tea
infused water
pumpkin pie seasoning
ranch dip
caramel sauce
chocolate magic shell
panko
royal icing
brown sugar
powdered sugar
cheese sauce {two ways}
chocolate fondue
hummus
instant oatmeal
jello
pudding
jello-style pudding
poor man’s cobbler
pie crust
flour tortillas
Buy Easy Homemade for $5.99 $3.99 (on sale through 8/18)!
You’ll also receive a set of printable recipe cards, the Nook and Kindle files to load to those devices and access to all of the recipes from the book on PlantoEat.com.
Still not sure? See the full table of contents and what other people are saying here.
P.S. If you purchased the original ebook, you should have a brand new copy in your inbox this morning, but if you don’t, please email me at orders@easyhomemade.net with your purchase information so we can get that taken care of for you!
The updated Easy Homemade is HERE!
© 2010-2014 Purple Martin Press, LLC | All rights reserved
 Related StoriesSummer Slump Cure: Mixed Berry Slump RecipeHealthy, Dairy-Free Lactation CookiesStrawberry Rhubarb Walnut Crisp: Easy Summer Desserts