Mandi Ehman's Blog, page 44
September 30, 2014
Footprint calendar {101 Days of Christmas}
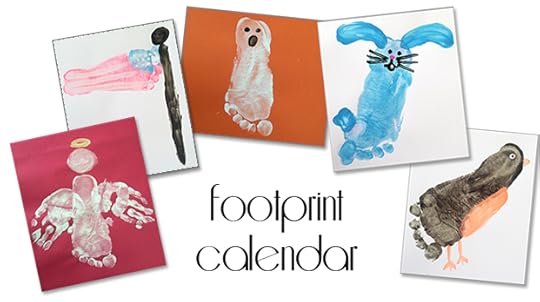
As I was searching for footprint ideas for this year’s calendar, I couldn’t help but laugh. It would seem that most of the ideas on Pinterest are either made by adults with tiny feet or children with exceptional artistry.
Needless to say, our footprints are less about a perfectly cute work of art and more about capturing a snapshot of our kids’ growth in a fun way. They’re messy and imperfect, but we giggled our way through them and our 5-year-old has asked me every day when we can make some more!
Note: Footprint calendars are really best for 2 and 3 year old’s. You can make it work with an older child with the horizontal designs (flag, bus, etc.), but a 5-year-old’s footprint is too big vertically for the calendar templates. That said, you could make a cute footprint book instead if you still want to go that route!
Click here to download or print your calendar template.
Then browse through this list of ideas, each with a picture and description, to choose the ones you’ll use for your calendar:
Angel (footprint) Apple Apple Tree Bald Eagle Bee Bird (footprint) Boat (footprint) Bunny (footprint) Bus Bus (footprint) Butterfly Candy Cane Butterfly & Caterpillar Chick Crab Fall Tree Fish Flag (footprint) Flowers (footprint) Ghost (footprint) Heart Heart (fingerprints) Heart (footprint) Jack-O-Lantern Kite Ladybug (footprint) Leprechaun Native American Penguin (footprint) Reindeer (footprint) Santa Shamrock Snowflake Snowmen Spider Strawberry Sun Sunflower Turkey Tulip Umbrella
 If your calendar includes handprints, grab one of the handprint poems for the front page of your calendar. There’s space at the bottom for you to add names and the date!
A few tips from our experience:
Have your children wear smocks or old clothes. Clip hair back away from face, roll up pants and sleeves. There’s beauty in imperfection, so don’t worry about smudges or other “mistakes”. We usually do only one or two different designs at a time rather than trying to work through all 12 pages at once. Washing hands or feet in between each one gets a little tiresome! When using multiple colors, it’s always easier if you let the bottom layer dry first, but it’s not necessary for most of these. Have fun!Projects from the archives:
Join us as we celebrate 101 Days of Christmas with new DIY projects, gift ideas, traditions and more every day from now through Christmas!
 Mandi Ehman is the blogger behind Life Your Way. She and her husband have four beautiful girls plus one baby boy, and together they live, work and homeschool on a little slice of heaven in wild, wonderful West Virginia. Mandi loves coffee, chocolate, easy meals, beautiful things and minimalist spaces.
 Meet the 101 Days of Christmas sponsors:
Plant Therapy Essential Oils: 100% pure, undiluted oils you can trust at a price you can afford
King Arthur Flour's Baker's Hotline: free professional help with any holiday baking challenge
World Vision Gift Catalog: share a full life with children in need by giving unique, life-changing gifts
Life Your Way Christmas Shop: get your 2014 Christmas planner today
Footprint calendar {101 Days of Christmas}
© 2010-2014 Purple Martin Press, LLC | All rights reserved


September 29, 2014
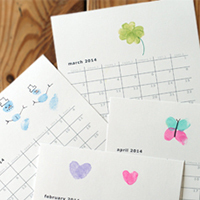
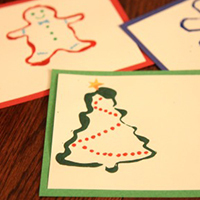
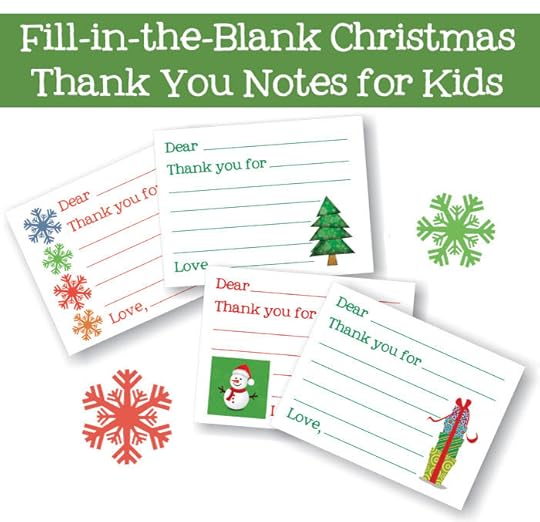
Fill-in-the-blank thank you cards {101 Days of Christmas}
The following post is from Jason & Jennifer Bruce of New Season Design :
Christmas is an easy time for kids to focus on what they’re getting. And it’s no wonder. I can’t count the number of times that Emma is asked what she’d like to have for Christmas.
One way to encourage a heart of gratitude in the middle of all this receiving is to have kids write thank you notes. I like the idea of writing thank you notes not only for gifts, but also for special visits or other events.
If writing thank you notes is intimidating for your kids, try these fill-in-the-blank thank you notes. They’re designed to kick-start the thank you note writing process. Kids can fill in the recipient’s name along with what the thank you is for and the child’s name.
If your child is too small to fill in the whole card, maybe he could write the recipient’s name at the top and his name at the bottom. Then you can act as a scribe for the body of the note.
Either way, writing thank you notes is just one more way to encourage gratitude in our kids.
Click here to download or print the thank you cards.
Printables from the archives:
Join us as we celebrate 101 Days of Christmas with new DIY projects, gift ideas, traditions and more every day from now through Christmas!
 Jason & Jennifer Bruce are the husband-and-wife design team behind New Season Design, where they work together to help clients put their best foot forward online. Jason is a pastor-turned-graphic designer, and Jennifer is a teacher-turned-blog designer who also blogs at The Simple Pen about life, learning and the things she loves.
 Meet the 101 Days of Christmas sponsors:
Plant Therapy Essential Oils: 100% pure, undiluted oils you can trust at a price you can afford
King Arthur Flour's Baker's Hotline: free professional help with any holiday baking challenge
World Vision Gift Catalog: share a full life with children in need by giving unique, life-changing gifts
Life Your Way Christmas Shop: get your 2014 Christmas planner today
Fill-in-the-blank thank you cards {101 Days of Christmas}
© 2010-2014 Purple Martin Press, LLC | All rights reserved

September 28, 2014
Practical ways to encourage kids to give {101 Days of Christmas}

While giving and generosity are character traits we cultivate in our family all year long, we like to focus on giving even more during the holidays as a way to offset the “gimme” mindset that so easily creeps in.
We do this through giving not just money but our time, by investing in our community, by talking about the sacrifices others make, by thanking the people who serve our community, and by looking for ways to bless those who are less fortunate than us.
Before we get into the rat race that can so easily characterize the holiday season, take some time now to plan out how you’ll give as a family this holiday season.
Here are some ideas to get you started:
1. Make a sparkle box.We absolutely love The Sparkle Box book. We read it at the beginning of our advent book countdown last year and then I spent the following weeks writing down each act of service, charity or kindness on a piece of paper and slipping it inside. On Christmas morning, we opened our gift to Jesus first, reading each slip of paper and remembering how we’d served. It’s a tradition I’m looking forward to repeating this year!
2. Thank a hero.One of the things we love most about our American Heritage Girls troop is the emphasis on honoring those who serve our country. At Christmas time, that means sending cards to soldiers through Holiday Mail for Heroes and laying wreaths on soldiers’ graves through Wreaths Across America. You could also bake cookies and make cards for your local police or fire department as a way to say thank you for their service!

I love the idea of having our girls shop from the World Vision Gift Catalog instead of just picking out toys for themselves. Seeing that something as simple as 5 ducks or 2 chickens or a pair of rabbits can truly impact a family in ways we can’t even imagine is a great lesson for kids who can get anything they could possibly imagine from Target or Amazon. I’d like to find a way for my older girls to truly be invested in the gift we give — by earning a portion of the money they’ll spend — but I just the act of pouring over the gift catalog the same way they do the toy catalogs that come in the mail is a potentially life-changing experience for them and the gift recipient.
4. Volunteer in your community.There are a million ways to volunteer during the holiday season, which can make it easy to avoid actually committing to one or two, but this is a great time to take the focus off the busyness and stress of the season and spend a few hours serving the community. Ring the Salvation Army bell, volunteer at a church outreach event, or put together holiday boxes for a family in need. Commit to it now, before your calendar fills up, to make it a priority this year!
5. Clean out the toys.Like a lot of families, I try to go through our toys before Christmas to declutter and make room for the new ones that will inevitably come. We involve our girls in this process to help teach them life skills about decluttering, organizing and that “stuff is just stuff”, but we also use it as an opportunity to donate the extras. However, one thing I’ve really felt strongly about lately is that we shouldn’t say, “You never play with these toys” or “You have a better one already” when we’re cleaning out the toys to donate. I don’t want to teach my girls to give their leftovers; I want to teach them to give sacrificially. And as a mom, I’ll admit I’ve vetoed something they wanted to give away because of the cost or the sentimentality of it.
This year I’m going to handle it differently. This year, in addition to decluttering for space, I’m going to encourage the girls to pick something special to donate as well. And rather than just tossing it in a box with all the other stuff that we donate, I’m going to make a bigger deal out of preparing it for another special little girl. Our kids have no shortage of toys (and they get more each and every birthday and Christmas), so I don’t want to miss this opportunity to teach them sacrificial giving.
Posts from the archives:
Join us as we celebrate 101 Days of Christmas with new DIY projects, gift ideas, traditions and more every day from now through Christmas!
Mandi Ehman is the blogger behind Life Your Way. She and her husband have four beautiful girls plus one baby boy, and together they live, work and homeschool on a little slice of heaven in wild, wonderful West Virginia. Mandi loves coffee, chocolate, easy meals, beautiful things and minimalist spaces. Meet the 101 Days of Christmas sponsors:
Plant Therapy Essential Oils: 100% pure, undiluted oils you can trust at a price you can afford
King Arthur Flour's Baker's Hotline: free professional help with any holiday baking challenge
World Vision Gift Catalog: share a full life with children in need by giving unique, life-changing gifts
Life Your Way Christmas Shop: get your 2014 Christmas planner today
Practical ways to encourage kids to give {101 Days of Christmas}
© 2010-2014 Purple Martin Press, LLC | All rights reserved

September 27, 2014
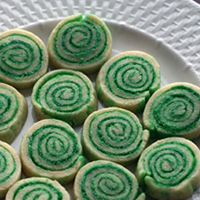
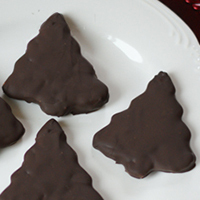
Chocolate pinwheels {101 Days of Christmas}
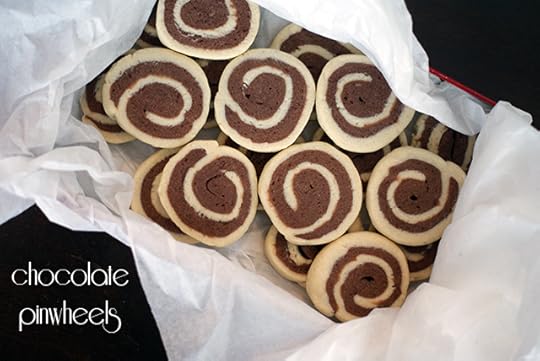
What’s not to love about these cookies?
Not only are they cute (and I imagine that someone with more skillz than me could make them even cuter!), but they combine a classic sugar cookie dough with a chocolate sugar cookie into one perfect pinwheel!
Although not especially Christmas-y, with no red and green dye or peppermint flavor in sight, these are a great addition to your recipe collection. And bonus points for the wow factor if you have kids in your home; my girls were so fascinated by the process!
Ingredients:

Directions:
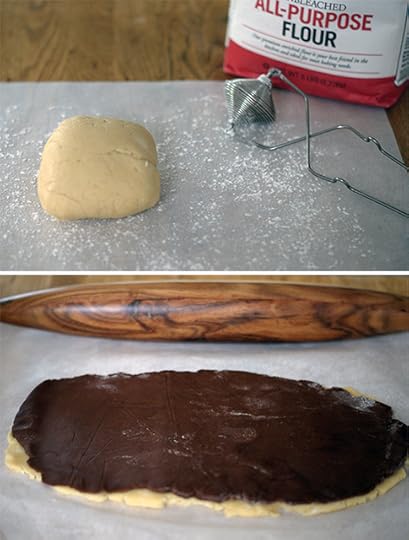
Mix flour and salt in a small bowl. In a large bowl, cream butter and sugar. Beat in egg, vanilla and 2 tablespoons milk. Slowly add flour mixture, mixing until well blended.
Divide dough and set half aside. Add cocoa powder and remaining milk to the mixing bowl with the other half. Mix until completely incorporated.
Form each half into a disc and wrap separately in plastic wrap. Refrigerate for at least an hour.
When ready, preheat oven to 375 degrees F.
Remove dough from fridge. If it’s been more than an hour, let sit for 15 minutes. Lightly flour your surface (this is the coolest tool ever for flouring!) and roll the first disc out to a 1/8-1/4″ thick rectangle. Repeat with the second disc.
Brush a light coating of milk on the sugar cookie disc and lay the chocolate dough on top. Starting on the long side, carefully roll the dough into a log. Cut into 1/4″ slices and transfer to a cookie sheet or stone.
Bake 12-14 minutes or until edges are light brown. Let cool in place for 3 minutes and then move to a wire rack to cool completely.
Click here to add this recipe to your Plan to Eat account.
Recipes from the archives:

Join us as we celebrate 101 Days of Christmas with new DIY projects, gift ideas, traditions and more every day from now through Christmas!
Mandi Ehman is the blogger behind Life Your Way. She and her husband have four beautiful girls plus one baby boy, and together they live, work and homeschool on a little slice of heaven in wild, wonderful West Virginia. Mandi loves coffee, chocolate, easy meals, beautiful things and minimalist spaces. Meet the 101 Days of Christmas sponsors:
Plant Therapy Essential Oils: 100% pure, undiluted oils you can trust at a price you can afford
King Arthur Flour's Baker's Hotline: free professional help with any holiday baking challenge
World Vision Gift Catalog: share a full life with children in need by giving unique, life-changing gifts
Life Your Way Christmas Shop: get your 2014 Christmas planner today
Chocolate pinwheels {101 Days of Christmas}
© 2010-2014 Purple Martin Press, LLC | All rights reserved
 CommentsThanks, Heather! by Mandi @ Life Your WayMandi, these look so festive! I've never made pinwheels before, ... by Heather @ My Overflowing Cup
Weekend Reading: September 27, 2014
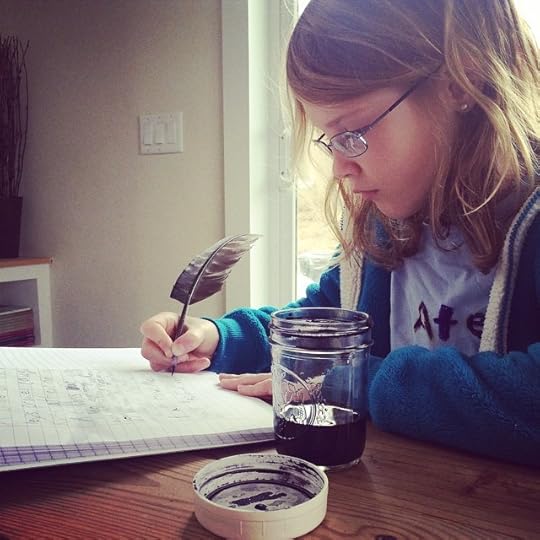
From Instagram: Oh, you know, just doing her schoolwork with a quill pen. {Confession: Inside I’m screaming, “The mess!”}
This week we get a brief reprieve from our birthday bonanza, but next week we make up for it with our oldest’s 10th birthday and our 12th anniversary. My parents will be in town for a few days, so my mom and I are taking Peyton out to a special dinner with her two best friends (I think we’ll let them sit at a table by themselves!) and then Sean and I will sneak out the next night for a long overdue date night. Can’t wait!
Having a 10 year old is definitely a whole new experience in the parenting department. I love being a mom of littles, and I was always terrified of adolescence — not just for the obvious reasons but because I just didn’t think I’d enjoy it. As it turns out, this is a really fun stage (when we’re not experiencing a roller coaster of emotions or preteen attitudes, at least), and I’m enjoying connecting with my older girls on a different level!
Here are some of my favorite posts from this week. As always, check out what I’m reading and what I’m pinning to see the other posts that make me stop and think (or, you know, drool…). You’ll find new posts all week long!
The big {homeschool} picture Take pain seriously | Simple Homeschool Let Them Wonder | Scholé Sisters Se7en + 1 Things That Have Helped Us Homeschool Through a Crisis… | se7en Just be yourself On being you | The Art of Simple Why are homeschooled kids so annoying? | Catholic Exchange Why You Don’t Need to Run with the Cool Kids | Becoming Minimalist On relationships Why Introverts Don’t Always Want To Be Alone | Psychology Today How to say goodbye | The Art of Simple There are four possible levels of relationship. | Modern Mrs. DarcyHave a great weekend!
Mandi Ehman is the blogger behind Life Your Way. She and her husband have four beautiful girls plus one baby boy, and together they live, work and homeschool on a little slice of heaven in wild, wonderful West Virginia. Mandi loves coffee, chocolate, easy meals, beautiful things and minimalist spaces. Meet the 101 Days of Christmas sponsors:
Plant Therapy Essential Oils: 100% pure, undiluted oils you can trust at a price you can afford
King Arthur Flour's Baker's Hotline: free professional help with any holiday baking challenge
World Vision Gift Catalog: share a full life with children in need by giving unique, life-changing gifts
Life Your Way Christmas Shop: get your 2014 Christmas planner today
Weekend Reading: September 27, 2014
© 2010-2014 Purple Martin Press, LLC | All rights reserved

September 26, 2014
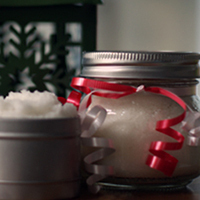
DIY lip scrub and lip balm {101 Days of Christmas}

Homemade toiletries are a popular DIY project for good reason: not only does making your own allow you to control the ingredients to avoid those that are toxic or questionable, but it’s also much less expensive than buying them.
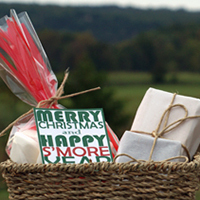
This homemade lip scrub and lip balm would make a great addition to a stocking or a little gift basket for a teacher or friend. Just make sure you make enough so that you can keep a set for yourself as well!
Lip ScrubRecipe for 1 circular tin. Multiply the recipe by the number of containers you have.
Ingredients:
1 tablespoon honey 4 teaspoons sugar* 1/2 teaspoon olive oil 6 drops essential oil (optional)***You can use any kind of sugar, but because I wanted my lip scrub to be very coarse, I used coconut sugar, which is rougher than white or brown sugar and doesn’t melt easily.
**The lip scrub has a natural honey flavor all by itself, so you don’t really need to add essential oils to this one.
Directions:
Mix the ingredients together with a wooden skewer and transfer to a cute container with a tight lid. (I used these 2″ round tins from Silly Frilly Kids on Etsy.)

Recipe for 1 rectangular tin or 3 tubes. Multiply the recipe by the number of containers you have. Adapted from My Buttered Life {Gifts}.
Ingredients
1 teaspoon beeswax pastilles 1 teaspoon coconut oil* 1 teaspoon shea butter 3 drops essential oils***Virgin coconut oil has a coconut flavor to it. That’s not necessarily bad, but some people prefer to use a refined coconut oil, which is odorless and tasteless.
**Shown here: sweet orange, vanilla and peppermint, which all make great flavors by themselves. But you could try any citrus, any mint, coffee, etc., or try combining a couple oils for even more flavor options!
Directions:
Combine first three ingredients in a double boiler and heat until completely melted.
To test the consistency, use a wooden skewer to drop a small amount on a piece of wax paper. Once it hardens, test it on your lips. If it is too solid, add a little bit more coconut oil. If it’s too runny, add a bit more beeswax.
Once the consistency is right, remove the mixture from heat and stir in the essential oils of your choice with a wooden skewer.
Carefully pour this warm mixture into your tin or tubes. (I used these small rectangular slider tins from Silly Frilly Kids on Etsy.) Let cool completely before closing the lids.
Projects from the archives:
Join us as we celebrate 101 Days of Christmas with new DIY projects, gift ideas, traditions and more every day from now through Christmas!
Mandi Ehman is the blogger behind Life Your Way. She and her husband have four beautiful girls plus one baby boy, and together they live, work and homeschool on a little slice of heaven in wild, wonderful West Virginia. Mandi loves coffee, chocolate, easy meals, beautiful things and minimalist spaces. Meet the 101 Days of Christmas sponsors:
Plant Therapy Essential Oils: 100% pure, undiluted oils you can trust at a price you can afford
King Arthur Flour's Baker's Hotline: free professional help with any holiday baking challenge
World Vision Gift Catalog: share a full life with children in need by giving unique, life-changing gifts
Life Your Way Christmas Shop: get your 2014 Christmas planner today
DIY lip scrub and lip balm {101 Days of Christmas}
© 2010-2014 Purple Martin Press, LLC | All rights reserved
 CommentsAh, Kathy — I meant to link to my double boiler alternative ... by Mandi @ Life Your WayWhere can I find the beeswax pastures? Also how can I cook this ... by kathyMy first “101 days of Christmas” with you, makes me wish ... by JoAnn C.Love this, Mandi! Thanks so much – pinning now. by Heather @ My Overflowing Cup
September 25, 2014
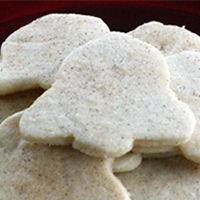
Meringue angel kisses {101 Days of Christmas}

I fell in love with meringue cookies a couple of years ago, and their light, airy texture and not-too-sweet flavor makes them a nice little treat any time of the year. But while these peppermint meringues are also pretty to look at, I just haven’t been able to bring myself to make them again because of our daughter’s red dye intolerance.
However, I stumbled across a recipe for “angel kisses” in King Arthur Flour’s recipe collection, and I just loved the name. We decided to make a vanilla version of the meringue cookies for this year’s 101 Days of Christmas series, and after we’d made them, the girls and I realized their marshmallow-y flavor made them perfect hot chocolate toppers!
Make these to add to your cookie tins, to serve at a hot chocolate bar, or to package them hot cocoa mix for a special treat. You could even make itty bitty ones to replace the marshmallows found in store bought hot chocolate packets!

Ingredients:
*Castor sugar is a superfine sugar that melts and incorporates easily so that your meringue isn’t grainy.
Directions:
Preheat oven to 200 degrees F.
Combine egg whites, cream of tartar, vanilla extract, and salt, and beat with an electric mixer on medium speed until soft peaks form. Slowly add sugar to the mix and beat on high speed until stiff peaks form and the mixture is glossy.
Add a decorating tip to a pastry bag and carefully add meringue to the bag.
Pipe meringue onto a cookie sheet lined with parchment paper.
Bake for 1-1/2 hours. Meringues will be firm and easily lift off the parchment paper. Transfer to wire rack to cool.
Store for two weeks in an airtight container at room temperature or freeze and enjoy straight from the freezer!
Variations:
Use different decorating tips to make different shapes. Make big cookies or little “drops”. Substitute different flavor extracts for the vanilla. Fold in chocolate chips or other mix-ins after the sugar has been incorporated.Click here to add this recipe to your Plan to Eat account.
Recipes from the archives:
Join us as we celebrate 101 Days of Christmas with new DIY projects, gift ideas, traditions and more every day from now through Christmas!
Mandi Ehman is the blogger behind Life Your Way. She and her husband have four beautiful girls plus one baby boy, and together they live, work and homeschool on a little slice of heaven in wild, wonderful West Virginia. Mandi loves coffee, chocolate, easy meals, beautiful things and minimalist spaces. Meet the 101 Days of Christmas sponsors:
Plant Therapy Essential Oils: 100% pure, undiluted oils you can trust at a price you can afford
King Arthur Flour's Baker's Hotline: free professional help with any holiday baking challenge
World Vision Gift Catalog: share a full life with children in need by giving unique, life-changing gifts
Life Your Way Christmas Shop: get your 2014 Christmas planner today
Meringue angel kisses {101 Days of Christmas}
© 2010-2014 Purple Martin Press, LLC | All rights reserved

September 24, 2014
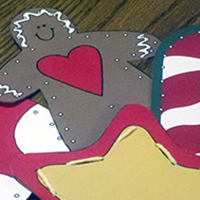
Easy sew felt ornaments {101 Days of Christmas}
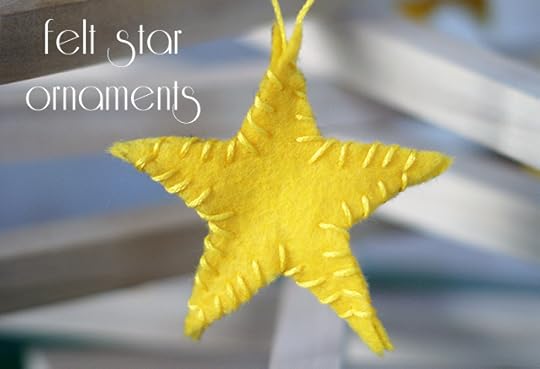
Supplies:


Join us as we celebrate 101 Days of Christmas with new DIY projects, gift ideas, traditions and more every day from now through Christmas!
Mandi Ehman is the blogger behind Life Your Way. She and her husband have four beautiful girls plus one baby boy, and together they live, work and homeschool on a little slice of heaven in wild, wonderful West Virginia. Mandi loves coffee, chocolate, easy meals, beautiful things and minimalist spaces. Meet the 101 Days of Christmas sponsors:
Plant Therapy Essential Oils: 100% pure, undiluted oils you can trust at a price you can afford
King Arthur Flour's Baker's Hotline: free professional help with any holiday baking challenge
World Vision Gift Catalog: share a full life with children in need by giving unique, life-changing gifts
Life Your Way Christmas Shop: get your 2014 Christmas planner today
© 2010-2014 Purple Martin Press, LLC | All rights reserved

September 23, 2014
Internet safety & how to keep your kids safe
The following post is from Lauren Rothlisberger of Get Me Geeky :

As my kids are get older they spend more time on the computer, and I encourage them to explore their interests through books, but also through online research.
Unfortunately, this is more complex than it seems due to the nature of the web. It is a forever long rabbit hole of topics. This isn’t news to anyone, but I think many of us are overwhelmed with the task of internet safety and feel defeated before we even start. We are the pioneer parents of this topic. While it is tempting to ban all things technology in name of the protection of our children, that is akin to saying no one will leave the house for fear they may get hurt. We must educate our children and monitor them so they can continue to make good choices.
I am not going to going into all the “how-tos” of internet safety because there are just so many. Instead I will point you to many good resources. The more you know, the more you can understand how to both monitor your kids and arm them with the tools to know when something isn’t right.
Obviously the issues and topics change as children get older. Especially with tweens and teens you won’t always be there to help them make good decisions. Be sure you spend the time talking with them about the dangers sooner rather than later.
Below are some of the biggest issues with internet safety. Each topic offers other links to continue your education.
InternetWhile there are many parental control packages you can purchase you can start by using Google’s Safe Search mode. You can even lock it in this mode. Other parental control softwares will let you blacklist certain sites you don’t want your kids on, or whitelist they only ones they can go on. This is helpful, but can get annoying. It is hard to know every site you might want your kids to access, and conversely, there is no way to know all the bad places they could go.
Limit your computer to just one browser and check the history frequently. That is typically found in the browser’s settings. Do not allow your kids to dump the history and be sure they are not using a different browser.
Macs do have a built in parental control system. It can be a little clunky, but is an option.
Another great privacy and internet safety resource is Common Sense Media.
YouTubeI gave YouTube it’s own category because it is one of the most popular sites on the web. I know when my kids are interested in exploring or researching a topic it is one of their first landing spots. YouTube is amazing, no doubt, but the problem can become how quickly kids can get off track. That sidebar of other videos to watch can quickly find you looking at something completely different.
Luckily YouTube also has a Safe Mode. While not perfect it, uses flagging, age-restrictions, and other tips to restrict videos. You can learn about all their resources in the Safety Center.
Social MediaSocial media has changed our world forever. I am very thankful for this way to keep up with my family and friends far and wide, but wow, what a can of worms. Especially through the teenage years. As kids, our biggest fear was someone sharing a note you wrote with another person. Now someone can share anything about you with the entire school.
Common Sense Media has a great information on what is age appropriate for your kids and social media. Digital citizenship (more below) is also crucial to keeping your teen out of a social media mess.
One fear is gossiping and bullying, but another threat is people who prey on children through the web. Be sure to give your kids guidelines on who it is appropriate to communicate with, and what it is appropriate to share. Check out Stay Safe Online for more on that.
MobileI know a lot of parents that have boldly stated, “My kid isn’t getting a cell phone!” The reality, though, is that in this day and age most kids have phones so they can communicate with you when they need to. That is a big responsibility for an immature mind. We need to keep a careful watch on where they are browsing, what apps they are using, and just the amount of time they spend on it. It is typically better to teach your kids how to appropriately use certain apps and what pitfalls they should be careful of, instead of banning them all together.
For tips on how to keep up with the latest apps check out this article on Common Sense Media.
Here is a good list of tips for teens and mobile phones.
Digital CitizenshipDigital citizenship is your quality of response as a member of a digital community. In the digital age we have witnessed people who hide behind their computer as a way to act completely out of line. This can be anything from saying something inappropriately to doing something downright illegal. People who are not good digital citizens do not treat the other members of the community like people.
I think many of the issues that we run into above would be resolved with good digital citizenship. If you need help talking to your kids about that, check out this post for Edutopia.
From everything I have read it seems that one of the most important parts of internet safety is having an open conversation with your kids. Give them a code word or phrase they can use if they find something they’re too embarrassed to talk about, or were exposed to a situation at someone else’s home. Continue to talk to them about the risks as they get older.
What practices do you have in place in your home to address internet safety?
 Lauren Rothlisberger blogs and consults over at Get Me Geeky. As a military wife and mom of three girls five years old and under, she loves focusing on technology and productivity and finding new ways to simplify her life. She recently started putting together MacMinis, which are easy to follow videos for Mac users, and also wrote an ebook, Evernote for Moms.
 Meet the 101 Days of Christmas sponsors:
Plant Therapy Essential Oils: 100% pure, undiluted oils you can trust at a price you can afford
King Arthur Flour's Baker's Hotline: free professional help with any holiday baking challenge
World Vision Gift Catalog: share a full life with children in need by giving unique, life-changing gifts
Life Your Way Christmas Shop: get your 2014 Christmas planner today
Internet safety & how to keep your kids safe
© 2010-2014 Purple Martin Press, LLC | All rights reserved

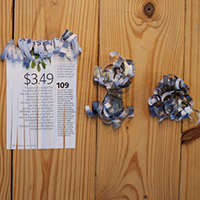
Printable gift bows {101 Days of Christmas}
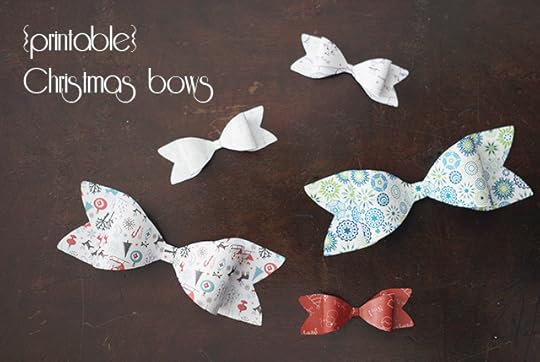
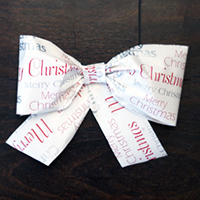
Although I love the convenience of buying a bag of bows at the dollar store for the top of our gifts, these printable bows are really so much fun.
They’re simple but elegant and add an extra touch to your wrapping. I’m not sure I’d bother adding them to my kids’ gifts just to watch them tear them off and toss them aside, but they’d make a lovely addition to a special gift for a teacher or friend!
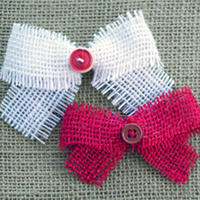
{PS. You could use this template to make bows out of virtually anything: wrapping paper, burlap, scrapbook paper, felt, etc.}

You could easily make a bunch of these while watching TV or waiting in the carpool line. Just cut, fold, glue and you’re done!

Print the bow templates of your choice and cut the bows out, cutting inside the solid lines.
Using the diagram above, fold the tabs at the ends of part AB into the middle of that piece to form the two loops of the bow. Be careful not to crease the bow. Secure with glue or a small strip of tape.
Lay the bow on top of part C and wrap the strip {D} around the middle to hold them together. Secure with glue or a small strip of tape.
Related Projects:
Join us as we celebrate 101 Days of Christmas with new DIY projects, gift ideas, traditions and more every day from now through Christmas!
Mandi Ehman is the blogger behind Life Your Way. She and her husband have four beautiful girls plus one baby boy, and together they live, work and homeschool on a little slice of heaven in wild, wonderful West Virginia. Mandi loves coffee, chocolate, easy meals, beautiful things and minimalist spaces. Meet the 101 Days of Christmas sponsors:
Plant Therapy Essential Oils: 100% pure, undiluted oils you can trust at a price you can afford
King Arthur Flour's Baker's Hotline: free professional help with any holiday baking challenge
World Vision Gift Catalog: share a full life with children in need by giving unique, life-changing gifts
Life Your Way Christmas Shop: get your 2014 Christmas planner today
Printable gift bows {101 Days of Christmas}
© 2010-2014 Purple Martin Press, LLC | All rights reserved