Mandi Ehman's Blog, page 40
October 30, 2014
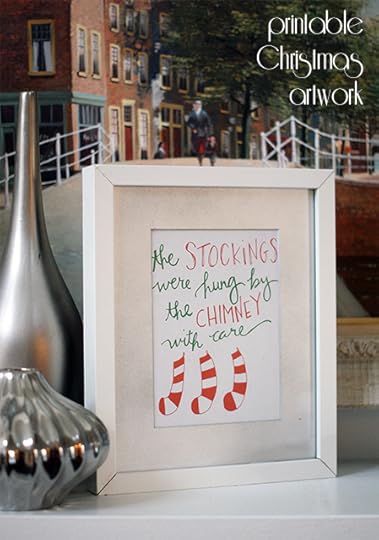
The stockings were hung artwork {101 Days of Christmas}
I first “met” Melissa Beaver through Instagram. I love the way she captures the every day moments of motherhood and her commitment to intentional community. She is also an incredible artist and owner of The Lovely Words, an Etsy shop featuring her prints and Scripture memory cards.
I asked Melissa if she’d be interested in creating a downloadable print for 101 Days of Christmas, and I love this whimsical design that she came up with.
Print it out on your home printer and frame it on your mantle as you decorate for Christmas this year. {And be sure to check out Melissa’s Etsy shop for more of her work!}
Click here to download or print this artwork!
Projects from the archives:


Join us as we celebrate 101 Days of Christmas with new DIY projects, gift ideas, traditions and more every day from now through Christmas!

Melissa is a lover of words + people. She’s knee deep in motherhood + finding art in the every day. She puts lovely words on paper at thelovelywords.etsy.com and shares snippets of this life on instagram: @melissabeaver. Melissa is also a believer in community and the holy work of gathering around the table. Follow her journey on instagram: @thecommontable as well as at commontablecommunity.com.
Meet the 101 Days of Christmas sponsors:
King Arthur Flour's Baker's Hotline: free professional help with any holiday baking challenge
World Vision Gift Catalog: share a full life with children in need by giving unique, life-changing gifts
Plant Therapy Essential Oils: 100% pure, undiluted oils you can trust at a price you can afford
Life Your Way Christmas Shop: get your 2014 Christmas planner today
The stockings were hung artwork {101 Days of Christmas}
© 2010-2014 Purple Martin Press, LLC | All rights reserved


October 29, 2014
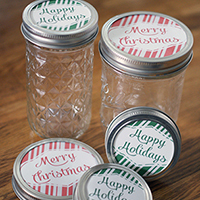
Printable candy bar wrappers {101 Days of Christmas}
The following post is from Jason & Jennifer Bruce of New Season Design :
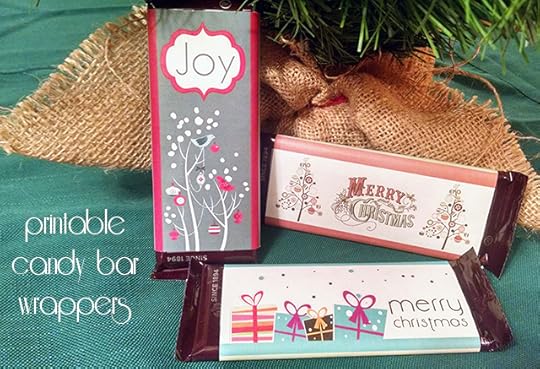
Here’s a gift idea that’s cute, easy, and fun! These printable Christmas candy bar wrappers are also inexpensive, so you could make a whole basket full to share with friends, family, teachers, neighbors, etc. or use them as Christmas party favors. As a bonus, they only take a few minutes to put together.
Simply print your favorite design (or all three), trim using the cutting guide lines, wrap them around standard sized candy bars, and tape the backs together. You’ve got a delicious gift that’s ready in minutes!
Click here to download or print the candy bar wraps.
Printables from the archives:

Join us as we celebrate 101 Days of Christmas with new DIY projects, gift ideas, traditions and more every day from now through Christmas!

Jason & Jennifer Bruce are the husband-and-wife design team behind New Season Design, where they work together to help clients put their best foot forward online. Jason is a pastor-turned-graphic designer, and Jennifer is a teacher-turned-blog designer who also blogs at The Simple Pen about life, learning and the things she loves.
Meet the 101 Days of Christmas sponsors:
King Arthur Flour's Baker's Hotline: free professional help with any holiday baking challenge
World Vision Gift Catalog: share a full life with children in need by giving unique, life-changing gifts
Plant Therapy Essential Oils: 100% pure, undiluted oils you can trust at a price you can afford
Life Your Way Christmas Shop: get your 2014 Christmas planner today
Printable candy bar wrappers {101 Days of Christmas}
© 2010-2014 Purple Martin Press, LLC | All rights reserved

CommentsSo cute! Well designed…and thank you for sharing so ... by Kristen
October 28, 2014
Get a $10 coupon PLUS a FREE bottle of Mrs. Meyer’s Multi-Surface Cleaner!
 Have you heard the buzz about ePantry? Some of my fellow bloggers have been sharing their experiences with this company, and now it’s my turn!
Keep reading because I’m not just going to tell you what I love about it; I also have a special offer just for Life Your Way readers!
If you’ve been hanging around here for long, you know I’m a huge fan of Amazon’s Subscribe & Save program for things like diapers, wipes and formula. I love having items delivered to my door so I don’t have to go to the store to get them, and I love to save money. The problem, though, is that despite their wide selection of products, they still don’t offer Subscribe & Save on all of the products we purchase… or in some cases they do, but I just can’t bring myself to buy a 24-count case!
And that’s where ePantry comes in.
ePantry is an online retailer offering some of the best eco-friendly brands on the planet (like Mrs. Meyers, Seventh Generation and Method) in individual quantities at great prices.
There’s a lot I love about this company: their commitment to saving 25 square feet of rain forest for every box shipped; their free shipping option, which lets you pay once for a lifetime of free shipping; and their smart shopping cart, which predicts when I’ll need refills on products based on the profile information I’ve filled out and my past orders! (But don’t worry, you always still have control on what’s shipped when!)
But they’re also just really good people, with amazing customer service (including online chat, so the phone-averse among us can still ask our questions!), a great sense of humor (for example, a recent email included this gem: “How do you make a handkerchief dance? Put a little boogie in it!” < Ha! Okay, clearly I’m still 9.) and a commitment to excellence.
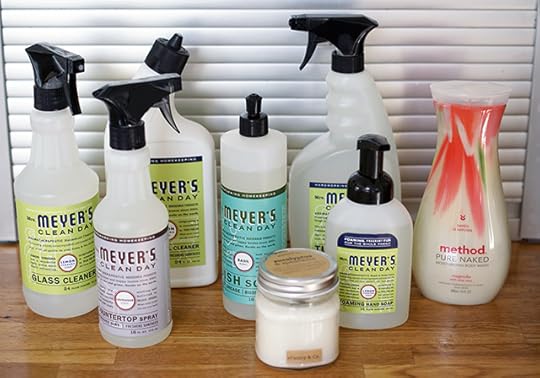
I got my first box last week, and it couldn’t have come at a better time. We found it waiting for us on the porch when we got back from North Carolina, and no less than 10 minutes after I’d unpacked it, Sean asked whether I’d gotten dish soap at the store. No one had told me we were out of dish soap (ahem!), so I hadn’t intentionally gotten it, but luckily I’d ordered some from ePantry…and our dishes could be washed without another trip to town just for dish soap!
Okay, but here’s the really fun part: ePantry has a special offer just for you!
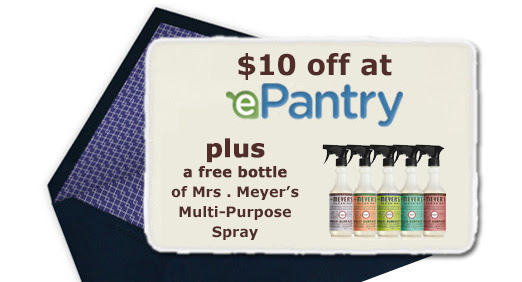
When you click my special referral link and add $30 to your cart for your first order, you’ll automatically get free shipping plus you’ll save $10 off your order and you’ll get a free multi-purpose spray!
Here’s how it works:
Head to ePantry via this link.
Answer questions about your household and product preferences.
ePantry will automatically suggest items for your cart, but you can add additional items using the Add Products button and remove any you’re not interested in.
You’ll see that the multi-purpose spray is automatically added and a $10 coupon applied (but you won’t be able to check out until your total after coupons reaches $20).
Check out and your box will arrive in just a few days with $35-40 worth of products for just $20. Not a bad deal!
ePantry will automatically make suggestions for future shipments, but you can change quantities, frequency or cancel your order at any time.
If you place an order, be sure to come back and tell us what you got. I’ve browsed the catalog a few times, but I know I’m still missing things, and it’s about time for me to plan my next order!
Meet the 101 Days of Christmas sponsors:
King Arthur Flour's Baker's Hotline: free professional help with any holiday baking challenge
World Vision Gift Catalog: share a full life with children in need by giving unique, life-changing gifts
Plant Therapy Essential Oils: 100% pure, undiluted oils you can trust at a price you can afford
Life Your Way Christmas Shop: get your 2014 Christmas planner today
Get a $10 coupon PLUS a FREE bottle of Mrs. Meyer’s Multi-Surface Cleaner!
© 2010-2014 Purple Martin Press, LLC | All rights reserved

CommentsI signed up using your link! I'm excited try, and I hope you'll ... by BrianaDeeI have always wanted to try Mrs Meyers so I placed an order ... by Heather
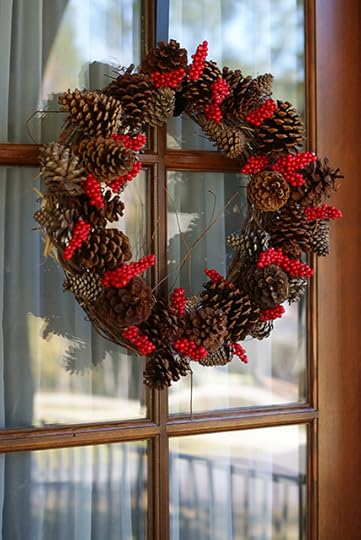
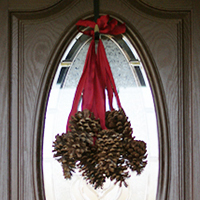
Pine cone and holly berry wreath {101 Days of Christmas}

My mom is the queen of wreaths. Three years ago she made these beautiful hanging pinecones for her front door, but two years ago she was preparing to move and last year she was living in Florida (where pinecones just don’t quite fit…), so she hasn’t made a Christmas wreath since.
But this year…this year she’s in North Carolina, home of the pine trees, pine needles and pine cones. {Which means it was really hard to find big pine cones to buy for this wreath since all of the ones in her yard were smaller. Imagine that…no market for pine cones in North Carolina!}
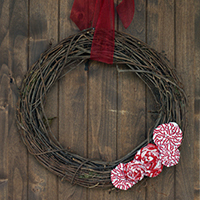
I love this wreath so much because it’s simple and elegant, but the holly berries keep it from being boring!
Supplies:
pine cones in a variety of sizes
holly berries*
grapevine wreath
hot glue
*She bought bunches of holly leaves and just cut off the berries to use; I don’t know if you can find the berries by themselves.
Directions:
Start by gluing the largest pine cones around the middle of the wreath, pointing them in different directions. Use plenty of glue so they’ll hold securely.
Repeat with the medium pine cones, making sure that they go in all directions to make the wreath look random and full.
Fill in any spaces with small pine cones and then add bunches of holly berries all around.
Don’t focus on perfection because it’s easy to over think it; just add the pine cones and berries where you see an open space!
Projects from the archives:
Join us as we celebrate 101 Days of Christmas with new DIY projects, gift ideas, traditions and more every day from now through Christmas!

Mandi Ehman is the blogger behind Life Your Way. She and her husband have four beautiful girls plus one baby boy, and together they live, work and homeschool on a little slice of heaven in wild, wonderful West Virginia. Mandi loves coffee, chocolate, easy meals, beautiful things and minimalist spaces.
Meet the 101 Days of Christmas sponsors:
King Arthur Flour's Baker's Hotline: free professional help with any holiday baking challenge
World Vision Gift Catalog: share a full life with children in need by giving unique, life-changing gifts
Plant Therapy Essential Oils: 100% pure, undiluted oils you can trust at a price you can afford
Life Your Way Christmas Shop: get your 2014 Christmas planner today
Pine cone and holly berry wreath {101 Days of Christmas}
© 2010-2014 Purple Martin Press, LLC | All rights reserved

October 27, 2014
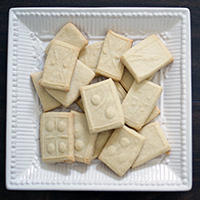
Austrian kipferl {101 Days of Christmas}
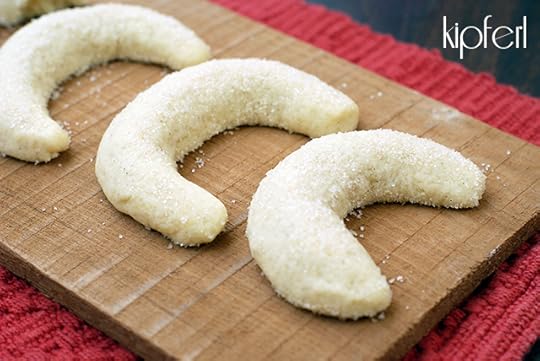
Ancestor to the croissant, kipferl cookies are fragile crescent-shaped cookies that literally melt in your mouth. Made from ground almonds, they have the slightest hint of almond flavor and a sweet vanilla sugar coating.
These cookies are so good that my husband fought over the last cookie of both batches I made. Despite their “fancy” shape, they’re actually fairly easy to roll out after chilling. The hardest part is being patient when they come out of the oven because they’re fragile until they cool and harden.
I love pretty much anything with almond flavor, and these are a nice change of pace!
Ingredients:
1-1/2 cups King Arthur Unbleached All-Purpose Flour
3/4 cup almond meal
1/3 cup confectioner’s sugar
pinch salt
3/4 cups (1-1/2 sticks) butter, softened
1 vanilla bean
2 egg yolks
Directions:
In the bowl of a mixer, combine flour, almond meal, powdered sugar and salt. Mix on low until well combined. Add butter and the pith from the vanilla bean. Mix on medium speed until dough resembles a coarse meal.
Add egg yolks and continue mixing to form a smooth dough.
Roll the dough into a 12″ log and wrap in plastic wrap. Chill in the refrigerator for 30-60 minutes.
Preheat oven to 350 degrees F.
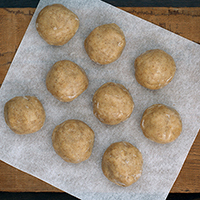
Remove dough from refrigerator and cut into 1/2″ slices. Roll each slice into a 3″ long piece with tapering ends. Bend into a crescent shape.
Place on a cookie sheet or stone and bake for 12-13 minutes. The cookies will look dry but should not brown.
Remove from oven and sprinkle generously with vanilla sugar. Let cool for 5-10 minutes on the cookie sheet before transferring carefully to a cookie rack.
Variations:
Sprinkle with confectioner’s sugar instead of vanilla sugar.
Dip in chocolate.
Click here to add this recipe to your Plan to Eat account.
Recipes from the archives:

Join us as we celebrate 101 Days of Christmas with new DIY projects, gift ideas, traditions and more every day from now through Christmas!
Mandi Ehman is the blogger behind Life Your Way. She and her husband have four beautiful girls plus one baby boy, and together they live, work and homeschool on a little slice of heaven in wild, wonderful West Virginia. Mandi loves coffee, chocolate, easy meals, beautiful things and minimalist spaces.
Meet the 101 Days of Christmas sponsors:
King Arthur Flour's Baker's Hotline: free professional help with any holiday baking challenge
World Vision Gift Catalog: share a full life with children in need by giving unique, life-changing gifts
Plant Therapy Essential Oils: 100% pure, undiluted oils you can trust at a price you can afford
Life Your Way Christmas Shop: get your 2014 Christmas planner today
Austrian kipferl {101 Days of Christmas}
© 2010-2014 Purple Martin Press, LLC | All rights reserved

October 26, 2014
Gifts for the person who has everything {101 Days of Christmas}
It’s always a challenge to buy gifts for the person who “has everything.” Of course these people don’t actually have everything, but whether they’re wealthy or not, they have all that they want or need, which can make it hard to purchase gifts that will be special and not just create clutter.
Photos & ArtworkSince the people in our lives who fall into this category are typically our parents and grandparents, we often choose sentimental gifts — pictures of our kids, handprint & footprint calendars, etc. We’ve done canvases and art calendars; you could do a photo book or photo keychains.
Honor Their StoryAnother idea is to find a way to honor their particular story. Maybe it’s framing a newspaper article that was written about them, having their friends and family sign a picture mat around a picture of a special occasion in their life, or giving them a prompt journal to record the story of their life. A couple of years ago we gave my grandmother a memory box with recorded messages from friends and family.
A Gift in Their NameFinally, if it’s in your budget, consider giving the gift of life to someone else in their honor.
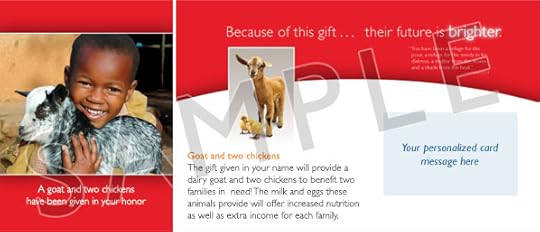
For example, the World Vision Gift Catalog offers animals, school supplies, job training, education and clean water for families in need around the world. Choose a donation hat will truly make a difference and give it in honor of the special people in your life.
When you make a donation in the name of a loved one, you’ll be able to choose a card with a photo, description of your gift and a personalized message to be mailed, emailed or printed at home.

Join us as we celebrate 101 Days of Christmas with new DIY projects, gift ideas, traditions and more every day from now through Christmas!
Mandi Ehman is the blogger behind Life Your Way. She and her husband have four beautiful girls plus one baby boy, and together they live, work and homeschool on a little slice of heaven in wild, wonderful West Virginia. Mandi loves coffee, chocolate, easy meals, beautiful things and minimalist spaces. Meet the 101 Days of Christmas sponsors:
King Arthur Flour's Baker's Hotline: free professional help with any holiday baking challenge
World Vision Gift Catalog: share a full life with children in need by giving unique, life-changing gifts
Plant Therapy Essential Oils: 100% pure, undiluted oils you can trust at a price you can afford
Life Your Way Christmas Shop: get your 2014 Christmas planner today
Gifts for the person who has everything {101 Days of Christmas}
© 2010-2014 Purple Martin Press, LLC | All rights reserved

October 25, 2014
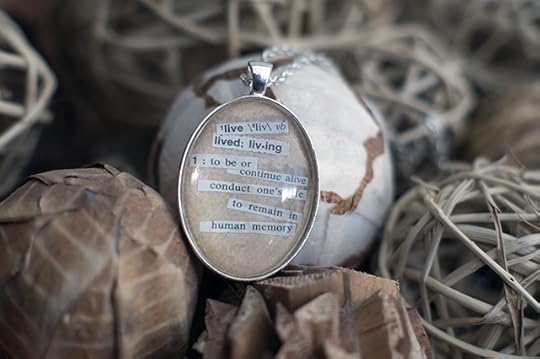
DIY word necklaces {101 Days of Christmas}
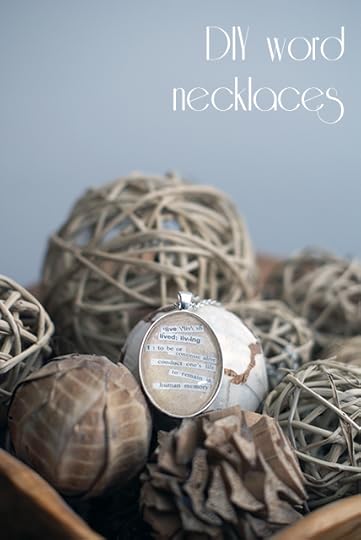
I love words. I love to read a quote that resonates in my soul or select a single word that summarizes everything I want to say all by itself.
After we made the DIY photo keychains last month, I began looking into different versions of “word” necklaces. I saw many with pages cut from dictionaries, but I really wanted to be able highlight specific usages or definitions.
Of course, it’s easy to set up and print your own on the computer, but for these necklaces I decided to try cutting out and assembling a definition from the pages of a dictionary instead. I started with “live” since that is my word for 2014, but you could do something like “grandma” and even add other definitions — like the definition of love or care or fun — to the actual definition to make a custom necklace!
Supplies:
pendant necklace kits from Candytiles Studio Loctite Crafter’s indoor-safe adhesive dictionary that you can cut apart scrapbook paper for the background foam brush (optional)Directions:
Cut out definitions and words from the dictionary and set aside.
Lay the glass tile on top of the scrapbook paper and cut a piece to size to be used as the background.
Lay out the remaining parts from the pendant necklace kits. (You can buy these pieces separately, but the kits are good quality and come with the right quantities of everything you need, so I think that’s the easiest way to go!)
Add a small dollop of glue to the foam brush or a piece of paper and carefully slide the right side of the definition through the glue. Glue it to the flat side of the glass so that the definition can be read from the other side of the glass.
Continue adding words and definitions, smoothing each one flat as you go.
Spread a thin layer of glue on the right side of the scrapbook paper and glue it on top of the words on the flat side of the tile.
Holding the glass tile between your finger and thumb, spread glue around the edges of the tile. Lay the glass in the frame and use a rag or paper towel to wipe off any excess glue that squeezes out.
Add the necklace chain and set aside to completely dry.
Variations:
Use a selection of music instead of words. Cut out various usages of the same word (love, loving, loved, beloved, etc.) and layer them together. Make a picture necklace instead, using the same steps we used for the keychains.Projects from the archives:

Join us as we celebrate 101 Days of Christmas with new DIY projects, gift ideas, traditions and more every day from now through Christmas!
Mandi Ehman is the blogger behind Life Your Way. She and her husband have four beautiful girls plus one baby boy, and together they live, work and homeschool on a little slice of heaven in wild, wonderful West Virginia. Mandi loves coffee, chocolate, easy meals, beautiful things and minimalist spaces. Meet the 101 Days of Christmas sponsors:
King Arthur Flour's Baker's Hotline: free professional help with any holiday baking challenge
World Vision Gift Catalog: share a full life with children in need by giving unique, life-changing gifts
Plant Therapy Essential Oils: 100% pure, undiluted oils you can trust at a price you can afford
Life Your Way Christmas Shop: get your 2014 Christmas planner today
DIY word necklaces {101 Days of Christmas}
© 2010-2014 Purple Martin Press, LLC | All rights reserved

Weekend reading: October 25, 2014

From Instagram: And a turkey leg for me and the boy. {At the NC State Fair!}
Well, it happened. Despite my best efforts to ignore or disallow it, Jackson turned 1 yesterday!!
We actually spent most of the day in the car, and then I taught my Essentials class in the afternoon, so I didn’t really even get to see his face or snuggle him until the evening. Then we celebrated by singing Happy Birthday and sticking a candle in a pear for him to gaze at in wonder while we all tried to show him how to blow it out — ha!
I’m so thankful for our little man, who is quite possibly the sweetest baby boy on the planet, and I can’t wait to see even more of his personality emerge in the next year!
What I’m reading: The Death of Bees by Lisa O’Donnell and Let’s All Be Brave by Annie F. Downs
What I’m cooking: chicken parmesan casserole, sloppy joes (in a crescent roll ring), upside down meatball casserole {um…should we call this the week of tomato sauce?!}
What I’m pinning: s’more cookie bars, s’mores cake, peanut butter cup s’mores {clearly I have a problem…}
What I’m thinking about:
On living with intention Remember your reasons | The Art of Simple A Life of Moderation: My Top Tip for Simple Living | Andrea Dekker Making Choices When You Don’t Know What’s Next | Storyline On marriage and parenting On not “firepitting” our marriage (or our children) | Rage Against the Minivan Why I Believe in Nighttime Parenting | HuffPo On a broader perspective #BringBackOurGirls: Meet the man who never gave up hope Badass Dad Follows Sons 300 Miles Disguised As a Beggar to Rescue Them from Slavery One Powerful Illustration Shows Exactly What’s Wrong With How the West Talks About EbolaHave a great weekend!
Mandi Ehman is the blogger behind Life Your Way. She and her husband have four beautiful girls plus one baby boy, and together they live, work and homeschool on a little slice of heaven in wild, wonderful West Virginia. Mandi loves coffee, chocolate, easy meals, beautiful things and minimalist spaces. Meet the 101 Days of Christmas sponsors:
King Arthur Flour's Baker's Hotline: free professional help with any holiday baking challenge
World Vision Gift Catalog: share a full life with children in need by giving unique, life-changing gifts
Plant Therapy Essential Oils: 100% pure, undiluted oils you can trust at a price you can afford
Life Your Way Christmas Shop: get your 2014 Christmas planner today
Weekend reading: October 25, 2014
© 2010-2014 Purple Martin Press, LLC | All rights reserved
 CommentsOh my goodness! He's 1 already? That means my little guy is ... by Kristen
October 24, 2014
Fabric-wrapped tabletop trees {101 Days of Christmas}
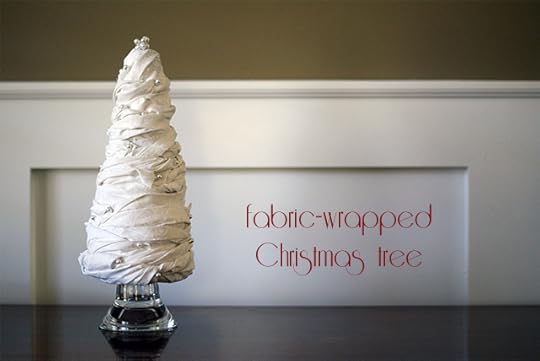
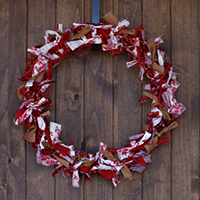
We’ve wrapped styrofoam trees in burlap, covered them in cupcake liners and feathers, coated them in glitter, and stuck gum drops in them, so it only seemed fair that we try wrapping them in fabric this year!
It took me a couple tries to get this just right, but I love how it turned out, and you could easily choose fabric in any color to match your Christmas decor.
The key to this project is to embrace the imperfections and randomness of the fabric and the twists. If you’re type-A like me, that is very, very difficult, but consider it a good opportunity to stretch and grow!
Supplies:
8″ styrofoam cone 2 fat quarters (in the same pattern) floral pins (or push pins) glass candle holderDirections:
Cut each fat quarter into four strips. (I cut them along the long edge because they were already creased that way, but you could do it the other way if you want longer, thinner strips.)
Fold the end of the fabric under and wrap it around the top of the tree. Twist the fabric strip a couple times and pin the twist in place. Continue wrapping, twisting every couple of inches.
When you get to the end of the first strip, twist a new strip around the first one, pinning through both strips, and continue wrapping.
At the bottom, tuck the edge under and pin in place.
Add a small ornament, a star or a group of floral pins to the top of the tree.
Set the tree on an upside down candle holder to display.
Join us as we celebrate 101 Days of Christmas with new DIY projects, gift ideas, traditions and more every day from now through Christmas!
Mandi Ehman is the blogger behind Life Your Way. She and her husband have four beautiful girls plus one baby boy, and together they live, work and homeschool on a little slice of heaven in wild, wonderful West Virginia. Mandi loves coffee, chocolate, easy meals, beautiful things and minimalist spaces. Meet the 101 Days of Christmas sponsors:
King Arthur Flour's Baker's Hotline: free professional help with any holiday baking challenge
World Vision Gift Catalog: share a full life with children in need by giving unique, life-changing gifts
Plant Therapy Essential Oils: 100% pure, undiluted oils you can trust at a price you can afford
Life Your Way Christmas Shop: get your 2014 Christmas planner today
Fabric-wrapped tabletop trees {101 Days of Christmas}
© 2010-2014 Purple Martin Press, LLC | All rights reserved
 CommentsMandi that is so pretty! It reminds me of meringue! by Turner
October 23, 2014
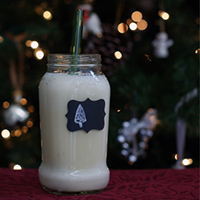
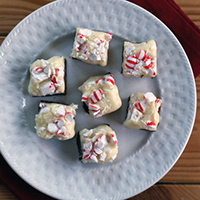
Easy eggnog fudge {101 Days of Christmas}
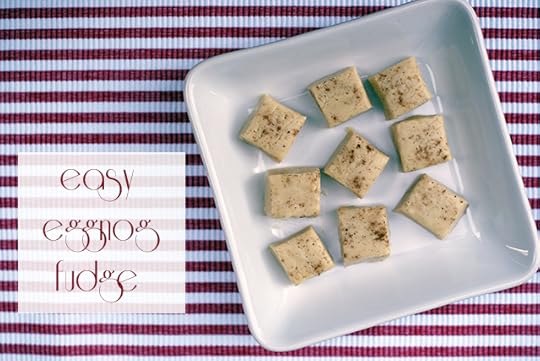
I love eggnog and I love fudge, but what really makes this recipe great is that it uses just a few simple ingredients and doesn’t require a candy thermometer, so it’s easy to whip together whenever you have a craving for eggnog!
This is also a great recipe to make with kids (or to have older kids make on their own!) because it’s so simple and straightforward.
Ingredients:
15-ounce can sweetened condensed milk 14 ounces white chocolate 1/4 teaspoon sea salt 1/2 teaspoon eggnog flavor 1/2 teaspoon nutmeg, plus extra for sprinklingDirections:
Line a loaf pan with foil.
In a medium saucepan, combine sweetened condensed milk and white chocolate. Heat over low, stirring until smooth.
Remove from heat and add salt, eggnog flavor and nutmeg, mixing well.
Pour into prepared pan and sprinkle with additional nutmeg.
Refrigerate overnight. Remove from pan and peel off foil. Cut into individual pieces.
Variations:
Use 1/2 teaspoon rum extract instead of eggnog flavor. Mix in 1 cup mini marshmallows.Click here to add this recipe to your Plan to Eat account.
Recipes from the archives:

Join us as we celebrate 101 Days of Christmas with new DIY projects, gift ideas, traditions and more every day from now through Christmas!
Mandi Ehman is the blogger behind Life Your Way. She and her husband have four beautiful girls plus one baby boy, and together they live, work and homeschool on a little slice of heaven in wild, wonderful West Virginia. Mandi loves coffee, chocolate, easy meals, beautiful things and minimalist spaces. Meet the 101 Days of Christmas sponsors:
King Arthur Flour's Baker's Hotline: free professional help with any holiday baking challenge
World Vision Gift Catalog: share a full life with children in need by giving unique, life-changing gifts
Plant Therapy Essential Oils: 100% pure, undiluted oils you can trust at a price you can afford
Life Your Way Christmas Shop: get your 2014 Christmas planner today
Easy eggnog fudge {101 Days of Christmas}
© 2010-2014 Purple Martin Press, LLC | All rights reserved
 CommentsOops, I meant to link it in the post. I've only seen it online: ... by Mandi @ Life Your WayWould you find eggnog flavoring at the grocery store or is it ... by Rachelme either! this sounds really good! by TurnerI didn't know there was eggnog flavoring! I'm going to have to ... by Kristen