
Nancy Zieman's Blog, page 75
September 4, 2018
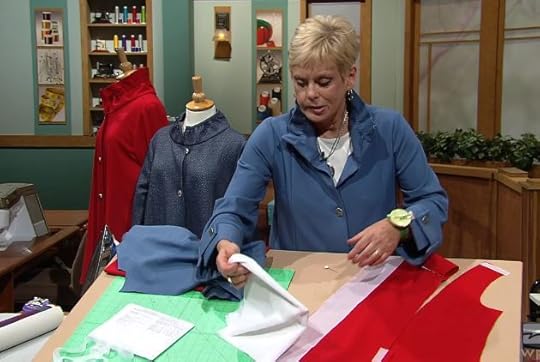
No-Fear Lapped Zipper
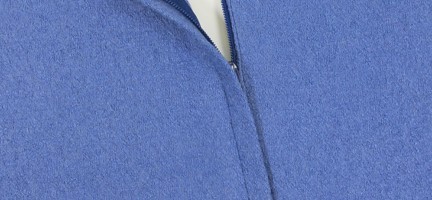 A lapped zipper gives a tailored look. Only one line of stitching shows on the right side of the fabric. It’s easier to keep the stitching straight and to make sure the zipper teeth are completely covered. We prefer the lapped zipper for side openings and sometimes back openings.
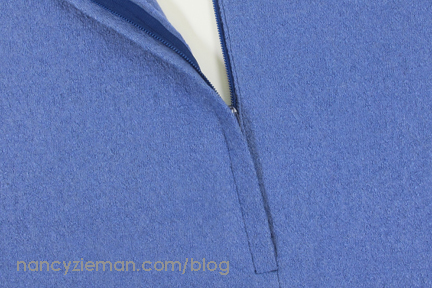
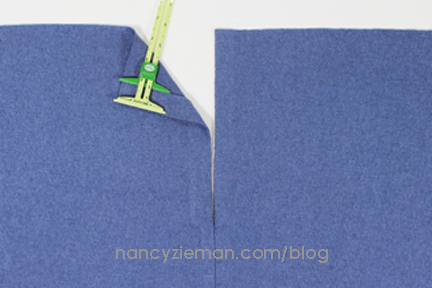
1. Increase the zipper seam allowance to 1″, before cutting out your clothing. For example, if the pattern allows a 5/8″ seam allowance, add 3/8″ to the seam in the zipper area.
 2. Mark the 1″ seamline at the top of the zipper opening on both the left and right seam allowances. These markings are very important.
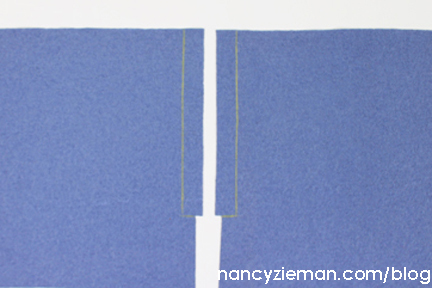
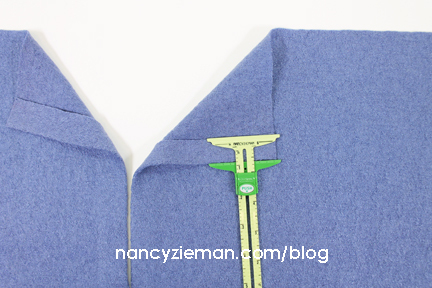
3. Stitch the seam below the zipper opening, stopping at the dot that marks the zipper opening and its wider seam allowance. Lock your stitches at the dot by sewing in place several times with the machine’s stitch length set at 0.
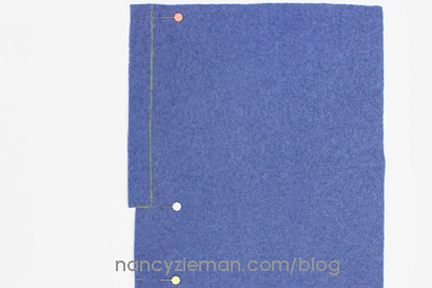
4. Press the seam.
Press the seam open below the zipper opening.
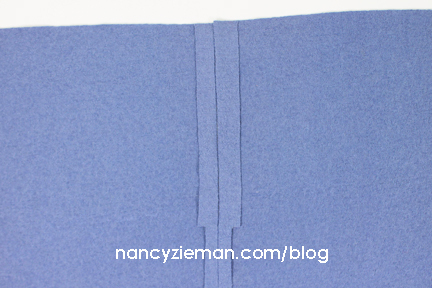
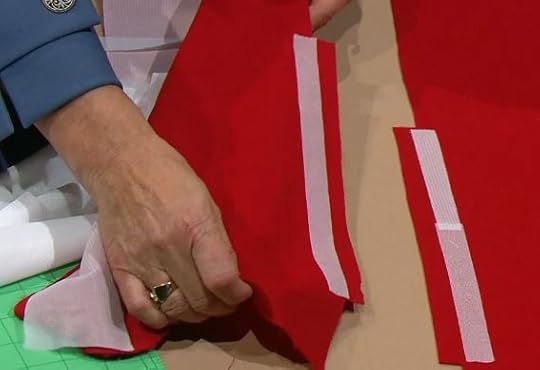
On the left side, fold and press under the entire 1″ seam allowance in the zipper area. Use the marking and the lower end of the zipper opening to position the foldline.
On the right side, press under 7/8″ of the 1″ seam allowance to create the zipper underlay. The finished zipper laps left over right.
 5. Insert the zipper.
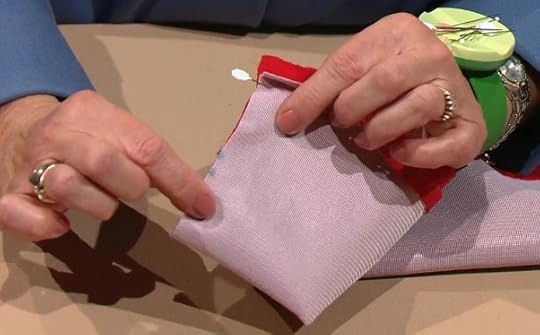
Position the closed zipper under the zipper underlay, with right sides up, placing the bottom of the zipper at the base of the zipper opening. Place the underlay fold next to the right side of the zipper teeth. Make certain the zipper tab extends above the top of the clothing. With short zippers, you shouldn’t have to pin the zipper—you can merely finger pin (hold the zipper in place) and stitch.


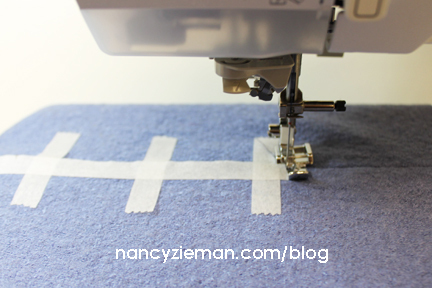
Pins sometimes create dimples in the fabric, causing uneven stitching. Instead of pins, use strips of Sewer’s Fix-It Tape or transparent tape about 4” apart to position the lap. This 1/2″ wide tape keeps the edge perfectly flat and results in more even topstitching. When you’re finished, you can easily remove the tape, leaving no sticky residue.
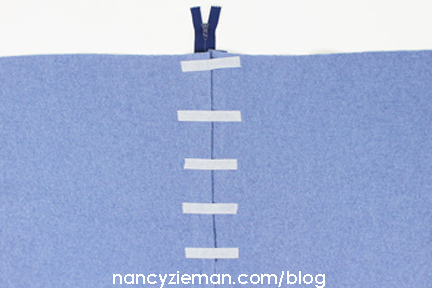
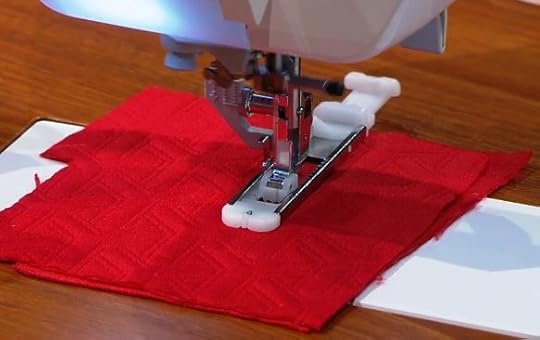
Position the machine’s zipper foot to the left of the needle. Stitch next to the fold, from the bottom to the top.
Lap the left side of the clothing over its right side, matching the markings. Tape the overlap in place.
6. Topstitch the overlap.
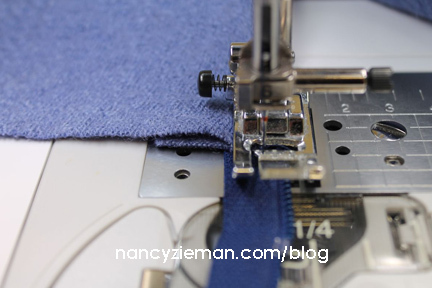
Align a strip of 1/2″ wide Sewer’s Fix-It Tape or transparent tape along the folded edge of the lapped seam allowance. This provides an accurate stitching guide.

Slide the zipper foot to the right of the needle.
Beginning at the base of the zipper, topstitch along the bottom edge of the tape and up the side.
Remove the tape.
7. Complete the zipper insertion.
Move the zipper pull down into the completed zipper placket.
Attach the regular (zigzag) presser foot to your machine.
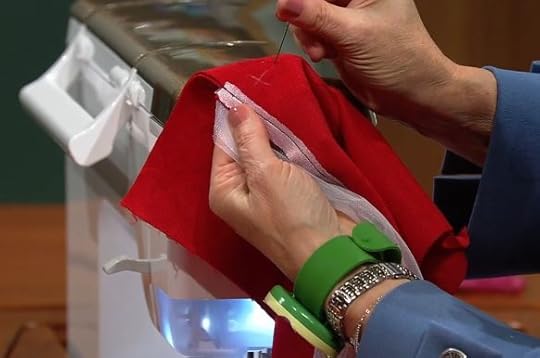
Satin stitch or bartack over the ends of the zipper tape at the top of the zipper reinforcement.
Cut off the excess zipper tape.

For more information on this technique and my other absolute easiest ways to sew, check out my book and DVD, The Absolute Easiest Way to Sew at Nancy’s Notions. See a collection of blog posts featuring my absolute easiest ways to sew a variety of projects on this link.

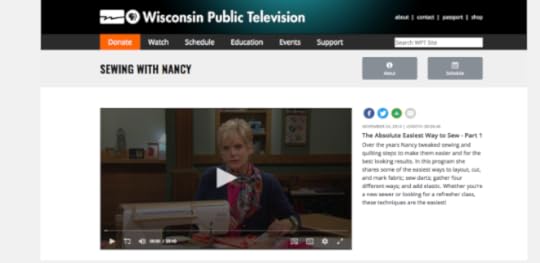
Watch Absolute Easiest Way to Sew (Part One, Part Two, and Part Three) on Sewing With Nancy online.

For a chance to win a copy of Nancy’s book and DVD, The Absolute Easiest Way to Sew from Nancy’s Notions, tell us where you would like to use Nancy’s lapped zipper technique.
Happy Sewing,
Team Nancy Zieman
Nancy Zieman Productions, LLC.

Content in this feed is © copyright 2018 by Nancy Zieman Productions, LLC and may not be republished without written permission. You’re welcome to forward the email to a friend or colleague but it’s not okay to add the RSS feed automatically as content on a blog or other website. The FTC requires us to tell you that Nancy Zieman Productions, LLC has provided products by other companies in the course of doing business. The FTC requires us to advise you to take this information into consideration when reading this posting.
Make sure you are subscribed to Nancy Zieman Productions, LLC enews mailing list so you won’t miss a thing. Sign up here . Join us on Facebook , plus a host of other social media channels. Connect With Nancy and Friends today!


September 1, 2018
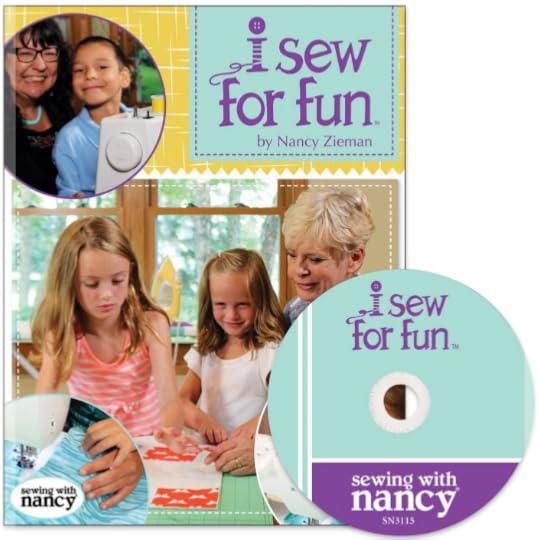
“Really Easy” Youthful Sewing Projects
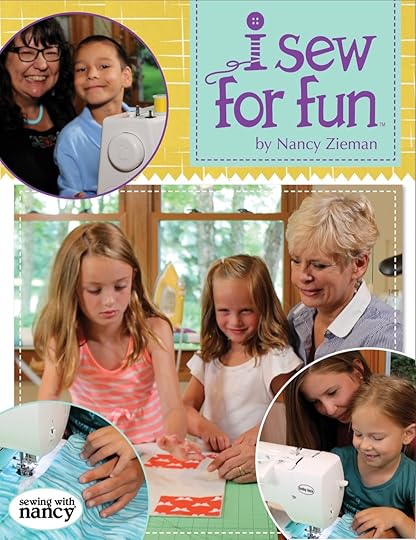
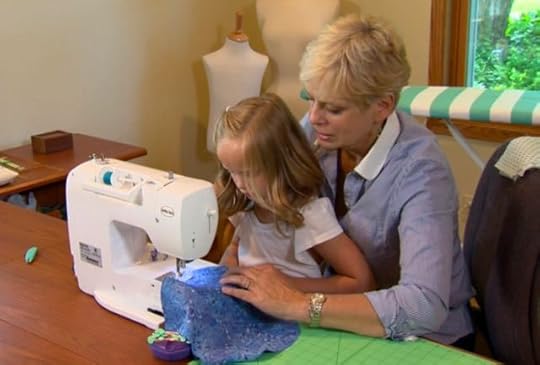
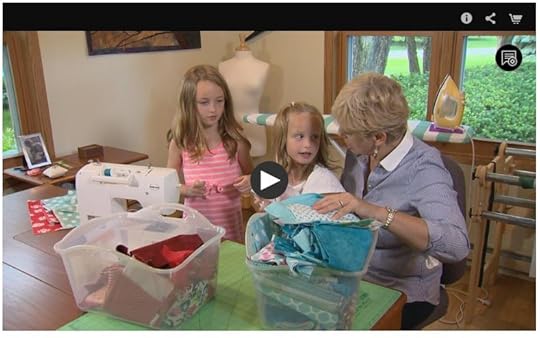
In today’s spotlight on Nancy Zieman’s I Sew For Fun program, we’ll take a look at seven “Two-Button” (really easy) sewing projects designed by Nancy. Remember to implement Nancy’s lighthearted methods when introducing youth to sewing. Watch the one-part series, I Sew For Fun on Sewing With Nancy.
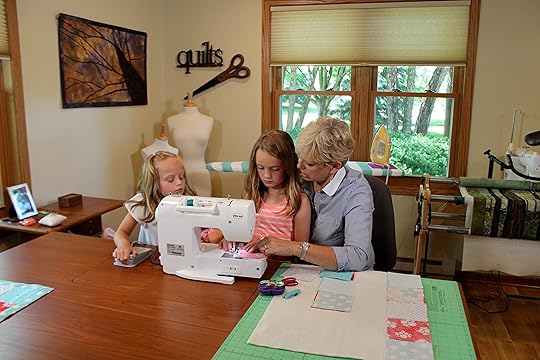 Nancy shares how to disregard lots of sewing rules and encourages adding a big dose of fun. Nancy’s approach of introducing youth to the experience of sewing can be paralleled to the way many of us initially work with youth in the kitchen—you work together as a team.
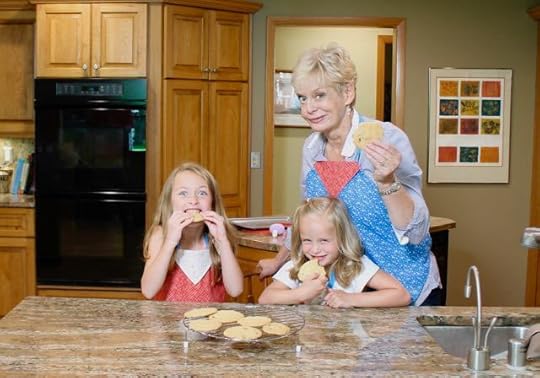 The little partner can crack an egg into a bowl (You may need to pick out a few shells.), fill the measuring cup, level off and dump the measuring cup (hopefully hitting the bowl), scoop out the dough, etc. And, of course, everyone can enjoy eating the cookies!
 In the 72-page book, I Sew For Fun, that accompanies this program, Nancy shares her step-by-step directions for 20 super-easy sewing projects.
 Give a little partner a few project and fabric options. Then, let them choose their favorite project to complete, with your guidance! You’ll plant the seeds of love for sewing that blooms with each new project. Here’s the sneak peek at the seven different Two-Button Projects (really easy projects) included in the book:
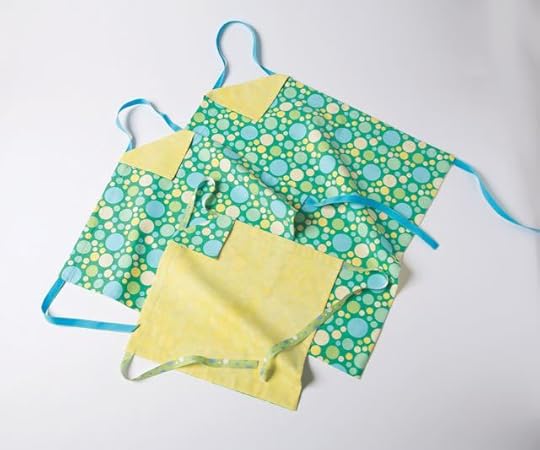
8. Aprons in three sizes
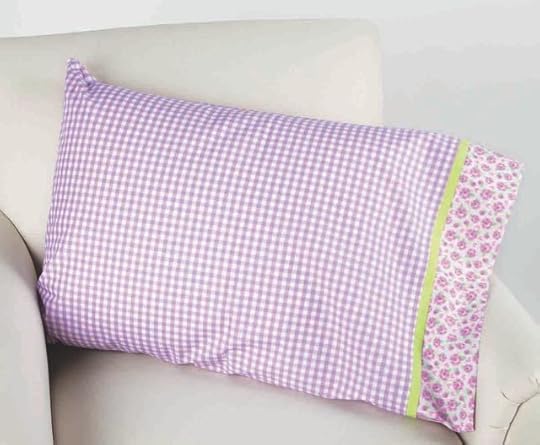
9. Pillowcase
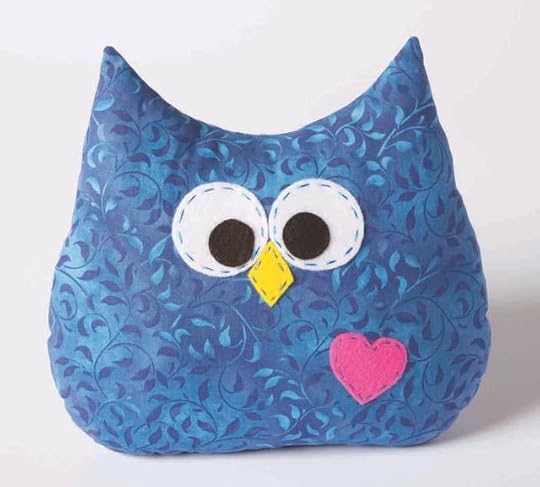
10. Owl Pillow
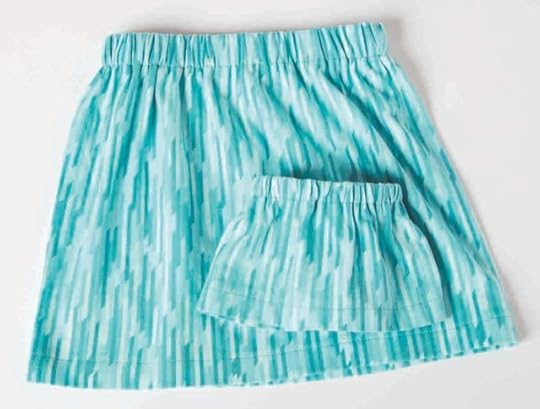
11. and 12. Skirts for Girls and 18-inch Dolls
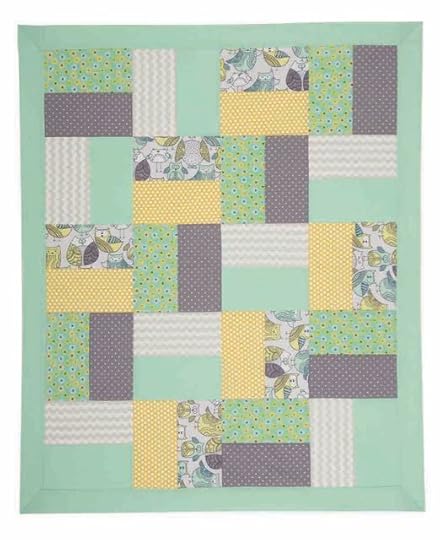
13. Two-Piece Block Quilt
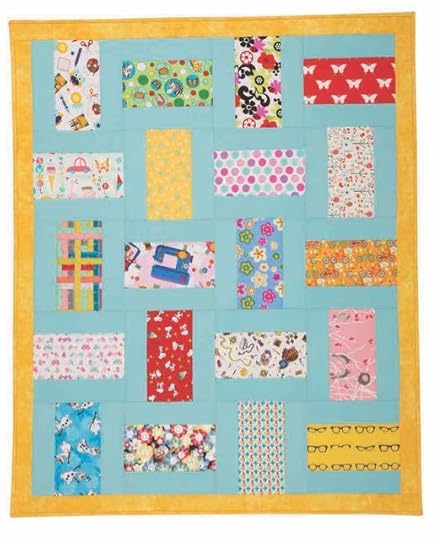
14. I-Spy Quilt
Watch I Sew For Fun on Sewing With Nancy online at NancyZieman.com.
 For a complete listing of all I Sew For Fun companion products by Nancy Zieman, visit isewforfun.com

For chance to win a copy of Nancy Zieman’s new book with DVD, I Sew For Fun, from Nancy’s Notions, please leave a comment below.

The randomly selected winner of two tickets to Quilt Expo, and a copy of the Beginning Landscape Quilting book/DVD from Nancy’s Notitions is Laura M.
Her comment is: To choose one, it would be fall with the interesting colors and the light. A four season project has always been on my to-do list. When I work on this project, I will choose a “scene” and show it in all four seasons.
Happy Sewing,
Team Nancy Zieman
Nancy Zieman Productions, LLC.
Content in this feed is © copyright 2018 by Nancy Zieman Productions, LLC and may not be republished without written permission. You’re welcome to forward the email to a friend or colleague but it’s not okay to add the RSS feed automatically as content on a blog or other website.
The FTC requires us to tell you that Nancy Zieman Productions, LLC has provided products by other companies in the course of doing business. The FTC requires us to advise you to take this information into consideration when reading this posting.
Make sure you are subscribed to Nancy Zieman Productions, LLC enews mailing list so you won’t miss a thing. Sign up here . Join us on Facebook , plus a host of other social media channels. Connect With Nancy and Friends today!
August 30, 2018
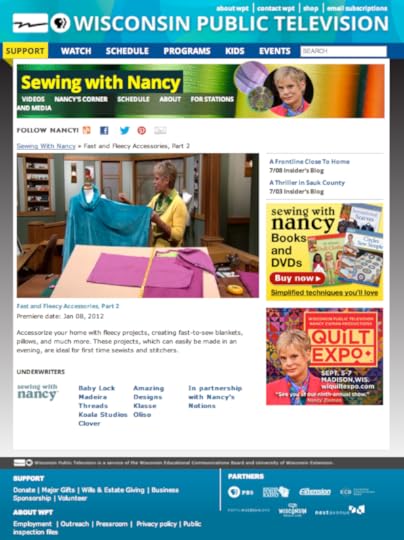
More Easy Fleecy Accessories
 This Sewing With Nancy spotlight is part two of Fast and Fleecy Accessories. Made without traditional sewing patterns, the accessories that Nancy details in the TV series are simple, yet very practical, you could easily say fun!
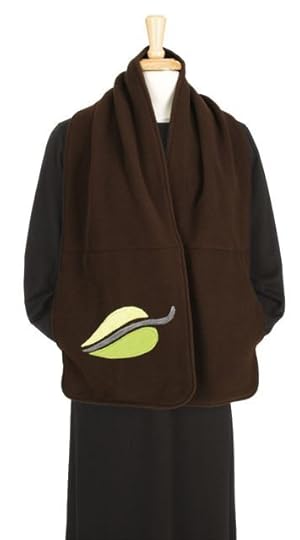
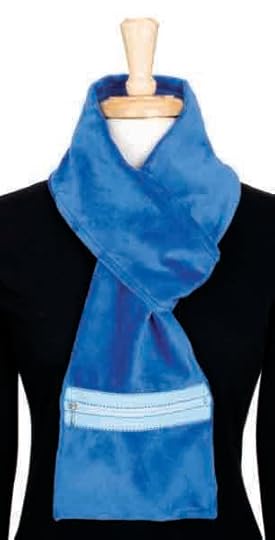
When you tune in to the show you’ll find the first project featured is a comfy scarf with muff-like pockets. Start with less than a yard of fleece fabric. Then, add a touch of creativity. You’ll be amazed how easy this is to sew!
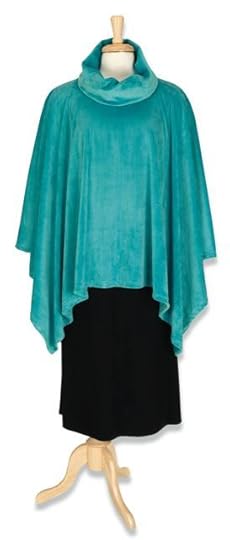
For a quick, yet totally warm coverup, choose your favorite fleece fabric and follow these sewing steps to create a snuggly cape. Two yards of fabric cut into three rectangles, plus an hour or so of sewing will make this next fabulous accessory.
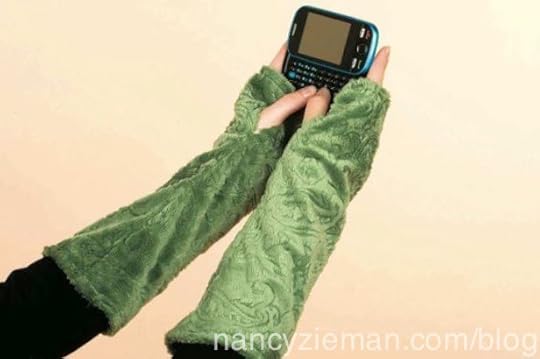
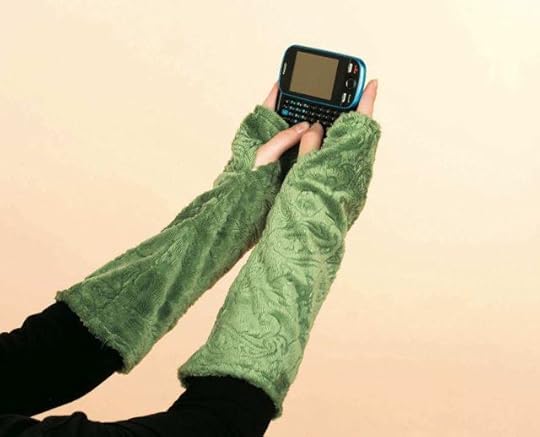
Small pieces of fleece fabric are ideal for the quickest of all fleece accessories—texting gloves. There are really only three steps: cut, stitch, and turn! (Our guess is that you can sew this fleecy project in 20 minutes or less!)
There are more ideas, but you’ll just have to watch the show to find out what they are! Remember, if you have an iPad, iPod touch, or iPhone you can download the Sewing With Nancy app and watch on your hand-held device.
All of the Fast and Fleecy Accessories featured in the 2-part series are detailed in the book. It’s a handy reference!

Watch Sewing With Nancy online.
There are 52 programs to watch online, or on your iPad, iPod Touch, or iPhone. Have you downloaded the app?

For a chance to win a copy of the Fast and Fleecy Accessories book, from Nancy’s Notions, tell us about your favorite accessory from this blog post below.

Happy Sewing,
Team Nancy Zieman
Nancy Zieman Productions, LLC.
Content in this feed is © copyright 2018 by Nancy Zieman Productions, LLC and may not be republished without written permission. You’re welcome to forward the email to a friend or colleague but it’s not okay to add the RSS feed automatically as content on a blog or other website. The FTC requires us to tell you that Nancy Zieman Productions, LLC has provided products by other companies in the course of doing business. The FTC requires us to advise you to take this information into consideration when reading this posting.
Make sure you are subscribed to Nancy Zieman Productions, LLC enews mailing list so you won’t miss a thing. Sign up here . Join us on Facebook , plus a host of other social media channels. Connect With Nancy and Friends today!
August 28, 2018
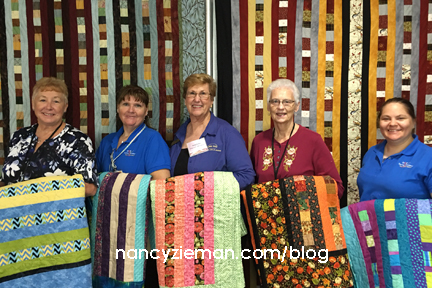
Quilt To Give Sets Goal to Stitch 300 Quilts!
Sewing a quilt and giving it as a gift is gratifying. Sewing a quilt for someone in need or who is going through tough times shows compassion. Most importantly, the recipient feels loved. Win. Win!
This will be the eighth year that Nancy Zieman’s Quilt to Give quilt pattern will be sewn and quilted during the annual Quilt Expo in Madison, WI, September 6–8. If you aren’t able to be at the event, you, too, can make a twin-sized quilt, then donate it to a local shelter or charity.
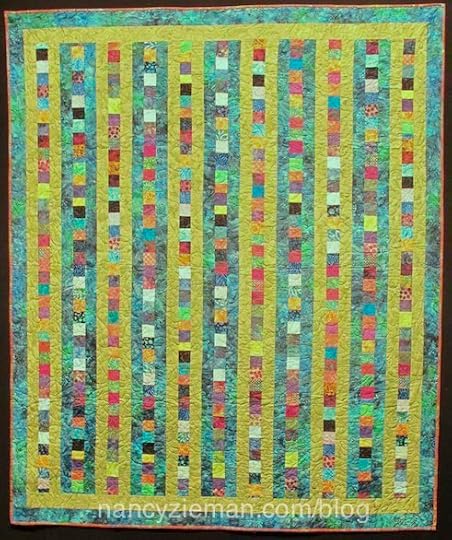
Nancy made the first Quilt to Give design in 10-days, sewing a little each day. She chronicled the 10-day journey with full instructions on how to make the quilt on the NZP blog. Our hope is that sometime in the near future, you and/or your quilting group will consider making this easy quilt design, made with columns instead of blocks, and then give it away. Hence the name Quilt to Give.
Quilt to Give Community Service Project
The Quilt to Give project will again be the community service project at the annual Quilt Expo, Last year over 28 bed-sized quilts were made and/or donated by participants. Quilts were donated to those affected by the 2017 flooding in Houston, TX, Enchanted Makeovers and Domestic Abuse Intervention Services (DAIS). Read about our 2018 goal, below!
Nancy Zieman Productions and Wisconsin Public Television would like to thank the many Quilt Expo Volunteers, Quilt Expo Attendees, the talented team at M&R Sewing and Vacuum, and the team at Baby Lock Sewing Machines for your many years of sponsorship and service of Nancy Zieman’s Quilt To Give.
Several kind souls present completely finished quilts at Quilt Expo— New Quilts of all patterns and colors are welcome.
Quilting groups also take on the challenge
Others donate time during the Quilt Expo event

Receive a Quilt To Give Volunteer Pin
Receive a Quilt To Give Volunteer Pin when you stop in and stitch 30 min., donate fabric in bright colors (1/4 yd. or more), and/or donate a finished/new bed quilt!

Bed-sized quilts are in demand
We’re looking forward to seeing some of the NZP blog readers at the Quilt Expo in Madison, WI, September 6–8, 2018. For many of you, the logistics of attending may not be in the cards. Yet, we encourage you to make one of these easy Quilt to Give projects with the intent of giving it away!
Bed-size quilts of all sizes are welcome. Twin-sized quilt donations are great, too—twin-size is the size we’ll be sewing during the event, too. Why? Two organizations that will be receiving finished quilts, Enchanted Makeovers and Domestic Abuse Intervention Services (DAIS) have both requested this particular size. Enchanted Makeovers services national women’s shelters and Domestic Abuse Intervention Services (DAIS) is a Madison-area woman’s shelter with twin-sized beds in each room.
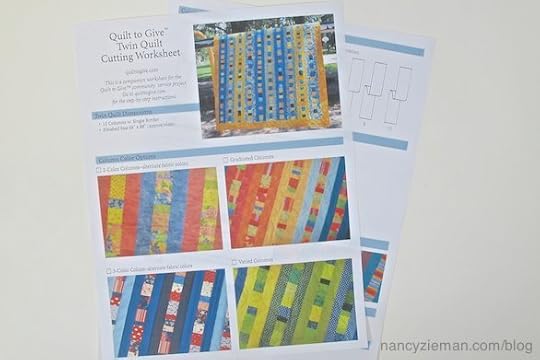
Make a quilting plan
Download the twin-sized quilt worksheet. Click here to download the twin-sized quilt worksheet . It will assist you in sorting and cutting fabrics.
Sort fabrics from your stash. Begin by selecting a print or prints that will be used as the inspirational fabrics. Then choose other fabrics that coordinate with the inspirational fabric.
Gather solid-color fabrics that coordinate or match with the inspirational fabrics. Choose many solids or mottled fabrics (subtle prints that appear as solid colors from a distance) as possible for this project. Click here to read the full lesson on sorting fabrics.
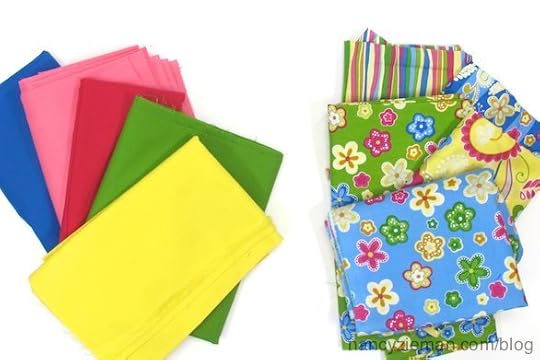
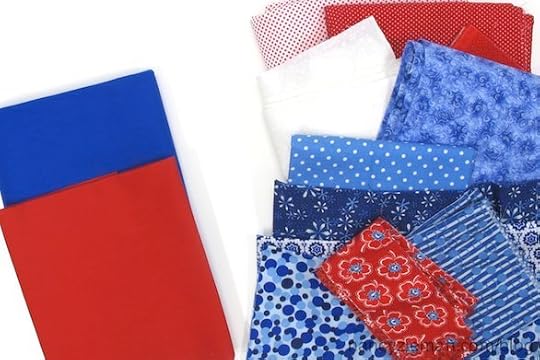
Determine which fabrics will be the outside columns (the more solid the better) and which will be used for the scrappy center columns. Fill out the worksheet to denote which fabric colors will go where.

Free online instructions
Here are links to all 10 Quilt to Give Lessons, or visit QuiltToGive.org.
The Easiest Ever Quilt to Give Design
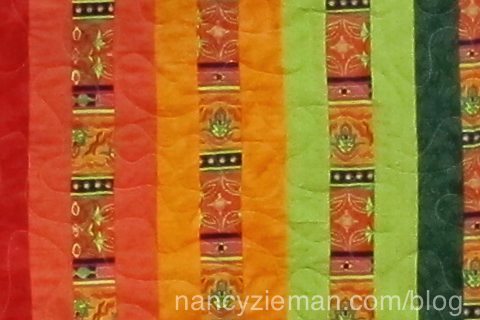
During our first community quilting project, a donation of four yards of striped fabric with a salsa flavor was given. Great donation, but it just didn’t seem to fit with any other fabrics.
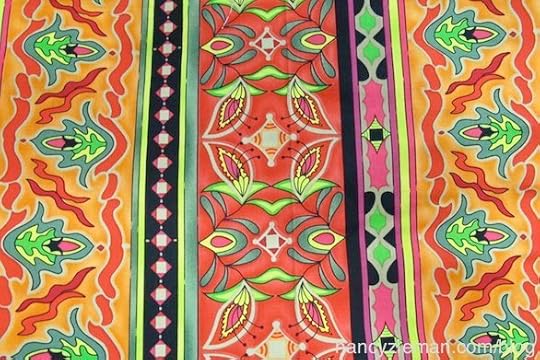 Then it dawned on Nancy to use the striped fabric as the center section of each column—no piecing needed for the center columns! You’ll find optional fabric cutting instructions when using a stripped fabric when you download the twin-sized quilt worksheet
Quilt To Give by the Numbers
2011: Thirty-five quilts were collected and an additional 10 were completed during the show. Quilts were distributed locally and twenty-five were sent to Joplin, MO.
2012: Twenty-five quilts were collected and 11 were completed during the show, which were distributed to those in need by Baby Lock dealers across the country.
2013: Sixteen quilts were collected and 15 were completed during the show, which were distributed to those in need by Baby Lock dealers across the country.
2014: Twenty-one quilts were collected and 10 were completed during the show and
donated to Enchanted Makeovers and Domestic Abuse Intervention Services (DAIS).
2015: Thirty-five quilts were collected and an additional 10 were completed during the show and donated to Enchanted Makeovers and Domestic Abuse Intervention Services (DAIS).
2016: Fifteen quilts were collected and an additional 12 were completed during the show and donated to Enchanted Makeovers and Domestic Abuse Intervention Services (DAIS).
2017: Seventeen quilts were collected and an additional 11 were completed during the show and donated to those affected by the 2017 flooding in Houston, TX, Enchanted Makeovers and Domestic Abuse Intervention Services (DAIS).
2011-2017 Totals: 267 Beautiful Bed Quilts! (164 donated and an additional 79 completed on site at Quilt Expo).
267 Total Beautiful Bed Quilts—to date—Donated to Individuals and Families in Need!
2018: Plans are underway to complete 16 bed quilts onsite with hopes to collect 17 bed quilts at the 2018 Quilt Expo, September 6–8, 2018. (16+17 = 33 Quilts!) This is our largest quilt goal to date! With your help, we will collect and sew 33 quilts, and achieve 300 quilts made with Nancy Zieman’s Quilt to Give community service project.
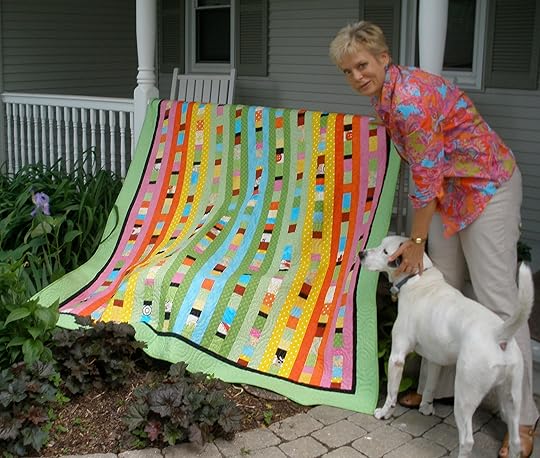
Nancy & Lucas with Nancy’s First Quilt To Give, 2011
For a chance to win two tickets to Quilt Expo, and four fat quarters, please leave a comment below showing your support for Nancy Zieman’s Quilt to Give.

Happy Quilting,
Team Nancy Zieman
Nancy Zieman Productions, LLC.
Content in this feed is © copyright 2018 by Nancy Zieman Productions, LLC and may not be republished without written permission. You’re welcome to forward the email to a friend or colleague but it’s not okay to add the RSS feed automatically as content on a blog or other website. The FTC requires us to tell you that Nancy Zieman Productions, LLC has provided products by other companies in the course of doing business. The FTC requires us to advise you to take this information into consideration when reading this posting.
Make sure you are subscribed to Nancy Zieman Productions, LLC enews mailing list so you won’t miss a thing. Sign up here . Join us on Facebook , plus a host of other social media channels. Connect With Nancy and Friends today!
August 25, 2018
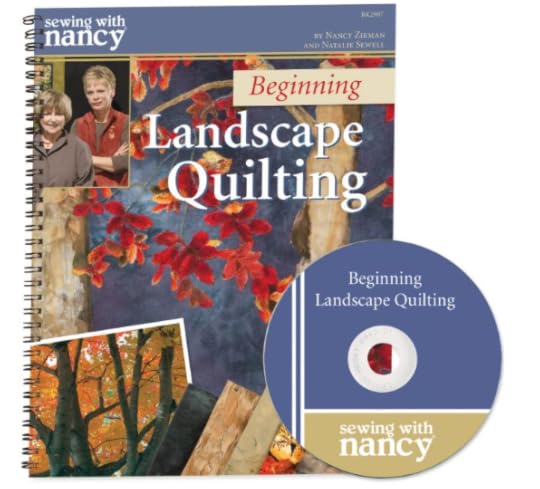
Beginning Landscape Quilt Artistry
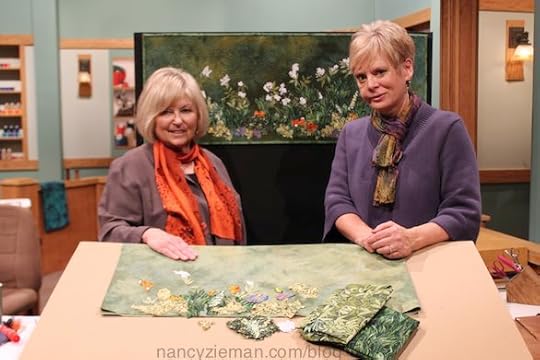
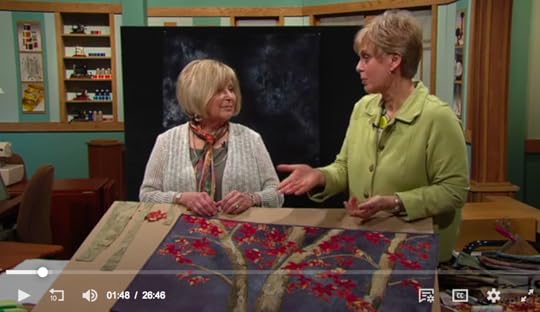
 Two of Nancy’s favorite hobbies were sewing and gardening. More than 20 years ago, Nancy was introduced to landscape quilting techniques by Natalie Sewell, nationally known landscape quilt artist. Natalie and Nancy became best friends and scheduled two or three quilting dates each year. During their final three-part Sewing With Nancy series, Beginning Landscape Quilting, their simplified the process so that everyone interested could enjoy the pleasure of creating outdoor scenes in fabric.
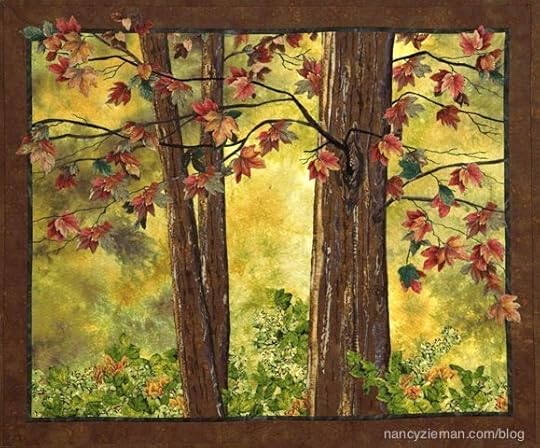
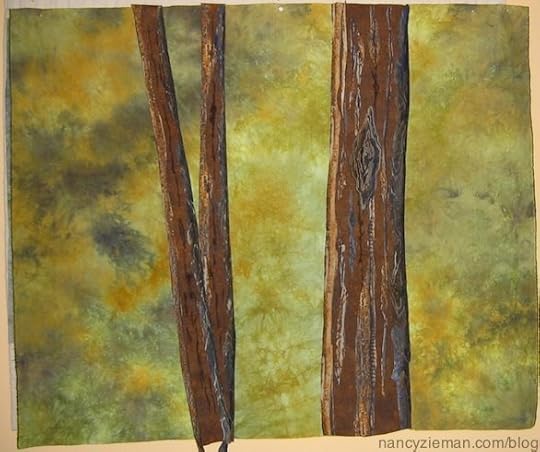
 Here’s a blog exclusive quilting tutorial on how Nancy created the scene, Wolf River Woods.
A photo was used as the inspiration for the design. Nancy did not interpret the design literally—it was used as a guideline.

The hand-dyed background fabric sets the mood for the scene—a sunny autumn day. The leaf and tree fabric choices seem to echo the colors playing across the canvas.

It’s nice to work on a design wall—a layer of flannel and Quilted Iron Quick sewn like a large pillow (without the pillow form) and a casing added at the top, through which you insert a curtain rod. This design wall is portable, although it can be hung year ’round.
Three brown trees, one fat and two skinny, are the first elements in the quilt. Roughly cut out the trees and glue them to the background fabric with a paper glue stick. No worries, the glue dries fast and clear and will not gum up your sewing machine.
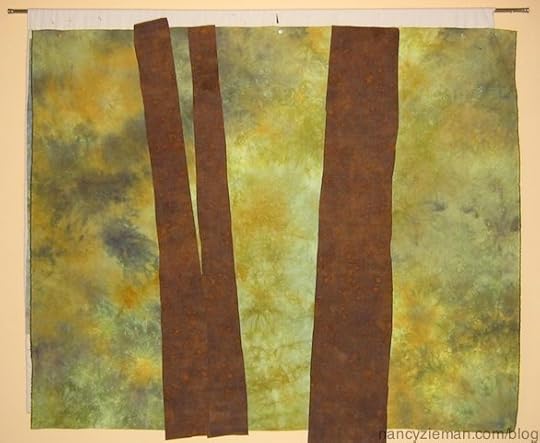
Add texture to the trees by cutting strips of the remaining two bark fabrics and gluing them to the tree trunks. One of the fabrics had a splendid knothole, which Nancy cut out and glued to the fattest tree. After deciding that the light came from the left, she shaded all three trees on the right with a black Sharpie marking pen.
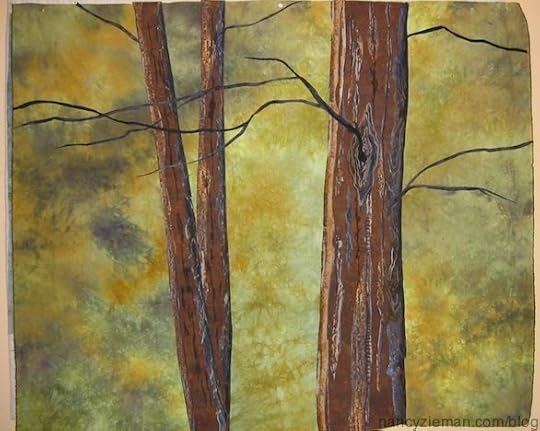
Next, she added dark branches to all three trees by cutting skinny strips of her darkest fabric.
Then, Nancy began the slow but satisfying process of adding leaves, carefully cut from the large leaf fabric depicted in the photo.
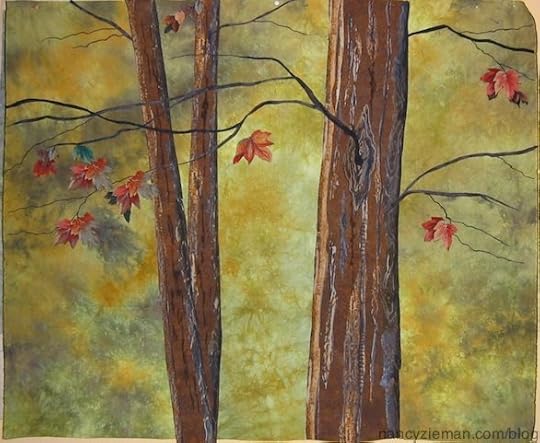
After adding many more leaves (mostly red but a few green), Nancy messy cut the two ground cover fabrics, using both their right and wrong sides. To enhance the fall mood, she “diced” up a few of the red and gold leaves with her favorite scissors and sprinkled them on the ground cover. Notice how few leaves it takes to convey a wooded scene in fabric compared with the thousands a photograph would depict.
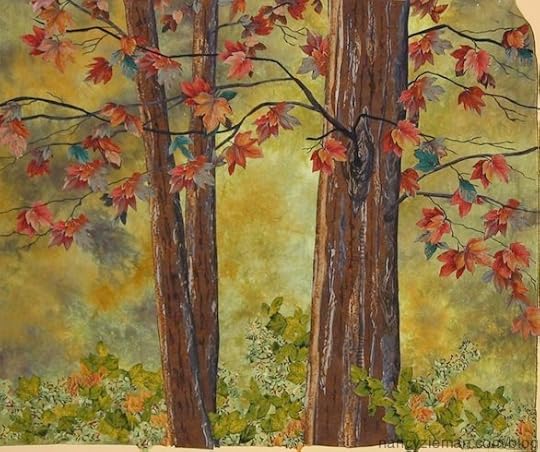
The design process continues after adding borders. A few leaves and branches in the border lend drama to the design.
Overview of the finishing steps
Landscape quilting bends many quilting rules. Messy cutting, fussy cutting, basting with a paper glue stick, and using the other right side of the fabric as well as the traditional right side are just a few of the ways that Natalie and Nancy show you how to be creative with fabric.
After designing, tried ’n true quilting techniques take over. The raw edges are basted down using free-motion techniques with clear thread in the needle, the quilt is squared, borders can be added, batting and backing are layered and then are stippled.
For more design ideas, watch Beginning Landscape Quilting ( Part One, Part Two and Part Three) on Sewing With Nancy online.
This fall at Quilt Expo, we’re please to be honoring Natalie Sewell and Nancy Zieman with a Special Landscape Quilt Legacy Exhibit. The Sewell Family from Madison, WI, and the Zieman Family from Beaver Dam, WI, have graciously provided, on loan, a large collection of Natalie’s and Nancy’s Landscape Quilts. The Natalie Sewell and Nancy Zieman Landscape Quilt Legacy Exhibit will be on display at Quilt Expo in Madison, WI, September 6–8, 2018.

Their love of landscape quilting brought Nancy and Natalie together. Remember them as you give it a try. Tell us which season you would most like to capture in landscape quilt imagery? Leave your answer in the comment section below for a chance to win two tickets to Quilt Expo, and a copy of the Beginning Landscape Quilting book/DVD from Nancy’s Notions. One winner will be randomly selected.
Happy Quilting,
Team Nancy Zieman
Nancy Zieman Productions, LLC.
Content in this feed is © copyright 2018 by Nancy Zieman Productions, LLC and may not be republished without written permission. You’re welcome to forward the email to a friend or colleague but it’s not okay to add the RSS feed automatically as content on a blog or other website. The FTC requires us to tell you that Nancy Zieman Productions, LLC has provided products by other companies in the course of doing business. The FTC requires us to advise you to take this information into consideration when reading this posting.
Make sure you are subscribed to Nancy Zieman Productions, LLC enews mailing list so you won’t miss a thing. Sign up here . Join us on Facebook , plus a host of other social media channels. Connect With Nancy and Friends today!
August 23, 2018
“Easy Peasy” Fleece Accessories
Looking for speedy sewing projects? Search no further. Tune in to Sewing With Nancy online or on PBS to learn how to sew fleecy fabrics, using Nancy’s favorite sewing techniques. During this first episode, we use simple sewing pattern shapes to create comfy accessories. Polar fleece, stretch fleece velour, and flat-back knits are just a few of the fabrics that can be transformed from yardage to fashion and home accessories in a short time.

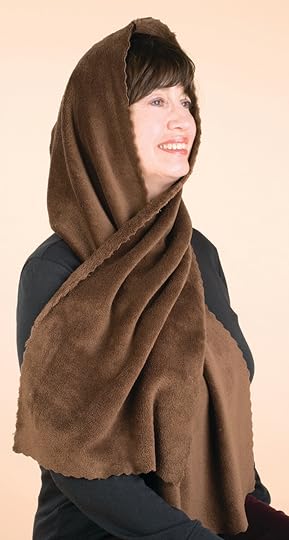
The first accessory you’ll learn to create is the 2-in-1 scarf. As a scarf it hugs around your neck; as a hoodie it keeps you warm when the weather turns brisk. It’s a super-quick fleecy project—an ideal way to begin this mini series entitled, Fast and Fleecy Accessories.
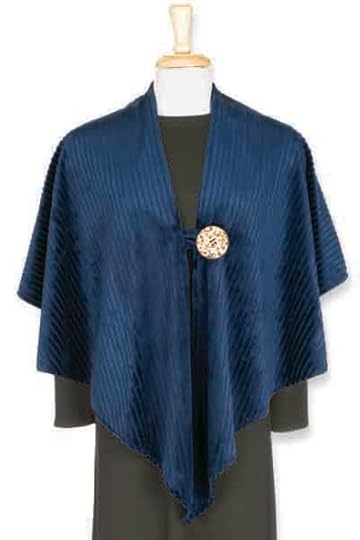
When you feel chilled, the best way to be comfy is to layer with a fleece wrap. Designed to hug your shoulders, this wrap will assuredly stay in place. See how you can easily make this No-Slip Wrap with fleecy fabric.
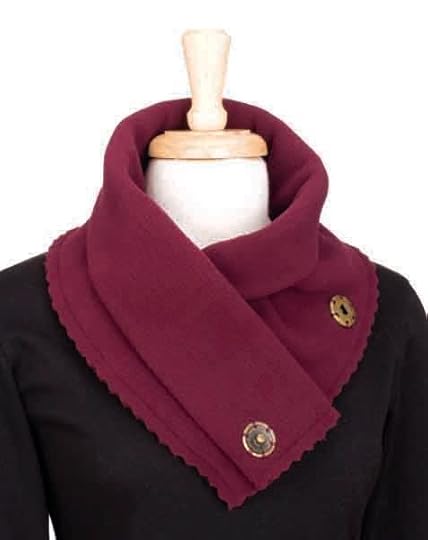
Cozy, yet without being bulky, that’s what best describes the Cowl Scarf. Snapped closed, it hugs your neckline without layers under a coat or jacket. If buttons are more your style, add details with easy-to-sew buttonholes designed for knits.
Here’s a comfy scarf that requires no knotting or fasteners of any kind, making it less bulky. Best of all, it always stays tied.
Have any fleece waiting to be sewn? You can find easy instructions in the book by the same name, Fast and Fleecy Accessories.

Watch the first episode at Sewing With Nancy online.

The randomly selected winner of the 30-Minute Doll Clothes book and DVD is Marie Gregersen

Her comment is: The “Meet Me at the Mall” ensemble and The “Tea Time” outfits are my favorites. I would make them both. I have lots of fabric and a couple dolls who need clothes.
Happy Sewing,
Team Nancy Zieman
Nancy Zieman Productions, LLC.
Content in this feed is © copyright 2018 by Nancy Zieman Productions, LLC and may not be republished without written permission. You’re welcome to forward the email to a friend or colleague but it’s not okay to add the RSS feed automatically as content on a blog or other website. The FTC requires us to tell you that Nancy Zieman Productions, LLC has provided products by other companies in the course of doing business. The FTC requires us to advise you to take this information into consideration when reading this posting.
Make sure you are subscribed to Nancy Zieman Productions, LLC enews mailing list so you won’t miss a thing. Sign up here . Join us on Facebook , plus a host of other social media channels. Connect With Nancy and Friends today!
August 21, 2018
Sew the Absolute Easiest Pillows Ever!

As the calendar turns to August, it’s time to start thinking back to school. Show your support by making a pillow for a special student in your life. Pillows are a go-to project for any skill level, they’re quickly sewn in most any size, and they can be made in multiple styles!
Tutorials Included
Wrapped Pillow Corners
Boxed Pillow Corners
Envelope Pillow Backs
Embroidered Pillow Wraps
Recycled Button-up Shirt Pillow
Throw Pillows Made from Quilt Blocks
Pillows from Quilted Fabrics
Wrapped Pillow Corners
Pillows, collars, and cuffs are just a few of the areas where corners need to be sewn. Cast aside the traditional technique and incorporate Nancy Zieman’s “absolute easiest way” to handle sewing corners. Learn to make crisp pillow corners using this tutorial .
Boxed Pillow Corners
Give your living space a breath of fresh air by sewing new pillows. These boxed-cornered pillows are almost effortless to make. Learn how to add a nice boxy edge to each of the four corners. Learn how to make the boxed-corner pillows here .
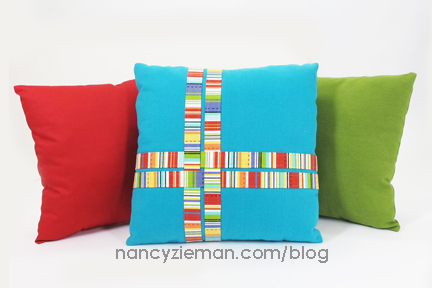
Envelope Pillows
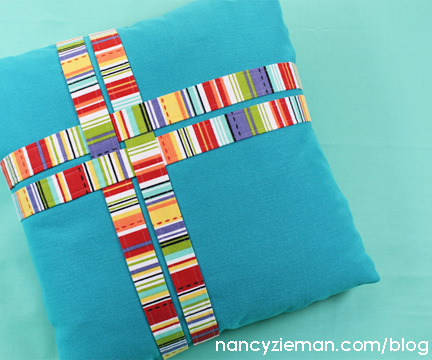
You can, of course, make any pillow design you wish. We thought this easy pattern might spark your creative juices. The Lattice Pillow features four machine appliquéd strips of fabric interlaced on a solid square. The pillow back is created in an envelope style and uses a hook-and-loop closure.
Embroidered Pillow Wraps
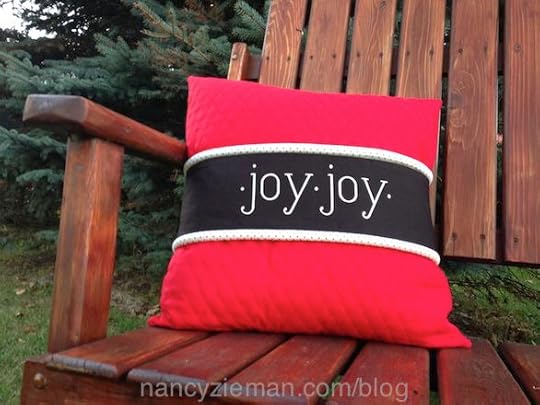
You can easily change your home décor with a little fabric and a great embroidery design with this pillow wrap project. Embroider a seasonal motif on fabric or choose an elegant fabric design to complement your décor. Then, follow these simple directions to create a pillow wrap, or two! We’ve made this pillow wrap two-sided, which will save time, fabric, and add a splash to the family room all year ’round. Find the embroidered pillow wrap tutorial here .
Recycled Button-up Shirt Pillow
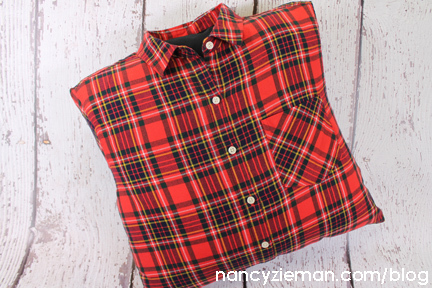 Lumberjack Pillow—from a flannel shirt: We call this recycled-garment project our Lumberjack Pillow, although you could make this from a loved ones’ shirt and sew a memory pillow as well. The technique used to fit the shirt around the pillow form allows for many shirts and pillow sizes to be created easily.
Throw Pillows Made From Quilt Blocks
 Along our quilting journey, we try new techniques and test interesting ideas. Sometimes these valuable lessons and attempts yield “orphan blocks” or leftover quilt blocks that don’t belong to a larger quilt. Take one or more of these treasured quilt blocks and sew them into throw pillows. It’s an easy idea that doesn’t require any additional quilting! See how easy it is to convert your quilt blocks to pillows using this tutorial.
Pillows from Quilted Fabrics
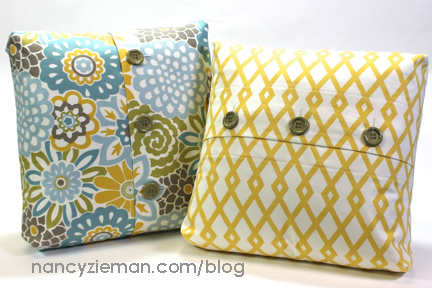
 Making pillows from double-sided prequilted fabrics is easier than you think! Nancy was smitten with the quilted eyeglass frames and polka dot duo from Riley Blake, knowing that a trio of pillows were destined for this playful fabric. Learn how to work with this fabric type in the Pillow Trio Tutorial.
Pillow Size Reference Chart:

Watch Absolute Easiest Way to Sew (Part One, Part Two, and Part Three) on Sewing With Nancy online.

The randomly selected winner of Sew Smart-A Three Season Jacket DVD, from Nancy’s Notions, is Nina. 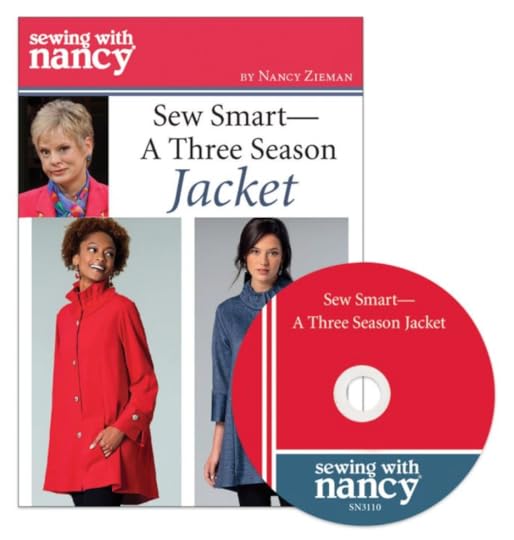 Her comment is: Not only are your designs interesting and easy to wear, but your pattern directions are excellent. I recommend your patterns to others.
Happy Sewing,
Team Nancy Zieman
Nancy Zieman Productions, LLC.
Content in this feed is © copyright 2018 by Nancy Zieman Productions, LLC and may not be republished without written permission. You’re welcome to forward the email to a friend or colleague but it’s not okay to add the RSS feed automatically as content on a blog or other website. The FTC requires us to tell you that Nancy Zieman Productions, LLC has provided products by other companies in the course of doing business. The FTC requires us to advise you to take this information into consideration when reading this posting.
Make sure you are subscribed to Nancy Zieman Productions, LLC enews mailing list so you won’t miss a thing. Sign up here . Join us on Facebook , plus a host of other social media channels. Connect With Nancy and Friends today!
August 18, 2018
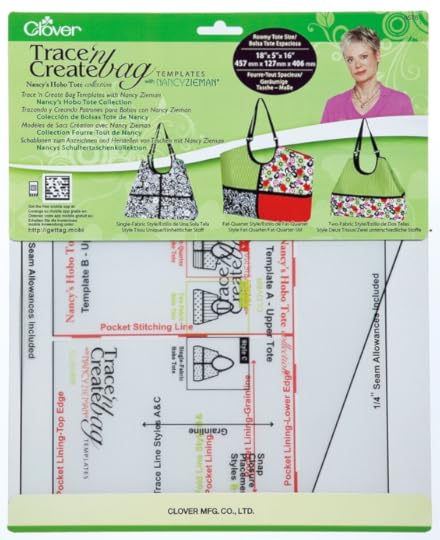
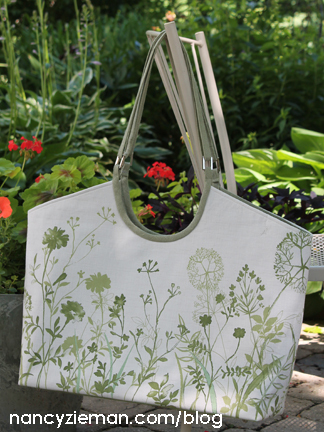
Sew A Designer Hobo Tote
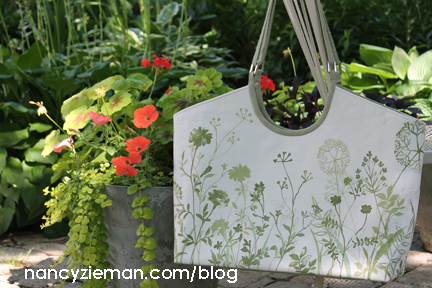
When it’s time to sew a new tote, choose a fabric border print and let the artistic design simplify the sewing process.
Border print fabrics are easy to fussy-cut. If you aren’t familiar with the term, fussy-cut, it means to feature a certain portion of the textile print in your sewing design. Using the Trace ’n Create Hobo Tote Template collection, a border print designer upgrade is quite simple.
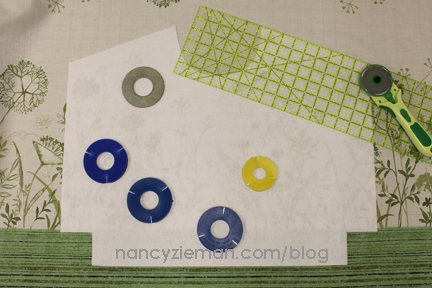
Supplies, fabric, and notions:
Pellon Peltex Interfacing: One-Sided Fusible
Fine-tip non-permanent marking pen
Border Print Fabric
 Use the fabric requirements listed on the Hobo Tote pattern. Keep in mind that you may need extra yardage to center the design. The fabric from Lecien is, unfortunately, no longer available. Shop at your local fabric retailer for the newest in border prints.
Trace ’n Create Hobo Tote Bag Template
 Modify the Template
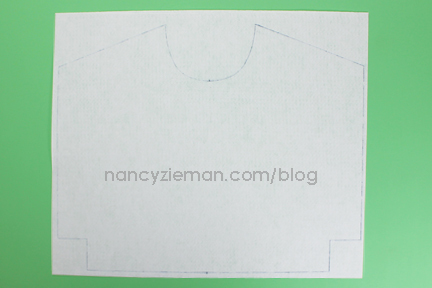
To easily fussy-cut the border print, we’ll create a full front/full back template from the provided pattern as described in the Hobo Tote: Style B.
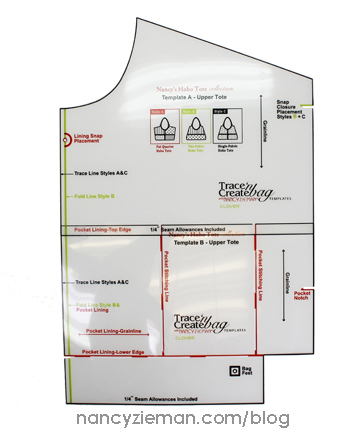
Lay the bag template on the Peltex Interfacing.
Use a non-permanent marking pen to trace around the template marking center front/back. Notice the center is not the edge of the template, but rather the marked seam allowance line shown in yellow.
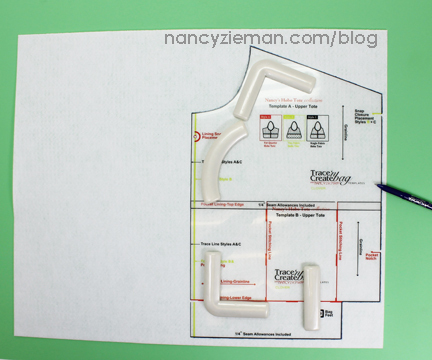
Flip the template to the left-hand side.
Align the center front markings and trace the left side of the bag.
Make two Peltex interfacing templates: one front and one back.
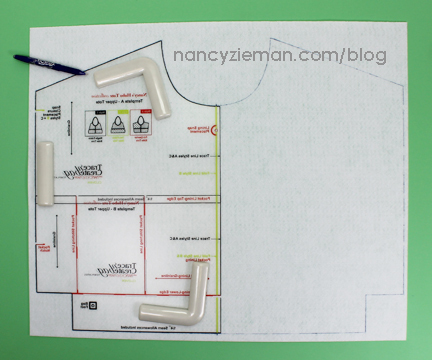
Cut out the Peltex interfacing templates.
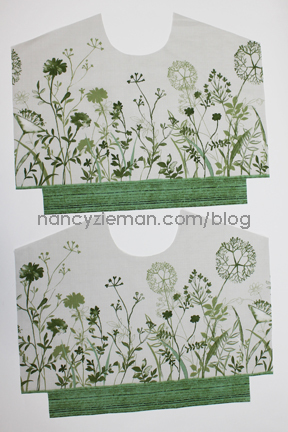
Position each interfacing shape over the border print.
Nancy decided to only showcase the floral portion of the fabric design. Notice that the Peltex is positioned with the bag base plus the 1/4″ seam allowance on the green section.
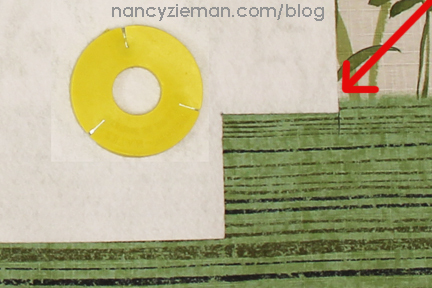
Cut the shape.
Fuse the Peltex Interfacing to the wrong side of the fabric, following the manufacturer’s directions.
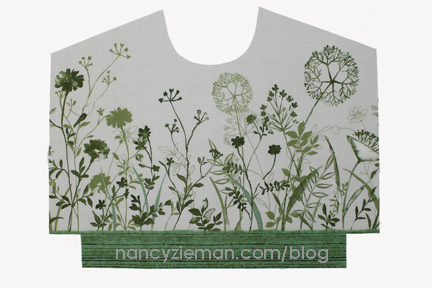
Repeat these steps to create a bag front and bag back.
Join the bag front and back by stitching the bottom seam.
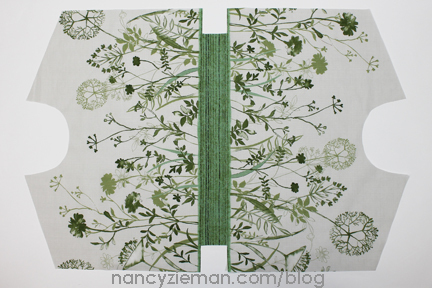
From this point, the border print designer tote can be stitched following the directions for the Hobo Tote: Style B.
Watch Hobo Totes—Casual To Classic on Sewing With Nancy online.
For a chance to win a Trace ’n Create Hobo Tote Bag Template from Clover Needlecraft, Inc., please leave a comment below sharing your Hobo Tote stitching plans.
Happy Sewing,
Team Nancy Zieman
Nancy Zieman Productions. LLC.
Content in this feed is © copyright 2018 by Nancy Zieman Productions, LLC and may not be republished without written permission. You’re welcome to forward the email to a friend or colleague but it’s not okay to add the RSS feed automatically as content on a blog or other website.
The FTC requires us to tell you that Nancy Zieman Productions, LLC has provided products by other companies in the course of doing business. The FTC requires us to advise you to take this information into consideration when reading this posting.
Make sure you are subscribed to Nancy Zieman Productions, LLC enews mailing list so you won’t miss a thing. Sign up here . Join us on Facebook , plus a host of other social media channels. Connect With Nancy and Friends today!
August 16, 2018
Sew More Stylish Doll Clothes in 30-Minutes
 Raising two boys, sewing doll clothes wasn’t on Nancy’s radar. So when Joan Hinds approached her on the topic of sewing doll clothes as a Sewing With Nancy topic, Nancy had to stop and think. Wow, she hadn’t thought of that before!
Joan’s take on the topic is to make simple styles in 30 minutes! That’s our kind of sewing! Recording the series was great fun, with Nancy’s adorable granddaughters as the prime reason. Plus, Nancy knew that many of you are in the doll clothes mode too, which was reflected in the interest shown in this series.
The second episode of 30-Minute Doll Clothes is this week’s online Sewing With Nancy feature. Watch online or on Public TV.
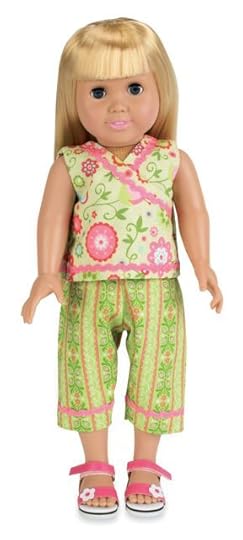
Playtime Top
This show begins with a playtime ensemble. Playtime is imagination time. Your little girl and her doll will go on all sorts of adventures, while you supply the wardrobe.
School Days
A little girl can get her doll dressed for the first day of school in a coordinating red, white, and blue outfit. The vest, top, and skirt each take 30 minutes or less to stitch. The sewing is made simple with flat construction tips.
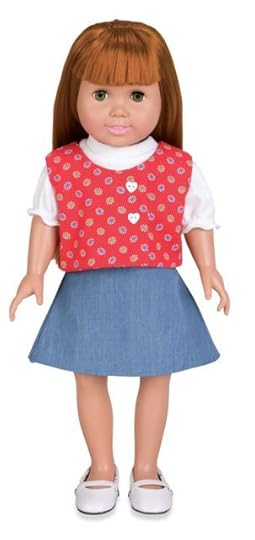
Blog Bonus: Since the recording of this series, Joan continues to make doll clothes. This update on the School Days outfit has a ribbon accent. Joan stitched ribbon ½″ above the hemline. But before stitching, use paper-backed fusible web to attach the ribbon to the fabric. The top is from the Birthday Party Trio, see last week’s blog. The overlay is eliminated, the top edge is turned under, and the ribbon is attached to the top edge.

Jiffy Jumper
There were three criteria for doll clothes in Nancy’s book: cute, easy to make, and durable! This Jiffy Jumper fits all the benchmarks with ease. Flat construction, fusing, and serging are components for success.
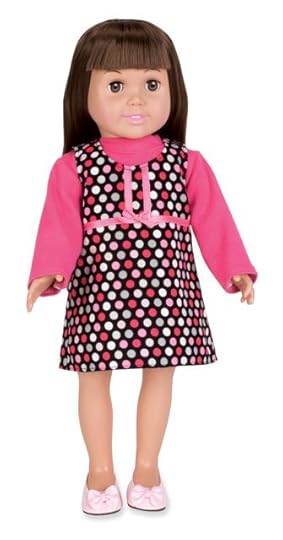
Sweet Dreams
Your little girl can dress her doll for sweet dreams after you make a simple nightshirt out of mere inches of fabric. We have a few helpful hints to assist you in streamlining the sewing process.

You’ll find all the instructions and the sewing patterns for these doll clothes and more in the book and DVD, 30-Minute Doll Clothes. Or, you can watch this show online.
Watch Sewing With Nancy online.
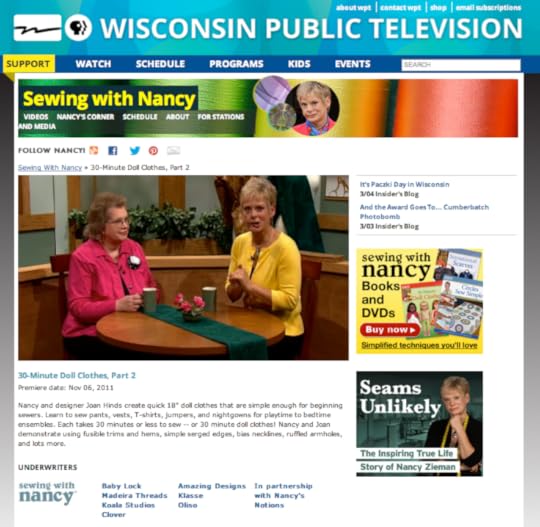
There are 52 programs to watch online, or on your iPad, iPod Touch, or iPhone. Have you downloaded the app?
For a chance to win a 30-Minute Doll Clothes book and DVD, tell us which doll outfit you would like to make for an 18 inch doll.
Happy Sewing,
Team Nancy Zieman
Nancy Zieman Productions, LLC.
Content in this feed is © copyright 2018 by Nancy Zieman Productions, LLC and may not be republished without written permission. You’re welcome to forward the email to a friend or colleague but it’s not okay to add the RSS feed automatically as content on a blog or other website.
The FTC requires us to tell you that Nancy Zieman Productions, LLC has provided products by other companies in the course of doing business. The FTC requires us to advise you to take this information into consideration when reading this posting.
Make sure you are subscribed to Nancy Zieman Productions, LLC enews mailing list so you won’t miss a thing. Sign up here . Join us on Facebook , plus a host of other social media channels. Connect With Nancy and Friends today!
August 14, 2018
Sew Smart-A Three-Season Jacket
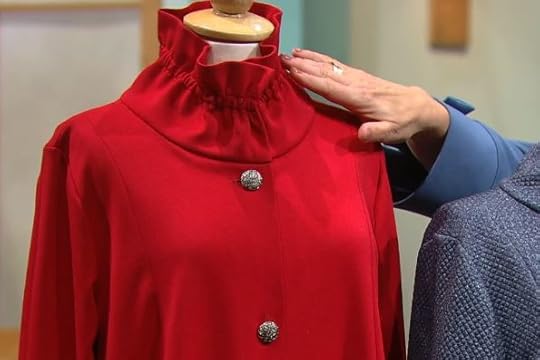
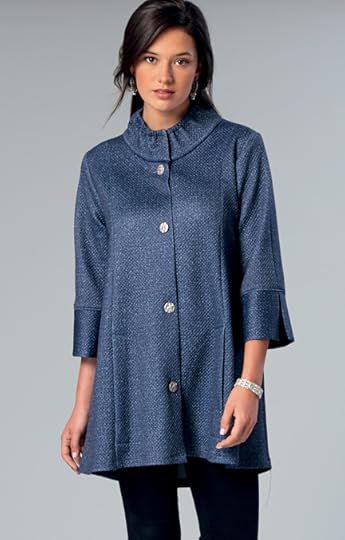 If it’s been awhile since you stitched a jacket, take an easy approach and create a swing-style version made from comfy, fashionable knit fabric. Tune in and watch Nancy as she shares her time-saving knit sewing tips and techniques. Jackets are flattering and versatle you can personalize with style options. The fabric of choice is Ponte Knit, a fabric that stitches like a woven, but is as carefree as the knit it is. Sew Smart—A Three Season Jacket is today’s featured Sewing With Nancy episode.
Pattern Basics
Opt to make a full sleeve or shorten it slightly. To give the jacket its shape, choose a garment with a back yoke, and interesting design lines. Nancy breaks down the sewing on today’s Sewing With Nancy featured show, Sew Smart—A Three Season Jacket.
Interfacing and Lining Basics
Use knit tricot interfacing when working with knit fabrics. It mimics the drape of the garment perfectly. Use interfacing strips to stabilize shoulder seams and pocket area. Learn why these steps are so important on today’s episode of Sew Smart—A Three Season Jacket.
Jacket Seams
Tackling a project is best broken down into segments. Think of sewing a section at time: the sleeves, the garment back, constructing the collar. Find out what steps Nancy recommends to sew first on Sew Smart—A Three Season Jacket. She’ll also address the type of stitch to use when working with knit fabrics.
Collars and Cuffs
Learn how to create a collar and cuffs with knit interfacing and transferred pattern markings. The markings are critical to creating the casing, an opening for the elastic, on the collar design.
Sleeves and Buttonholes
Nancy’s tips for setting-in sleeves and creating buttonholes will take the stress out of future garment making. We often hear from seamstresses that these two steps are not a favorite. Let the feed-dogs do the easing when working with knit sleeves. Also, learn how to create automatic buttonholes using your own sewing machine. Watch Sewing With Nancy.
A three-season jacket will add variety, warmth, and comfort to your wardrobe.
Watch Sew Smart—A Three Season Jacket on Sewing With Nancy online.
For a chance to win a copy of the Sew Smart-A Three Season Jacket DVD, from Nancy’s Notions, please leave a comment below.

The randomly selected winner of a Sewing Today’s Fashion Trends—Tunics DVD from Nancy’s Notions, is Marvel Donovan.

Her comment is: I love tunics!! They are so easy to make and wear. Perfect sewing projects for all levels of experience.
Happy Sewing,
Team Nancy Zieman
Nancy Zieman Productions, LLC.
Content in this feed is © copyright 2018 by Nancy Zieman Productions, LLC and may not be republished without written permission. You’re welcome to forward the email to a friend or colleague but it’s not okay to add the RSS feed automatically as content on a blog or other website.
The FTC requires us to tell you that Nancy Zieman Productions, LLC has provided products by other companies in the course of doing business. The FTC requires us to advise you to take this information into consideration when reading this posting.
Make sure you are subscribed to Nancy Zieman Productions, LLC enews mailing list so you won’t miss a thing. Sign up here . Join us on Facebook , plus a host of other social media channels. Connect With Nancy and Friends today!
Nancy Zieman's Blog

- Nancy Zieman's profile
- 21 followers

