
Nancy Zieman's Blog, page 114
March 19, 2016
2016 Quilt Extravaganza—March Block of the Month

The third block of the 2016 Quilt Extravaganza is here! This month, you’ll learn how to create a contemporary quilt block, featuring semicircles machine appliquéd to the scrappy background fabrics. Use the Carefree Curves Template to create the shapes easily and without setting in any curved seams.
Have you selected fabrics and created the strata for your 2016 Block of the Month? Check out the details in the January 9 blog. I encourage you to use as many scraps from your stash as possible. I’m using bright and neutral fabrics in this quilt.

All blocks for 2016 will be created from pieced fabric strata. Read more on this blog post.


Block #3: Opposites Attract
Supplies:
One neutral fabric strata
One bright fabric strata
Lightweight fusible interfacing
Point 2 Point Turner
Trace ‘n Create Carefree Curves Template Set
Monofilament thread
Fine Tip Non-Permanent Marking Pen
Cut Fabrics
Cut the following fabric and interfacing pieces:
From each bright and neutral strata cut one 6-1/2″ x 12-1/2″ fabric rectangle (background).
[image error]
From each bright and neutral fabric strata cut one 10″ x 10″ fabric square (for circles).
Cut two 10″ x 10″ interfacing rectangles (for circles).
Cut one 1″ x 12-1/2″ fabric rectangle (dividing strip).
Create the Semicircles
Using the 10″ x 10″ fabric and interfacing rectangles, pin the smooth side of the interfacing on the right side of the fabric. Make two pair; one bright strata and one neutral strata.
[image error]
Fold circle in half matching pins and wrong sides.
Press.

Remove pins. Unfold.
Use rotary cutting tools to cut along the pressed foldline.
Note from Nancy
Pin together and save the unused semicircles. You’ll be using these sections in a later month.


Fold the background fabric in half to find the center. Lightly finger press.

Fold the semicircles in half to find the center. Lightly finger press.
Align the centers and cut edges of each semicircle and background fabric.

Pin semicircles to the backgrounds.
Edgestitch with monofilament thread .
Note from Nancy
Notice in the photo I used an open toe foot and a narrow blanket stitch to stitch the circle to the background. Each point takes a small dip into the circle itself. Choose a blanket stitch, decorative stitch, or straight stitch to apply the shapes.

Lay out the block with the center dividing strip.
Note from Nancy
Consider auditioning different center strips to decide on the best complimentary color.


March 17, 2016
Wind Chime Quilt—Fresh for Spring

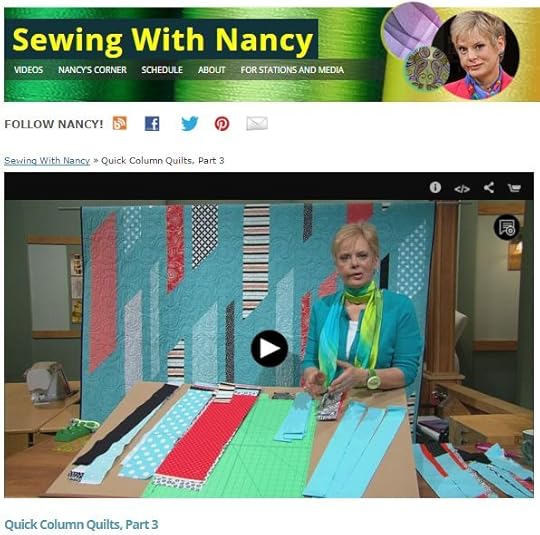
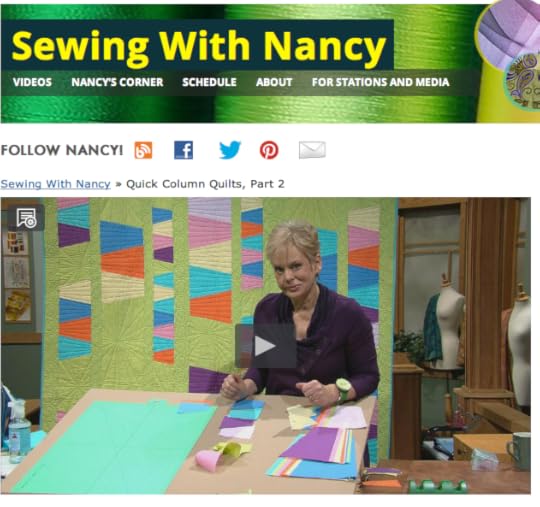
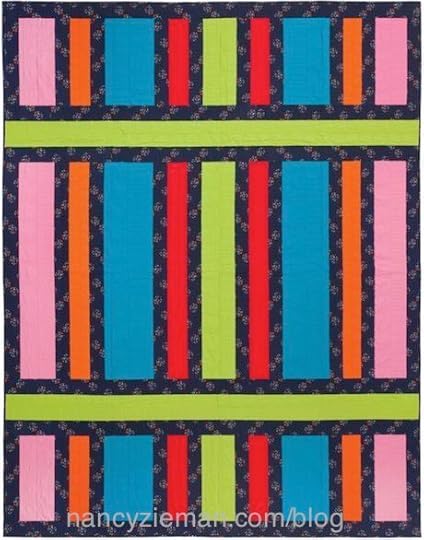
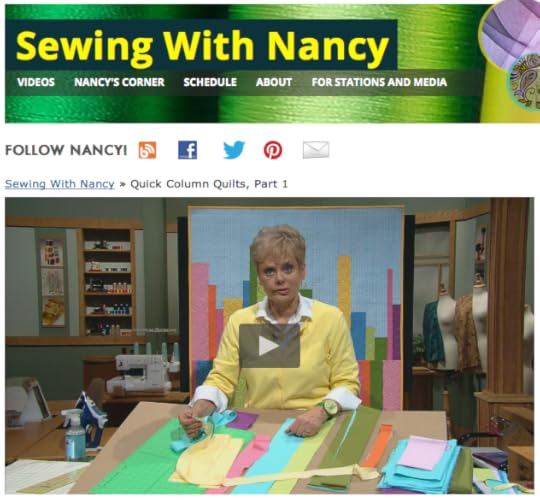
As you probably know, I am a big fan of making interesting projects with quick methods. Sometimes, like many of you, I just do not have the time to devote to a complex intricate design. When I started designing quilts with columns instead of traditional quilt blocks, my head spun with ideas and I found the designs appeared complex and intricate, with ease of construction. Welcome to the third blog post and third Sewing With Nancy episode in the series on my book on Quick Column Quilts.
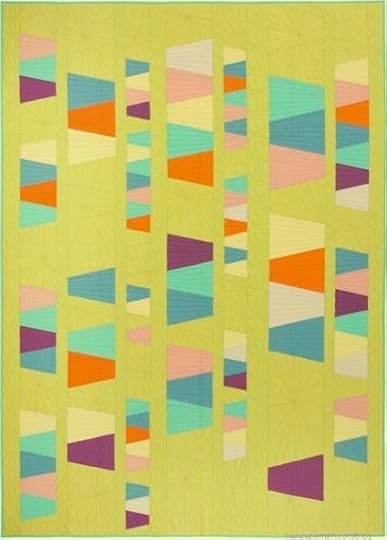
Wind Chime Column Quilt

The wind chimes hanging from our deck served as the inspiration for this Wind Chime Column Quilt. Just like real wind chimes, the angled accent pieces, seem to move as if gently nudged by the wind. Here’s a little preview of how I designed this column quilt.
Auditioning fabrics: You’ll learn how to use a print fabric to audition other fabrics to see if they’re compatible. The striped fabric served as the color inspiration for this quilt. All of the “wind chime fabrics” came from my stash.
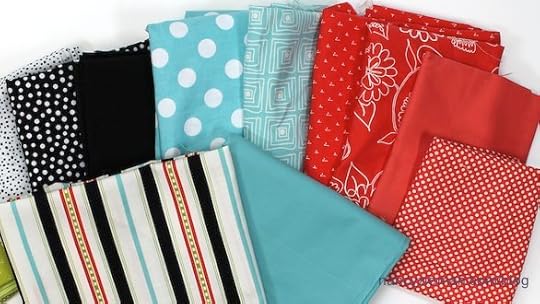
Waste not want not: Since some of the fabrics were short on yardage, I designed a way to use every inch of a strip. You’ll have to tune into the show to learn this technique. It’s easier to see it demonstrated than to write about it. Just call me lazy!
Folded Flying Geese Wall Hanging
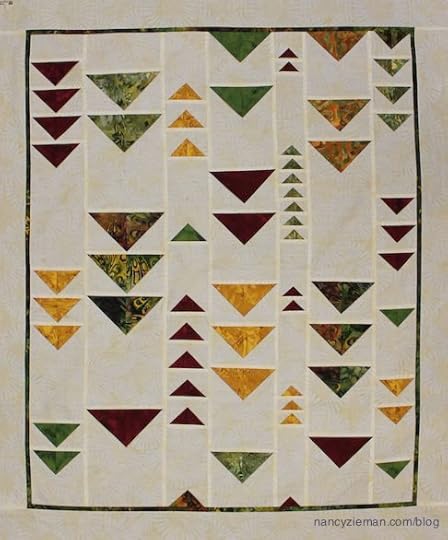
No half-square triangles are needed to make these artistic Flying Geese. Start with squares, fold three times, and presto the folded triangles create 3-dimensional Flying Geese. Plus, the background columns are not cut, but rather one piece of fabric. Hmm, it’s kinda interesting.
Floating Squares Column Quilt

This double-sized quilt looks difficult to make, but not so! The darker squares float on the light background of the quilt top, made with some creative cutting and sewing of crosswise strips. Not to worry; you will not be required to cut squares. I’ve opted for a quick-to-make column quilt!
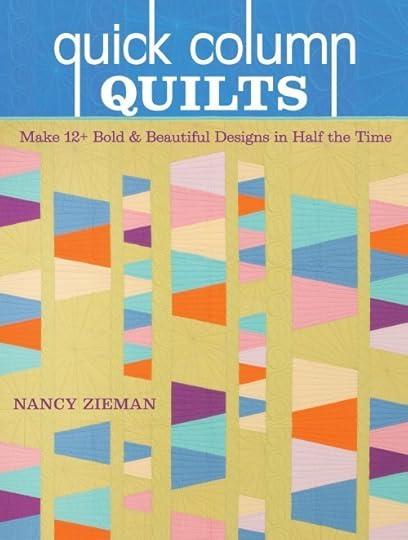
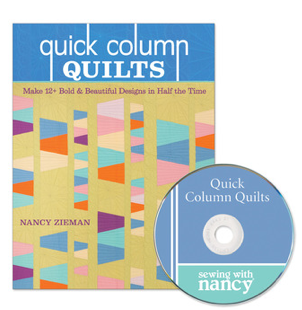
13 Quilt patterns are detailed in the book, Quick Column Quilts .

Watch Quick Column Quilts (Part One, Part Two, and Part Three) on Sewing With Nancy online.
To watch Sewing With Nancy on your iPad, iPod Touch, or iPhone, download the app.
 For a chance to win a copy of the book, Quick Column Quilts, compliments of F+W Media, please let me know which of these quilts is your favorite by leaving a comment below.

The random winner of my newest M7353 Spring Knit Dress and Top pattern, compliments of The McCall Pattern Company, is Carol. She said: I really like the cowl neckline since it is so flattering. The cowl neckline dress as well as a shortened version for a top would be nice to sew.
Don’t forget to submit your Pillow project for the 2016 Pillow Sewing Challenge! The deadline to enter is March 20, 2016. Click here to see how to enter. Make sure you are subscribed to my enews mailing list so you won’t miss a thing. Sign up here.
Bye for now,

Content in this feed is © copyright 2016 by Nancy Zieman and may not be republished without written permission. You’re welcome to forward the email to a friend or colleague but it’s not okay to add the RSS feed automatically as content on a blog or other website.
Make sure you are subscribed to my enews mailing list so you won’t miss a thing. Sign up here . Join us on Facebook , plus a host of other social media channels. Connect With Nancy today!

March 15, 2016
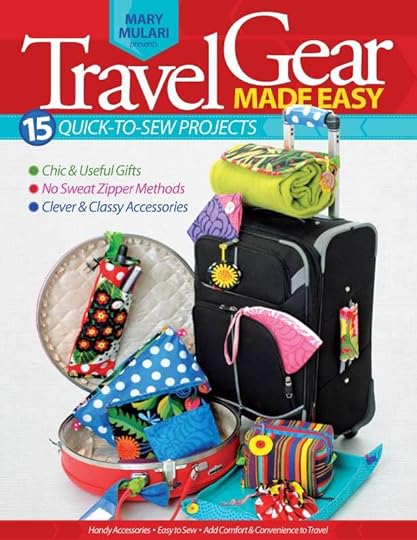
How to Sew a Travel Gear Bag in Three Sizes

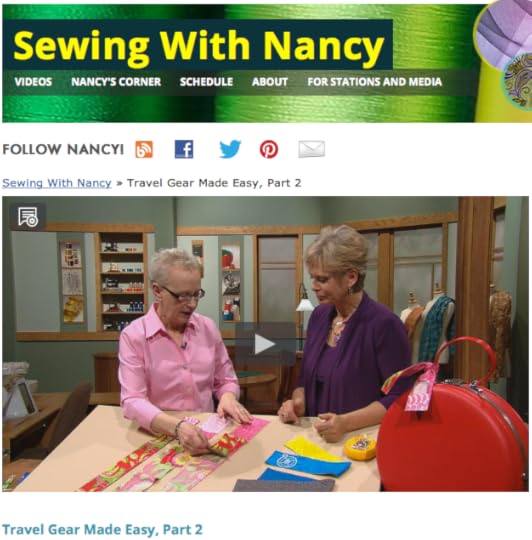
Do you like creative stitching projects that can be made in an evening or less? You’re in for a treat! In part two of the TV series, Travel Gear Made Easy, this week’s featured online video, guest Mary Mulari teaches how to quickly stitch travel gear for everyday travel or extended trips. Mary knows all about travel, but even more about making travel easy. Watch the second episode by clicking here. (If you missed the first show, watch by clicking here.)
In part two of the TV show, and in her book, Mary shares her easy zipper technique for the hidden zipper used to make the Travel Trio Bag Set (pictured above). The clever recessed zipper adds style to this collection of bags.

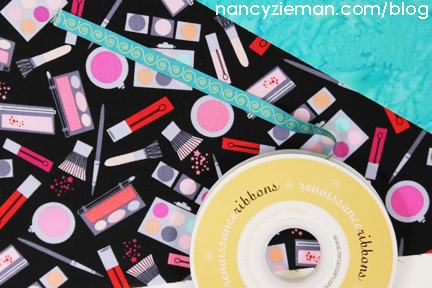
A few weeks after Mary and I recorded the Travel Gear Made Easy series, she sent me a package. Inside was my very own Travel Trio Bag Set. Aren’t the fabrics delightful?

Mary designed these bags for carrying electronic components, jewelry, or makeup. Plus, they nest together for gift-giving and for easy storage.

Mary’s here today with a guest blog posting on how to create these nesting bags in three sizes:
Sizes:
5″ x 7″
8″ x 10″
9″ x 13″
Supplies
1/2 yd. fabric (outer fabric and lining)
Two 3″ fabric strips (contrasting zipper frame)
1/2 yd. medium weight interfacing
15″ Designer Renaissance Ribbon 3/8″ wide (5″ per bag)
Optional: 3″ length of ribbon per bag for zipper pull
Zippers- to be adjusted for each bag width
5-in-1 Sliding Gauge

Cutting
Cut one bag outer fabric, one lining, and one interfacing to these dimensions:
9″ small bag = 9″ x 12″
11″ medium bag = 11″ x 16″
14″ large bag = 14″ x 18″
Construction
Fuse interfacing to wrong side of the bag outer fabric.

Pin the wrong side of the lining to the interfaced side of the outer fabric.

Zigzag or serge the two long edges.

Measure, using the sliding gauge, and cut two 2-1/2″ lengths of ribbon, PER BAG.

Fold each ribbon in half, matching wrong sides.

Position the folded ribbon 1″ from the cut edge. Baste ribbon to the outer fabric. Add ribbon to right and left sides.

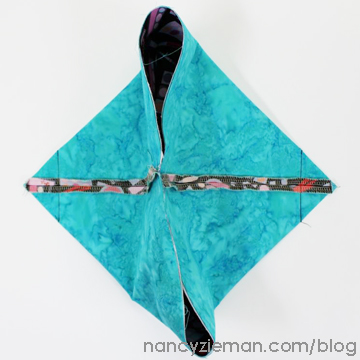
Fold the bag in half with right sides together, meeting top edges.

Sew side seams with 1/4″ seam allowances.

Form a triangle at the bottom corners of the seams.
Mark across the triangle 1″ for small bag, 2″ for medium bag, and 3″ for large bag. (Large bag is shown.)

Pin and sew across marked lines to create boxed corners.
Prepare and Apply the Zipper
Press the zipper flat.
Measure the zipper length needed (2″ shorter than the bag width).

Trim the zipper.

Use a wide zigzag stitch, with a zero stitch length, to bartack over the zipper teeth at the cut end.

Cut two 2″ x 3″ fabric strips.
Fold the strips in half. Open.
Meet the cut edges to the center foldline.
Press.

Wrap the narrow folded fabric around the cut end of the zipper.
Stitch across the zipper end. Note: Be careful not to stitch over the metal zipper stop in the event you didn’t need to trim it.

Cut two 3″ fabric strips (2-1/2″ for small bags) for each side of the zipper, the same length as the width of the bag. For example, 11″ strips for the medium size bag.
Press the strips in half, matching wrong sides.

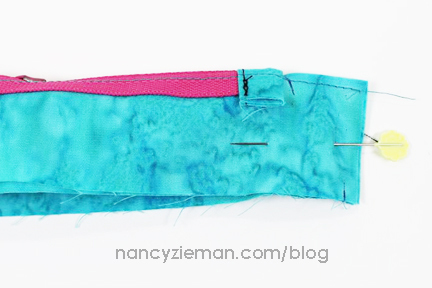
Pin the fabric folded edges to the right side of the zipper tape, leaving an extra 1″ beyond each end of the zipper.
Fold over and pin the excess tape at the top end of the zipper to the fabric strip.

Switch to a zipper presser foot.
Using left or right needle position, sew each folded fabric strip to the zipper, moving the zipper head away from the presser foot if necessary.

Meet the right sides of the zipper strips at the corners. Pin together.
Mark 1/4″ from the cut edges and taper toward the zipper at both ends.

Stitch the marked tapered line on both ends.


Trim the seam allowances to 1/4″.
Press short seams open.
Press bag side seams open.
With bag inside out and zipper open, meet the right side of the zipper unit to the right side of the bag. Align and pin the side seams of the zipper unit and the bag.

Extend the fabric triangle of the zipper unit 1/4″ above the bag edge. Pin all edges together.

Sew around bag top edge using a 1/4″ seam allowance.

Trim seam allowance with a pinking shears to eliminate bulk, especially at the side seams.
Turn bag right side out. Press the zipper unit inside the bag. Pin.

Topstitch 1/8″ from the folded top edge of the bag. Sew Slowly over side seams where fabrics are thicker.
 Tie an additional 3″ length of ribbon to the zipper pull.
The first nesting bag is finished!
I hope you have fun sewing all three sizes!
Enjoy,
Mary

Thank you Mary, for sharing details on how to sew your Travel Trio Bag Set! Mary also created an embroidery design collection to coordinate with her book projects. Make the travel accessories from the book and add designs from the Travel Gear Made Easy Complete Design Collection to personalize and embellish your creations. There are over 30 embroidery designs , an alphabet for monograms, and three unique travel gear projects not included in the book.

Watch Travel Gear Made Easy on Sewing With Nancy online.
To watch Sewing With Nancy on your iPad, iPod Touch, or iPhone, download the app.
For a Chance to win a copy of Mary Mulari’s book, Travel Gear Made Easy, please leave a comment below sharing your favorite project from the TV series, Travel Gear Made Easy.
Don’t forget to submit your Pillow project for the 2016 Pillow Sewing Challenge! The deadline to enter is March 20, 2016. Click here to see how to enter. Make sure you are subscribed to my enews mailing list so you won’t miss a thing. Sign up here.
Bye for now,
Content in this feed is © copyright 2016 by Nancy Zieman and may not be republished without written permission. You’re welcome to forward the email to a friend or colleague but it’s not okay to add the RSS feed automatically as content on a blog or other website.
Make sure you are subscribed to my enews mailing list so you won’t miss a thing. Sign up here . Join us on Facebook , plus a host of other social media channels. Connect With Nancy today!
March 12, 2016
The Easiest Way to Appliqué a Monogram

A terrific way to add an artistic touch to a gift is with appliquéd monograms. Machine embroidery and appliqués team together in my new Carefree Appliqué Alphabet collection. There are three sizes of letters/monograms and numbers: 2″, 3-1/2″ and 5″ with geometric shapes that are ideal for monogram “frames.” Templates of each letter, number, and shape are included in the instructions, streamlining the appliquéing process.
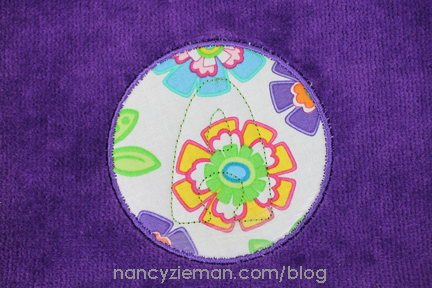
For this project, I chose to embroider a letter A centered on a fabric circle for one of my darling granddaughters. Don’t worry; there will also be a personalized towel for her younger sister, too. Thankfully, my friends at Nancy’s Notions have towels in vibrant colors.

Supplies
Amazing Designs® Carefree Appliqué Alphabet ADL-52
Paper-backed fusible web
Assortment of fabrics
Assortment of Madeira Embroidery Thread
Fingertip Towel
Bobbins wound with all-purpose sewing thread
Sticky-Back Tear-Away Stabilizer
Optional: Mini Iron and pressing surface
Optional: Wash-Away Stabilizer (I used this product to allow my stitches to sit on top of the terry cloth towel. Your project may vary.)

Instructions
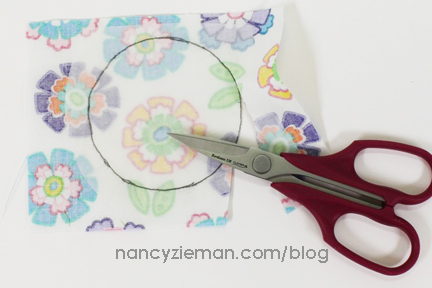
Trace the monogram or letter appliqué and a frame (circle in this instance) onto the paper side of paper-backed fusible web . Designs are mirror imaged so they will appear correctly on the completed project. All mirror-imaged appliqués are included in the instructions.

Roughly cut out each image, allowing approximately ¼” around all edges.
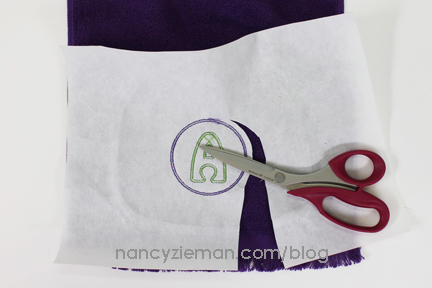
Fuse cut out appliqués to the wrong side of the fabric chosen for the appliqués. Cut out fabric letters, following traced lines.

Remove paper backing from shapes, numbers, or letters.

Use the directions in the Carefree Appliqué Alphabet to select the monogram, number, or frame design. Add it to the embroidery machine.
Hoop the fabric. Or, depending on the project, hoop a sticky backed stabilizer, release the paper and stick the towel to the adhesive side of the stabilizer.

Insert hoop into the computerized embroidery unit.
Determine the placement of the embroidered appliqué on your project. Use your favorite method of positioning. I chose to use a placement sticker to align the project.

Easy Automatic Appliqué Technique
Embroider the first thread color—the outline.
Note from Nancy: Use the same thread color for the first, second, and third thread colors.

Position the wrong side of the appliqué fabric over the embroidered outline.

Fuse the first cutout appliqué using a Mini Iron .

Position Wash-Away Stabilizer over the appliqué to keep the stitches from sinking into the terry cloth pile.

Embroider the second thread color—the tackdown stitch.

Embroider the third thread color—the satin stitch.

Remove Wash-Away Stabilizer .
Change thread colors to match the next appliqué shape.
Stitch thread color four to the outline monogram placement.

Remove hoop from machine. (Do not remove fabric from the hoop.)
Remove the paper backing from the fabric appliqué letters.
Place the appliqué within the outline.
Using the tip of an iron or a Mini Iron , fuse the appliqué to the fabric.

Reinsert the hoop into the embroidery machine.
Continue embroidering thread colors two and three.

After the embroidery is complete, remove the stabilizer and fabric from the hoop.
Carefully cut away excess stabilizer from behind the project.
Creative Options
If you have embroidery editing software, or your embroidery machine can merge designs, consider merging the designs together before embroidering.
Omit the fabric appliqué. Skip the step of cutting and fusing the fabric appliqué characters. Embroider directly onto your project. The base fabric is the feature fabric of the embroidery.
Skip the satin stitching for a raw edge appliqué.
Personalize the quilting design of your next quilted gift by skipping the satin-stitching and using the alphabet lettering for stress-free quilting with machine embroidery. More details on using an embroidery machine for quilting can be found here.
Using SVG Files
There are additional instructions in Carefree Appliqué Alphabet for using this fun design in conjunction with computer guided cutting systems. Cut exact lettering with ease using one of these systems.
So Many Options in One Package
Three sizes of each letter/monogram: 2″, 3-1/2″ and 5″—both upper and lower case
Three sizes of numbers 0–9
Four different frame options in multiple sizes to coincide with the three sizes of letters/monograms and letters
Ready-to-trace and cut mirror-image appliqués for easy monogramming
User friendly instructions

Watch Machine Embroidery in Six Easy Lessons (Part One and Two) on Sewing With Nancy online.
To watch Sewing With Nancy on your iPad, iPod Touch, or iPhone, download the app.

Don’t forget to submit your pillow project for the 2016 Pillow Sewing Challenge! The deadline to enter is March 20, 2016. Click here to see how to enter. Make sure you are subscribed to my enews mailing list so you won’t miss a thing. Sign up here.
Bye for now,
Content in this feed is © copyright 2016 by Nancy Zieman and may not be republished without written permission. You’re welcome to forward the email to a friend or colleague but it’s not okay to add the RSS feed automatically as content on a blog or other website.
Make sure you are subscribed to my enews mailing list so you won’t miss a thing. Sign up here . Join us on Facebook , plus a host of other social media channels. Connect With Nancy today!
March 10, 2016
Break the Quilting Rules—Create Column Quilts

Take a recognizable tumbler quilt design and turn it on its side. Combine several sizes of tumbler shapes and presto, you have a modern quilt design that breaks most sewing rules. This week’s Sewing With Nancy features two traditional quilt designs that are sewn in columns, not rows. Plus the piecing is super-simple. This is the second episode of Quick Column Quilts. I hope you’ll enjoy creating your next quilt with the Grandmother’s One Patch Template, create hexagon designs with ease. Watch online by clicking here.
Tumbling Tumblers Quilt
The first quilt of this episode is called Tumbling Tumblers. Transform a design, traditional to modern, with a simple turn of the design.
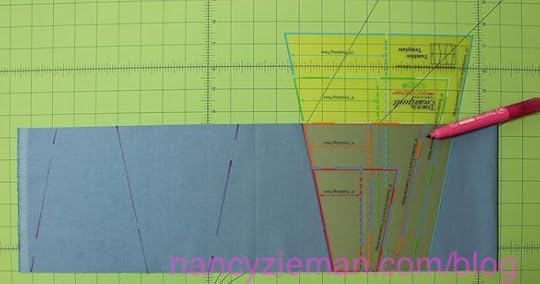
The tumbler template from the Trace ‘n Create Grandmother’s One Patch Template is used to create this quilt design. There are four sizes of tumbler shapes—4″, 6″, 8″, and 10″ in one template. All four sizes are traced on the fabric and then cut, using a ruler, rotary cutter, and mat.
The tumbler shapes are stitched together using traditional quilting techniques.
Multiple background colored tumbler shapes are sewn together to add negative space to the design. Negative space is the new buzz word in quilting, and it references the space around the quilt design, not the design itself, which forms an interesting or artistic look.
You can see how the rest of the quilt is created while watching the TV show or see all the dimensions detailed in the book, Quick Column Quilts.
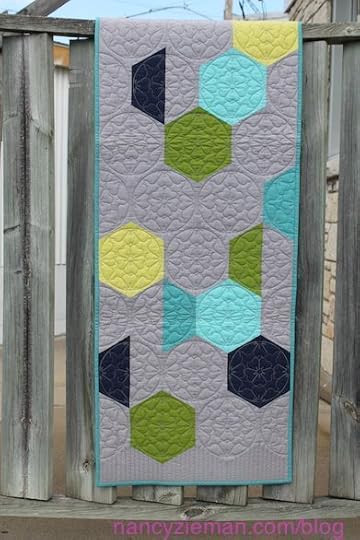
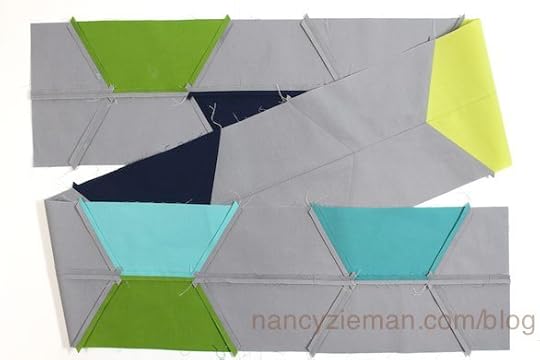
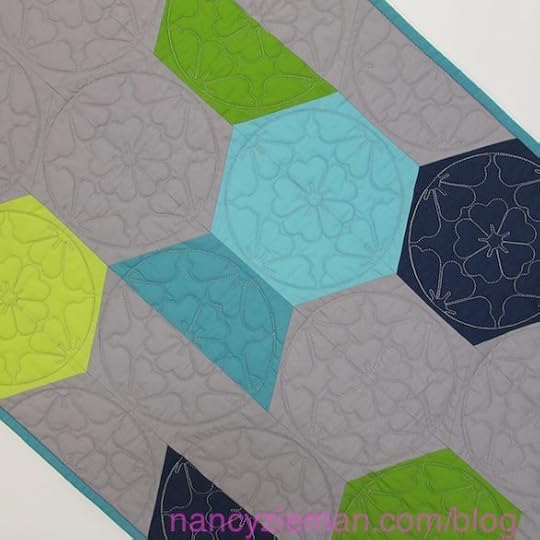
Hit and Miss Table Runner
At first glance, hexagon shapes cause many quilters to think, Oh no, the dreaded Y-seam! Not so with this speedy column quilt design. The hexagon shapes are created with two halves, eliminating the intersection of three seams, otherwise known as Y-seams. With this technique, faux hexagon halves are stitched in columns with relative speed and ease. Plus, the results are dramatic.
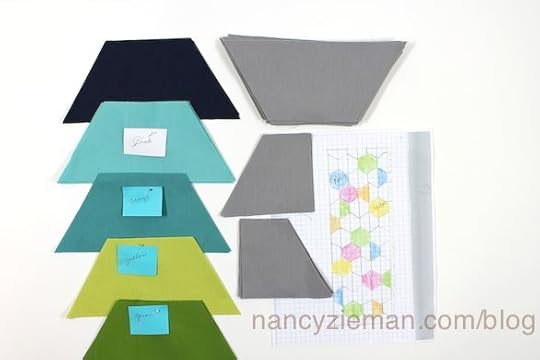
The second template in the Grandmother’s One-Patch Template set, the faux hexagon, is used for this project.
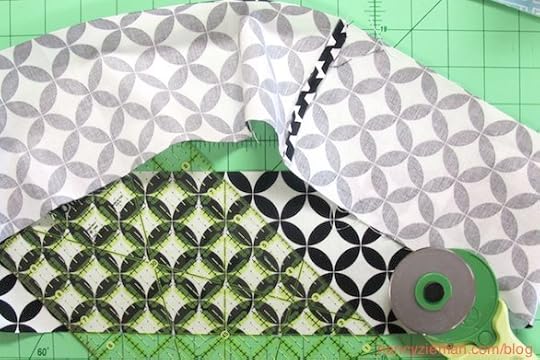
Only the 4″ shape is traced and cut from the fabric, including the end pieces. ( Watch me demo this online , it’s a lot easier to show this in action than to write about it!)

Four fabrics are traced and cut from the faux hexagons, plus the background fabric, which again creates the negative space design element. This photo was taken during my design process. Notice my design sketch—elementary!
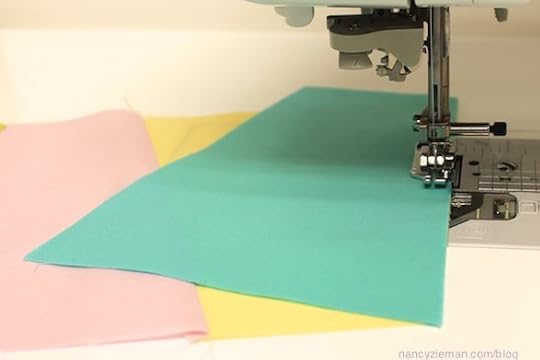
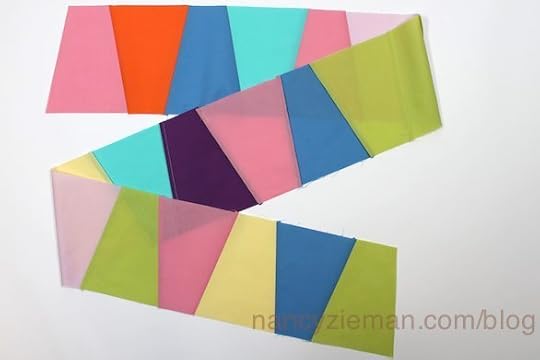
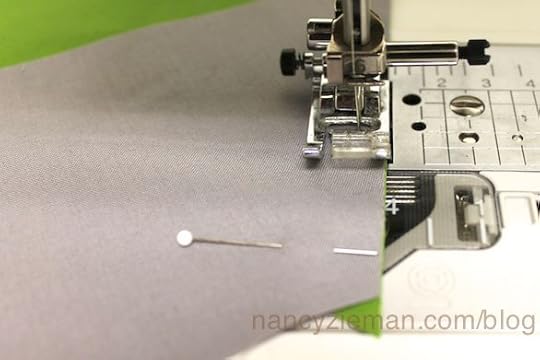
The faux hexagons are sewn together with straight seams. No Y-seams in this column quilt project.
Columns are created.
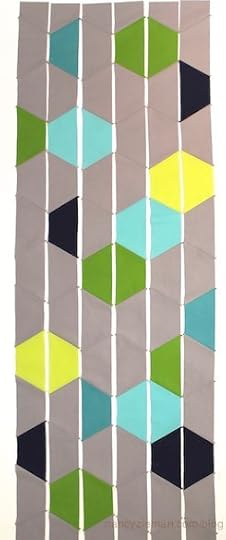
Then, the columns are sewn together. That’s it—all straight seaming.
Full details, including the yardage, are in Quick Column Quilts.
Watch Quick Column Quilts (Part One, Part Two, and Part Three) on Sewing With Nancy online.
To watch Sewing With Nancy on your iPad, iPod Touch, or iPhone, download the app.
For a chance to win a copy of the book, Quick Column Quilts, compliments of F+W Media, please let me know which of these quilts is your favorite by leaving a comment below.
Don’t forget to submit your Pillow project for the 2016 Pillow Sewing Challenge! The deadline to enter is March 20, 2016. Click here to see how to enter. Make sure you are subscribed to my enews mailing list so you won’t miss a thing. Sign up here.
Bye for now,
Content in this feed is © copyright 2016 by Nancy Zieman and may not be republished without written permission. You’re welcome to forward the email to a friend or colleague but it’s not okay to add the RSS feed automatically as content on a blog or other website.
Make sure you are subscribed to my enews mailing list so you won’t miss a thing. Sign up here . Join us on Facebook , plus a host of other social media channels. Connect With Nancy today!
March 9, 2016
Celebrate National Quilting Month with Baby Lock Sweepstakes

March is National Quilting Month and Baby Lock is hosting a National Quilting Month Sweepstakes and Contest on their site! Click the link or image above for more information on how to enter the Sweepstakes. One Grand Prize Winner will receive Baby Lock Soprano Sewing Machine!
The Baby Lock National Quilting Month celebration brings together projects from Sewlebrities and bloggers. Each week, download featured quilt block patterns and sew along with the Baby Lock community.
Plus share your favorite quilting project! Just upload a photo on Instagram of your best quilting @BabyLockSewing with #BabyLockQuilting2016 and “like” your favorites from other quilters. Four lucky Instagram quilters with the most likes win a quilting bundle! Click for details.
Click on the image above or click here to enter sweepstakes.
Baby Lock’s 2016 National Quilting Month Sweepstakes and Contest ends March 31, 2016. Enter once per day!
Please note: The National Quilting Month Sweepstakes and Contest is a Baby Lock sponsored sweepstakes. Because different countries have different legal requirements, this sweepstakes is made available to US residents. Click for details.
For a copy of the winner list from either the Sweepstakes or the Contest, include a self-addressed, stamped envelope. Residents of Vermont need not include a self-addressed stamped envelope. View Official Rules here.
Bye for now,
Content in this feed is © copyright 2016 by Nancy Zieman and may not be republished without written permission. You’re welcome to forward the email to a friend or colleague but it’s not okay to add the RSS feed automatically as content on a blog or other website.
Make sure you are subscribed to my enews mailing list so you won’t miss a thing. Sign up here . Join us on Facebook , plus a host of other social media channels. Connect With Nancy today!
March 8, 2016
How to Sew a Lumberjack Pillow from a Flannel Shirt

With the 2016 Pillow Sewing Challenge in full swing, I thought it would be fun to share this recycled-garment pillow project. I call it the Lumberjack Pillow, though you could make this from a loved one’s shirt and sew a memory pillow as well. The technique used to fit the shirt around the pillow form allows for many shirts and pillow sizes to be created easily.
Click here for more information on the 2016 Pillow Sewing Challenge. Brainstorm, browse, design, plan, and stitch your favorite pillow. Enter my 2016 Pillow Sewing Challenge by emailing me your image (info@ziemanproductions.com). My staff and I will add it to the link tool. It’s easy!

Make a pillow to showcase your sewing talents. Entries may be for any occasion, any color, or any size (that fits on a sofa or comparable household furniture). Sew a pillow using as much imagination as you like. You may enter ONE pillow; it must be completed within the last year and not entered in the 2015 challenge.
For this challenge, my staff and I will upload your pictures. We’ve listened to your feedback and know that having larger, clickable pictures would be ideal. We’ll make that happen. Simply email a photo of your completed project and project name to info@ziemanproductions.com. Deadline for photo entries is March 20, 2016.
Pillow Sewing Challenge Guidelines
Select or create your design.
All sewing, quilting, serging, machine embroidery, and embellishment techniques are eligible!
Grab our Pillow Sewing Challenge blog badge to let your friends know about this fun Pillow Sewing Challenge.
Remember to share your progress and projects on your social media sites using the hashtag: #NZPillowChallenge
Email your photo by March 20, 2016, to info@ziemanproductions.com .
Online voting begins March 22, 2016.
Voting closes on April 3, 2016.
Winners will be announced April 5, 2016.
An InLinkz Link-up
Go Social with Your Pillow Sewing Challenge
If you have a website, copy the code above and paste it into your website editor to have the Pillow Sewing Challenge badge on your site.
If you are on social sites like Instagram, Twitter, Flickr, or Facebook, let all your friends know you are working on the Pillow Sewing challenge by tagging your post with the hashtag: #NZPillowChallenge.
The hashtag is a searchable “word” associated with an event or activity, which, when searched on popular social websites, like Instagram, Twitter, Flickr, and Facebook, shows every single post using that hashtag. Even if you don’t personally know that stitcher, you’ll see her/his progress and a photo. Hashtags are a fun way to network and connect with people who share similar interests.
Inspiration: Lumber Jack Pillow
Supplies:
1 men’s shirt, any size
13″ x 10″ square of contrasting fabric to fill neckline area
Color coordinated thread
16” Pillow form
Double sided basting tape
5-in-1 Sliding Gauge
Chaco Marking Pen
Cutting Instructions:
Unbutton shirt and turn wrong-side out.

Working from the wrong side, button the lowest three to four buttons. Secure placket lower edge with double sided basting tape.

Follow manufacturer’s directions to apply tape.

Edgestitch the lower center front placket.
Note from Nancy: Our plaid flannel shirt had a back pleat. To avoid puckering, we topstitched the entire back pleat closed.

Center pillow form inside shirt. (Notice the shirt is still wrong side out.)

Button the shirt completely.

Pin shirt parallel to the pillow form edges along the right, left, and bottom edges.

Pin through the sleeve, closing the armhole area.

Unbutton the shirt. Remove the pillow form.
Lay the shirt flat.
Use the 5-in-1 Sliding Gauge to measure 1″ beyond the pinned line.
Mark with a Chaco Marking Pen.

Cut along the marked chalk line.


Keep the pins in place.
Mark the pinned line with a marking pen.

Use a straight stitch and 1″ seam allowance to sew right, left, and bottom edges.

Try the shirt on the pillow form.
Note from Nancy: Fine tune the fit of the shirt around the pillow form. A loose shirt may look sloppy and it is quite easy to turn the shirt wrong side out to remark/stitch a tighter fit.

Cut a 13” x 10” square of contrasting fabric to fill neckline area. Press under ½” along the 13” sides.
Note from Nancy: If the flannel shirt size is XL, it may be necessary to use a larger rectangle of fabric to cover the opening in the shirt.

Pin the midpoint of one 13” side to the center back of the neckline seam where the collar is attached to the shirt.

Continue to pin approximately 3” from each side of the center back.

Edgestitch the rectangle to the shirt where pinned along the collar or neckband seam line.
Trim excess seam allowance from pillow sides and lower edge.

Fold the seam allowance to create a “wrapped corner” at the lowered edges. Stitch in place.

Turn the shirt right side out.
Insert the pillow form.
Button the shirt and tuck the contrasting fabric in place.
Use an invisible hand sewing stitch to secure the contrasting fabric along the shoulder and center front.


Ta-dah! The pillow is finished!
Additional Inspiration—Pillow Tutorials
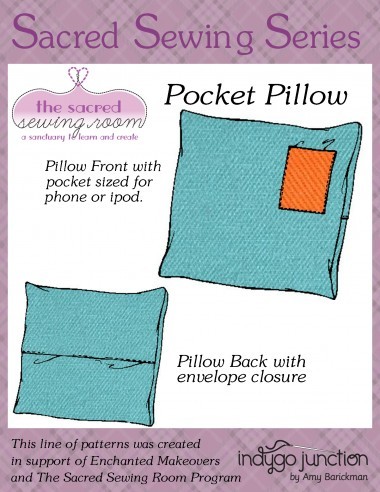
From Indygo Junction: Pocket Pillow
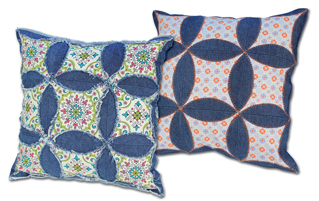
From June Tailor: Charming Circles Pillow
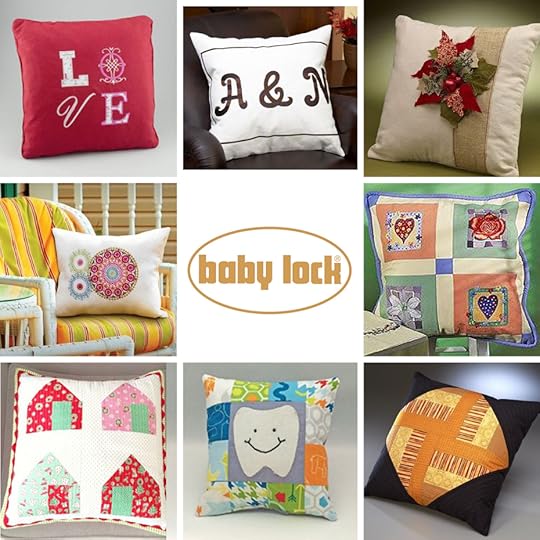
From Baby Lock Sewing: Pillow Projects
Simply type Pillow into their search bar to find pdf directions to these and many more pillow projects.
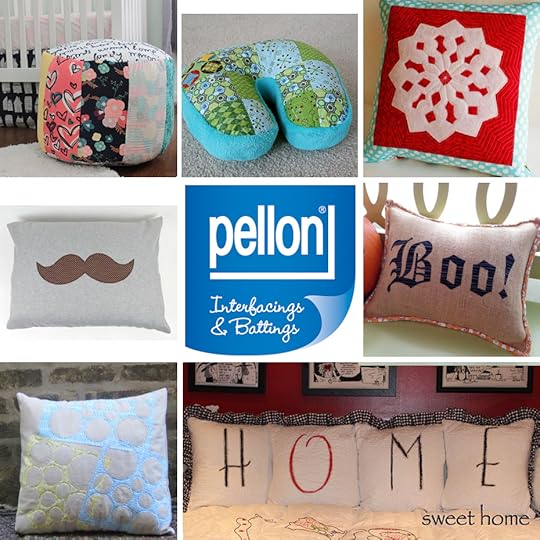
From Pellon: Pillow Projects
Find these and many more pillow projects on the Pellon Projects website.
——————————————-
2016 Pillow Challenge Prize Sponsors
Baby Lock Sewing: Anna Sewing Machine, value of $399

Assorted Product Bundle (patterns, books and fabric) from Amy Barickman and Indygo Junction, case and props not included, value of $200

Assorted Product Bundle from June Tailor, value of $185

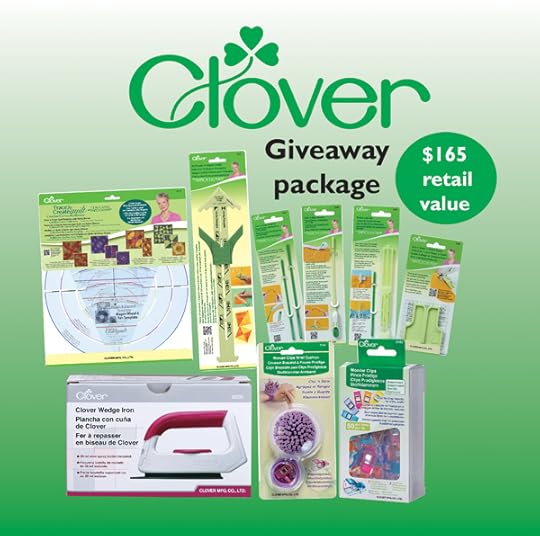
Clover Assorted Nancy Zieman Product Bundle, value of $165
Sewing With Nancy DVD Value Set from Nancy’s Notions, value of $164

Pellon Product Bundle from Pellon, value of $87

F+W Media Two-Book Package, value of $55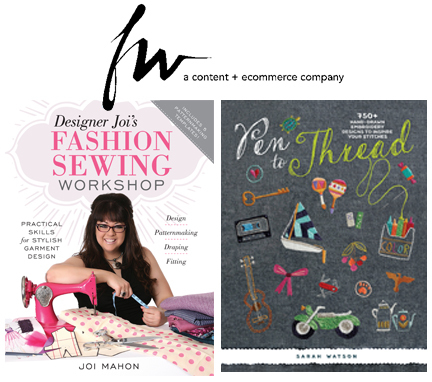
2016 Pillow Sewing Challenge Schedule
March 1: Pillow Sewing Challenge kick off TODAY!
March 20: Entry Deadline
March 22: Voting Opens
April 3: Voting Closes
April 5: Winners Announced
Share your comments below about the Pillow Sewing Challenge and send us your project to join!
Get Stitching!
Email challenge questions to info@ziemanproductions.com. Challenge not open to sponsors, employees, and immediate family members. Photos and techniques may be featured in future promotions, blog posts, videos, and/or TV shows.
Nancy Zieman—author, pattern designer, businesswoman, producer, and national sewing authority—is the host of the popular show Sewing With Nancy, which appears exclusively on public television stations across the United States and Canada. Follow Nancy’s blog at nancyzieman.com/blog and sign up to receive Nancy’s E-News for the latest news in sewing, quilting, creating, and block of the month updates.
Content in this feed is © copyright 2016 by Nancy Zieman and may not be republished without written permission. You’re welcome to forward the email to a friend or colleague but it’s not okay to add the RSS feed automatically as content on a blog or other website.
March 5, 2016
New McCall’s Spring Knit Dress and Top

My newest pattern with The McCall Pattern Company is in line with my sewing approach—easy styling with streamline sewing tips. M7353 is a top in three styles. Make the empire elastic-waist design in a couple lengths and change up the neckline with two included options—cowl and scoop neckline. Like other knit garments, this completed piece will be lightweight and travel well.

You’ll find the pattern available at Nancy’s Notions or your local fabric shop.
Make this pattern as a top or dress. If you decide to cut your hem length somewhere in between top and dress, you’ll have a wonderful knit pull-over tunic to wear with leggings.
Sizes included with this collection range from pattern size 6–22.

Find modern patterned knit fabrics at Nancy’s Notions. Depending upon your fabric choice—print or solid fabric—this quick-to-sew fashion can be made for daywear, your next vacation, casual lunch dates, or even evening wear.

Easy Sewing Features
From the illustrations, you can see that the sewing time will be minimal. In fact, the dolman-sleeve style eliminates setting in sleeves. How speedy it that! Plus, I know you’ll enjoy my elastic casing technique; the elastic is sandwiched in the seam, eliminating the traditional topstitching step.


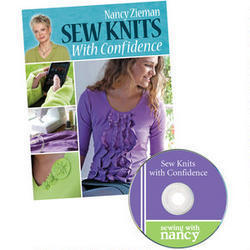
Sew Knits With Confidence Book
Haven’t worked with knits lately or need an update? Find knit sewing updates in my book: Sew Knits With Confidence. This book is a lifetime compilation of techniques that make sewing fun and easy for all skill levels. You’ll learn about sewing tools, easy sewing techniques, how to use a sewing machine and serger, how to select and use fabrics and patterns, and how easy it is to sew simple knit projects.
Watch Sew Knits With Confidence (Part One and Part Two)on Sewing With Nancy online.
To watch Sewing With Nancy on your iPad, iPod Touch, or iPhone, download the app.
For a chance to win a copy of my new
McCall’s M7353 Knit Top/Dress Pattern, please leave a comment below and let us know what view you’d like to make. The McCall Pattern Company will give away one pattern to one US resident in the 48 contiguous states.
Don’t forget to submit your pillow project for the 2016 Pillow Sewing Challenge! The deadline to enter is March 20, 2016. Click here to see how to enter. Make sure you are subscribed to my enews mailing list so you won’t miss a thing. Sign up here.
Bye for now,
Content in this feed is © copyright 2016 by Nancy Zieman and may not be republished without written permission. You’re welcome to forward the email to a friend or colleague but it’s not okay to add the RSS feed automatically as content on a blog or other website.
Make sure you are subscribed to my enews mailing list so you won’t miss a thing. Sign up here . Join us on Facebook , plus a host of other social media channels. Connect With Nancy today!
March 3, 2016
Modern Quilts Made Easily
During this first episode, learn the streamlined details of creating three unique linear quilts–large or small, the sewing is most enjoyable!
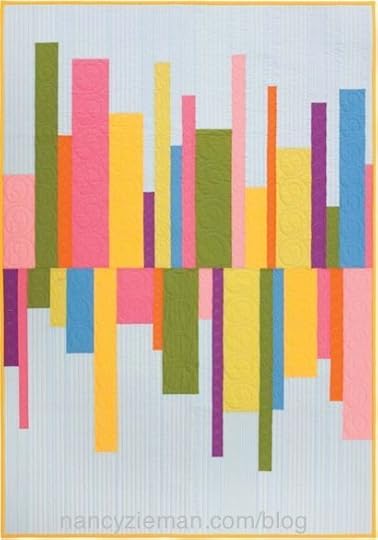
The Heartbeat Column Quilt
The design bears only a vague similarity to an echocardiogram, yet I think you can see why I chose that name! Like the rhythms of the heart, the peaks and valleys of the fabric provide a pleasing and a rhythmic movement. The stitching may be quick, yet the pleasing result is long-lasting. This is a great beginner quilting project.
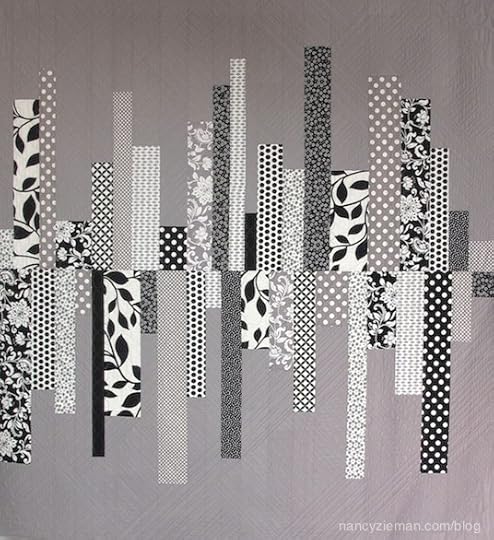
Heartbeat Column Quilt—Double, Queen, or King-sized
Not limited to a baby or lap quilt, the Heartbeat Column Quilt is ideal for larger quilts. Using gray, white, and black prints with a neutral background, the quilt design takes on a modern look. To adjust to the large bed-quilt sizes, just vary the number, width, and length of the columns.
Interrupted Column Quilt
This speedy queen-sized quilt is designed with a very easy lesson in color coordination. Simply find a print you love for the narrow columns, and choose five colors from the print to use for the column colors. The interruptions—horizontal strips—stop the lengthwise movement while creating an artistic design.
13 Column Quilts in One Convenient Book.
In my book, Quick Column Quilts, I explore how easy it is to make a modern, fresh quilt using a straight-forward column approach. The traditional quilt blocks are replaced with columns of varying widths to create a linear composition. The projects in the book are featured in this week’s Sewing With Nancy. Watch it on your local PBS station or anytime online.
Watch all three episodes of Quick Column Quilts online: Part One, Part Two, or Part Three.
To watch Sewing With Nancy on your iPad, iPod Touch, or iPhone, download the app.
For a chance to win a copy of the book, Quick Column Quilts, compliments of F+W Media, please let me know which of these quilts is your favorite by leaving a comment below.
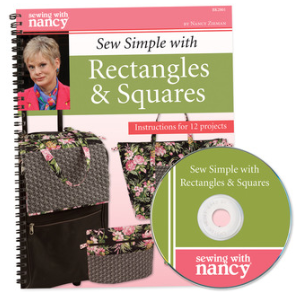
Thanks for all your comments sharing your favorite projects from Sew Simple with Rectangles & Squares. The random winner of a copy of the book is Karen W. She shared: All of the above!!! We’re working on a new quilting studio and everything would be perfect!
Don’t forget to submit your Pillow project for the 2016 Pillow Sewing Challenge! The deadline to enter is March 20, 2016. Click here to see how to enter. Make sure you are subscribed to my enews mailing list so you won’t miss a thing. Sign up here.
Bye for now,
Content in this feed is © copyright 2016 by Nancy Zieman and may not be republished without written permission. You’re welcome to forward the email to a friend or colleague but it’s not okay to add the RSS feed automatically as content on a blog or other website.
Make sure you are subscribed to my enews mailing list so you won’t miss a thing. Sign up here . Join us on Facebook , plus a host of other social media channels. Connect With Nancy today!
March 1, 2016
Nancy Zieman’s Second Annual Pillow Challenge
You are invited to participate in my 2016 Pillow Sewing Challenge. Brainstorm, browse, design, plan, and stitch your favorite pillow. Enter my Pillow Sewing Challenge by emailing me your image (info@ziemanproductions.com). My staff and I will add it to the link tool. It’s easy!
Make a pillow to showcase your sewing talents. Entries may be for any occasion, any color, or any size (that fits on a sofa or comparable household furniture). Sew a pillow using as much imagination as you like. You may enter ONE pillow; it must be completed within the last year and not entered in the 2015 Nancy Zieman Pillow Challenge.
For this challenge, my staff and I will upload your picture. We’ve listened to your feedback and know that having larger, clickable pictures would be ideal. We’ll make that happen. Simply email a photo of your completed project and project name to info@ziemanproductions.com. Deadline for photo entries is March 20, 2016.
Pillow Sewing Challenge Guidelines
Select or create your design.
All sewing, quilting, serging, machine embroidery, and embellishment techniques are eligible!
Grab our Pillow Sewing Challenge blog badge to let your friends know about this fun Pillow Sewing Challenge.
Remember to share your progress and projects on your social media sites using the hashtag: #NZPillowChallenge.
Email your photo by March 20, 2016, to info@ziemanproductions.com .
Online voting begins March 22, 2016.
Voting closes on April 3, 2016.
Winners will be announced April 5, 2016.
An InLinkz Link-up
Go Social with Your Pillow Sewing Challenge
If you have a website, copy the code above and paste it into your website editor to have the Pillow Sewing Challenge badge on your site.
If you are on social sites like Instagram, Twitter, Flickr, or Facebook, let all your friends know you are working on the Pillow Sewing Challenge by tagging your post with the hashtag: #NZPillowChallenge.
The hashtag is a searchable “word” associated with an event or activity, which, when searched on popular social websites, like Instagram, Twitter, Flickr, and Facebook, shows every single post using that hashtag. Even if you don’t personally know that stitcher, you’ll see her/his progress and a photo. Hashtags are a fun way to network and connect with people who share similar interests.
Inspiration: Lattice Pillow
You can, of course, make any pillow design you wish. I thought I might share this easy pattern to spark your creative juices. The Lattice Pillow features four machine appliquéd strips of fabric interlaced on a solid square. The pillow back is created in an envelope style and uses a Velcro closure.
Note from Nancy: Additional pillow sewing tutorials are provided by our generous sponsors and are linked at the end of this pattern.

Supplies:
½ yard of fabric for base of pillow (We’ve used Crossroads Denim.)
Two 2-1/2” crosswise strips of fabric for lattice accents
One package of 1-1/4” wide Create-A-Strap (#9511)
16” pillow form
Madeira’s Monofil Thread
7″ of 3/4″ Sew-on Hook & Loop Tape
Double-sided basting tape
5-in-1 Sliding Gauge
Non-permanent marking pen
Cutting Instructions:
Cut one 17” square for the face of the pillow.
Cut two 17″ x 11-1/2″ rectangles for the back of the pillow (see blog for size).
Cut two 2-1/2” crosswise strips for lattice accents.

Create the Lattice
Fuse the Create-A-Strap to the wrong side of the 2-1/2” crosswise strips.

Cut four 17” lengths.
Fold and press along the interfacing perforations.


Position a length of double-sided basting tape on the wrong side of each lattice strip. Remove the protective backing.
Place one vertical lengths of lattice on the pillow front 5-1/2” from the left corner of the 17″ square. Place a second length ¼” from the first.

Place the first horizontal length 5-1/5” from the top edge. Weave over, then under the vertical lattice. (It will be necessary to slightly release the tape in the vertical lengths where the lattice will weave under.)
Place a second horizontal length ¼” from the first length. Again weave the vertical strips, this time under, then over.
Use a quilter’s ruler to guarantee the strips are placed at right angles.


Note from Nancy: I chose to offset the woven section of the lattice. Consider centering the strips for a symmetrical look. Be advised, though, if you add strips diagonally across the pillow, cut them longer.

Use clear thread such and Madeira’s Monofil in the needle of your machine. Wind the bobbin with thread that matches the pillow fabric. Stitch the lattice pieces to the pillow front.

Create the Pillow Back
Create the back using the two rectangles cut 17″ x 11-1/2″ and a 7″ length of sew-on hook & loop tape.
Separate the hook & loop tape pieces.

Serge or zigzag one long edge of each pillow back rectangle.

Center the top edge of the hook & loop tape strips to each rectangle 1-1/2″ from the serged or zigzagged edge. Measure using the 5-in-1 Sliding Gauge .

Topstitch the hook & loop tape to the fabric.


Fold under a 3″ hem along one hook & loop tape edge.

Topstitch the hem.

Overlap the rectangles, matching the hook & loop tape strips. The pillow back is now the same size as the pillow front.


Baste the overlap on right and left sides.

Stack the front and back pillow pieces, right sides together.
Shape the corners of the front and back pieces to prevent pokey corners.
Measure down and across 4″ and mark with a non-permanent pen .
Measure in 1/2″ along both sides of the corners and mark.


Connect the lines using a ruler. (Optional)

Place ruler at 4″ measurement along cut edge and taper to 1/2″ mark; trim.

Repeat on all four corners.

Note from Nancy: Consider making a template of the size of the shaped corners from poster board to quickly mark the pillow corners.
Stitch front and back pillow pieces, using a 1/2″ seam allowance.

“Wrap” the corners: Fold the fabric along the stitch line at the bottom corner; pin.
Note from Nancy: Here’s a bit more detail on wrapped corners: Meet the pillow front and back, right sides together. Stitch one edge of the pillow from end to end. Press both seam allowances toward the under layer. Fold (or “wrap”) the seam allowance along the first stitching line, right sides together. Meet the remaining seam edges. Straight stitch from the fold to seam end. Repeat on all four pillow edges. Press. Turn right side out. Use pointer tool to help get uniform accurate points. Watch me show my wrapped corner technique on a collar on this episode of Sewing With Nancy.

Release hook & loop tape, turn right side out. Insert the pillow form. Ta-dah!
Additional Inspiration—Pillow Tutorials
From Indygo Junction: Pocket Pillow
From June Tailor: Charming Circles Pillow
From Baby Lock Sewing: Pillow Projects
Simply type Pillow into their search bar to find pdf directions to these and many more pillow projects.
From Pellon: Pillow Projects
Find these and many more pillow projects on the Pellon Projects website.
——————————————-
2016 Pillow Challenge Prize Sponsors
Baby Lock Sewing: Anna Sewing Machine, value of $399
Assorted Product Bundle (patterns, books and fabric) from Amy Barickman and Indygo Junction, case and props not included, value of $200
Assorted Product Bundle from June Tailor, value of $185
Clover Assorted Nancy Zieman Product Bundle, value of $165
Sewing With Nancy DVD Value Set from Nancy’s Notions, value of $164.
Pellon Product Bundle from Pellon, value of $87.
F+W Media Two-Book Package, value of $55
2016 Pillow Sewing Challenge Schedule
March 1: Pillow Sewing Challenge kick off TODAY!
March 20: Entry Deadline
March 22: Voting Opens
April 3: Voting Closes
April 5: Winners Announced
Share your comments below about the Pillow Sewing Challenge and let us know if you plan to join!
Get Stitching!
Email challenge questions to info@ziemanproductions.com. Challenge not open to sponsors, employees, and immediate family members. Photos and techniques may be featured in future promotions, blog posts, videos, and/or TV shows.
Nancy Zieman—author, pattern designer, businesswoman, producer, and national sewing authority—is the host of the popular show Sewing With Nancy, which appears exclusively on public television stations across the United States and Canada. Follow Nancy’s blog at NancyZieman.com/blog and sign up to receive Nancy’s E-News for the latest news in Sewing, Quilting, Creating, and Block of the Month updates.
Content in this feed is © copyright 2016 by Nancy Zieman and may not be republished without written permission. You’re welcome to forward the email to a friend or colleague but it’s not okay to add the RSS feed automatically as content on a blog or other website.
Nancy Zieman's Blog

- Nancy Zieman's profile
- 21 followers


![[image error]](http://www.nancyzieman.com/blog/wp-content/uploads/2016/03/MarchBoM_NancyZieman_2.jpg)
![[image error]](http://www.nancyzieman.com/blog/wp-content/uploads/2016/03/MarchBoM_NancyZieman_3.jpg)
![[image error]](http://www.nancyzieman.com/blog/wp-content/uploads/2016/03/MarchBoM_NancyZieman_28a.jpg)