
Nancy Zieman's Blog, page 113
April 9, 2016
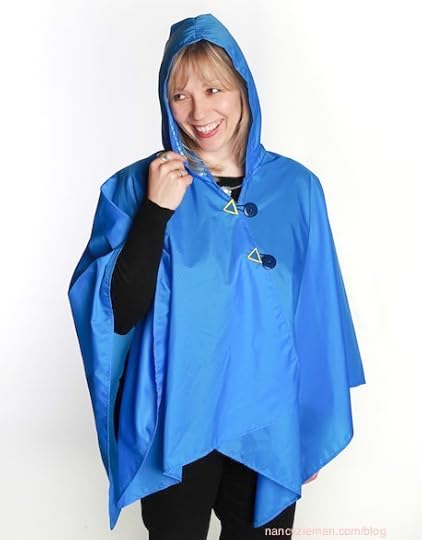
Sew an April Showers All-Weather Wrap
All-Weather Wrap
By Mary Mulari , guest blogger and friend of Sewing With Nancy
On a cool or partly cloudy day, wear this wrap as another layer of comfort. When it rains, put up the hood.
Supplies
Two yd. 54″–60″ wide fabric (Use Rip Stop Nylon or any other water-repellent fabric)
Two buttons, at least 1″ in diameter
Two ponytail elastics
One yd. trim or ribbon for hood
Ultrasuede fabric scraps for wrap closure
Note from Mary: Don’t have Ultrasuede fabric scraps? Consider purchasing a purse/bag from a thrift store and using the leather or faux leather in place of the Ultrasuede.
Cutting
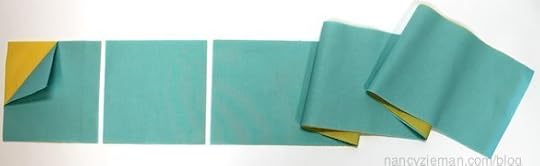
Fold the body of the wrap: Cut a 54″ wide x 57″ long piece of fabric.

For the hood: Cut fabric 24″ wide x 15″ long.
Cut the storage pocket fabric 10″ x 14″.
See the suggested cutting layout, below.

Work with the body fabric section folded in half.
Then, fold the wrap body fabric in half again, to create a second fold in the fabric.
Mark the foldline on each side of the fabric with pins or a disappearing marking pen, as illustrated.

Download the neck opening pattern here.
Make sure to mark the shoulder line on the traced pattern.

Place and pin the pattern on the center front fold of the wrap body, aligning the shoulder line marking with the fold mark.
Trace the pattern and extend the line down to the bottom of the fabric, 1″ away from the fold.
Cut out the neck opening, cutting from the bottom up and around the curved neck opening.

Construction
For knit or nonfray fabrics, no edge stitching is required, but on water-repellent fabrics and woven fabrics, consider the choices of serging around the edges of the fabric or overcast stitching on the sewing machine.
Then, turn under the stitching and topstitch a neat edge finish. You can round off the corners of the wrap for an easier continuous seam around the fabric.

Serge or overcast stitch all four sides of the hood fabric.
Fold the fabric in half, meeting the 15″ edges with right sides together.
Sew across the top edge with a 1/4″ seam allowance and then overcast or serge that seam edge.

Sew a 3″ seam across the point of the hood back, as illustrated.
On the bottom edge, turn the serged/overcast edge 1/4″ to the wrong side of the fabric and sew in place.

Turn the open edge of the hood 1″ to the wrong side; press and pin.
Sew the edge to the hood; cover the seam with a piece of decorative trim or ribbon .

Fit the hood into the curved neck opening, matching the wrong side of the center back edge of the hood to the center right side of the neck opening, and pin the edges together.
Topstitch the hood to the wrap neckline.

It’s time to try on the wrap to select placements for closures. Though the closures are optional, they help keep the wrap closed on a rainy, windy day.
Overlap the two sides of the wrap to determine where the loop and button closures should be located.

Cut two triangles from Ultrasuede fabric or other nonfray fabric scraps.
Sew two ponytail elastic loops on the right side of the wrap, in the closure locations chosen. Sew back and forth to secure the loops.
Cut off extra lengths beyond the stitching. Pin the two triangles on the wrap to cover the elastic ends and sew them in place.
Sew buttons to the opposite side to complete the closures.
Add an extra layer of fabric reinforcement behind the buttons for a more secure hold.

Sew the wrap storage pocket to the bottom inside edge of the wrap.
Turn under 1/4″ on the bottom and sides of the pocket fabric.
Serge or zigzag stitch the top edge and turn it under 1/2″ and stitch in place.

Position the pocket as illustrated and sew the three sides to the wrap back edge.

Here’s how you can fold the wrap and store it in the stitched pocket:

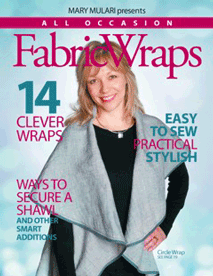
See this wrap and 13 more in the All Occasion Fabric Wraps book, which includes detailed step-by-step instructions and illustrations for 14 easy to sew fabric wraps!
Watch All Occasion Fabric Wraps on Sewing With Nancy online.
To watch Sewing With Nancy on your iPad, iPod Touch, or iPhone, download the app.
For a chance to win a copy of the All Occasion Fabric Wraps book, leave a comment below telling us what color fabric you’ll choose to sew your all-weather wrap.
Thank you, Mary, for sharing this tutorial!
Bye for now,

Content in this feed is © copyright 2016 by Nancy Zieman and may not be republished without written permission. You’re welcome to forward the email to a friend or colleague but it’s not okay to add the RSS feed automatically as content on a blog or other website.
Make sure you are subscribed to my enews mailing list so you won’t miss a thing. Sign up here . Join us on Facebook , plus a host of other social media channels. Connect With Nancy today!


April 7, 2016
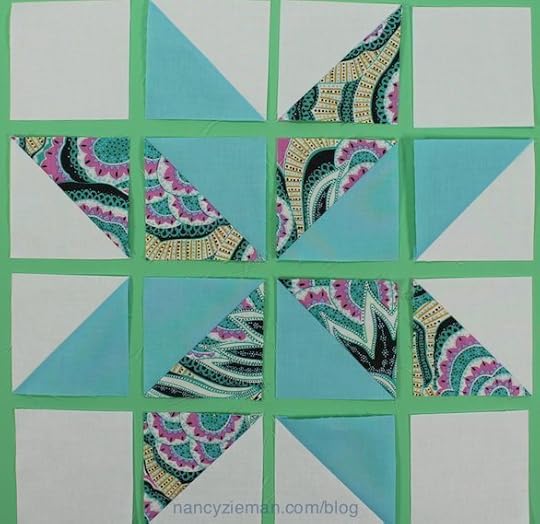
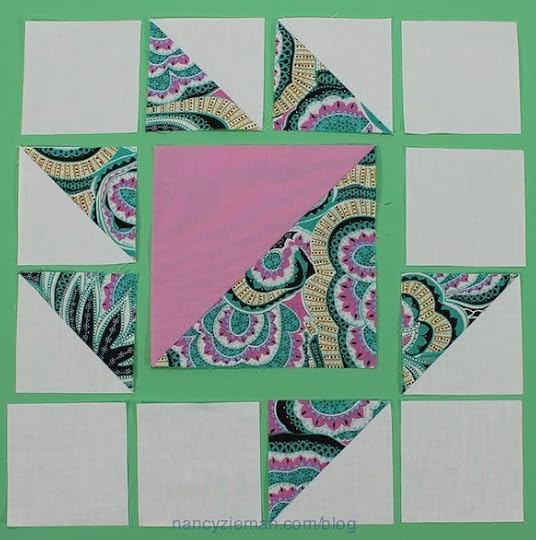
Easily Sew 1/2-Square Triangles

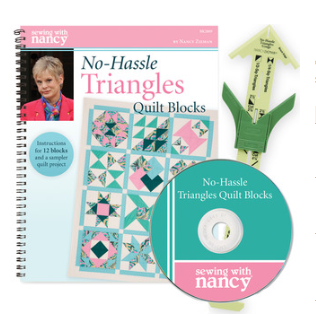
One of the easiest places to start quilting is with a 1/2-square triangle. I’ll show you how to create this traditional quilting staple without fussing around bias-cut edges. Make the block unit easily, the no-hassle way, in this week’s episode of Sewing With Nancy, which features blocks from my book, No-Hassle Triangles Quilt Blocks.
During the first episode on Sewing With Nancy, learn to create six different blocks, all made with 1/2-square triangles. During the second episode—next week’s feature—learn about 1/4-square triangles. Here’s a sneak peek into this week’s Sewing With Nancy episode!
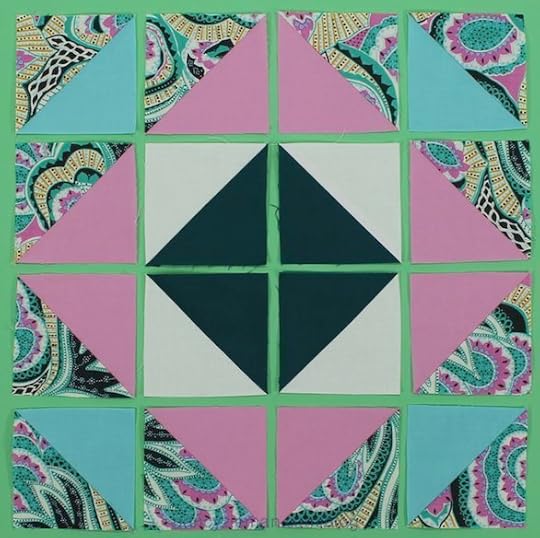
The Box Quilt (1898)
One of the more streamline quilt blocks to create from 1/2-square triangles is the Box Quilt. First illustrated in print in 1898, it’s created with eight 1/2-square triangle blocks and a square. The design has great movement, reminding me of a pinwheel.

Shadow Play
Instead of making all the 1/2-square triangles from the same fabrics, stitch together three different color combos. I call this block, Shadow Play, where the fabric choices create the impact.

Godey Design
Godey’s Lady’s Book was a monthly magazine published in Philadelphia between 1830 and 1876. Before the Civil War, it was the most widely circulated magazine in the United States. Sarah Josepha Hall was the editor of the magazine from 1837 to 1877; she also wrote Mary Had a Little Lamb. One of the designs featured in the magazine in 1858 was simply called, Godey Design.
Square in a Square
When researching quilt block names, I found literally dozens of quilt blocks named Square in a Square. With seemingly limitless geometric options with squares, no wonder it’s a common name. Regardless, it’s an attractive block all designed with 1/2-square triangles.
May Basket
May Basket is another frequently used name for a quilt block. I also found this block named, Cactus Flower. Your fabric choice will dictate the name. This version combines two sizes of finished triangles: 3-1/2″ and 6-1/2″, giving the block a center focal point.
Nancy’s Spool
This block may or may not be an original arrangement of 1/2-square triangles. My guess is that it has been created before, but since I couldn’t find it in print, I boldly named it Nancy’s Spool.
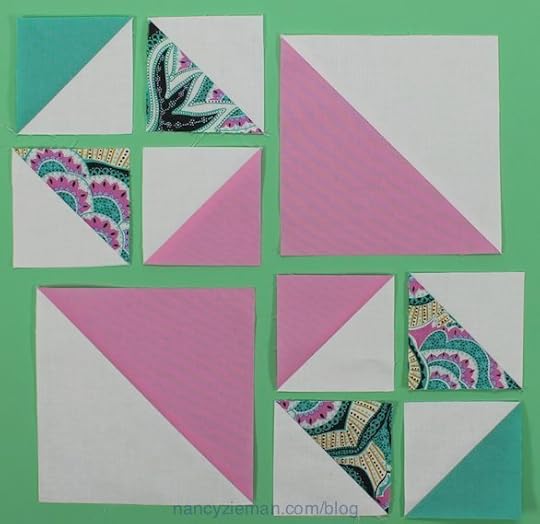
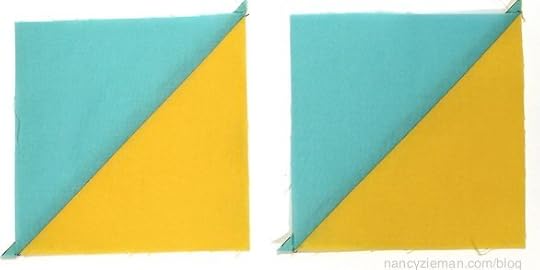
How to Make 1/2-Square Triangles
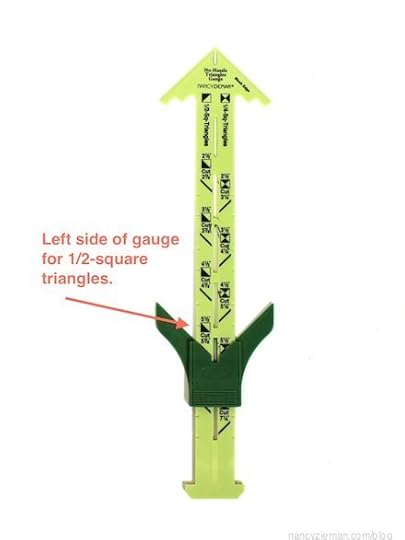
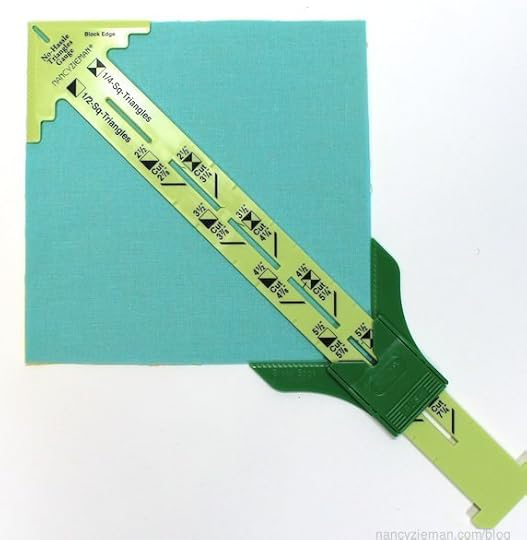
During the TV episode, I share how to easily make the above blocks as well as basic 2-1/2″, 3-1/2″, 4-1/2″, 5-1/2″ and 6-1/2″ half-square triangles. (Next week, learn 1/4-square triangle tips!) There’s no hassle and no need to cut a single triangle! The measurements are printed on the No-Hassle Triangles Gauge that I designed for Clover.
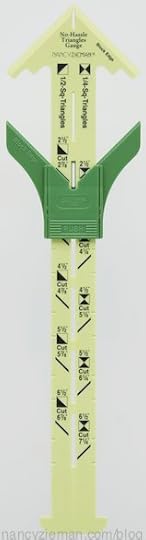
Reference the left side of the No-Hassle Triangles Gauge to select a half-square block size.
Cut crosswise strips of two fabrics—the size is printed on the No-Hassle Triangles Gauge. Cut strips into squares.
Lay the No-Hassle Triangles Gauge onto squares to double-check the block size. If the block set is larger or smaller than the confines of the gauge, recut the blocks.
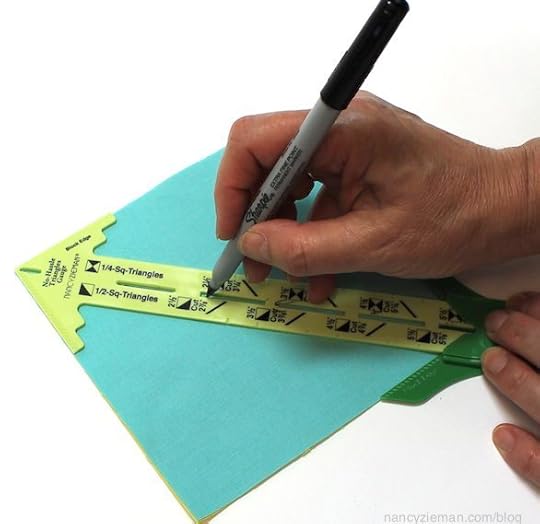
Mark a center diagonal line through No-Hassle Triangles Gauge die cut openings.
Stitch a scant 1/4″ from each side of the center marking.
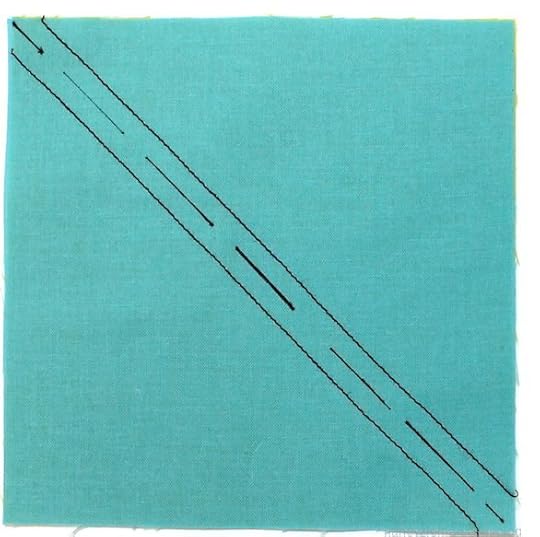
Cut along the center diagonal line.
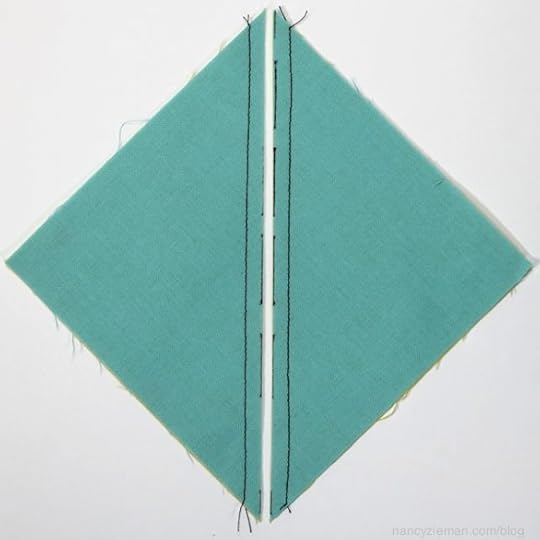
Presto, there are now two accurate 1/2-square triangles!
Just click and watch No-Hassle Triangle Quilts online! You’ll see all the details for creating these six precision-made quilt blocks.
Make This Sampler Quilt at Home
The No-Hassle Triangles Quilt book shows exactly how to make the 12-block sampler quilt. Hint: the remaining six blocks will be featured next week. For best results, use the No-Hassle Triangles Gauge.
Watch No-Hassle Triangles Quilt Blocks (Part One) on Sewing With Nancy online.
To watch Sewing With Nancy on your iPad, iPod Touch, or iPhone, download the app.
An InLinkz Link-up
For a chance to win a No-Hassle Triangles Gauge from Clover, please leave a comment sharing which of these six 1/2-square triangle blocks is your favorite. The six quilt block titles are listed below and pictured above.
The Box Quilt
Shadow Play
Godey Design
Square in a Square
May Basket
Nancy’s Spool

The random winner of a copy of the Magic Patterns book, compliments of Amy Barickman, is Pam Hopp. She said: What a fabulous concept! Looking forward to watching the series.
Bye for now,
Content in this feed is © copyright 2016 by Nancy Zieman and may not be republished without written permission. You’re welcome to forward the email to a friend or colleague but it’s not okay to add the RSS feed automatically as content on a blog or other website.
Make sure you are subscribed to my enews mailing list so you won’t miss a thing. Sign up here . Join us on Facebook , plus a host of other social media channels. Connect With Nancy today!
April 5, 2016
2016 Pillow Challenge Winners Announced
Whenever we post a sewing challenge, I’m inspired to try one of the contestants sewing techniques. Most of all, I take time to admire the creativity and workmanship. Thank you to all who entered and congratulations to all our winners. If you missed viewing the entries, check out our Pillow Challenge Blog.
Thank you to our generous sponsors!
And the winners are…
FIRST PLACE:
Baby Lock Sewing: Anna Sewing Machine, value of $399 
SECOND PLACE: Assorted Product Bundle (patterns, books and fabric) from Amy Barickman and Indygo Junction, case and props not included, value of $200

THIRD PLACE: Assorted Product Bundle from June Tailor, value of $185

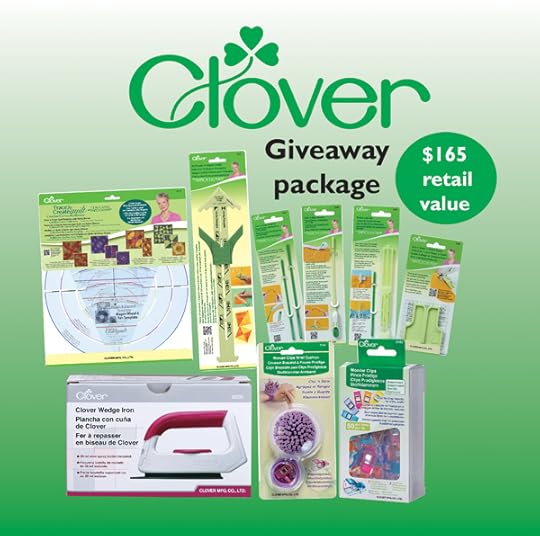
FOURTH PLACE: Clover Assorted Nancy Zieman Product Bundle, value of $165
FIFTH PLACE: Sewing With Nancy DVD Value Set from Nancy’s Notions, value of $164

SIXTH PLACE: Pellon Product Bundle from Pellon, value of $87

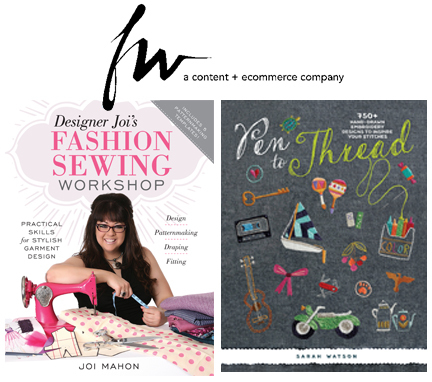
SEVENTH PLACE: F+W Media Two-Book Package, value of $55
RANDOMLY DRAWN WINNER: Hobo Tote Template and Notions bundle donated by Nancy Zieman, value of $50 
See all the beautiful entries here:
An InLinkz Link-up
Email challenge questions to info@ziemanproductions.com. Challenge not open to sponsors, employees, and immediate family members. Photos and techniques may be featured in future promotions, blog posts, videos, and/or TV shows.
Nancy Zieman—author, pattern designer, businesswoman, producer, and national sewing authority—is the host of the popular show Sewing With Nancy, which appears exclusively on public television stations across the United States and Canada. Follow Nancy’s blog at NancyZieman.com/blog and sign up to receive Nancy’s E-News for the latest news in Sewing, Quilting, Creating, and Block of the Month updates.
Content in this feed is © copyright 2016 by Nancy Zieman and may not be republished without written permission. You’re welcome to forward the email to a friend or colleague but it’s not okay to add the RSS feed automatically as content on a blog or other website.
April 2, 2016
Serge a Colorful Fabric Bin

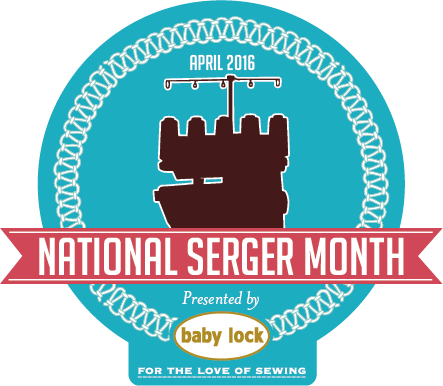
Serge this fast and fun fabric bin—an ideal project for 10-inch precut fabric squares. 10-inch precuts are also known as 10-inch Stackers, Crackers, Layer Cakes, Patty-Cakes, Storybooks, and Ten Squares! If you’ve been wondering what to do with 10-inch precuts, start by selecting four 10-inch precut squares and celebrate National Serger Month with some one-on-one time with your serger.

Baby Lock is celebrating National Serger Month, during the month of April, by offering over 50 projects to make with your serger. Head over to NationalSergerMonth.org and check out the many projects designed by your favorite sewlebrities and bloggers.
The colorful fabric bin project here features decorative serger stitching, a technique that has many applications.

Supplies
Four 10″ precut fabric squares , cut two 10″ x 10″ squares from outer fabric, two 10″ x 10″ squares from inner/lining fabric.
Cut two 10″ x 10″ squares from fusible interfacing .

Stack fabric and interfacing squares. Mark and cut out a 2-1/2″ square from each of the lower corners.

Press fusible interfacing to wrong side of outer fabric squares following the manufacturer’s fusing instructions.

Serge lower base seam with a 4-thread overlock stitch, right sides together. Press seam to one side.


Repeat for inner/lining fabric.


Press 4″ x 4″ Pellon Peltex One-Sided Fusible Ultra Firm Stabilizer square to center base of outer fabric.

Align side seams, right sides together; serge seam. Repeat for inner/lining fabric.


Press seams to one side.
Note From Nancy: To prevent the serged edge from leaving an impression on the right side of the fabric, press seam over a sleeve board or dowel.


Form and stitch gussets on bottom of tote
Fold side seams to align with lower base seam, right sides together, forming gusset.

Serge gussets, trimming off excess fabric. Repeat for lining fabric.


Assemble, stitch, and attached lining to bin
Turn outer fabric tote right side out.

Insert lining tote inside outer tote wrong sides together. Pin.

Serging is both decorative and functional
Madeira Mouline Floss in the upper and lower loopers creates a beautiful finished edge.
Serge top edges
Setup serger for a standard 4-thread stitch.
Set the length and width settings at the longest and widest stitch options.
Insert Madeira Mouline , 100% cotton, six-strand floss into the upper and lower loopers.
Note From Nancy: I like to use the “lasso technique” in the upper and lower loopers when using decorative thread and the ExtraordinAir or Jet-Air Threading feature on my Baby Lock Ovation Serger.
Cut about 30-inches of all-purpose thread, loop in half, insert the cut ends into the threading ports, hold on to the lasso end, and push the button, which threads the loopers.
Insert the decorative thread through the lasso of the all-purpose thread (as pictured below). Manually pull the ends of the all-purpose thread, which will thread the heavier thread through the loopers.

Thread needles with coordinating Madeira Aerolock Thread . Test the stitch on a scrap of fabric. Adjust the stitch length or width as needed.

Note from Nancy: Madeira Flosses are ideal for a decorative serger finish that resembles cording. Madeira Floss is securely packed in practical and unique packaging, which protects the thread from dust and dirt. Simply clip an opening at the bottom of thread pack and pull the thread you need. The floss stays clean and tangle free in its self-storage pack and can be stitched to the very last inch. Use large Wonder Clips to clip the floss packages to the serger thread guides.

Serge the tote top edges, trimming off approximately 1/8”. Overlap ending and beginning stitches about 1/2”.

Secure thread with Fray Block .
Speed-dry Fray Block by placing thread between layers of paper towels and pressing with a hot iron.

Pull thread tales into stitching, using large darning needle .

Ta-dah!
For the perfect gift, fill your colorful fabric bin with sewing supplies and surprise a friend–just because!

The fabric bin is reversible and versatile!
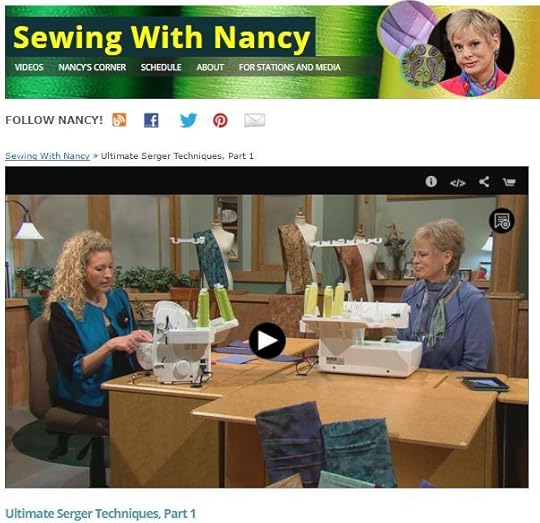
Watch Ultimate Serger Techniques (Part One, and Part Two) on Sewing With Nancy online.
To watch Sewing With Nancy on your iPad, iPod Touch, or iPhone, download the app.
Head over to NationalSergerMonth.org and check out my Big Bigger Canas Tote! It’s just as fun and easy to make as the above fabric bin!

Bye for now,
Content in this feed is © copyright 2016 by Nancy Zieman and may not be republished without written permission. You’re welcome to forward the email to a friend or colleague but it’s not okay to add the RSS feed automatically as content on a blog or other website.
Make sure you are subscribed to my enews mailing list so you won’t miss a thing. Sign up here . Join us on Facebook , plus a host of other social media channels. Connect With Nancy today!
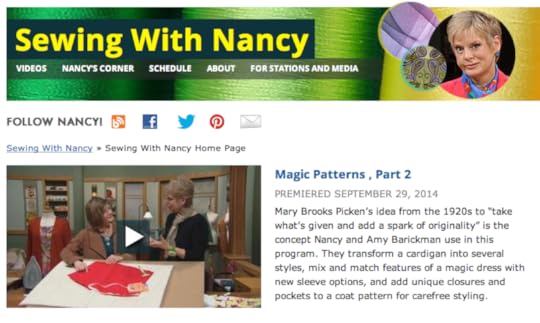
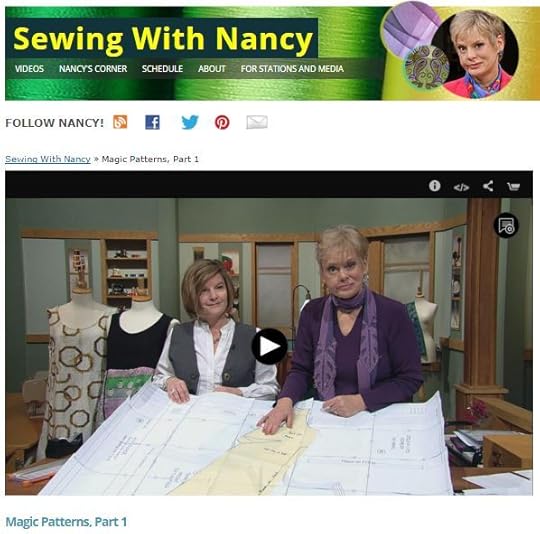
March 31, 2016
Add Your Style to Fashion Patterns
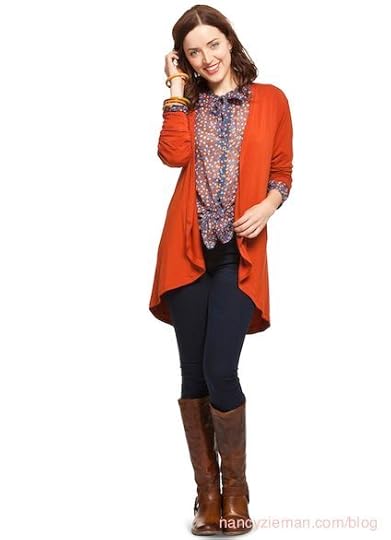
Amy Barickman, my friend and guest, unlocked the magic contained in sewing patterns. The idea behind Magic Patterns has a copyright date from the 1920s. Amy has expanded on the concept bringing you versatility in garment design and sewing. Patterns are so much more than a flat sheet of paper!
I hope you’ll watch the second episode of Magic Patterns online or on PBS with my guest Amy Barickman. Amy modeled her concept of Magic Patterns after one of the sewing stars in the early 20th century, Mary Brooks Picken, founder of the Woman’s Institute of Domestic Arts & Sciences. Mary always encouraged students to add their own creative style to designs.
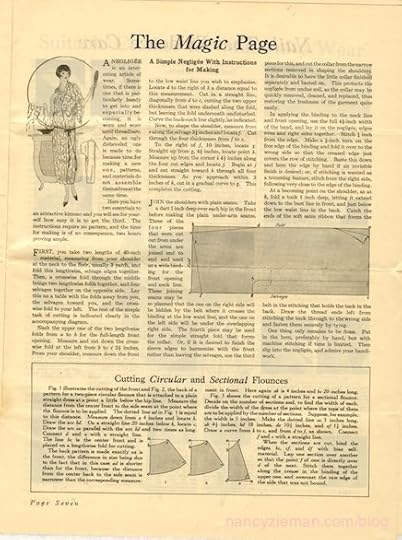
Following her lead, Amy and I show you how to use a basic style and then add personalized touches.
Magic Cardigan
Cardigan—the name makes us think of being cozy! From sleek jersey knit to a wrapped-up number, we’ll show you the details to transform this pattern into several styles with simple yet unique details.

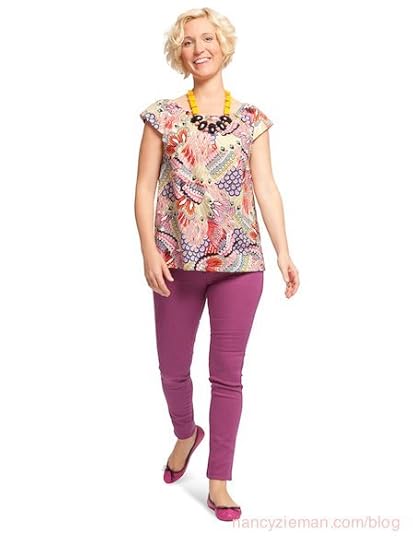
Magic Dress Pattern
When making the magic dress pattern, you can mix and match the subtle style features. Focusing on the sleeves, learn how to easily change the styling with Amy’s easy-to-sew as well as easy-to-wear ideas.

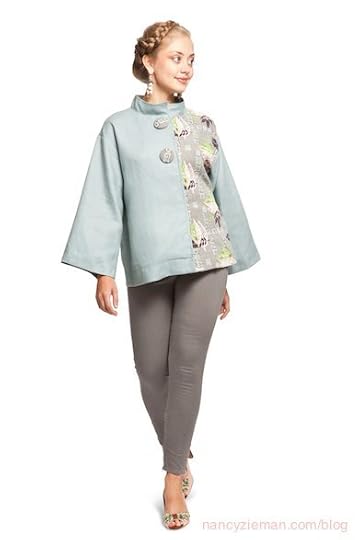
Magic Coat Pattern
Sew a coat? Certainly! Working with patterns that have carefree styling is what this program is all about. Choose a beefy fabric; then match your imagination with one of the styles.

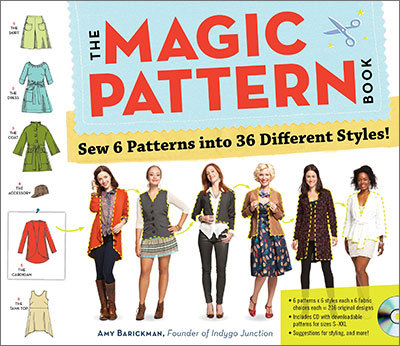
This book features six magic patterns that can be transformed into 36 different styles, with 216 different looks. Complete with beautiful full-color photos, step-by-step instructions, and a CD of printable patterns, this easy-to-follow book shows how six patterns x six looks x six fabric suggestions (for each look) result in a complete wardrobe. Amy and I guide you on how to tile the patterns, which are featured on the CD in the book.

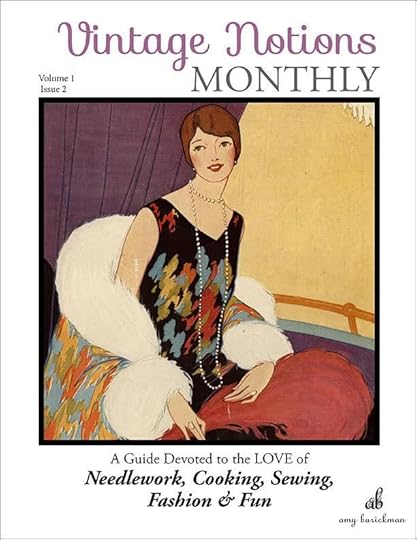
This is the continuation of the story Amy told in her book Vintage Notions. This book shared a small piece of the history of her muse Mary Brooks Picken, and the school she founded, The Women’s Institute of Domestic Arts & Sciences.
In honor of the 100th Anniversary of the Institute this year, Amy will be releasing a series of magazines, Vintage Notions Monthly , which will feature a curated collection of Woman’s Institute materials including:
Excerpts from the Institute’s newsletter Inspiration & magazine Fashion Service
Vintage fashion illustrations
Inspiring stories and testimonials
Sewing lessons & techniques
A monthly Magic Pattern—a fashion sewing pattern created from personal measurements instead of pattern pieces.
The sewing lessons, vintage wisdom, and beautiful (and fun to color!) illustrations will appeal to the modern sewists in our industry who love to buy, share, and enjoy inspiration.
To view the video & preview a free sample issue, visit: http://amybarickman.com/vintage-notions-monthly-magazine/
Watch Magic Patterns (Part One and Part Two on Sewing With Nancy online.
To watch Sewing With Nancy on your iPad, iPod Touch, or iPhone, download the app.
For a chance to win a copy of the Magic Patterns book, compliments of Amy Barickman, please leave a comment below sharing which design you’d like to sew from the TV show Magic Patterns, Part Two.
Bye for now,
Content in this feed is © copyright 2016 by Nancy Zieman and may not be republished without written permission. You’re welcome to forward the email to a friend or colleague but it’s not okay to add the RSS feed automatically as content on a blog or other website.
Make sure you are subscribed to my enews mailing list so you won’t miss a thing. Sign up here . Join us on Facebook , plus a host of other social media channels. Connect With Nancy today!
March 29, 2016
Sew a Plastic Bag Wrangler for Easy Storage

By Emily Jansson, Nancy’s Notions guest blogger
With Earth Month just around the corner, I’m inspired to work on my carbon footprint. I use my shopping tote habitually for groceries, recycle everything I can, and use my Green Kitchen Produce Bags, Beeswax Wraps, and Reusable Snack Bags. You can view the instructions for making these items here.
Still, every once in awhile, I just need a plastic bag. When I’m wiping up something especially yucky or cleaning the litter box, I reach for my secret stash of shame— under my sink, it’s a veritable mess of plastic bag tumbleweeds.
To keep errant bags in check, I made a bag wrangler. I wish I could take credit for this idea, but I really got it from my mom. She made one for herself a couple years ago, and I’ve always been a little jealous.
This project is so easy, you can whip it up in about a half hour. All you need is a fat quarter of pretty fabric and some 1/4″ elastic (Thanks, Mom!).
Supplies
Fat quarter of cotton fabric
8″–12″ (or less!) of 1/4″ elastic
Flex ‘n Glide Bodkin (or a safety pin)
Pins
Start by cutting a 2″ wide strip of fabric parallel to the selvage, and a rectangle of fabric measuring 9-1/2″ x 13″ (if you keep a lot of bags around, you may want it to be longer than 13″).

Sewing the ties:
Fold the long, skinny rectangle (2″ x length of the selvage) in half the long way and press (right sides out).

Now open and fold each raw edge inward toward the centerfold. Press.

Refold along the centerfold and press. Stitch along the open side, a scant 1/8″ from the edge, encasing the raw edges. You’ve just made double-fold tape—this will be the tie for your bag wrangler. You can fold each end over twice and secure with a quick stitch to finish.

Sewing the bag:
Fold the short edges of the remaining rectangle (measuring 9-1/2″) toward the wrong side of the fabric a scant 1/2″. Fold again at 3/4″ to encase the raw edges at each end for the elastic. Stitch a scant 1/8″ from the folded edge to create a channel.
Cut two pieces of elastic 4-1/2″ long. Use the Flex ‘n Glide Bodkin to thread elastic through each channel, securing the ends with a pin and then stitching 1/4″ from each edge. The channels will gather—this is what you want.

Match the long edges of the rectangle, right sides together, and stitch along the length with a 1/4″ seam allowance, back-tacking at both ends. Turn right-side-out through one of the elastic openings, and stitch the center of the double-fold tape you made earlier to the seamline at one end.
Tie it somewhere convenient and stuff all your bags in the top. When you need one, just grab hold of some plastic through the bottom hole and you’ve got yourself a bag!

Thanks to Emily Jansson and the Nancy’s Notions Team for sharing this tutorial!
Bye for now,
Content in this feed is © copyright 2016 by Nancy Zieman and may not be republished without written permission. You’re welcome to forward the email to a friend or colleague but it’s not okay to add the RSS feed automatically as content on a blog or other website.
Make sure you are subscribed to my enews mailing list so you won’t miss a thing. Sign up here . Join us on Facebook , plus a host of other social media channels. Connect With Nancy today!
March 26, 2016
What sewing or quilting project are you most proud of?

We were blown away with the number of responses to March’s sewing and quilting question! Many of your proudest sewing or quilting moments involved one of life’s pivotal events: first day of school, birthdays, weddings, baptisms, and graduations. We chose a few proud projects to share with you. Some will bring a smile to your face or even tug on your heartstrings. Enjoy!
Below, be sure to check out April’s Share Your Insight question and if you’d like, submit a response.
What sewing or quilting project are you most proud of?
Here’s what you are saying:
Runway Walk
“In 1970, when I was 16 yrs old, I made a shirred waist dress and entered it into a fashion show contest. It was accepted so I got to model it on a runway at the mall. This was big time! As I sauntered down the stage, I tripped over the mic cord, which fell and knocked down the background where girls were readying for their “walk.” I was so mortified that when I got down to the end of the runway, I jumped off the stage and ran out. To this day I am very proud of that dress and laugh about the event! Sew on!”—Barbara Crowell, Eagle, ID
Sewing Outreach
“I am proud of the accomplishment of sewing colorful bears for the Rare Bear Project. Each bear is made with mixed colors and patterns so that they are as rare as the children that have rare diseases. After completing each bear, I feel a kinship to my creation and I send it off with love from my heart and hands to theirs.”—Carrie Muetzel, Logan, OH
Hopeful Finishes
“The first response I thought of is ‘I’ll be proud of the next project.’ So often the items I make don’t turn out the way I visualized them and so I try to look at what went wrong and to learn from my mistakes. Another reason for this response is that I have so many projects waiting to be finished and more waiting to be started that I think the next one will be wonderful.”—Lynn Sterud, Madison, WI
Retirement Quilt
“I am most fond of the memorial quilt I made for my husband upon his retirement from the military. It includes the actual patches he wore during his deployment in the war, as well as photos printed on fabric of his medals awarded him during his time in the service.”—Dottie Caldwell, Elkton, TN
Prize Winning Project
“My quilting project that I am most proud of is a quilt I made from Quiltmaker magazine! I consider myself a novice quilter (especially at the time I did this quilt) but when I saw the beautiful colors of the leaves in this quilt, I knew I had to make it! I used beautiful batiks. It is just a lap size quilt, but I LOVE it because it reminds me of the fall colors I grew up with in Pennsylvania. I entered this quilt in our local fair and I won a 1st place and a Special Award ribbon! My mom always sewed because she had to with 16 children! I get to sew and be creative because I want to! Thanks mom for being a wonderful inspiration!”—Jeannette Hammons, Elko, NV
To Tell a Story
“My pieced wall hanging “The Story of the Universe” was done as an assignment in my Master of Pastoral Studies coursework. The assignment was to tell the story of the universe, integrating religious tradition using an artistic medium. The work is mostly cottons with organdy, lamé, sequins, buttons, and ribbon to highlight the major events in the story along a gold bias spiral. It ends with a rainbow created with blue water, red hearts, purple stones, yellow daffodils, and the like. I also incorporated musical symbols and a little boy and girl holding hands. The design and balance in the wall hanging helped me realize that I was a creative person.”—Louise Johnson, Modesto, CA
A Quilted Memory
“I’m most proud of a quilt my grandma and I were making together as she taught me how to quilt by hand. We used her old dresses for the stars and yes, there were “Y” seams. When she passed away, the quilt was missing as was her cedar chest, which were both bequeathed to me. I was heart-broken. When my aunt passed away and they were cleaning the attic, they found the cedar chest. When I opened it, our quilt was right on top! The bad news is the extra backing and sashing fabrics weren’t there. The background and sashing are a bright orange. All I have left to finish is the top left-side sashing. I take the quilt with me every time I shop for fabric, hoping to find the orange. I’m determined to find the orange fabric, sew that sashing strip on and then quilt it. What started as a teaching quilt is now a memory quilt. I’m very blessed to have the first quilt I ever made and with the stars made of grandma’s dresses that I still remember her wearing. To say I’m proud of it would be an understatement.”—Dianne Patternson, Olathe, KS
The Big Finish
“I’m most proud of the sewing and quilting projects I complete!”—Karen Brennan, Livonia, MI
Party Dress Details
“I’m most proud of the long deep blue jersey strapless dress with flounced hem that I made for my 18th birthday party in 1977. When it surfaced from the loft last year, I was amazed at the accuracy and finishing skills I learned from my mum. I just recall throwing garments together on the day of the party, and assuming they were flawed until now!”—Debbie Davis, Bristol, UK
Naturally Inspired Home Dec
“I created a fabric room divider on which I appliquéd large ginkgo leaves in various stages of life and ending in satin-like clouds. I’m proud of my creativity.”—Jeanne Theodore, Waynesville, NC
Doing Good Work
“I gave my first quilt top to a group to quilt. It was then given to a fifth grade girl in the hospital. They sent me a picture of the young girl holding my quilt; I was hooked to do more for others.”—Harriet Wetherell, Plano, TX
Committed to Learning
“I always learn something new or find new solutions to a problem that makes me feel accomplished! Then my new skills and experiences cause me to look back on previous projects and see what I could have done better. The things that I stay proud of are the ones I’ve given away so that they’re not around anymore for me to nitpick!”—Robin Gandy Harsh, DeSoto, KS
The Table was Turned
Note From Nancy: Jen on my staff asked, “Why don’t you answer the same question?” I had to pause and think. Like many of you, I chose a sewing project made for a special occasion. I made both of my granddaughter’s baptism gowns. For my oldest granddaughter, I selected an embroidered Swiss batiste. Her sister’s gown was satin. I was surprised that my daughter-in-law wrapped little Luella in a flannel receiving blanket, covering up her dress. Then I learned that the satin was so slippery that the baby almost slipped out of her mama’s arms! Word to the wise, batiste is a better choice.
March Reader Spotlight:
Amy R. Shimonkevitz’s Answer
“My wedding outfit, which was my first-ever full outfit that I sewed for myself from start-to-finish.”—Amy, Baltimore, MD
About Amy:
What type of sewing had you done prior to a making your wedding outfit? My sewing experience at that time was limited to a few simple garments (skirts, simple dartless blouses, a bathrobe) and basic unfinished quilt tops before deciding on the crazy idea to sew my own wedding outfit.
Could you give us a brief description of your dress? Unfortunately, I no longer have a picture , but it was a purple linen six-gore tea-length skirt with a purple cotton batik print 3/4-sleeve tunic for the top. My husband’s favorite color is purple, and I thought I’d do all I could to “stack the deck in my favor” by wearing his favorite color to our wedding. The sewing was simple, but the effect was pretty because of the batik—I knew I would never find anything in the store that would suit my vision. It was comfortable (being cotton and linen), and I felt so good keeping our expenses to a minimum. I didn’t use trims or fancy stitching; I let the batik and the rich purple color do most of the work for effect.
What was your biggest challenge? My biggest challenge was fitting. I made a muslin. The muslin didn’t fit, so I fussed with a new muslin to get the fit just right. The pattern had enough ease that I didn’t have to re-sew too often. I’m pretty sure I didn’t do the fitting the way it is recommended, but for my purposes, the tunic fit and it looked great—better than anything I ever purchased. Turns out I inadvertently made French darts in the bust without knowing .
What will you tackle next? Since that time, I’ve completed quilts—jelly rolls, mostly—and I’m just now beginning a pair of dress pants using the Palmer-Pletsch fitting technique and a modified Nehru-style jacket using a cut-apart sweatshirt as the pattern and prequilted fabric as the medium. Nancy helps me feel confident about trying new sewing projects, and her blog and website are such good resources for someone like me who has to watch and re-watch and re-read to understand what needs to be done to get good results. I’m so grateful for this easy to use and accessible resource.
April’s Share Your Insight Question
April Question: Describe your dream sewing or quilting day.

Submit your answer by April 17, using the form below, to be considered for our April Reader Spotlight.
Disclaimer: We may contact you to verify your answer. Your contact information will not be used for any other reason. Your submission to Nancy Zieman Productions, LLC, including contact information, gives us the right to modify, use, distribute, reproduce, publish, and display the submission indefinitely in all media, means, and forms without any payment to you. You hereby represent that you haven’t copied the content from a book, magazine, newspaper, or other commercial source.
Watch Sewing With Nancy online.
To watch Sewing With Nancy on your iPad, iPod Touch, or iPhone, download the app.
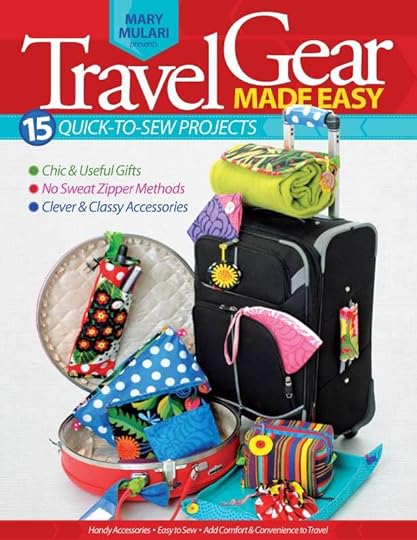
The random winner of a copy of Travel Gear Made Easy book, compliments of Mary Mulari, is Patty Sack. She said: I really like the travel trio set and can think of a lot of people who would enjoy getting these as a gift!
Check out this blog for quick and easy projects!
Content in this feed is © copyright 2016 by Nancy Zieman and may not be republished without written permission. You’re welcome to forward the email to a friend or colleague but it’s not okay to add the RSS feed automatically as content on a blog or other website.
Make sure you are subscribed to my enews mailing list so you won’t miss a thing. Sign up here . Join us on Facebook , plus a host of other social media channels. Connect With Nancy today!
March 24, 2016
Alter Apparel Designs with Magic Patterns
Building on ideas that originated over 90 years ago, you will be amazed at the magic used to create a variety of sewing patterns. During the next two Sewing With Nancy programs my guest Amy Barickman and I will be showing Magic Patterns. The concept was originally published by Mary Brooks Picken, founder of the Woman’s Institute of Domestic Arts & Sciences, back in the ‘20s. The designs of Amy Barickman and her staff are an ode to Mary’s original concept, which is to take what’s given and add your own spark!
The Magic Tank Top Pattern
From retro to modern, the first Magic Pattern, a tank top, can be easily changed by adding gathers, ruffles, or using vintage fabric. The sewing is designed to take just the minimum of time with a maximum of style. Watch online as Amy and I show you a few of the variations of this pattern.
Avery—a touch of gathering at the neckline and bias trim is what sets this pattern version apart from the rest.

Adelaide—add flounces, it is easier than you think!
Alice—upcycle using vintage fabric. The featured fabric is bark cloth, once used for home décor, now repurposed for this modern tank top.

The Magic Skirt Pattern
Onward to skirts—learn how to stretch your creativity and make the magic swirl skirt. We start with the basics. Learn how to sew a waistband, add a pleat, and repurpose menswear for another charmed style.
Billie—This is the basic skirt pattern. If it has been awhile since you’ve sewn a skirt, give this a try!

Blythe—with a little pattern magic, learn how easy it is to add a pleat to the center front.
Bridget—Repurposed menswear is the fabric of choice for this skirt. I think you’ll enjoy seeing how the pattern pieces are placed on the “fabric.” Clever.
The Magic Pattern Book
This book features 6 magic patterns that can be transformed into 36 different styles, with 216 different looks. This easy-to-follow book shows how 6 patterns x 6 looks x 6 fabric suggestions (for each look) results in a complete wardrobe. The book has beautiful full-color photos, step-by-step instructions, and a CD of printable patterns. Amy and Nancy guide you on how to tile the patterns, which are featured on the CD in the book.
I’m also happy to share with you, Amy’s latest endeavor:
Vintage Notions Monthly with Amy Barickman of Indygo Junction
This is the continuation of the story Amy told in her book, Vintage Notions. This book shared a small piece of the history of her muse, Mary Brooks Picken, and the school she founded, The Women’s Institute of Domestic Arts & Sciences.
In honor of the 100th Anniversary of the Institute this year, Amy will be releasing a series of magazines, Vintage Notions Monthly, which will feature a curated collection of Woman’s Institute materials including:
Excerpts from the Institute’s newsletter—Inspiration, and its magazine—Fashion Service
Vintage fashion illustrations
Inspiring stories and testimonials
Sewing lessons & techniques
A monthly Magic Pattern—a fashion sewing pattern created from personal measurements instead of pattern pieces.
The sewing lessons, vintage wisdom and beautiful (and fun to color!) illustrations will appeal to the modern sewists in our industry who love to buy, share, and enjoy inspiration.
To view the video & preview a free sample issue, visit: http://amybarickman.com/vintage-notions-monthly-magazine/
Watch Magic Patterns on Sewing With Nancy online.
To watch Sewing With Nancy on your iPad, iPod Touch, or iPhone, download the app.
For a chance to win a copy of The Magic Pattern Book from Amy Barickman, please leave a comment below sharing which design you’d like to sew from the TV show Magic Patterns Part One.
Bye for now,
Content in this feed is © copyright 2016 by Nancy Zieman and may not be republished without written permission. You’re welcome to forward the email to a friend or colleague but it’s not okay to add the RSS feed automatically as content on a blog or other website.
Make sure you are subscribed to my enews mailing list so you won’t miss a thing. Sign up here . Join us on Facebook , plus a host of other social media channels. Connect With Nancy today!
March 22, 2016
Pillow Challenge Voting Opens Today
Voting is open for the 2016 Pillow Sewing Challenge!
Thank you to everyone who participated by entering a pillow this year! I love seeing the work of this dynamic group of talented stitchers. I’m thankful I don’t have to choose just one winner.
Each voter will receive FIVE votes. Scroll down to the pillow gallery to vote. Share this post with a friend; everyone is eligible to vote. In addition to the generous prizes offered by sponsors, I decided to also offer a prize bundle, the Hobo Tote Template Package, to one randomly drawn winner.

Pillow Sewing Challenge Guidelines
Online voting begins March 22, 2016.
Voting closes on April 3, 2016.
Elected winners and one randomly drawn winner will be announced April 5, 2016.
An InLinkz Link-up
Go Social with Your Pillow Sewing Challenge
If you have a website, copy the code above and paste it into your website editor to have the Pillow Sewing Challenge badge on your site.
If you are on social sites like Instagram, Twitter, Flickr, or Facebook, let all your friends know you are working on the Pillow Sewing Challenge by tagging your post with the hashtag: #NZPillowChallenge.
——————————————-
Over $1,300 in prize packages from our generous sponsors:
Baby Lock Sewing: Anna Sewing Machine, value of $399
Assorted Product Bundle (patterns, books and fabric) from Amy Barickman and Indygo Junction, case and props not included, value of $200
Assorted Product Bundle from June Tailor, value of $185
Clover Assorted Nancy Zieman Product Bundle, value of $165
Sewing With Nancy DVD Value Set from Nancy’s Notions, value of $164.
Pellon Product Bundle from Pellon, value of $87.
F+W Media Two-Book Package, value of $55
Hobo Tote Template and Notions bundle donated by Nancy Zieman, value of $50
2016 Pillow Sewing Challenge Schedule
March 22: Voting Opens
April 3: Voting Closes
April 5: Winners Announced
Share your comments below about the Pillow Sewing Challenge and let us know if you plan to join!
Get Stitching!
Email challenge questions to info@ziemanproductions.com. Challenge not open to sponsors, employees, and immediate family members. Photos and techniques may be featured in future promotions, blog posts, videos, and/or TV shows.
Nancy Zieman—author, pattern designer, businesswoman, producer, and national sewing authority—is the host of the popular show Sewing With Nancy, which appears exclusively on public television stations across the United States and Canada. Follow Nancy’s blog at NancyZieman.com/blog and sign up to receive Nancy’s E-News for the latest news in Sewing, Quilting, Creating, and Block of the Month updates.
Content in this feed is © copyright 2016 by Nancy Zieman and may not be republished without written permission. You’re welcome to forward the email to a friend or colleague but it’s not okay to add the RSS feed automatically as content on a blog or other website.
March 20, 2016
Enter the 2016 Pillow Challenge Today!
Today is the last day to enter the 2016 Pillow Sewing Challenge. Brainstorm, browse, design, plan, and stitch your favorite pillow. Enter my Pillow Sewing Challenge by emailing me your image (info@ziemanproductions.com) by tonight- March 20, 2016; 10pm central! My staff and I will add it to the link tool. It’s easy!
Pillow Sewing Challenge Guidelines
Select or create your design.
All sewing, quilting, serging, machine embroidery, and embellishment techniques are eligible!
Grab our Pillow Sewing Challenge blog badge to let your friends know about this fun Pillow Sewing Challenge.
Remember to share your progress and projects on your social media sites using the hashtag: #NZPillowChallenge.
Email your photo by March 20, 2016, to info@ziemanproductions.com .
Online voting begins March 22, 2016.
Voting closes on April 3, 2016.
Elected winners and one randomly drawn winner will be announced April 5, 2016.
An InLinkz Link-up
Go Social with Your Pillow Sewing Challenge
If you have a website, copy the code above and paste it into your website editor to have the Pillow Sewing Challenge badge on your site.
If you are on social sites like Instagram, Twitter, Flickr, or Facebook, let all your friends know you are working on the Pillow Sewing Challenge by tagging your post with the hashtag: #NZPillowChallenge.
Additional Inspiration—Pillow Tutorials
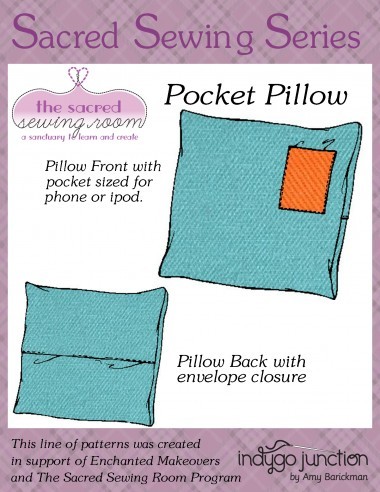
From Indygo Junction: Pocket Pillow
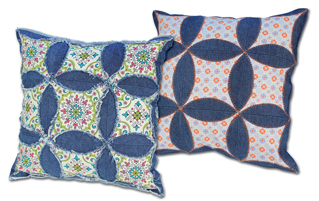
From June Tailor: Charming Circles Pillow
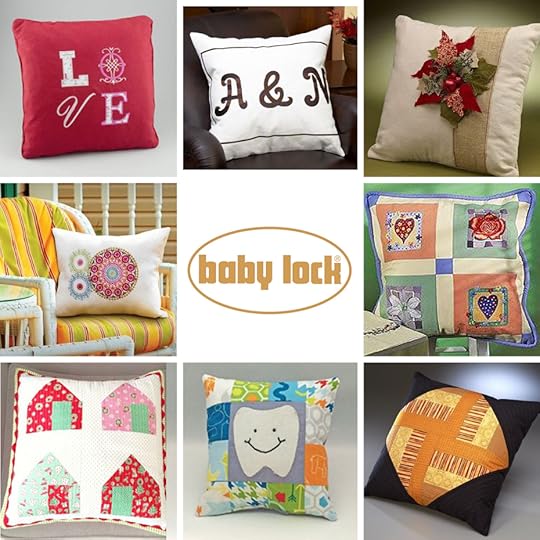
From Baby Lock Sewing: Pillow Projects
Simply type Pillow into their search bar to find pdf directions to these and many more pillow projects.
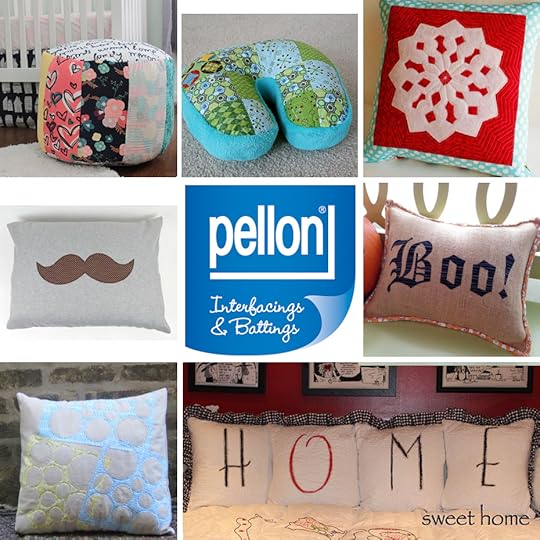
From Pellon: Pillow Projects
Find these and many more pillow projects on the Pellon Projects website.
——————————————-
Over $1,300 in prize packages from our generous sponsors:
Baby Lock Sewing: Anna Sewing Machine, value of $399
Assorted Product Bundle (patterns, books and fabric) from Amy Barickman and Indygo Junction, case and props not included, value of $200
Assorted Product Bundle from June Tailor, value of $185
Clover Assorted Nancy Zieman Product Bundle, value of $165
Sewing With Nancy DVD Value Set from Nancy’s Notions, value of $164.
Pellon Product Bundle from Pellon, value of $87.
F+W Media Two-Book Package, value of $55
Hobo Tote Template and Notions bundle donated by Nancy Zieman, value of $50
2016 Pillow Sewing Challenge Schedule
March 20: Entry Deadline
March 22: Voting Opens
April 3: Voting Closes
April 5: Winners Announced
Share your comments below about the Pillow Sewing Challenge and let us know if you plan to join!
Get Stitching!
Email challenge questions to info@ziemanproductions.com. Challenge not open to sponsors, employees, and immediate family members. Photos and techniques may be featured in future promotions, blog posts, videos, and/or TV shows.
Nancy Zieman—author, pattern designer, businesswoman, producer, and national sewing authority—is the host of the popular show Sewing With Nancy, which appears exclusively on public television stations across the United States and Canada. Follow Nancy’s blog at NancyZieman.com/blog and sign up to receive Nancy’s E-News for the latest news in Sewing, Quilting, Creating, and Block of the Month updates.
Content in this feed is © copyright 2016 by Nancy Zieman and may not be republished without written permission. You’re welcome to forward the email to a friend or colleague but it’s not okay to add the RSS feed automatically as content on a blog or other website.
Nancy Zieman's Blog

- Nancy Zieman's profile
- 21 followers

