
Rinku Bhattacharya's Blog, page 59
November 4, 2016
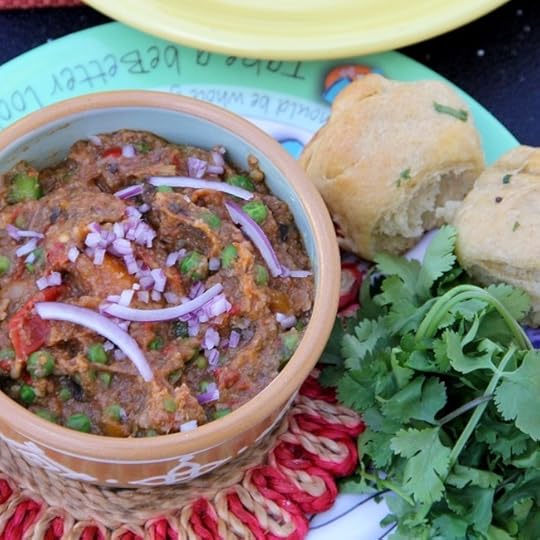
Pau Bhaji – Vegetable Pate with Homemade Rolls
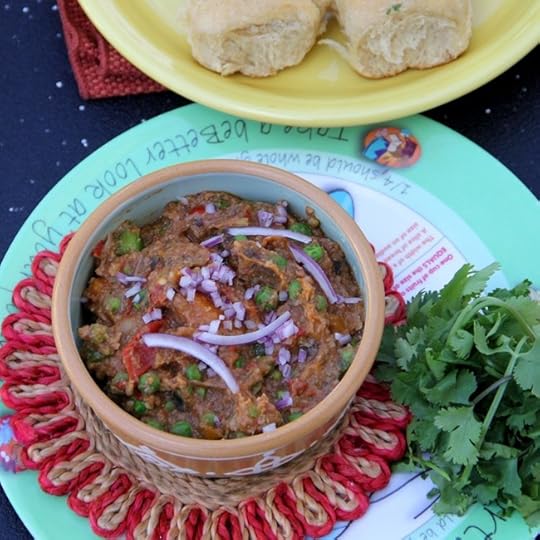 A pau bhaji essentially at heart is pureed vegetables, with spices and simmered with generous doses of butter served with small buttered rolls popularly called pau in Mumbai. This is quintessential street food and possibly of Portuguese origin.
It is a perfect dish for these wet and cool says that we have been enjoying and makes good use of all the somewhat mismatched vegetables that one might find around this time of the year. I do not overdo the butter, and this time round I made my own rolls, somewhat different but pretty darn delicious… In fact, so much so, that I will devote a separate post on the rolls and their making. The one thing I learned from this post was, when it comes to pau bhaji, think cauliflower.
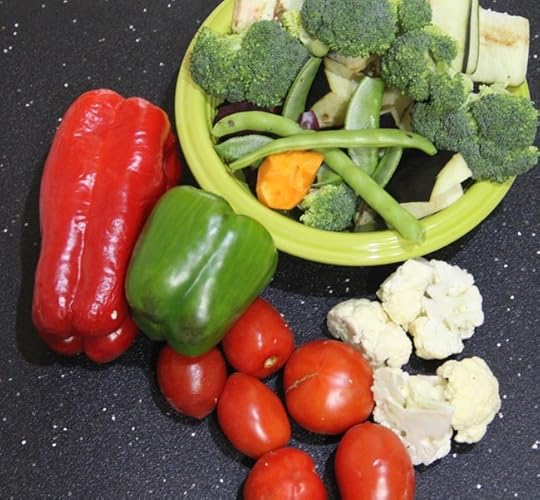
Yes, all those vegetables were cooked together to make this bhaji or vegetable puree and the color actually is natural, so it might not be the commercial bright red that your beach side memories are made of, it is pretty color a happy marriage of tomatoes and beets. I have to confess, I was bone tired tonight but I did not want to miss out on the kids eating something together as it was Bhaiphota, a Bengali festival celebrate the bond between a brother and sister.
Honestly, this might have been a far cry from the festive menus that siblings around India have been enjoying, but the kids were happy to sit together on a weeknight and enjoy fresh bowls of warm soft vegetables. I have mentioned this before, but, I will confess when it comes to the kids and the luck department I really could not do better. My children are motivated, hard working and affectionate. Everything a parent can hope for and more.
And with some butter, just not way too much, here is my recipe for pau bhaji
PrintPau Bhaji – Vegetable Pate with Homemade Rolls
Prep Time: 10 minutes
Cook Time: 45 minutes
Total Time: 1 hour
A iconic vegetarian pate from the streets of Mumbai.
Ingredients
1 medium sized head of cauliflower (about 1.5 pounds), coarsely chopped1 cup broccoli florets
1 small eggplant, chopped
2 potatoes, peeled and chopped
1 small beet, peeled and quartered
2 medium sized carrots
1 tablespoon grated ginger
2 to 3 cloves garlic
1 tablespoon cumin coriander powder
1 tablespoon garam masala
1.5 teaspoons salt
1 tablespoon amchur or dried mango powder (can be subbed with 2 tablespoons lime juice)
To finish
3 tablespoons oil
1 teaspoon whole cumin seeds
1 teaspoon red cayenne powder
4 tomatoes, chopped
1/2 cup frozen peas
4 tablespoons chopped cilantro
4 tablespoons chopped onion
Instructions
Place the cauliflower, broccoli, eggplant, potatoes, beet, carrots, ginger and garlic in the pressure cooker with 1/4 cup water.Add in the cumin-coriander powder, garam masala, salt and amchur powder and cook for about 10 minutes.
Cool and remove the lid and mash well.
In a large skillet heat the oil and add in the cumin seeds and let the seeds sizzle. Add in the cayenne powder, tomatoes and mix well and cook until the tomatoes soften.
Add in the mashed vegetables and simmer for about 15 minutes, mashing the vegetables into an even smooth puree.
Stir in the peas and cook for a minute or two.
Garnish with the chopped cilantro and onions and serve with warm fresh dinner rolls.
3.1http://www.spicechronicles.com/pau-bhaji-vegetable-pate-homemade-rolls/
The post Pau Bhaji – Vegetable Pate with Homemade Rolls appeared first on Spice Chronicles.


October 16, 2016
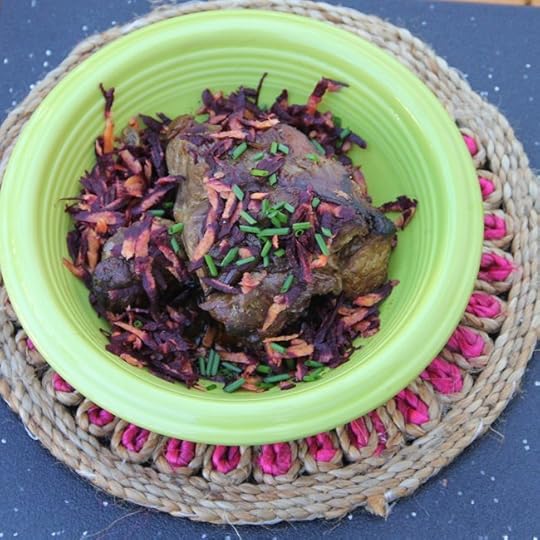
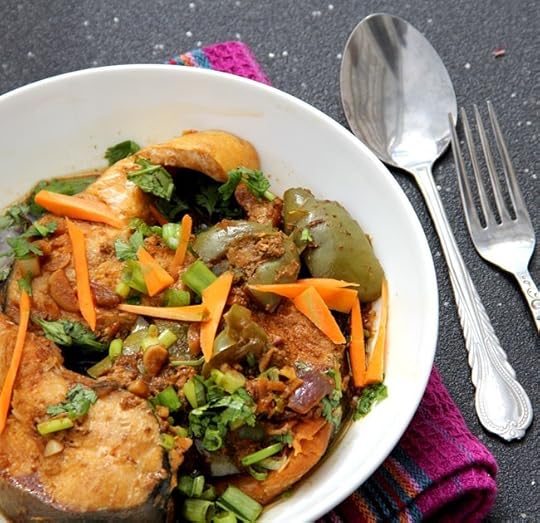
Goan Style Roast Pork and staying off the Soapbox
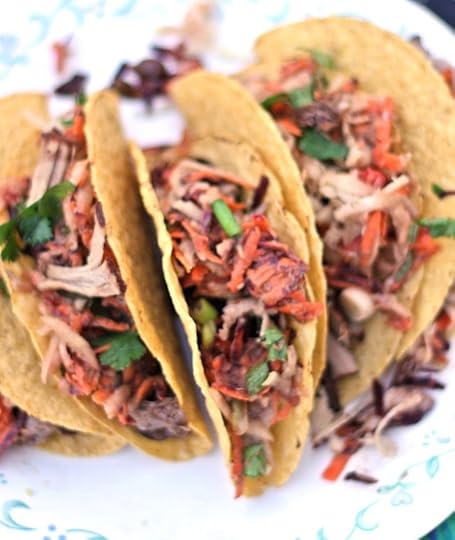
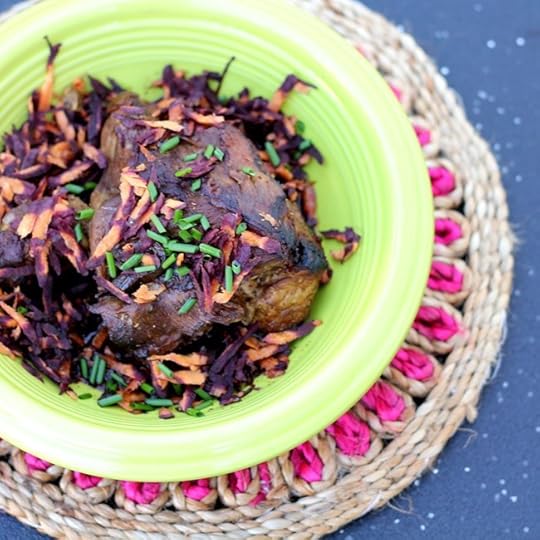 I tried this Goan Style Roast Pork and was thrilled with the way it worked out. Relatively effortless, I might add, all about a good deep sear and some pressure cooking, making this a pot roast rather than a true roast. We enjoyed it in our tacos all the same.
It looks like it is all dressed for Halloween, with the funny shredded purple carrots I found from the farm.
Most of you readers probably realize that these days with my recipes you get my daily dose of philosophy. Today I accidentally found myself on the receiving end of someone’s soapbox particularly about all her life’s problems were attributed to issues beyond her control and often beyond real change. Believe me, I know how that feels but honestly, if all our problems are unchangeable we shall remain stuck with them until doomsday. Maybe she got me on a bad day, but honestly, I think there is sometimes some merit to staying off the soapbox, particularly during times when it is easiest to get on the same.
This deep spicy pot roast, with a touch of sweetness brings back memories of a childhood evening with friends of the family who were charged with baby sitting me for the evening.I listened to stories of her Goan childhood and pictured the waves, sea breeze and palm trees as the scents of the roast cooking filled us with warmth and anticipation.
The meal consisted of this absolutely gorgeous roast and sliced potatoes, with a mixed vegetable salad. Mavis Aunty told me that it was a family favorite Sunday supper, her twist to it was to add a little jaggery to assist with the browning and lend a touch of sweetness to balance out the spices. Almost Bengali… This evening, I had the meat marinated, but ran out of steam to roast it but cooked it in the pressure cooker instead. A star is born, perfect for our tacos that we enjoyed with the kids for our Sunday Supper.
Venturing out in some ways out of my comfort zone next week, both with the cooking and other ways of life. Stay tuned to see what happens.
I am either awfully close to something or terribly far away from it, Aadi and I are waiting and watching.
PrintGoan Style Roast Pork and staying off the Soapbox
Prep Time: 1 hour, 30 minutes
Cook Time: 30 minutes
Total Time: 2 hours
A gorgeous goan spiced pot roast done effortlessly in the pressure cooker. Perfect for Sunday Supper and more.
Ingredients
4 tablespoons cider vinegar2 tablespoons grated ginger
2 tablespoons grated garlic
2 tablespoons garam masala
1 tablespoon whole cloves
1 tablespoon bruised green cardamoms
2 tablespoons soy sauce
1 tablespoons cayenne pepper (optional, but if you like it spicy, add it)
4 tablespoons brown sugar
3 to 4 pound piece of pork shoulder
4 tablespoons oil
1 large onion, thinly sliced
To garnish
Shredded carrots
Chopped cilantro and chives
Instructions
Mix the vinegar, ginger, garlic, garam masala, cloves, cardamoms and soy sauce and toss together. Cover the pork with this mixture and marinate for about 1 or 2 hours.In the base of the pressure cooker, heat the oil and add the onions and stir well for 4 to 5 minutes. Place the pork and let it cook for 6 to 7 minutes on each side so that it is nicely seared. Turn and pour in all the marinating spices, add about 3 to 4 tablespoons of water to deglaze the base.
Cover the pressure cook and cook for about 15 minutes under pressure. Let the pressure release naturally.
Remove the meat and place in a serving plate with any pan drippings.
Garnish with the carrots, chives and cilantro and enjoy!3.1http://www.spicechronicles.com/goan-style-roast-pork-staying-off-soapbox/
The post Goan Style Roast Pork and staying off the Soapbox appeared first on Spice Chronicles.
October 12, 2016
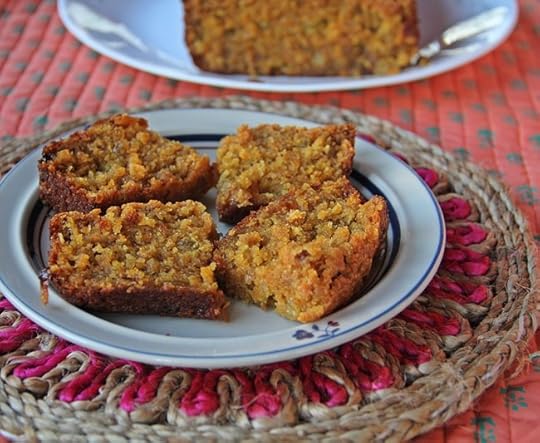
Super Moist Carrot Banana Loaf
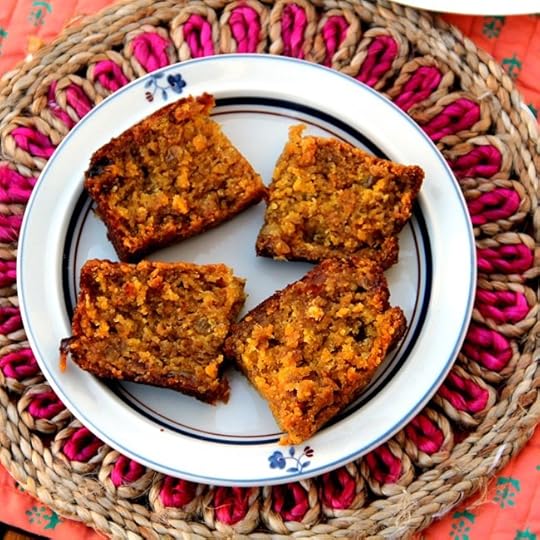 My first encounter with carrot cake was on a school trip, we had camped out at someone’s parents house. They had left a gorgeous carrot cake, loaded with raisins, walnuts and pineapples. Given my love for fruitcakes, I was completely hooked. Over the years, I have however realized that the key to a good carrot cake is dense sweet and spicy moistness and in this case this one totally hits the spot.
I have been cooking up a storm, loads and loads of food – lentils, chicken and even my kind of desserts. There were two super ripe bananas, I quickly folded them into loads of freshly pulled carrots, added in a little garam masala and think I might just have created the world’s easiest and moistest carrot cake, except it was a loaf.
Funny, how carrots get a short shrift in fall. They are as orange as pumpkins and in my opinion far more versatile. I am a huge carrot cake fan, in fact, if I get to pick it is what I like as cake of choice. I personally like it uncluttered without the icing. I think if the carrot cake in my life was missing something it was the bananas. I really was not planning to do a lot with this loaf, except maybe burn nervous energy. Once, I cut myself a piece of this moist warm slice I think I might ruined for other carrot cakes forever.
I will definitely rue this bout of crazy cooking someday, as the children are getting very spoiled with this everything homemade phase we have been having. For today, however I will let them enjoy the moment. They are currently waiting on their newest favorite a sort of lunchbox ragu.
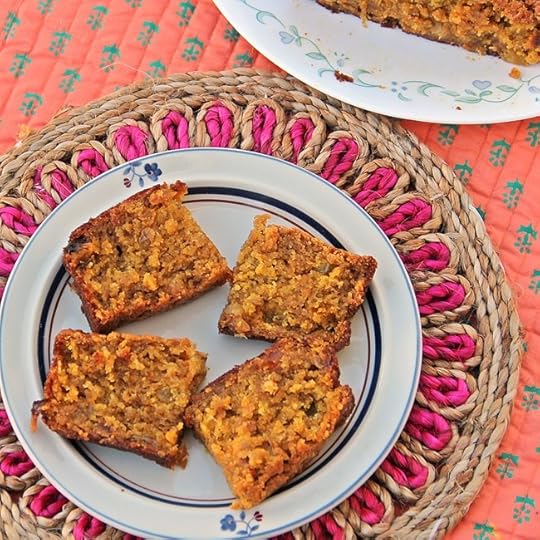
The tepid pictures might not entice, but take my word for it, give this simple easy treat a try and you just might end up a believer like me.
PrintCarrot Banana Loaf
Prep Time: 15 minutes
Cook Time: 45 minutes
Total Time: 60 minutes
A beautiful moist and golden carrot and banana cake, perfect for those after school fall evenings.
Ingredients
4 to 6 medium sized carrots, peeled and shredded (About 1,5 cups)2 very ripe bananas, mashed
2 eggs
1/2 cup butter softened, plus more for greasing
3/4 cup raw turbinado sugar
2 teaspoons garam masala powder
1.5 cups all purpose flour
1 teaspoon baking powder
1 teaspoon baking soda
3/4 cup golden raisins
Instructions
Pre-heat the oven to 350 degrees.Place the carrots and the bananas in a mixing bowl and beat in the eggs.
Add in the butter and the sugar and beat until well mixed.
In a separate bowl, mix in the garam masala, flour, baking powder and soda and gradually add to the wet ingredients and beat until well mixed. Do not over beat.
Stir in the raisins
Pour into a greased loaf pan and place in the oven and bake or 45 minutes until the cake is done.
Cool for about 45 minutes cut into slices and serve.3.1http://www.spicechronicles.com/super-moist-carrot-banana-loaf/
The post Super Moist Carrot Banana Loaf appeared first on Spice Chronicles.
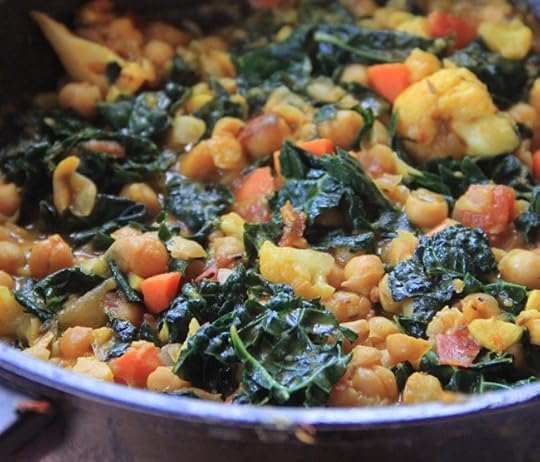
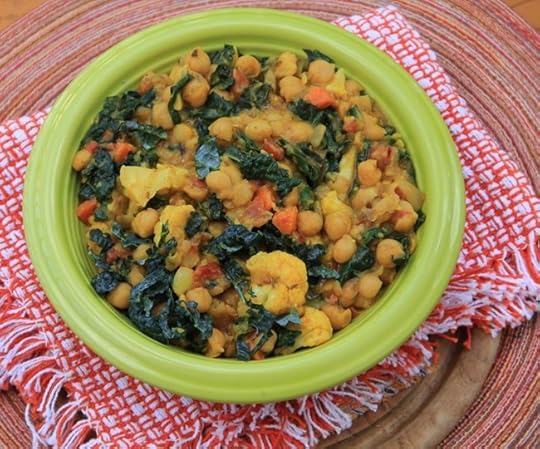
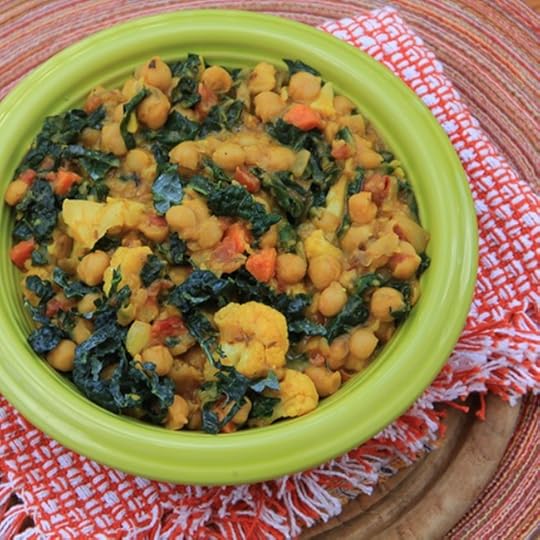
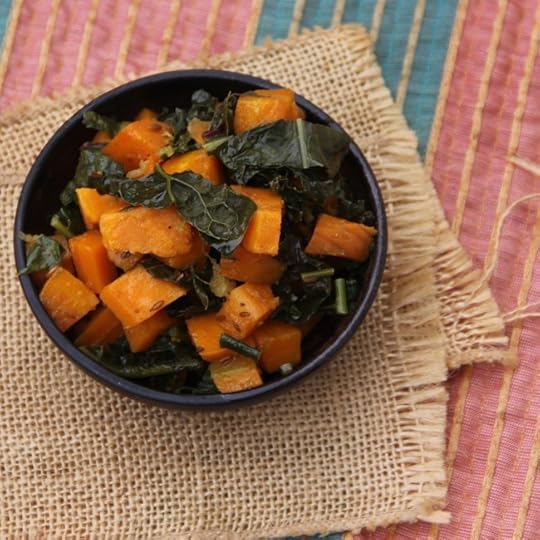
Channa Masala with Kale, Carrots and Cauliflower
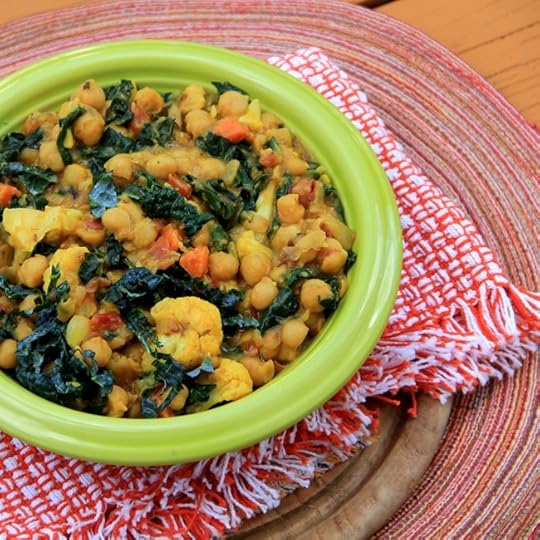 Chickpeas were one of the first things that I learnt to cook for myself, and along the way it became my go to dish for potlucks and events. I learned along the way to call the curried chickpeas Channa Masala and later when married into a North Indian family, choley. My go to version then and today is a veggie laced version not unlike my fall chicken curry, only this one is with vegetables, or my Channa Masala with Vegetables.
In fact, I even braved taking this to the very first job I had. No-one knew who had made the dish, but I heard people praising the and now, well even the children love this dish.
The relatively more time on my hands, almost an extra day per week has not necessarily translated to more time with the kids. Certainly not Deepta at least, making me brutally aware of how fast they are growing up. Even the election shenanigans have gone from funny to plain seriously disgusting. I cannot help longing for election campaigns and pretty much everything where the world was a safer and more private place.
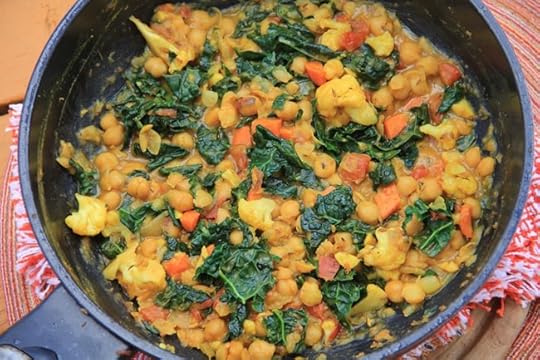
The unique character I add to this version, is finishing it off with 2 teaspoons of thyme. I had originally, way back in the day done it because my spice pantry was ridiculously sparse. It consisted of a handful of basic spices offered to me courtesy of my aunt and this container of dried thyme given to me by someone shifting apartments. I miss the possibilities of those spartan days when life was so simple and yet full of possibilities. Of course, those first vegetables used were frozen ones and today this fall staple comes together with garden carrots, kale and cauliflower.
I have been asked for a pressure cooker primer which I will definitely offer someday, but for today my accomplishment shall be simply sharing this recipe.
On a post script, I will be spending quality time in the kitchen as I have loads of tomatoes from the farm and plan of getting busy in making tomato chutney, stay tuned to see what I do with the chutney.
PrintChanna Masala with Kale, Carrots and Cauliflower
Prep Time: 10 minutes
Cook Time: 15 minutes
Total Time: 30 minutes
A hearty channa masala with carrots, kale and cauliflower.
Ingredients
2 tablespoons oil (such as olive or canola)1 teaspoon whole cumin seeds
1 large red onion chopped
1 tablespoon freshly grated ginger
2 cloves of minced garlic
2 teaspoon cumin powder
1 teaspoon coriander powder
1 teaspoon red cayenne pepper
1 teaspoon turmeric powder
1 teaspoon salt or to taste
3 cups of cooked chickpeas
1 or 2 tomatoes, chopped
2 medium carrots chopped
1/2 medium cauliflower, cut into chunks
1 teaspoon dried thyme or 1 tablespoon fresh
2 cups of finely chopped kale or any other leafy green
1 teaspoon garam masala
3 tablespoons fresh lime juice
Instructions
Heat the oil in the base of a pressure cooker or a heavy bottom pot and add in whole cumin seeds and wait for the seeds to sizzle and add in the red onion. Saute the onion for about 5 to 7 minutes until the onion softens and begins to turn golden.Add in the ginger and garlic and cook for another minute.
Add in the cumin, coriander, turmeric, salt and red cayenne powder and stir in the chickpeas cook for another minute.
Add in the tomatoes, carrots and cauliflower and about a half cup of water. If using a pressure cooker, cover and cook for 5 minutes or add a cup of water and cover and cook for 25 minutes until the vegetables are tender.
Cool and remove the cover and stir in the thyme and kale and cook until the kale is wilted.
Stir in the garam masala and the fresh lime juice.
Serve as a wholesome gorgeous bowlful.3.1http://www.spicechronicles.com/channa-masala-vegetables/
The post Channa Masala with Kale, Carrots and Cauliflower appeared first on Spice Chronicles.
October 10, 2016
Komola Kanchagolla – Bengali Cheese Desserts
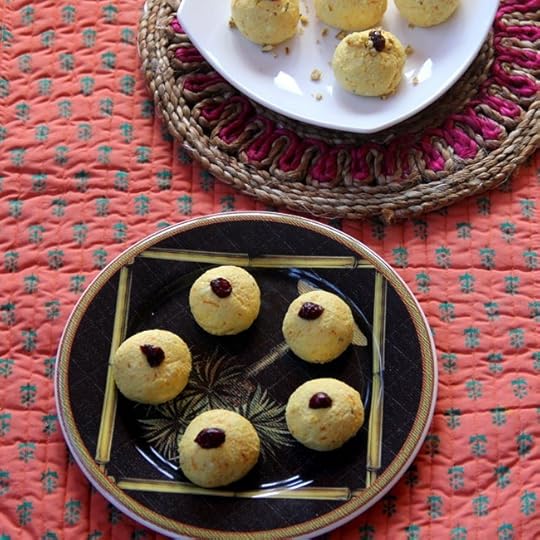 Happy Pujo to all my readers, here is a really simple recipe that is fitting for a weekday celebration. It is extremely simple and called kanchagolla because it needs to cooking. The word kancha in Bengali means raw or uncooked and golla refers to the balls or the round shape.
In today’s virtual world, somethings are a little closer like the flood of puja pictures I see in peoples feeds. Although sometimes it highlights what might be missing as well. The festival season has been somewhat quiet in our house, but I have been happy to enjoy some peaceful quiet moments in the kitchen with the kids and husband.

This dessert is even simpler than sondesh but it is all about technique, the key here is to make good quality homemade channa or paneer, you can follow my video here. I actually have demonstrated the process of mixing and whipping the paneer in the food processor. Typically, the kanchgolla is served plain seasoned with cardamom, or date palm jaggery or nolen gur. In this variation, I have made komola or orange kanchagolla using lot of orange zest.
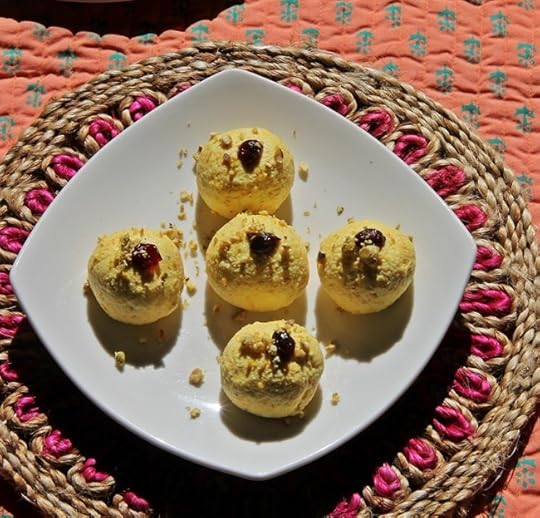
In addition, I added a pinch of orange color. I have tried this with saffron and feel that it almost mutes the freshness of of the orange. This ends up being one of our favorite desserts because it is so pure, pristine and of course easy to make. We Bengalis believe that Ma Durga returns once a year, destroys all evil and returns leaving the world a better place until next year.

Here is hoping and wishing everyone all the peace and simplicity of fall, cozy and warm winter evenings filled with the comfort of warmth and happiness. Not, unlike the pure melt in your mouth simplicity of a good kanchagolla.
PrintKomola Kanchagolla – Bengali Cheese Desserts
Prep Time: 45 minutes
Cook Time: 5 minutes
Total Time: 50 minutes
Yield: 10 kanchagollas
Serving Size: 1 ball
A simple melt in your mouth orange flavored Bengali dessert called Komola Kanchagolla.
Ingredients
1/2 gallon whole milk1-2 limes
11/2 tablespoons fresh orange zest
3/4 cup sugar
a few drops orange food color
Cranberries and chopped pistachios for decorating
Instructions
Heat the milk in a large heavy bottomed pan and bring to a rolling boil. Turn off the heat and squeeze in the lime juice, using a half lime at a time. Stir until the milk solids separate from the whey.Drain and gather in a cheesecloth and drain for about 45 minutes.
Place in a food processor with the orange zest and food color and pulse for a minute or so. Alternately, mash the channa with your hand until smooth and soft for at least 10 minutes. You should feel a little bit of the grease from the paneer coating your hands.
Shape into small balls a little larger than a walnut. Top with cranberries, sprinkle with the pistachios and enjoy.3.1http://www.spicechronicles.com/komola-kanchagolla-bengali-cheese-desserts/
The post Komola Kanchagolla – Bengali Cheese Desserts appeared first on Spice Chronicles.
October 4, 2016
Sushi Bowls – (Inspired by Aadi)
 Food, or for that matter anything is a matter of labeling, who knew that Sushi Bowls would become the next in thing in our house.
In fact, they were pronounced to be almost as good as (Bagels and Lox – aka smorgasbord). We shall save that story for another day, let us talk about how these bowls came to be.
It started with my son Aadi returning on Friday and announcing, “Do you know what XX brought for lunch?”
Anytime a conversation begins with stories of the school cafeteria, or someone’s lunchbox story I cringe before continuing to listen. Such conversations lead to stories about nutella sandwiches, and call me a tiger mom, but the later is not going to be a part of his lunchbox anytime soon.
Instead, he went on to tell me about his friends sushi lunchbox, except, he explained it was broken bits of fish and rice. And, the idea of the sushi bowl gelled. I had sushi rice sitting in my house forever, like all those crazy things that I buy and never get down to using. I remembered I also had nori sheets and furikake seasoning, thank you HMart!
The rest of the “bowl” was sheer inspiration, seasoned rice was topped with the flaked poached fish, seasoning liquid and all, carrots, green onions and avocado. A squirt of sriracha for the dad, lots of thinly sliced nori and furikake to finish and voila dinner was done. I had made the rice earlier in the day in the it was ready to use by dinner time. Next up will be a tofu version so that we can keep all the vegetarians happy.
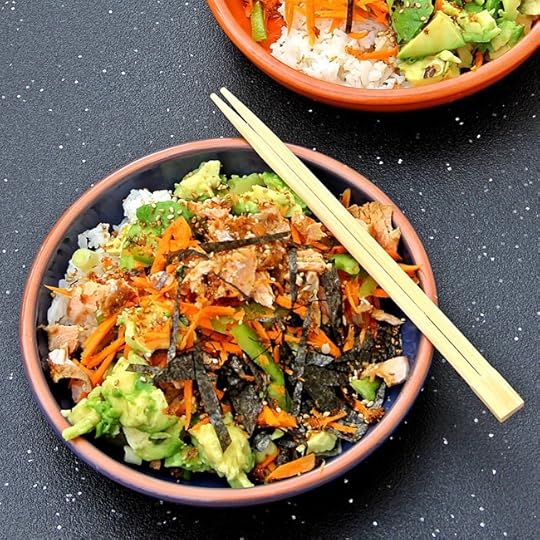
I had picked up extra chopsticks from yesterday’s sushi run, I know, the kids love sushi, who knew? In fact, that still surprises everyone when they ask me about their favorite food. So, we are down to a 48 hour countdown to Thursday, the official beginning of Durga Puja, I need to come up visualize something festive, right?
PrintSushi Bowls – (Inspired by Aadi)
Prep Time: 15 minutes
Cook Time: 25 minutes
Total Time: 40 minutes
Serving Size: Serves 4
An easy lunch bowl, featuring sushi rice, tamari poached salmon, loads of veggies and snipped nori.
Ingredients
For the Rice1/2 cup sushi rice
2 tablespoons vinegar
1 teaspoon sugar
1/2 teaspoon salt
2 tablespoons mirin or cooking rice wine
For the salmon
1 tablespoon oil
2 cloves garlic
1 tablespoon freshly grated ginger
1/2 cup chopped scallions
3 tablespoons cooking wine
2 tablespoons tamari
3/4 pound salmon, steaks or fillet
For the bowl
3 carrots grated
1/2 cup chopped green onions
1/3 cup finely chopped kale
1 avocado
3 nori sheets
Furikake seasoning to sprinkle (optional)
Instructions
Place the rice in the rice cooker with twice the amount of water and cook per rice cooker directions. Cool the rice and place in a mixing bowl. In a separate bowl, add in the vinegar, sugar, salt and mirin and mix well. Toss over the rice.Divide the rice into four parts.
In the meantime, divide the salmon into 4 pieces. Heat the oil and add in the garlic and ginger and saute for about 2 minutes. Add in the scallions and deglaze with the cooking wine and soy sauce. Add the salmon, cover and simmer for 10 minutes. Cool enough to handle and flake the fish, removing any bones if using steaks.
For each bowl. Add most of the salmon with some of the poaching liquid, add a heap of grated carrots, a little green onions, kale and some avocado. Snip some of the nori sheet. Top with the remaining salmon, snip more nori and sprinkle with the furikake is using.
Voila, sushi bowl, where have you been all my life?
3.1http://www.spicechronicles.com/sushi-bowls-inspired-aadi/
The post Sushi Bowls – (Inspired by Aadi) appeared first on Spice Chronicles.
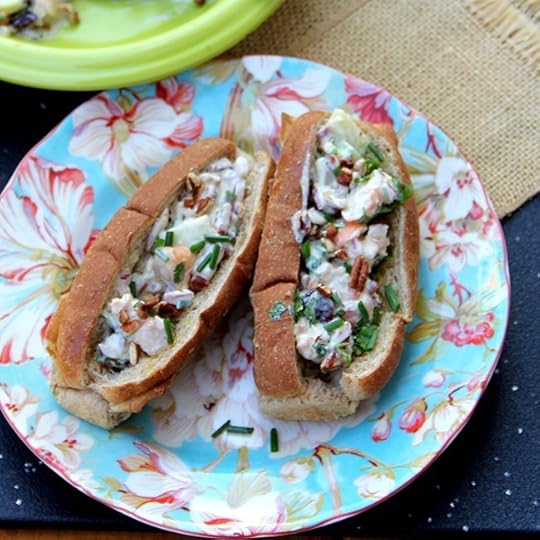
Fall Shrimp Salad Rolls
 To create this fall salad, I received free samples of Sabra Spreads mentioned in this post. By posting this recipe I am entering a recipe contest sponsored by Sabra and am eligible to win prizes associated with the contest. I was not compensated for my time.
Now, I wanted something shrimp today. I also wanted something fall, and then meshing the flavors of the Sabra Spread and my ideas this shrimp salad roll was born.
There has been a lot of cooking going on in the house the past few days. I always cook when I am anxious. I will probably be this kind of anxious, until the end of the week. So, you will see a lot of action here the next few days. I suppose it could be worse, I could do worse things…
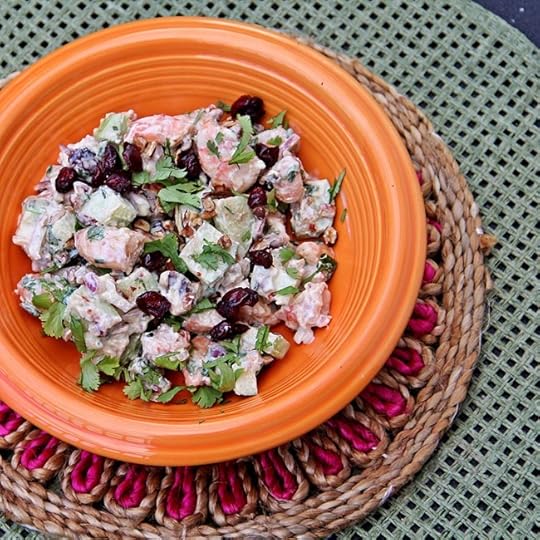
I like shrimp and like the concept of a shrimp salad, however, the though of those stale heavy mayo doused salads are a turnoff. So, I decided to create a salad that we could all learn to love and enjoy.

Last week, I received a bunch of Sabra spreads, three varieties to be specific – Garlic Herb, Sea Salt and Cracked Pepper and Honey Mustard. These will come good use in our house, as my children have anyway expressed a preference for Hummus in their sandwiches.
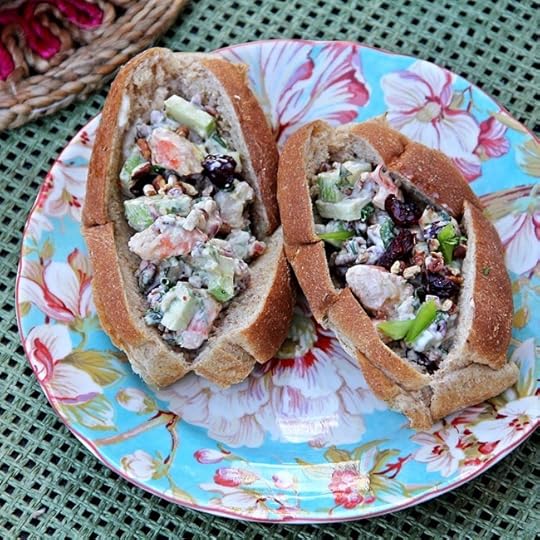
These spreads are very flavorful, lighter than mayo, about 75% less calories and come in a squeezable easy to use bottle. As I tasted them, my fall shrimp salad was born. This is a salad made with freshly cooked well seasoned shrimp with a burst of flavor from apples, pecans and cranberries in every bite. To put this salad together, I cooked shrimp in a well seasoned base, sort of a masala version of a court boulion, and them cut them into small pieces. Tossed these with pecans, apples, red onions herbs and dried cranberries and for a dressing I used the honey mustard and some Greek Yogurt.
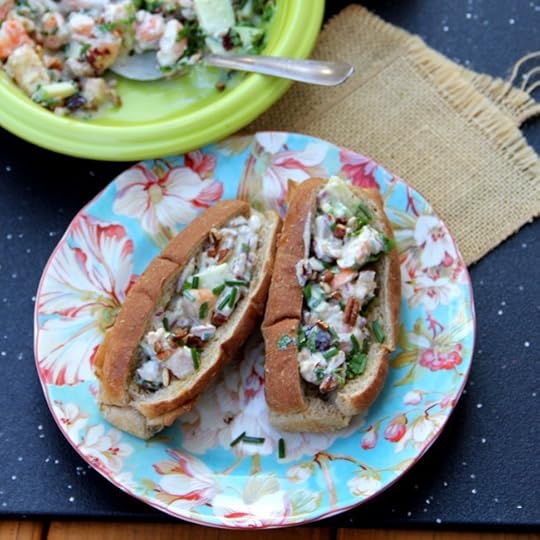
Letting the salad rest for about an hour helps bind the flavors considerably. I then toasted whole wheat hot dog rolls, drizzled them with olive oil and some more sabra spread and we enjoyed these for lunch. I have been enjoying these opportunities from Recipe Redux, a group I joined earlier this year. The group and their monthly keep me creative and help me think outside the box, right alongside my son Aadi.
An InLinkz Link-up
PrintFall Shrimp Salad Rolls
Prep Time: 45 minutes
Cook Time: 7 minutes
Total Time: 52 minutes
A lovely fall shrimp salad that makes great shrimp rolls, this version uses flavored Sabra humus spreads and olive oil instead of mayo..
Ingredients
For the Poaching Liquid1 cups of water
1.5 teaspoons red cayenne pepper (it seems like a lot but imparts just mild heat)
2 tablespoons chopped fresh herbs (I used a mixture of thyme and cilantro)
2 teaspoons pink or regular salt
1/2 pound of fresh shrimp, shelled and deviened
For the salad
2 granny smith apples, cored and cut into small pieces
1/2 red onion, finely chopped
2 tablespoons chopped chives
1 tablespoon chopped cilantro
1/2 cup chopped pecans
1 tablespoon dried cranberries
1 tablespoon Sabra honey mustard spread
1/2 tablespoon Sabra sea salt and black pepper spread
2 tablespoons Greek Yogurt
1 tablespoon extra virgin olive oil
1 teaspoon sweet Aleppo Pepper flakes (optional)
For the Sandwich
4 to 6 whole wheat hot dog rolls
1 tablespoon extra virgin olive oil
1 or 2 tablespoons Sabra sea salt and cracked black pepper spread
Instructions
Place the water, cayenne pepper, herbs and salt in a simmering pot and bring to a simmer. Add in the cleaned shrimp and cook for 4 minutes, until the shrimp turns barely pink.Drain, cool and cut into small bite sized pieces.
Place in a mixing bowl. Add in the apples, red onion, chives, chopped cilantro,pecans and dried cranberries and toss well.
Add in the pepper flakes if using.
In a separate bowl, mix the Sabra Honey mustard spread, Sabra sea salt and black pepper spread, with Greek Yogurt and olive.
Mix in this dressing into the salad and let the salad chill for at 30 minutes up to 3 to 4 hours, depending on the time available.
To prepare the sandwiches, toast the hot dog rolls, drizzle with the olive oil, add the Sabra spread and fill with the shrimp salad and enjoy right away.
3.1http://www.spicechronicles.com/fall-shrimp-salad-rolls/
The post Fall Shrimp Salad Rolls appeared first on Spice Chronicles.
October 2, 2016
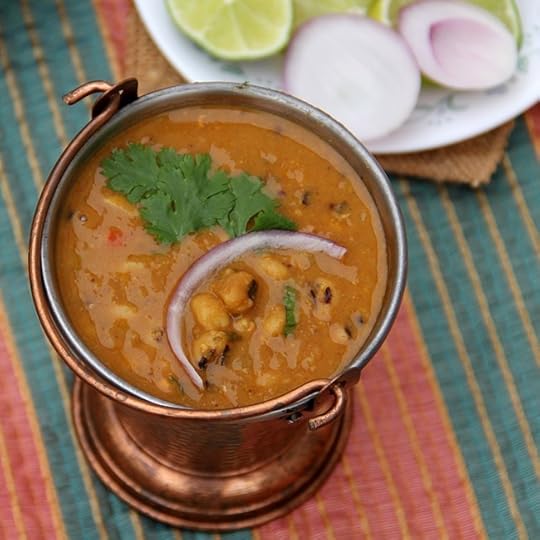
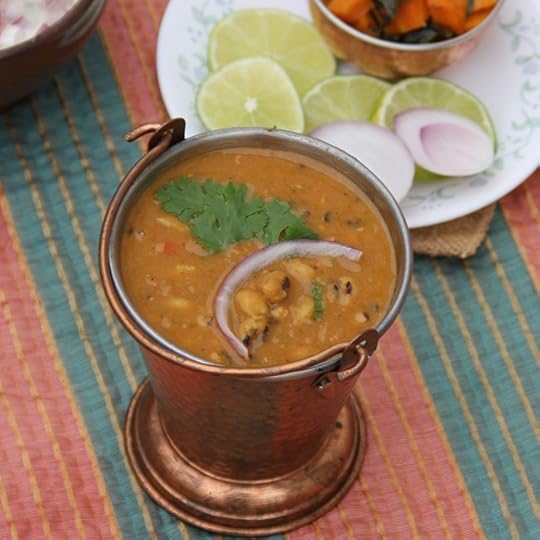
Sweet and Sour Lentils with Black-Eyed Peas
 There is nothing dull about dal (generic world for lentils) in the Indian universe. We like them everyday and any which way!
This sweet and sour pumpkin dal with black-eyed peas was just what I needed to lift up my spirits. It does not really help that the weather feels like dusky Halloween when it is only the second day of October.
The kids and dad are out and about, for their robotics, and I was wondering what to cook for family dinner. This dish came back to me, from last winter, something I had tried in a Punjabi household, the technique pretty typical of that area where two kinds of legumes are conjoined in a happy marriage, to create taste and texture.
Other than the sheer variety of legumes we enjoy, they myriad methods of cooking across the country in itself is just amazing. When I had first tried this stew, I had fallen in love with the complexity of flavors. A dish savored at a friends house, made by their aging help. When aunty explained the method to me, I was very skeptical, I really did not think 3 steps and an assorted complexity of ingredients could just melt into happy comforting puddles of just like that. Anyhow, today I figured I would give this whole thing a shot a shot and boy do I have a happy husband.
I revived this very simple creation, this time working through it in three minutes in my pressure cooker, we had a humble meal that would make a king jealous. The black-eyed peas or lobia are a smart choice as they cook pretty quickly and do not get overdone by the time the rest of the dal is ready. The pumpkin infused the dal with a natural sweetness and the finish with limes the right amount of tartness to balance the sweetness.
PrintSweet and Sour Lentils with Black-Eyed Peas
Prep Time: 10 minutes
Cook Time: 25 minutes
Total Time: 35 minutes
A whole one-pot meal, meshing lentils with squash or pumpkin.
Ingredients
1/2 cup red masoor lentils3/4 pound of pumpkin or sweet potatoes, cubed
3 cups of water
1 teaspoon salt or to taste
1 tablespoon freshly grated ginger
4 cloves of garlic
1 teaspoon turmeric
1 teaspoon red cayenne pepper
1.5 teaspoons powdered cumin
2 tomatoes, chopped
1/2 cup dried black-eyed peas
For the tempering
2 tablespoons oil
1.5 teaspoon mustard seeds
1 tablespoon minced garlic
To finish
1 lime or lemon, halved
Chopped cilantro
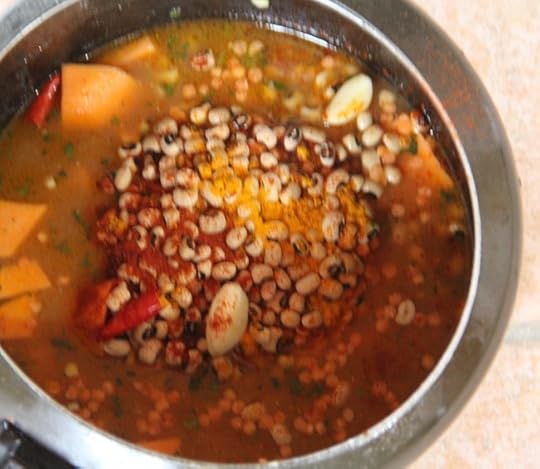
Instructions
Place the red lentils, pumpkin or sweet potato and water in a pressure cooker.Add in the water, salt, ginger, garlic, turmeric, cayenne pepper, cumin, tomatoes and black eyed peas.
Turn on the heat and cook for about 15 to 20 minutes, once the pressure cooker reaches full pressure.
Let the pressure cool naturally.
Remove the lid and stir the mixture gently with a wooden spoon, until the red lentils and the pumpkin, mix together to form a smooth puree leaving the black eyed peas whole.
In a separate pan, heat the oil and add in the mustard seeds and when they crackle add in the garlic and saute until the garlic is fragrant.
Pour the tempering over the lentils and stir well.
Squeeze in the lime juice and garnish with cilantro and serve with rice and flatbreads.
Notes
This recipe needs a distinct sweet and sour taste, so if you are using a winter squash, you might add 1 teaspoon of sugar.
If you do not have a pressure cooker, simple cook the lentils over the stove until they reach a smooth and creamy texture.
The post Sweet and Sour Lentils with Black-Eyed Peas appeared first on Spice Chronicles.
October 1, 2016
Light, Quick, and Easy Chicken Korma
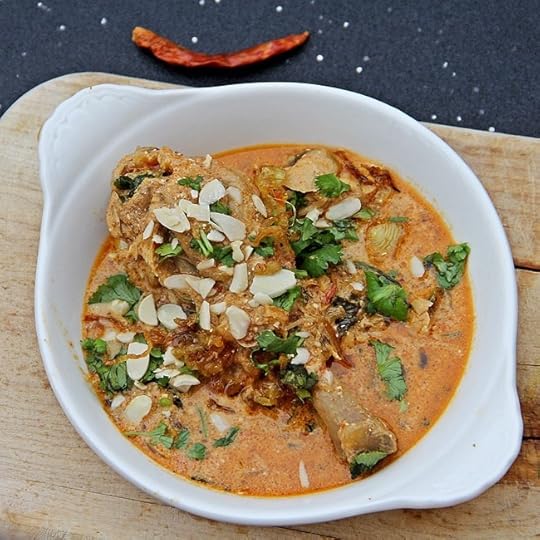 This light, quick and easy chicken korma is a sheer genius recipe that is going to make me happy on many days to come, I can just see that in my upcoming future.
It originated from a feeling of sibling jealously. Yes, the baby brother is in India while I am still pounding the pavement. I mean Kolkata this time of year, gosh that is so unfair…
All of this resulted in a craving for a good chicken curry, the deep slow cooked variety, specifically a light and soupy korma like my grandmother used to make complete with steamed rice. On a Saturday morning, there is no time for making slow simmered chicken curries the real kinds with chicken on the bone, slow simmered to perfection, and then an inspiration hit, what if I made this in my pressure cooker? As with anything done for revenge, this chicken curry was seriously good!
A korma is done differently in different parts of the country, but at heart has yogurt and most North Indian variations have cashew or almond pastes. This particular variation, I concocted actually has more tomatoes that I would add but, once made we loved the tang that it added so I think it is here to stay. I guess for a paler variation you can try this recipe, or even this one.
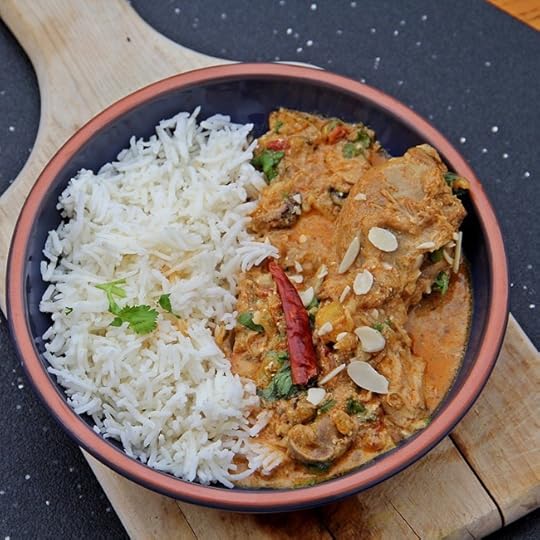
And I made this with no nuts, just used some to garnish, I did use a mixture of sour cream and yogurt. The overall effect of using the pressure cooker was that is retained all the wonderful flavor and kept the sauce nice and broth like. I did not skimp on the actual cooking, and browned the onions and all that.
The pressure cooker has been on my mind lately, not that I am every without all my different ones. However, I have been getting lots of questions about it, so I will definitely do a more full fledged post about the pressure cooker soon. Maybe coupled with a round up…
PrintLight, Quick and Easy Chicken Korma
Prep Time: 10 minutes
Cook Time: 25 minutes
Total Time: 25 minutes
A gorgeous and full flavored light chicken korma, with loads of flavor and freshness.
Ingredients
2.5 pounds of skinless chicken on the bone (I strongly recommend dark meat)1/3 cup yogurt
1/3 cup sour cream
1 teaspoon turmeric
1.5 teaspoons salt
1 teaspoon red cayenne pepper
3 tablespoons oil
2 medium sized onions, thinly sliced
1 tablespoon freshly grated ginger
3 pods of garlic, chopped
1.5 teaspoons cumin
1.5 teaspoons coriander powder
3/4 cup fresh tomato puree (about 4 tomatoes, pureed)
1.5 teaspoons garam masala
1 tablespoon sliced almonds
1.5 teaspoons chopped cilantro or coriander
Instructions
Rub the chicken with the yogurt, salt, and cayenne pepper and set aside while doing the rest of the prepping.In the base of the pressure cooker heat the oil and add in the sliced onions, gently cook the onions for a good 6 to 8 minutes adding in the sugar to help with even and uniform browning.
Remove about 1/3 of the browned onions to garnish.
Add in the ginger and the garlic and cook for another couple of minutes.
Add in the chicken and the cumin and coriander powder.
Add in the tomato puree and 1/4 cup of water and bring to a simmer.
Cover the pressure cooker and bring to full pressure. Cook for about 8 minutes once the it reaches full pressure. Let the pressure cool naturally.
Gently remove the lid and stir well.
Stir in the garam masala and the reserved golden onions. Garnish with sliced almonds and cilantro and serve with rice.3.1http://www.spicechronicles.com/light-quick-easy-chicken-korma/
The post Light, Quick, and Easy Chicken Korma appeared first on Spice Chronicles.
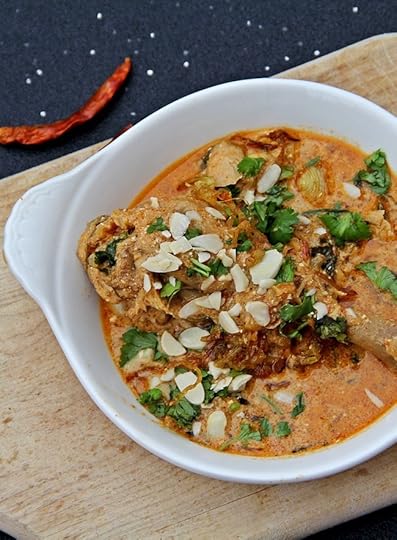
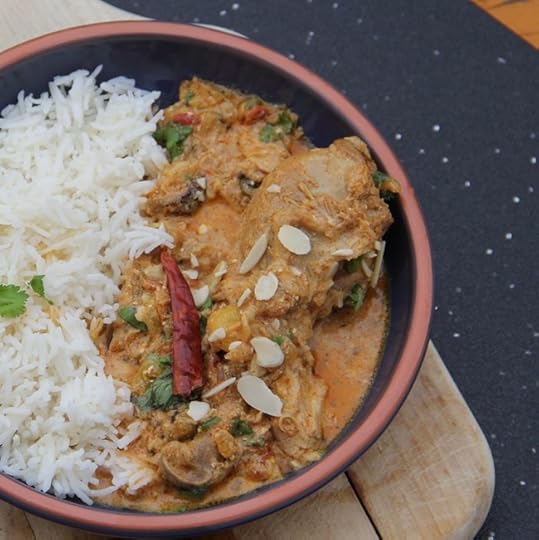
Light, Quick and Easy Chicken Korma
This light, quick and easy chicken korma is a sheer genius recipe that is going to make me happy on many days to come, I can just see that in my upcoming future.
It originated from a feeling of sibling jealously. Yes, the baby brother is in India while I am still pounding the pavement. I mean Kolkata this time of year, gosh that is so unfair…
All of this resulted in a craving for a good chicken curry, the deep slow cooked variety, specifically a light and soupy korma like my grandmother used to make complete with steamed rice. On a Saturday morning, there is no time for making slow simmered chicken curries the real kinds with chicken on the bone, slow simmered to perfection, and then an inspiration hit, what if I made this in my pressure cooker? As with anything done for revenge, this chicken curry was seriously good!
A korma is done differently in different parts of the country, but at heart has yogurt and most North Indian variations have cashew or almond pastes. This particular variation, I concocted actually has more tomatoes that I would add but, once made we loved the tang that it added so I think it is here to stay. I guess for a paler variation you can try this recipe, or even this one.
And I made this with no nuts, just used some to garnish, I did use a mixture of sour cream and yogurt. The overall effect of using the pressure cooker was that is retained all the wonderful flavor and kept the sauce nice and broth like. I did not skimp on the actual cooking, and browned the onions and all that.
The pressure cooker has been on my mind lately, not that I am every without all my different ones. However, I have been getting lots of questions about it, so I will definitely do a more full fledged post about the pressure cooker soon. Maybe coupled with a round up…
PrintLight, Quick and Easy Chicken Korma
Prep Time: 10 minutes
Cook Time: 25 minutes
Total Time: 25 minutes
A gorgeous and full flavored light chicken korma, with loads of flavor and freshness.
Ingredients
2.5 pounds of skinless chicken on the bone (I strongly recommend dark meat)1/3 cup yogurt
1/3 cup sour cream
1 teaspoon turmeric
1.5 teaspoons salt
1 teaspoon red cayenne pepper
3 tablespoons oil
2 medium sized onions, thinly sliced
1 tablespoon freshly grated ginger
3 pods of garlic, chopped
1.5 teaspoons cumin
1.5 teaspoons coriander powder
3/4 cup fresh tomato puree (about 4 tomatoes, pureed)
1.5 teaspoons garam masala
1 tablespoon sliced almonds
1.5 teaspoons chopped cilantro or coriander
Instructions
Rub the chicken with the yogurt, salt, and cayenne pepper and set aside while doing the rest of the prepping.In the base of the pressure cooker heat the oil and add in the sliced onions, gently cook the onions for a good 6 to 8 minutes adding in the sugar to help with even and uniform browning.
Remove about 1/3 of the browned onions to garnish.
Add in the ginger and the garlic and cook for another couple of minutes.
Add in the chicken and the cumin and coriander powder.
Add in the tomato puree and 1/4 cup of water and bring to a simmer.
Cover the pressure cooker and bring to full pressure. Cook for about 8 minutes once the it reaches full pressure. Let the pressure cool naturally.
Gently remove the lid and stir well.
Stir in the garam masala and the reserved golden onions. Garnish with sliced almonds and cilantro and serve with rice.3.1http://www.spicechronicles.com/light-quick-easy-chicken-korma/
The post Light, Quick and Easy Chicken Korma appeared first on Spice Chronicles.


