
Rinku Bhattacharya's Blog, page 57
January 7, 2017
Hearty Winter Ragout for a Restless Winter Evening
 I was thrilled to cobble together a hearty Vegan Winter Ragout.
I received a free sample of Kikkoman soy sauce mentioned in this post. This came my way via Recipe Redux. By posting this recipe I am entering a recipe contest sponsored by KikkomanUSA. I am eligible to win prizes associated with the contest. I was not compensated for my time. The soy sauce added a deep rich flavor to the dish. It also essentially allowed be me to cut down sodium and salt.
I have indeed been restless again. In less than a week, I have a date with destiny, that I need to win. And when I am restless, I cook… However, luckily or unluckily some of my best creations tend to emerge when I am somewhat cooking to stay calm.
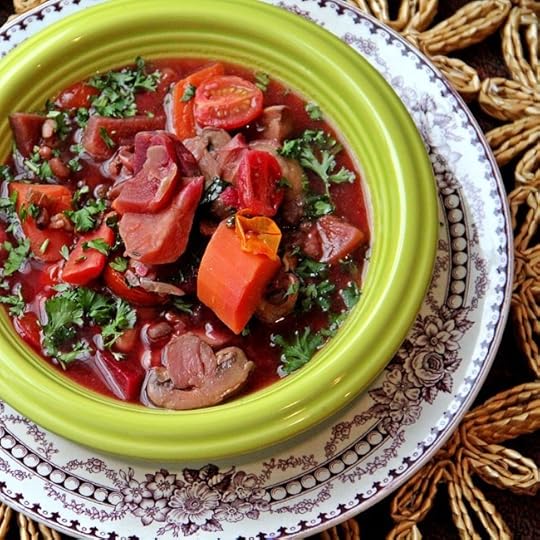
In this recipe, I used cannelloni beans, loads of root vegetables, mushrooms mushrooms and a cup of deep malbec to get a dish that we all enjoyed. I tried the second version subbing all salt with soy sauce, and we had a winner.
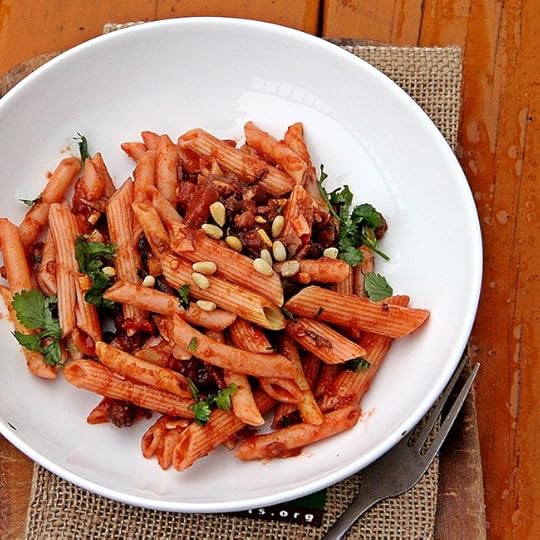
I tried the ragout over pasta, but really like it on its own maybe with some buttered toast for good measure. The sauce gets its depth of color from the beets along with the red wine. As for the beans, they cook down to deep softness add texture and thickness to the dish.
My concession to the new year today was to host the robotics team for a small holiday get together and I tried serving this over pasta.

I made this recipe, saved as a place holder and then remade and posted this current version. This site is so much like a food journal for me, I often keep recipes in progress as drafts.

So, often if I do not share or post, I lose the moment, and with this dish and possibility this week it is important maybe to savor all my thoughts and culinary creations!
PrintHearty Meatless Ragout
Prep Time: 10 minutes
Cook Time: 45 minutes
Total Time: 55 minutes
Yield: 4 to 6 servings
A fragrant bean and vegetable stew in the style of a ragout.
Ingredients
1/4 cup extra virgin olive oil1 medium sized red onion, thinly sliced
4 cloves of garlic, minced
1 medium sized turnip, diced
1 medium sized beet, diced
3 medium sized carrots, diced
1/4 cup sliced shitake mushrooms
1/2 cup sliced cremini mushrooms
1 tablespoon chopped thyme
1 tablespoon chopped rosemary
2 tablespoons soy sauce
1 tablespoon freshly ground black pepper (note, you can reduce this to taste)
1 cup of red wine or vegetable stock
3/4 cup well cooked cannelloni beans
1/2 cup adzuki or other small beans
1/2 cup grape tomatoes, halved
2 to 3 tablespoons chopped parsley
Instructions
Heat the oil and add in the onions and garlic and saute for about 5 minutes until soft and fragrant.Add in the turnip, beet and the carrots and mix well.
Add in the mushrooms and saute well. Mix in the chopped thyme and rosemary and add in the soy sauce.
Add in the black pepper with the red wine and cook for 10 minutes.
Add in the adzuki beans and about 1 and 1/2 cups water and simmer for 25 until the vegetables are very tender.
Add in the grape tomatoes and cook for about 3 more minutes.
Check for seasonings and garish with the chopped parsley and serve hot with crusty bread or over mashed potatoes.
3.1http://www.spicechronicles.com/hearty-winter-ragout/


The post Hearty Winter Ragout for a Restless Winter Evening appeared first on Spice Chronicles.


January 1, 2017
Welcoming in a New Year and Kadhi
 Well, it is almost like the holidays did not happen and here is a new year.
The holiday season in our house was simple, mostly just us and the robots. Today, I made kadhi, simple comforting dish with all the right notes to welcome in the new year. I probably should have had this post up yesterday, but I chose to sleep in and welcome the year with the peaceful content of a good nights sleep and some thoughts of possibilities that I am looking forward to a week from now.
One of my resolutions, this year is to focus more on bringing in some reinvented classics that are now family heirlooms to this blog beginning with this silky smooth chickpea based soup called kadhi that is pure comfort food. As with other dishes that run around the Indian subcontinent, this dish has many variations and this one is mine. The technique and style is very traditional, my seasonal touch is in the pakora or dumplings, I make them with sweet potato and kale.

The one highlight of the Christmas break was that we caught an early screening of Hidden People, mostly since the husband was left to fend for entertainment for the break. An amazing movie that filled and inspired so many myriad thoughts, just way too many to share, however left us in the perfect mood for soft and comforting kadhi.

A good Kadhi takes some time, not necessarily loads of effort but time to slowly cook the chickpea and yogurt gravy down to the point that it reaches a beautiful silky comforting smoothness. This has taken me some time to learn and master. In my salad days, I would cook the dish relatively quickly resulting in acceptable but not truly good results. This can be made for a lighter variation without the pakoras, but why mess with perfection? This is often comforting winter Sunday lunch served with cumin scented rice.
PrintKadhi Pakora
Prep Time: 10 minutes
Cook Time: 1 hour
Total Time: 1 hour, 10 minutes
Yield: Serves 6 to 8
A soulful chickpea flour stew with chickpea dumplings.
Ingredients
For the Pakora1 cup chickpea flour (besan)
1 teaspoon cumin seeds
1 teaspoon red cayenne pepper
1 teaspoon salt
1 cup grated sweet potatoes
1 cup chopped kale leaves
1 medium sized red onion, thinly sliced
Oil for frying
For the kadhi
2 cups yogurt
2 cups buttermilk
1/4 cup chickpea flour
1 teaspoon turmeric
2 teaspoons salt
1 teaspoon minced ginger
2 tablespoons oil
1 and half teaspoons cumin seeds
1 and half teaspoon crushed coriander seeds
1/4 teaspoon asafetida
1/2 teaspoon fenugreek seeds
15 to 20 curry leaves
To finish
1 teaspoon ghee
1 teaspoon cumin seeds
1/2 teaspoon red cayenne pepper
1 tablespoon chopped cilantro leaves
Instructions
In a large mixing bowl, mix together the chickpea flour, cumin seeds, cayenne pepper and salt and mix well to remove any lumps.Mix in the sweet potatoes, kale and red onion with about 1/2 cup of water to form a thick batter.
Heat the oil and drop spoonfuls of the batter and fry for 3 to 4 minutes on each side until the fritters are crisp. Remove from the oil and drain on paper towels.
While they are cooking, place the yogurt, buttermilk, chickpea flour, turmeric salt and ginger and mix well with 2 cups of water set aside for 20 minutes.
Heat the oil for the Kadhi in a large wok, add in the cumin seeds, coriander seeds, asafetida and fenugreek seeds and cook until the seeds darken and get fragrant, this takes about 30 seconds.
Add in the curry leaves and then add in the yogurt mixture.
At this point the mixture will be very thin, let it simmer low and slow for 20 minutes. Add in the pakoras and simmer for 20 minutes. The sauce should still be think, smooth and silky. It will thicken further when the heat is turned off.
Heat the ghee and add in the cumin seeds and cayenne pepper and pour over the kadhi.
Garnish with cilantro and serve hot.
3.1http://www.spicechronicles.com/welcoming-in-a-new-year-and-kadhi/


The post Welcoming in a New Year and Kadhi appeared first on Spice Chronicles.
December 21, 2016
Rishta – Kashmiri Meatballs -Recipe Redux
 This post for Recipe Redux, features a deep and flavorful Kashmiri stew with meatballs called Rishta. Our task on hand was to find a cookbook, pick a variation of 2016, find a recipe and well redux it.
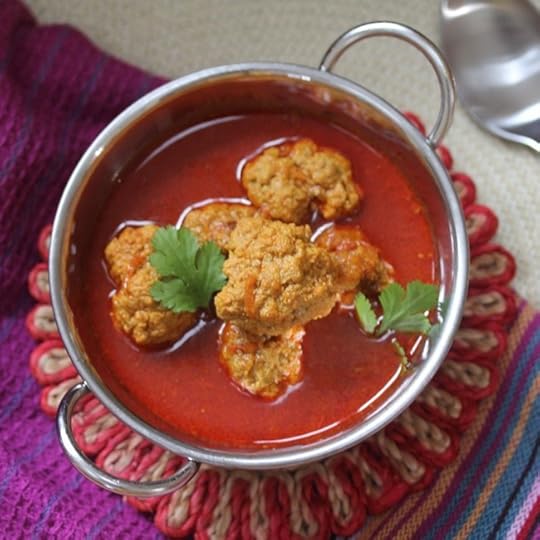
To keep things practical, I found Raghavan Iyer’s 660 curries, given the size of the cookbook, I figured it would given me plenty of options and what I did is use ground turkey instead of lamb to lighten up the dish. Actually reading from an authentic Kashmiri cook, turkey probably is not a bad choice since she emphasizes the desired leanness of the meat in general. The recipe with all my tweaks (mostly to work with the young one’s palates) and Raghavan’s turned out really good. The dish gets most of its color from a mixture of saffron and a generous amount of Kashmiri Chili powder which is innately a mild chili powder and therefore acceptable to use in generous amounts. Rishta is one of many meatball dishes found on the Kashmiri table.

There just is too much going on, so I did not have a chance to do better with pictures, but I think that you can see this is a beautiful visually appealing dish. Since it tastes as good as it looks, I will update sometime with more creative photography. It looks like this year will end on a crazy note with a sad road trip to New Jersey to say goodbye to Dr. Brush. Much as I might like to wait sometimes you just cannot do that.
For our Sunday Supper this week, I served these with a basic cumin scented rice, and the black bean cauliflower rice that I shared on Monday. This week as a part of paying it forward I hit the treadmill, scary how a year of inactivity can ruin you.
PrintRishta – Kashmiri Meatballs -Recipe Redux
Prep Time: 2 hours
Cook Time: 45 minutes
Total Time: 2 hours, 45 minutes
A beautiful full flavored Kashmiri meatball dish made with turkey.
Ingredients
For the meatballs1 and 1/2 pounds of ground turkey
2 tablespoons oil (mustard is the preferred oil)
1 teaspoon salt or to taste
1 tablespoon freshly grated garlic
1 teaspoon powdered ginger
1 teaspoon powdered fennel
For the gravy
2 tablespoons oil
1 medium onion, finely chopped
1 tablespoon kashmiri red chili powder
1 teaspoon saffron strands
1 and half teaspoon ground ginger
1 teaspoon powdered fennel
2 to 3 black cardamoms
1 teaspoon salt or to taste
Instructions
Mix the ground turkey, mustard oil, salt, garlic, powdered ginger and powdered fennel and shape into round meatballs. Set aside for a couple of hours.Heat the oil for the sauce and add in the onion and cook until soft and translucent. Add in the red chili powder, saffron strands, ground ginger, fennel and black cardamoms with 2 cups of water.
Simmer for about 10 minutes.
Add in the meatballs and simmer for another 30 minutes, until the meatballs are tender and the sauce thickens slightly. Serve hot.3.1http://www.spicechronicles.com/rishta-kashmiri-meatballs-recipe-redux/
a href=”http://thereciperedux.com/category/cu...” rel=”nofollow”>
The post Rishta – Kashmiri Meatballs -Recipe Redux appeared first on Spice Chronicles.
December 19, 2016
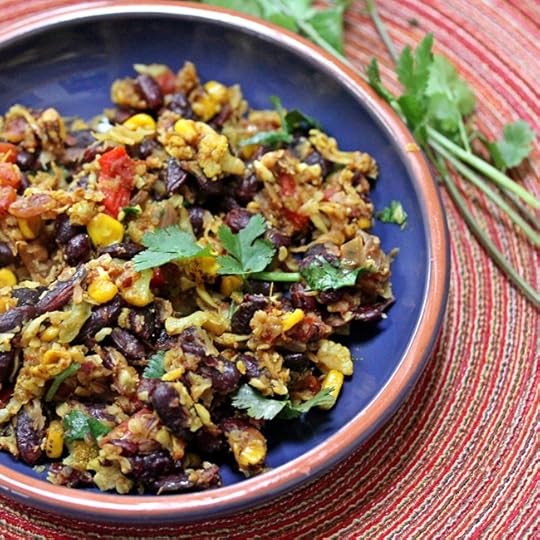
Rajma Pulao with Cauliflower Rice
 Yesterday, for our Sunday Supper, I created a dish that sort of fits the cauliflower rice mold, except we at it much like a salad or side dish. It was essentially a Rajma Pulao with Cauliflower Rice.
I somehow seem to have acquired loads of Rajma beans in my house, so I decided to put some of them to good use. I had initially thought of making this version, but then decided to do the cauliflower thing. After all our legume obsession is very well known and one cannot really go wrong with cauliflower…
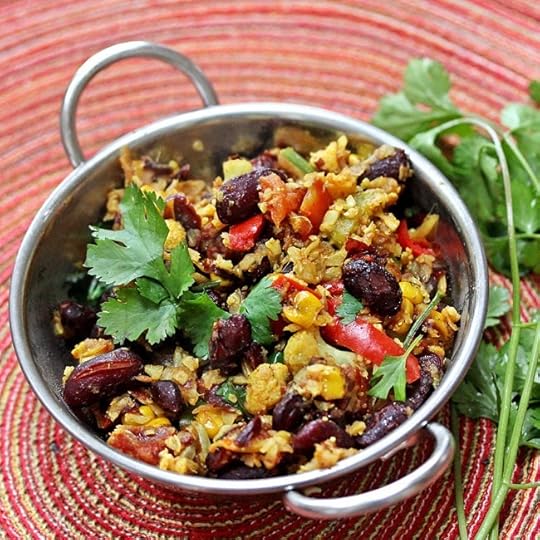
This really is a vegetable pulao with Rajma, but I want to call it a Rajma Pulao with Cauliflower Rice, because well I riced the cauliflower and sort of felt very trendy about the whole thing.
Overall this resulted in a really nice salad like side dish, the kinds to enjoy with grilled chicken or fish… Not sure if I can swap it out for rice with Alu Bhate anytime soon.
With my struggle to keep on top of my pictures, I thought of arranging my pictures in a website. I do have flickr which is a royal mess, and I have a semblance of stuff I am trying to compile into pictures here. For some reason my household favors chickpeas over rajma, so I tend to always have leftovers anytime I make a pot of red kidney beans making them perfect for dishes like this.

So, essentially I added corn, bell peppers and the shredded cauliflower to the mix to create this dish. I hand grated the cauliflower as I felt that it more of a texture appropriate for this dish anyway. I am now on a quest, we have a Rosemary tree in our house, I want to make a mini granny square tree skirt. Something that can last the tree forever. The quest… to use up my current yarn stash and actually finish a project…
The general consensus around Christmas is that things will be quiet, barring the kids party, if only we can get a date for the same. Today, after a long time I have found the time and positive energy to organize a book project that I am working on. May the positive energy continue.
PrintRajma Pulao with Cauliflower Rice
Prep Time: 10 minutes
Cook Time: 45 minutes
Total Time: 55 minutes
A remake of Rajma Pulao using grated cauliflower instead of Rice. If desired leftover Rajma or kidney beans can be used for this dish.
Ingredients
For the Quick Rajma Base1 tablespoon oil
1 teaspoon whole cumin seeds
1 medium sized red onion, finely chopped
1 tablespoon freshly grated ginger
1 teaspoon powdered cumin
1 teaspoon powdered coriander
1/2 teaspoon red cayenne pepper
1 and 1/2 teaspoons salt
3/4 cup chopped tomatoes
1/2 cup dried red kidney beans (note, a couple of hours of soaking goes a long way)
1 teaspoon sugar
For the cauliflower
1/2 medium head of cupflower
1 tablespoon oil
1/2 teaspoon turmeric
1 teaspoon salt
1/2 medium bell pepper thinly sliced
1/2 cup of fresh or frozen corn kernels
To Finish
1 and 1/2 teaspoons garam masala
1 and half tablespoon fresh lime juice (about 1/2 a lime)
2 tablespoons chopped cilantro
Instructions
Heat the oil in the base of a pressure cooker and add in the whole cumin seeds. When they begin to crackle add in the red onion and ginger and sauté well for about 7 to 8 minutes until the onion softens and begins to gently turn golden.Add in the powdered cumin and coriander and the red cayenne pepper and salt and mix well. Add in the chopped tomatoes and cook for another 2 minutes.
Add in the beans with 1 and half cups of water and the sugar and cook under pressure for about 25 minutes on the stove top and 40 minutes in the electric cooker.
While the beans are cooking, using the large side of a box grater grate the cauliflower, you should have about 1 and half cups of grated cauliflower.
Heat the oil and add in the turmeric and salt. Mix in the cauliflower and the pepper and cook for about 2 minutes and add in the corn.
Once the beans are cooked, remove the cover of the pressure cooker. Check for the amount of sauce, we should have very little cooking liquid just enough to loosely coat the vegetable mixture, so if needed cook to dry out the sauce.
Stir in the cauliflower mixture gently and cook for 2 minutes. Check for salt and seasonings.
Add in the garam masala and mix well.
Sprinkle with the lime juice and cilantro and serve along with other accompaniments or enjoy as a light meal.
3.1http://www.spicechronicles.com/rajma-pulao-cauliflower-rice/
The post Rajma Pulao with Cauliflower Rice appeared first on Spice Chronicles.
Pleasantville Farmers Market Open for Winter
 This time of the year gets a little tricky for us in New York, not all that much by way of offerings.
My mother always shudders at the though of land covered in snow, with not much offering by way of fresh veggies. At least, there are winter farmer’s markets… The closest one in the vicinity is the Pleasantville Farmers Market.
Yes, the Pleasantville Farmers market is a year long market and spends the four winter months in the Pleasantville Middle School cafeteria at 40 Romer Ave.
They invite you to join them and share a warm smile with returning favorites and new discoveries and to enjoy fresh, winter-grown produce along with our trademark variety of meats, cheeses, breads, prepared foods, you name it. It’s a great way to support local agriculture and eat healthy year-round.
Well, there are more winter fresh pickings than anything else you will find this time of the year, certainly fun to focus on heirloom roots and shallots and onions and other things that you do not have time to focus on when the market is in full swing. I personally have always enjoyed finding preserved meats and sausage, local honey and often the most interesting variety of cheese that I do not sometimes have time and space for during the busier more bountiful months of the year. And of course there is bread! But, that is something I always have time for all times of the year.
The winter market hours are perfect for a late riser like me, they operate from 9am to 1pm.

But they are strict about the time, so if you like to visit the market early please restrain yourself, maybe stop and savor that coffee and newspaper just a little longer before you decide to venture into the market.
The post Pleasantville Farmers Market Open for Winter appeared first on Spice Chronicles.
December 18, 2016
Mini Quiche Florentines from the Scratch
 These mini Florentine quiches, almost never happened!
There is something very right about a mini Quiche! I had to make them happen! With some thinking, in a jiffy, they did happen. In fact, I ended up putting them together right from the scratch. Testimony to the fact that both on good days and bad, the kitchen and stove never fails me.
You can follow the technique to make any mini quiche of your fancy, plain, with ham and tomatoes, sub with broccoli are some of what comes to my mind.
Last month, Beverly my surrogate mom passed away, peacefully without much complaint. After a few days of bravado, Dr. Brush is in the hospital, his health failing, ironically due to a weak heart. Their daughters are struggling with the loss. They are trying to accept and cope with the possibility of losing both parents in less than two months. Dr. Brush met Beverly in his teens and their love is a testimony to the stuff dreams are made off. Their story is partly chronicled in his memoir Farewell the Winterline.
Today at 91, maybe after a journey of over 70 years together as friends and then husband and wife, he said goodbye to her. Probably, he is just too heartsick to continue the journey alone. Will I be able to say farewell? I wonder? I sit hear thinking of my early days in this country, when their warmth and love filled so much of the emptiness of homesickness.

One of my distracting weekend activities is to plan the snack for Aadi’s robotics team, something that he loves to supervise and co-ordinate. The success of how well the snack is received somehow is personal for my son. I cannot tell whether it is because of his own popularity rating or his love for me.
I first started this exercise with puff pastry, which I burnt and then continued with making a ridiculously easy pie crust recipe and I think that I will stick to the second option. As quiche recipes go, this one was pretty light with a couple of easily found cheeses – cheddar and Parmesan. Feel free to make your own.

This weekend, I have sort of taken to a little bit of downtime! I indulged in some shopping and am immersing myself in planning and assisting the team get ready for their first showdown on the 21st!
And for your snacking pleasure… here is the recipe!
PrintMini Quiche Florentine
Prep Time: 20 minutes
Cook Time: 40 minutes
Total Time: 1 hour
An easy festive spinach based mini quiche perfect for holiday snacking of breakfasts.
Ingredients
For the Pie Crust11/2 cups flour
1/2 cup salted butter
1 tablespoon cider vinegar
4 tablespoons ice cold water
For the filling
2 tablespoons olive oil
1 medium sized red onion, finely diced
2 cups chopped spinach or any leafy green
2 eggs
1/2 cup half and half
1 teaspoon powdered cumin
2 tablespoons minced cilantro or parsley
1 and 1/2 teaspoons freshly ground black pepper
1 teaspoon salt
1 cup of sharp cheddar (such as Cabot extra sharp cheddar) or replace with 1/4 cup Parmesan Cheese
Instructions
Place the flour and butter in a food processor and pulse together until well mixed. Add in the vinegar and water and pulse until the dough forms a ball.Grease a muffin pan. Break pieces of the dough and roll into circles and shape around the muffin wells. Stick the pan and dough in the freezer for about 20 minutes, while you prep the rest of the recipe.
Heat the oil and add in the red onion and saute for about 5 minutes until the onion softens. Add in the greens and mix well. Cool the mixture.
Pre-heat the oven to 350 degrees and remove the baking dish from the freezer and bake for about 10 minutes.
Beat the eggs with the half and half, cumin, cilantro or parsley, black pepper, salt and fold in the spinach mixture and cheese.
Remove the muffin pan from the oven and fill with the mixture. Fill until about three quarters full, do not overfill.
Return to the oven and bake until set and golden (about 20 minutes).
Carefully remove and serve.
Notes
The cooking time is mostly unattended.
3.1http://www.spicechronicles.com/mini-quiche-florentine/The post Mini Quiche Florentines from the Scratch appeared first on Spice Chronicles.
December 17, 2016
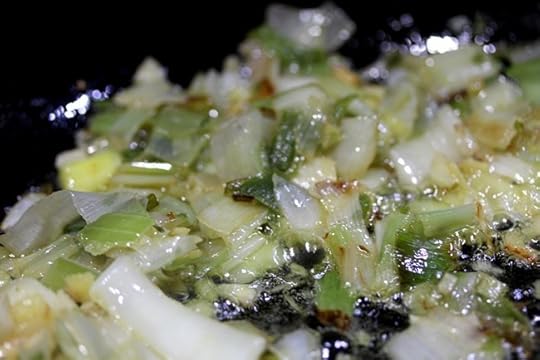
Creamy Leek and Acorn Squash Soup
 This recipe for Creamy Acorn Squash and Leek Soup got a makeover about 6 years later.
This recipe is a simple lovely bowl of soup, the kind you want to make when you are snowbound and have the vegetables on hand. I am actually trying to move through the vegetables on hand. We are going on vacation next week – much, much, needed one at that! A special treat I get to go and visit my baby brother in Seattle. I had this acorn squash that I had bought in a whim and it had acorn squash soup written all over it.
So, most of this weekend and Monday evening is going to be spent on figuring out, how to eat down the fridge…
This soup truly is very peaceful, I made two kinds of simple sandwiches to eat with it to complete a nice comforting lunch. The leeks take a long time to caramelize, so I do the rest of the chopping while the leeks are cooking. I was a little disappointed to see how much of the green stuff was getting thrown away, actually for no particular reason, so I ended up adapting a savory tart that used this, that will come up later.
A hack I have learned is to use Trader Joe’s Frozen Leeks, when in a hurry, it works really well.
It is worth mentioning that as I post script I have made this soup with delicata and Butternut squash as well and it tastes as good as the acorn squash version.
PrintCreamy Leek and Acorn Squash Soup
Prep Time: 10 minutes
Cook Time: 40 minutes
Total Time: 50 minutes
Yield: Serves 4
A satisfying creamy and delicate tasting soup that is great for winter.
Ingredients
1 medium sized (about 2 pounds), acorn or other winter squash)4 tablespoons olive oil
1 teaspoon cumin seeds
2 leeks (thinly sliced, and very well washed white and pale green parts only)
1 tablespoons freshly grated ginger
1 tablespoon minced garlic
1 tablespoon chopped thyme
1/2 tablespoon chopped rosemary
1 teaspoon red cayenne pepper
2 teaspoons salt or to taste
4 cups of water, plus more or less for pureeing
1 cup of half and half
Instructions
Roast the squash in a 350 degree oven for about 30 minutes. Cool. Cut into half, remove the seeds and scoop out the flesh.While the squash is cooking, Heat the olive oil and add in the cumin seeds and wait for them to sizzle.
Reduce the heat and add the celery and the leek and cook on low heat stirring occasionally for about 15 minutes, the leeks wilt, shrink and then begin to turn very lightly golden.
At this point add in the ginger, garlic, rosemary and thyme and cook for another minute.
Add in the squash and mix well and stir in the salt and the water and simmer for 10 to 15 minutes
Cool slightly.
Place the squash and leek mixture in the blender and puree with the half and half and some water. Return to the cooking pot and heat through before serving.
This recipe yields a pale, thick and very satisfying soup.
To serve, garnish with chopped herbs and freshly ground black pepper or even toasted sesame seeds and enjoy!
3.1http://www.spicechronicles.com/creamy-leek-acorn-squash-soup/
The post Creamy Leek and Acorn Squash Soup appeared first on Spice Chronicles.
Kancho Lonka Murgi – Green Chili and Cilantro Chicken
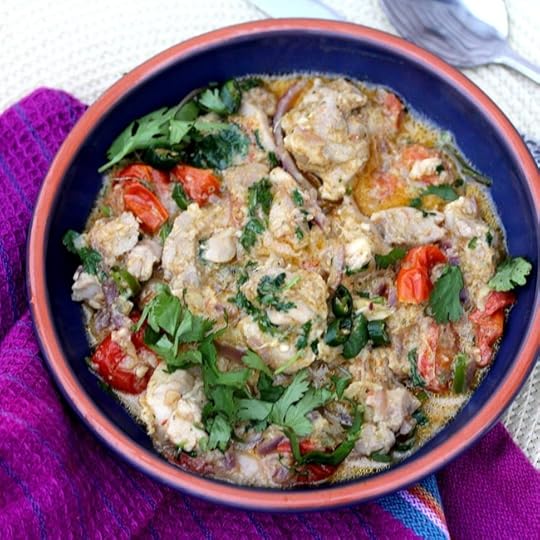 It has been so cold the past few days, bringing my creative juices back. The cold weather and Indian food are a match made in heaven. After all, tis the season for puddly, spicy food, soupy lentils, spicy curries, flatbreads, softly simmered vegetables and in the midst of all of this a Bengali style Green Chili and Cilantro Chicken or Kancha Lonka Dhoney Pata murgi.
We Bengalis name our dishes after the dominant flavor or ingredient, so here I call this Kancha Lonka or Green Chili, Dhoney Pata or Cilantro Chicken, and you can have another version that is named similarly but offers a very different rendition.
This dish was one of those pure and simple dishes that are meant to grace the Friday night table and fill it with warmth and comfort without really causing much harm.
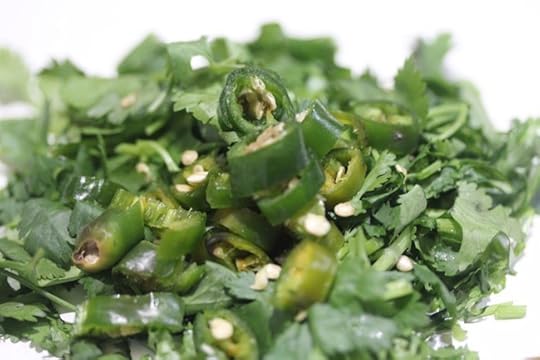
My secret delight for this dish was the fact that I suddenly ended up with a fresh garden harvest of cilantro leaves, fostered between the suddenly warm spell in November and the chill that is also known as the North East Winter.
I fished around for some very basic ingredients to conjure up this Kancha Lonka Dhoney Pata Moorgi and these were, one largish tomato, cumin, ginger and garlic and some yogurt to finish, the yogurt gives this dish a nice creamy comforting tang, that and the fact that I realized that we are overflowing with yogurt in our house. A rare occurrence but there you have it, it happens.

I even cooked this in my pressure cooker, making this an extra quick creation. If you have the time, plan and make this a day ahead as the simple flavors settle in making the dish extra flavorful. With all things in life, there is a time for pause and reflection and we have reached that time of the year when we pause to think of the year that just went by and look forward to welcome a new one on its way. We are home for Christmas after a long time, sadly there is not a lot going on, I am trying to as always salvage the remains of possibilities. What after all is life, without the possibilities.
PrintKancho Lonka Murgi – Green Chili and Cilantro Chicken
Prep Time: 5 minutes
Cook Time: 15 minutes
Total Time: 20 minutes
A simple full flavored chicken curry bursting with the flavors of ginger, garlic and fresh cilantro.
Ingredients
2 tablespoons oil1 teaspoon cumin seeds
1 medium sized onion, diced
1 tablespoon coarsely grated ginger (peeled and using the wide side of the box grater)
2 cloves of garlic, coarse grated
2 pounds of boneless, skinless chicken thighs, cut into 2 inch pieces
Salt to taste
1 medium sized tomato quartered
4 to 6 green chilies chopped
3/4 cup coriander leaves, chopped
3/4 cup natural yogurt, beaten
Instructions
Heat the oil and add in the cumin seeds and wait until they begin to sizzle. If you are doing this like me in the pressure cooker, you start the process at the base of the pressure cooker.Add in the chopped onions and saute until translucent. Add in the ginger and the garlic and cook for about a minutes.
Add in the chicken and the salt and cook for 3 to 4 minutes.
Stir in the tomato and mix well.
Add in most of the cilantro and green chilies (save a little to garnish) and cover and cook under pressure for 6 minutes or simmer for 20 minutes. Cool slightly and remove the cover and add in the whipped yogurt right away.
Garnish with the cilantro and chilies and serve with rice or flatbreads. Alternately, save overnight and serve the next day.
Notes
The cook time is for the pressure cooker method. For a regular stove top rendition, you need to cook this for 20 minutes more.
3.1http://www.spicechronicles.com/kancho-lonka-dhoney-pata-murgi-cilantro-chicken/
The post Kancho Lonka Murgi – Green Chili and Cilantro Chicken appeared first on Spice Chronicles.
December 12, 2016
Roasted Broccoli with Cumin, Garlic, Lime and Rosemary
 I roasted broccoli tonight, exactly as I tell you, Roasted Broccoli with Cumin, Garlic, Lime and Rosemary. OK! OK, I snuck in some red pepper flakes and sumac as well. As things go, not uncommon flavors for roasting Broccoli.
All things considered, it is the perfect, mindless Monday kind of dish – simple, fool proof and almost guaranteed to please. It reminds me of the time when the world was a simpler place. When all we worried about was whether our presidents ate their broccoli. A sharp contrast to today’s world where we wonder whether we have other countries hacking our election.
Well, deep thoughts and complicated food have no place on a Monday. It is about, getting through the first day of the week and all it holds for us. Such as tomorrow’s school concert. Such as a bunch of possibilities for me that may or may not fizzle through.

The most interesting part of this dish is that it works with frozen broccoli, I had actually a batch of our home frozen broccoli and that is what I used in the recipe. I have tried this with regular fresh broccoli, the first option is softer and quicker. It is usually in my opinion a little more popular with kids. The second option with fresh broccoli crisps better and well better liked with people who like their roasted veggies crispy. I personally love either, and enjoy this with dal.

The upside is that it really is easy and foolproof, resulting in the perfect side dish. So, here you have a recipe that just is a good version of shake and bake and crisp and serve. I have tried the same treatment on Brussels Sprouts and it also works well, so if you are in the mood for Brussels try this recipe too!
PrintRoasted Broccoli with Cumin, Garlic, Lime and Rosemary
Prep Time: 10 minutes
Cook Time: 35 minutes
Total Time: 45 minutes
A beautiful, flavorful and super-easy way to cook your broccoli. The assertive seasonings work well in getting the broccoli to shine.
Ingredients
1 pound of chopped broccoli florets, fresh or frozen4 tablespoons of extra virgin olive oil
8 cloves of chopped garlic
1 teaspoon bruised cumin seeds
1 and half tablespoon snipped rosemary
1 teaspoon salt or to taste
1 teaspoon sumac
1 teaspoon red pepper flakes
1 fresh lime halved
Instructions
Preheat the oven to 410 degrees.Place the broccoli in a single layer on the baking sheet. Drizzle with the olive oil, chopped garlic, bruised cumin and rosemary and mix well.
Place in the oven and cook for 20 to 25 minutes, until the broccoli is tender and turning golden at spots. If you want it crisper cook it for another 5 to 10 minutes.
Remove from the oven, sprinkle with salt, sumac, red pepper flakes.
Squeeze in the lime juice and serve immediately.3.1http://www.spicechronicles.com/roasted-broccoli-cumin-garlic-lime-rosemary/
The post Roasted Broccoli with Cumin, Garlic, Lime and Rosemary appeared first on Spice Chronicles.
December 11, 2016
Kalakand or Milk Cake to appease the gods…
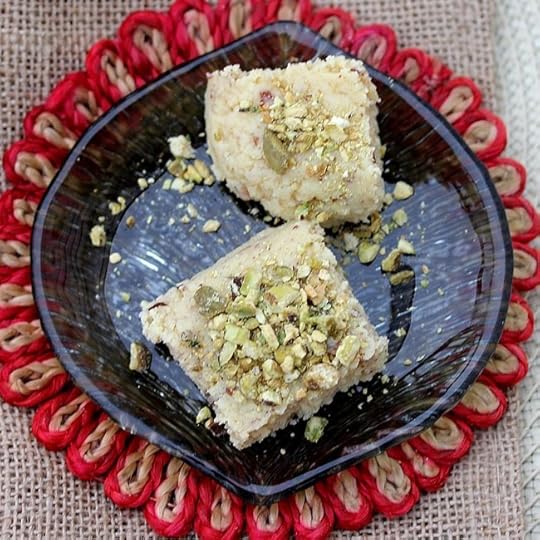 Last evening we attended a Satyanarayan Puja. As an offering I decided to make Kalakand or Milkcake, from the scratch.
I probably needed an excuse to make this luscious dessert. All things considered, I felt that the effort might please this all powerful and merciful deity.
Growing up, my mother invoked and performed the puja before all things good and bad. She still does a puja every time my brother visits.
I have often thought of doing it at our house but really not progressed to the event. Maybe next year…
The kalakand, is a classic burfi or dessert one of many classic Bengali sweets, that are well worth the effort. I do have a recipe in the Bengali Five Spice Chronicles, but that is a little simpler as I use evaporated milk. But for yesterday, I used whole milk which I cooked down to yield a dessert that was soft crumbly and pure perfection.

Something about the entire process of slow cooking, and making the dessert thinking of pure thoughts was uplifting. I remembered days of childhood, when I helped my grandmother prepare for puja offerings. The evening was peaceful, spent in the company of people who were uplifted by the simplicity of an evening of prayer. Something I miss on days when I have the time to miss and reminisce, I miss have a temple closer to us.

Now, down to the Kalakand, fancifully called milk cake in other parts of India, we are talking milk, sugar and cardamom. I add some almonds both to the fudge and to garnish, but that is purely optional. In this recipe homemade channa or paneer is folded into thickened milk and it is cooked down until the mixture is thick and begins to leave the sides of the pan.
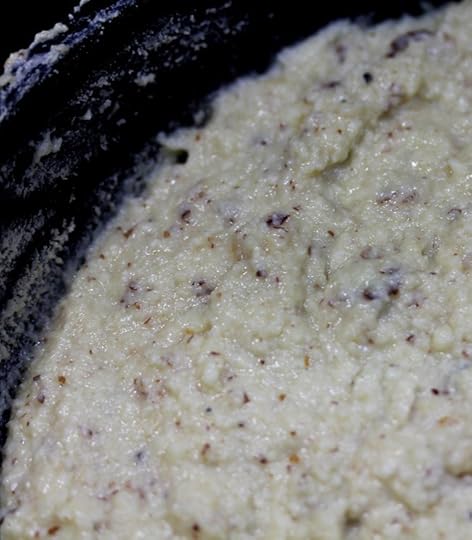
The process needs patience, and about an hour of active cooking. The result is a dish fit for the gods, that we mortals are only to happy to relish and savor. Making sweets at home is time consuming but the alternative of suggary fairly stale impressions of Bengali sweet is hardly an option either.
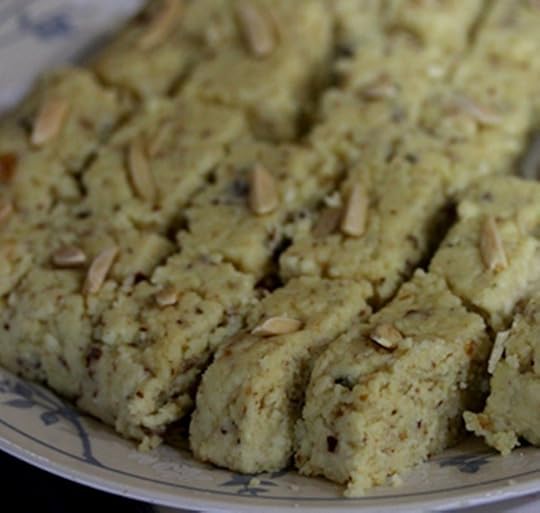
Once it reaches the right thickness, the sweet is poured into a square pan. To finish, it is garnished with almonds or pistachios and enjoyed.
May the gods smile on all of us and brings me many an occasion to savor homemade kalakand again.
PrintKalakand or Milk Cake to appease the gods…
Prep Time: 5 minutes
Cook Time: 2 hours
Total Time: 2 hours, 5 minutes
A classic Bengali dessert, Kalakand or milkcake is the stuff dreams are made off.
Ingredients
2 and half gallon whole milk2 limes
3/4 cup sugar
1 teaspoon freshly ground cardamom (about 15 pods)
1/2 cup almond meal
Pistachios and almonds to garnish
Instructions
Bring 1 and half gallons of milk to boil, when it reaches a rolling boil, turn off the heat and add in the lime juice squeezing in half a lime at a time until the milk curdles to form paneer.Drain the channa in a cheese cloth lined colander and gather the paneer and set aside to drain.
Heat the remaining milk and set aside to thicken on low to medium heat, stirring occasion to ensure that the milk does not stick. You need to ensure that the milk is cooking fast enough to evaporate but the temperature is not high enough to burn the milk. When the milk has cooked down to half its volume add in the drained paneer and mix in.
Continue cooking this mixture for about 20 minutes until it is fairly thick and even, stirring constantly.
Add in the sugar, ground cardamom and almond meal and continue cooking until the mixture is thick enough to separate from the sides. This will need constant stirring and cooking until the mixture separates from the sides of the pan.
Pour this into a greased square casserole or baking dish.
Cool, cut into squares, invert and serve.3.1http://www.spicechronicles.com/kalakand-milk-cake-appease-gods/
The post Kalakand or Milk Cake to appease the gods… appeared first on Spice Chronicles.


