
Rinku Bhattacharya's Blog, page 56
February 9, 2017
Kosha Moorgi – Slow Cooked Traditional Bengali Chicken
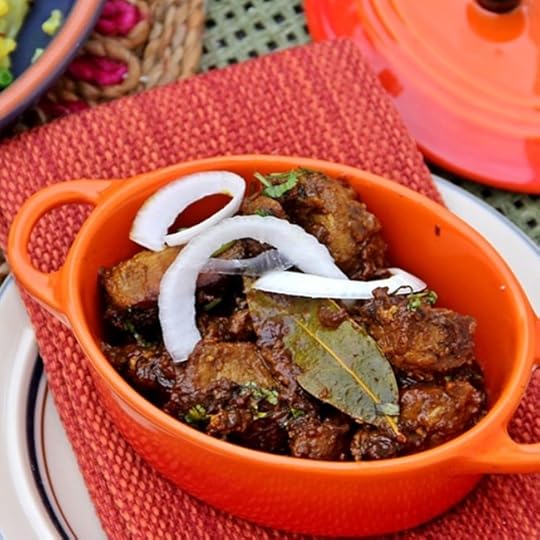 Kosha Moorgi done well is the stuff dreams are made of. It is a dish of deep distinction, holding a very special place on the Bengali table.
This preparation is often done with goat meat, but chicken also works. It is a dish meant for Sundays and ultimate celebrations.
Kosha Moorgi is cooked with extreme care and precision.
To make this right, the base is done with lot of onions, cooked slowly until they reach golden brown perfection. The meat is then added with other whole spices, a generous dose of cayenne and sometimes potatoes and cooked to a burnished golden dark brown hue. Done right, this dish is cooked with minimal added moisture and no other ingredients such as tomatoes. To keep the dish moist and flavorful it needs low heat and constant stirring. This resulting labor of love, is the magic that happens when simple ingredients form a happy and perfect marriage. This dish is distinguished by its deep and dark burnished complexion, resulting form the caramelized onions tinging the chicken.
To create the perfect kosha moorgi, needs at least 1 and a half hours of unhurried cooking, making it practically unattainable for most days. I follow my mother’s recipe for this dish. I remember as a child getting terribly impatient every time she made dish. Impatient to savor the deep seductive goodness of the spicy chicken. The sweet smells of the onion would start the process. The fragrances eventually getting deeper and more complex as she added in more spices filling the house with tantalizing warmth. I would circle around the kitchen sometimes even persuading her to offer me a taste of the spice base in the making. After what seemed like forever, the dish would be done. She would often fry flaky crisp fried breads to go with the chicken. It tastes pretty good with rice as well.
All of these hours of cooking, stirring and attending to the chicken, put this dish well outside my realm of cooking. Even for a party, at times I felt that it took so much time, I did not have time to complete the meal. So, Kosha Murgi stayed out of bounds for me until until I learned a hack. A hack that cheats on tradition might seem blasphemous, but, this one gets this dish down to about 30 minutes. The best part, it keeps tasting every bit as good. In fact, so much so, that I do not do it the original way anymore. I savor the compliments every time I make it, people often complimenting me on the authentic taste.
I have convinced myself that the end justifies the means.
My tool for cheating on tradition is none other than the pressure cooker, something no Indian kitchen is complete without.

Finishing this dish off in the pressure cooker, keeps the flavors intact. In fact, sealing the natural richness of the spices and the juices from the chicken. I get an almost no fail perfect golden coating to the chicken, that is otherwise obtained from at least an hour of low and slow cooking. The final finish takes me about 4 to 6 minutes of pressure cooking after the basics are done.
A few things that deepen the flavor are using mustard oil for cooking and using chicken on the bone. I have however done this with boneless skinless chicken thighs and using grape seed oil as well, and the results are not terribly compromised.
PrintKosha Moorgi – Slow Cooked Traditional Bengali Chicken
Prep Time: 10 minutes
Cook Time: 25 minutes
Total Time: 35 minutes
A beautiful classic Kosha Murgi or Bengali Slow Cooked Chicken with Caramelized Onions.
Ingredients
1/4 cup of oil (mustard oil goes a long way in deepening the flavor)2 large red onions, thinly sliced
1 and 1/2 tablespoons freshly grated ginger
4 pods of garlic, minced
2 teaspoons ground cumin
1 tablespoon ground coriander
1 teaspoon red cayenne pepper more or less to taste
1 large stick cinnamon (about 3 inches, broken into smaller pieces)
4 to 5 cloves
4 to 5 green cardamoms, bruised
3 pounds of chicken on the bone cut into small pieces (or 2 pounds of boneless skinless chicken thighs)
3 to 4 bay leaves
1/2 teaspoon turmeric
6 to 8 baby potatoes peeled
1 and 1/2 teaspoon salt or to taste
2 teaspoons sugar
2 tablespoons beaten yogurt
3 green chilies (such as Serrano), minced
Optional Garnishes
Thinly sliced red onions
Sliced Green Chilies
Instructions
Heat the oil in the base of the pressure cooker and add in the red onions and cook on low heat for about 10 minutes. The onions will soften, gently wilt and then begin to turn golden. This step may take a little longer depending on the onions and the thickness of the pressure cooker, the key is to get uniform golden brown onions. It should not be dark brown at this point.Add in the ginger and garlic and cook for another minute.
Add in the ground cumin, coriander and the red cayenne powder and mix well. Add in the cinnamon, cloves and green cardamoms and mix well.
Add in the turmeric and the chicken and 2 tablespoons water and cook the chicken for about 5 minutes.
Stir in the potatoes, salt and the sugar and mix well. Stir in the yogurt and mix well.
Cover the pressure cooker and cook under pressure for about 4 minutes or 6 if using chicken on the bone.
Let the pressure cool down naturally.
Remove the lid and stir in the green chilies and mix well.
Serve garnished with red onions and green chilies if desired.3.1http://www.spicechronicles.com/kosha-moorgi-slow-cooked-bengali-chicken/


The post Kosha Moorgi – Slow Cooked Traditional Bengali Chicken appeared first on Spice Chronicles.


February 7, 2017
Mohon Bhog – Bengali Semolina Halwa

Mohon Bhog, is the Bengali name for Semolina Halwa, similar to other versions but usually distinguished by the addition of milk, raisins and bay leaves. The other fragrant spices such as cardamom I have seen in North Indian variations but not bay leaves.
On cold winter and fall weekend mornings, this used to be one of those breakfast treats that I looked forward to. This year, I felt I would I needed to tackle this simple and delectable creation.
It has taken me a lot of trial and error to get just the right consistency, my mother always made it look so simple. Of course we enjoyed every variation of this comforting pile of warm fragrant goodness, but the key to this dish is the balance of roasting coupled with the creaminess of moisture usually milk. I now realize that my mother would actually finish roasting the semolina, well, before I woke up and whip the rest together while we were settling down on the table.

My daughter loves this treat and often asks for it as her Sunday dessert. This year after the first round of the robotics competition, I decided to make a large batch to take as an offering for Saraswati Puja. As a kid, this festival seemed so important as Saraswati is the goddess of learning.

Photo Credit – Sonali Sandal Photography
Today, I guess, I am still learning all about life and the skills that we need to deal with its ripples, a different kind of learning and a different kind of knowledge and a different kind of invocation to the goddess of knowledge and learning. The traditional fare for this goddess is a khichuri and labra or a melange of vegetables. I was thrilled to see it among the many offerings as it gave the kids a chance to try this.

When you want some sweet and simple goodness, on a day that has you reaching for that comforting, grab some semolina and make yourself some Semolina Halwa or Mohon Bhog. Your heart, soul and spirit will be happy.
PrintMohon Bhog – Bengali Semolina Halwa
Prep Time: 5 minutes
Cook Time: 25 minutes
Total Time: 30 minutes
A comforting rich and soft Bengali semolina halwa called Mohon Bhog.
Ingredients
4 tablespoons of ghee or clarified butter3/4 cup of semolina (I buy the variety sold as coarse semolina in Indian stores)
2 to 3 bay leaves
2 cups whole milk
1 cup water
1/2 cup sugar (more if you like it sweeter)
2 tablespoons raisins
1 or 2 tablespoons sliced almonds
1 teaspoon cardamom, powdered
Instructions
Melt 3 tablespoons of tablespoons of the clarified butter in a heavy bottom pan or skillet. Add the semolina and gently roast the semolina stirring frequently until the semolina is turns golden and smells fragrant and nutty. This process will take at least 10 to 15 minutes and will need some attention.Add in the bay leaves and the milk and water. Cook the semolina on low heat until the mixture slowly thickens. Cook for about 5 to 7 minutes until the mixture is still fairly loose but a smooth texture like polenta.
Add in the sugar, raisins and sliced almonds and the powdered cardamoms, stir well and cook for another minute or so.
Add in the final tablespoon of ghee. Let it cool a little and serve warm.
If you want to make this ahead, before serving add in about 1/2 cup or milk or water and warm through before serving.
3.1http://www.spicechronicles.com/mohon-bhog-bengali-semolina-halwa/


The post Mohon Bhog – Bengali Semolina Halwa appeared first on Spice Chronicles.
February 4, 2017
Fried Chickpeas with Mint and Cayenne
 Friday took some effort, but the evening ended with Fried Chickpeas with Mint and Cayenne. I just remembered these amazing chickpeas and folks I just had to post this before it was too late, before by some accident, it ended up in my pile of forgotten recipes. That just could not happen.
Thursday did not end with the high that I wanted, it carried over onto Friday, much like that proverbial hangover. I wanted to sleep in but then there was work. I dragged through the day, and came home to hungry dad and kids, expecting something great for dinner, after all I was home earlier than other days. Someday, my family might equate that with needing a little rest. And yet without them these Fried Chickpeas with Mint and Cayenne, would not have been born.
Although, since we are doing this recipe backwards, it would be fair to acknowledge that I got some rest, quiet so called me time today. A large chunk of which I spent dealing with crazy lines at Trader Joe’s. To each our own. I have done roasted chickpeas before, however, I liked these pan fried chickpeas better, crisper outside and moister inside – the trade off? Some more grape seed oil. After all, everything in life is just that – a collection of choices and trade-offs.

The great thing about these chickpeas are that, while they make the perfectly addictive crisp and crunchy snack. They are also great as dinner. I served them with a barley pilaf or risotto, yogurt and pickled red onions. Oh! the pickled red onions are great even if you want to do this as a snack. In the interest of full disclosure, I had first stumbled upon this idea from this post, completely forgot about it and then dredged them up this Friday.
Surprisingly, the seasonings despite doing them from memory are close. I used amchoor or dried mango powder instead of lime zest and of course a few other fun things, just for fun. The general emphasis a combination of mid-eastern and Indian flavors, how can one go wrong?
PrintFried Mint and Cayenne Chickpeas
Prep Time: 10 minutes
Cook Time: 25 minutes
Total Time: 35 minutes
A well seasoned snack of Fried Mint and Cayenne Chickpeas.
Ingredients
2 cups cooked chickpeas1 or 2 tablespoons rice flour (optional, but adds to the crunch)
3/4 cup grapeseed oil
Salt to taste or 1 teaspoon
1 teaspoon red cayenne pepper
1 teaspoon smoked paprika
1.5 teaspoon amchoor powder (dried mango powder) or sumac
1 teaspoon dried mint
1/2 teaspoon chopped thyme
Finely chopped cilantro
Finely chopped red onions
Instructions
Drain and dry the chickpeas. Toss with the rice flour if using.Heat the oil in a large skillet. Add the chickpeas in batches and fry until crisp and golden. This will take about 15 minutes per batch.
Drain on paper towels.
Mix the salt, red cayenne pepper, smoked paprika, amchoor powder or sumac, dried mint, chopped thyme and cilantro in a mixing bowl.
Toss the chickpeas with this mixture.
Toss with the chopped cilantro and red onions. Serve warm.3.1http://www.spicechronicles.com/fried-chickpeas-mint-cayenne/


The post Fried Chickpeas with Mint and Cayenne appeared first on Spice Chronicles.
Memories of Chilli and Masala Sunshine Cornbread – Part I
 This Masala Sunshine Cornbread is a bright and perky upside down cornbread.
I had first made on a bright fall day to kindle memories of my first American dinner over 2 decades ago. A meal made of memories from many moons ago. I first tasted cornbread way back then.
True, that cornbread was very different from this well seasoned creation. This cornbread was born in my immigrant kitchen. This Masala Sunshine Cornbread keeps memories of that wonderful meal alive. A meal of vegetarian chili and cornbread.
It was the first meal I had enjoyed with people who became my surrogate family. I lost them late last year, compounding the general sense of loss and confusion around us. I will tell you about the meal in the second part of this post, today I will express a little sadness about the world and things happening around us. This Masala Sunshine cornbread comes back to my table anytime I want some instant comfort.

It is to cope with the general crazy happening in the world around, get a sense of hope, a feeling of being grounded I made my sunshine cornbread again. This cornbread is as Indian as it is American, it is a dish that I learned to make my own just like I learned to love this country and make it my home. Like me there are many other who are confused, unsure about when immigrant became a bad word in the, “land of the free and the home of the brave”.
It is a week, I have dealt with suspicion on my choices about life, because they were off ever so slightly from the beaten path, making me wonder when we lost our tenacity for differences. Thoughts and ideas are fodder for posts on this site and they make for reflective cooking.
Thoughts today are a bit of jumble, the long long lines in Trader Joe’s did not help! The kids returning home tired and hungry did not help! Thank goodness, I had this meal all done and ready for them.

My additions and contributions are they small tomatoes, cumin, cayenne and dried fenugreek leaves. I make this sunny cornbread every time I make a pot of chili. I did this today for the famished family this evening. There are many ways to make this, mine version is savory and full of fragrant smoky spices. This is great in summer for a quick breakfast or brunch.
PrintSunshine Cornbread
Prep Time: 10 minutes
Cook Time: 20 minutes
Total Time: 30 minutes
This beautiful sunshine cornbread is well seasoned and dotted with fresh tomatoes and is a perfect accent to any chili or breakfast.
Ingredients
1 small 6 or 7 inch cast iron skillet2 tablespoons butter
3/4 cup grape or cherry tomatoes
1 cup coarse cornmeal (I used Bob's Red mill)
1/2 cup all purpose flour
2 tablespoons sugar
1 teaspoon salt
3/4 teaspoon baking powder
1/4 teaspoon baking soda
1/2 teaspoon turmeric
1/2 teaspoon freshly ground cumin
2 teaspoons dried fenugreek leaves or thyme
1 teaspoon red cayenne pepper
1 cup buttermilk
2 eggs
2 tablespoons oil or melted butter
1/2 cup fresh or frozen corn kernels
Instructions
Place the skillet on the stove top and melt the butter and add the tomatoes and toss to coat the tomatoes with the butter, turn the skillet to let the butter coat the sides and make sure the tomatoes are evenly spread across the skillet.Turn on the oven to 400 degrees.
In mixing bowl place the cornmeal, all-purpose flour, sugar, salt, baking powder, baking soda and still well to let the ingredients mix well.
Stir in the turmeric, ground cumin, dried fenugreek or thyme leaves and the red cayenne pepper and mix well.
In a separate bowl, gently mix the buttermilk, eggs and the melted butter and mix well. Stir in the corn kernels
Add the wet ingredients to the dry ingredients and mix well. You should have a fairly moist batter. Pour this into the skillet over the tomatoes and place the skillet into the oven. Bake for about 15 to 20 minutes. Test the cornbread by inserting a toothpick in the center, much like any other cake.
Turn off the heat. Let the cornbread rest for about 10 to 15 minutes.
Turn over and cut into wedges and enjoy!3.1http://www.spicechronicles.com/masala-sunshine-cornbread/


The post Memories of Chilli and Masala Sunshine Cornbread – Part I appeared first on Spice Chronicles.
Loaded Smashed Roasted Potato Tikka
 These loaded smashed roasted potato tikkas are in keeping with my superbowl tradition, of not understanding or following the game, but making sure I use the opportunity to create a new snack or mini munch able.
I love potatoes and do not really need an excuse to work with them, but today by posting this recipe I am entering a recipe contest sponsored by Potatoes USA and am eligible to win prizes associated with the contest. I was not compensated for my time.
What a crazy week this has been for the world around us, and of course for me. It was an exhausting week, without much to show for it. With the kids getting ready for the next round of their robotics run, they were all out and gone by 9am. I fixed breakfast (grudgingly, I might add.. and then went back to sleep). Woke up took a long walk around the neighborhood without a camera and phone and came back and was inspired to make these loaded loaded smashed roasted potato tikkas.
Potatoes are nutri-dense complex carbs, with loads of potassium enhancing that feel good feeling. But, of course I love them because they offer such an amazing show case for flavors and spice. This rather simple and wholesome snack, offers a great flavorful energy boost and was everything I was looking for and then some. The idea of smashing and roasting the potato is pretty cool as it offers the nutrition for the skin. I liked using baby potatoes for this dish you can decide if you want to use larger varieties.

It is important to steer away from loading the potatoes with too much junk, and here I have done a well seasoned melange of pinto beans, onions, peppers, cilantro and lime. If you want you can through in some chaat masala but I felt that potatoes had loads of flavor already. Drizzled with some sour cream or tahini and topped with some crunchy peanuts this dish is ready to party. There is a lot of writing and sharing planned today, so stay tuned. This recipe is inspired by the concept of ragda patties, where deep fried potato cakes are topped with a lovely split pea topping. This variation is lighter

In the meantime, make yourself a plate of these very addictive loaded smashed potato tikkas to enjoy with your evening tea or tall glass of water.
PrintLoaded Smashed Roasted Potato Tikka
Prep Time: 20 minutes
Cook Time: 35 minutes
Total Time: 55 minutes
A lighter fun retake of the deep fried ragda patties, these loaded smashed roasted potato tikkas will bring healthy indulgence to your next party.
Ingredients
For the potatoes20 small baby potatoes (your favorite kind, I like either fingerlings or baby reds)
1/3 cup olive oil
1 teaspoon salt
1 tablespoon tandoori spice mix ( any good blend will work)
1 teaspoon dried fenugreek leaves or thyme
1/2 teaspoon red cayenne pepper
For the topping
1/2 cup cooked white or pinto beans
1 small red onion, finely diced (about 1/4 cup)
1 Serrano chili, minced
4 tablespoons lime juice (about 1 lime)
2 tablespoons chopped cilantro
2 tablespoons finely chopped bell pepper
To finish
Sour cream (vegan or regular)
Toasted crushed peanuts
Extra cilantro
Instructions
Boil the potatoes in their jackets for about 8 minutes. They should be just cooked through. In the meantime, pre-heat the oven to 375 degrees.Drain the potatoes and smash to flatten them using a jar or any broad heavy item such as a rolling pin.
Carefully place them on a baking sheet.
Mix the olive oil and the tandoori spice mix and the dried fenugreek or thyme and the red cayenne pepper. Drizzle this over the potatoes.
Place the potatoes in the oven to roast for 30 minutes, turning once halfway. The potatoes should be crisp and golden.
In the meantime, mix the beans, red onion, Serrano chili, lime juice and chopped cilantro and chopped bell pepper.
To assemble, top the roasted smashed potato tikka with a little bean mixture. Drizzle with a little sour cream, sprinkle with crushed peanuts and cilantro and serve.
Notes
You can drizzle the spiced oil over the potatoes and let them rest for up to 3 to 4 hours, this will allow them to absorb the spices better.
3.1http://www.spicechronicles.com/loaded-smashed-roasted-potato-tikka/


The post Loaded Smashed Roasted Potato Tikka appeared first on Spice Chronicles.
January 24, 2017
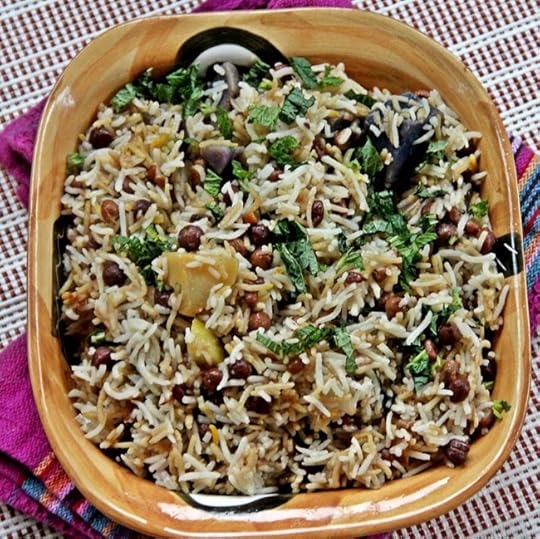
Nostalgic Chickpea Potato Biryani for a Rainy Day
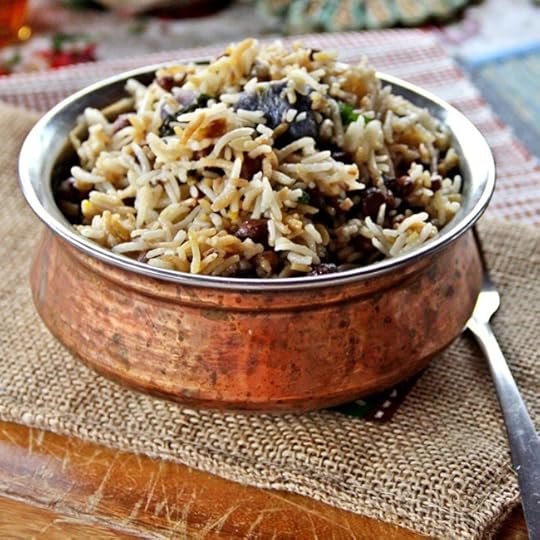 This Chickpea Potato Biryani goes back a while in my life, to days when I really did not understand the big difference between dark brown chickpeas and their milder mannered white cousins. This is another recipe cobbled from my Pakistani roommate in school, sort of a variation of this recipe picked up on Food52.
This biryani typically uses a mixture of fresh green garbanzo beans and dark brown chickpeas and adds loads of mint and some saffron for finish, flavor and completion. A frugal meal with elegance. An unusual yet potent blend of spices. On a rainy day such as this, this meal offered just the perfect dose of comfort! After all who said that rainy days are just for soup?. This comforting one pot meal taking me back to days of nostalgia is wonderful served piping hot! Better still with a simple Indian style raita or salad.
This for all intents and purposes, is one of those quick posts. A lot going on this week. Trying to juggle in all and stay sanguine. In the middle of it all, my daughter is showing her true teen colors and how! Yikes, I will take the terrible twos many times over!!1 What happened to my beautiful little girl? Who took her and replaced her with the head monster that we see in her place? This one reserves her worst and most offensive behavior for me? It is exactly on days like this, I am happy that I never gave up my spud love. You will hear and see more about that in the next few posts to come.
PrintChickpea and Potato Biryani
Prep Time: 10 minutes
Cook Time: 25 minutes
Total Time: 35 minutes
A hearty frugal and wholesome meal with with loads of flavors and a touch of elegance.
Ingredients
3 tablespoons oil1 medium sized onion, thinly sliced
1 tablespoon freshly grated ginger
1 medium sized tomato, diced
1 cup of dark brown cooked chickpeas (kala chana)
1 medium sized white potato, peeled and quartered
1 medium sized purple potato, peeled and quartered
1 teaspoon salt
1 and 1/2 teaspoons garam masala powder
1 teaspoon crushed whole black peppercorns
1 cup of basmati rice, soaked for 30 minutes and drained thoroughly
3 whole black cardamoms
2 bay leaves
1 teaspoon saffron strands
1 and 1/2 tablespoons finely chopped mint
2 to 3 tablespoons fresh lime juice
Instructions
Heat the oil ad add in the onion and saute for about 7 to 8 minutes, until the onions are wilted and begin to turn gently golden.Add in the ginger and the tomato and cook until the tomato is softened.
Add in the potatoes, salt, garam masala powder, crushed whole black pepper corns and mix well.
Gently stir in the basmati rice with 2 cups water and whole black cardamoms and bay leaves.
Bring the rice to a simmer and cover and cook for 12 minutes until the water is mostly evaporated.
Add in the saffron strands crushing them lightly.
Cover and cook for another 5 minutes. Turn off the heat and let the rice rest for about 10 to 15 minutes.
Sprinkle with chopped mint and lime juice before serving.3.1http://www.spicechronicles.com/chickpea-and-potato-biryani/


The post Nostalgic Chickpea Potato Biryani for a Rainy Day appeared first on Spice Chronicles.
January 18, 2017
Super Citrus Tea Cake for a January Day
 January is about cold days, comfort food, and citrus cravings.. The kind of cold days that inspire recipes like this Super Citrus Tea Cake.
Tea and me go back a long way! We connect during all seasons, good and bad, but especially on chilly winter mornings! If you are Bengali like me with your tea you might just fancy something like this Citrus Tea Cake.
It was more than just tea that brought this tea cake my way, it was loads of nostalgia and a general sort of need for relaxation. I suddenly wanted something with loads and loads of citrus but not one of those wimpy, suggary glazed cakes, I wanted a toothsome cake, that brought back memories of breakfast with my grandparents. Given that I was going to stay away from glazing, I would recommend milder, sweeter citrus such as clementines, blood oranges, tangerines or even Meyer Lemons if you have those wondrous creatures in your midst.

I grew up with the luxury of living close to my grandparents, and they (especially my maternal ones) doted on me. Sundays with Dida and Dadu, were a common thing in my early childhood and anytime I visited my grandfather did the Sunday shopping of select items – usually tender goat meat and freshly baked cakes from a bakery called Lord’s Bakery.

The cakes that he brought were simple, fluffy and uncomplicated usually dotted with bits of dry fruit and nuts. My grandmother often had fresh and fragrant winter tangerines to got with them. That and of course hot buttered toast and butter. I wanted to make a cake that would pull together the memories of those flavors. This one is a good attempt.
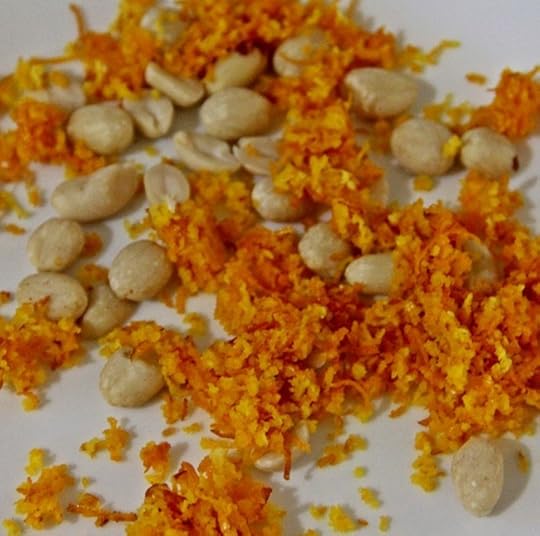
I used my regular flour of choice, Trader Joe’s White whole wheat flour. This one tends to be my flour of choice for most things and certainly baking, added in some homemade peanut meal and raisins. What I got back was a fragrant earthy loaf. The kind that you might actually be able to dunk into some tea.

Cake and biscuit dunking is a very Bengali thing, and you just have to get to know me a little better to truly understand such a personal thing. But for now, let me share the recipe with you.
Ps. The got finished with the juice of a blood orange, no sugar added!
PrintSuper Citrus Tea Cake
Prep Time: 15 minutes
Cook Time: 45 minutes
Total Time: 1 hour
Yield: Makes 12 to 14 slices
A fragrant wholesome Citrus Tea Cake perfect with your favorite brew.
Ingredients
2 clementines2 blood oranges (or you can just use 4 clementines)
3/4 cup raw blanched peanuts
11/2 cup whole wheat baking flour (I have a preference for the TJ white whole wheat flour)
1 teaspoon baking powder
1/2 teaspoon baking soda
1/2 teaspoon salt
1 cup raw cane sugar
2 eggs
1/4 cup buttermilk
1/3 cup vegetable oil (I actually find this offers a lighter crumb than Olive OIl)
1/2 raisins
Instructions
Pre-heat the oven to 350 degrees.Grease and prepare a cake loaf pan.
Zest the clementines and blood oranges. Cut the citrus in half, remove the seeds. Juice three of the fruit in one bowl and the remaining one in a separate bowl.
Toast the peanuts and grind into a powder, leaving some texture if you wish.
In a mixing bowl mix in the flour, baking powder, baking soda and salt.
In a separate bowl beat the eggs, vegetable oil until well mixed. Add in the buttermilk and the juice of the 3 citrus. Mix in the zest and the raisins.
Make a well in the center of the dry ingredients and add in the wet mixture and mix well.
Pour the batter into the prepared cake pan.
Place in the oven and bake for about 45 minutes until the cake is golden and baked through.
Cool slightly, loosen the cake and invert onto a cooling rack.3.1http://www.spicechronicles.com/super-citrus-tea-cake/


The post Super Citrus Tea Cake for a January Day appeared first on Spice Chronicles.
January 17, 2017
Visiting Miro Kitchen on a Fall Day
 Driving all the way up to Fairfield, CT is a little out of the way for Brunch, however on a picture perfect fall day it offered me the perfect excuse to catch some fall colors and sample the cuisine at Miro Kitchen.
In a unique marriage of Pacific Rim and comforting Southern flavors, this crisp, beautiful restaurant offers a new approach to some of your favorite dishes, with every dish tagged as V, VE and GF. Pacific Rim, brings to your table influences from Hawai, Philipines with some Korean Bar-B-Q action thrown in for good measures. The restaurant will bring you back to Black Rock turnpike again and again. Think burgers, poke and taco bowls with a gentle asian Pacific rim vibe!
The vibe is crisp cool and stylish, just like the beautiful fall day, with perfect blue skies. Lots of whites, grey and wood sum up the clean and clear decor of this small and serviceable restaurant.
A combined effort between Chris Gonzalez, the chef behind the popular Hapa Food Truck and restaurateur Eugene Kabilnitsky, this spot is the new avatar of a former Italian restaurant.

Stopping by for Brunch was a great idea, beginning with their drinks – think mimosas and crisp sake infused pear sangria. The pear sangria was indeed light enough for brunch, but had a very refreshing and distinctly crisp taste.

In fact, their bar seemed to have an almost disproportionate dose of their spicy adventurousness. Think lime, Sriracha and Fresh chili infused vodkas.

Well, let us move onto to the food. After all, that is what really floats my boat. Lots of comforting homey breakfast items, starting with the breakfast taco – cheese, pork belly, topped with an egg.

Right along those lines, we have possible one of my favorites – a short ribs Benedict – eggs, gochujang hollandiase and a poached egg. Yes, this one is all about the hollandaise.

And the dish with all the beauty, although I will confess, this might not quite be my favorite in terms of taste. It was plenty good, but just not my real favorite! This was the chicken and waffles – red velvet waffles that is, with ube jam and maple syrup, getting us all so excited about the ube jam…

Every bit as good as anything else and then some, is their General Tso’s chicken. Crisp, sweet and seductive veggie goodness!

All of this finished off with a really good chocolate banana foster french toast. In short, ultimate decadence on a plate!


The post Visiting Miro Kitchen on a Fall Day appeared first on Spice Chronicles.
January 15, 2017
Indo Chinese Chilli Chicken Meatballs
 These chilli chicken meatballs were a result of being snowed in, while feeling homesick, anxious, and generally nostalgic.
Basically a riff of the more traditional chilli chicken, this recipe takes away all the grease and fuss of batter coating and deep frying the chicken. It beats almost anything that you might try named similar in your regular US Indian restaurant. But you probably knew that!
The first time I made chili chicken, was for my childhood bestie! not that I called her such. She was my friend, in good times and bad, today we have strayed away a little further than I would like. Her life more peaceful and sanguine and mine more turbulent than I would like, all in all not a good combination!
Some day, however our tempos will be the same again, and she and I will enjoy this seriously good dish of chilli chicken meatballs! BTW, I spell chilli with 2 l’s, what about you?
On a different note, are we in strange times or am I just listening to ultra-liberal NPR? Why is there nothing in my world telling me All is Well?

Just busy, confused and wondering… Possibly why and where umami, spice infused, seriously good chili chicken meatballs fit into my life. Heck! They even have an appropriate dose of nostalgia… As with most other things, that I doctor or monkey around with, this recipe has its share of veggies in a sort of shredded kind of format!

So, what makes these a cut above – no deep frying! the bestie and I both have expanding waistlines…
No coating, breading, etc…
All I do with these chilli chicken meatball babies is just pan brown them and add in the chili chicken flavorings, yes, that does mean a decent amount of fresh green Serrano chopping action.. So, the other thing that I did with these is to add in some Hoisin sauce. I know.. I know… but try it, the gentle, subtle sweet will sort of work well.

So all things considered here is this recipe… enjoy with or without your bestie..
With or without seltzer or a good glass of wine… You see where I am heading, this is a great dish that works well with almost anything you can thing of.
PrintIndo Chinese Chilli Chicken Meatballs
Prep Time: 15 minutes
Cook Time: 25 minutes
Total Time: 40 minutes
Yield: 4 to 6 servings
A lighter simpler and super delish rendition of the iconic Kolkata Chili Chicken.
Ingredients
For the meatballs1 pound ground chicken
1 tablespoon freshly grated ginger
1 tablespoon minced garlic
2 tablespoons chopped cilantro
1 teaspoon salt
2 tablespoons oil
For the sauce and finish
3 tablespoons soy sauce
1 tablespoon hoisin sauce
1 tablespoon sesame oil
1 tablespoon cider or rice vinegar
1 tablespoon cornstarch
1 tablespoon oil
1 tablespoon minced garlic
1 shallot, finely chopped
4 scallions, thinly sliced (whites and greens separated)
1 carrot, peeled and julliened
1 bell pepper, halved seeded and thinly sliced
6 to 8 green Serrano chillies, thinly sliced
2 tablespoons chopped cilantro
Instructions
Mix the ground chicken with the freshly grated ginger, minced garlic, cilantro and salt. Shape into walnut sized balls.In a skillet heat the oil and place the chicken balls with enough space to turn. Cook the balls for about 3 to 4 minutes allowing them to brown lightly.
While these are cooking, in a mixing bowl add the soy sauce, hoisin sauce, sesame oil, vinegar, cornstarch and mix well with about 1/2 water.
Remove the meatballs from the skillet, add the remaining tablespoon of oil and the garlic and shallot and the white parts of the scallions and cook for about 2 to 3 minutes.
Add in the mixed soy sauce mixture and when it begins simmering, add in the chicken meatballs and the carrot, bell pepper and Serrano chilies and cook for about 5 minutes until the sauce is glossy and coats the meatballs.
Mix well.
Toss in the scallion greens and chopped cilantro.
Serve with rice as a main dish or as a snack.
3.1http://www.spicechronicles.com/indo-chinese-chilli-chicken-meatballs/


The post Indo Chinese Chilli Chicken Meatballs appeared first on Spice Chronicles.
January 8, 2017
Cuban Black Bean Soup – A vegetarian take
 A Cuban Black Soup, I said and the kids looked at me skeptically! The older one even wanted to know if it was because I was missing Fidel Castro!
Well, the soup was made, loved and savored! And it was all vegetarian, with a deep and smoky flavor. Yes, I am pretty hooked on to my new secret ingredient…
I received a free sample of Kikkoman soy sauce mentioned in this post. By posting this recipe I am entering a recipe contest sponsored by Kikkoman and am eligible to win prizes associated with the contest. I was not compensated for my time.
Now, in this recipe, adding the soy sauce sauce instead of salt cuts down the sodium by 1000 mg per serving, but honestly, it is more that sodium saving. It is flavor raising.

The traditional Cuban Black Bean Soup uses a ham hock to create depth of flavor. I personally think that working with slow cooked beans, spices and other natural ingredients helps you boost up the flavor profile without the meat. Meat has its place but not in a deep comforting pot of beans. Adding the soy sauce to the base added a depth of rich smokiness without any clashing of other tastes and looks like the kids now have a new favorite. Here is a more traditional version, but mine has more spicy goodness and the kids love it.
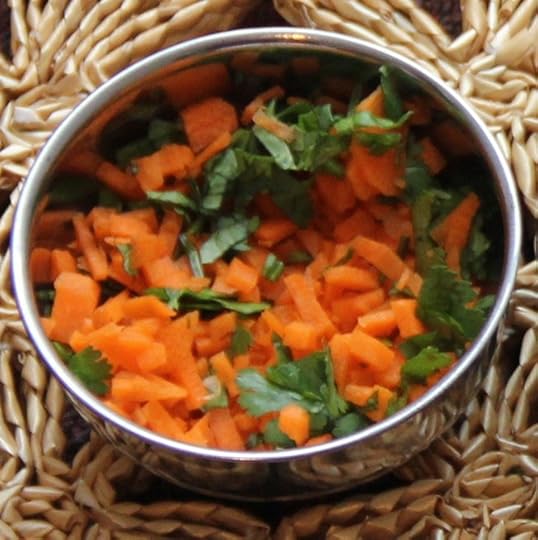
All of that goodness in this Cuban Black Black Soup, gets topped with a lime crema and minced carrot chimichurri. And, this recipe can be kept vegan by using vegan sour cream, so there, all you need to do is believe me when I tell you that the flavors are deep rich and compatible. The deep creaminess of the soup is created by cooking the beans for a long time, and yes, if you are like me you will probably use your pressure cooker and cut down on the cooking time. However, to get this right I did cook this for almost an hour in the pressure cooker. January for me must call black beans, here is another black bean soup that I had made many moons ago.

And the weekend gradually winds down slowly and I await my date with destiny, wondering silently as to what and where life might take me, and the year turns two weeks old.
PrintCuban Black Bean Soup
Prep Time: 10 minutes
Cook Time: 1 hour
Total Time: 1 hour, 10 minutes
A deep flavorful and soulful black bean soup that is guaranteed to chase away your deepest winter blues.
Ingredients
3 tablespoons oil1 large onion, finely chopped
4 to 6 cloves of garlic
1 small to medium bell pepper diced
1 carrot, finely diced
1 tablespoon freshly ground cumin
1 teaspoon red cayenne pepper
3 tomatoes, diced (can be subbed with 1/2 can or jarred tomato with juices)
2 tablespoons cider vinegar
2 tablespoons soy sauce (I used the Kikkoman brand)
3/4 cup of dried black beans (soaked for about 4 hours, see note)
4 cups of water
To garnish and finish
2 tablespoons sour cream or yogurt
2 tablespoons lime juice
1 medium sized carrot, minced
2 tablespoons chopped cilantro
1/2 teaspoon red cayenne pepper
Instructions
Heat the oil and add in the onion and saute for about 4 to 5 minutes. Add in the garlic and the bell pepper and saute for another 2 minutes until soft. If you plan on using the pressure cooker for this, you can do this at the base of the pressure cooker.Add in the carrot, ground cumin, red cayenne pepper and the tomatoes and cook for 3 minutes. Add in the vinegar and the soy sauce and carefully mix in the sofritto or seasoning mix.
Add in the black beans and the water and bring to a simmer. If using a pressure cooker, cover and cook under pressure for 45 minutes. On the stovetop, cover and cook on low heat for 3 to 4 hours. You want the beans to begin breaking down to give the soup a deep rich and naturally creamy texture.
If you are pressure cooking, cool remove the cover and mix well. Simmer uncovered for about 5 to 7 minutes until thick and creamy.
To make the sour cream or yogurt topping, beat the sour cream with a tablespoon of water and lime juice.
Mix the carrots with the cilantro, red cayenne pepper and remaining lime juice.
To serve, place into bowls, drizzle with the sour cream topping and sprinkle with the carrot mixture and serve.
Notes
If you absolutely do not have time to pre-soak the beans, fret not. Cook them a longer, about 10 minutes in the pressure cooker and 45 minutes on the stove top.
3.1http://www.spicechronicles.com/cuban-black-bean-soup/


The post Cuban Black Bean Soup – A vegetarian take appeared first on Spice Chronicles.


