
Bill Loguidice's Blog, page 112
December 6, 2015
Review: AtGames Sega Genesis Classic Game Console (2015 version) (with videos)
AtGames has released the 2015 version of their Sega Genesis Classic Game Console, which is available in standard (reviewed here) and deluxe (the addition of a cartridge containing five generic sports games) versions, with the former usually selling for a street price of around $40. The main change between this year’s version and last year’s is the software mix, and specifically with Mortal Kombat, Mortal Kombat II, and Mortal Kombat 3 in the 80 included games (I provided the full list here). Of course, as usual, thanks to what is effectively this system’s Genesis-on-a-chip, it can play most Sega Genesis cartridges via its cartridge port (more on that later in Cartridge and Flashcart Compatibility).
If you’d like to skip to the part where I provide direct feed video of some of the games in action, check out the Games and Cartridge and Flashcart Compatibility sections of this review. Otherwise, there’s no better place to start than the Introduction.
Introduction
Thanks to its strong arcade roots that can be traced all the way back to the 1940s, the company that came to be known in 1965 as Sega was always defined by great games. Of its home platforms, the most successful was easily the Sega Genesis (also known as the Mega Drive in various territories). That combination of great Sega games married to a great Sega platform was a difficult combination for the company to replicate, even though the its predecessor, the Master System, successor the Saturn, and, in particular, its final console, the Dreamcast, have more than their fair share of fans. It’s not surprising then that AtGames releases new versions of their Sega Genesis Classic Game Console, as well as a portable version that accepts SD cards instead of cartridges (for the same general price), every year.
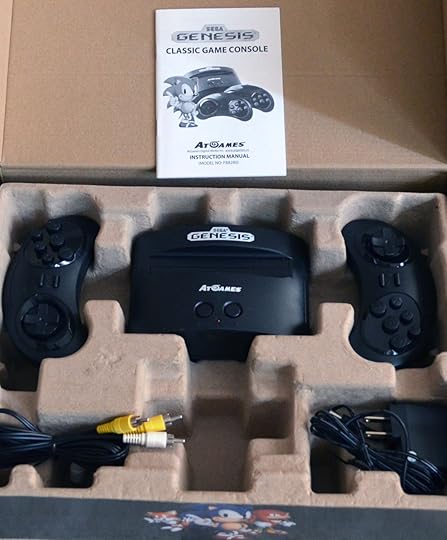
What comes in the box.
Console
The console itself is quite small and light, measuring approximately 5.5 x 4 x 5 inches (13.8 x 10 x 12.7 cm). Unlike some of AtGames’ other products, this design only vaguely recalls the original Genesis console’s look, but does nail the heavily black color scheme.
At the top of the console is a cartridge slot and a power indicator LED, which is flanked by ON/OFF and MENU buttons, the latter of which can be pressed to reset the console without powering it off. On the front of the console is the infrared sensor, which is flanked by two ports for plugging in wired controllers.
The rear of the console has separate AUDIO (white) and VIDEO (yellow) composite connections, which works with the included, but relatively short, composite cables, or, you can of course use your own. Finally, there’s a 9V DC jack for use with the included power supply.
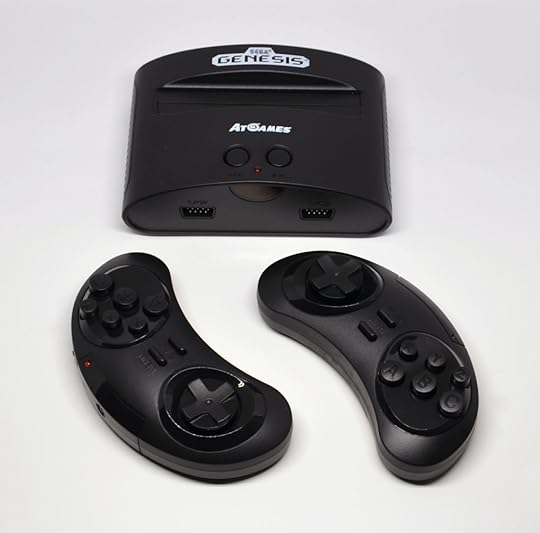
Everything is quite compact.
Controls
Both controllers, which mimic, but do not directly replicate, the proven design of the original Sega Six Button Control Pad, are functionally the same, and contain a switch to designate one or the other as player one (P1) or two (P2). As with the AtGames Atari Flashback 6, these controllers use like-it-or-hate-it infrared wireless technology, which requires general line of sight with the sensor on the front of the console to work properly. Each controller requires three AAA batteries, which are not included.
Of course, you can also plug in just about any original wired Sega Genesis controller directly to the console, including many of the third party replacements. AtGames themselves makes wired versions of their infrared controllers.
Games
The menu system is straightforward. Move up and down or left and right to move between the games and pages of games. Once you select a game by pressing START, it starts up the same as it does on a standard Sega Genesis.
Of the 80 included games, 40 are originals from back in the platform’s prime, while the other 40 are later, more generic releases that are typically lower quality clones of popular titles. However you choose to look at the selection, it’s still a good value, particularly since you can easily augment what’s included with individual cartridges. Here’s a sampling of some of the built-in games to give you an idea of how they look and sound:
Altered Beast:
Mortal Kombat 3:
Panic Lift:
Sonic the Hedgehog:
Streets of Rage 3:
Cartridge and Flashcart Compatibility
I had no issue with a random sampling of cartridges I tried. Just plug the cartridge in with the console off, turn the console on, and the game starts up immediately, bypassing the internal menu system. I also tested with the two flash carts I have, EverDrive MD and Mega Driver Flash Cartridge (a clone version of the EverDrive MD). I had no issues running games with the EverDrive MD, with most standard games running just fine, but the Mega Driver Flash Cartridge didn’t work (note that AtGames sells their own SD card cartridge solution to run ROMs, but I didn’t have one on hand for testing). Here’s a quick sampling from each category of physical cartridges (and EverDrive MD games) I tried:
Greatest Heavyweights:
NBA Jam:
Rambo III:
Battletoads (via EverDrive MD):
Road Rash 3 (via EverDrive MD):
Flashcart or original cartridge, it’s important to keep in mind that not every game will work. You’re probably looking at greater than 95% compatibility here, but given the large size of the Genesis library (700+ titles), that still leaves a good number of incompatible titles, including some high profile releases, like Virtua Racing, which has special hardware on its cartridge, or certain modern homebrews, like Star Odyssey (it should be noted that neither of those games work on my Sega Nomad handheld either).
Audio/Video
You can judge for yourself from the included videos, but, for the most part, there are some color and sound variations versus what you’d get from a real Sega Genesis console. Worst is probably the sound simulation, as some notes sound almost “sour.” With that said, everything is still perfectly playable, and, unless you’re looking for specific differences, you likely won’t be too bothered by any of the drop-off in relative audio-video quality.
The composite connection is just about the poorest connection available, but also the most universally compatible, especially with the type of older CRT TVs the Sega Genesis games were originally designed around. It’s best to use this console with one of those older TVs as video quality will vary dramatically on modern displays, although is still perfectly usable, even if some of the menu text and other text-based items aren’t as clear as they could be. Naturally, when using this console on a modern display, you’ll want to make sure the games display in their original 4:3 format rather than 16:9 (widescreen).
Conclusion
The same warning applies here as it does with any of these types of mass market products. If you want absolute authenticity, there’s no beating the original consoles. Emulation is also a winner. With both those things in mind, for a street price of around $40 – and sometimes for much less – this is a convenient, versatile package that offers a modern alternative to cultivating vintage technology or the slightly sterile feel of emulation. And especially for more casual consumers, there’s no question this is something worth checking out.
Thanks to AtGames for providing the review unit.
DISCLAIMER: I advise AtGames on an occasional basis as an Independent Contractor. Opinions expressed in this review are solely my own.
The post Review: AtGames Sega Genesis Classic Game Console (2015 version) (with videos) appeared first on Armchair Arcade.


December 3, 2015
Infographic: The Best Selling Games and Consoles of All Time
Our friends over at game room retailer, Home Leisure Direct, have come up with an interesting new infographic, The Best Selling Games and Consoles of All Time. As the name implies, it highlights some of the best selling consoles, gaming handhelds, arcade machines, and videogames (including pack-ins) of all-time.
By my own math and just sticking to the past three generations of consoles (no handhelds), which started with the release of the PlayStation 2 in March 2000, and is still racking up new sales with the PlayStation 3, PlayStation 4, Wii, Wii U, Xbox 360, and Xbox One, Sony has sold approximately 270 million consoles, Nintendo 135 million, and Microsoft 128 million. Big numbers indeed, and they’ll only keep getting bigger this holiday shopping season and beyond.
Here’s the infographic:

Infographic: The Best Selling Games and Consoles of All Time
The post Infographic: The Best Selling Games and Consoles of All Time appeared first on Armchair Arcade.
For the Record: What I think Nintendo’s NX Platform will be
In Time‘s recent article, 14 Things Nintendo President Tatsumi Kimishima Told Us, additional vague details about Nintendo’s forthcoming NX platform and what it means for Nintendo’s current platforms have come to light. Unfortunately, there’s still no clear picture of exactly what the NX platform is going to be. I’ve discussed my thoughts before both here and on social media of what my best guess about the NX is, but I thought it might be fun to put them down here, for the record and easy reference when we know all the facts, to see how close I ultimately come with my predictions.
First off, I do think Nintendo will break past form and fully unveil the NX at E3 2016 in June, and then have a wide release of at least a few core components of the platform for holiday 2016 (maybe mid- to late-November). Even with the recent statements, I still think the NX is a logical successor to both the Wii U and 3DS, although they can’t say that directly for fear of further damaging sales. I believe them that the Wii U and 3DS will still be their own platforms and supported, but I think the trickle of software for each will further diminish to the point where we won’t see much, if anything, of note, by 2017, with support for the Wii U almost certainly drying up first.
It seems like the NX will be a clean departure – their first in many generations – from any previous Nintendo platform, meaning no backwards compatibility (save for Virtual Console stuff, of course). I think Nintendo needs that clean break psychologically, both internal and external to the company. I also think this will indeed be a hybrid system, one that can be used as a full portable like a 3DS, but is also modular and usable – with obvious enhancements when docked – as a proper console.
Nintendo’s greatest strengths these days, and what Japan in particular seems to favor, is the handheld stuff, but other territories tend to favor consoles more. To me, a modular NX seems then like it would be a logical attempt to please everyone, while playing to the company’s remaining strengths. And for a Nintendo who struggles to keep a software pipeline going for multiple platforms, rallying around a single platform will make it far easier for them to release interesting new content on a more regular basis. It should also make it more enticing for third parties to want to release their own content as well, something that’s been a growing problem for a number of years for Nintendo platforms, but of course came to a disastrous head with the Wii U.
So, those are my predictions. I guess we’ll see in June 2016 – maybe sooner – how right I was. As always, if you have thoughts of your own, feel free to share them in the comments.
The post For the Record: What I think Nintendo’s NX Platform will be appeared first on Armchair Arcade.
November 29, 2015
Review: AtGames Atari Flashback 6 (includes videos)
Before I get into the detailed review, for those considering an upgrade or replacement, I thought I would start by describing the differences between AtGames’ 100 title Atari Flashback 6 (I provided the full list of original titles and newly created homebrews here) and 92 title Atari Flashback 5. For everyone else, you’ll probably want to skip to the Introduction and read through the rest of the review before coming back to the Differences from the Flashback 5 section for the extra detail.
Differences from the Flashback 5
While the Flashback 6 has the same hardware as the previous edition, the added value comes from including eight (8) more games. New additions to this release over the Atari Flashback 5 are as follows (I’ve inserted a short video of each game being played on the Flashback 6 after its respective description):
Atari Climber—An original homebrew from 2004 by Dennis Debro, based off of a type-in program for Atari 8-bit computers from a 1987 issue of COMPUTE! magazine. The basic goal is to climb ladders and avoid obstacles to retrieve a ball. I own the cartridge version of this and always thought it was a great deal of fun.
Indy 500—This 1977 title is something of a surprise inclusion. It’s an overhead racing game that was originally packaged with Driving Controllers (like single Paddle Controllers, but free rotating and with different internal functionality), but now works with the included joysticks. Unfortunately, unlike with Paddle Controllers for games on the list that originally supported them, you can’t use Driving Controllers with the Flashback 6.
MotoRodeo—A 1990 release, this game offers split screen monster truck racing and stunts.
Radar Lock—A 1989 release, this modified first person perspective air combat game is a nice shoot’em up that tries to invoke the spirit of Sega’s classic After Burner (1987) arcade game.
Secret Quest—Designed with some high level input from Atari co-founder Nolan Bushnell, but actually programmed by Steve DeFrisco, this 1989 release was a surprisingly sophisticated action adventure for the platform. Unfortunately, because the Flashback 6 doesn’t duplicate the original console’s TV Type switch function, there’s no way to access Secret Quest‘s Status Screen, which limits playability. As such, it’s hard to count this as a full game in the list of 100.
Solaris—This 1988 release is similar to Radar Lock, but features even nicer graphics and slightly more sophisticated gameplay.
Swordquest: Waterworld—The third game in the Swordquest series, this 1983 action adventure is one of the harder original titles to find today. Like the other two games in the series (a fourth game, Airworld, was never finished) , which are also included on the Flashback 6, it’s not an especially fun title, particularly since you can no longer play to win the prize from the original contest, a jeweled crown worth $25,000 (that’s about $57,000 in today’s money).
Yars’ Return—A 2005 homebrew sequel to 1981 release, Yars’ Revenge (also included on the Flashback 6), it doesn’t quite live up to the standard set by its classic predecessor.
Introduction
The Atari Video Computer System (VCS), later known as the Atari 2600, was the first cartridge-based console to become a cultural phenomena. Though its release in the summer of 1977 was hardly a blockbuster event, thanks to the continued financial support of parent company Warner Communications, the Atari 2600 was able to outlast its early competition, growing its library, and eventually turning hundreds of thousands of sales a year into more than a million by the start of the new decade. By 1980, once official ports of high profile arcade games, like Taito’s Space Invaders (a loose recreation of the arcade game is included on the Flashback 6, but not the popular Atari 2600 version) and Atari’s own Asteroids and Missile Command (both included), started coming out, there was no stopping the 2600’s momentum.
Besides arcade ports, and despite Atari’s best legal efforts, the 2600 was also gifted with a wide range of third party software from some of the best of the early publishers, like Activison and Imagic (neither of which is represented here due to licensing issues, although you do get a nice representation of other third party publishers). While these third parties would come to support other platforms, the 2600, with its extensive user base, was almost always first choice.
The Atari 2600 specialized in fast action games, with blocky, but colorful visuals. While its iconic 8-way, single button joystick may seem primitive now, it was well designed and well suited to the offerings of the time. Of course, many other add-ons and controller types were eventually released, including a pair of paddles, which were bundled, along with two of the joysticks, in the earliest releases of the console. To its credit, and one reason why we’re up to version six (actually, a bit more than that if you count a few mid-term releases) of the Flashback and counting (although it would be nice to see a portable at this point), is that the Atari 2600, in its final, smallest console revision, lasted into 1992, an amazing 15 year overall commercial lifespan.
Console
The Flashback 6 console is rather diminutive, having an approximate width of just under 9”, depth of just under 6”, and height of about 1.5”. It also weighs next to nothing, containing a small motherboard that features dual-core custom chips running at 100MHz, with on-board hardware enhancements to accelerate the real-time software emulation. The console is styled in a way that vaguely recalls, but does not directly mimic, the most iconic version of the 2600, complete with matching controllers.

The Atari Flashback 6 console.
A standard DV 5V AC adapter plugs into the rear of the console, along with a hard-wired composite video output, with mono audio. The games are best viewed with your display set to a 4:3 aspect ratio, since that’s what they were originally designed for.
Controls
The Flashback 6‘s two included controllers are wireless. Removing a tiny screw beneath each controller reveals a battery door, where two AAA batteries – not included – are placed. For better or worse, these wireless controllers use infrared technology, which requires general line of sight with the sensor on the front of the console. The player one joystick duplicates the Reset, Select, and Start buttons found on the front of the console. The included joysticks are less stiff and easier to move than original Atari joysticks, and perform well, as does the action button.

The included controllers.
Finally, there are two joystick ports, which accept standard Atari-style wired controllers, including paddle controllers. AtGames sells their own recreation of the paddle controllers separately (as they do with the wired joysticks), or they’re included with the Atari Flashback 6 Classic Game Console Deluxe, which is available exclusively from Sam’s Club (expect to pay $10 or so above the price of the standard edition).
Menu
A push to the left or right on the joystick moves to the previous or next page, respectively, while up and down moves amongst the games on the same page. The primary action button selects the highlighted game. This setup is functional, if not intuitive, much like the alphabetical game listings, with game names that are often shortened in unusual ways. Simply put, all listed games are there, just not necessarily under the name, and thus, in the order that you’d expect. Once a game is selected, the game is started the same way as on the original console, meaning either from one of the buttons on player one’s wireless controller or from a button on the console.
Games
There were no major issues with any of the Flashback 6’s 100 games, save for Secret Quest, though purists will notice slight color and sound differences versus the same games played on original hardware. As stated earlier in the Differences from the Flashback 5 section of this review, due to the lack of duplicating the original console’s TV Type switch function, there’s no way to access Secret Quest‘s Status Screen. In this case, it’s best to think of the Flashback 6 as having 99 games and one demo.

The AC adapter and manual.
While most games are easy to pick up, some games do require more detail than the sparse manual provides. As such, it’s recommended you visit a site like AtariAge or do a general Google search to look up the manuals for some of these games.
Audio/Video
In terms of displays, the Flashback 6 was tested across four different types. The first was an LG Flatron LCD monitor, the second was a Commodore 1084S CRT monitor, the third was a Sharp Multi System CRT television, and the fourth was a Panasonic plasma TV. The Flashback 6 performed reasonably well across all display types, though was particularly crisp on the Sharp. Nevertheless, regardless of the display type used and what adjustments are made to settings like contrast, sharpness, and color, it’s important to remember that there are definite limits to overall picture quality, thanks in part to the low quality of the lowest common denominator composite connection that’s included.
Conclusion
As I’ve stated before with products like these, if you’re the kind of person who wants absolute authenticity, there’s no beating the original consoles. There’s also no denying that emulation on your computer, smartphone, tablet, or similar devices can also offer a great experience. However, if you don’t want to put in the non-trivial amount of effort or expense to achieve optimal results, and want a fully legal alternative, there are worse ways to spend the $40 street price, especially since it can sometimes be found for even less. As a product targeted primarily to casual consumers with a vague, but fond memory of classic Atari games, it’s hard to argue with this product’s value proposition and is an easy way to get in on some of the retrogaming craze.
Thanks to AtGames for providing the review unit.
DISCLAIMER: I advise AtGames on an occasional basis as an Independent Contractor. Opinions expressed in this review are solely my own.
The post Review: AtGames Atari Flashback 6 (includes videos) appeared first on Armchair Arcade.
November 28, 2015
Cloanto Releases Amiga Forever and C64 Forever 2016!
Commodore fans, rejoice! Cloanto has just released the 2016 versions of their superior Commodore Amiga and Commodore 8-bit emulators, Amiga Forever, and C64 Forever.
Here are the new features in Amiga Forever:
New user interface with gorgeous high-DPI display features (“retina”/4K density and beyond, multi-monitor)
Ability to merge Amiga and 8-bit CBM content in single player (if both Amiga Forever and C64 Forever are installed)
PowerPC emulation support, including 1+ GB of RAM, PCI bridge, preset devices with native AmigaOS 4.1 FE driver support, and more
A wealth of new content configuration and authoring features (right-click a title and select Edit)
Enhanced Amiga serial port, MIDI and printer support
New Amiga devices for storage, graphics, sound and networking
New Shared folder to exchange data between different Amiga configurations and the host system
New AmiKit, AROS, ROMs, and more
And here’s the change log for the new features in C64 Forever:
New player interface, with gorgeous support for high-DPI displays
Can now access CBM 8-bit and Amiga platforms in the same player if both C64 Forever and Amiga Forever are installed
New title authoring (right-click and Edit) features. Numerous other enhancements
Passed official Windows 10 tests
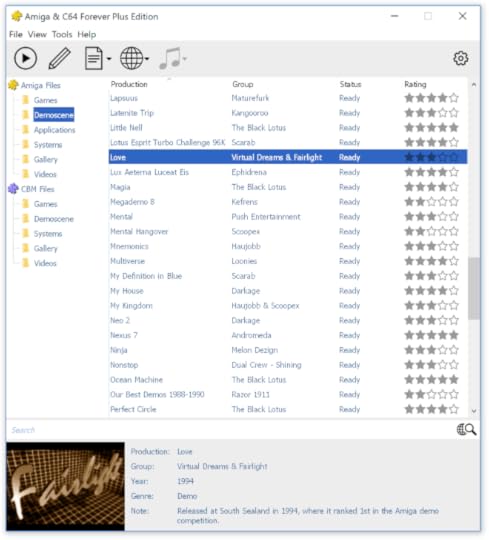
Cloanto’s two products can now work together.
The full press release:
Cloanto Releases Amiga Forever and C64 Forever 2016
November 28, 2015 – Cloanto released today Amiga Forever 2016 and C64 Forever 2016, the latest versions of the official Commodore/Amiga preservation, emulation and support suites for Windows.
With their gorgeous high-DPI display support and seamlessly integrated 8-bit, 68K and PowerPC virtualization, the 2016 editions blend stunning contrasts of different eras of computing into a powerful player and content authoring interface.
“After almost two years of hard teamwork since the 2014 versions were relased, it may seem like the focus is entirely on the products. To some degree, this is true,” said Cloanto’s Mike Battilana. “We are a bit obsessive about software quality. But we also feel the burden of other challenges. For example, a belief in quality and innovation is easy to put into practice by releasing great products, but how can you manifest and be entrusted with a vision of ultimate long-term care?”
“As the holders of the Commodore/Amiga copyrights our goal is both ’emulation done right’ and ‘preservation done right’. This is a long path, which is made possible by the support of our generous customers and contributors. So once again my thankful thoughts go to our community. These 2016 software releases are by them, for them, and they allow us to keep working in this direction.”
Amiga Forever 2016 is available now in three editions:
Value Edition (downloadable installer)
Plus Edition (downloadable installer with option to build DVD ISO image)
Premium Edition (downloadable Plus Edition plus boxed software and additional videos on 3 DVDs)
C64 Forever 2016 is available now in three editions:
Free Express Edition (feature-limited version)
Downloadable Plus Edition (downloadable installer with option to build CD ISO image)
Boxed Plus Edition (downloadable Plus Edition plus boxed CD)
Both packages recognize and work with each other, for example if the user wishes to merge the different platforms into the same interface. Prices start from $9.95 (Value Edition, or special upgrade offers).
The post Cloanto Releases Amiga Forever and C64 Forever 2016! appeared first on Armchair Arcade.
November 27, 2015
Review: 8GB USB 2.0 Flash Drive and Voice Recorder
While most of us have several devices, including our smartphones, that can relatively easily do quick audio recordings, it’s still nice to have a dedicated device for the purpose, particularly if you regularly need such a function. THZY’s USB Flash Drive (SK-868) is multi-function, which is always good when you’re asked to carry around yet another device, and has an interesting form factor.

The front of the package for the THZY USB Flash Drive.
The USB Flash Drive has the same basic form factor as a typical USB flash drive, but with the addition of an on/off switch (when on and recording, there’s a flashing blue indicator light, which takes a little bit of time to show up). Once charged, the recorder should work for about 15 hours from its 110 mAH lithium ion battery. The 8GB of storage can be split between recordings and data. Recordings are in WAV format at a default 128K bps bit rate and should work fine with just about any standard audio editing software on your computer (I usually use Audacity; note that not every media player will be able to play this particular WAV format, so something like Audacity or VLC Media Player might actually be required for your setup). Although other bit rates (64K to 384K) are apparently available, I couldn’t figure out how to access them. Using the default 128K bps and the full 8GB of space, you can record around 150 hours of content, although, as stated earlier, you’ll only get about 15 hours between charges, and you can’t record while charging.

The rear of the package.
When recording, you’ll want to be within 10 feet or so of the device, which is not surprising considering the tiny form factor. While you won’t want to use this for high quality recordings, when recording your thoughts, a lecture, a meeting, or any other utilitarian situation, it definitely gets the job done.

The contents of the package.
If you’d like to hear a sample of the audio quality, I recorded something quick to SoundCloud, which you can hear here.
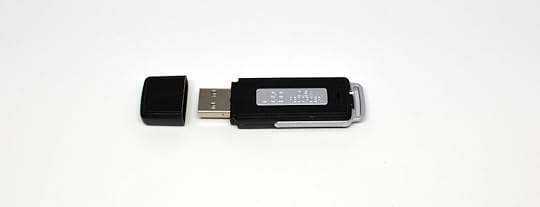
The flash drive itself.
It’s nice to see a simple, no nonsense device like this. While I personally use USB flash drives much less these days, and only occasionally need to record voice notes, it’s nice that I can have both functions in one simple-to-use device in an all-in-one form factor. Anything like this that helps reduce bulk and clutter is definitely a positive.
Thanks to THZY for the review unit.
The post Review: 8GB USB 2.0 Flash Drive and Voice Recorder appeared first on Armchair Arcade.
November 23, 2015
Building the Picade Mini Arcade Cabinet: Part 04
This is part four of my attempt to build the original Kickstarter version of the Pimorini Picade (Maxi version). Part three is here.
As we left off, I was going to hook up the Raspberry Pi 2 Model B and get RetroPie on a microSD card and go from there. For those following along, I’ll be mostly trying the directions here, here, and especially here.

Hooking it all up.
I plugged the Raspberry Pi into the Picade’s USB, audio, and HDMI outputs. I then plugged the power into both the Picade and Rasberry Pi. I also plugged the Phantom Lapboard‘s dongle into another USB port on the Raspberry Pi in order to use its mouse and keyboard for setup.
Now, it’s time to power it all on and see how I did.
And… it didn’t detect the Pi. I troubleshot the issue by bringing out another monitor with a different HDMI cable. I got a signal on that. So I used that other HDMI cable to connect to the Picade, which did work. I then put the included short HDMI cable back in, making sure it was pushed in better on both ends.

By some miracle, all of my wiring worked.
Now I just had to follow the RetroPie prompts to set up my control panel.

The display is quite nice.
I went into the RetroPie setup and configured the audio to go through the headphone jack. Both speakers work fine, but there is a low level hiss, which is apparently common with sound through the Pi’s headphone jack. When there’s sound, it’s not that noticeable, but it is something I’ll have to figure out how to adjust at some point.
There’s not much pre-installed other than the emulators on RetroPie (this is of course using the EmulationStation front end), but it does have a small selection of “ports” and other games that aren’t particularly interesting to me in this type of arcade-style setup.

EmulationStation is the front end.
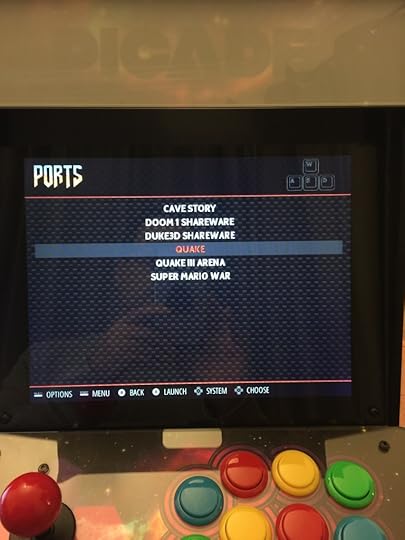
Included Ports, short and sweet.

Duke Nukem 3D is cool, but not something I really want to play on this type of setup.
That was good enough for testing, but I really want this mostly for arcade games.
I had to first create a retropie directory on a USB stick and then put it in the Pi. Once it finished blinking, I had to take it to my desktop computer and put the appropriate ROM files in the newly created directories for what looked like a really nice range of emulators. I started out with personal favorites, Pooyan and Satan’s Hollow, I threw the Super NES version of Donkey Kong Country on there for good measure.
I pressed F4 on my keyboard and let it reboot itself. Sure enough, I got a Super Nintendo emulator to appear, as I did the three different versions of MAME that it supports (I copied the two ROM files to each MAME directory, not being sure which version was going to perform best).
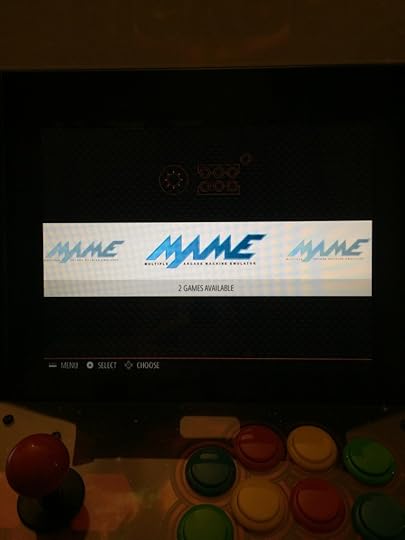
There are three MAME options.

Selecting what to play.
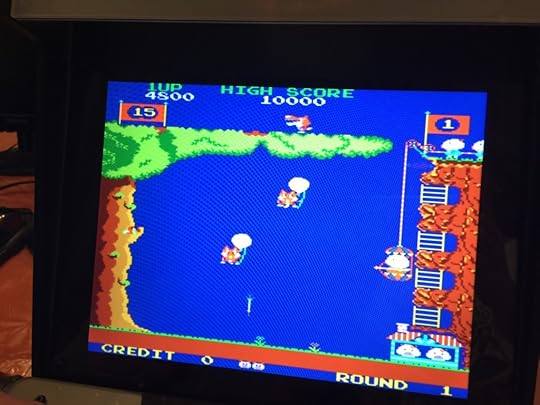
Of course I’m going to test with Pooyan.
So obviously that works fine, although I do want to remove image stretching on MAME. I’d much rather have a smaller visible screen and the games the correct aspect ratio. Unfortunately, that’s one of the tricky things about this Picade setup. There is no dedicated Escape or other, similar, key, so I’m kind of flying blind without also using a USB keyboard (luckily I have one hooked up; I guess I’ll dedicate the Phantom Lapboard to this system since it has a dongle that seems to work for both its keyboard and mouse). Even with the USB keyboard, I wasn’t able to figure out how to exit out of MAME.
Upon rebooting, I selected the third MAME version, and sure enough, that one displays the screen the way that I want it. The right pinball button on my cabinet even allowed me to exit back to the master RetroPie menu!

Pooyan the way it’s supposed to look.
The first MAME option works well too, although like the third MAME is a bit heavy on the graphics filtering.

Satan’s Hollow puts the sound on this system through its paces.
In any case, the controls are pretty responsive and I have no major complaints with the emulation, as you’d expect from the latest, most powerful Raspberry Pi available at the moment. As is usual with these things, the setup is going to be a long process. With that said, I’m happy that it works and I’ll be of course be setting up a few key titles to be sure to play.
Unfortunately, there’s no dedicated on/off switch for the Pi, as the on/off switch on the side of the arcade cabinet only turns the monitor on or off. I can however do that from the software controls, so it’s not too bad, but I’d still like a dedicated switch.
Since everything was working, I decided one last time to try and figure out the issue with the marquee. I took it off, and sure enough, there was still a plastic protector on each piece of the plexiglass. I don’t know how I missed that. The good news is, now it really does look the way it’s supposed to.

The marquee is fixed!
So now the only thing left is to properly mount the Raspberry Pi on the back of the door. Unfortunately, I couldn’t figure a satisfactory way of doing that with the included holes and screws, so if I can find ones that fit, I’m just going to order PCB Mounting Adhesive Standoffs and place it roughly where I have it now.

It really should be mounted on the door, but it’s easier this way.
Actually, after I wrote that, I did find one adhesive standoff in the leftover Picade parts, so I used that to secure the Raspberry Pi to the bottom of the cabinet. It seems to work well and just having the one allows me to manipulate the PCB when necessary.

It would have been nice if both the Raspberry Pi and Picade could be powered together, rather than separately. That will have to be something to look into for the future.
So, to sum up, if you have sufficient patience, this is a relatively easy build. There were several areas where I struggled mightily, but it was obviously never anything insurmountable. While I would have preferred a fully pre-configured SD card dedicated to MAME, the available RetroPie image gets most of the job done. With the marquee issue resolved, my only real beef is with the sound output. When there’s something playing, it sounds fine and you can set it in software to be quite loud. However, the audible hiss when nothing is happening is not that nice. I’m not sure if I’m ever going to bother fixing that, however.
Interestingly, just like before, after I wrote that, I decided to investigate a possible fix for the audio hiss. The answer was found here. Editing the config.txt file (just like the days of MS-DOS for me), I added the line disable_audio_dither=1 to the end of the file. It fixed the issue. There might still be some minor hissing when certain sounds are actually playing, but not when it isn’t playing, which is what really matters.
I also don’t like the idea that I have to set the volume level via software. I’d much rather have a dedicated dial or buttons. The side buttons on the monitor (that pass through the case side nicely) control the volume, but I’m not using the monitor for sound. If possible, I may try to figure a way to use the case speakers like I do now, but have it be controlled via those buttons. Who knows, though?
My long-term goal is to perfect a MAME setup on this. I casually installed a few more MAME game ROMS, and some worked, while others didn’t (and I also have to figure out how to install sound samples, since I assume that’s not an automated process; at least there’s no specific folder, so it may require some copying somehow using the File Manager). I’m going to experiment with the other version of MAME (the other one that defaults to the correct aspect ratio) and see if that improves things, as well as look for a full ROM set (although I’m not really sure I want to wade through a whole lot of cruft, so I may just install on demand). I also would like to figure out how to disable display of some of the other emulators on there, at least until I decide to make use of them. Again, time will tell. Anyway, for now, I’m pretty happy with how this went and will certainly consider similar time consuming, but gratifying projects in the future.
The post Building the Picade Mini Arcade Cabinet: Part 04 appeared first on Armchair Arcade.
November 22, 2015
Upgrading the Commodore PET 2001-8: Part 1
I recently received the PET microSD with datasette power and Commodore PET 2001 ROM/RAM upgrade board from Tynemouth Software, so I thought I’d document the upgrade process for those interested in doing it themselves. I’ll be upgrading my Commodore PET 2001-8, last seen in a new article I wrote for PC Gamer. Although my main PET is a SuperPET, I’d love to get this more interesting vintage specimen up to snuff as well.
While I’m not going to address the rust spots or other case issues, I did first want to address a slight wobble my unit has. Perhaps it’s from a slightly warped metal case, because all four feet seem to be present and fairly level. My idea to fix it is to just to take another sticky foot pad thing and put it on the left front foot, which is the side that’s slightly elevated.

The front left foot was the one I needed to boost a bit.
Since I wasn’t satisfied with the pad in the first photo because it was square when the foot itself was round, I did find a perfectly shaped circular pad in a baggie of miscellaneous ones I had.

It’s going to be a bit tough to see, but the PET is probably as stable as it’s going to be now.
With that minor issue resolved, I wanted to power up the PET again just to make sure everything was still functional.

Power on!

The orange glow from the inside of the unit is both good and a bit scary looking.
As you can see, it works! The screen is crisp and gorgeous and every key on the keyboard works, although 2918 bytes free of memory doesn’t sound quite right. It should instead have 7167 bytes free. Hopefully the one upgrade fixes that RAM issue by bypassing it completely.
Before I get to the first upgrade, I just wanted to check if the tape drive worked. Last time I recall, it didn’t read in a tape. If it doesn’t work this time, I’ll wait on replacing that in the future (if I bother at all since I can just use one of a seemingly infinite number of external tape drives I have).

It could also be any other number of issues, including the tape itself.
Unfortunately, no luck. It’s something I’ll have to test again with a different tape in the future, maybe doing a head cleaning and demagnetizing first, but I think the internal tape drive is probably shot.
So, for the first upgrade, I’m going to have to open up my PET.

This is the one that goes inside the unit.
On mine, there are only two screws – one on each side – holding the case down.

I’m sure it was different from the factory, but right now there is only one screw on each side keeping the lid from moving up.
With both screws removed, I lifted the lid up. Yes, it’s as terrifying as it looks.

The lid is up. I have to put that kickstand on the upper left down to keep it stable.
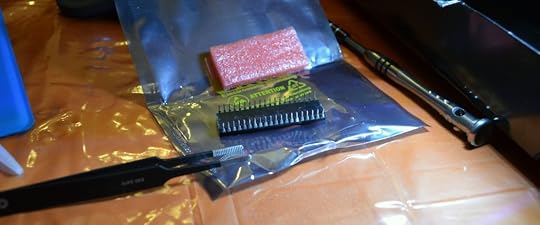
I need to replace the CPU chip with this new board. The dip switch settings on the new board are set to 32K RAM (from a choice that also includes 8K and 16K) and BASIC 4 (from a choice that also includes PET tester, BASIC 1, and BASIC 2), so that’s good for me.
Now I just have to remove the CPU.

For visual reference, I digitally labeled the CPU, The CPU.
That chip was in there good, but I eventually got it out with a standard chip puller. One of the 6502’s pins got bent fairly badly in the extraction, but fortunately, I shouldn’t need it again and can always work on unbending if I ever did.
Now it’s time to insert the new board.

The CPU did come out, but not without a pin casualty.
Another tight fit and a struggle, but it eventually went right in.

There were no notable issues getting the new board in.
Now to close the lid and see what happens when I turn it on.
And… nothing but bars on the screen. It turns out I have to put the CPU in that socket on the new board. Doh! Now to carefully unbend that darn pin!

Before.
After.
Still a little crooked, but hopefully it will go in.
And… the pin snapped off. So, off to eBay to get a replacement 6502 chip!

Dang!
So, there will be an unexpected part two in a little more than a week, then.

The empty CPU socket mocks my ham hands.
The post Upgrading the Commodore PET 2001-8: Part 1 appeared first on Armchair Arcade.
November 17, 2015
Review: Edifier Gammatera G2 Hi-fi Professional Gaming Headset
Although you may not know the name Edifier, they’re actually the parent company of Stax, an ultra-premium headphone brand (think $3000+ for something like the STAX SR-009), and the second largest consumer audio manufacturer. The Edifier name is being used for consumer products with more mass market pricing, like the $39.99 Edifier Gammatera G2 Hi-fi Professional Gaming Headset, which I’m now reviewing.

The box for the Edifier Gammatera G2 Hi-fi Professional Gaming Headset.

The packaging is definitely cool.
Considering its sub-$40 price, even as a wired headset, you’d expect some compromises in build quality. However, it’s actually a lot nicer than you might think. It features a rather attractive black design with red accents (aka, Stealth Black), adjustable band sizing, and pivoting microphone extension. The only areas that might betray its low cost are in how light the headset is – which is probably not a bad thing considering it’s meant to rest on your head for hours at a time – and in the felt ear cushions. While the felt ear cushions do indeed provide the intended padding for your ears, the padding itself is not quite as cushy as I might otherwise like. Although I didn’t experience any issues with the felt, I also have some concerns about how breathable that particular material will be long term.

You get the headphones and a small instruction manual.
In terms of the most important part of the equation, the sound quality, I had zero issues with it. All sounds were nice and clear with good bass response, plus I was able to get it really loud with no noticeable distortion. While this headset is primarily meant to be plugged into the 3.5mm audio jack of a PC, it worked just fine in my other tests with a PlayStation 4 controller and on my iPhone 6 Plus. Next to the audio plug is a microphone plug, which of course is meant for a PC’s 3.5mm microphone input, and which also sounded nice and clear in my testing.
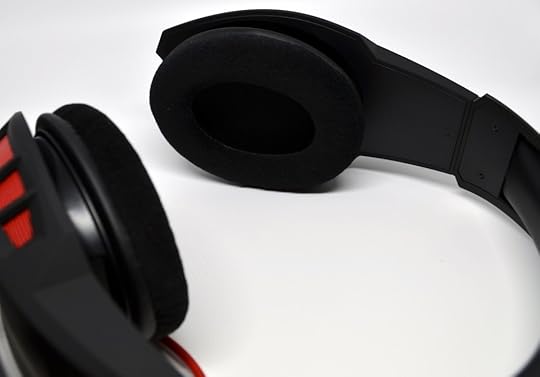
The felt pads definitely provide cushion, but it’s one area where I might have wanted a little more.
One of the more helpful features of this headset is that there’s a dedicated volume slider and microphone on/off switch right on the main part of the cable. The cable itself is a nice tube-style, with good length.
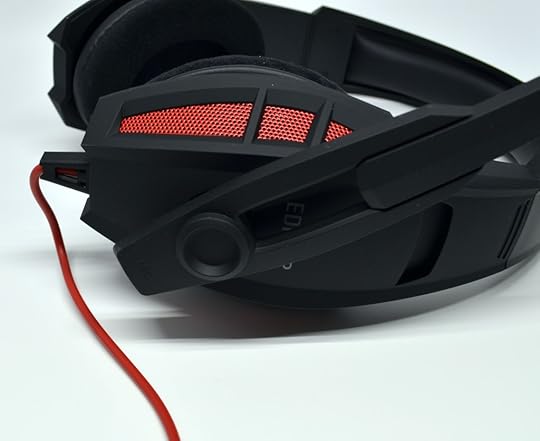
The microphone boom arm swivels out of the way if you don’t need it.

The plug ends support audio out and microphone in, respectively.
If you’re looking for an inexpensive pair of headphones that delivers excellent sound quality for gaming or any other type of audio, you could do far worse than the Edifier Gammatera G2 Hi-fi Professional Gaming Headset. It’s a definite recommendation.
Thanks to Ventmere for the review unit.
The post Review: Edifier Gammatera G2 Hi-fi Professional Gaming Headset appeared first on Armchair Arcade.
Review: Shock Shutter Tamper Resistant Outlet Cover
 Anyone with children knows that there’s a period of time from between when they start crawling to roughly when they’re Preschool age that you need to “batten down the hatches” in your home. This includes moving electronics out of the way, putting fragile knick-knacks on a higher shelf, putting baby gates in strategic spots, putting in cabinet catches, and of course, making sure electrical outlets are properly covered. Some of those tasks are fairly painless, while others, like those horrible plastic outlet covers that are difficult for even adult hands to pull out, are not. The Shock Shutter aims to fix that annoyance.

The front of the package for the Shock Shutter.

The back of the package for the Shock Shutter.
The Shock Shutter is available in two different outlet designs, Decor and Duplex, each of which is available in White or Ivory. I’m reviewing the Duplex in White.
As you can see from the photos that follow, installation is simple. Remove the old outlet cover and put the new one in its place.

Our existing outlet cover with traditional outlet plugs. I hate those things.

The outlet plugs removed.

The old outlet cover removed.

The back of the Shock Shutter showing the black shutters. It’s designed in such a way that it only allows access when an actual electrical plug is inserted evenly into the outlet. Other objects will not get past these built-in shutters.

The Shock Shutter is now screwed in.

It takes some practice to get a plug to go in evenly to disable the shutter, but it’s still far easier than trying to remove those awful traditional plastic plug covers every time you want to plug something in. As you can see in this photo, I was able to get even a heavy duty three prong AC plug into the outlet.
Once installed, you’ll notice that the Shock Shutter juts out a bit more than traditional cover plates. Even with the slightly thicker footprint, it’s arguably still far more attractive than the plastic outlet plugs.
The Shock Shutter can be ordered direct from the manufacturer’s Website and are incredibly inexpensive at only $2.50 each. If you have a baby or are otherwise worried about outlet tampering and don’t want to be hassled by incredibly annoying plastic outlet covers, this is definitely something you should check out.
Thanks to Shock Shutter for the review unit.
The post Review: Shock Shutter Tamper Resistant Outlet Cover appeared first on Armchair Arcade.


