
Bill Loguidice's Blog, page 110
February 21, 2016
Review: MX Plus Android TV Box
The MX Plus Android TV Box is one of a new breed of low cost, Android-based media boxes. While there’s obviously no touchscreen, most of Android’s other features are fully supported, including Web browsing, gaming, video chat, and productivity applications.

The front of the box.
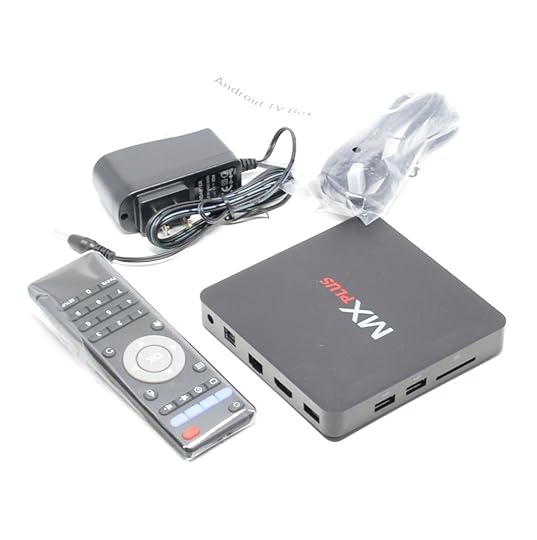
The box contents.
At the heart of the MX Plus Android TV Box is Android 5.1 Lollipop running Kodi (formerly XBMC), a powerful free and open-source media player software application developed by the XBMC Foundation, a non-profit technology consortium. That translates to support for a wide range of audio and video file formats and a great way to play it all back. Media files can be accessed from local storage, SD card, a device on one of the USB ports, or from a location on your network.

One angle of the console.

Another angle of the console.
In the package is the sleek and tiny MX Plus console, remote control (the two required AAA batteries are not included), a three foot long HDMI cable, AC adapter, and a small user manual. The console itself features two standard USB ports, an HDMI port with support for 4K resolutions, an optical audio/SPDIF port that supports up to 5.1 channel audio, one RJ45 jack if you want to use a hardwired network connection up to 1000 Mbps instead of the built-in 802.11 b/g/n wi-fi, and an SD card slot. Bluetooth 4.0 is also built-in.
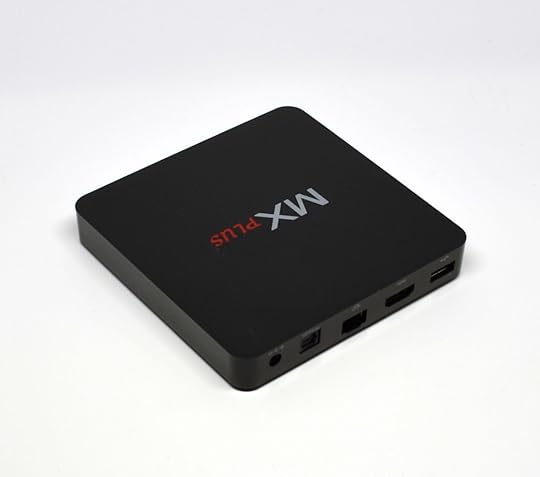
One last angle.

The remote.
Setup is simple. Plug everything in and after a short boot-up sequence, the user interface appears on your TV. You see the usual Android menu interface at the bottom of the screen, some quick access buttons, and then some large tiles for Online Video, Recommend (sic), Music, My Apps, Local, and Settings. If the MX Plus Android TV Box is not connected through a hardwired network connection, the first thing you’ll want to do is get it on your wi-fi network, which is naturally done from Settings. Of note is that my router has both 2.4GHz and 5GHz networks, but the MX Plus Android TV Box was only able to see my 2.4GHz network (a common issue with many devices like this, especially on Android).

The Home screen.
Once connected, I went to the Media Center app under Recommend. It had no trouble seeing my networked media servers and other devices (DLNA_DMP, DLNA_DMR, and AirPlayer (iOS network display) are all supported). In this same Recommend area is a Miracast app, which of course allows you to use the MX Plus Android TV Box to mirror the display of a compatible device.

The My Apps menu.
Under My Apps, a bunch of software is pre-installed, including, but not limited to, Chrome, Facebook, Google+, Hulu Plus, Netflix, Play Store, Plex, Skype, and Twitter. Start-up is quick, as is performance across the board; it’s running an Amlogic S905 Quad-core 64-bit ARM Cortex-A53 up to 2GHz and has 1GB of DDR3 RAM, along with 8GB of onboard eMMC flash storage.

The DLNA and AirPlayer options.
Ultimately, this is an inexpensive, powerful device, but it’s definitely not for the casual consumer. If you know Android well or like to tinker, this is a fun, versatile option. For everyone else, they’re probably better off with one of the more expensive, less configurable, but easier to work with options that are available.
Thanks to Mifanstech for the review unit.
The post Review: MX Plus Android TV Box appeared first on Armchair Arcade.


February 14, 2016
Review: ZINK hAppy Smart App Printer featuring Zink Zero Ink Technology
 The ZINK hAppy Smart App Printer is a premium semi-portable small format printer for iOS- or Android-based devices. With the right acid-free, permanent adhesive label pack loaded (referred to as “zRoll” and available in five sizes), you can print glossy full-color labels, pictures, coupons, stickers, tags, or similar types of small format output. Since the zRolls are self-contained, there’s no additional ink to worry about. Once the zRoll is used up or you wish to change sizes, just load another and get back to printing.

The box.
A 1/2″ zRoll is included (3/8″, 3/4″, 1″, and 2″ are also sold separately, and it’s the latter that’s most appropriate for small photos), along with the printer itself, power adapter (a rechargeable lithium-ion battery for true portability is sold separately), quick start guide, and a Cleaning zRoll, which is a white, non-printing label pack that starts a cleaning cycle. ZINK recommends you run a cleaning cycle for best performance after every 20 prints or so.

Opening the box.
Setup is fairly straightforward. Plug in the power, load the zRoll, and download and run the ZINK Design and Print Studio app from either the Apple App Store or Google Play (note that there are some in-app purchases for certain “premium” content, which is disappointing considering the cost of the printer and consumables). From there, just follow the instructions in the app, which are a bit overbearing, but do eventually work, even though it took me a few tries and I wasn’t able to initially register an account.

Inside the box.
The app itself is easy enough to use. Once you’re happy with your design, just print and then swipe your finger across the Swipe-to-Cut Groove on the printer to cut the print. If you print multiple copies, the printer will kiss cut between each copy so that individual prints can be peeled on demand, although this too can be changed to Swipe-to-Cut in the app.
The tape roll snaps in the back. There’s also room for an optional battery.
There is also a ZINK MailEasy app for printing lots of address labels and a ZINK Big app that lets you assemble smaller prints into 4×6″ or larger (up to 16×20″) photos. It seems you’re not just limited to those apps either, as the ZINK hAppy Smart App Printer supposedly supports AirPrint on iOS and Google Cloud Print on Android, but I didn’t test either possibility.

The wi-fi light turns blue when connected to your network.
Although the print speed is pedestrian, print quality is generally excellent, with good color. As you can hopefully see from the photos, this higher print quality makes it usable in a wider variety of scenarios than just for home use, particularly since it is effectively glossy laminated by default. However, the included 1/2″ zRoll is pretty small (about return address label size) so it’s hard to coax much detail, so getting some of the bigger sizes is definitely recommended.
The printer in action.
It’s a premium product that does exactly what it sets out to do. If you don’t mind the similarly premium price for the printer and its consumables, this is definitely something worth checking out for your small format, adhesive printing needs, be they labeling, party photos/photo booth, scrapbooking, or anything else like that you can think of.

Some sample output (when you peel the label, the white doesn’t stay). The top label is showing the backside of the sticker paper.
Thanks to C&A Marketing for the discounted review unit.
The post Review: ZINK hAppy Smart App Printer featuring Zink Zero Ink Technology appeared first on Armchair Arcade.
Review: Vivaglory Dog Collar LED Light Safety Collar
If you’re a pet lover like my family is, you’re always on the lookout for quality products that will benefit your furriest charges. The Vivaglory Dog Collar LED Light Safety Collar is one such device, which helps keep your dog visible no matter how late at night he or she is out and about.
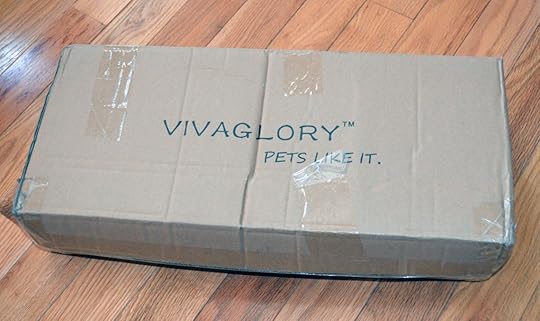
It came to us in this box along with the Vivaglory Wave Cat Scratching Board.
The Vivaglory Dog Collar LED Light Safety Collar comes in four sizes, from SMALL (13.8 – 16.9 inches) all the way up to XL (20.5 – 23.6 inches). We have two small dogs, so we went with the SMALL. It was too big for our toy poodle mix, Bitsy, but fit pretty well on our shih tzu, Butch, at the smallest setting (definitely measure before ordering).

The collar is in the small black box.
The collar comes in eight different colors, with matching LED light. Since Butch is a boy, we decided to get him the Blue, which is a nice change from the pink he’s usually saddled with. The blue LED light is impressively bright, and there are three display modes, as well as Off: Solid, Fast Flash, and Slow Flash. You’ll probably end up using Solid most of the time. In any case, no matter which mode you prefer, the two CR2016 button cell batteries should last at least 60 hours.

You get the collar and instructions.
As for the collar itself, it’s nice and wide and really high quality. Considering the amazing price, even if you don’t use the LED light much, having it as a regular collar is reason enough to get it.

Despite needing a bath and grooming, Butch is looking sharp in his new collar.

Butch.

Butch.
Thanks to Vivaglory for the review unit.
The post Review: Vivaglory Dog Collar LED Light Safety Collar appeared first on Armchair Arcade.
February 9, 2016
Review: AmazingWorks Aluminum Gaming Mouse Pad
Although some people eschew mouse pads, and in fact most mice these days don’t even need a specialized mousing surface to work, there is still some benefit to using one. Perhaps the biggest of these benefits is to provide a specific type of surface for your mouse to track on, be it to help with precision, enhance speed, or something in-between.
The box.
The AmazingWorks Aluminum Gaming Mouse Pad is among the more unique of these mousing surfaces. As the name suggests, its surface is made of aluminum, which generally stays cool to the touch, but has, when using your mouse on it, a somewhat sandpaper-like texture. You’ll not only feel the slight resistance for improved precision, but also really hear your mouse sliding across it.

The top surface.
The silver surface itself has more of a matte finish, with shiny edges. The rubberized base helps to protect your tabletop and provides a nice grip to help keep the mouse pad suitably stationary.

The rubber bottom.
While it’s undeniably a striking looking mouse pad, the textured surface will likely wear away the rubber skids on the bottom of your mouse. While this is not a major expense to replace, that, combined with the noise generated, definitely limits the potential user base for what is otherwise a high quality, low price product.

Shown on top of a Razer Destructor mouse pad for a size comparison
Thanks to AmazingWorks for the review unit.
The post Review: AmazingWorks Aluminum Gaming Mouse Pad appeared first on Armchair Arcade.
February 8, 2016
Review: Stuhrling Original Men’s Legacy (371.02) Automatic Self Wind Watch with Genuine Black Leather Strap
A noted luxury watch maker, Stuhrling is probably best known for their bold designs. As you can see from the photos, the Stuhrling Original Men’s Legacy (371.02) Automatic Self Wind Watch with Genuine Black Leather Strap is no exception.

The exterior packaging.

The interior packaging.

You get the watch, a cleaning cloth, instructions, and warranty and other paperwork.
As is the trend with this type of men’s watch, the Legacy 371.02 is oversized and thick, placing the watch’s elegant features in sharp relief against your wrist. The transparent face on the gold-toned, stainless steel round case lets you see the watch’s inner workings, which are set off by rich accents (two other tone and color options are available in this model at different price points, which you can see under “Customers Also Shopped For” in the middle of the Amazon page). A similarly transparent rear lets you see how the watch functions from that angle, albeit only when taken off your wrist.

The watch.

A closer look.

The rear.

A closer look.
As the “Automatic” and “Self Wind” in the name suggests, this watch features a mainspring that is wound automatically from the natural motion of your arm. If worn daily, this means your watch will never need winding or any other energy source. Of course, you can also manually wind the spring. Water resistance up to 165 feet means you never have to take the watch off, although you might want to take care with the 24mm wide alligator-embossed black leather strap.

A size comparison with the 42mm Apple Watch.

It’s a powerful look.
A large crown lets you set either of the dual time faces, one on the main part of the watch and the other in a smaller, secondary window. Elegant sun and moon icons indicate AM or PM, respectively.

Another angle.
The Legacy 371.02 is a striking creation. Being the technophile that I am, this won’t replace my Apple Watch for everyday use, but I’ll certainly be wearing this watch when I want to make a more professional (and fashionable) statement.

One last look.
Thanks to Stuhrling for the review unit.
The post Review: Stuhrling Original Men’s Legacy (371.02) Automatic Self Wind Watch with Genuine Black Leather Strap appeared first on Armchair Arcade.
February 7, 2016
Review: NuCam 720p Light Bulb Camera with Night Vision
If you’re interested in a straightforward security camera for your home or business, the NuCam IR 720P HD Audio Security Camera promises a low effort install with no subscription. You simply screw the bulb-shaped device into any standard E26/E27 light fixture and connect over Wi-Fi to your Android, iOS, or Windows or Macintosh PC device.
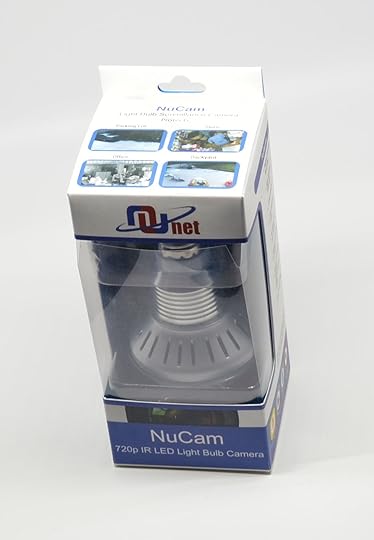
The front of the box.
The bulb itself features a 1MP camera, which translates to a maximum resolution of 1280×720, or 720p, with a viewing angle of 65 degrees. It also contains a low brightness LED (white) light (how it’s at least nominally a light bulb) rated to last 30,000 hours (or about 10 years of use) and two infrared lights, which of course allows it to have night vision.

The back of the box.
Included in the box is the bulb camera, a white light remote control (turns the light portion on or off independent of an app), a flyer, a mini CD-ROM, and a USB 2.0 microSD card reader. The microSD card slot on the bulb supports up to a 32GB microSD card (and a minimum of 2GB), which is required (it automatically saves .hkv video files, which, unfortunately, is a somewhat obscure format), but not included, and you can also transmit and record directly to your compatible smartphone, tablet, or PC via an app.
If you go to hd265.com, you can download the appropriate software for your device (or if you’re on Android or iOS, just download the BSTCAM app from Google Play or the Apple App Store). While it doesn’t make up for the lack of instructions in the box, it’s a straightforward enough process. If you still have a PC with an optical drive, the included mini CD-ROM does include instructions for both smartphones and tablets (it’s iOS-specific, but works the same on Android) and PC, although the latter is just to tell you which version of the included software to install for Windows or Macintosh, respectively. There’s also an Android .apk file in the “Smartphone manual” folder. In any case, you’re better off getting the app directly from the hd265.com Website and then following the instructions in the next paragraph.
Once the bulb is screwed into your indoor or outdoor fixture (it’s not really weather proof, so if you install it outside, make sure the area is protected from the elements) of choice and you confirm it’s working (the easiest way is to see a red light or simply turn on the white light from remote), install the app. To save yourself a lot of heartache, follow the instructions in the Setup Guide on the Nuvending Website. Unfortunately, while following the instructions allowed me to easily connect to it as a local camera, no matter what I tried, I couldn’t get it to work as a camera I could connect to from any non-local Internet connection. The camera always showed as offline.

The contents of the package.
While this camera has a lot of promise for a low price, setup is not intuitive and the instructions are poor. Audio-video quality is fairly low as well and I couldn’t get the app to properly save audio or video files, or use the microphone for two way communication, on my Apple iPhone 6 Plus. As such, although others, as you can see from the Amazon reviews, have had better luck with it, this is not something I’d personally be able to recommend in its present state.

The view from the iOS app via a direct wifi connection.
Thanks to NuVending for the discounted review unit.
The post Review: NuCam 720p Light Bulb Camera with Night Vision appeared first on Armchair Arcade.
January 29, 2016
A quick look at Gorf with Magic Voice for the Commodore 64 (includes video)
I was messing around with some PAL- and NTSC-based Commodore 64 stuff, and just happened to finally get a chance to test out a Commodore Magic Voice Speech Module with the Commodore cartridge conversion of Bally Midway’s arcade classic, Gorf. Both are fairly early Commodore products and definitely not the best that the Commodore 64 is capable of, but together they make for one of the better home Gorf ports. The speech really does add a lot to it.
The Magic Voice was supported by only a handful of cartridges, so it’s not really worth trying to acquire as anything more than a novelty. Nevertheless, it’s a fairly interesting add-on and can operate both on its own by issuing BASIC programming language speech commands or by inserting a compatible cartridge (like Gorf). You need to send the audio output from your Commodore 64 to the audio input of the Magic Voice, then the audio output of the Magic Voice to your display. Unfortunately, it’s purely a mono transaction on the Magic Voice side, but the sound quality is still good enough. My particular chain went from a Commodore 64 stereo S-VIDEO cable to both the Magic Voice and the XRGB-mini Framemeister, which went to my capture device and monitor. Enjoy the video and be sure to check out the photos that follow (note that for the video, but not the photos, I plugged the other audio channel into the Framemeister, so you should hear stereo (or at least two channels of audio)):

The Gorf and Magic Voice boxes.
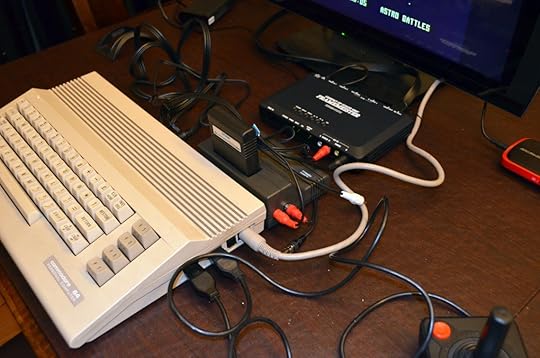
The unit from the side.

Running Gorf.

Running Gorf.

Running Gorf.
The post A quick look at Gorf with Magic Voice for the Commodore 64 (includes video) appeared first on Armchair Arcade.
Review: Mixcder Bluetooth Headphones
If you’re looking for wireless Bluetooth headphones in a form factor other than in the ubiquitous earbud-style, there’s finally a quality solution. The Mixcder Bluetooth Headphones (aka, Ausdom M05 Bluetooth Over-ear Headphones) can be used both wired, via a 3.5mm audio cable, or wireless, via its Bluetooth 4.0 connectivity, and it uses the popular can-style form factor, where the cushioned earpads cover your ears.

The packaging.
You get the lightweight headphones itself, a short mini-USB charging cable, a 3.5mm audio cable (4 feet or 1.2 meters in length), a drawstring padded carrying sack, and a user manual. Since you’ll almost certainly want to use these wirelessly, you should charge the battery, which takes about two to three hours from full drain. You get about 20 hours of playback from a full charge, or, since this has a built-in microphone to work with your smartphone, a similar 20 hours of talk time and about 250 hours of standby time.
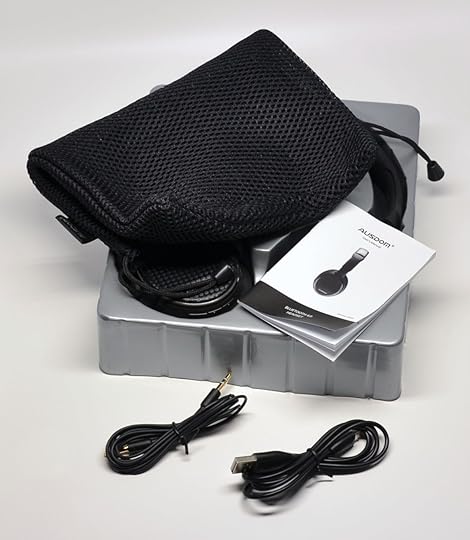
What’s in the box.
Build quality on the Mixcder Bluetooth Headphones is excellent, with nicely textured surfaces and generous, soft padding around both the adjustable headband and earpads, the latter of which rotates to lay flat. A surprising number of dedicated controls for Volume Up, Volume Down, Power, Track Forward, Play/Pause, and Track Reverse round out its generous feature-set.
So how do they sound? The wireless fidelity is excellent, with superb clarity and solid bass. Wired fidelity is at least a match for how good it sounds over Bluetooth. Even the microphone has excellent pick-up and clarity for the benefit of those you’re speaking to (take note, however, that the microphone and button-based functionality only works in Bluetooth mode, not when using a 3.5mm audio cable).

These are stylish cans.
These are my new favorite full-sized multi-purpose headphones. Between the generous feature-set, support for the latest wireless and data transmission standards, extreme comfort, and reasonable retail price, the Mixcder Bluetooth Headphones are easy to love.
Thanks to Mixcder for the review unit.
The post Review: Mixcder Bluetooth Headphones appeared first on Armchair Arcade.
January 21, 2016
Review: Aootek Intelligent LED Night Light and Table Lamp
Although my two oldest daughters no longer need it, one of their favorite night lights used to be a little glowing, rubberized figure that charged when it was docked to its base, so it could then be used as a portable. The Aootek Intelligent LED Night Light and Table Lamp is like a grown up version of that concept, with uses far beyond simply keeping nighttime bogeymen at bay.

The packaging.
Its lantern-like design is both practical and stylish. While nice and light thanks to its use of ABS plastic, it doesn’t feel cheap.

You get the lamp, dock, and instructions.
As soon as you pull the lantern from its docking cradle with the attached rope – a nice touch that both reinforces its lantern-like property and also lets you hang it places – it lights up with its pleasant, yellow light. There’s also a manual on/off dial, that also works as a brightness setting. Pressing the button on top of the dial sets the timer for 10 minutes. When you’re ready to put the lamp back in its docking cradle, it’s keyed to only go in one way, so you always know you’ve made a good connection.

Docked and charging.
The Aootek Intelligent LED Night Light and Table Lamp‘s built-in 1600MA recyclable lithium battery allows it to last from three to 12 hours, dependent upon brightness setting, on a full charge. Whether you need it for when the power goes out, as a night light, or just as a portable outdoor light, there’s a lot to like about this classy product.

The soft, yellow glow is pleasing.
Thanks to Aootek for the review unit.
The post Review: Aootek Intelligent LED Night Light and Table Lamp appeared first on Armchair Arcade.
January 20, 2016
Review: Phshion 41W 5 Port Auto Sense USB Charger
With seemingly everything USB-connected or -powered these days, it’s more important than ever to have free USB ports. Unfortunately, since there is so much USB-based stuff out there, even if you do have lots of ports (my desktop alone has close to a dozen), it’s still difficult to find any USB ports that are actually available even for what would be an otherwise simple job of charging. Frankly, even if you do find an easily accessible free USB port, there’s no guarantee that it will provide enough power to your device to do anything but trickle charge it. That’s where something like the Phshion 41W 5 Port Auto Sense USB Charger comes in so handy.

How the hub comes packaged.
The Phshion 41W 5 Port Auto Sense USB Charger provides five auto-sensing USB ports that total a generous 8.2 Amps of output (or about 41 watts of power, like in the name). That’s plenty for charging multiple USB-powered devices at their fastest possible rate.

The box.
The hub itself is suitably attractive and compact, with a single removable AC plug out back. The build quality is excellent, with enough weight to the unit where it should have little trouble staying in place.

What’s inside the box.
I personally own several different brands of these types of units and find them invaluable, with some never leaving my desk and other used as portable power centers. What I like the most about the Phshion offering is it’s the smallest of all of the ones I own. While it can’t really be used vertically, its horizontal orientation still creates a modest footprint.
Thanks to Fashion Digital Store for the review unit.
The post Review: Phshion 41W 5 Port Auto Sense USB Charger appeared first on Armchair Arcade.


