
Ree Drummond's Blog, page 63
January 16, 2012
Apple, Pecan, and Blue Cheese Salad with Dried Cherries
 I thought I'd follow up the french fry post with something slightly more redeeming. I made this salad a couple of weeks ago, and it was a triumph for the taste buds. My favorite salads are ones with lots of different things going on: some kind of fruit, some kind of nut, some kind of cheese. And always a little hint of sweetness in the dressing.
Serve this with french fries for an unexpected treat!
Just kidding.
I think.
 The Cast of Characters: Salad greens, apples, pecans, blue cheese, dried cherries, olive oil, Dijon mustard, maple syrup, and apple cider vinegar.
 Start by making the dressing, and if you don't have a few little mason jars for this use, get thee to the supermarket and gitcha a package of them. Add a heaping tablespoon of Dijon…
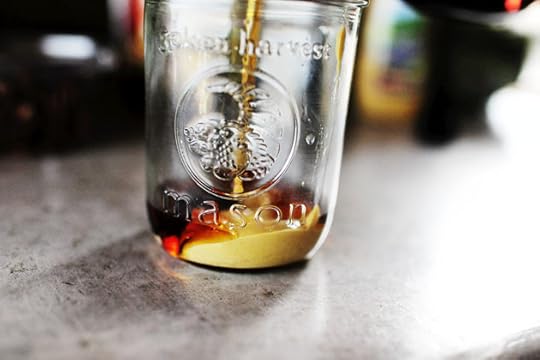 A little maple syrup. Yum.
 A splash of vinegar…
 And a fourth a cup or so of olive oil. Some salt and pepper, too.
 The beauty of a mason jar. Just shake it up and it's done.
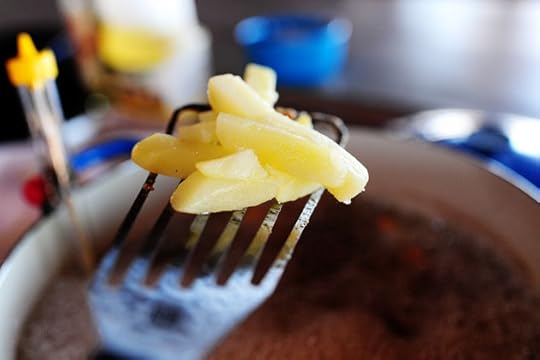
 Next, cut pretty little slices of apple by cutting an apple into six (or so) wedges, then cutting the core off of each wedge.
 Then just slice each wedge into thin pieces.
 Next, grab a chunk or two of weird looking (but oh-so-delicious tasting) blue cheese. I think this was Stilton, but any kind will do. Then take a fork and chunk it up into bite-sized pieces. I did not show this step because my brain is a torrent of haphazardness.
In other words, I done forgot.
 Next, grab plenty of scrumptious dried cherries. I could founder on these puppies.
 Next, throw the greens into a big ol' bowl…
 Pile on the apples and dried cherries…
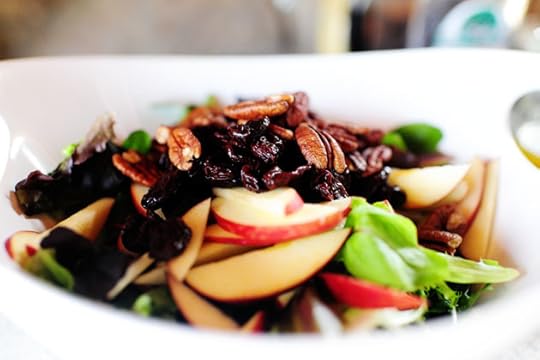 And the pecans…
 Then drizzle on a little of the dressing.
 You definitely won't use all of the dressing; just toss in a little at a time until you think you've added enough.
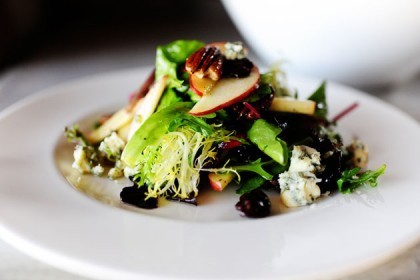
Heap the salad on plates, then throw on plenty of blue cheese chunks. And you could definitely just toss the cheese with the rest of the salad. I just forgot to add them in.
This is delicious, guys. A beautiful, fresh salad with lots of lovely things going on. Change it up by substituting pears for apples, goat cheese for blue cheese, cranberries for cherries, spinach for greens.
And serve with a side of fries if you feel like it. I'm the last person on Earth that's going to judge.
Here's the handy printable!
Recipe: Apple, Pecan, and Blue Cheese Salad with Dried Cherries
Prep Time: 15 Minutes
|
Cook Time:
|
Difficulty: Easy
|
Servings: 8
Print Recipe
3"x5" Cards
4"x6" Cards
Full Page
Ingredients
12 ounces, weight Salad Greens (spring Mix)2 whole Apples, Cored And Sliced Very Thin1/2 cup Pecan Halves1/4 cup Dried Cherries6 ounces, weight Blue Cheese, Cut Into Chunks1 Tablespoon (heaping) Dijon Mustard1 Tablespoon Maple Syrup (more To Taste)1 teaspoon Apple Cider Vinegar (more To Taste)1/4 cup Olive Oil Salt And Pepper, to taste Preparation Instructions
Add greens, apple slices, pecan halves, dried cherries, and blue cheese chunks into a large salad bowl.
In a small jar, mix Dijon, maple syrup, vinegar, olive oil, and salt and pepper. Put the lid on the jar and shake well to mix.
Pour a little salad dressing over the top of the salad and toss to combine. Taste salad and add more salad dressing to taste.
Serve with french fries. Just kidding. I think.
Posted by Ree on January 15 2012


January 13, 2012
Perfect French Fries
 These are the facts of the case and they are undisputed:
1. French fries are delicious.
2. French fries dipped in a mixture of ketchup and mayonnaise are divine.
3. Did you know that's called "Fry Sauce" in Utah?
4. If you peel a bunch of potatoes and cut them into sticks, then immediately plunge them into hot oil and fry them, they will never, ever, ever, be as good as the french fries I'm showing you below.
5. French Fries for President!
I love lists. I never follow them, but I love them.
But it's really true, guys: to get perfectly golden french fries that are soft in the middle and crisp on the surface, plunging potatoes straight into oil just doesn't work. The starch on the outside of the potatoes interferes with the texture of the fries and never allows them to become nice and crisp, and in order to cook the fries long enough to soften the potato, the outside can often get to brown. Utter chaos, I'm telling you!
Not that I've ever walked away from any form of fried potato. Let me just set that record straight.
But once you try french fries the way they're meant to be made—and the way they're made by most restaurants and fast food chains—you'll have a hard time not trying to find ways to work french fries into your weekly menu. Whether or not this is a positive thing is something I'll let you figure out.
 Begin by peeling five pounds of potatoes, then cut them into sticks. Throw them in a pot or large bowl and cover them with cold water, then let them soak for at least two or three hours.
Soaking the sliced potatoes is the fundamental first step of making proper french fries. The soaking process removes the troublesome starch on the outside of the potato, which will help the fries achieve the perfect crispness.
Note: Because somewhere along the way I got into the habit of planning ahead for fries, I usually wind up soaking the fries for several hours, or even overnight. Last Sunday, for instance, I peeled and sliced the potatoes before church and let them soak while we were gone so they'd be ready to cook up when we got home. I'd say the minimum time you'd want to soak the potatoes would be an hour or so, but there's definitely no harm in going longer.
 By the way, when this finally breaks, I'm going to mourn.
You don't need this, though. Just cut the peeled potatoes into four or five long pieces, then lay them flat and cut them into sticks.
But I love that french fry cutter. It's seen me through some really rough times.
 After they've soaked awhile, drain the fries, then lay them on a bunch of paper towels to dry them off. Blot the top of the potatoes to remove all the excess moisture.
 Next, heat a pot of oil to 300 degrees, using a thermometer to monitor the temperature.
300 degrees is a low frying temperature…and I'll show you why in a second.
Okay, seven seconds.
 Working in batches, add the potatoes to the 300 degree oil…
 Then fry the potatoes for about 4 to 5 minutes. The key here isn't to fry them or brown them at all…just to start softening them up.
Note: If you have little kiddos in the house, please be sure to put the pot on a backburner!
 Once they're soft (I usually use the spatula to cut through one of them in the pot; if it easily cuts through, they're ready) remove them from the oil…
 And drain them on (new, dry) paper towels.
 Keep doing this until you've fried all the potatoes at 300 degrees.
Then…crank up the heat and bring to oil to 400 degrees. We'll finish them off a this high temperature.
Making fries is fun!
 Then batch by batch…
 Throw 'em back into the oil and fry 'em till they're nice and golden and crisp and irresistibly, ridiculously perfect.
 When they look like they're brown enough, remove them from the oil…
 Drain 'em on a plate with a napkin or paper towel…
 Then sprinkle 'em with sea salt.
Look at what you made! A beautiful, golden brown, crispy, tender, gorgeous, perfect plate of french fries.
If you can do this, you can do most things in life.
Dig in!
Recipe: Perfect French Fries
Prep Time: 3 Hours
|
Cook Time: 30 Minutes
|
Difficulty: Easy
|
Servings: 8

Print Recipe
3"x5" Cards
4"x6" Cards
Full Page
Ingredients
5 pounds Russet Potatoes Vegetable Or Peanut Oil For Frying Sea Salt Preparation Instructions
IMPORTANT: Please be careful when frying with hot oil. Keep the pot on the backburner so little kiddos won't get hurt.
In a nutshell, here it is: Soak potatoes, dry potatoes, fry potatoes, drain potatoes, then fry again!
Peel and rinse the potatoes, then cut them into sticks by cutting the potato in four or five vertical pieces, then cutting each piece into sticks. Place them in a large bowl and cover with cold water, then allow them to soak for two or three hours. (You can also stick them in the fridge and let them soak for several hours or overnight.)
When you're ready to make the fries, drain off the water and lay them on two baking sheet lined with paper towels. Blot them with paper towels to dry them.
Heat a few inches of oil in a heavy pot to 300 degrees. In 3 or 4 batches, cook the potatoes for about 4 to 5 minutes per batch, or until the potatoes are soft. They should not be brown at all at this point! You just want to start the cooking process. Remove each batch and drain them on new/dry paper towels.
Once all the potatoes have been fried at 300, turn up the heat until the oil reaches 400 degrees. When the oil's hot, start frying the potatoes in batches again, cooking until the fries are golden and crisp. Remove from the oil and drain on paper towels.
Sprinkle fries with sea salt and dive in!
Posted by Ree on January 12 2012

January 11, 2012
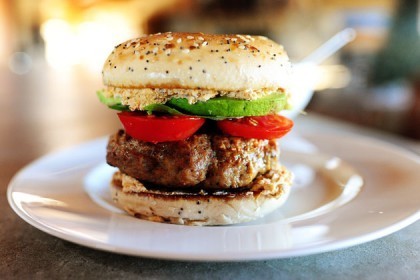
Turkey Bagel Burger
 I would like to state for the record that I don't go around making turkey burgers very often, because…let's face it. They're turkey burgers. In three million years, they could never hold a candle to a regular burger when it comes to flavor, and I'm not just saying that because I live with a cattle rancher. I'm saying it to just get it over with, to get it out in the open: Turkey burgers and beef burgers…well, there's just no comparison.
That said, if you dress it up just right, a turkey burger can be a nice change of pace and—theoretically, anyway—a nice little foray into healthy eating, unless of course you serve said turkey burger on a very large bagel with a goat cheese spread, avocado, and next to a pile of homemade fries.
Look, I'm not on this earth to make perfect sense. That's not what I have to offer the world.
This really was yummy! The key is adding plenty of savory seasonings to the turkey; salt, pepper, and Worcestershire are good. And I added an egg yolk for a binder and because I wanted to, not necessarily in that order.
Come make one with me.
 The Cast of Characters: Ground turkey, Everything bagels, goat or cream cheese, sundried tomato or basil pesto, tomatoes, avocado, and basil leaves if you have them. I had planned to use lettuce, but I wound up scrapping it. Burger didn't need it.
 Throw the (really grody looking, if you want my honest opinion) ground turkey into a bowl.
I wouldn't want to meet this stuff in a dark alley, I'll tell you that.
 Throw in plenty of dashes of Worcestershire, some salt and pepper, and an egg yolk. Because you're worth it.
 Knead the meat together, form it into patties, and throw them into a skillet with a little canola oil and butter over medium-high heat. Cook them thoroughly! There should be zero sign of pink in the middle. Cook, cook, and cook some more. Amen.
 Meanwhile, split the bagels in half and toast them in a separate skillet with plenty of melted butter. They should be golden brown and slightly crispy. Everything bagels are perfect for turkey burgers because they bring even more flavor to the scenario.
 Throw the goat cheese (or cream cheese; yum) into a bowl and plop in some pesto.
 Stir this around, then please resist the urge to blaze through an entire box of crackers with this blessed concoction spread on top.
But sometime if you're looking for a nice cracker spread, here you go.
 To serve the burger, spread a good amount of the creaminess on both sides of the toasted bagel.
 Then throw on the nice, flavorful, sizzling hot burger…
 Then two or three juicy, red slices of tomato…
 Then lay a few slices of avocado on the top bun and two or three basil leaves on top of the tomatoes.
Now that…is one beautiful turkey burger.
 It's even more beautiful next to a plate of absolutely perfect homemade french fries…which will be our next recipe.
This burger's going to require some major smushing in order to fit your mouth around it…but all good things in life are worth a little work!
Here's the handy dandy printable:
Recipe: Turkey Bagel Burgers
Prep Time: 10 Minutes
|
Cook Time: 15 Minutes
|
Difficulty: Easy
|
Servings: 8
Print Recipe
3"x5" Cards
4"x6" Cards
Full Page
Ingredients
8 whole Everything Bagels4 Tablespoons Butter4 ounces, weight Goat Cheese (chevre) Or Cream Cheese2 Tablespoons Pesto (basil Or Sundried Tomato)2 pounds Ground Turkey1 teaspoon Kosher Salt (more To Taste) Plenty Of Black Pepper8 dashes Worcestershire Sauce4 dashes Hot Sauce (more To Taste)1 whole Egg Yolk (optional)1 Tablespoon Canola Oil1 Tablespoon Butter4 whole Roma Tomatoes, Sliced3 whole Avocados, Sliced16 whole Large Basil Leaves Preparation Instructions
Melt butter in a skillet over medium heat and grill the cut side of the bagels until golden brown and slightly crisp. Set aside.
Stir together the goat cheese (or cream cheese) and the pesto until smooth. Add more pesto if you'd like!
Combine turkey, salt, pepper, Worcestershire sauce, hot sauce, and egg yolk (if using) in a large bowl. Stir or knead together with your hands, then form into patties.
Heat canola oil and 1 tablespoon of butter in a skillet over medium-high heat. Cook the patties on both sides until totally done, with no sign of pink in the middle, at least 4-5 minutes per side.
To serve, spread a good amount of the pesto spread on each bagel half. Place the burgers on the bottom half, then top with tomato slices and basil leaves. Lay avocado slices on the top half, using the spread to make them stay put. Sprinkle a little salt and pepper on the avocados, then place the top half on the bottom half, smush it together...and dig in!
Posted by Ree on January 11 2012

January 9, 2012
Bruschetta
 Hardly anything makes my tastebuds jump up and down and do flip-flops more than bruschetta. I've loved it for more than half my life and used to regularly devour it during my vegetarian days, before Marlboro Man roped my heart and introduced me to the world of steak cooked in sizzling butter. And I still love it today every bit as much as I ever did.
Here's the thing about Bruschetta: It can be a snack. It can be an appetizer. It can be a salad. It can even be a main course if the whole "Where's the Beef?" thing isn't an issue for you.
Either way, it's divine. And it's so very, very easy to make.
 The Cast of Characters: Red grape (or cherry) tomatoes, yellow grape (or cherry) tomatoes, garlic, olive oil, balsamic vinegar, fresh basil, baguette, and (not pictured) salt, pepper, and butter.
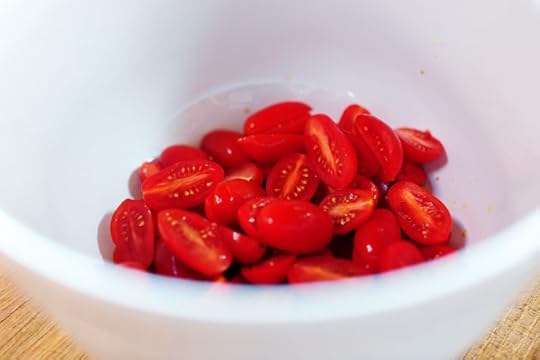
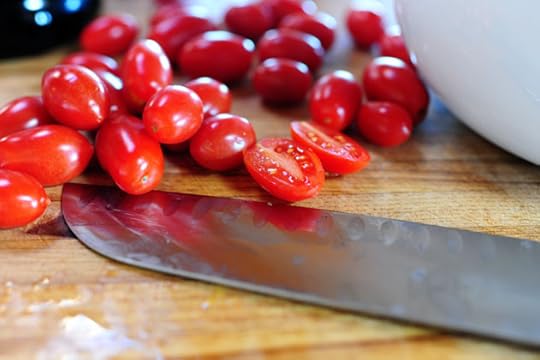 Slice the tomatoes in half lengthwise…
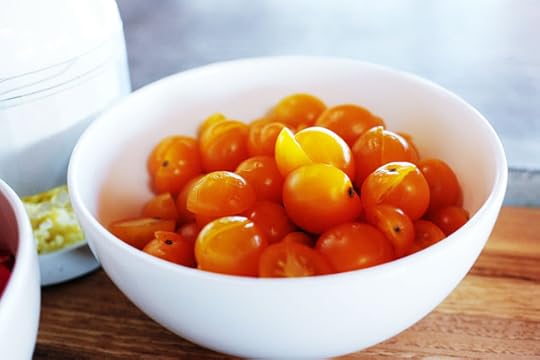 Then do the same with the yellow. Eat two. Repeat as necessary.
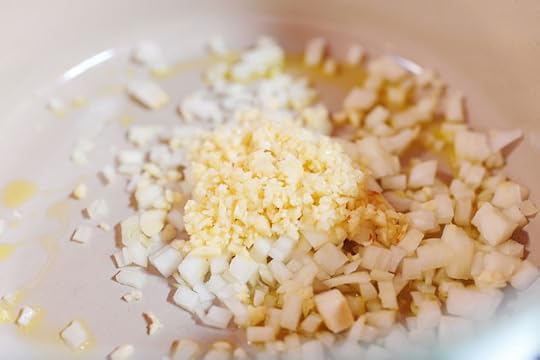
 Chop up a bunch of pre-peeled garlic cloves using this chopper contraption, because if you're like me, this is your new favorite way to quickly chop a bunch of garlic…
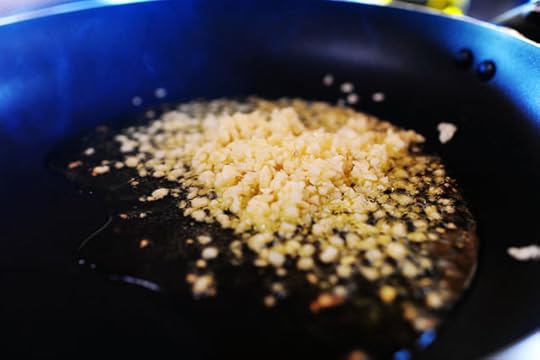 Then heat some olive oil in a small skillet over medium-high heat and throw in the garlic.
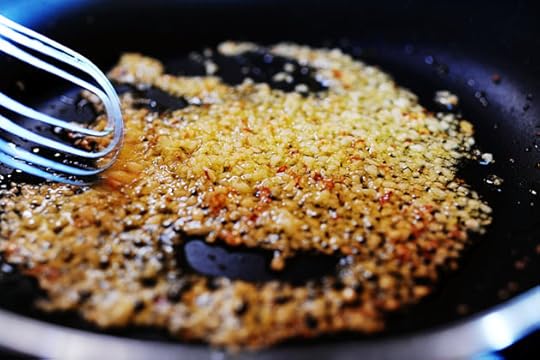 Stir it around for less than a minute, just to get the flavors going and to brown it just a bit…but don't let it burn!
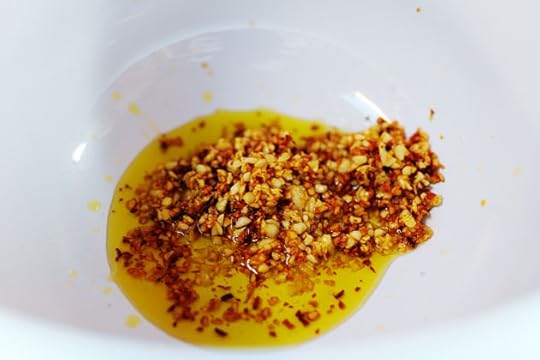 Then throw it—olive oil and all—into a bowl and let it cool for just a bit.
You might stop a few seconds earlier than I did so it's a little more "golden" than "golden brown."
Don't be like me, is what I'm saying.
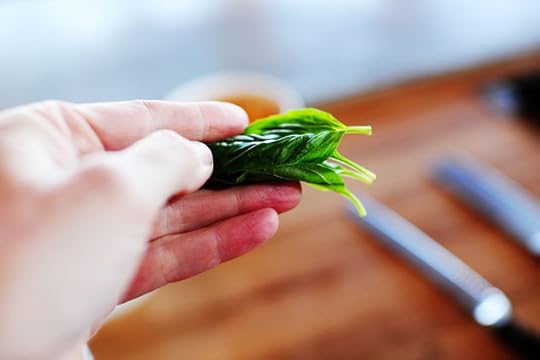 Meanwhile, grab some basil leaves and stack them on top of one another…
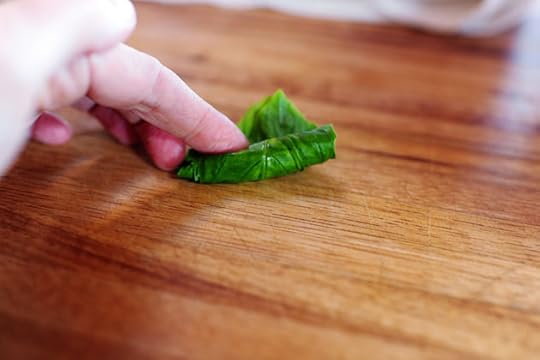 Then roll them up tightly…
 And slice them into strips. You'll need a whole bunch more than this. I'm just demonstrating.
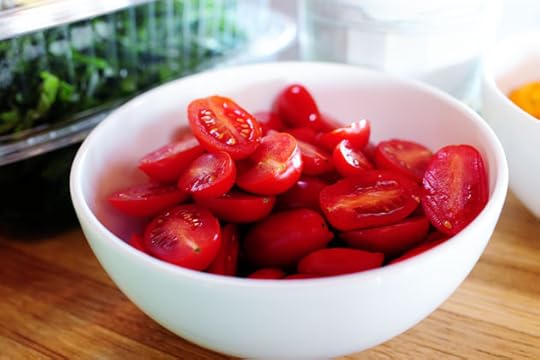
 Next, throw the red tomatoes into the bowl…
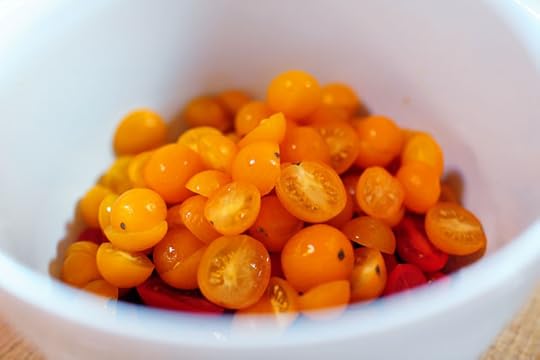 Followed by the yellow tomatoes…
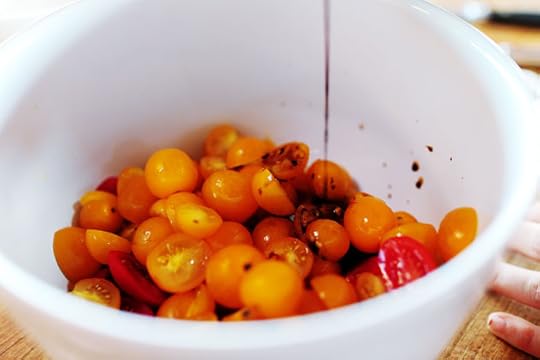 A little balsamic…
 The basil…
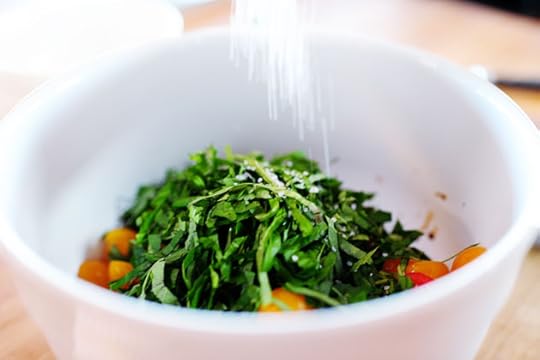
 And a little salt and pepper. Not too much salt! Start light and work your way up if necessary.
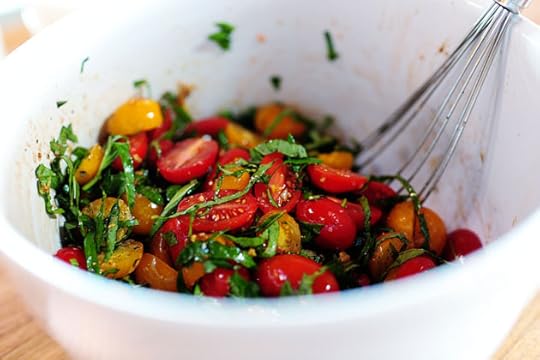 Next, stir it to combine and give it a taste, adding more of whatever you think it needs. I added a bunch more basil…
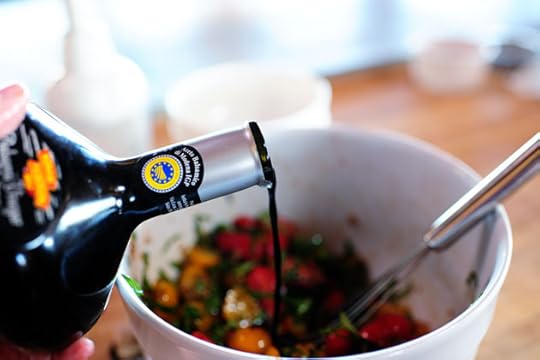 And a tiny splash of more balsamic.
Now, you can use this right away, but I think it's better if you can let it sit (either on the countertop or in the fridge) for an hour or so, just to let the flavors meet and mingle and fall in love and procreate.
Sorry. Strange visual. Let's move on.
 Now for the baguette! You can cut straight, round-ish slices of the bread if you'd like the pieces to be on the small side. Or you can cut extreme diagonal pieces like this, to allow for more surface area.
More surface area = More stuff on top.
I vote for more surface area.
 You can toast the pieces of bread in the oven, dry. But why in the world would you want to do that when you can brown them in butter in a skillet?
 Mmmmm, baby. This is what makes bruschetta divine. Well, this and the tomatoes, basil, garlic, and balsamic.
Never mind.
Oh, and another note about the bread: Sometimes I grill the bread on a grill pan so it has nice grill marks. This is pretty, too. But it just never seems to have the crisp, buttery, flavorful quality that this skillet stuff has.
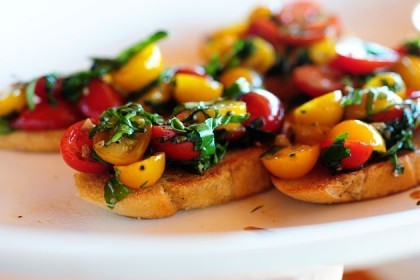
 To serve, arrange the bread pieces on a large platter and heap the tomato mixture onto each piece.

Then serve it as an appetizer, a first course…or just a snack while you're watching Inception.
Inception has taken over my life. I just thought you should know this about me.
 Enjoy this, my friends! It's one of the most delicious things you'll ever put in your mouth.
Here's the handy dandy printable:
Recipe: Bruschetta
Prep Time: 20 Minutes
|
Cook Time: 10 Minutes
|
Difficulty: Easy
|
Servings: 12
Print Recipe
3"x5" Cards
4"x6" Cards
Full Page
Ingredients
2 Tablespoons Olive Oil5 cloves Garlic, Finely Minced1 pint Red Grape Tomatoes, Halved Lengthwise1 pint Yellow Grape Tomatoes, Halved Lengthwise1 Tablespoon Balsamic Vinegar16 whole Basil Leaves (chiffonade) Salt And Pepper To Taste (don't Oversalt!)1 whole Baguette8 Tablespoons Butter Preparation Instructions
In a small skillet, heat olive oil over medium-high heat. Add garlic and stir, lightly frying for about a minute, removing before the garlic gets too brown (it can be golden.) Pour into a mixing bowl and allow to cool slightly.
Add tomatoes, balsamic, basil, and salt and pepper to the bowl. Toss to combine, then taste and add more basil if needed, and more salt if needed (don't oversalt, though!) Cover and refrigerate for an hour or two if you have the time.
Cut the baguette into diagonal slices to allow for the most surface area possible. Melt half the butter in a large skillet and grill half the bread on both sides, making sure they're nice and buttery. Cook till golden brown on both sides. Repeat with the other half of the butter and the other half of the bread.
To serve, give the tomato mixture a final stir, the spoon generously over the slices of bread. Serve on a big platter as a first course or appetizer.
Posted by Ree on January 9 2012

January 4, 2012
Tuscan Bean Soup with Shrimp
 I'm Pioneer Woman. And I'm obsessed with soup.
This delicious take on the simple, classic Tuscan Bean Soup has a nice tangy tomato edge and plenty of chunky wonderfulness…with just a hint of sass. Just kidding about the sass part; I just felt like throwing it in. The soup also contains kale, which happens to be my boyfriend right now. I think my body must have been suffering from a gnarly Vitamin K and beta carotene deficiency, as the way I've been inhaling kale over the past few months is somewhat shocking. But I love the way it cooks: it wilts, yes, but unlike spinach, it really holds its own in soups and stews (or even just sauteed in a pan.) I absolutely love it in this soup.
I added sauteed shrimp to the top of the finished soup, which might be a bit weird. Cooked, sliced Italian sausage or even strips of grilled chicken would probably make more sense. But being weird just isn't something I wake up fearing on any given day, and it really did turn out to be a yummy bowl of soup.
 The Cast of Characters: Onion, garlic, tomato paste, canned tomatoes, canned Great Northern beans, chicken broth, kale, butter, parsley, shrimp, red pepper flakes, dried oregano, fresh parsley, fresh basil (if you can get it), and Parmesan (or Romano) cheese. Sounds like a lot…but it ain't. It's easy.
Oh, and wine. I would have included it in the photo, but I hadn't yet retrieved the bottle from my bedside table.
 Start by throwin some diced onion…
 And some garlic into a pot w/ some olive oil over medium-high heat.
 Stir it around and cook it for a couple of minutes…
 Then throw in some tomato paste.
 Stir this around and cook it for a minute or two, just to fry the paste a bit and release some lovely tomato-pasty flavor, and to get the bottom of the pan nice and dirty.
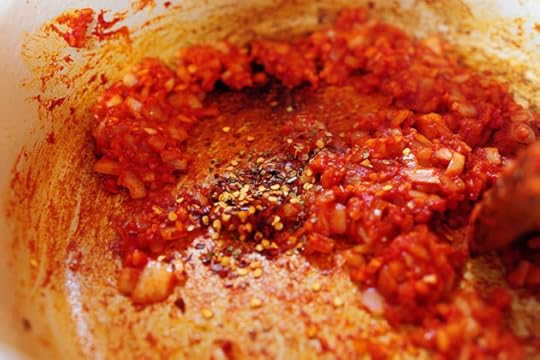 Next, throw in some red pepper flakes and some dried oregano, then stir it around and cook it for about 30 seconds or so. Maybe 34 seconds. But not 35; whatever you do, do not cook it for 35 seconds!
I'm just kidding.
 Next, and this is always my favorite part, pour in a good amount of dry white wine.
 Mmmm. Stir this around with a whisk, scraping the bottom of the pan and giving thanks for such a blessed aroma.
 Let this bubble up and reduce for a good 5 minutes, or until the wine is reduced by about half.
 Then pour in the canned tomatoes, juice and all.
 Pop open the cans of beans, and give them a good rinse under cold water to lose all that grody, slimy nonsense.
 Pour the beans into the soup, then stir them around to combine.
 Then pour in a good amount of chicken stock.
 Stir and let this simmer for 20 minutes or so, adding a little more broth if you think it needs it.
 While it's simmering, heat some butter in a medium skillet over medium high heat. When it's hot, throw in the shrimp and parsley…
 Sprinkle with salt, then toss/stir them around to cook until the shrimp are totally opaque and starting to turn golden, about 4 to 5 minutes. Remove from the stove and set aside.
 I'd like you to meet my boyfriend, Kale. You'd love him. He's a bunch of fun.
Get it? Bunch?
Don't pay any attention to me.
 Rinse the kale and tear it into chunks, then just throw it right into the pot.
 Stir it around and watch it shrivel and shrink and become one with the zuppa.
 Sprinkle in the salt. Nice hand, Ree.
 Then add some basil. I grabbed a whole bunch of leaves, then ripped them with my own two hands and threw it into the soup. Then I realized I didn't take a photo of myself doing that, so I grabbed a basil leaf and held it near the pot to represent the fact that I'd just added basil to the soup.
Don't be like me.
Taste the soup, adding more salt and pepper (or more red pepper flakes for heat) if you think it needs it, then just let it simmer.
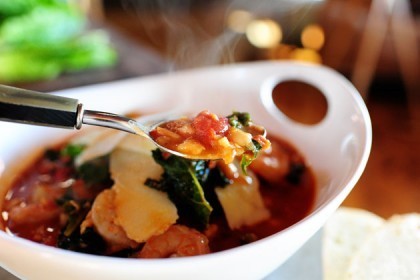
 When the soup is perfectamundo, add it all to a large serving bowl and top with the cooked shrimp. (Or of course, you can ladle it into individual bowls and place 3 to 4 shrimp on top.)
 Oh! And violently tear up some more basil and sprinkle it over the top. The stuff that dreams were made of.
 At the end, throw on a bunch of Parmesan or Romano shavings (I used Romano).
And by the way, I love Parmesan/Romano shavings. I love the way they look, I love the way they melt onto the top of soups, and I love what they stand for.
 Take a look!
Now go and cook.
Enjoy this, guys! It's a cold weather keeper.
Here's the handy, dandy, printable:
Recipe: Tucan Bean Soup with Shrimp
Prep Time: 10 Minutes
|
Cook Time: 45 Minutes
|
Difficulty: Easy
|
Servings: 8
Print Recipe
3"x5" Cards
4"x6" Cards
Full Page
Ingredients
5 cloves Garlic, Minced1 whole Medium Onion, Diced3 cans (14.5 Ounce) Cans Great Norther Beans, Drained And Rinsed2 Tablespoons Olive Oil1 teaspoon Red Pepper Flakes2 teaspoons Dried Oregano1/4 cup Tomato Paste3/4 cups Dry White Wine1 can (28 Ounces) Whole Or Diced Tomatoes6 cups Low Sodium Chicken Broth1 bunch Kale (more If Desired) Plenty Of Torn Fresh Basil4 Tablespoons Butter1-1/2 pound Raw Shrimp, Peeled And Deveined1/4 cup Chopped Fresh Parsley Fresh Parmesan Shavings Preparation Instructions
Heat olive oil in a large pot over medium high heat. Add onions and garlic and stir to cook for 3 to 4 minutes. Add tomato paste and stir to cook about 2 minutes, getting lots of flavor in the bottom of the pan. Stir in red pepper flakes and dried oregano; stir and cook for another 30 seconds.
Pour in wine and whisk, scraping the bottom of the pan a bit as you go. Allow this to bubble up and reduce, cooking until the wine is reduced by half.
Add canned tomatoes. Drain and rinse beans, then add to pot. Pour in chicken broth. Stir to combine and allow it to simmer for 20-25 minutes. Sprinkle in salt and pepper to taste.
While the soup is simmering, cook the shrimp: melt butter in a small skillet over medium-high (or high) heat. Throw in the shrimp and chopped parsley and toss to cook until no longer opaque, about 4 minutes. Season with salt. Set aside.
Rinse the kale and tear it into chunks. Stir into soup. (It'll shrink quite a bit, so don't be afraid when you first add it!) Add a bunch of torn basil and stir. Allow the soup to simmer for another 5 minutes, tasting and adding salt and pepper (or even more red pepper flakes) as needed.
Transfer soup to a large serving bowl and top with the shrimp, or ladle into individual bowls and top with 3 or 4 shrimp.
Add big, fat Parmesan or Romano shavings and more torn basil at the end. Utterly divine!
Posted by Ree on January 3 2012

January 2, 2012
Cheeseburger Salad
 My gosh, is this ever good. All the goodness of a juicy cheeseburger in salad form. It's similar to a taco salad, in that it has a bunch of meat, cheese, and tomato on top of lettuce. But this is…different. It's crazy, crazy good. You'll want to eat the meat mixture alone right out of the skillet. You'll wonder where it's been all your life.
(I think it's the pickles. Try it and see if you agree with me.)
Here's how I make it. You'll absolutely fall in love with it.
(Note: This recipe is adapted from this recipe on The Pampered Chef, which happens to make three of my most favorite cooking tools in the world. More on this another day.)
(This is not a paid advertisement for Pampered Chef products. Over and out and amen.)
 The Cast of Characters: Ground beef, ketchup, yellow mustard, Dijon mustard, barbecue sauce (not shown because I'm a dork), Roma tomatoes (not shown, see note on barbecue sauce), cheddar cheese, hamburger or hot dog buns, butter, and Romaine lettuce.
 Brown the ground beef, then drain off the fat and squirt in some ketchup.
Did you know ketchup is way underrated as an ingredient rather than a condiment?
Make this. You'll see.
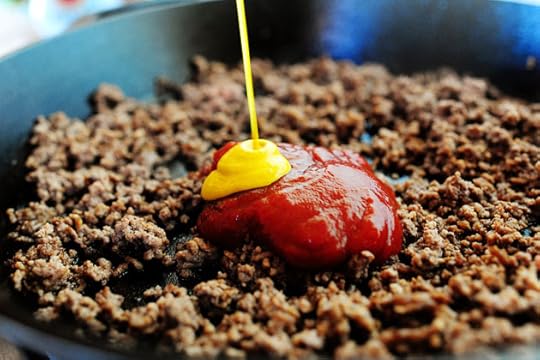 Squirt in some mustard…
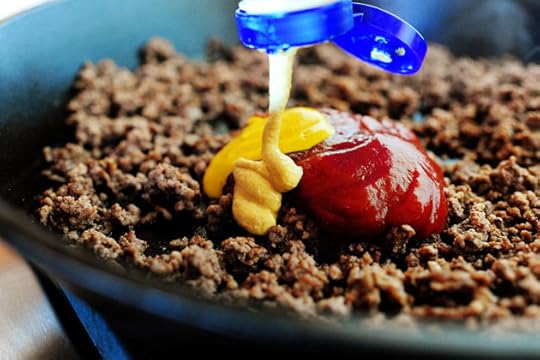 Some Dijon or grainy mustard…
 And some barbecue sauce. Then stir this together and take yourself a little bite.
Delightfully sticky, sweet, weird, and wonderful.
 Keep the meat warm, then grab some hamburger buns. Or you can grab some hot dog buns and pretend they're hamburger buns.
 Split them in half lengthwise, then slice them lengthwise a couple more times.
 Then cut them in the opposite direction to create about a 1-inch dice. These'll be the croutons!
They'll also change your life.
 Throw them in a skillet over medium-low heat with 1/4 stick of butter. Toss them around and cook them for the next 10 minutes or so, adding another 1/4 stick of butter every few minutes until you've added (and tossed in) 1 stick. Adding the butter gradually like this helps the croutons absorb them more evenly.
My word, are these croutons good.
 Next up, grab some dill pickle spears and chop 'em into large chunks.
My mouth squirted just looking at this photo. Just thought I'd share.
 Grate a bunch of cheddar cheese…
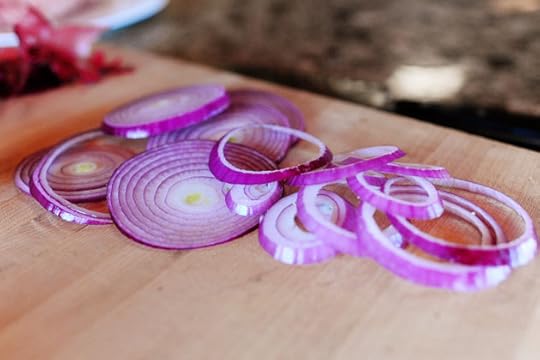 Slice up some red onion…
 And dice up some juicy, red tomato.
 Oh, and you might want to tear up some lettuce…considering this is a salad and all.
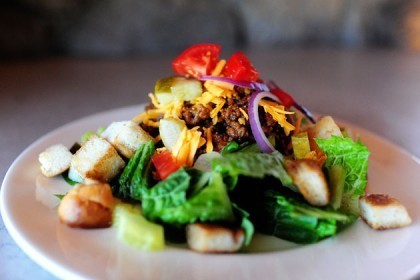
 Now just assemble the salads! Mound some lettuce on each plate, then pile on some of the meat mixture and some of the grated cheese.
 Then add plenty of pickle chunks, diced tomato, sliced red onion, and lots of the buttery, toasty croutons.
 This is absolutely, positively delicious. I think I'd choose it over taco salad. Please don't tell taco salads I said that.
I'm not here to hurt anyone's feelings.
 Try it soon, guys—I promise you'll love it. (Be sure to load on extra pickles. They make the salad, baby.)
Here's the handy dandy printable.
Recipe: Cheeseburger Salad
Prep Time: 10 Minutes
|
Cook Time: 10 Minutes
|
Difficulty: Easy
|
Servings: 6
Print Recipe
3"x5" Cards
4"x6" Cards
Full Page
Ingredients
2 pounds Ground Beef1/3 cup Ketchup1 teaspoon Yellow Mustard1 Tablespoon Dijon Or Spicy Mustard2 Tablespoons Barbecue Sauce2 heads Romaine Or Green-Leaf Lettuce, Torn8 whole Dill Pickle Spears, Cubed4 whole Roma Tomatoes, Diced1 cup Grated Sharp Cheddar Cheese1 whole Red Onion, Sliced4 whole Hamburger Buns1 stick Butter Preparation Instructions
(Adapted from The Pampered Chef.)
Brown meat in a large skillet, then remove from heat and drain off the fat. Add ketchup, mustards, and barbecue sauce to the meat and stir to combine. Taste and add more of whatever you think it needs. Keep warm.
Cut hamburger buns into 1-inch cubes. Melt 1/4 stick butter in a separate skillet, then add the bread cubes and toss to coat. Toast the croutons in the skillet over low heat for about 10 -12 minutes, adding 1/4 stick of butter every couple of minutes until you've used the whole stick. (This will ensure all the croutons soak up the butter and toast nicely.)
To assemble each salad, pile torn lettuce on a plate. Pile on a good quantity of the meat mixture, then top with plenty of grated cheddar. Add diced tomato, chunks of pickles, and slices of red onion over the top, then sprinkle warm croutons all around the plate.
Serve immediately. Yum yum yum!
Posted by Ree on January 1 2012

December 30, 2011
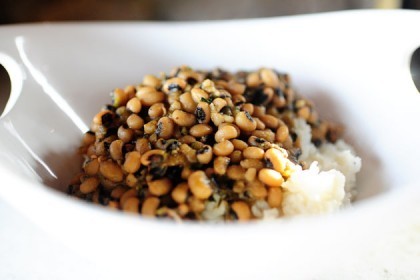
Hoppin' John
 I'm not a big believer in superstition, but for some reason I've always eaten black-eyed peas on New Year's Day. Whether it's Zannie's Black-Eyed Pea Dip (oh my gosh, please try it now) or cool, crisp Black-Eyed Pea Salsa…or today's dish: a yummy, hearty southern New Year's Day tradition, I figure starting the new year by indulging in a juicy superstition can't hurt.
Hoppin' John is a basic, simple black-eyed pea stew. I kept it extremely pared down, and when I made it yesterday I had a hard time not adding bright red bell pepper, big pieces of torn kale, and canned diced tomatoes. All of these are acceptable, of course, but I wanted to keep it basic and unadorned. There's beauty in simplicity sometimes.
Also, I was lazy.
 Begin by throwing a bunch of onion, celery, and green bell pepper in a pot of sizzling butter.
 Stir it around and add quite a bit of minced garlic. Then cook the veggies for 3 to 4 minutes, breathing in the magical aroma.
 And now for the black-eyed peas: These are fresh (they came from the big city) and lots of supermarkets will sell these at this time of year. However, if you use dried black-eyed peas, just soak them in cool water for about 6 hours or so before using them. They'll be delicious!
 Pour the peas right into the pot…
 And stir them around to combine.
 Then pour in low (or no) sodium chicken broth.
 Next, add in a big, gnarly ham hock…
 A little salt (you can always add more later)…
(Oh, and nice hand, Ree!)
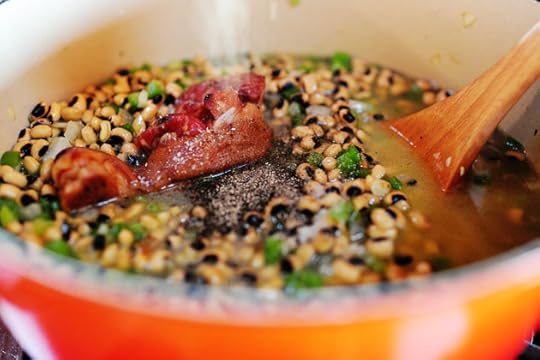 And a lot of black pepper.
 Then bring it to a boil, reduce the heat, and cover the pot. Simmer it for a good 30 minutes, or until the beans soften and the liquid reduces quite a bit.
 At the end, I decided to add in plenty of cayenne pepper for some spice…then I stirred in some white vinegar, which is something my BFF Hyacinth always does with her Hoppin' John.
I like to do what Hy does. Except control what I eat.
 Then you just spoon the whole thing over white or brown rice, making sure to get lots of the soupy liquid in there so the whole thing becomes a delicious mess while you eat it. Another thing you can do is stir the rice into the pot and mix it all together before serving. I might have done that, but my rice turned out a little sticky (something about the fact that I forgot I was cooking it until I smelled something funny) and I decided not to push it.
This is a yummy New Year's Day tradition, folks. And again, this is the really basic recipe…so here are some variations:
* Add diced red bell pepper to the onion/pepper mixture at the beginning of the recipe.
* Use 2 cups of diced ham to the pot instead of ham hocks.
* Use 4 slices of bacon cut into bits instead of ham hocks; just cook it along with the onion/pepper mixture.
* Add 14.5 ounce can of diced tomatoes to the cooking liquid with the broth.
* Stir in 1 bunch of washed, torn kale to the pot when it has about 5 to 10 minutes left of cooking time.
* Stir in a couple of sliced green onions at the end.
Have some fun with it and make it your own!
And Happy New Year, my friends. Stay safe, happy, and healthy.
Love,
PW
Recipe: Hoppin' John
Prep Time: 6 Hours
|
Cook Time: 1 Hour
|
Difficulty: Easy
|
Servings: 10
Print Recipe
3"x5" Cards
4"x6" Cards
Full Page
Ingredients
4 Tablespoons Butter1 whole Large Onion, Diced4 cloves Garlic, Minced1 whole Green Bell Pepper, Diced2 stalks Celery, Diced4 cups Soaked Black-eyed Peas5 cups Low-sodium (or No-sodium) Chicken Broth1 whole Ham Hock Salt And Pepper, to taste Cayenne Pepper To Taste2 Tablespoons White Vinegar White Or Brown Rice, For Serving Preparation Instructions
(Soak black-eyed peas in cool water for at least 6 hours. Rinse before using.)
Heat butter in a large pot over medium-high heat. Add onion, garlic, green pepper, and celery and stir. Cook for 3 to 4 minutes. Stir in soaked beans, then add chicken broth, ham hock, salt & pepper, and cayenne to taste. Bring to a boil, then reduce heat and cover the pot for 30 minutes.
After 30 minutes, check the liquid level; if it's too soupy, cook with the lid off for another 15 minutes or so. If it's too thick, splash in a little more broth.
Stir in vinegar, then taste for seasonings. Add more spice if needed.
Serve over white or brown rice, making sure to get plenty of the cooking liquid spooned over the top. Or, you may mix the bean mixture with the rice before serving.
Variations: add red bell pepper, canned diced tomatoes, diced jalapenos, diced ham (instead of ham hocks), or sliced bacon (instead of ham hocks). Stir in torn-up kale when 5 minutes of cooking time remain.
Variation: use canned, drained black-eyed peas if preferred. Just use diced ham instead of ham hock and a little less broth, as peas won't need to cook as long.
Posted by Ree on December 30 2011

December 28, 2011
Spicy Whiskey BBQ Sliders
 Are you having a New Year's Eve get together at your house? If so, I must urge you to strongly consider making these decadent, drippy, diminutive, dreamy, and divine sliders. I made them just before Christmas and when I took my first bite, I actually heard angels singing.
They're positively out of this world.
Here. Let me prove it to you.
 The Cast of Characters: ground meat, salt & pepper, butter, onion, whiskey (not pictured because I didn't think to add it until I was in the middle of cooking the sauce), jarred jalapenos, and small buns/rolls.
 You can use ground beef, ground turkey, or…guess what this is? Bison! Don't tell my cattle ranching friends.
Or my cattle ranching family.
A girl's gotta experiment from time to time, man.
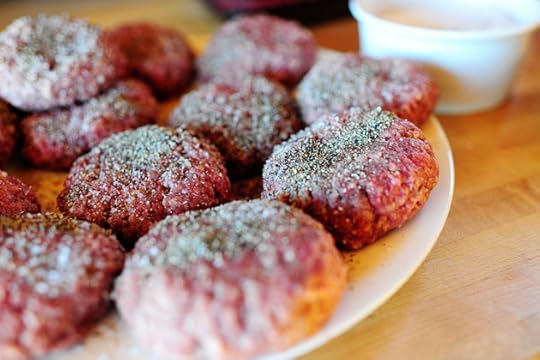 Form the meat into small patties (about 12) then sprinkle them generously with salt and pepper.
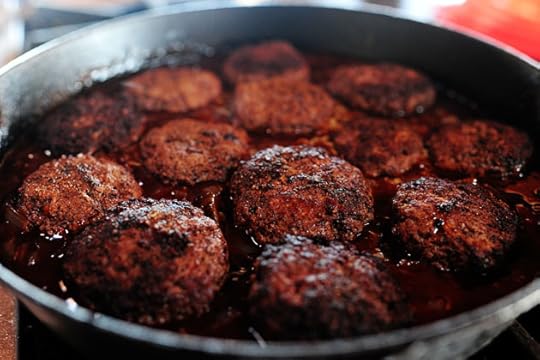
 Fry them in two batches in a skillet of melted butter over medium to medium-high heat. You want them to be almost done in the middle without totally burning/blackening on the outside.
 Mmmm. Look at that beautiful spatter. It's the stuff that messes were made of.
 After all the patties are cooked, remove them to a plate.
 Now you've got a skillet of butter and grease and flavor, which is wonderful…
 But we don't need all of it. Pour off all but about 2 tablespoons of the grease.
 Then throw in the diced onions and stir them around to cook them for a couple of minutes.
 Wouldja LOOK at that BEAUTIFUL skillet full of FLAVOR?
 I was going to add the barbecue sauce right off the bat, but I decided to go with whiskey first.
 Stir the whiskey around to deglaze the pan and let it cook and bubble and reduce for 3 to 4 minutes, or until it's reduced by about half.
 Then grab some jarred jalapenos…
 And throw them into the skillet. I started with a small amount but wound up working my way up to about 1/4 cup. You need at least that much to really taste the spice in the end.
 Next, pour in the barbecue sauce, stir it around, and reduce the heat to low.
Your kitchen smells really, really good right now.
 Next, return the patties to the skillet…
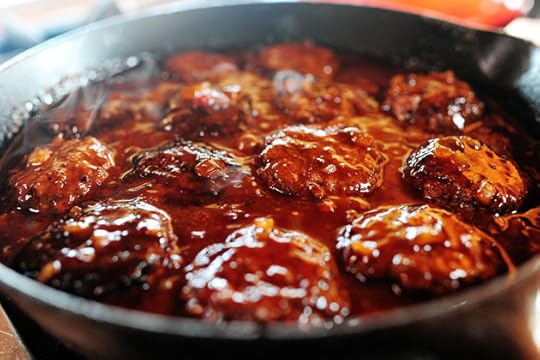 Flip them over to coat…
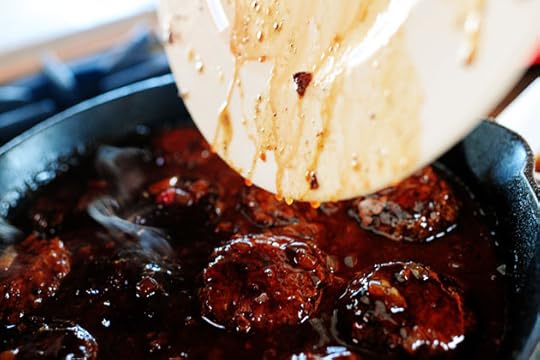 And be sure to pour any juices that were left on the plate right on into the skillet.
Flavor, baby. Flavor.
 Now just let 'em simmer in the sauce for several minutes. If there's any pink left in the patties, it'll cook right off and everything will be right with the world.
You can not imagine how good this smells.
 Okay, so I went a little heavy on the butter. But life is nothing but a nice, long series of learning experiences.
Grill the buns on a skillet or griddle until they're nice and golden and slightly crisp on the surface…
 Then retrieve individual patties…
 And put them on the buns.
 Garshk. I'm just going to sit here and stare for a minute.
 When you've got the buns loaded up, spoon extra sauce all over the tops of each one. You want to get that onion/jalapeno chunkiness on each slider.
Top 'em with the other half of the buns and serve 'em up to your guests.
Warning: If you decide to have a New Year's Eve get together…
And you decide to serve these sliders…
You will be expected to have a New Year's Eve get together every year for the rest of your life…
Whether you want to or not.
I'll let you make the call. I just wanted you to be informed.
Enjoy these, guys!
Recipe: Spicy Whiskey BBQ Sliders
Prep Time: 15 Minutes
|
Cook Time: 15 Minutes
|
Difficulty: Easy
|
Servings: 6
Print Recipe
3"x5" Cards
4"x6" Cards
Full Page
Ingredients
2 pounds Ground Meat (beef, Bison, Turkey) Salt And Pepper4 Tablespoons Butter4 Tablespoons Butter1 whole Large Onion, Diced1/2 cup Whiskey1 cup Barbecue Sauce1/4 cup Jarred Jalapeno Slices (more To Taste)12 whole Slider Buns Or Dinner Rolls, Split Preparation Instructions
Form the meat into 12 (or so) miniature patties and salt and pepper them on both sides. Melt the butter in a skillet over medium-high heat and cook the patties until just about done in the middle, approximately 3-4 minutes per side. Remove the patties from the skillet and set aside. Drain off all but 2 tablespoons of grease, then return the skillet to the stove.
Throw the diced onions in the skillet and stir to cook, about 3 minutes. Pour in whiskey (be careful if you're cooking over an open flame; turn it off momentarily to be extra careful) and stir. Allow the whiskey to reduce by half, about 2 to 3 minutes, then stir in jalapenos and the barbecue sauce.
Reduce the heat to low and place the patties in the barbecue sauce, turning to coat. Allow the patties to simmer in the sauce until everything's hot and bubbly.
Place the patties on individual buns and be sure to spoon extra sauce (with the jalapenos!) over the top of each one before topping with the other half of the bun.
Perfect New Year's Eve treat!
Posted by Ree on December 28 2011

December 26, 2011
Delicious Hot Chocolate
 I love hot chocolate and really can't be trusted around it.
Here are a few varieties I whipped up recently.
(If you'd like a late-afternoon/adult version, splash brandy or other booze into any of the varieties below.)
(But you didn't hear that from me.)
BASIC HOT CHOCOLATE
 Add 2 cups of milk and 2 cups of half-and-half to a small saucepan. As you can see, this wasn't my first batch of hot chocolate that day.
As I said, can't be trusted.
Oh, and I'm sorry about the whole half-and-half thing. But delicious hot chocolate is my life, and half-and-half is one of the more direct routes to hot chocolate.
 Warm the milk mixture over medium-low heat, then add a cup of good semi-sweet chocolate chips.
 Stir it around, making sure it doesn't get too hot…and that's it for the basic hot chocolate concoction! If it's too chocolatey for you, splash in 1/2 cup to a cup more milk. If it's not quite sweet enough for you, add about 1 teaspoon of sugar and even a little vanilla extract.
I love hot chocolate using chocolate chips. Even though it melts and becomes part of the milk, there are also very small particles of chocolate throughout. Packs a punch.
ORANGE HOT CHOCOLATE
 To make orange hot chocolate, drop 3 or 4 strips of orange rind into the milk mixture before you begin warming it. Let it stay in there the whole time you make the hot chocolate.
 I also took a walk on the wild side and dropped in a couple of slices of orange. I like to live dangerously.
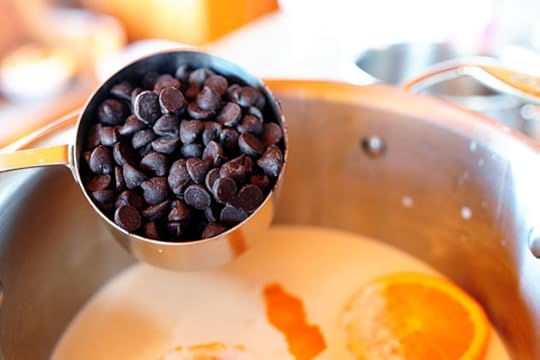 Then just add the chocolate chips and heat it until it melts. Remove the orange slices along the way, but keep the orange peel in there.
 Serve in a mug with a piece of fresh orange rind just to make it purty.
RASPBERRY HOT CHOCOLATE
 To make raspberry hot chocolate, drizzle a few tablespoons of raspberry syrup (the kind you'd find at a coffee shop) into the saucepan after the chocolate is melted.
 Mmmm. See what I mean about the particles? Oh, and drop in three or four raspberries, just for kicks.
MINT HOT CHOCOLATE
No photo, but get this: Drop 1 or 2 miniature peppermint patties into each mug before ladling in the hot chocolate. Stir to melt…divine!
(You could also add a couple of drops of mint extract…but the peppermint patty approach is a little more decadent.
MEXICAN HOT CHOCOLATE
 Have you seen this? Do you have it at your supermarket?
 It's Abuelita hot chocolate: tablets of a mixture of chocolate, sugar, and cinnamon—designed to be dropped into hot milk. It's so incredibly delicious. Look for it in the Hispanic Foods aisle!
 You can either break the wedges and add them to individual cups of warm milk or you can drop the whole disc into the saucepan.
This ain't no paid advertisement. I just love the stuff, man.
 Abuelita already has cinnamon in it, but I went ahead and added a couple of cinnamon sticks just to drive the point home.
 Just stir it around as it heats; this is the halfway mark. Abuelita is really meant to be whisked, which creates a nice froth on top. But I was too lazy to walk across the kitchen and get one.
(Note: If you can't find Abuelita, just follow the basic hot chocolate recipe above, adding four or five cinnamon sticks and a couple of teaspoons of sugar.)
 Once it's all melted and smooth, ladle into mugs and serve with a new cinnamon stick.
My name is Pioneer Woman. And I like hot chocolate.
Hope you're having a great holiday, everyone!
Recipe: Delicious Hot Chocolate
Prep Time: 5 Minutes
|
Cook Time: 15 Minutes
|
Difficulty: Easy
|
Servings: 6
Print Recipe
3"x5" Cards
4"x6" Cards
Full Page
Ingredients
2 cups Milk2 cups Half-and-half1 cup Good Semi Sweet Chocolate Chips VARIATIONS: Orange Rind, Orange Syrup, Cinnamon Sticks, Raspberry Syrup, Abuelita Chocolate, Mint Extract, Peppermint Patties, Whipped Cream, Chocolate Shavings Preparation Instructions
To make the basic hot chocolate, combine milk with half-and-half in a small saucepan. Warm over medium-low heat, then stir in chocolate chips. Stir until melted (though there will still be lovely particles of chocolate throughout.) If it's too chocolatey for you, splash in a little more milk. If it's not quite sweet enough for you, add 1 teaspoon sugar. Serve in mugs with whipped cream.
VARIATIONS
Orange Hot Chocolate: Add 4 slices of orange rind as you warm the milk mixture. Add a splash of orange syrup if you have it, but it isn't necessary.
Raspberry Hot Chocolate: Add 3 tablespoons raspberry syrup to the hot chocolate. Drop a couple of raspberries into each cup.
Mint Hot Chocolate: Drop 1 to 2 miniature peppermint patties into each mug before adding hot chocolate. Stir to melt.
Mexican Hot Chocolate: Substitute 2 discs of Abuelita chocolate for the chocolate chips. Simmer cinnamon sticks in the saucepan with the hot chocolate. Add 1 cinnamon stick to each mug before serving.
Garnish any and all variations with whipped cream or chocolate shavings.
Posted by Ree on December 26 2011

December 22, 2011
Brussels Sprouts with Balsamic and Cranberries
 This is the third recipe from my Christmas special on Food Network, and as a Christmas side dish, it's absolutely to die for. Roasted Brussels sprouts are unbelievably delicious in themselves. But drizzle on a glossy black balsamic glaze and toss them with a bunch of tart-and-sweet dried cranberries? Fugghetaboutit, and I'm not even joking.
I eat these till I bloat. But in a really good way.
 I made quite a bit, so started with three pounds of Brussels sprouts. You can easily halve this recipe if you'd like! Just clean and trim the sprouts…or buy them already trimmed and cleaned if you have a supermarket that carries them in that blessed form. Then arrange them on two baking sheets (or one if you're halving.) For the Christmas special, I halved them; for this post, I kept them whole. Either way is pretty and delicious!
 Drizzle the brussels sprouts liberally with olive oil, then sprinkle with plenty of salt and pepper. Roast them in the oven for 25 to 30 minutes, or until they start to get nice and dark in color.
 While the sprouts are roasting, combine balsamic vinegar with a little sugar in a small saucepan. Bring it to a boil, then reduce the heat to medium-low and cook it for 15 to 20 minutes, or until it's nice and rich and thick.
Note: You do not have to add sugar to the balsamic in order for it to reduce and thicken. The sugar gives the dish a nice sweetness in this case, but it's not essential! The balsamic is really the star of the show.
 Right before serving, heap the roasted Brussels sprouts on a big ol' platter. Look at the blackish brownish greenish gorgeousness!
 Throw a whole buncha dried cranberries on top…
 Then just drizzle on the balsamic glaze…
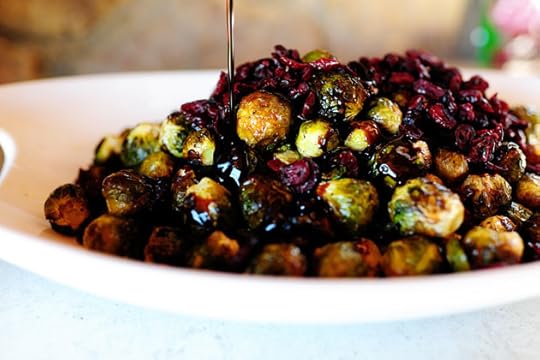
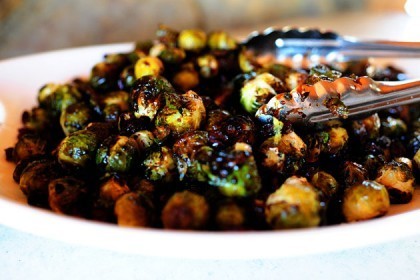
 And use tongs to toss 'em around.
Serve 'em with your Christmas beef, turkey, ham…or whatever you're serving up!
This dish is a delicious as it is gorgeous.
Here's the handy printable:
Recipe: Brussels Sprouts with Balsamic and Cranberries
Prep Time: 10 Minutes
|
Cook Time: 30 Minutes
|
Difficulty: Easy
|
Servings: 16
Print Recipe
3"x5" Cards
4"x6" Cards
Full Page
Ingredients
3 pounds Brussels Sprouts1/2 cup Olive Oil Salt And Pepper1 cup Balsamic Vinegar1/2 cup Sugar1 cup Dried Cranberries Preparation Instructions
Trim/clean Brussels sprouts, then cut them in half if desired (or you can leave them whole). Arrange on two baking sheets and toss with olive oil. Sprinkle with plenty of salt and pepper and roast at 375 degrees for 25 to 30 minutes, or until brown.
Combine balsamic vinegar and sugar in a saucepan. Bring to a boil, then reduce heat to medium-low and reduce until very thick, about 15 to 20 minutes.
Drizzle the balsamic reduction over the roasted sprouts, then sprinkle on dried cranberries. Toss and serve immediately.
Posted by Ree on December 22 2011

Ree Drummond's Blog

- Ree Drummond's profile
- 2032 followers

