
Ree Drummond's Blog, page 62
February 6, 2012
Spicy Spinach-Stuffed Mushrooms
 Garsh. Were these good. I made them last night on a whim. Amid all the wings and ranch and other Super Bowl food—including a big mess-maker of a delicious cake my younger daughter made—I decided I couldn't live without stuffed mushrooms another minute.
My eating is very whim-driven.
 This is what I violently pulled out of the fridge, freezer, and pantry. Later I would violently pull Choulula hot sauce out of my spice cabinet, but when I snapped this photo, it hadn't occurred to me yet.
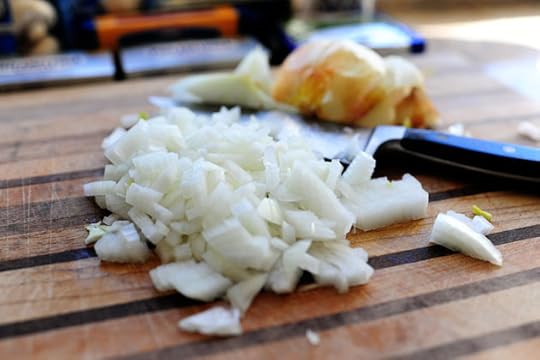 Chop up an onion.
 Rinse a bunch of mushrooms in cold water. Give thanks for fungi.
Did you hear about the mushroom that walked into the bar? The bartender took one look at him and said, "We don't serve your kind here."
The mushroom looked at him and replied, "Why not? I'm a fungi!"
Gosh, I love that joke.
 Pop the stems out of the shrooms. I love that little popping sound.
It's very poppy.
 Now you'll have a big pile of stems.
 So chop 'em up sorta kinda finely.
 Next, heat some olive oil and butter in a skillet over medium-high heat.
 Throw in the onions and shroom stems.
 Then sprinkle in some salt and pepper…
 And cook it till it's all soft and starting to turn golden, about 5 to 7 minutes.
 Now, throw in some panko crumbs! This'll add just a little substance to the filling. Just stir 'em around and let 'em cook for a couple of minutes.
Then just pour the whole mixture onto a plate and set it aside to cool.
 Next, stick the chopped spinach in a strainer or colander and run water over it to thaw it, breaking it apart as you go. Then squeeze (you can be violent) as much of the liquid out of the spinach as you can. Feel guilty when you see the green juice running down the drain. Then make your peace with it and quickly move on.
 Put the spinach in a bowl and set it aside.
 Add a block of softened cream cheese to a bowl.
 Then grab a little sour cream…
 Then add it in along with some grated cheddar and jack cheese.
Swiss would be good, too!
 Next, add the cooled shroom stem/Panko mixture…
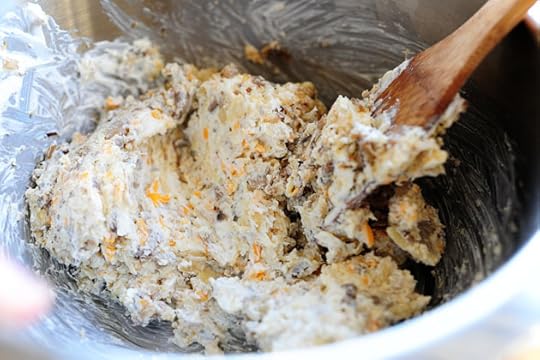 And fold it all together.
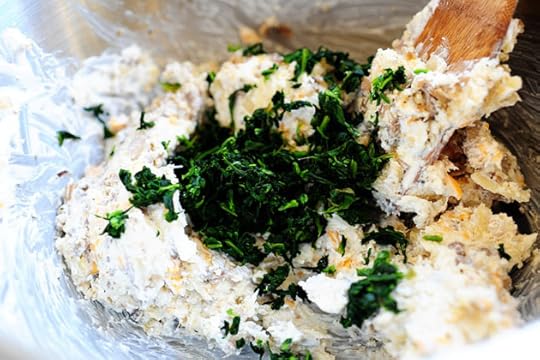 Then add the spinach!
 Stir it in. And how good does this look?
 Well, it's about to get better.
 Add lots o' dashes of hot sauce, then mix it in.
At the end, be sure to taste the filling. Add salt and pepper if it needs a little pick-me-up.
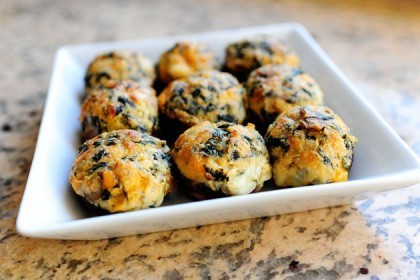
 Use a spoon to smear a rounded helping of the filling on top of each cap.
 Num num yum yum nummy nummy yummy yummy.
Translation: I want one.
 Oh, here's the Super Bowl cake my girl was working on as I was making the shrooms.
I love that kid.
 Now just throw these onto a baking sheet and put 'em in a 375 degree oven for about 20 to 25 minutes. Raise the heat in the last few minutes if you think they need to get a little browner.
 These were very, very, very, very good. Lots of flavor, golden on the outside, soft and melty on the inside.
 The pinky freak alien hand absolutely loved them. And I loved them, too.
Here's the handy dandy printable. Happy Monday, everyone!
Recipe: Spicy Spinach-Stuffed Mushrooms
Prep Time: 10 Minutes
|
Cook Time: 25 Minutes
|
Difficulty: Easy
|
Servings: 8
Print Recipe
3"x5" Cards
4"x6" Cards
Full Page
Ingredients
24 ounces, weight White Mushrooms1 Tablespoon Olive Oil1 Tablespoon Butter1 whole Medium Onion, Diced1/2 cup Panko Breadcrumbs Salt And Black Pepper To Taste8 ounces, weight Cream Cheese, softened1/3 cup Sour Cream1/2 cup Grated Sharp Cheddar Cheese1/2 cup Grated Monterey Jack Or Farmer's Cheese1 package (small) Chopped Spinach, Thawed8 dashes Hot Sauce (I Used Choulula) Preparation Instructions
Preheat oven to 375 degrees.
Wash and dry mushrooms. Pull the stems off the mushrooms, then chop the stems finely. Heat olive oil and butter in a skillet over medium-high heat. Add onion and chopped mushrooms stems and saute for several minutes, or until soft and starting to turn golden. Add panko crumbs, salt, and pepper. Stir and continue cooking for 2 minutes. Remove from heat and set aside to cool.
Squeeze excess liquid out of thawed spinach. Set aside.
In a large bowl, add softened cream cheese, sour cream, grated cheeses, and the cooled mushroom/onion/panko mixture. Fold together to combine. Add spinach, a dash of salt, a little pepper, and hot sauce to taste. Fold together until combined.
Using a spoon, mound the mixture into the stemmed mushroom caps. Use the spoon to round the mixture on top. Place on a baking sheet or in a baking dish and bake for 20 to 25 minutes, or until the mushrooms are cooked and the filling is hot. Serve immediately or at room temperature. Yummy!
Posted by Ree on February 5 2012


February 2, 2012
My Top Ten Food Picks for Super Bowl Sunday
Super Bowl Sunday is almost here! Yahoo yippety.
Of course Super Bowl Sunday is primarily about football. But following close behind is the food surrounding the big game.
Whether you're having a huge gathering at your house, taking a dish to someone else's gathering, or just huddling around the TV with your nuclear family, I wanted to share my Top Ten Food Picks for Super Bowl Sunday.
(If you'd like to browse yourself, here's the full category: Super Bowl Recipes on PW Cooks)
Here we go! In no particular order. I think.
 Spicy Whiskey BBQ Sliders. To. Die. For. And you can fry the patties ahead of time, then start simmering them in the sauce when guests arrive. Seriously delicious.
 Perfect French Fries. Foolproof and utterly addictive.
 Spicy Pulled Pork Sandwiches with Cilantro Slaw. So good, I want to cry. And you can make so much of it ahead of time: Do the pulled pork on Saturday. Shred it then refrigerate in the cooking liquid. Then on Sunday, just skim off the fat and reheat on the stovetop. Chop the cabbage for the slaw on Saturday, then make the dressing and keep it in a jar in the fridge. Then on Sunday, chop the cilantro and throw it all together just before serving. Oh, yes.
 The Marlboro Man Sandwich, PW Style. Sliced cube steak, Worcestershire, sherry, peppers, mushrooms. Few things will please a crowd more than this. Slice the meat, peppers, onions, and shrooms ahead of time, then just throw 'em in the skillet when guests arrive.
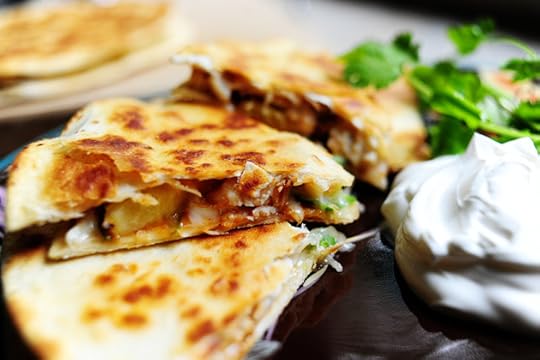 Grilled Chicken and Pineapple Quesadillas. Quesadillas are one of my favorite things on earth, and these are awe-inspiring. Grill the chicken breasts and pineapple on Saturday and keep in the fridge overnight to save time on Sunday.
 Restaurant Style Salsa. The best ever, and you'd better make about four thousand gallons. It's absolutely addictive.
 Mushroom-Swiss Sliders with Spicy Fry Sauce. Positively yummy.
 Wings, baby. Of course. Any hey! Make them Saturday! After you get 'em all done, throw 'em in a baking pan and cover with foil. Keep it in the fridge, then just pop it in the oven the next day to warm 'em up.
 Sloppy Joes. Such an easy way to feed a crowd. Make 'em nice and spicy by adding crushed red pepper to the meat mixture. Bada BING!
 Or good ol' Circa 1983 Mexican Layer Dip. Or was that 1982? I can't remember.
Here's the full category for you to browse.
Super Bowl Food on PW Cooks
Have a great weekend, everyone!
Pioneer Woman

January 30, 2012
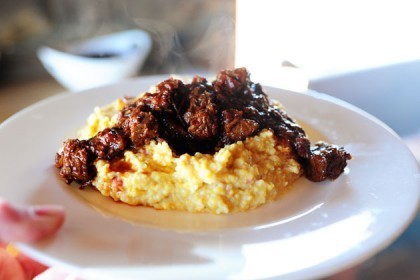
Spicy Stewed Beef with Creamy Cheddar Grits
 My oh my, was this good. Ultra spicy, seriously tender stewed meat served over unbelievably creamy cheese grits. The spiciness of the beef combined with the mild creaminess of the grits was almost too much for me to handle. I cried, is what I'm trying to say.
This crowd-pleasing combo is erfect for your Super Bowl party! This amount will feed a nice roomful of hungry football-crazed humans! Feel free to halve the entire recipe if you prefer; it'll turn out just fine.
The Cast of Characters
Stew meat
Canned chipotle peppers
Red bell pepper
Chili peppers
Low-sodium beef broth
Minced garlic
Cumin
Salt
Pepper
Stone ground grits
Cheddar cheese
Low-sodium chicken Broth
Half-and-half
 To begin, heat a heavy pot over high heat. Add some canola oil and butter (just a bit) then throw in the stew meat.
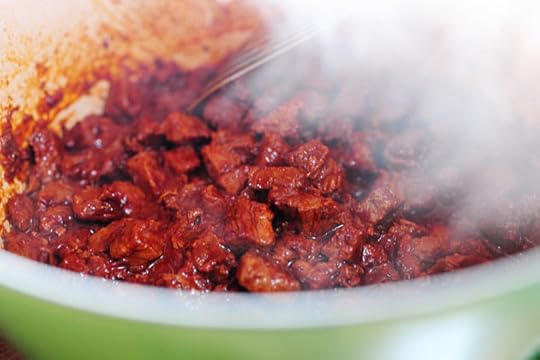
 Cook it around for a few minutes, or until the meat starts to brown.
 Then add in the chipotle peppers. I realize this photo is very, very confusing.
Sorry. Happens sometimes.
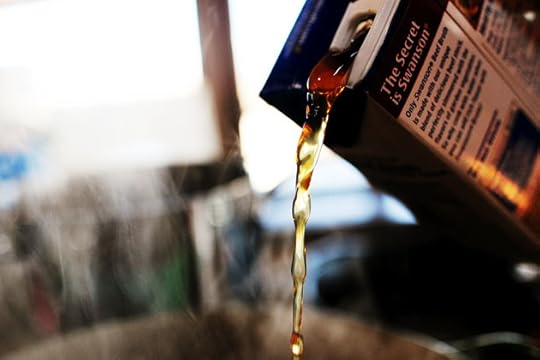 Add in plenty of beef broth.
 Four or five cups should be fine. This is going to stew for quite awhile, so you need the liquid, baby.
Sorry I called you baby. It just comes out sometimes.
 Stir it around, then bring it to a boil…then turn the heat to low and cover the pot. Simmer the meat for a good 2 1/2 to 3 hours…
 Or until the meat is fall-apart tender and the cooking liquid is reduced to a nice, thick stage. This is about 2/3 of the way through.
 This is it! Wow.
 Oh. And you can add in some garlic, cumin, salt, pepper, etc. I should have added it earlier, but I'm forgetful, airheaded, and imperfect.
And forgetful.
And airheaded.
You get the picture.
 While the beef is still cooking (sometime in the last hour of cooking time), make the grits! Saute diced onion and bell pepper in butter in a heavy pot.
 Stir it around and cook it for five minutes or so…
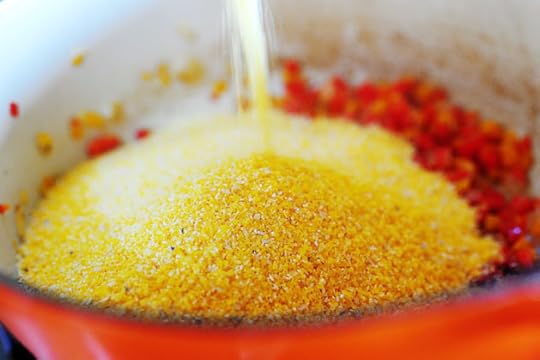 Then pour in the grits…
(Remember that you can halve this recipe! I'm making a lot here.)
 Followed by lots and lots of beef broth. Stir it well and cook the grits, covered, for a good thirty minutes. Stir it occasionally and be sure to check the liquid content as they cook. Feel free to splash in liquid if needs a little more!
 When the grits are tender but still have a bit of a bite to them, pour in a good amount of half-and-half. You won't be sorry.
 Cook them for another 20 minutes, or until they're totally cooked. Again, feel free to splash in more broth if it needs it.
 At the very end, remove the grits from the heat and stir in plenty of grated cheddar cheese.
 Pour the grits into the first serving bowl. Geez Louise.
 And pour the stewed beef (along with any extra cooking liquid) into the second.
 To serve it up, plop a good portion of the grits onto a plate, making a little divot in the center.
 Then spoon the meat over the top.
Golly gee willikers. Let me just attempt to explain the bliss. Never mind, I can't even begin to. The meat is pretty spicy. Pretty durn spicy. But those creamy cheese grits settle down the spice a bit, and the combination of flavors and textures are an absolute feast for the senses.
For a little color, sprinkle sliced green onion over the plate. Pretty!
You'll really, really like this.
Recipe: Spicy Stewed Beef with Creamy Cheddar Grits
Prep Time: 20 Minutes
|
Cook Time: 3 Hours
|
Difficulty: Easy
|
Servings: 12
Print Recipe
3"x5" Cards
4"x6" Cards
Full Page
Ingredients
2 Tablespoons Canola Oil2 Tablespoons Butter3 pounds Stew Meat Or Diced Chuck Roast1 can (11 Ounces) Chipotle Peppers In Adobo Sauce4 cups Low-sodium Beef Broth, More If Needed5 cloves Minced Garlic1 Tablespoon Cumin2 teaspoons Chili Powder1 whole Onion, Diced1 whole Red Bell Pepper3 whole Chilies (any Variety, Hot Or Mild)4 cups Stone Ground Grits6 cups Low Sodium Chicken (or Beef) Broth3 cups Water2 cups Half-and-half2 cups Grated Cheddar Cheese Preparation Instructions
To make the meat, heat 1 tablespoon oil and 1 tablespoon butter in a large pot over high heat. Throw in stew meat and brown for 1 minute, then add chipotle peppers, beef broth, garlic, cumin, and chili powder. Stir, then bring to a boil. Reduce the heat to low, then cover and simmer for 2 1/2 to 3 hours, or until the meat is fall-apart tender and the liquid is thick. (Watch the meat occasionally and add more beef broth as needed.)
In the last hour of cooking time, make the grits: Heat remaining 1 tablespoon of both oil and butter. Add diced onion, bell pepper, and chilies and cook for five minutes or so. Pour in grits, then add chicken (or beef) broth and water. Stir, then bring to a boil . Reduce the heat to low, then cover and cook for 30 minutes, stirring occasionally. After 30 minutes, add half-and-half. Cook for another 20 to 30 minutes, or until grits are tender. Remove from heat and stir in grated cheese.
Serve pile of grits with stewed meat (liquid and all) over the top. Sprinkle on sliced green onion for color.
Posted by Ree on January 29 2012

January 28, 2012
Weekend Mixer Giveaway (Winners Announced)
The winners of the red mixers are:
#3324 Liz: "Once it warms up enough, I'm heading out to the yard to continue the cleanup – have to get ready for my veggie garden. I'm getting the seed catalogs so time to dream!"
#7722 Amy Mac: "Nothing but spending time with my little boy and enjoying my last two days of maternity leave. Have to go back to work on Monday, woe!"
#21258 anya: "i'm spending the entire weekend in pajamas. i plan to read on my kindle and snuggle with my cat and my cockatiel. the other pets aren't snugglers, but they will be close by. there will be tea and chocolate, and by Sunday night we'll be ready for Downton Abbey."
Congratulations, winners! Contact prizes@thepioneerwoman.com to claim your mixer.
 Today, because it's Saturday thank goodness, because it's been awhile since I've had a giveaway, and because I love ya, I'm giving away three (3) of these gorgeous candy apple red KitchenAid stand mixers.
I love this mixer.
It's red.
It's shiny.
Amen.
TO ENTER
To enter this giveaway, just answer the following questions in the Comments section of this post:
"What are your weekend plans?"
It's a beautiful weekend in Oklahoma and my mom and sister are visiting. What's up in your world? Are you seeing a movie? Catching up on housework? Vegging out in front of the TV? Going shopping? Just shout out your weekend plans and you're automatically entered to win one of the mixers.
THE RULES
One entry per person, please.
Winners will be selected and announced Sunday night.
Have a great weekend, my friends!

Weekend Mixer Giveaway
Today, because it's Saturday thank goodness, because it's been awhile since I've had a giveaway, and because I love ya, I'm giving away three (3) of these gorgeous candy apple red KitchenAid stand mixers.
I love this mixer.
It's red.
It's shiny.
Amen.
TO ENTER
To enter this giveaway, just answer the following questions in the Comments section of this post:
"What are your weekend plans?"
It's a beautiful weekend in Oklahoma and my mom and sister are visiting. What's up in your world? Are you seeing a movie? Catching up on housework? Vegging out in front of the TV? Going shopping? Just shout out your weekend plans and you're automatically entered to win one of the mixers.
THE RULES
One entry per person, please.
Winners will be selected and announced Sunday night.
Have a great weekend, my friends!
January 25, 2012
Sausage-Kale Breakfast Strata
 I love make-ahead breakfast casseroles, also known as strata, also known as Breakfast Bread Pudding, also known as I Don't Care What It's Called, I Just Want to Eat It. There are thousands of variations on the theme: Mix chunks or slices of bread with your choice of ingredients, then pour an egg mixture over the top, refrigerate overnight if you can, and bake. And the world suddenly makes perfect sense again.
I made a large quantity of a breakfast strata just before Christmas, and it wound up being enough for an army. This is the full recipe, but you could easily halve it if you just need a few servings. And feel free to sub whatever ingredients you have on hand: bacon, ham, different cheeses, caramelized onions, red peppers…have fun making your own.
But most of all, have fun eating it.
 The Cast of Characters: Breakfast sausage, crusty bread, eggs, half-and-half, kale, mushrooms, salt, pepper, Monterey Jack cheese, and fresh oregano if you can get it.
 First, roast the mushrooms by placing them on a baking sheet…
 Then sticking the pan in a 425-450 degree oven for 15 or 20 minutes, until they're nice and roasted.
 Don't be like me. I forgot about them until they were crisp. Oops.
At this time I will decline to show you the oyster mushrooms I also roasted and forgot about. Scariest looking things I've ever seen.
But I was not going to be thwarted.
 Next, tear the kale into large pieces and rinse it really well.
 Then throw it into a large skillet with a little olive over over medium-high heat.
 Move it around with tongs until the kale begins to shrink up, just about 2 minutes or so. Then remove it from the pan and set aside.
Kale is still my boyfriend. We're totally hot and heavy these days.
 Next, cook up the sausage patties…
 Remove them from the pan and let them cool…
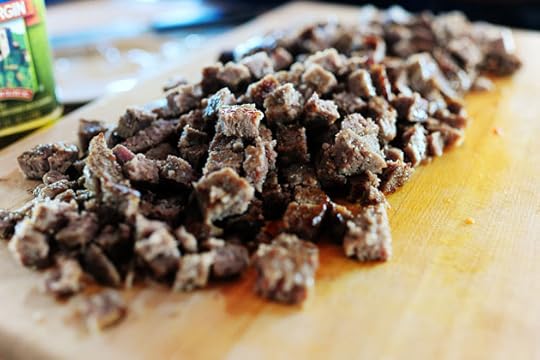 Then chop it into cubes.
 Next up, grab the oregano (or you can use parsley, basil…whatever you can get right now)…
 Then mince it really finely and set it aside.
 Grab the bread and cut it into a dice, then set it aside…
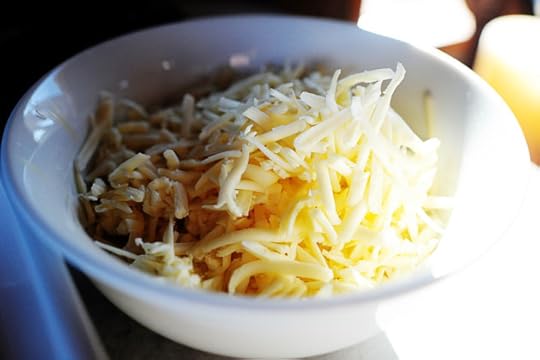 And grate the cheese and set it aside.
Whew. We just set a lot of things aside! I'm exhausted.
Roasted mushrooms
Sauteed kale
Diced sausage
Minced oregano
Cubed bread
Grated cheese
Oh! And one more thing:
 Mix a bunch of eggs with some half-and-half or milk…
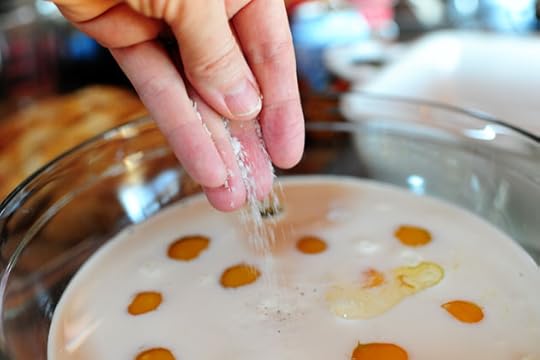 Then sprinkle in some salt…
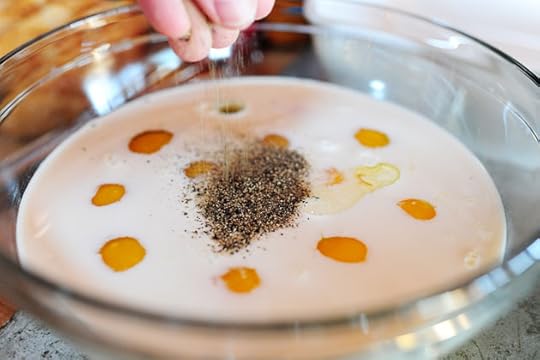 And some pepper.
 Then whisk it all together and add in the minced oregano.
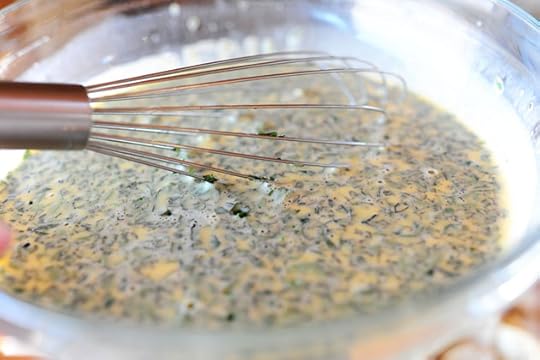 And whisk it to combine. Yum!
And *sniff sniff* YUM. Smells so, so good.
 Now it's time to build the sucker. Add half the bread to a large, buttered casserole dish (I used a lasagna pan because I'm making so much.) Then lay half the kale on top.
 Then add half the mushrooms. Yours will look much better than mine.
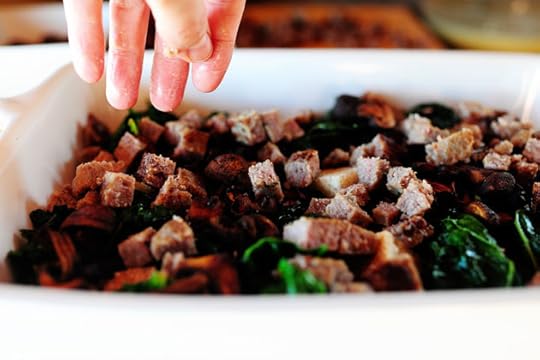 Next, add half the sausage.
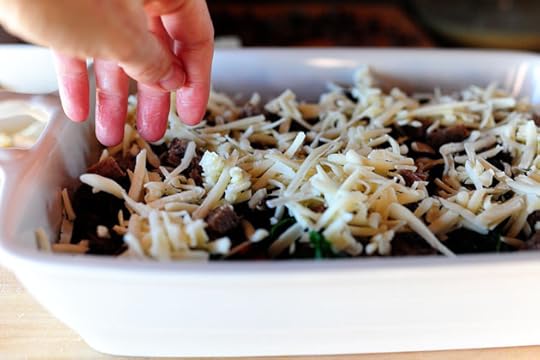 Then comes half the cheese…
Then you repeat all the layers, ending with cheese. It'll probably be sticking up over the surface of the pan, but that's a good thing. It conveys abundance!
 After you get the second layer on, just pour the egg mixture all over the top, pouring it on as evenly as possible.
 Go kinda slow, as you want the egg mixture to touch all the bread, both on the top and bottom layers.
Then, here's what you do: Cover it in plastic wrap and stick it in the fridge. Of course, you could bake it right away (I did for the purposes of this post) and it will be totally delish. But if you keep it in the fridge overnight and bake it the next day, that'll give the bread a chance to really soak up the eggy goodness and for all the flavors to marry and live happily ever after.
 To bake it, cover it in foil and bake it in a 350 degree oven for 30 to 40 minutes, which will give the egg/bread a chance to cook. Then remove the foil and continue cooking it for 20 to 25 minutes, to allow the top to get nice and crisp and wonderful. And that's the glory of a dish like this: the top surface is nice and golden brown and crisp, but the underside is soft and tender.
I made this a few weeks ago and now I'm craving it again. I need to stop talking about it. It's causing me pain.
 And…yum. To serve it, just scoop it out onto a plate (or cut it into neat squares if you're a neat square kinda person) and serve it with grapes or other cool, fresh fruit.
Divine! A breakfast fit for a king…and enough to feed an army.
(And just to remind you: you can easily halve this recipe!)
Enjoy, my friends.
Here's the handy dandy printable:
Recipe: Sausage-Kale Strata
Prep Time: 30 Minutes
|
Cook Time: 45 Minutes
|
Difficulty: Easy
|
Servings: 12

Print Recipe
3"x5" Cards
4"x6" Cards
Full Page
Ingredients
12 whole Eggs2-1/2 cups Half And Half (or Milk, If You Prefer) Salt And Pepper, to taste4 Tablespoons Minced Fresh Oregano (or Parsley, Basil, Etc.)1 loaf Crusty French Or Italian Bread, Cut Into Cubes2 pounds Breakfast Sausage Patties, Cooked And Cut Into Cubes1 bunch (large) Regular Kale, Torn Into Pieces Olive Oil (for Frying)16 ounces, weight White Mushrooms, Halved2-1/2 cups Grated Monterey Jack Cheese Preparation Instructions
*Note: Recipe can easily be halved.
Mix together eggs, half-and-half, salt, pepper, and minced oregano. Set aside.
Drizzle olive oil over mushrooms and sprinkle with salt and pepper, then roast in a 425 degree oven for 15 to 20 minutes, or until golden brown. Remove from oven and set aside.
Heat olive oil over medium-high heat, then throw in kale. Cook for 2 minutes, or until slightly wilted. Remove from heat and set aside.
Layer half the bread, half the kale, half the mushrooms, and half the cheese in a large, buttered lasagna pan. Repeat with the other half of all the ingredients, ending with the cheese. Slowly pour egg mixture all over the top.
Cover with plastic wrap and refrigerate overnight if possible.
To bake, remove from fridge 20-30 minutes before baking. Replace plastic wrap with foil and bake in a 350 degree oven for 30 to 40 minutes. Remove foil and continue baking until top is golden brown and slightly crisp.
Posted by Ree on January 25 2012

January 24, 2012
Stocking Up – The Printable List!
 I should have thought to provide a corresponding printable list with Saturday's Stocking Up post before I posted it…but my mind rarely works that efficiently. Thanks to all of you for your great feedback and for sharing your own tips for stocking up.
Here's a printable PDF document of my list for those of you who'd like to take it to the supermarket with you on your next trip. It's by no means 100% complete and comprehensive…but it'll give you a great start. Note that the items on the list fall under the category of "Staples" and are meant to be filled in with fresh/perishables like fresh produce, eggs, milk, etc. as needed.
Stocking Up – The Printable List
Have a great day, everyone!
Love,
PW

January 23, 2012
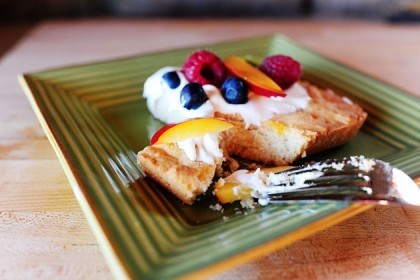
Deep Dish Fruit Pizza
 My sister-in-law Missy first introduced me to the concept of fruit pizza years and years ago, and here's how: she brought one to my house and I proceeded to eat the whole thing. But it was small. And I was nursing. My mammary glands made me do it.
I whipped up a whopper of a fruit pizza a couple of weeks ago using my good ol' standby sugar cookie recipe…and it was so darn good in such a naughty, naughty way. Feel free to halve the recipe below and press into a smaller pan, or just split the full recipe in half and roll out two thinner pizzas.
This is one of those fun, throw-together treats that's perfect for everything from a slumber party to a baby shower. Change up the fruit you use, the configuration of the design…just have fun with it, man!
Sorry I said mammary glands. It won't happen again. Until tomorrow.
 The Cast of Characters: my sugar cookie dough (recipe below), marshmallow creme, cream cheese, peaches, kiwi, blueberries…and whatever other fruit you'd like!
 Now, you could divide the dough in half, then roll out each half into thin, round pizzas.
Or you could do what I done did…
 And press the whole quantity of dough into a sheet pan.
 I love this pebbly texture. Rustic, man.
 Then just throw it in the oven…
 And bake it till it's golden brown but not very crisp. This took about fifteen minutes, but if you go with rolling out two halves, they'll probably take a little less time than that.
Then just let the crust cool completely.
And then…brace yourselves.
 Throw some cream cheese into the bowl of an electric mixer.
 Add a couple o' jugs of marshmallow creme.
I vanted to leek dees spatula.
So I deet.
 Next, just whip the whole thing together until it turns into something indescribable. You'll taste it. You'll want to think you know what it is. But unless you saw yourself putting the ingredients into the bowl, you really won't know exactly what it is.
So I'll just tell you. What it is…is a splendid, creamy, slightly glossy concoction that will make your skirt fly up unless you're a boy. And then whatever the counterpart is to making your skirt fly up will happen.
And when it does, will you tell me what that is? I haven't yet been able to figure it out.
 So what you do next is, you slice up a bunch of fruit: peaches, kiwi, and blueberries are good. You can also do pears, raspberries, or any fruit that floats your boat.
 Start throwing the fluffy stuff on the crust…
 Then spread it all over the surface of the crust.
Geez Louise. Look at that stuff.
 Keep going until it's all covered except for a rim around the edge. Kinda like a pizza.
And then…
And then…
And THEN?
You do this.
 Do whatever design you like! I felt like a random mix, but you can do color coordinated rows so that it looks more like a tart if you'd like.
 Then just cut it into pieces and serve away! The crust turned out nice—it was definitely on the thick/substantial side, so it was sort of like eating a cookie-cake.
Fruit pizzas are lots of fun. Use this basic recipe to make large ones, or a bunch of individual, small ones. Change up the fruit! If you do a bunch of smaller pizzas, do single varieties: all kiwi for some, all blueberry for others. That'd make a lovely presentation.
But most of all, enjoy!
And be sure to use any leftover white fluffy stuff as a fruit dip.
(But you didn't hear that from me.)
Recipe: Deep Dish Fruit Pizza
Prep Time: 1 Hour
|
Cook Time: 15 Minutes
|
Difficulty: Easy
|
Servings: 24
Print Recipe
3"x5" Cards
4"x6" Cards
Full Page
Ingredients
1-1/3 cup Shortening (may Substitute Butter)1-1/2 cup Sugar1 teaspoon Orange Zest1 teaspoon Vanilla2 whole Eggs8 teaspoons Whole Milk4 cups All-purpose Flour3 teaspoons Baking Powder1/2 teaspoon Salt2 jars (13 Ounces Each) Marshmallow Creme2 packages (8 Ounces Each) Cream Cheese Peaches Kiwi Fruit Blueberries Pears Raspberries Other Fruit Optional Preparation Instructions
Cream shortening (or butter), sugar, orange peel, and vanilla thoroughly. Add in eggs and beat until light and fluffy. Add in the milk and mix.
Sift dry ingredients together, then blend into cream mixture. Slightly flatten between two sheets of waxed paper, then refrigerate for one hour (or freeze for 20 minutes).
Press dough into a sheet cake pan OR divide the dough in half and roll each half into a large round, then transfer to pizza pans.
Bake for 12-15 minutes until cookie dough is cooked and golden brown, but not overly crisp. Remove from oven and allow to cool completely.
Using a mixer with a whisk attachment, whip together marshmallow creme and cream cheese until light. Spread onto cooled "pizza" crust, then decorate the top generously with sliced fruit. Slice into squares or wedges and serve.
Posted by Ree on January 22 2012

January 21, 2012
Stocking Up
On today's Food Network show, I cook a few recipes from staples I happen to have have on hand in my pantry, freezer, and fridge. Since I never like to get in my car and go anywhere, ever (don't be like me; I have issues, man) I try my best to structure things so that I have a stockpile of basic essentials that I buy in bulk once or twice a year…then I just fill in the fresh things (milk, bread, eggs, fresh produce, meat, etc) at the grocery store as needed.
Since time is limited on the show, here's the complete, comprehensive list of what I must have in my kitchen at all times or else I get twitchy and start to have disturbing dreams:
PANTRY ITEMS
Canned tomatoes: Crushed, whole, diced, tomato paste, RO*TEL
Dried pastas in every shape and size imaginable
Rice: long grain, brown, and Arborio for risotto
Peanut butter
Honey: Sweeten yogurt smoothies, use in recipes…and drizzle on hot biscuits. Sorry.
Various jellies: Strawberry, apricot, jalapeno
Real Maple syrup
Chipotle peppers in adobo sauce. Add to soups. Add to roasts. Puree with mayonnaise for a great salad dressing or veggie dip.
Roasted red peppers: place them on panini, puree them and make a soup or pasta sauce, chop them and make bruschetta
Canned artichoke hearts: throw into a pantry pasta sauce, make baked artichoke dip, etc.
Assorted olives, jalapenos, pepperoncinis etc.
Baking ingredients: bulk flour (all-purpose, whole wheat, self-rising), sugar, brown sugar (store in a nice airtight container), powdered sugar, baking powder, baking soda, extracts, yeast, etc.
Shortening and vegetable oil
Chocolate chips and other forms of baking chocolate
Oatmeal and other grains
Evaporated milk and sweetened condensed milk
Cornmeal: Use in baking, of course, but also dissolve a little in water and stir into soups and chilis for a little thickening and flavor
Masa: Corn flour sold in the Hispanic Foods aisle. Use in similar ways as cornmeal.
Ketchup, different mustards, and barbecue sauce
Mayonnaise: (Not Miracle Whip. Grody.)
Also…
 Potatoes, onions, and garlic. I store 'em in a basket so air can circulate.
Onions and garlic are the basis of innumerable recipes.
Potatoes are…well, essential out here.
 Dried beans. Put 'em in soups. Put 'em in stews. Cook 'em in a pot with a hamhock. Make refried beans. So delightfully basic.
 Stocks and broths. Chicken, beef, vegetable. Make soups, braise briskets, make pot roast. Amen.
 Jarred pesto and specialty relishes, chutneys, etc.
Jarred pesto is an easy way to inject big flavor into soups, pasta, quiches, chicken salads, dips, and dressings when you don't have access to fresh basil.
 Panko breadcrumbs. Top casseroles. Coat fried mozzarella. Mix them in meatballs and meatloaf.
 And then of course: Kosher salt, black pepper, Worcestershire, Tabasco, olive oil, different vinegars, soy sauce, etc.
And as for the fridge…
FRIDGE
 Lemons, limes, and apples.
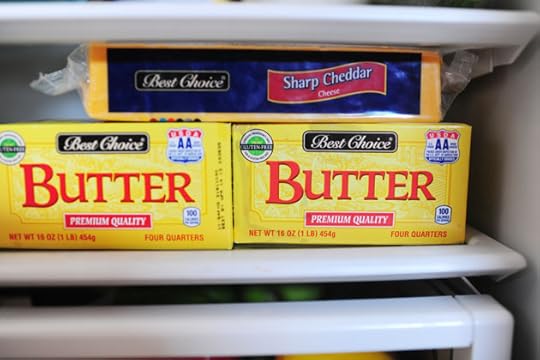 Butter. Sorry.
And longer lasting cheeses like cheddar, Parmesan, and feta, which has a nice, long shelf life.
 Bacon. Sorry again. And this can be a freezer item, too. Make BLT's, top burgers, cut into bits and fry with onion as the basis for some pasta sauces and soups.
Also: Corn tortillas. If they're stored properly, they seem to last forever in the fridge.
And then there's the beloved freezer.
FREEZER
Beef, wrapped in butcher paper.
Chicken breasts, wings, legs, and thighs, either flash frozen then stored in ziploc bags, or vacuum sealed
Raw shrimp
Sausage: breakfast sausage, Italian sausage, chorizo, etc.
Bread: Crusty artisan loaves that I get when I'm in the big city, and a couple of back-up loaves of sandwich breads
Pizza dough: unrisen, stored in ziplocs
Frozen dinner rolls: I love the (storebought!) unrisen, unbaked little round balls of dough. They rise and bake up so beautifully, and you can slather them with butter and chopped rosemary and turn them into something entirely different. And you can roll them out and use them to make calzones or mini-pizzas.
Pie crust: formed into disks and stored in ziplocs. To use, just remove, let thaw for 30 minutes or so, then roll out.
Pecans/walnuts
Frozen fruits: Peaches, berries, cherries, etc. These are awesome stand-ins for pies, crisps and cobblers when the fresh fruits aren't in season. And you throw the frozen fruit right into the blender for smoothies whenever you want.
 "Fresh" vegetables. The freezer is where I stock the veggies that aren't great in canned form: green beans, peas, lima beans, carrots, corn. These non-acidic vegetables stay so much more delicious, nutritious, and fresh in the freezer.
(Freeze your own veggies out of the garden by blanching, then throwing in ice water, then drying, then flash freezing, then throwing into larger ziplocs.)
 Ready-made recipes stored flat in ziploc bags. Take a day where you cook up bulk recipes for the freezer, or just gradually build them up over time. Store both large and small quantities so you can easily feed a crowd…or just yourself. Reheat by adding to a large pot with a little water just to help it along.
Chili, which you can eat it on its own or put on top of burgers, hot dogs, nachos, Fritos, etc.
Pasta sauces
Soups and stews
 And weird little ingredients like homemeade pumpkin puree—measure it in 1 or 2-cup quantities so you can easily use them in holiday recipes.
And now…I'm going to go cook something. I'm hungry.
I may have missed a few items (my mind is a highly imperfect mechanism) so feel free to shout out your not-to-be-missed pantry, fridge, or freezer staples!
Love,
P-Dub

January 19, 2012
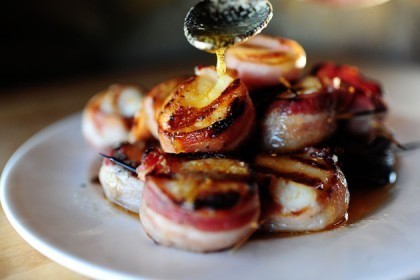
Bacon-Wrapped Scallops with Chili Butter
 I made these beautiful, tasty little suckers before Christmas and am only just now recovering from the bliss so I can tell you about them. I've always loved bacon-wrapped scallops, but for some reason this batch was so miraculously miraculous. Maybe it was just that I was filled with Christmas cheer and this made everything taste better. Or maybe that it was that the scallops were especially scallopy or that the bacon was exceptionally bacony.
Or maybe it was that I drizzled the whole thing in melted chili butter, which made me faint and eat four thousand of them.
Or maybe I just love food and become hyperbolic in its presence.
In any event, these things are yummy.
 The Cast of Characters: Scallops, bacon, butter, chili powder, and cayenne pepper.
 I…love…scallops. Please tell me you do, too. And you'll notice that these are nice, big suckers. That's what you want.
 Because the scallops are big, I'm using thick-cut bacon. But if you're using some slightly smaller scallops, or if you want your bacon to really cook down, you should use thin bacon instead. The world is your oyster!
Huh huh. Get it?
 Cut the bacon pieces in half or thirds (depending on the size of your scallops) and wrap them around the outside of each scallop. While holding the bacon somewhat tautly around the scallop, secure a long toothpick (also known as a short skewer) through the bacon and the scallop to secure it.
And yes. "Tautly" is a word. And the reason I know that is that I just looked it up four seconds ago.
 Repeat until all the scallops are done, then you can cook them in either of the following ways:
1. On a roasting pan (one with a drip tray) in a 425-degree oven for 15 to 20 minutes, or until the bacon is sizzling. (You can let it cook as much as you'd like; I kinda like my bacon chewy and not crisp.)
2. On a roasting pan under the broiler for 15 minutes or so, until the bacon is sizzling.
 3. Or on the grill, for as long as they take to get to the doneness you want.
 Usually, in the time it takes for the bacon to cook, the scallops cook, too. As I said, I like my bacon a little on the chewy side. Feel free to cook yours longer if you're a normal person.
Note that if you do the broiler or the grill, your skewers will have a tendency to turn black. You can mitigate this if you soak the skewers in water for at least an hour before using them.
But I'm not organized enough to mitigate anything.
 I forgot to take a photo of the butter I made, because it was four days before Christmas when I made these and Scotch tape (the purple package, not the green one) was holding my brain together. But here's what I heated together in a saucepan:
Butter
Plenty of chili powder
Dash of cayenne pepper for heat
Heat it up until it's all mixed together, the spoon it over the top of the scallops just after removing them from the heat.
These are delish, guys. Perfect for a weekend dinner served with rice or pasta (drizzle a little extra chili butter over the rice/pasta, then sprinkle the whole thing with sliced green onions. Yum) or as an appetizer. Super Bowl scallops, anyone?
Here's the handy dandy printable!
Recipe: Bacon-Wrapped Scallops with Chili Butter
Prep Time: 15 Minutes
|
Cook Time: 20 Minutes
|
Difficulty: Easy
|
Servings: 8
Print Recipe
3"x5" Cards
4"x6" Cards
Full Page
Ingredients
2 pounds Large Scallops1/2 pound Bacon, Cut Into Thirds Or Halves1 stick Butter2 teaspoons Chili Powder Dash Of Cayenne Preparation Instructions
Wrap bacon pieces around the outside of the scallops, then attach with a wooden skewer.
Cook in a 425 degree oven (on a drip pan) for 20 minutes, or until bacon is sizzling and brown
OR
Cook under the broiler for 15 minutes, or until bacon is sizzling and brown
OR
Grill until bacon is sizzling and brown.
Melt butter and stir in chili powder and cayenne. Drizzle over scallops before serving.
Posted by Ree on January 18 2012

Ree Drummond's Blog

- Ree Drummond's profile
- 2032 followers

