
Rachael Ray's Blog, page 86
August 16, 2012
Two DC Chefs Give Their Spin on American Cuisine
Half the fun of discovering a new restaurant is sharing it with people you know will enjoy it. As Rachael Ray’s resident restaurant guru, here’s an inside look at what I report back to Rach about some of my favorite restaurant finds and food experiences!
From: Kappy
To: Rachael
Sent: Wednesday, August 15, 2012 2:00pm
Subject: Two DC Chefs Give Their Spin on American Cuisine
Hey Rachael- I recently got back from a quick in-and-out day trip to Washington, DC. With a little time to spare between meetings on the front end and back end, take a wild guess what I did. Yep, I ate!
On arrival, I headed to Chef Michel Richard’s Central. Central is a fantastic bistro-style restaurant that is this French chef’s spin on some American dishes. I sat in the lounge and went to town with the menu. First up was the French Onion Soup. I’m always a sucker for a good French Onion Soup, and when the server told me they use a touch of miso in the soup, that sealed the deal - I had to try it. It was brothy and rich with a good-quality cheesy topper, all how a good crock of French Onion should be. [image error] Next, I decided to splurge a little bit and went for the Lobster Burger. It was served with salad alongside on a brioche bun with a slice of roasted tomato, a lovely, crisp ground lobster patty, a couple thin discs of potato (see photo) and a dab of their homemade aioli. This was a winner! I could barely put it down, but I managed to get some bites of salad in here and there. [image error]
After Central, I followed up my afternoon meeting with a stop at Chef Jose Andres’ America Eats Tavern before heading to the airport. This restaurant used to be Café Atlantico, but was transformed into America Eats, which was a “benefit” destination in support of the National Archives Experience exhibition program. It featured Chef Andres’ spin on classic American dishes, drinks and dessert, each of which included an anecdote about its origin and history on the menu. My server walked me through the menu and helped me select a few things to taste.
As you know, if Buffalo Wings are on the menu, I’m going to order them. Their version was deboned chicken wings that were pan-fried and served with homemade blue cheese dressing. [image error] I also ordered their take on Mac and Cheese, called Noodles Cooked in the Style of Pudding. A light but flavorful cheesy sauce topped vermicelli noodles, with a thin yet crisp cheese topper and two pieces of mushroom alongside for a little pop of flavor. [image error] Also on the table was their spin on Peanut Butter & Jelly, two three-inch round pieces of bread that were filled with peanut butter and jelly and enclosed. I hate to use this comparison, but it reminded me of those Uncrustables in the freezer section of the grocery store, but better… obviously! The PB&J was served with an individual carafe of milk and homemade potato chips. [image error] Last was the Hush Puppies, which truth be told I ordered as a vehicle to taste the Catsup Sampler I ordered. The hush puppies were small round fried cornmeal dumplings served with a sorghum butter that was surprisingly good. For my catsup sampler, I ordered Cherry flavor, Golden Tomato and Jack Daniel’s.
It was hard to overlook the time and effort that was put into this establishment and the creativity behind it. Sorry for the late notice, but I believe their one year run just finished up- that’s my bad- stay tuned for future news from them though.
Central Michel Richard
1001 Pennsylvania Avenue NW
Washington, DC 20004
(202) 626-0015
www.centralmichelrichard.com
America Eats Tavern
405 8th Street NW
Washington, DC 20004
(202) 393-0812
www.americaeatstavern.com
And that’s what’s on my plate!
- Kappy
Andrew “Kappy” Kaplan loves food. A professionally trained chef, by day he runs Yum-o!, Rachael Ray’s charity focused on kids and cooking, and keeps special projects running smoothly for her. By night he hops course to course, place to place, all across the country. He’s Rach’s own personal dining guide! You can also follow Kappy on Twitter to see what’s On Kappy’s Plate in real-time!


August 15, 2012
Montalcino Red Sauce
We are very fortunate to know the Italian hillside town of Montalcino in Tuscany through a very special trip that we took there one September to celebrate our 25th wedding anniversary. Perched on a hilltop in Tuscany, the ancient stone village of Montalcino was founded in Etruscan times. A large fort that now houses a wine shop (enoteca) towers above the town and the rolling hills covered with the vineyards of the precious Sangiovese grosso grapes that produce the Brunello and other local wines. There are wines shops on every street because this is the heart of the Brunello region. Narrow cobblestone streets and steep paths rimmed by flowers connect one level to another in this delightful village. You walk across stone ramparts and everywhere there are breathtaking views of the Tuscan countryside. Remnants of the ancient stone walls remain around the town center. Cypress trees dot the hills as the vineyards drape the hollows. The sun bathes everything in a light no painter could match. It’s heaven.
Wine is sunlight, held together by water.
Galileo Galilei
And Brunello is also the perfect complement to food, turning every meal into a special feast. Here is a pasta recipe for what I’ve come to call Montalcino Red Sauce. It’s from our favorite restaurant in Montalcino, a place called Taverna Il Grappola Blu. It couldn’t be more simple. There the chef/owner makes it with handmade pasta and crushed cherry tomatoes, garlic, olive oil, and fresh basil. In my recipe, I have substituted San Marzano tomatoes unless you are in the heart of summer and can actually find garden fresh cherry tomatoes similar to what you could find in Tuscany. It’s couldn’t be more simple but it’s just delicious. The recipe is below and there is a video on our site where I make it for you. Enjoy!
MONTALCINO RED SAUCE
by Cheryl Carlesimo
photo John McCally
Ingredients:
2 28-oz cans Italian San Marzano whole peeled tomatoes
12 whole cloves garlic, peeled
1 medium onion, diced
Red pepper flakes to taste
Salt to taste
Fresh ground black pepper to taste
Extra virgin olive oil: enough to generously cover the bottom of your sauce pan
12 fresh basil leaves, washed
1 pound long pasta
Fresh basil leaf
Fresh Parmiggiano-Reggiano cheese for grating
Fresh pepper
Preparation:
This recipe can be made in under a half hour if you cook the pasta while the sauce is simmering. Start by putting a large pot of water on high heat. Salt the water by measuring a little mound into the palm of your hand. Put an oven safe pasta serving bowl into the oven on warm so it will be ready for serving.
Next, pour the tomatoes into a large mixing bowl, keeping all the juice from the cans. Break the tomatoes by hand, until the larger chunks are about the size of grapes. Heat the oil in a 6 quart or larger sauce pan. When hot, add the pepper flakes, a pinch of salt, and the diced onions. When the onions are translucent, add the whole cloves of garlic. As the onions turn golden brown, add the tomatoes to the pan. Cook on medium for about 15 minutes.
At this point, you can add the pasta to the water, and cook as/per the package directions until al dente (probably about 14 minutes, but be sure to test a few minutes before the cooking time marked on the package so it doesn’t get soft).
While the pasta cooks, gently tear the basil leaf into large pieces, and stir into the sauce pot. Salt to taste, but remember not to overdo it because you’ll be adding grated cheese when you serve. Grind in fresh pepper from the pepper mill to taste. Cook on low for another 5 minutes. Remove from heat, and put about a third of the sauce in the bottom of the warm serving bowl. Drain the pasta into a colander, and put it into the bowl with the sauce while piping hot. Toss the sauce in the bowl with the pasta, and then add most of the remaining sauce, keeping a cup or two for the table.
Serve hot into individual bowls. Add basil leaf for garnish, and top with fresh grated Parmigiano-Reggiano cheese. Mangia!
Recommended side dishes are an Insalata Tricolore, and Grilled Italian Sausages or Pork Chops. And of course, you must eat all of this with a large glass of Tuscan red wine. If you’re very lucky, enjoy a glass of Brunello di Montalcino, the king of Tuscan reds! But if saving for a trip to Italy, any Tuscan red would be magnifico! Buon appetito!
This recipe and many other family favorites are available on DishandDine.com. Stop by and become part of this grass roots global food community!
DishandDine - It’s All About Food
http://www.facebook.com/DishandDine
http://www.twitter.com/DishandDine
August 13, 2012
Jackson Heights And Piping Hot Veggie Fritters
My dear friend Irit and I often talk about India. For me, it’s the childhood Delhi winter breaks eating channa bhaturra (Indian chickpea curry and fluffy fried bread) for Irit it is the spiced tea with which to break the day. Irit is not Indian, yet without question I learn so much form her when it comes to India and as her stories become more vivid, her moistened eyes drift further East. It was time to take Irit down memory lane to a place that would recreate the bold aromas, aesthetic vibrancy and lively sounds. We were took the R train from Manhattan to Jackson Heights.
We started out on 74th street, it was only 10 am but one could already smell the competing scent of barfee (Indian fudge) and samosas filled with ground lamb and potatoes (Indian empanadas ) in the air. Our first stop was at Butala imports. A fun place to buy Indian treasures from religious figurines and yoga DVD’s to traditional pots and pans. The brands available at Butala are also available at many local ethnic stores or yoga studios outside of Jackson Heights, but at Butala, price comes without premium.

As we continued our navigation down 74th street, Jackson Heights was waking-up. Like the adrenalin that drives a country whose population exceeds 1.2bn people, the energy is similar here too. No stone is left unturned, no opportunity is left unexplored and no space is spared (no matter how small, impractical and questionably legal) . Here, a store can play host to a phone card vendor, barber and palm reader, a pop-up table sells imported DVDs and CD’s (even American), tiny mithai shops (Indian sweet shops) sell the largest variety of confection and gold merchant display windows are filled sell 24 carrot gold adornments. There is nothing mundane about this street or the culture it represents.
However, the experience can be overwhelming to a newcomer as it is challenging to know where to start. Taking it one brush stroke at a time, we made our second stop at Sabzi Mandi, a full on Indian supermarket. Here, one can find everyone all kinds of Indian mangoes, bitter gourd, stacks of lentil packets, a variety of rice, spices, pre-packed paneer blocks and Indian television dinners.
Needless to say that we walked out with several bags and were now in need of respite. What could be better at this very moment than a garama garam chai (A Chaiwalas expression for ‘hot hot tea’) and something to munch on. Amidst several places to choose from, Raj Bhog seemed like the best option. Raj Bhog is an Indian snack shop, with stores throughout India and franchises all over the world. Their specialty are ‘afternoon-tea snacks’, a whole genre in itself in India. Here one can find a variety of samosas, pakoras (vegetable fritters) and chaats (crispy noodles or chips, yoghurt, spicy and sweet tamarind sauce, mint chutney and spice blends).
Today I will be sharing the recipe for pakoras. They are addictive and a great way to eat a myriad of vegetables. Traditionally people make these with cauliflower, eggplant and potatoes, but be as creative as you want and try other vegetables, such as, asparagus and bell peppers.

Veggie Pakoras
Ingredients
1 ½ cups besan (gram flour)
1 cup chopped cilantro (hara dhania)
2 cups of water (Use water as needed)
4 cups Vegetable oil
2 large potatoes (russet), peeled and cut in to 0.5cm rounds
1 medium-sized egg plant, cut into rounds
1 large onion
1 tsp. Salt
1 tablespoon of coarsely coriander powder
½ tsp. garam masala (optional)
1 tsp. black pepper
1 tsp. carom seeds
* for added crispiness, add 3 tbsp. rice flour
Method
1) Combine dry ingredients: besan, rice flour, coriander powder, and salt and spices
2) Add the water slowly to make a batter
3) Add cilantro. Mix well.
4) Heat the oil in a frying pan on medium high heat. Test the oil by adding a little batter to the hot oil, if it sizzles immediately, it is ready
5) Dip the vegetable slices in the batter one at a time and slowly drop in frying pan.
6) Fry the pakoras in small batches. The pakoras will take about 4 to 5 minutes to cook. Turn them every couple of minutes so they don’t burn on anyone side
7) fry until golden and crisp, remove with slotted spoon, drain on paper towels
Saira Malhotra, is of British –Indian descent and is a chef, food writer and cooking instructor based in New York City. Raised in Hounslow, U.K, or rather ‘Little India’, where the air is aromatic with roasted spices, little did Saira know these moments would follow her from being a student in France and Italy to residing in NYC with her husband and kids and parlay themselves unexpectedly in to a culinary career. She is a graduate of the International Culinary Center in New York City. Come visit her at her food blog: Passport Pantry where she shares approachable and international recipes.
Crushed Cookie Affogato
I’ve been thinking and talking a lot about easy entertaining. It just makes sense when the weather is nice to do things in a more casual way in order to have more time to enjoy your surroundings. But I’ve said it before and I’ll say it again: casual can still be classy. I love for my guests to feel as though I spent a lot of time and effort preparing no matter how long it actually took me. And thanks to a repertoire of easy but special recipes, that’s usually the case.
One of my favorite casual desserts to entertain with is Affogato. Affogato means “drowned” and is basically an italian dessert made by “drowning” a scoop of vanilla ice cream or gelato in a shot of warm espresso. The strong bold flavor of espresso pairs gorgeously with the creamy vanilla ice cream. When the two join together it’s nothing short of divine marriage. The ice cream melts into the espresso and acts both as sweetener and a creamer—genius! You guys, this dessert rocks!
I don’t know about you but, in our house, no meal is complete without coffee and dessert and this recipe delivers both in one delicious and satisfying sweet treat. It takes mere seconds to make and makes a beautiful presentation. Top yours off with some crushed cookies or shaved chocolate as I did here and you have yourself a dessert that is both easy and elegant.
Crushed Cookie Affogato
Serves 4
Ingredients:
1 pint of vanilla ice cream
1 cup espresso, warm
2 large chocolate cookies or any cookie you fancy, crushed
Instructions:
1. Place one scoop of ice cream into 4 shallow cups (espresso cups work well for this).
2. Pour about 1/4 cup of expresso over each scoop of ice cream and top with crushed cookies. Enjoy!
Christina Stanley-Salerno is a mama, recipe developer, food stylist, photographer and blogger atTakeBackYourTable.com. She loves cooking for and with her family. Life is hectic, but Christina is passionate about mealtime because she believes that family meals are the glue that holds everyone together. Creating simple, quick and healthy meals is her specialty and her trick to keeping the family meal a reality, even on busy weeknights.
Follow her on Twitter @TakeBackTables
August 11, 2012
Pork, Pigs, and Animal Welfare: A King Arthur Story

King Arthur
Loving animals, and eating them, generally are thought of as separate impulses. But sometimes I wonder. I went to a dinner last night at a restaurant called Northeast Kingdom in a bleak, barren, and remote section of Brooklyn. The occasion was the serving of a large Hereford / Gloucestershire Old Spots pig named King Arthur, who had been raised specifically for the occasion. Although Arthur was bound for a terminal rendezvous with 150 outer-borough gastronomes, in the form of a 24 course tasting menu, he seems to have lived well. I say “seems” but one need not surmise - the restaurant will show you how King Arthur lived on their blog, and diners were welcome to come up and meet him.
This reasonated for me as the founder of Meatopia. The older I get, and the more meat I eat, the more important animal welfare seems to me. Whole Foods Market, our presenting sponsor, rolled out a five-step animal welfare grading system two years ago, and I am proud to say that every meat served at Meatopia is at least a 2 on the system. (Just getting a “1″ means that you are treating animals humanely; Smithfield Pork or Tyson chicken would never even get rated.)
It wouldn’t be unreasonable to suspect that my sudden conversion to animal-rating zeal might have to do with Whole Foods’ sponsorship. But in fact, my eagerness to attach my appetites with my conscience had everything to do with my seeking out Whole Foods as a partner. While it’s not reasonable to expect that every pork chop you buy at Whole Foods Market to have a public life like King Arthur’s, there’s no reason for you to think of its life as having been passed in unspeakable suffering.
I suppose I should say what the five-step program actually is. According to the Global Animal Partnership, which established the standards, defines them thus:
Step 1: prohibits cages and crates.
Step 2: requires environmental enrichment for indoor production systems
Step 3: outdoor access
Step 4: pasture-based production
Step 5: an animal-centered approach with all physical alterations prohibited
Step 5+: the entire life of the animal spent on an integrated farm.
I’ve never been to a 5+ farm, but there is one in North Carolina that Whole Foods works with, and I want to go there, meet the animals, and eat them. I know this sounds weird, but it is weird. If you’re going to eat other animals, especially ones that look and act sort of like people, you have to find a way to think about it that makes sense. You have to know how the animal lived, you have to eat all of it, pretty much, and - the hardest part - is that you have to find it in yourself to not eat commodity meat. Which, let’s face it, can and is often fabulously delicious. But whatever. I’m a work in progress.
August 10, 2012
Dinner at Home with a Master Chef
OK, so full disclosure: what I should have said is “Dinner at Home with an Almost Master Chef”. An old culinary school friend, Amanda, is crashing at our house this week as she’s shadowing professional chefs at our alma mater, The Culinary Institute of America, to prepare herself for taking the acclaimed (and incredibly, arduously challenging) Certified Master Chef exam.
Leaps and bounds beyond the awards given to contestants in cooking reality series, Certified Master Chef (or “CMC” as chefs call it in the biz) is a title earned (to date) by only 63 people in the world. As an aside, Amanda, if she successfully passes next year, would be only the second woman to have ever earned the CMC honor. In my eyes (and the professional chef world), she’s a really big deal, so imagine my resistance to accepting her offer to make dinner for us during one night of her visit…not.
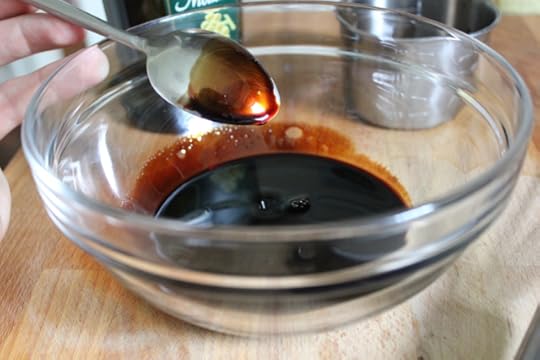
Raiding our pantry with the keen eye of a hunter, she effortlessly pulled together a meal that was simple, sophisticated, and ridiculously delicious. The icing on the cake of it all was the “gastrique” sauce that she served alongside. Gastrique is a fancy chef term for a sauce that’s based with a reduction of vinegar and sugar (which, for those of you who cook along with Rach at home know, she loves to do with balsamic vinegar and brown sugar; her signature “drizzle”). To accompany the perfectly roasted chicken she served us, she fortified (another fancy chef word that means “made better”) her gastrique with some brown butter. Heaven was indeed a place on earth.

Balsamic-Brown Butter Gastrique
Bring the flair of a future Certified Master Chef to your next weeknight meal with this simple and delicious sauce that pairs with just about anything. You can even make it a bit ahead of time and serve it at room temperature or refrigerate and use it for up to 3 days. Remember though - it’s very rich in body and flavor, so a little goes a very long way.
1/2 cup balsamic vinegar
2 tablespoons brown sugar
2 teaspoons Dijon mustard
4 tablespoons butter
Salt and freshly ground black pepper
In a small pot over medium-high heat, combine the balsamic vinegar and brown sugar. Bring the mixture up to a bubble and simmer until reduced by half and syrupy, about 5 minutes. Transfer the vinegar to a mixing bowl along with the mustard and set aside.

Wipe out the pot that the vinegar was reduced in and return it medium heat with the butter. Melt the butter and allow it to cook until some brown bits form on the bottom and it begins to smell nutty, 4 to 5 minutes. Add the butter to the mixing bowl and vigorously whisk everything together until fully combined (it should look like a vinaigrette). Season with salt and pepper. Serve the sauce warm or at room temperature.
Makes 4 to 6 servings
Patrick W. Decker’s life revolves around food. Always has. Probably always will. As a graduate of The Culinary Institute of America and past member of the culinary team on Rachael’s daytime talk show, he now works as a food stylist and producer in NYC by day, and a food writer and recipe developer at his home in New York’s Hudson Valley by night. You can see what he’s up to by following his latest twEATs on Twitter at @patrickwdecker or visiting his website at patrickwdecker.com.
August 9, 2012
An Easy DIY Closet Organizer!
At some point I’m going to have to turn this closet into a place that stores clothes instead of a place that stores art and craft supplies. I’m hoping if I can get it really organized maybe it can do both. For now, it works fine for my supplies, but it could be better.

The biggest problem I have is rolls of paper. They end up getting damaged when I just have them leaning in a corner, and I find I’m always having to move them around to get to something else. I decided it was time to do something about it. I have always loved those perforated, metal radiator covers sold at hardware stores. I thought this would be the perfect material to build my organizer.
For this project you’ll need:
Metal radiator cover 24″ x 36″
Drill with small bit
3/4″ metal screws
Level
S-hooks
Cotton twine or wire
In the radiator cover, drill holes in the top and bottom corners (on the shorter side). I used a scrap wood block to protect my table.

Fold the metal into a cylinder and overlap the edges about an inch. Mark the other side and drill two more holes so they line up with the first holes.

Using a level, draw a line where you want to attach the top of the metal.

Line up the pre-drilled holes and attach the metal to the back of the door using a metal screw.

Drill another screw into the bottom pre-drilled holes, so the metal forms a cylinder.

Press the bottom of the metal cylinder so it’s flat against the door.

Pre-drill four more small holes along the bottom and add more screws to secure. It helps to have a friend holding things in place while drilling the holes and attaching the screws.

To give your closet organizer even more storage capabilities, use S-hooks and string or wire to attach ribbon, scissors and other supplies.

Fill with roles of paper, or anything else that needs its own spot.

If you’re like me, you’re going to need two of these.


Find me on Facebook!
August 8, 2012
The Olympics and Food and Art
The Summer Olympics are here and this year they are being held in London for the third time and the first since the Post War Games in 1948. Millions of spectators are travelling there to see 10,500 athletes from over 200 nations compete in 32 sports at the highest level of competition.
Gymnastics, Track & Field, Swimming, Soccer, and Cycling have always dominated the Summer Olympics. Newer sports like Beach Volleyball have grown enormously in popularity. But many of the original events from the Ancient Greek Olympic Games continue on: the marathon, discus throw, javelin toss, running, and wrestling.
For too long the world has failed to recognize that the Olympic Games and the Olympic Movement are about fine athletics and fine art. Avery Brundage
I recently saw an original and inspiring exposition in New York that combined Food and Art with an Olympic twist. The IMAFestival opened in Milan, then traveled to New York in June, and is in London now for the Olympic Games. Called Sport Your Food, this innovative and inspiring exposition created by writer Rossella Canevari and producer Elena Manzine asked five chefs and five artists to team up as a couple and create a recipe and a work of art inspired by one of the Olympic sports. Below are photos of the exciting results from one of these pairs: the talented Apulian chef Cristina Bowerman and visionary Sicilian painter Fulvio Di Piazza. Chef Cristina Bowerman chose to interpret the discus throw in a splendid culinary dish depicting the discus hitting the earth and smashing into pieces. And Fulvio Di Piazza was inspired by the movement of the discus thrower in his exciting, masterful painting, Bruscobolo.
We all grew up watching the Olympics on TV. Who doesn’t dream of being an Olympics swimming champion like Michael Phelps? My family has a special personal Olympic story. In 1992, my brother, P.J. Carlesimo, was one of the coaches for the U.S. Men’s Basketball Dream Team that went to the Summer Olympics in Barcelona. It is still the team by which all others are measured. It included Michael Jordan, Larry Bird, and Magic Johnson and was the first team to accept NBA players. Sports Illustrated later stated that the Dream Team was “arguably the most dominant squad ever assembled in any sport.” Since Barcelona, basketball has become a premier Olympic event. The Dream Team was admitted to the Naismith Memorial Basketball Hall of Fame in 2010.
“It was like Elvis and the Beatles put together. Traveling with the Dream Team was like traveling with 12 rock stars. That’s all I can compare it to.” Coach Chuck Daly
As London prepares for the arrival of these millions of visitors, I asked several English friends what they would serve this summer if they were hosting an Olympic party in their London flat or home. There was a spirited debate but they ended by agreeing on a very traditional, very tasty dessert - English Trifle! They felt it would be the perfect thing to serve outdoors watching rowing on the Thames; or indoors watching swimming and diving events on the telly. Of course, you have to add a prayer that it doesn’t rain to the recipe, especially if you are hosting an outdoor party!
So I am going to leave all of you with a recipe for English Trifle so that you, too, can host a party this summer for the London Summer Olympics in your own home wherever you are. This is a recipe from a dear family friend Naomi, who lives in Henley-on- Thames, where the rowing events are held. Naomi’s recipe is a summer Trifle with raspberries and blackberries. Make some, and feel a sense of solidarity and community with our English hosts in London. Enjoy it! And enjoy the Games!
ENGLISH TRIFLE
Photo up top
Servings: Six.
Ingredients:
1 eight inch sponge cake ( buy or make)
1 pint Whipping cream
2 oz Super fine sugar
2 oz flaked almonds, slightly toasted
1 lb Raspberries
4 oz Blackberries
2 small Bananas sliced thinly
4 oz Sherry
2 cups English cream custard, room temperature. (Bird’s custard is the best, although you can make English custard from scratch).
Preparation:
In a trifle glass bowl, (8 inch diameter and 5 inches deep), place large pieces of the sponge cake, upside down, in the bottom of the bowl. Pour the Sherry evenly over the cake. Then, in a small saucepan stew the blackberries and 4oz of the raspberries with 2oz of the sugar. This will take about five minutes. Let this fruit stew cool a little and pour over the cake. (Some folks use strawberry jam in place of the fruit stew).
This recipe and many other family favorites are available on DishandDine.com. Stop by and become part of this grass roots global food community!
DishandDine - It’s All About Food
http://www.facebook.com/DishandDine
http://www.twitter.com/DishandDine
August 6, 2012
The J.Parker - Best Rooftop View in Chicago
Half the fun of discovering a new restaurant is sharing it with people you know will enjoy it. As Rachael Ray’s resident restaurant guru, here’s an inside look at what I report back to Rach about some of my favorite restaurant finds and food experiences!
From: Kappy
To: Rachael
Sent: Monday, August 6, 2012 2:02pm
Subject: Best Rooftop View in Chicago
Hey RR - Remember that restaurant we went to last time you were in Chicago, Perennial Virant? It’s that one where mixologist Erin Hayes made us some crafty cocktails… Anyway, their rooftop bar just opened and the view is insane. I know that they gave you a sneak peek when it was a construction zone, but this place is madness. I’m talking 360-degree views of the city with incredible cocktails and food. The cocktail program theme is “destination cocktails.” Every few months, they’ll highlight a few different countries and do a few drinks riffing on the classics. They’re starting with Spain, Cuba and Mexico and I may or may not have tried them all already. Not that you asked, but I think my two faves are the Parker Paloma, which has tequila, grapefruit bitters and grapefruit soda [image error] and the Rose Sangria, which has fresh strawberry puree mixed in. [image error]
While we all loved our meal that night downstairs at Perennial, the concept that Chef Paul Virant has come up with for upstairs is pretty cool. There is a column of “base” ingredients to start from and then you choose an “accompaniment” from the column below, giving the diner a chance to get creative. (But don’t worry, there’s an asterisk on the menu that allows the kitchen to veto any poor decisions.) In keeping with my habit of telling you what to order, keep an eye out for the “base” semolina crostini - it’s frickin fantastic! - and then choose what you want to put on top. We also tried the “base” sliced steak with the romesco sauce “accompaniment.” I’m telling you, I grew up in the stockyards of Chicago, but two of the best steak dishes I can remember were from Paul Virant.
Paul and farmers go together like white on rice, so this menu and its options will most likely change often, or as often as a new ingredient gets pulled from the ground, washed, cooked (sometimes) and put on your plate.
I have to give a nod to the service staff. While the place is in its early stages, everyone is quite friendly and willing to help, from the attendant in the elevator to the servers and bussers. This is no surprise given that this is the newest project from Boka Restaurant Group.
Oh, I almost forgot: chocolate chip cookies with a sprinkle of sea salt- do it! [image error]
the J.Parker (at Hotel Lincoln)
1816 N. Clark Street, 13th floor
Chicago, IL 60614
(312) 254-4747
www.jparkerchicago.com
And that’s what’s on my plate!
~ Kappy
Andrew “Kappy” Kaplan loves food. A professionally trained chef, by day he runs Yum-o!, Rachael Ray’s charity focused on kids and cooking, and keeps special projects running smoothly for her. By night he hops course to course, place to place, all across the country. He’s Rach’s own personal dining guide! You can also follow Kappy on Twitter to see what’s On Kappy’s Plate in real-time!
Hair Weather Woes
There’s nothing worse than leaving the sanctuary of climate control with a fresh hair style only to be slammed by the elements! We’ve all been at the mercy of the Mother Nature and it’s always detrimental to our styled locks. Have no fear we have the hair solutions you’ve been looking for to combat humidity, wind and rain.
Problem: Beating Humidity
Solution: Use it to your benefit! Take your tousled frizz and turn it into a runway ready do in minutes.
[image error] [image error] [image error]
Begin by pulling all the hair to one side and create a loose, low sitting side braid. Work with the texture and frizz by roughing up the scalp with the palm of your hands to exaggerate your overall disheveled look. The best part is, the more frizz the better the finished style will appear. Finish, with a holding hairspray and you’re ready to hit the streets.
Problem: Wind


Solution: Dampen dry hair and add a little beach spray, Redken’s Radiant Sea Spray works great (or as simple as a mixture of table salt and water for gritty texture). Take large random sections of hair and roll upward in a round motion. Secure with pin curl clips or large hair pins and let sit (perfect for a day at the beach).
[image error] [image error] [image error]
Once dry, remove the pin curl clips and roll the hair back down. Rake your fingers through your newly formed waves for a uniform finished beachy texture that looks fabulous with a little aid from the wind.
Problem: Rain
Solution: When in doubt, keep it wet and slick it back!
On wet hair, apply Redken Harware Gel and Cutler Shine Tattoo Spray. Be sure to take medium/large sections of hair and apply product moving up the head. Using a fine toothed comb, comb the product through ensuring even saturation. Next, create a heavy side part in the hair and using the comb begin smoothing the hair, guiding it back towards the direction of where you want the ponytail to sit.
Continue to slick and smooth the hair out adding Cutler Shine Tattoo Spray as needed. Pull all the hair back into a tight ponytail and secure with an elastic band. Finish, by misting hair with the shine spray and a light hairspray for hold. Now, you’re ready to face any weather that comes your way in style!
Rachael Ray's Blog

- Rachael Ray's profile
- 296 followers


![[image error]](http://www.rachaelray.com/blogs/wp-content/uploads/2012/08/img_4691.jpg)
![[image error]](http://www.rachaelray.com/blogs/wp-content/uploads/2012/08/img_4692.jpg)
![[image error]](http://www.rachaelray.com/blogs/wp-content/uploads/2012/08/img_4719.jpg)
![[image error]](http://www.rachaelray.com/blogs/wp-content/uploads/2012/08/img_4717.jpg)
![[image error]](http://www.rachaelray.com/blogs/wp-content/uploads/2012/08/img_4716.jpg)
![[image error]](http://www.rachaelray.com/blogs/wp-content/uploads/2012/08/dump-of-2-16-08-012.jpg)
![[image error]](http://www.rachaelray.com/blogs/wp-content/uploads/2012/08/montalcinoredsauce.jpg)
![[image error]](http://www.rachaelray.com/blogs/wp-content/uploads/2012/08/affo6.jpg)
![[image error]](http://www.rachaelray.com/blogs/wp-content/uploads/2012/08/affo4.jpg)
![[image error]](http://www.rachaelray.com/blogs/wp-content/uploads/2012/08/affo-2.jpg)
![[image error]](http://www.rachaelray.com/blogs/wp-content/uploads/2012/08/cristinabowerman.jpg)
![[image error]](http://www.rachaelray.com/blogs/wp-content/uploads/2012/08/fulviodipiazza-bruscobolosmall.jpg)
![[image error]](http://www.rachaelray.com/blogs/wp-content/uploads/2012/08/img_5424.jpg)
![[image error]](http://www.rachaelray.com/blogs/wp-content/uploads/2012/08/img_5522.jpg)
![[image error]](http://www.rachaelray.com/blogs/wp-content/uploads/2012/08/img_5490.jpg)
![[image error]](http://www.rachaelray.com/blogs/wp-content/uploads/2012/08/photo-13.jpg)
![[image error]](http://www.rachaelray.com/blogs/wp-content/uploads/2012/08/photo-12.jpg)
![[image error]](http://www.rachaelray.com/blogs/wp-content/uploads/2012/08/photo-19.jpg)
![[image error]](http://www.rachaelray.com/blogs/wp-content/uploads/2012/08/photo-15.jpg)
![[image error]](http://www.rachaelray.com/blogs/wp-content/uploads/2012/08/image6.jpeg)
![[image error]](http://www.rachaelray.com/blogs/wp-content/uploads/2012/08/image8.jpeg)
![[image error]](http://www.rachaelray.com/blogs/wp-content/uploads/2012/08/image12.jpeg)
![[image error]](http://www.rachaelray.com/blogs/wp-content/uploads/2012/08/photo-17.jpg)
![[image error]](http://www.rachaelray.com/blogs/wp-content/uploads/2012/08/photo-18.jpg)
![[image error]](http://www.rachaelray.com/blogs/wp-content/uploads/2012/08/photo-72.jpg)
![[image error]](http://www.rachaelray.com/blogs/wp-content/uploads/2012/08/photo-14.jpg)