Rachael Ray's Blog, page 90
July 9, 2012
Easy On-The-Go Breakfast Taquitos
We finally moved into our new house and are beginning to make ourselves at home. Moving is never easy and is especially challenging with two little ones but we are making it work. The first days were a little hairy in terms of schedule and mealtimes and bedtimes were a mess. This is all to be expected so I’m rolling with it but still managing to hold fast to the thing that grounds us as a family—food!
We’re on day four in our new home have managed to have family dinner every night but with so much unpacking still left to do, breakfast has been more grab-and-go. I’m not talking pop-tarts and donuts here, in fact, I’m getting pretty good at whipping up portable breakfasts that keep everyone full and satisfied. Just this AM I made these delicious breakfast Taquitos that were a snap to make and so delicious. They were such a big hit (even for my picky 3-year old) that I already have a request for them tomorrow morning. I’m happy to oblige because they literally took 5 minutes to make and kept them full until lunchtime. Even cooler, these little taquitos are the perfect breakfast to eat on the run or in the car—real food fast!
Customize your taquitos by adding chopped veggies, crispy bacon or your favorite cheese. Stuff, roll and go!
Breakfast Taquitos
Makes 6
Ingredients:
3 eggs, beaten
1/4 teaspoon salt
1 tablespoon butter
1/4 teaspoon butter
1/2 cup shredded cheddar cheese
6 small corn tortillas
Salsa, for dipping
Instructions:
1. Place tortillas onto a microwavable plate and cover them with a damp paper towel. Microwave in 30 second intervals until they are warmed through. Wrap tortillas in foil until ready to use.
2. In a small bowl, whisk eggs together with salt and pepper. Melt butter in a large skillet over medium heat. Pour eggs into the skillet and stir slowly until they just set, about 1-2 minutes.
3. Place tortillas onto a flat surface and evenly distribute scrambled eggs and shredded cheese amongst them. Roll each tortilla up tightly and place onto plate seam side down. Serve alongside fresh salsa or ketchup for dipping.
Christina Stanley-Salerno is a mama, recipe developer, food stylist, photographer and blogger atTakeBackYourTable.com. She loves cooking for and with her family. Life is hectic, but Christina is passionate about mealtime because she believes that family meals are the glue that holds everyone together. Creating simple, quick and healthy meals is her specialty and her trick to keeping the family meal a reality, even on busy weeknights.
Follow her on Twitter @TakeBackTables
July 5, 2012
London Olympics 2012, doing it British style with A Pimms Cup!
People have barely put away their bunting from the Queens Jubilee celebration and it’s time to take it out again, only this time, it’s for the London Olympics. Great Britain played host to the Olympics back in 1908, 1948 and of course now 2012.
Knowing London is to know that it is not symbolic of vast spaces and a low density population. It is an already bustling city that right now is bustling on steroids to make space for this mammoth event. When 205 nations participate in 300 events, improving transportation to include an almost $40 million cable car and taking over parks and royal properties are just some of the initiatives deemed ‘essential’ (the cable car is perhaps debatable). This city is pushing its limits to accommodate every sport possible from archery to wrestling, it is show time and people are under the gun.
Momopeche
But the excitement does not come without controversy which is already in full swing with the immediate departure of Chief Executive Andrew Altman after the games are over. The London Olympics logo also caused quite a stir with its rapidly changing colors, causing fits of epilepsy. But controversy is no stranger to the Olympics. Here is a snapshot of just some of some of those marquee moments in history:
- 1916, Summer Olympics had to be cancelled due to the eruption of World War 1
- 1924, Germany not allowed to participate
- 1956, Boycotting of the games by Egypt, Iraq and Lebanon because of the Suez Crisis
- 1964-1992 South Africa prohibited to enter games due to apartheid
- 1976, Host city Quebec racked-up a $1.5M debt which was paid off in December 2006
- 1998, Ben Johnson lost his medal after testing positive for the use of Stanozolol
- 2008, 2 Chinese female gymnasts ages are thrown in to question
Edoardo Costa
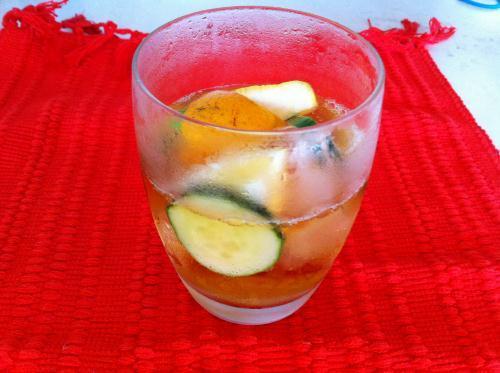
Most of us will be hooked over the next few weeks, whether it is in support of our favorite contestants, patriotism or gossip. Either way, when emotions are running high and low, what could be better than a ‘British Pimm’s’ to take of the edge? Get in to the Olympic spirit this summer and do it the British way with a chilled, cucumber-y and fruity drink with a lick of Pimm’s to let those emotions be tamely expressed.
Pimms Cup Recipe
Ingredients
2oz Pimm’s
4oz Sprite or 7up or any other lemon-based soda
Lemon slice, 1 wedge cut into 2
Orange Slices, 1 wedge cut into 2
Cucumber, 1/4” piece, cut into thin rounds
Ice cubes
Method
1) Take a chilled glass. Add the ice, citrus and cucumber slices
2) Pour the 2 parts lemon soda to 1 part Pimm’s over the top
3) Mix and serve
Saira Malhotra is a classically trained French chef and graduate from the French Culinary Institute. A British born Punjabi, Saira has grown up around food which started from her family pizza business in a small suburb of London. Having studied in France and Italy and living in the Big Apple for the past 12 years, Saira has brought her European, Asian and American influences together via the palate and communicated through her food blog ‘Passport Pantry’.
July 3, 2012
Making a Morel Sauce — Old School!
I have to admit that, like a lot of people, I only like doing what I’m good at. In my case, that means cooking meat over fires, or in a pan, or in an oven. You may have noticed a certain overemphasis on meat starkly seasoned with salt on these pages - so much so that my last column was literally entirely about salt. But gastronomy is a vast vocabulary, and my meaty monosyllables can only go so far.
So I decided to make a sauce for Danit.
Now, I’m not saying there was anything wrong with the chicken, taken by itself. I have been cooking a lot of chickens for Danit, and I believe that my method, take by itself, is about as perfect as a human being can attain. At it’s most stripped down, it amounts to this: 1) get a chicken; 2) put salt on it; 3) roast it; 4) rest it and cut it up on the cutting board. That’s it, and it’s great. The key is not overcooking it, and using a really great chicken, like Bell & Evans. But I wanted to do more. And while walking around at Whole Foods, I found myself in a strange, unfamiliar area to me: the produce section. It’s mystifying and enormous, with hundreds of objects in it that I can’t identify. I did see a mushroom section, though, and they had damn nice looking morels.
I love morels; they’re practically an honorary meat themselves. And given that I was also there to buy the President salted butter I love so much, I thought, why not? Why not try to make a morel sauce for Danit? So instead of cooking the chicken on a rack, as I usually would, I cooked it directly on the enameled cast iron pan. Why? So there would be more stick bits on the bottom.
Pan sauces are all about stickies. The wine or whatever definitely has a lot of flavor, and more importantly a lot of acid, but the real body of the sauce comes from the “black bits.” So when my chicken was done, I did something very intelligent. I poured off the most of the fat in the pan, reserving it for fries later. Then I poured all the hot chicken liquids from the cavity back into the pan, and the pan back in the oven! That sticky, opaque liquid cooked on and became a fondant or glaze. Meanwhile, I sauteed up the morels with some fresh herbs in some good butter, and put them aside. The chicken was meanwhile resting away; there was plenty of time. I added about a cup and a half of dry white wine I had lying around to the pot, and on a hot burner I scraped up all that stuff from the bottom of the pan. I added the morels and a big chunk of butter, and I kept moving my wooden spoon around, and eventually it all reduced to a morel sauce. I poured it over the chicken and just knocked Danit out. Flabbergasted her completely. It was a triumph of old school sauce, remade for the post-modern ape man, and the result no sure bet. That made me even prouder of it, though.
July 2, 2012
A Mobile Roman Holiday: Use your iPhone to Find the Best Food in Rome
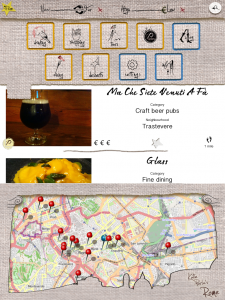
Mobile apps have quickly become standard gear for travelers from Paris to Bangkok, allowing adventurers handheld access to phrasebooks, train timetables, hotel info, and more. An increasing number of foodie-oriented apps, like Katie Parla’s Rome for Foodies are helping curious culinary travelers find out where the locals eat.
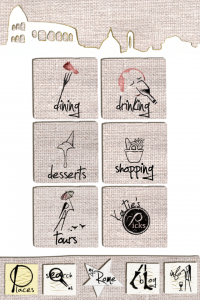
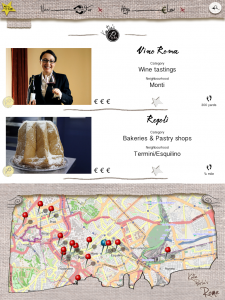
If you’re traveling to Rome this summer, Rome for Foodies is a excellent app ($3.99 for iPhone and iPad) to have with you. It’s beautifully designed, wide-ranging and easy to navigate. Its creator, Katie Parla, is an American who has lived in Rome since 2003, where she gives culinary and art historical tours, and writes about Rome on her blog, Parla Food, as well as the New York Times and other publications. Her app covers all the hot topics that a discerning foodie in Rome needs to know, including Rome’s pizza scene, wine bars and pubs, outdoor and indoor markets, interactive maps, and of course, her favorite restaurant picks. The app also includes Katie’s updated blog posts on all things having to do with la cucina Romana.
I caught up with Parla this week to get the real scoop on eating out in Rome. She gave me some good info that might surprise you.
Louisa: What’s the story with tipping in Rome?
Katie: If visitors wish to follow local customs, I would recommend leaving a euro or two per person at most restaurants. Observe locals and see how they tip (or don’t!) depending on the quality of the service or just whether they have pocket change handy or not. At pubs, there is no need to tip at all. And at a caffe, don’t tip if you have table service, but if you stand up for a coffee, it is customary to tip 10 cents per prepared beverage.
What neighborhoods are good for culinary exploration?
I think the Trionfale neighborhood is great for culinary exploration. It is fairly residential and there are some excellent shopping venues like Mercato Trionfale for produce and Johnny’s Off License for beer, wines and spirits. Fatamorgana serves exceptional gelato, while Pizzarium has pizza by the slice that is unrivaled in Rome.
What can you eat in Rome that you can’t find anywhere else?
The one thing I have never found anywhere else is rigatoni alla pajata, pasta served with milk fed lamb (or veal) intestines, which have been cooked in tomato sauce.
Sometimes European cities shut down in August. Do travelers to Rome need to plan around this?
Rome doesn’t shut down anymore. The financial crisis has led many establishments to remain open in the past few years, closing for a very short time or not at all during August. I wrote this post last year on the topic. My app also has suggestions for August and holiday dining under the new tours section.
How does your app help someone who’s exploring Rome?
Parla Food is a collection of the best pizzerias, wine bars, restaurants, food shops and gelaterias Rome has to offer. It is a carefully curated list of places I endorse for their dedication to quality. Visitors can use it to plan their trips from afar or while they are on the ground. Using filtering, search, itineraries, and maps, gastronomic travelers can be led to the best Rome has to offer. And the app works offline so no need to spend money on roaming charges!
Why are you so passionate about Roman food?
I love food, Roman and otherwise. I have been here for 9 years now and, while I must admit the overall quality of food in the city has declined, there are still exceptional places out there that won’t compromise the quality of their ingredients or service for profit. My desire to showcase these places is what led to the app.
What are a few standby restaurants that are always a good bet?
The pizza at Sforno never disappoints, Pizzarium’s pizza by the slice can’t be beat. Roscioli is always a good bet for carbonara and L’Arcangelo’s suppli’ and gnocchi alla matriciana are consistently top. You will never have a bad gelato at Il Gelato di Claudio Torce, Fatamorgana, Gori, or Neve di Latte.
Louisa Shafia is a cook with a passion for healthy eating. She recently penned Lucid Food: Cooking for an Eco-Conscious Life, a collection of seasonal recipes and eco-friendly advice on food. To watch her cooking videos, see her recipes, and find out about her cooking classes, go to lucidfood.com.
Cooking From The Pantry: Moving Edition
If you read my post last week you know I’m moving and of course, as with most moves life is insane. With two days left until The BIG day, I’m desperately trying to feed the family well with what we have on-hand. it’s been a little tricky but since last weeks post, we’ve been doing pretty well.
Today, I challenged myself to use what I had left in the pantry and the fridge which are both pretty sparse since I really didn’t want to have to have to pack food in boxes. I like the idea of starting fresh, save for a few pasta boxes so I’m really using everything up before we leave. I wasn’t hopeful that I could pull off a decent meal so i was ready to head to the fish store. But, a quick scan of the fridge and pantry produced, eggs, some spinach, grated cheese and canned lentils. Strangely enough I had all of the ingredients needed to make Lentil Cutlets, a fave of mine from my vegetarian days and a recipe I love making for little ones (we all know how much I love savory pancakes) because they are easy to eat and contain protein and veggie in one cute little package. I served them with lime wedges, although I prefer lemon and rice and fresh corn (I had 2 cobs left from my last shopping trip!!). Everyone was full with something healthy and we didn’t need to spend a dime or waste any food. Success.
What are your favorite “Cooking From The Pantry” meal creations?
Lentil Cutlets
Makes 8
Ingredients:
1 (15 ounce) can of lentils, washed and drained (freshly made lentils are even better but this is what I had)
1/4 cup grated cheese (I used Parmigiano Reggiano)
3/4 cup breadcrumbs
1/2 cup baby spinach, finely chopped
1/2 teaspoon salt
1/2 teaspoon black pepper
3 tablespoons olive oil
Instructions:
1. In a large bowl, combine the first six ingredients and mash it together using your hands. You want to work the mixture until the lentils to get slightly mashed and the mixture easily comes together to shape into patties. If it seems dry, add another egg, if too wet, add more breadcrumbs. Form into 8 patties.
2. Heat olive oil in large skillet over medium heat. Add patties to the pan and cook for 4 minutes on each side or until patties are golden brown and cooked through. Serve warm with some lemon.
Christina Stanley-Salerno is a mama, recipe developer, food stylist, photographer and blogger atTakeBackYourTable.com. She loves cooking for and with her family. Life is hectic, but Christina is passionate about mealtime because she believes that family meals are the glue that holds everyone together. Creating simple, quick and healthy meals is her specialty and her trick to keeping the family meal a reality, even on busy weeknights.
Follow her on Twitter @TakeBackTables
Oatmeal Chocolate Chip Bars
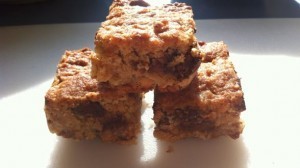
The other night I had to bring dessert and I had no time for cookies. I was in the mood for something I wouldn’t feel too terribly about eating and oatmeal always makes me feel better about the 3 or 4 cookies or bars I know I will inevitably eat while baking. These bars are quick and delicious - a few people who tried them thought they had coconut in them - they do not - it must be the texture of the oats. These of course made a good breakfast as well (good meaning tasty not necessarily the healthiest breakfast of the year) and my kids loved them as a snack or dessert.
Oatmeal Chocolate Chip Bars
Ingredients
1 cup flour
1-1/4 teaspoons baking powder
1/2 teaspoon salt
1 cup light brown sugar, packed
12 tablespoons butter, softened
1 teaspoon vanilla extract
1 egg
1/4 cup milk
2 cups quick oats
1 cup chocolate chips
Directions
Preheat oven to 375 degrees F. Line an 8 inch metal pan with foil and spray with cooking spray.
Mix together the flour, baking powder and salt; set aside. Beat the butter and sugar with an electric mixer until fluffy. Beat in vanilla. Reduce speed to low and beat in the egg and milk. By hand or with lowest speed of mixer, stir in the flour mixture. Stir in oats and chocolate chips.
Spread batter into prepared baking pan. Bake for 28-32 minutes or until wooden pick inserted in center comes out clean. Cool completely on a wire rack.
Lift from pan and slice into bars.
Makes about 16
June 30, 2012
The Easiest 4th of July Party EVER!!!!!
You don’t have to spend a lot of time and money to make your place look festive for the 4th of July holiday. You don’t even have to be good at making stuff. These tips will make even the most artistically challenged Americans look like a patriotic design expert.
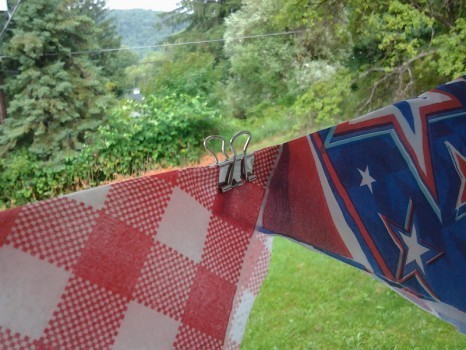
Independence Day Banner
This banner looks great indoors or out. All you need to make this adorable decoration is:
Red, white and blue napkins (paper or fabric)
Small binder clips
Any kind of twine or string
Measure the twine. I wanted my banner to run the length of the porch, so I brought the twine outside, ran it along the length of the railing, and cut—no rulers or tape measures required.
Hang the twine on some small wire nails (I used the existing nails usually reserved for my Christmas lights).
Unfold the napkin from the square it’s normally folded into, and refold it into a triangle.

Using small binder clips (you could even use paper clips if you don’t have binder clips), clip the napkins onto the twine. I overlapped the edges of my napkins to cut down on the number of clips needed.
If using several different styles of napkin, alternate them for a festive look. This banner is so easy you could have the kids do it while you’re grilling your feast!
Potted Flags
This project is even simpler than the last.
I would love to hang an American flag on the porch, but I just don’t have one big enough…so to make the house look festive, simply fill some decorative pots with soil (you could use galvanized buckets or window boxes too), and plant a little flag. These look so cute on the front steps!
Glow Stick Lanterns
If you’re planning on having your afternoon barbeque run into the night, these lanterns are the perfect decoration to come home to after the fireworks.
Simply, roll a pice of waxed paper or parchment paper into a drinking glass (or any kind of clear cylinder).
At dusk, unwrap a glow stick and bend it to crack it which activates it. Then place it into the glass. You’ll have a few hours of glowing light without using any fire.
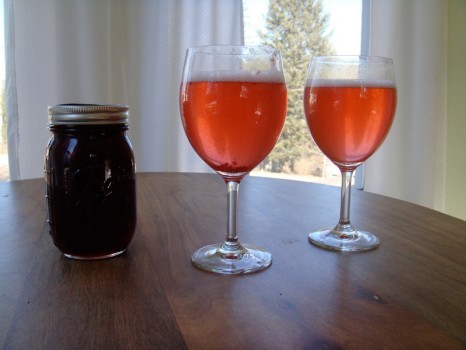
Martha Washington’s Shrub: drink like the founders did
This recipe takes a little time an effort, but it can be done way in advance, so by the time your 4th of July party rolls around, you’ll be all set for cocktail hour.
I first had this drink in Philadelphia at the City Tavern which has been in business since Paul Revere road to Philadelphia to bring the news of the British government closing the port of Boston.
Apparently, Martha Washington used to make this cocktail. Usually it is made with rum, but the City Tavern also offers it mixed with champagne.
The raspberries give it a fruity flavor, while the vinegar keeps it from being too sweet. Mixing the berries with the vinegar and sugar helps to preserve them which is probably why it was so appealing in colonial times. Plus, the syrup probably helped to cut through the strong taste of the homemade alcohols of the day.
To make the raspberry syrup you will need:
raspberries
apple cider vinegar
sugar
water
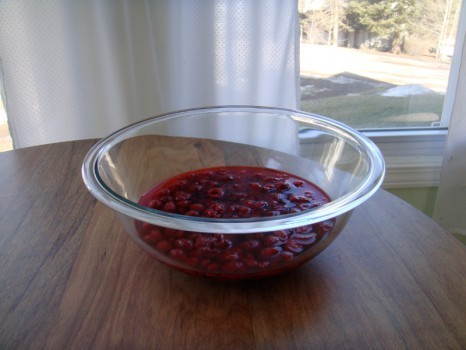
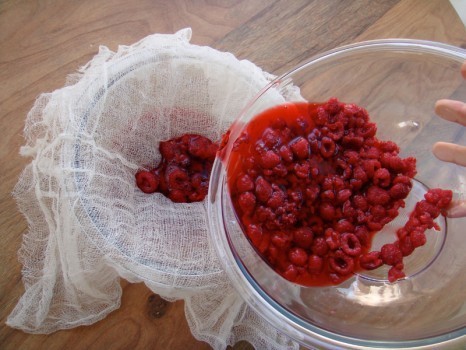
I had use use frozen berries (10-oz. package) because the berries haven’t quite ripened in my part of the country yet.
Use just enough vinegar to cover the berries so they are not floating. Let sit overnight.
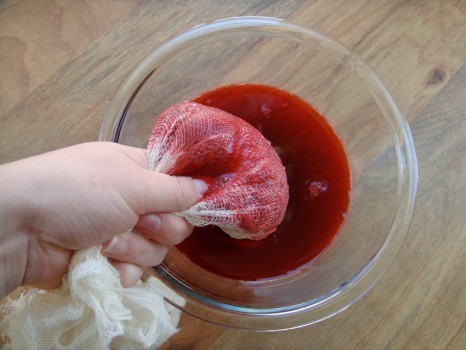
Strain the mixture through cheesecloth.
Squeeze as much liquid as you can from the cheesecloth. Discard the remaining berries and cloth (I threw mine in the compost pile).
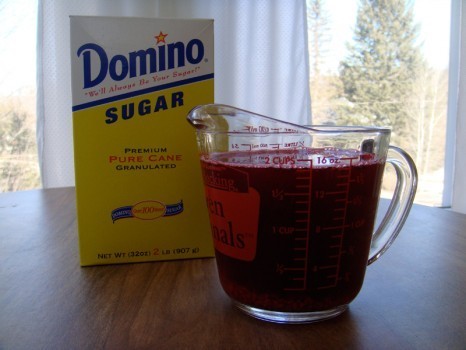
Measure the amount of liquid. You will need one part liquid to one part sugar. Since I had about two cups liquid, I needed about 2 cups sugar.
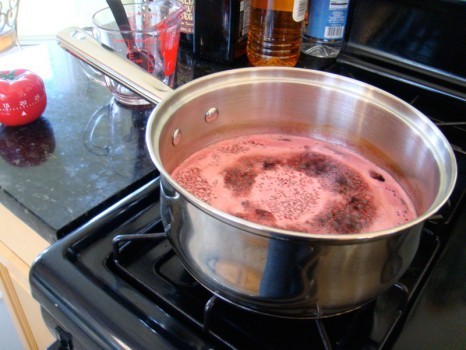
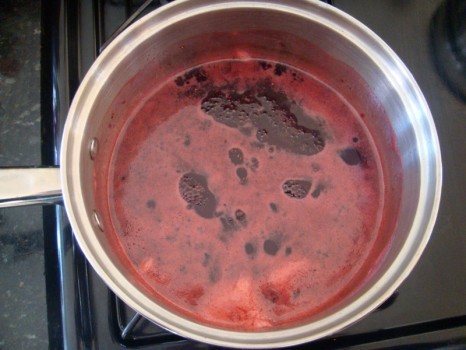
In a saucepan, add the raspberry liquid and sugar. Stir to dissolve and bring to a boil. Simmer for 20 minutes.
The mixture will reduce to a nice syrup.
Let cool and bottle or jar the mixture. Store in a cool, dry place.
For the champagne cocktail, mix one part syrup to four parts water or seltzer water. Pour the diluted syrup into a glass a little less than halfway to the top. Then, fill the rest of the glass with champagne.
For the rum drink add two shots of rum to the diluted syrup and water mixture and serve over ice.
This is a tasty drink that should be able to bridge any political divide. Happy Independence Day everyone!
Find me on Facebook!
June 26, 2012
Indian-Inspired Lettuce Cups Stuffed With Beef: Shrinking That Waistline
My plate is frequently home to a generous serving of rice. It certainly kicks the ‘recommended’ nutritional chart to the side and leaves me feeling bloated and ready for bed. Since the weekend reached dizzyingly hot temperatures, it became clear that I could no longer afford to feel like this (the built-in flotation device around my waist - AKA love handles - was not doing me any favors either).
To feel good about myself this summer I knew I had to investigate my infatuation with rice. My findings: Rice was most of the time a mere vehicle with which to eat other things. That was an empowering moment for me. Tonight, I made a dry sautéed ‘chili- keema’ which is usually made with chicken or ground goat meat. Typically, I eat this dish with rice or roti (Indian bread). Of course, there is nothing wrong with either rice or roti; it’s just that some of us don’t know our limits. For those of you, who are like me, switch out the rice for lettuce to make ‘lettuce cups filled with beef’. Not only does it taste great and add texture, the meal becomes exceedingly lower in carbs.
I decided to make keema with ground beef instead of my habitual ground chicken. The flavor of beef for this dish is a livelier choice, which is necessary since there is no gravy to bolster the taste. While I was in ‘investigation-mode’ I experimented with different types of lettuce too and the winner for me was romaine because it was pliable enough without being lifeless and dry.
In India, this dish is often made stuffed in slightly wilted cabbage leaves but I love to combine the spicy and hot ground beef with the cool, crisp and hydrating lettuce leaves. This dish is great as a snack, a main course or even a picnic dish leaving you feeling lighter and less bloated than white rice or roti would.
Ingredients
1lb ground lean beef
1 medium sized onion, rough dice
1 tbsp. chopped diced ginger
1 tsp. cumin seeds
1 tbsp. tomato puree
Chili powder
¼ tsp. turmeric
Salt and pepper to taste
½ red bell pepper, diced
¼ cup frozen peas
1 green chili, chopped
¼ cup of fresh mint, finely chopped
1 handful of cilantro, chopped
8 romaine leaves, washed and dried
Method
1) Heat oil in a pan, add cumin seeds. When seeds start to crackle, add onions and cook on high heat until the onions start to brown from the sides. Add the ginger, turmeric, chili powder and red bell pepper. Cook for a couple of minutes and add the tomato puree and cook for a couple of minutes
2) Add the beef and break down with a spoon for a uniform texture, cook until it turns brown and begins to stick to the bottom of the pan (this gives a nice roasted flavor)
3) Add the frozen peas and ¼ cup of water. Cook until the peas are tender and the water evaporates
4) Check for seasoning
5) Fill romaine cups with ground beef, garnish with chopped cilantro, mint and green chilies
Saira Malhotra is a classically trained French chef and graduate from the French Culinary Institute. A British born Punjabi, Saira has grown up around food which started from her family pizza business in a small suburb of London. Having studied in France and Italy and living in the Big Apple for the past 12 years, Saira has brought her European, Asian and American influences together via the palate and communicated through her food blog ‘Passport Pantry’.
June 25, 2012
Meatball Perfection
I have been making meatballs my entire adult life and I am 41. I didn’t learn as a child, tied to my mother’s apron strings as some would like to fantasize the Italian girl’s rearing to be, mostly because I didn’t like meatballs or the idea of them until I became an adult. As a child they grossed me out, as did most of my favorite foods of today (sardines, tomatoes) so I steered clear of eating or learning about them until I hit 20.
When the time was right, I learned easily how to make a meatball (second nature), but for years have been changing and rewriting my recipe and the more I tinkered with it, the worse my meatballs got. They always seemed to be too bland, too dry or too tough. Something was always off and my Italian boyfriend’s glares kept getting more grave as he kept saying,”Why are you trying so hard? Just stick to what you know!” He was right. I tried way too hard at different techniques but finally went back to basics this weekend to make the meatballs I remember my grandmother making and let me tell you-these were the best meatballs I have ever made in my life. No lie. Here’s what I did and the liner notes along the way.
Meatballs and Tomato Sauce
Ingredients
3 slices white bread
1 cup milk
1 1/2 pounds equal parts ground beef, veal and pork
3 - 4 fat cloves of garlic, chopped up
3 eggs, lightly beaten
1/4 cup parsley, chopped
1/4 cup basil, chopped
1 teaspoon allspice
1 tablespoon tomato paste
A couple of grinds of freshly grated pepper and salt
1/2 cup grated percorino romano cheese
1/4-1/2 cup breadcrumbs
EVOO and Vegetable oil
Instructions:
Place the bread in a stack in a bowl and douse with the milk until soaked through completely. Wring the bread out as much as you can and crumble into a big bowl. It will be soggy but not dripping of the milk. Add the rest of the ingredients up to the breadcrumbs and then add the crumbs as needed to get it to the point where it is not too wet, but still moist.
Pour about 2 tablespoons EVOO and 2 tablespoons vegetable oil into a deep frying pan and heat to medium high. Once hot, drop meatballs in to the pan but don’t overcrowd. Meatballs should be no larger than 2 inches across, about the size of a golf ball or slightly larger. Stay close to the stove and with a wooden spoon, rotate the balls in the oil until lightly browned all over but not burned. Remove balls to a plate covered with a paper towel and keep going until all of the meatballs are done. Salt the plate of meatballs. To be continued…
But first, The Sauce
Ingredients
4 pork ribs or a small rack, whatever you can find, or you can experiment with most any kind of meat (nothing too lean)
EVOO
4 large cloves garlic, chopped
1 yellow onion, chopped
4 large cans crushed San Marzano tomatoes (find your favorite brand and stick with it. This decision can make or break a sauce)
4 cups organic chicken broth
1/2-1 teaspoon red pepper flakes
1/4 cup of fresh basil, chopped
1/4 cup of fresh oregano, chopped
Salt and pepper
Instructions
Pour a bit of EVOO into a large, heavy bottomed sauce pot and heat to medium-high. Brown the ribs on all sides -this is important to do so you can lock in the flavors. Once browned, remove to a plate. In the same pot, lower heat to medium and add chopped onions and stir, loosening any brown bits from the ribs. If you need to add more oil, do so. After a minute, add the garlic and red pepper and stir for another minute. Then add the tomatoes and broth and stir until combined. Add back the ribs and let the sauce simmer, uncovered on low heat for an hour. Stir occasionally so it doesn’t burn the bottom. Add the herbs and salt and pepper.
Back to the meatballs… it’s hard to overcook the ribs, so you have leeway. They are there to flavor the sauce. So at this stage, give or take 1/2 hour, add the meatballs that have been browned and make sure they are submerged in the sauce completely. Let cook for 1/2 hour and no longer. Any longer and the balls will start to break apart and the sauce will become watery.
Once the sauce with the meat and meatballs is done, we like to take all the meat out and serve it in a large bowl or platter and serve the sauce over our favorite pasta of the moment, with the meat on the side. If freezing leftovers, make sure you add the meat back into the sauce so any meat that is to be frozen is completely covered. You do not want to freeze exposed meatballs or they will not survive. I like to freeze some sauce without any meat and some with meatballs. I don’t usually hang on to the ribs because we’ve most likely eaten them already.
Mangia bene!
Rosemary Maggiore is our Last Minute Lady. A single mom of two kids plus a full time job (she runs this website!) keep her busy and usually pushing things to the last minute. Somehow she manages to keep her cool and her sanity while she enjoys good food, wine, friends and most importantly, family.
For more Ro, see:
Follow me on Twitter at @lastminutelady
Oven Puff Pancake
My ten-year old daughter was on a baking rampage in the kitchen this weekend as in 24 hours time she made popovers, a crumb cake and this oven baked pancake. Everything turned out well with minimal input from me - the biggest challenge for her is the clean up, as course. This oven baked pancake is super easy and very impressive when it comes out of the oven as it is puffed up like a souffle - it quickly deflates so admire it while you can. With a sprinkling of powdered sugar and some strawberries, this is an easy breakfast my kids loved. My older daughter said it tasted like fried dough - a high compliment.
Oven Puff Pancake (click here for printable recipe)
Ingredients
1/3 cup butter
1 cup flour
2 tablespoons sugar
½ teaspoon cinnamon
½ teaspoon salt
4 eggs
1 cup milk
Directions
Heat oven to 400 degrees. Put butter in 10-inch cast-iron skillet and place in oven. While butter melts, prepare the batter.
Sift flour, sugar, cinnamon and salt in a small bowl. Beat eggs well and add milk, then whisk in dry ingredients and mix until smooth. Remove skillet from oven and immediately pour in the prepared batter into hot skillet. Return to oven and bake for 20 to 25 minutes until pancake is puffed and center is dry.
Serve immediately, as the pancake deflates quickly.
Makes 4 to 6 servings.
Rachael Ray's Blog
- Rachael Ray's profile
- 296 followers


