Rachael Ray's Blog, page 94
May 29, 2012
The Endless Backyard BBQ - Part I
My boyfriend and I have been throwing an epic Memorial Day BBQ party for the past three years. When we first hosted this event, what we thought would be a cookout turned into a 2 day, multi-meal party. Five people spent the night and became as obsessed about cooking as we are and just couldn’t peel themselves away before we surprised them with another show-stopper course.
The following year was amped up a bit and different. Instead of one group of people, we had two different parties, on two different days. This was no fun for us because we were working the entire time at cooking and entertaining because there was a limited amount of time with each group. There was a party beginning and an ending, so like a performance, we had to work it, time it and create the food so people could eat and get on with their days. Plus, the first group ate almost everything we bought for the two days and we had to go shopping again for the second day.
This year we swore we would stick to one day. Guess what? It stretched out to three! Inevitably no one’s schedules lined up perfectly so only some could come on Saturday, some on Sunday and then we had a surprise group decide to drop by on Monday. I panicked at first, but then relaxed and gave myself a few rules that helped immensely:
Be organized-I figured out in advance what I would be making for each day, for each course and how much of everything I would need. This turned into a shopping list so I wasn’t just blindly picking up everything that looked good at the market
Clean as you go-of course it rained alot this weekend so there was a constant flow of people in and out of the house, which meant lots of muddy foot traffic. Also, with so many dishes, the pots and pans piled up and since I swore off paper products in lieu of earth-friendly recycled materials, I had more to wash this year. As long as I cleaned as the days progressed, I didn’t fall too far behind.
Make use of leftovers-of course inevitably I made a few big batches of something or other that was barely touched. Instead of throwing these dishes away, I figured out how to reincarnate them. This is perhaps the piece that makes me happiest as entertaining can be expensive and I didn’t want to have to go back to the store as I did in year two. Here are some examples of how I recycled perfectly good food:
We grilled too much sausage. Upon looking at the plate of leftover sausage the next day, I wanted to gag. However, after I sliced them and sauteed them with garlic, freshly chopped spinach, sundried tomatoes, and onions, they came back to life. Why throw out perfectly delicious sausage that is only a day old? Meanwhile, I boiled orechiette pasta and then tossed everything together along with grated Pecorino Romano cheese and lemon zest. It was a hit the next day and talk about stretching a buck!
I made way too many ears of corn. This was my great excuse to try Seamus Mullen’s Corn and Crab Salad recipe, or my variation of it based on what I had on hand. I happened to have two cans of crabmeat that I was going to use for a Crab Dip, but this recipe just stole it right from the cupboard. First I took the leftover ears and scraped the kernels off with a knife. In a bowl, per Seamus’ instructions, I grated a clove of garlic, added white wine vinegar, lemon juice and zest and EVOO and whisked it together. I tossed the corn with this dressing, along with a minced red onion, a seedless cuke, a pint of sliced grape tomatoes, the crab, a handful of fresh tarragon and fresh basil, a sprinkling of ancho chili powder, salt and pepper. His recipe is different, but mine worked great and it was super light and refreshing.
Roasted Beets on their own? Not a hit I guess everyone wanted things that made them feel bad on day one of our party because no one touched the beets I laboriously roasted the night before. I should have made a Beet and Goat Cheese Salad, but instead, the next day I turned these wallflowers into the main act. I sauteed some onion, garlic, carrot and celery until soft and added Farro, or Italian Barley, then cooked it as you would risotto, slowly adding broth. Once cooked, I tossed it with the roasted beets which were diced, a handful of crumbled feta cheese, sliced cherry tomatoes, freshly sliced red onion, fresh herbs including mint, basil, oregano and thyme and sliced marinated artichoke hearts from a jar. On the side I whisked together a lemon vinaigrette and tossed the whole thing together for a side dish the next day.
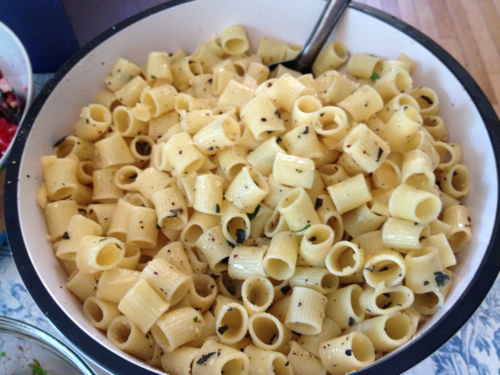
We grilled way too many shrimp on skewers. I marinated these babies overnight in a delicious garlic-lemon-EVOO blend while they were still in their shells and then we grilled them on skewers for people to pull off and peel. Maybe no one wanted to go through the effort of peeling their own shrimp (mental note for next time) because we had many leftovers. We also had a few leftover clams from my boyfriend’s famous Clams in wine broth that he does in a cast-iron pot right on the grill. Meanwhile, I had made a simple and delicious pasta dish that yielded many leftovers. All I did was make a simple and plain short pasta. To it I tossed in half a stick of butter (it was two pounds of pasta), chopped fresh sage from my garden, Pecorino Romano cheese, and tons of black pepper (and a little salt). Delish!
You guessed, it, with all of these leftovers, the second dish was to saute the clams and cleaned and chopped shrimp super briefly in EVOO and garlic and toss with the pasta dish above. It was super tasty.
Here’s the method to my madness:
Leftover meat=saute with onions and garlic and maybe a green and toss with pasta OR serve in a warmed tortilla with a salsa of sorts
Leftover veggies=cook a sturdy grain like a brown rice, quinoa, farro or small whole wheat pasta and toss with the veggies and a vinaigrette for a hearty side salad.
Stay tuned for Part II from this weekend’s festivities- There’s Always Room for Dessert!
Rosemary Maggiore is our Last Minute Lady. A single mom of two kids plus a full time job (she runs this website!) keep her busy and usually pushing things to the last minute. Somehow she manages to keep her cool and her sanity while she enjoys good food, wine, friends and most importantly, family.
For more Ro, see:
Follow me on Twitter at @lastminutelady
Jumbo Coffee Cake Muffins
This seemed like a very long holiday weekend. The weather feels more like mid-August dog days then late May spring/early summer. My kids have a few weeks of school left, but their minds are in summer mode as well. My eight-year old star student son was up doing homework at 9:30 last night and they are sleeping in later and later. Good luck to everyone ending the school year with a strong finish - including me.
I made these muffins this warm Saturday morning and they were moist and delicious - definitely bakery quality. Two thumbs up. Note the layer of streusel in the middle of the muffin - a shame to waste it all on the topping.
Jumbo Coffee Cake Muffins (adapted from a recipe from marthastewart.com)
Ingredients:
For Streusel:
1 cup packed brown sugar
1 cup flour
1 teaspoon ground cinnamon
1/2 teaspoon salt
1/2 cup (1 stick) cold butter, cut into small pieces
For Muffins:
1/2 cup (1 stick) butter, room temperature
1 3/4 cups flour
2 teaspoons baking powder
1 teaspoon baking soda
1 teaspoon cinnamon
1/2 teaspoon salt
1 cup Greek yogurt (nonfat)
1 tablespoon fresh lemon juice
1 cup sugar
1 1/2 teaspoons vanilla
2 eggs
Directions:
Prepare streusel: In a medium bowl, stir together brown sugar, flour, cinnamon, and salt. With a pastry blender or two knives, cut in butter until mixture resembles large coarse crumbs; refrigerate until ready to use.
Prepare muffins: Preheat oven to 350 degrees. Line with paper liners 10-jumbo muffin cups. In a small bowl, whisk together flour, baking powder, baking soda, cinnamon and salt; set aside. Using an electric mixer, beat together butter, yogurt, lemon juice, sugar, and vanilla on medium speed until light and fluffy. Beat in eggs, one at a time, until well combined. With mixer on low, beat in flour mixture just until combined. Divide half the batter among the ten muffin cups; top with half the streusel. Cover with remaining batter; top with remaining streusel. Bake until a toothpick inserted in the center of a muffin comes out clean, 30 -35 minutes. Cool in pan 5 minutes, then transfer to a rack to cool completely.
Rachael’s Book Tour Dates
Just announced! Rachael on book tour! Catch Rachael in one of these cities and get your copy of Book of Burger signed! Buy the book here and see ya on tour!
Wednesday, June 6 - PRINCETON, NJ
6:00 PM to 8:00 PM EST
BARNES & NOBLE
Signing
3535 US Route 1
Princeton, NJ 08540
Thursday, June 7 - PHILADELPHIA, PA
6:00 PM to 8:00 PM EST
WEGMANS
One Village Drive
King of Prussia, PA 19406
Friday, June 8 - PITTSBURGH, PA
6:00 PM to 8:00 PM EST
BARNES AND NOBLE #2367
800 Settler’s Ridge Center Drive
Pittsburgh, PA 15205
Saturday, June 9 - CHICAGO, IL
2:00 PM to 4:30 PM CHICAGO TRIBUNE/PRINTERS ROW
Harold Wash. Library/Cindy Pritzker Auditorium
Chicago Public Library @ Harold Wash./Cindy Pritzk
400 South State Street
Chicago, IL
Sunday, June 10 - KANSAS CITY, KS
4:30 PM - 6:30 PM
RAINY DAY BOOKS
Unity Temple
707 W 47th St
Monday, June 11 - DALLAS, TX
6:00 PM to 8:00 PM
WALMART STORE #259
782 E Interstate 30
Rockwall, TX 75087
Contact: Laura Goeller
.
Tuesday, June 12 - NEW YORK, NY
6:00 PM to 8:00 PM EST
BARNES & NOBLE
Union Square
33 East 17th Street
Friday June 22 - LOS ANGELES, CA
6:30 PM to 8:30 PM
BARNES & NOBLE
189 The Grove Drive
Los Angeles, CA 90036(323) 525-0270
Get your copy of Book of Burger today!
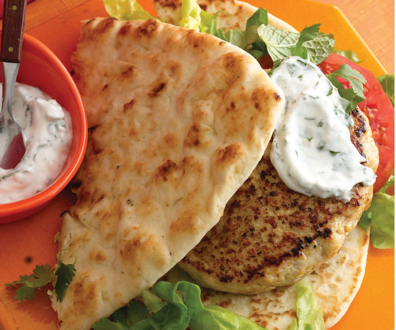
Here’s an example of what you’ll find:
Indian Spiced Patties with Yogurt Sauce
Ingredients
1 1/4 pounds ground chuck or lamb
2 tablespoons mild or hot curry paste or seasoning blend
A pinch of ground cinnamon
Kosher salt
1 tablespoon extra virgin olive oil (EVOO)
1 cup Greek-style yogurt
1 clove garlic, grated or pasted
Juice of 1/2 lemon
A small handful of cilantro, finely chopped
A small handful of mint leaves, finely chopped
4 leaves Bibb lettuce or Boston lettuce, chopped
2 tomatoes, sliced
4 brioche rolls or grilled naan breads
Serves 4
Preparation
In a large bowl, combine the chicken or lamb with the curry paste (or seasoning blend) and cinnamon; season with salt and mix thoroughly. Score the mixture into four equal portions and form them into patties slightly thinner at the center than at the edges for even cooking and to ensure a flat surface (burgers plump as they cook).
Heat the EVOO, one turn of the pan, in a large skillet over medium-high heat. Cook the burgers, flipping once, 10 minutes for medium lamb burgers (adjust the cooking time for rarer or more well-done burgers) and 10-12 minutes, or until the juices run clear for chicken burgers.
While the burgers are cooking, in a small bowl, stir together the yogurt, garlic, lemon juice, cilantro and mint. Season the lettuce and tomatoes with a little salt.
Place the burgers on the roll bottoms or on one side of a naan and top with yogurt sauce, lettuce, and tomato. Set the roll tops in place or fold the naans over the burgers.
May 26, 2012
Adorable, Durable Glass Straws
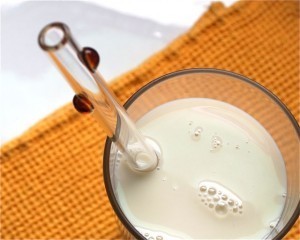
How cool are these glass straws?! Glass Dharma, a company in Fort Bragg, California, makes these straws by hand out of the same material as Pyrex, so they’re nearly unbreakable. They look beautiful and they feel good to the touch.
Why would you want to use a glass straw? Well, you may have noticed that food that touches plastic takes on a plastic flavor, so drinking from glass just tastes better. Also, there’s been a lot of news recently about the toxins in plastics, so choosing non-plastic eating utensils like plates, forks, cups, and straws seems like a good idea.
Environmentally, plastic straws are a real bummer. Although lots of straws are recyclable, most go into the trash. We throw away roughly five hundred million straws daily. FIVE HUNDRED MILLION! And that’s just in the United States. Many end up in oceans, lakes, and rivers, where they are lethal to the seabirds and sea mammals who mistake them for food.
There’s a lot to like about these glass straws. You can order them plain, or decorated with multi-colored dots. My favorite is the straw that’s bent so it tilts over your cup! The straws come with a cleaning brush, and you can order a carrying case if you want to take them on a trip. Glass Dharma has a lifetime warranty on the straws if one happens to break.
Some tips on how to use and maintain glass straws:
Store them in a tall glass jar where they will be seen and used.
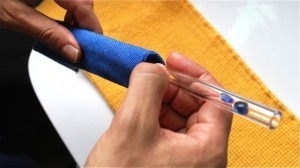
Wash the straws after each use with soap and water. Use the cleaning brush that comes with the straws.
Sanitize straws in the dishwasher. They’re dishwasher and microwave safe.
If the straws start to look cloudy, soak them in white vinegar and clean with the brush.
If you need a glass straw on the go, wrap it in a cloth or stash it in a cute hemp carrying case.
Check out Glass Dharma’s site for ordering info.
Louisa Shafia is a cook with a passion for healthy eating. She recently penned Lucid Food: Cooking for an Eco-Conscious Life, a collection of seasonal recipes and eco-friendly advice on food. To watch her cooking videos, see her recipes, and find out about her cooking classes, go to lucidfood.com.
May 25, 2012
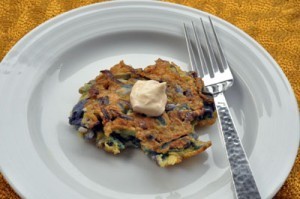
Savory Red Cabbage and Onion Pancakes with Spicy Chili Mayonnaise
I’ve been on a red cabbage kick lately and until recently, I never really ate the stuff. On Saint Patty’s Day I whipped up a delicious Braised Cabbage and Apples but I never ventured passed that. Until recently when one was staring at me in the supermarket. I swear I’m not cracking up. It looked so happy and colorful and just wanted me to take it home. So I did! And I found out that I really, truly love red cabbage! love everything about it, the color, the crunch and the mild but slightly sweet flavor. It’s delicious!
I had a hunk of cabbage leftover after my salad today and I was itching to use it up, so I figured savory pancakes would be a fun way to eat it. I’m big on savory pancakes like these Ricotta and Spinach cakes that my kiddos adore! This time, my idea was to riff off of the Japanese Okonomiyaki pancakes using red cabbage instead of white. As with every recipe, there are a million versions Okonomiyaki, and they are all very different but they usually call for cabbage (white/green kind), scallions, eggs, flour and whatever other meat/veg you have on hand. today I had very little in the fridge and pantry, so I knew I wasn’t going to make anything close to the traditional recipe. It didn’t matter because I figured I could still make something delicious with a similar flavor profile with whatever I had on-hand. You can definitely swap in white cabbage for red and scallions for red onion but, like I said, this is what I had on-hand and it worked out beautifully. I paired it with a simple dipping sauce made from mayonnaise and hot chili sauce.
The trick to these pancakes is slicing the cabbage super-duper thin. Use a mandolin if you have it or a very sharp knife (watch those fingers!). The pancakes cook up quick so the cabbage stays crisp which is something I really enjoy. If you want a softer texture to the cabbage, feel free to saute the cabbage and onion before adding to the pancake batter. Make them smaller in size and serve them as an appetizer or as a main course served alongside a lovely salad or brothy soup. So next time a cabbage is staring at you in the supermarket, don’t pass it by. Take that little guy home and have some fun in the kitchen! I bet you won’t regret it. I didn’t.
Red Cabbage and Onion Pancakes
Serves 4-6
Ingredients:
5 eggs, beaten
2 tablespoons soy sauce
1 tablespoon sesame oil
1/2 teaspoon salt
1/2 teaspoon pepper
1/3 cup all-purpose flour
2 cups red cabbage, very thinly sliced
1 small red onion, very thinly sliced
1/4 cup vegetable oil
Instructions:
1. Whisk together the first six ingredients until a thin batter forms. Stir in cabbage and onion.
2. Heat two tablespoons of oil in a large skillet over medium heat. Using a 1/4 cup measuring cup, ladle the mixture into the skillet. Cook each pancake until golden brown on each side, about 3 minutes per side. Add additional oil to the pan as necessary and repeat the process with remaining batter. Serve with Spicy Chili Dipping Mayo (see below for recipe).
Chili Mayonnaise
Ingredients:
3/4 cup mayonnaise
2-3 tablespoons of asian chilli sauce or your favorite hot sauce
Instructions:
1. Place mayonnaise and chili sauce into a small bowl. Stir to combine and serve alongside pancakes.
Christina Stanley-Salerno is a mama, recipe developer, food stylist, photographer and blogger atTakeBackYourTable.com. She loves cooking for and with her family. Life is hectic, but Christina is passionate about mealtime because she believes that family meals are the glue that holds everyone together. Creating simple, quick and healthy meals is her specialty and her trick to keeping the family meal a reality, even on busy weeknights.
Follow her on Twitter @TakeBackTables
May 24, 2012
Homemade pancakes
My dad was weekend breakfast duty guy when I was growing up, and he typically stuck to eggs and french toast. We always used pure maple syrup, and it had to be warmed. I used to frequently sleep over at a friend’s house and Mrs. Butterworth was their family’s syrup of choice. I begged my mom to get it, but it never happened. Of course she knew best.
I am the weekend breakfast chef around here and I continue the tradition of warmed real syrup - the only way my kids will have it as well. The tradition continues. I happened to have some leftover buttermilk last weekend so I made these very soft and fluffy buttermilk pancakes. If you don’t have buttermilk on hand, the second recipe is equally tasty.
Buttermilk Pancakes
Ingredients
2 cups flour
2 teaspoons baking powder
1 teaspoon baking soda
1/2 teaspoon salt
3 tablespoons sugar
2 large eggs, lightly beaten
3 cups buttermilk (be sure to shake it up first)
4 tablespoons melted butter
Directions
Heat griddle to 375 degrees. Whisk together flour, baking powder, baking soda, salt, and sugar in a medium bowl. Add eggs, buttermilk, and 4 tablespoons butter; whisk to combine. Batter should have small to medium lumps. Prep your griddle by spraying with nonstick cooking spray or coating with butter.
Pour 1/3 cup pancake batter, in pools 2 inches away from one other. When pancakes have bubbles on top and are slightly dry around edges, about 2 1/2 minutes, flip over. Cook until golden on bottom, about 1 minute. Repeat with remaining batter. Serve warm.
Old-fashioned Pancakes
Ingredients
• 1 1/2 cups flour
• 1 tablespoon sugar
• 1/2 teaspoon salt
• 2 3/4 teaspoons baking powder
• 1 large egg, lightly beaten
• 1 1/4 cups milk
• 3 tablespoons melted butter
Directions
In a large bowl, whisk together the flour, sugar, salt, and baking powder. Make a well in the center of the flour mixture. Add in the egg, milk, and 2 tablespoons of the butter. Whisk from the center, slowly incorporating the flour. Rest the batter for 10 minutes.
Heat a griddle over medium-high heat (to 375 degrees F). Prep the griddle with non-stick cooking spray or butter. Pour 1/4 cup of batter for each pancake. When bubbles rise to the surface, flip the pancakes, slightly reduce the heat, and cook until the bottoms are golden and the centers are cooked, about 1 minute. Serve warm.
May 23, 2012
Black and white cupcakes
I have a black and white cookie recipe that I really like and was excited to stumble upon these black and white cupcakes in my Bon Appetit cook book. What a great idea. The cupcake is very similar to the black and white cookie - a cakey, kind of dense texture with a slight lemon flavor. These would be great for a barbecue or picnic this holiday weekend.
Black and White Cupcakes (from Bon Appetit Coookbook)
(click here for printable recipe)
Ingredients
For the chocolate frosting:
1/4 cup whipping cream
1 tablespoon light corn syrup
4 ounces bittersweet or semisweet chocolate chocolate chips
1/2 teaspoon vanilla extract
For the white frosting:
1 cup powdered sugar
2 tablespoons whipping cream
2 teaspoons fresh lemon juice
For the cupcakes:
3 large eggs
1 teaspoon vanilla extract
1 teaspoon lemon zest
1 1/2 cups cake flour
3/4 teaspoon baking powder
1/4 teaspoon salt
1 1/4 cups sugar
3/4 cup (1 1/2 sticks) butter, room temperature
1/3 cup buttermilk
Directions
For the chocolate frosting:
Bring cream and corn syrup just to simmer in heavy small saucepan over medium heat. Remove from heat. Add chocolate and vanilla; whisk until melted and smooth.
For the white frosting:
Whisk all ingredients in small bowl to blend. Let both icings stand 1 1/2 hours at room temperature to thicken.
For the cupcakes:
Preheat oven to 325°F. Line 12-cup muffin tin with paper liners. Whisk eggs, vanilla, and lemon zest in medium bowl to blend. Mix cake flour, baking powder, and salt in another medium bowl. Using electric mixer, beat sugar and butter in large bowl until well blended, stopping occasionally to scrape down sides of bowl. Gradually beat in egg mixture. Beat in dry ingredients alternately with buttermilk in 2 additions each.
Divide batter among cups. Bake until tester inserted into centers comes out clean, about 25 minutes. Cool cupcakes in pan on rack 5 minutes. Remove cupcakes from pan and cool completely.
Spread chocolate icing over half of each cupcake. Spread white icing on second half of each cupcake. Let stand until set, about 1 hour.
May 21, 2012
Need More Calcium? Try Black Sesame Seeds
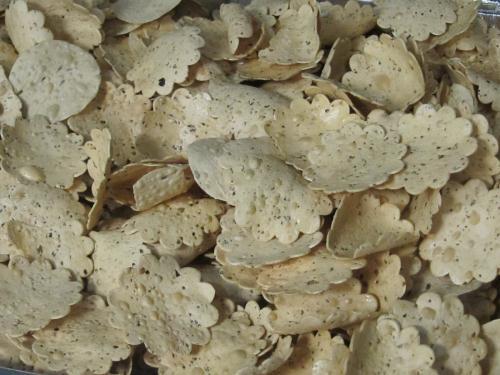
Crisp black sesame seeds are my latest discovery at the Japanese market. They’re great for giving a rich, nutty flavor to just about anything, and they look striking as a garnish, too. As people throughout Asia have known for thousands of years, sesame seeds have powerful health properties.
Doctors of traditional Chinese medicine prescribe black sesame seeds for increasing energy, relieving joint pain, and for nourishing dry skin and thinning hair. In China, black sesame seeds are used everywhere from stir-fries to desserts to the ever-present toasted sesame oil.
In the west, black sesame seeds are known to be a great source of both calcium and magnesium, and they’re highly recommended for preventing osteoporosis. The key to making the calcium available for absorption in your body is to grind the seeds. Just put them in a mortar and pestle or an electric spice grinder and grind enough to last for a month or so, or fill a pepper grinder and grind the seeds as needed.
In Japan, sesame seeds are part of an everyday seasoning called gomasio, a mix of ground sesame seeds and salt. Gomasio is used to season food just like salt, but because it has so much flavor from the sesame seeds, you use a lot less salt. Mix up a batch of gomasio and keep it on your table with the salt and pepper. Add a spoonful to baked goods, breakfast cereal, or the flour coating for fish. Look for black sesame seeds in health food stores and Asian food stores, or order online from a reputable spice company like Penzey’s.
Japanese Gomasio
The traditional Japanese way to make gomasio is to grind it by hand in a suribachi, a Japanese mortar and pestle. Hand grinding is believed to preserve more nutrients than electric grinding. Avoid storing the gomasio in plastic, as it contains toxins that can leach into fat-soluble foods like sesame seeds.
1 cup black sesame seeds
1 rounded tablespoon sea salt
If the sesame seeds are raw, toast them in a 350-degree oven for about 5-10 minutes, until you just start to smell the seeds. Transfer the seeds to a plate and cool to room temperature.
Combine the seeds and salt in a mortar and pestle or a spice grinder. If grinding by hand, mix until the sesame seeds turn into a coarse, textured powder. If using a spice grinder, pulse for a few seconds at a time, and grind until the seeds are just broken down. Overgrinding can turn the mixture into a paste.
Store in a clean, dry container at room temperature.
Louisa Shafia is a cook with a passion for healthy eating. She recently penned Lucid Food: Cooking for an Eco-Conscious Life, a collection of seasonal recipes and eco-friendly advice on food. To watch her cooking videos, see her recipes, and find out about her cooking classes, go to lucidfood.com.
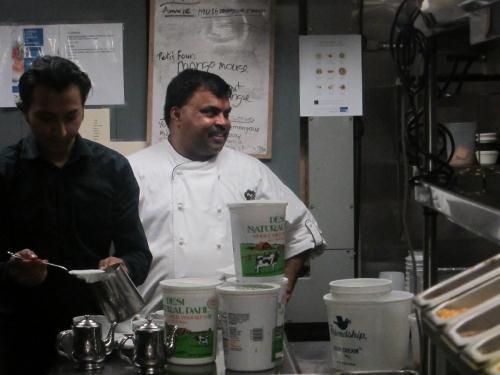
India, A Country Of Many Cultures And Curries - Part 2
Goan food in a nutshell is ‘vibrant’. The dishes are interesting and just a glimpse at their elements will indicate a ‘more than meets the eye’ story. Goa, situated in West India, is distinctly different to the rest of India. Creating a patchwork in this otherwise non-pork and beef eating blanket, one can commonly finds pork and beef on the menu and of course thanks to its lovely coastline; fish. It may seem surprising and inconsistent at first blush, but to understand the history of Goa, it couldn’t have been any other way. A state whose origins were planted in Hinduism only to experience 400 years of Portuguese colonialism will certainly communicate this through its way of life, language and food.
A Goan kitchen will look very different to that of the Punjabi North. Open the refrigerator and expect to find coconut milk, grated coconut, kokum (a sour fruit used in savory cooking) and the citrus note curry leaf. From the Portuguese influence, the savory dishes incorporate vinegar, sour fruits (guava, passion fruit) and pork dishes (pork vindaloo).
Today’s dish is a Goan seafood curry that we make at Tulsi. The dish is well balanced in terms of sweetness from the coconut, acid from the yoghurt and heat from the roasted spices. Each mouthful will yield a cultural dialogue of two very different cultures coming together and producing a harmony of flavors.
Goan curry works well with all pearls of the ocean. Baste a piece of salmon in the sauce or cook it with a combination of shrimp, fish and scallops and if you’re not in the mood for seafood, swap it out for chicken or vegetables. All combinations work. Throw on your beach flip-flops and unwind as you eat this curry ‘Goan style”
Goan Curry
Ingredients
Spice mix
1 tsp. ground black pepper
1 tsp. cayenne pepper
2 tsp. ground coriander powder
1 tsp. cumin seeds
2 tbsp. desiccated coconut (shredded and unsweetened)
¼ cup water
1 lb large shrimp, peeled and de-veined
Kosher salt
1 medium onion, finely diced
1 tbsp. ginger and garlic paste
1/2 teaspoon turmeric
3 cups tomato sauce
A handful of fresh cilantro, chopped
Method
1) Except for the desiccated coconut, roast the spice mixture until aromatic, remove from heat. Add the desiccated coconut and grind with ¼ cup water until it is a wet paste
2) Add oil to a hot pan, sauté onions until translucent, add ginger and garlic and cook until they lose their raw flavor. Add the turmeric and season with salt, cook for a couple of minutes
3) Add the tomato sauce and the wet paste and cook until the oil separates. Check for seasoning. Add the shrimp and cook until the shrimp is translucent in the center. Garnish with cilantro
Saira Malhotra is a classically trained French chef and graduate from the French Culinary Institute. A British born Punjabi, Saira has grown up around food which started from her family pizza business in a small suburb of London. Having studied in France and Italy and living in the Big Apple for the past 12 years, Saira has brought her European, Asian and American influences together via the palate and communicated through her food blog ‘Passport Pantry’.
May 17, 2012
Dark chocolate brownies
Over the past year I have experimented with at least 12 different brownie recipes and while all have been good, I haven’t hit on a go-to brownie recipe yet. I made this dark chocolate brownie recipe from Joy the Baker (who found it in Bon Appetit) and it is the current leader in the brownie race. I am surprised because I usually like a chewy brownie and these were a little cakey but dense and delicious.
Dark Chocolate Brownies (from Joythebaker.com)
Click here for printable recipe
Ingredients
8 ounces unsweetened chocolate
12 Tablespoons (1 1/2 sticks) butter
1 1/3 cup all-purpose flour
1 teaspoon baking powder
1/2 teaspoon salt
2 cups sugar
4 large eggs
2 teaspoons vanilla extract
confectioners sugar for dusting, if desired
Directions
Preheat oven to 350 degrees F. Line a 9×13-inch baking pan with foil and spray the foil with non-stick cooking spray.
Melt butter and chocolate in microwave-proof bowl and melt in microwave, stirring frequently to avoid scorching. Stir until chocolate and butter are completely melted. Whisk together flour, baking powder and salt and set aside.
In a medium sized bowl, whisk together sugar, eggs, and vanilla extract. Whisk until pale and thick. Pour the chocolate mixture into the egg mixture. Whisk until completely incorporated. Add the flour mixture all at once and whisk to incorporate. Pour into the prepared pan and bake for 25-30 minutes, or until a skewer inserted in the center comes out clean. Let cool and dust with confectioners sugar if desired.
Rachael Ray's Blog
- Rachael Ray's profile
- 296 followers


