Rachael Ray's Blog, page 88
July 25, 2012
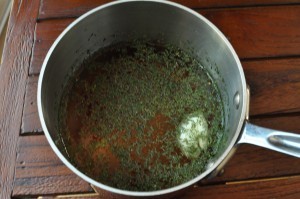
Herb-alicious Rice Meatballs, Lactose and Gluten-free!
Classic Italian meatballs get a boost of fat and flavor from grated Parmesan, while breadcrumbs make the texture fluffy. And who doesn’t love them? Juicy, plump, and aromatic, little parcels of ground meat bubbling away in a rich sauce are irresistible.
Although I’ve always associated meatballs with Italy, it turns out that people throughout the world have their own version of this savory delicacy. From Turkey to India to Sweden to Iran, you’ll find delicious variations, many of which use no bread or cheese.
In Iran, for example, meatballs are made with white rice, which helps to bind the meat and make every bite tender and soft. Rice is a great jumping-off point for making meatballs that are flavored however you like, and are easy on the digestive system. At this time of year, when fragrant green herbs are everywhere, from farmer’s markets to backyards, make your meatballs stand out with a fresh taste of the garden.
Here’s an easy recipe for rice meatballs seasoned with basil, parsley, and oregano that will be a hit with gluten and dairy-free eaters, and anyone who enjoys a good meatball!
Meatballs with Fresh Herbs and Rice
Makes 26 meatballs
Ingredients
1 white or yellow onion, coarsely chopped
4 cloves garlic, crushed
1 cup fresh basil
1/2 cup fresh parsley
1/4 cup fresh oregano
2 cups cooked white rice, any kind
1 pound ground turkey, chicken, or beef
1 egg, whisked
6 tablespoons cooking oil
1/4 cup tomato paste
2 1/4 cups hot water
Chile flakes, for garnish
Salt and freshly ground pepper
Instructions
Combine the onion, garlic, herbs, and rice in a food processor and pulse until coarsely ground. Transfer to a large bowl and add the meat and egg, along with 2 teaspoons salt and 1 teaspoon pepper. Mix well. The mixture should be dry and easy to form into balls. At this point, you can cover the meat and refrigerate for 24 hours.
Form the meat into balls the size of heaping tablespoons. Heat a large skillet over medium heat with 3 tablespoons of the oil. Add half of the meatballs and brown them for 6-8 minutes. Remove, and brown the rest in the remaining 3 tablespoons of oil.
Caramelize the remaining half an onion in the oil that’s left in the skillet. Add the tomato paste, water, and 1 teaspoon salt. Bring to a boil, then lower the heat and place the meatballs in the sauce. Cover and simmer gently for 30 minutes, or until the meatballs are cooked through. Season with salt and pepper, and garnish with chile flakes. Serve warm, with salad and a fluffy cooked grain like rice or quinoa.
Louisa Shafia is a cook with a passion for healthy eating. She recently penned Lucid Food: Cooking for an Eco-Conscious Life, a collection of seasonal recipes and eco-friendly advice on food. To watch her cooking videos, see her recipes, and find out about her cooking classes, go to lucidfood.com.
Frozen Thai Iced Coffee
Somehow I made it thorough college without becoming a coffee addict. Who knows how that happened but I’m basically a tea drinker, unless we are talking about one of those fancy frozen coffee drinks which tastes more like dessert than coffee. Thanks to Starbucks and other coffee chains the world has become obsessed with them too but Lord knows they are an expensive habit and pretty unhealthy so I try to only have one once in a while.
The summer is here and my craving for icy, sweet coffee drinks gets stronger as the temperature rises. Luckily my neighborhood is free from fancy coffee chains so it has prompted me to play around with healthier, much less expensive coffee drinks right in my own kitchen. There’s really nothing to these drinks. All you need is a blender, some ice and an imagination. It’s a great use for cold, leftover coffee and by making your own you can control the calories that you put into them.
I’ve always loved Thai iced coffee but never made one at home. After some research I realized just how simple it is to make a delicious Thai iced coffee at home and even decided to one up my local joint’s recipe by serving it blended as a frozen coffee drink instead of straight up over ice. Let me just tell you this drink rocked my world. It’s only slightly sweet with a hint of spice from the cardamom and I just love how the texture of the crushed ice contrasts with the silky smooth evaporated milk/milk combination. To lower the calories even more, you can certainly use skim milk or light soy milk but the recipe serves 2-4 on a 1/4 cup of whole milk so you really aren’t getting much fat in it at all. Play around with the measurements to reach your desired level of sweetness but this version was just perfect for me. Refreshing, caffeinated and best of all, inexpensive—the perfect summer beverage if you ask me.
Frozen Thai Iced Coffee
Serves 2-4
Ingredients:
2 cups very strongly brewed coffee
1/2 teaspoon ground cardamom
3 tablespoons evaporated milk
1/4 cup whole milk
3 cups ice
Instructions:
1. In a pitcher whisk together coffee, cardamom, evaporated milk and whole milk.
2. Add coffee mixture to the blender and top with ice. Blend using the pulse feature until the ice is slushy-like but not too melted, you want some texture. POur into glasses and serve with a thick straw. Enjoy!
Christina Stanley-Salerno is a mama, recipe developer, food stylist, photographer and blogger atTakeBackYourTable.com. She loves cooking for and with her family. Life is hectic, but Christina is passionate about mealtime because she believes that family meals are the glue that holds everyone together. Creating simple, quick and healthy meals is her specialty and her trick to keeping the family meal a reality, even on busy weeknights.
Follow her on Twitter @TakeBackTables
Philly; Part 3 of 3
Half the fun of discovering a new restaurant is sharing it with people you know will enjoy it. As Rachael Ray’s resident restaurant guru, here’s an inside look at what I report back to Rach about some of my favorite restaurant finds and food experiences!
From: Kappy
To: RR
Sent: Wednesday, July 25, 2012 10:10am
Subject: Philly Series, Part 3 of 3
Oh yes, Ms. Ray…it’s Part 3 of my year in Philly food, 2011. I hope you’ve enjoyed it up to this point. I should add that I’m on track to keep this Philly train moving in 2012, as I’ve had some good eats there this year already.
The team behind Zahav Restaurant and Percy Street BBQ semi-recently opened a place called Federal Donuts. They serve coffee, homemade donuts and Korean-style fried chicken. An unusual combination indeed, but it’s working, and it’s working well. I was lucky enough to pop in just before they opened to get a sneak peek at the place. I tasted the chicken, which they serve with the option of a few different glazes on it, and I stuffed my face with some donuts, including Key Lime with Graham Cracker, Chocolate Glazed with Raspberry Filling and a coconut-topped donut with pineapple filling.  There are only a few counter seats where you can sit and eat, so it’s mostly for take-out. You’ve got to get there early, because they run out. And when they’re out, they’re out!
I had yet to hit up a food truck in Philly, so when I heard that Iron Chef Jose Garces had launched a truck called Guapos Taco Truck, I tracked it down and gave it a whirl. I tried a carnitas taco and a short rib taco as well as the esquites, which is essentially a version of the Mexican elote corn, but this version is cut off the cob. 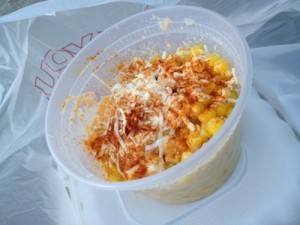
Speaking of Chef Garces, I asked some folks on his team where they go for down and dirty food when they go out for a casual meal. They directed me to Dim Sum Garden, right near the bus terminal. I knew I was in good hands when there was a woman sitting at a table making dumplings from scratch as I walked in.  I started with the marinated pork, which is unexpectedly served cold, but was packed with flavor.
  On the recommendation of my server, I also tried the pan-fried pork dumplings, along with the soup dumplings, which they are known for. Those and the scallion pancakes I added to the mix were both fantastic. I even brought some leftovers to the crew at work the next day and they loved it!
I don’t eat Philly Cheesesteaks that often, but when I do, I try to save the craving for when I know I will be in Philly. A guy I work closely with at QVC recommended Jim’s Steaks. He told me there was always steak cooking on that flat grill… and there was.  Although it was new to me, Jim’s has been around for a while and when you see it, you can tell it has some history. I got mine with onions and wiz. I know you don’t like the cheese sauce thing, but I felt like I had to. While everyone has their favorite place for a cheesesteak in Philly, Jim’s is right up there on top for me.
For one of my last meals of the year, I went to Top Chef winner Kevin Sbraga’s restaurant, Sbraga. I sat at the kitchen counter and watched the show while Chef prepared a selection of tastings for me and a guest. Kevin is not only entertaining in the kitchen, he’s talented as heck. We started with the Celery Royale with Lobster, a light and delicious custard-like dish. We then had a little piece of black cod with jalapeño and ranch popcorn. 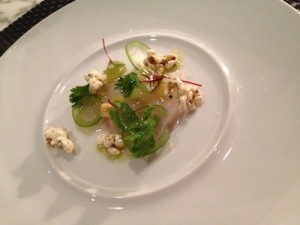 Next was something that I thought was going to be the end of me, but I’ll tell you this: if you ever have the chance to try Kevin Sbraga’s Foie Gras Soup, you must do so. I am not a huge foie gras fan, but I can do it in small doses. This soup had a light quality to it with a subtle richness of foie gras - it was truly unbelievable.
  I also tasted a black truffle risotto with a butternut squash puree in the middle and some sea bass with clams and lobster. I then dug into the ultimate meatloaf, which had foie gras folded into it. Ending the night on a high note was a pumpkin mouse with maple whipped cream.
  The menu is updated regularly with seasonal ingredients and to reflect Chef Sbraga’s most recent creations, but you can count on an incredible meal at Sbraga.
And that’s what’s on my plate!
~ Kappy
Federal Donuts
1219 South 2nd Street
Philadelphia, PA 19147
(267) 687-8258
www.federaldonuts.com
Guapo’s Taco Truck
www.guapostacos.com
Dim Sum Garden
59 North 11th Street
Philadelphia, PA 19107
(215) 627-0218
Jim’s Steaks
400 South Street
Philadelphia, PA 19147
(215) 928-1911
www.jimssteaks.com
Sbraga
440 South Broad Street
Philadelphia, PA 19146
(215) 735-1913
www.sbraga.com
Andrew “Kappy” Kaplan loves food. A professionally trained chef, by day he runs Yum-o!, Rachael Ray’s charity focused on kids and cooking, and keeps special projects running smoothly for her. By night he hops course to course, place to place, all across the country. He’s Rach’s own personal dining guide! You can also follow Kappy on Twitter to see what’s On Kappy’s Plate in real-time!
July 22, 2012
Light and Refreshing No-Cook Lemon Pasta Sauce
Lemon is one of those flavors that goes well with so many things. From beef to fish, pasta to potatoes, you name it and I’ve put lemon on it. The bright refreshing zip of lemon is my kind of flavor and summertime only heightens my love for this tangy citrus fruit.
This past week I was tired and hot and feeling too lazy to cook. I was almost ready to phone it in. I didn’t want anything too heavy or complicated. What I wanted was something light yet filling, something my whole family would enjoy and would get me in and out of the kitchen in a flash. I knew pasta would be easiest and loved by all but it definitely wasn’t red sauce kind of weather and the thought of standing over a bubbling pot of marinara made me cringe. So I stood in my kitchen scanning my surroundings when my giant bowl of lemons (a kitchen staple) gave me the inspiration for my new favorite summertime pasta dish—Lemon Spaghetti!
I knew the acidity of the lemon would pair beautifully with the salty sharpness of locatelli cheese and whisked in some olive oil to bring it all together into one creamy and refreshing no-cook sauce. Honestly, I can barely even call it a ”sauce” because it’s embarrassingly easy to make and so crazy good. All you need are lemons, locatelli cheese (Parmigiano works well too), and olive oil. I threw in crushed red pepper flakes for a little heat, but left it out of my kids portions and you can do the same for those who don’t like heat. What I love most about this sauce is that it can be made in less than the time it takes to cook your pasta and tastes just as good warm as it does at room temperature. Pair it with your favorite short cut pasta and you have yourself the perfect dish to serve at your next BBQ or picnic.
No-Cook Lemon Pasta Sauce
Serves 4-6
Ingredients:
Zest and Juice of 2 lemons
1/2 cup grated Locatelli Romano cheese (Parmigiano works well too)
1/2 cup extra virgin olive oil
1 teaspoon crushed red pepper flakes or black pepper (leave out for little ones)
1 lb spaghetti, cooked al dente according to your package instructions
1/4 cup finely chopped flat-leaf parsley
Instructions:
1. Boil your pasta according to package instructions until it is al dente. WHile the pasta is cooking make the sauce.
2. In a medium bowl whisk together lemon juice, zest, grated cheese, oile oil and pepper. Whisk until well combined. Pour sauce over drained spaghetti and top with parsley and an extra drizzle of olive oil before serving. Enjoy!
Christina Stanley-Salerno is a mama, recipe developer, food stylist, photographer and blogger atTakeBackYourTable.com. She loves cooking for and with her family. Life is hectic, but Christina is passionate about mealtime because she believes that family meals are the glue that holds everyone together. Creating simple, quick and healthy meals is her specialty and her trick to keeping the family meal a reality, even on busy weeknights.
Follow her on Twitter @TakeBackTables
Bright and Refreshing No-Cook Lemon Pasta Sauce
Lemon is one of those flavors that goes well with so many things. From beef to fish, pasta to potatoes, you name it and I’ve put lemon on it. The bright refreshing zip of lemon is my kind of flavor and summertime only heightens my love for this tangy citrus fruit.
This past week I was tired and hot and feeling too lazy to cook. I was almost ready to phone it in. I didn’t want anything too heavy or complicated. What I wanted was something light yet filling, something my whole family would enjoy and would get me in and out of the kitchen in a flash. I knew pasta would be easiest and loved by all but it definitely wasn’t red sauce kind of weather and the thought of standing over a bubbling pot of marinara made me cringe. So I stood in my kitchen scanning my surroundings when my giant bowl of lemons (a kitchen staple) gave me the inspiration for my new favorite summertime pasta dish—Lemon Spaghetti!
I knew the acidity of the lemon would pair beautifully with the salty sharpness of locatelli cheese and whisked in some olive oil to bring it all together into one creamy and refreshing no-cook sauce. Honestly, I can barely even call it a ”sauce” because it’s embarrassingly easy to make and so crazy good. All you need are lemons, locatelli cheese (Parmigiano works well too), and olive oil. I threw in crushed red pepper flakes for a little heat, but left it out of my kids portions and you can do the same for those who don’t like heat. What I love most about this sauce is that it can be made in less than the time it takes to cook your pasta and tastes just as good warm as it does at room temperature. Pair it with your favorite short cut pasta and you have yourself the perfect dish to serve at your next BBQ or picnic.
No-Cook Lemon Pasta Sauce
Serves 4-6
Ingredients:
Zest and Juice of 2 lemons
1/2 cup grated Locatelli Romano cheese (Parmigiano works well too)
1/2 cup extra virgin olive oil
1 teaspoon crushed red pepper flakes or black pepper (leave out for little ones)
1 lb spaghetti, cooked al dente according to your package instructions
1/4 cup finely chopped flat-leaf parsley
Instructions:
1. Boil your pasta according to package instructions until it is al dente. WHile the pasta is cooking make the sauce.
2. In a medium bowl whisk together lemon juice, zest, grated cheese, oile oil and pepper. Whisk until well combined. Pour sauce over drained spaghetti and top with parsley and an extra drizzle of olive oil before serving. Enjoy!
July 20, 2012
When Life Hands You Cherries…Reach For the Brandy
The allure of fresh cherries is undeniable. I’ll be hard-pressed to forget the first time I actually went cherry picking. Akin to apples, pears, peaches, and the like, cherries grow on trees in orchards. Beautiful, sweeping orchards with vistas the stuff that postcard dreamscapes are made of. So I embarked, armed with two 10-gallon buckets, a 4-footish-tall ladder, and the determination to hand-pick some cherries. The bonus smells of summer and sounds of ailing bird calls (a clever deterrent to “warn” hungry invaders of false danger, thus keeping them far away from the succulent ripe fruit) were the perfect Hollywood set-up on my quest to bring home one of nature’s most delicious creations.

Be not mislead, cherry picking virgins, by the equally insulting artificial colors and flavors pumped into foods that are pushed as “cherry”. The flavor of true cherry is really enjoyed in the fruit’s fresh form; hence my mission to preserve and enjoy it for as long as possible. While freezing freshly picked cherries is certainly an incredibly successful option, I opted for a preservative that would do better to complement my evening cocktail: brandy.

The dawn of cherry season this year meant bringing home a hand-picked haul from an orchard just outside Hudson in Columbia County, New York. Our brandied cherry coffers of the previous year stripped bare from routine enjoyment, I set my hands to “artisan” mode and commenced to pitting and preserving nearly 20 pounds of cherries….by hand…one, by one, by one… Many hours (and days of stained red fingertips) later, our cleaned bounty of seasonal perfection had been transformed into a singular bite of brandied bliss. I was confident that I’d once again found a way to keep the fickle window of seasonality open. So I stocked my basement shelves with jar after jar of affirmation that the taste of summer would be with me - or at least with my drink - all year long.

Brandied Cherries
To truly preserve these cherries for enjoyment all year round, they should be jarred. If you’re unfamiliar with jarring, it’s quite easy to do at home, but there are a few key safety tips that must be followed. Always read and follow the instructions that accompany your purchased jars.
When picking your own cherries, there are many different varieties available. Whether you’ve got a sweet tooth or enjoy a sour punch, use the kind you enjoy most. You can also flavor them however you like; I enjoy the robust spices used in this recipe, but feel free to mix & match them with your favorite flavors.
3/4 cup sugar
3/4 cup water
Juice of 1 lemon
1 cinnamon stick
1 vanilla bean, seeds scraped
2 star anise
1 pound cherries, washed and pitted
1 cup brandy
In a medium saucepan over medium-high heat, combine all ingredients except the cherries and brandy. Bring them to a boil, stirring occasionally, until the sugar has dissolved. Reduce the heat to medium, add the cherries, and simmer for 5 minutes.
Remove the pot from the heat, stir in the brandy, and let cool to room temperature. Refrigerate the cherries in an airtight container, shaking once daily, for one week.
Store the finished cherries in the refrigerator for up to three weeks.

July 19, 2012
Rice Pudding with An Eastern Promise
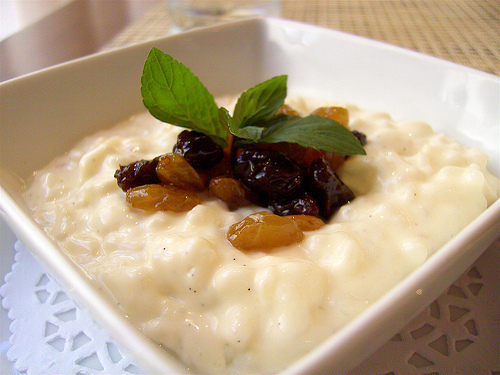
Mystery, fantasy, mastery. I am talking about Kheer or rather Indian Rice Pudding, a pudding that takes the mind and the senses to a very exotic place. This is not the first time a dessert has shown the ability to take us higher, but usually those deserts involve chocolate. This dessert is different. No chocolate, no alcohol, no obvious coating of the mouth - just sugar, milk, rice and a few other simple companions. Perhaps it is the fragrance of the cardamom? Or the hue of the saffron? May be it is the silkiness of the rice pudding against the robustness of pistachios and almonds – a playful experience don’t you think?
Whilst in many parts of the world, Kheer is considered comfort food, in India, Kheer holds a prestige value. Some loyalists like it just the way it is whilst others enjoy it in its full splendor with perhaps some nuts and dried fruits, a sprinkle of rose petals and edible silver leaf. You totally know where I am going with this.
Photo by RD Peyton
When I met my husband, 12 years ago, he very quickly revealed to me that kheer and tiramisu were his favorite desserts. My mother-in law had mastered how to make what I consider to be the perfect kheer, and she was happy to pass the baton forward. This is the recipe I share with you today with just a small tweak here and there. It is creamily delicious with a touch of cardamom to counterbalance the dairy.
Kheer
Ingredients
5 ½ cups of milk
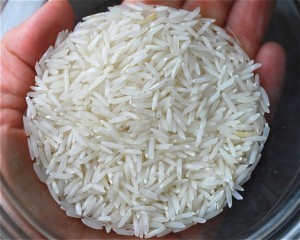
½ cup Basmati rice, washed and drained (available at any large supermarket)
4 strands saffron
3 pods of cardamom
¾ cup of sweet condensed milk
Sprinkle a garnish of any of the following: dried fruits, nuts, edible silver leaf
Method
1) In a heavy bottomed pan, bring the milk and rice to a boil and reduce to a simmer
2) In a mortar and pestle, break down the saffron strands and cardamom pods and add to the milk and rice
3) Simmer for approximately 40 minutes or until the rice is fully cook and begins to break down
4) Add the condensed milk and serve hot or cold with garnish sprinkled over the top
Saira Malhotra, is of British –Indian descent and is a chef, food writer and cooking instructor based in New York City. Raised in Hounslow, U.K, or rather ‘Little India’, where the air is aromatic with roasted spices, little did Saira know these moments would follow her from being a student in France and Italy to residing in NYC with her husband and kids and parlay themselves unexpectedly in to a culinary career. She is a graduate of the International Culinary Center in New York City. Come visit her at her food blog: Passport Pantry where she shares approachable and international recipes.
Brown lawn? Green your grass with this solution.
This summer’s heat wave is off the charts, and I don’t know about you, but at this point my lawn is very brown. You can go barefoot at your own risk as it’s basically turned to hay. Ouch. I recently came across this concoction which you mix up and apply to your lawn in order to transform it from brown to green. People have had mixed results, but it may be worth a try. Of course the sure-fire solution for a green lawn is to water your lawn regularly (water after sundown so the water doesn’t evaporate) but the best of us fall behind.
Lawn Tonic Recipe:
1 can of beer (regular, not light)
1 can of soda (regular, not diet)
1/2 cup dishwashing liquid (not antibacterial soap)
1/2 cup liquid ammonia
1/2 cup mouthwash
Mix it all together with a ten gallon sprayer attached to your garden hose. The soda and beer act as food for your grass. The dish soap is also an ingredient in a lot of gardening recipes. For really brown grass, spray this concoction every three weeks.
Note: Be sure neither the dish soap or mouthwash has bleach in their ingredients or there may be a dangerous chemical reaction with the ammonia. Read ingredients before mixing any chemicals!
July 18, 2012
Adventures in Baking: 15 tips I have learned first hand
I started a baking business from my home this past fall and it has truly been a labor of love. I have made literally thousands of cookies, bars, muffins, and cupcakes to the point that I gained six pounds (quality control) and my tongue hurt from all the sugar I was consuming during the height of Christmas holiday orders. People have ordered boxes of treats for countless reasons: teacher gifts, hostess gifts, thank you gifts to nurses stations, graduation parties, baby showers, wedding showers, dinner parties, baby gifts, 5K race awards, the list goes on. I have learned quite a few tips - first hand - during my adventures in baking that I though I would share:
1.) You are probably using too much flour - I realized I was for years. The key is to the fluffing. I now keep my flour in a big vat on my counter so the flour is fluffed during the transfer process from the bag to the vat. If you are measuring flour directly from the bag, spoon it into the measuring cup. Once the flour is in the measuring cup, use a butter knife or your finger to level the flour across the top of the measuring cup.
2.) Your baking powder may be expired - mine was as I unfortunately learned when I made a birthday cake that didn’t rise and tasted bad. Expired baking powder has an off flavor and it doesn’t allow your muffins, cupcakes, etc. to properly rise. Check the bottom of the can for the expiration date.
3.) All ovens are not created equal - mine is cool. Same goes for baking times - start checking ten - fifteen minutes prior to when the recipe says to take your item out of the oven to avoid burning.
4.) There is no perfect brownie recipe out there. I have been looking, and testing and still haven’t found my go-to. I like fudgy and chocolaty - not cakey and light on the chocolate. If you have one I’d love to try it.
5.) Do not put hot-from-the-oven baked goods straight into the fridge to speed cooling. This affects the texture of the finished product. Plus, just like proteins, baked goods benefit from “carry-over cooking” - meaning they continue to bake a bit after they come out of the oven.
6.) If you want a thinner chocolate chip cookie, decrease the flour. I like mine super thin and use over 1/2 cup less flour than most recipes call for.
7.) When it comes to eggs, butter, flour, and sugar, you can get away with the store brand, when it comes to chocolate and vanilla, buy the best quality you can afford - it makes all the difference.
8.) There IS a cut-out recipe that doesn’t require chilling the dough before you roll it out. And it’s delicious. Here it is.
9.) There is a whole art form to decorating cakes and cookies and piping decorations and letters. I have literally spent hours on blogs and You Tube researching. You Tube finally solved my frosting consistency issue after many days and attempts. It takes a lot of practice!
10.) If you do a lot of baking, buy in bulk. I buy flour, sugar, chocolate chips and brown sugar at BJ’s and a local bakery supply store. You’ll save a little but mainly save on trips to the store.
11.) You can freeze just about any baked good - cookies, brownies, even individually wrapped unfrosted cakes. Just be sure that they are completely cooled prior to wrapping tightly. I put cookies directly into freezer bags (squeeze the air out) and I wrap brownies, cakes and muffins first in a double layer of plastic wrap and then in freezer bags. Do NOT re-freeze after thawing.
12.) Line brownie pans with foil and cookie sheets with parchment paper for easy clean up. The foil-lined brownie pan also helps when cutting the brownies into even squares. I am obsessed with neat and evenly- cut brownies. When you lift the foil and brownies out of the baking pan at once, you can put the whole thing on a cutting board and cut the brownies evenly easier than if you are trying to cut them from the pan.
13.) When baking cookies, do not place your next batch of dough on a hot-from-the oven sheet to bake. Place the hot cookie sheet in your fridge to cool off for just a minute or two. When you bake cookies on a hot sheet the cookies will cook unevenly - the bottoms will over-brown and the cookies will spread.
14.) Salt is key in baking. It sounds strange but you need salt to bring out the sweet in your recipe. Don’t omit the salt (unless you need to for health purposes) and sometimes I add more.
15.) Salted butter is ok in baking. Most recipes call for unsalted butter. My family prefers salted butter on toast, etc. so that is what I have in my house. I don’t omit the salt called for in the recipe because of my salted butter, either. I actually may be a salt-a-holic.
Happy baking! Share your personal baking tips here!
Quick Bread and Butter Pickles
Making homemade pickles is easier than you think and so much fun! Kids will have a blast filling the jars with cucumbers and watching them transform into something salty and delicious. These bread and butter pickle chips have a slightly sweet and tangy taste that’s great for sammies or anytime snacking
Quick Bread and Butter Pickles
Makes 4 jars
Ingredients:
1 cup apple cider vinegar
1/2 cup white vinegar
1 1/2 cups water
1/2 cup brown sugar
1 teaspoon salt
1 teaspoon dried dill weed
1 teaspoon mustard seed
2 hothouse cucumbers
Instructions:
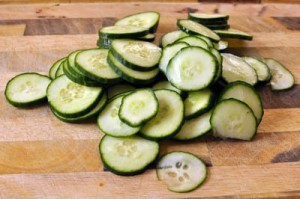
1. Slice cucumbers 1/4-inch in thickness.
2. Combine vinegars, water, sugar, salt, dill and mustard seed in a medium sauce pan and bring to a boil. Boil for 1-2 minutes, then turn off heat. Allow mixture too cool for 10 minutes.
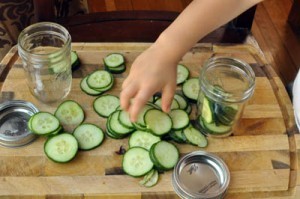
3. Place cucumbers into four small mason jars (or any jar or container with a tight fitting lid) making sure to fill each jar almost all the way full with cucumbers. Pour pickling liquid over cucumbers until they are full submerged in the liquid. Put the lids onto each jar and refrigerate for a minimum of two hours but overnight is best. Pickles may be stored in an airtight container in the refrigerator for up to three weeks.
Christina Stanley-Salerno is a mama, recipe developer, food stylist, photographer and blogger atTakeBackYourTable.com. She loves cooking for and with her family. Life is hectic, but Christina is passionate about mealtime because she believes that family meals are the glue that holds everyone together. Creating simple, quick and healthy meals is her specialty and her trick to keeping the family meal a reality, even on busy weeknights.
Follow her on Twitter @TakeBackTables
Rachael Ray's Blog
- Rachael Ray's profile
- 296 followers


