Rachael Ray's Blog, page 84
September 10, 2012
Chillin’ and Spillin’ and the ABCs on Back to School Stains
Wow hard to believe it’s almost three weeks since Luke left the nest! And, I’m happy to report that he’s doing BETTER THEN WELL and surprisingly so am I. Tears ‘n fears have been replaced by cheers, peers, chillin’ n spillin’: “Cheers” because when I pass by his room there aren’t piles of laundry waiting for me and “peers” as in I’ve had time to see peeps/friends that I’ve rarely had time to chill with or even just chat.
Please don’t get me wrong I do miss him but it’s sorta nice having the luxury of not rushing and sipping my coffee when it’s first brewed vs. nuked over and over. Tears and waves of missing him do happen and the smallest thing can trigger a good little cry…Like this morning driving by his grammar school and seeing a little boy on the ground crying and his mommy kissing the boo boo on his knee. Tears just started to flow… But, as both the little boy and I finished our cry, I got to thinking how I would get those blood stains out of Luke’s clothing-Fascinating thought, I know, but none the less something all we moms deal with at some point. So I thought I’d share that handy dandy tip along with other common BTS stain removal tips I learned to master over the years!
We begin with a few stain-removal musts:
o Pre-treat pronto so stain doesn’t set
o Test on small area to insure pre-treater doesn’t harm fabric/color
o Blot, never rub, unless otherwise mentioned
o Always put a cloth under the stained areas so you don’t wind up with two stains
o Never put in dryer ‘til it’s 100% out unless you would like it to be there permanently or want to turn their long-sleeved shirt into a short-sleeved one and pants into shorts
Now to the stains….But first for those who prefer to watch vs. read what follows, here’s a clip of yours truly sharing a bunch of my BTS tips and tricks with Kathie Lee ‘n Hoda on the Today Show:
Today Show - Back to School - Stain Removal from The Accidental Housewife on Vimeo.
SPIT ON BLOOD STAINS
That’s correcto, the natural enzymes in saliva help to lift the stain. Kicker is it has to be your own saliva in order for it to work…If it is, spit and gently massage it in then launder.
Alternatively, if it’s your little one’s:
o Blot excess
o Take hydrogen peroxide and apply with eye-dropper directly onto stained area
o Watch it bubble and let sit for 10-15 minutes
o Feel free to multi-task and continue cleaning your ‘lil one’s boo boo
o Run under cool water and/or launder immediately
USE A SPUD TO REMOVE MUD
No I’m not going off half-baked-the juices in a potato contain acidic astringents that help remove the stain!
o Remove as much of the excess as possible
o Cut a raw potato in half and gently rub the area with the white side of the potato-a circular motion is best
o Soak in cool water
o Launder par usual
o Nuke the other half for a tasty and healthy treat
GIVE GRASS STAINS A SHOT OF VODKA
My philosophy was a shot for the stain and one for me since it made the stain disappear regardless LOL! Kidding aside, vodka is an eco-friendly solvent as well as a natural cleaner and disinfectant.
o Douse a clean cloth with vodka and blot stained area
o Launder par usual
PRETTY IN INK-TAKE AIM WITH HAIRSPRAY
Photo courtesy www.iowatheatre.blogspot.com
Hairspray is made primarily from alcohol that is a natural cleaning aid. So next time your little one uses their pants as a notepad do the following: Please note it must be a brand like your mum used i.e. Aqua Net in that kitsch fish net aerosol can since it has a high alcohol content.
o Be sure to put a clean cloth under stained area
o Douse stained area with spray
o Blot with clean paper towels
o Repeat until majority of stain is lifted
o Rinse with cool water and launder par usual
SPILLIN’ ‘N CLEANIN’ COFFEE W/HAND SANITIZER
I remember the days when trying to get Luke to school on time, I’d be in my car hitting those speed bumps and next I knew I was wearing my coffee. And, on those days when I forgot my handy dandy Tide to Go or Clorox Bleach Pen, I always had a bottle of hand sanitizer WITH ALCOHOL for Luke’s little friends to use upon entry. Good news is if you put a dab on your coffee stain and gently work it in it will help lighten the stain. The glycerine will loosen the stain and the alcohol will lift it. Launder after par usual and consider putting more milk in your coffee so the stain won’t be so dark since there are always bumps in the road LOL!
Visit my website www.juliestips.com And, PLEEEZE if you have any tips, questions on cleaning, organizing, home repair, manicure-friendly decorating or want to know what my favorite type of vodka is please leave your comments right here!
September 8, 2012
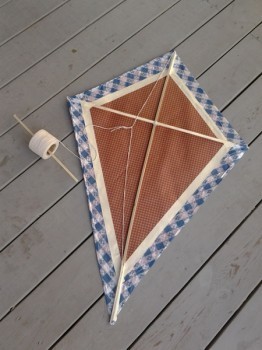
Fall is The Perfect Season for Kite Making!
There’s something really soothing about flying a kite. It takes a little effort—and a little wind—to get it flying, but once it’s up there it can be smooth sailing for a while.
Materials:
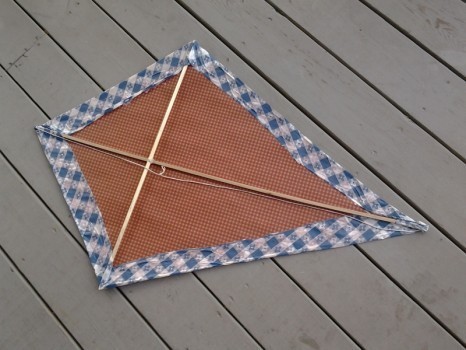
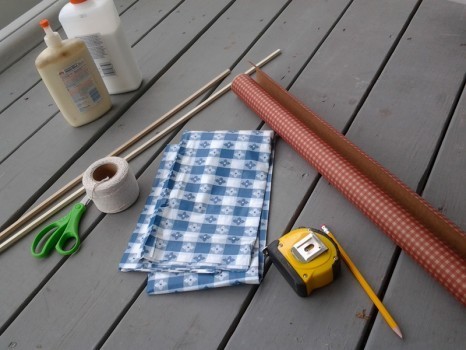
This handmade kite is pretty easy to make, and can be made out of anything that can be cut with scissors: paper, plastic, or fabric. For a really durable kite, use rip-stop nylon. I used what I had on hand: a very cheap plastic tablecloth, some patterned brown craft paper and masking tape.
The kite frame is made of two 36″ dowels, 5/16″ thick, cotton twine and wood glue.
Assembly:
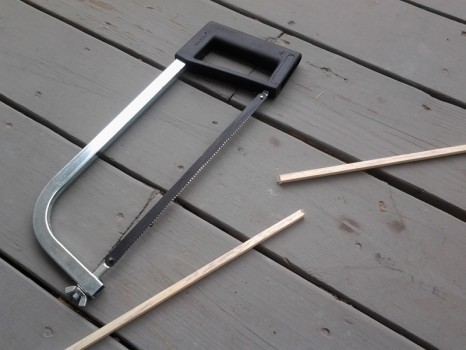
Cut a foot off one of the dowels so it’s 24″ long. Reserve the cut end.
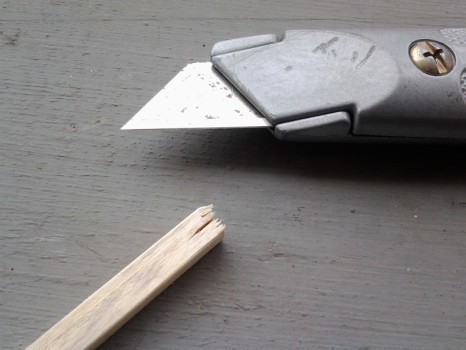
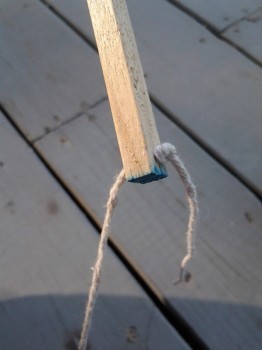
Cut a 1/4″ notch into the end of each dowel.
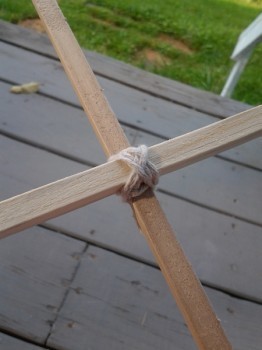
Measure a foot down on the longer dowel and mark it with a pencil. Using wood glue, glue the shorter dowel in the center at the mark, and then secure it by wrapping the cotton twine around a few times.
Cut a piece of cotton twine long enough to run around the perimeter of the kite. Tie a knot in one end and wedge it into the bottom notch of the kite frame.
Run the twine around the kite, wedging the twine into each notch. Make the kite’s bridle—the thing you will tie your kite string to—by wedging another piece of twine into the top and bottom of the kite frame. Tie a loop near the center of the bridle.
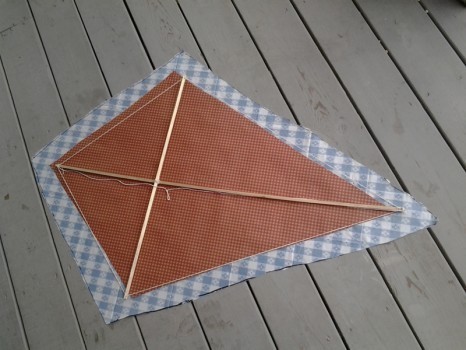
Use the kite frame as a guide to cut the material for the kite. Since I’m using two different materials, I made the plastic tablecloth a couple inches larger than the kite frame, so I have excess to wrap around the edges.
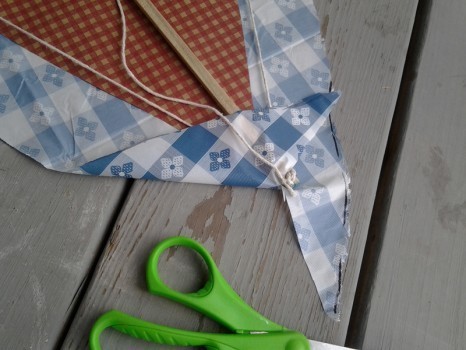
When wrapping the edges, make sure you make a slit in the top and bottom so the bridle will move freely.
Glue the wrapped material to secure. To further strengthen the kite, and to make it look a little neater, add a strip of masking tape. Tie a kite string, or the remaining cotton twine to the kite. Use the reserved dowel piece as a handle for the twine.
How to fly the kite:
A kite needs at least a 5mph wind to stay up—look for blowing tree branches. If wind is more than 25mph, you may want to avoid flying a paper or thin plastic kite because it may get damaged. However, a kite made from the rip-stop nylon will probably be fine, but it will be challenging to keep it from dipping and crashing.
Have your back to the wind. Hold your kite at the bridle point and let the line out. If the wind is just right, your kite should start to rise. Sometimes, the kite needs a little help, so you may need to jump start it by running with it behind you.
Let the kite fly away a little by letting out some of the kite string. Keep letting out the string to let the kite fly higher and higher.
Make sure you fly your kite in a clear area away from trees and power lines.
If the kite begins to dip, tug on the string or run a little to stabilize.
When finished flying the kite, slowly start to pull it in by wrapping the string around the spool. It helps to have a friend catch the kite, so it doesn’t crash to the ground.
Have fun flying your kite!
Find me on Facebook!
September 6, 2012
Cod In Coconut Sauce
Today was my little guy’s first day back at school. Now a first grader, he ran in without looking back, gosh how different did this scene compare to last year when the doe-eyed kindergartner clung to me. The morning couldn’t have been more perfect. The sky was a little grey with a few droplets of rain and the promise of a new season was on its way. It was clear in both our minds that summer fun and frolic was over as was the anarchy that comes with it. No more negotiation on staying-up for ‘one more hour’, the 15 minute I-Pad rule would be reinstated and no more late evening strolls to the ice cream parlor. It was time to center ourselves again and reconnect with routine.
To set the tone, meal times have always been an important place to start. Preparing something of a less whimsical and spontaneous nature, but rather, a dish cooked with all purpose and intention. A dish that fills the home with aromas and the soul with gratification. It felt too soon for anything braised, oh no, I would save that for the winter, but a dish with some kind of sauce is what would be needed, a dish whose appeal could also be valued through the nose as the eyes are closed.
I decided on making a cod coated in an aromatic coconut sauce and served it with rice. Oh how his eyes lit up with the whiff of steamed rice and savory coconut sauce with lemony notes.
Ingredients
2lb fish, cut into 4 pieces
¾ tbsp. of coriander powder
Salt and pepper
Cooking oil
1 can coconut milk
1 Lime Juice
1 tbsp. ginger
Curry leaves
1 tsp. Mustard seeds
¼ tsp. cumin seeds
1” stick of lemon grass
A few sprigs of cilantro
Rice – 2 cups, cooked according to instructions
Method
Making the sauce
1) Heat the oil in a pan, add the cumin and mustard seeds, as the cumin deepens in color and the mustard seeds begin to bounce off the pan, add the curry leaves for a minute until they curl up around the edges and crispen. Add the ginger, salt and pepper and cook until the ginger becomes golden
2) Add the coconut milk and lemon grass and allow to reduce until it coats the back of a spoon (it will reduce to about half)
3) Check the seasoning and squeeze in the lime juice
Fish
1) In a plate, combine the coriander powder, salt and pepper
2) Rub the mixture on one side of the fish
3) Heat a pan with 1 tbsp. oil and add the fish, with seasoned side faced down first. Cook for a couple of minutes (to get a nice crust) and then flip to cook the other side. Check that it is cooked by inserting a knife in to the thickest part. If the knife is hot, remove from heat
4) Spoon the sauce over each fillet of fish and serve with hot rice
5) Splash a few droplets of lime over each dish for added zing, top with cilantro
Saira Malhotra, is of British –Indian descent and is a chef, food writer and cooking instructor based in New York City. Raised in Hounslow, U.K, or rather ‘Little India’, where the air is aromatic with roasted spices, little did Saira know these moments would follow her from being a student in France and Italy to residing in NYC with her husband and kids and parlay themselves unexpectedly in to a culinary career. She is a graduate of the International Culinary Center in New York City. Come visit her at her food blog: Passport Pantry where she shares approachable and international recipes.
September 2, 2012
Leave The Sun. Make The Cannoli Ice Cream
Summer. Is. Not. Over.
I repeat.
Summer. Is. NOT. Over.
It may be September but I REFUSE to let go of Summer just yet. My mind is telling me that Fall is creeping up on us like a sneaky little thief in the night but there is still time left to enjoy the warm weather and I full intend on doing that. Case in point: I took out my ice cream maker yesterday for the first time the entire summer. I know, it’s kind of weird because by this point in the season i normally would have been on my 10th batch of homemade ice cream. But with my recent move and the general craziness of life, I just never got around to making any.
Since this was my first batch of ice cream this year, I wanted to make something special and a little unique. I had been craving this crazy delicious cannoli ice cream that I used to get at a bakery back when I lived in Brooklyn so I figured I’d give it a whirl and see what I could come up with. The texture of this ice cream is less creamy than traditional ice cream because of the ricotta. It literally tastes like a frozen cannoli which is, OMG, so good! I even thought about using it to fill cannoli shells instead of on a traditional ice cream cone, but I was too lazy to try and track some down. If you can find cannoli shells, I think that it would make a gorgeous and unexpected presentation.
This ice cream is best eaten directly from the machine but it can certainly be frozen in an airtight container for scooping later. Just not that the texture change slightly making a little harder to scoop. Either way, it’s delicious!
Cannoli Ice Cream
Serves 4
Ingredients:
1 (15 ounce) container of ricotta
1 cup whole milk
1 cup granulated sugar
Zest of one orange
1 1/2 teaspoons vanilla extract
3/4 cup semi-sweet chocolate chips (mini is my fave kind to use)
Instructions:
1. Place your ice cream container into the freezer to freeze according to your ice cream makers directions.
2. In a food processor combine ricotta, milk, sugar, orange zest and vanilla. Process just to break down the ricotta curds slightly, about 2 minutes. Assemble your ice cream maker, turn it on and pour ricotta mixture into the drum. Churn the ice cream for as long as your makers directions specify. Add in the chocolate chips about 5 minutes before the end of the freezing process. Serve.
Christina Stanley-Salerno is a mama, recipe developer, food stylist, photographer and blogger atTakeBackYourTable.com. She loves cooking for and with her family. Life is hectic, but Christina is passionate about mealtime because she believes that family meals are the glue that holds everyone together. Creating simple, quick and healthy meals is her specialty and her trick to keeping the family meal a reality, even on busy weeknights.
Follow her on Twitter @TakeBackTables
August 31, 2012
Supermarket Score! Beer
“Supermarket Score!” is all about taking a look at the great deals and delicious meals that are hidden in lesser-known yet commonly found supermarket items.
With Labor Day weekend and an early kick-off to football season coming just down the pike, I think it’s important to take a little time to celebrate where we are. To reflect on the memories of a great summer. To pop open a few beers and kick back with some friends. To thank the sweet merciful heavens for sending the children back to school (c’mon, I know you all are thinking it…).
But let’s go back to that beer part for a second. The great thing about beer - well, one of the many great things about beer - is how universal it is beyond just the backyard cookout cooler. Check out these Supermarket Score! ideas that’ll turn a 12-pack of PBR cans from an afterthought to the star of the show.
BEER-ARITAS AND SHANDIES

We’ve all enjoyed a lovely Prosecco cocktail before, yes? A glass of sparkling wine mixed with some orange juice or even a little Campari? Well then why not do the same with beer? When you’re planning drinks for this weekend’s Labor Day BBQ, stretch your beer a bit further with a pitcher of one of my two favorites. The half beer-half margarita combo (known affectionately at our house as the “Beer-arita”) is always a winner or, for those looking for something a bit lighter, make up a Shandy with half beer and half lemonade (a shandy is a general term used to describe drinks made with equal parts beer and something non-alcoholic like ginger ale, lemonade, or citrus soda). Both of these are super flexible as you can just eyeball the amounts and they’re delicious with whatever variety of beer you like to enjoy.
BEER-BRAISED TACOS

This is an essential to file away for football season! Nothing feeds a crowd of hungry guys like a taco bar, and nothing says “man food” like calling it “beer-braised”. Bust out your slow cooker and leave a pot of your favorite pulled pork on (or pull some inspiration from one of Rach’s recipes), swapping out the juice or stock for beer (I’d recommend going with something lighter here, like an ale or lager). Put that down on the table and it’s “Game On!” for beer-braised ribs, beer-braised chicken, beer-braised brisket… You get my drift?
THE BEST BEER & CHEESE DIP EVER

Now I have to admit, I totally understand beer & cheese dip, but I was never overly “wow’d” by it. That is until I made it for myself at home. And served it with the largest platter of Rachael’s pretzel chicken known to mankind. This is a dinner I’ve often repeated and recommend that you do the same. Start by making up a béchamel, which is the cheese sauce that is the base for macaroni & cheese (if you don’t have a family favorite, do a search in Rachael’s archives, she’s got a bunch of them). Make the sauce with half milk and half light beer as the liquid and stir in a mix of Gruyere & sharp cheddar cheeses along with a big dollop of spicy mustard. Taste. Devour. Repeat (often).
Patrick W. Decker’s life revolves around food. Always has. Probably always will. As a graduate of The Culinary Institute of America and past member of the culinary team on Rachael’s daytime talk show, he now works as a food stylist and producer in NYC by day, and a food writer and recipe developer at his home in New York’s Hudson Valley by night. You can see what he’s up to by following his latest twEATs on Twitter at @ patrickwdecker or visiting his website at patrickwdecker.com .
August 30, 2012
Vetri’s Italian Gastropub (Philly)
Half the fun of discovering a new restaurant is sharing it with people you know will enjoy it. As Rachael Ray’s resident restaurant guru, here’s an inside look at what I report back to Rach about some of my favorite restaurant finds and food experiences!
From: Kappy
To: Rachael
Sent: Thursday, August 30, 2012 11:15am
Subject: Vetri’s Italian Gastropub (Philly)
Hey Rach - I just got back from Philly after your last QVC appearance. The night before I was there, I ate at Marc Vetri’s newest restaurant, alla SPINA. They say it’s their version of an Italian gastropub. It was a pretty cool concept, but very casual compared to some of his others. We started with the Shaved Vegetables with Bagna Cauda [pictured above] (for those of you reading this email on my blog, bagna cauda is traditionally made with olive oil, butter, garlic, anchovies and herbs). I wouldn’t let the staff clear this from the table because I kept going back for more! We also snacked on the Porcini Deviled Eggs. These looked like traditional deviled eggs, but there was a porcini puree on half of them. [image error] Along with those we ordered the Homemade Pretzels with Beer Cheese - I mean, how could we not order them?! But as another - lighter! - option we added the Cucumber Salad with Pepperoncini. This was really good, but I think they had substituted the pepperoncini with Fresno peppers (which I was okay with). [image error]
Now, I’ll try just about anything once or twice, including various pig parts, such as pig tail. I don’t recall ever having it before, but they had Crispy Pig Tails with Fennel Agro Dolce on the menu and beyond just being something different to try, quite frankly, it was the best dish we had! The meat was tender, yet super crisp, and had a sweet and sour-y fennel sauce. We also popped a couple fried snails, which were served with a garlic and parsley tarter sauce. [image error]
Moving down to the sandwich portion of the menu, we split the Mortadella Hot Dog served with spicy pickles and a red cabbage slaw, all on a brioche bun. This was pretty tasty and reminded me of a lighter bratwurst. We also had a few bites of the Veal Milanese Hoagie on a sesame seed bun. The server said this is what Chef would eat if he were there, and I could see why. [image error] Not that we needed it, but to finish we ordered the sundae: fiordilatte soft serve, dark chocolate covered bacon plus and caramel covered pretzels. It was good and all, but a few bites were all I needed!
I know you’re a big Italian food fan, so if you have a dinner available in Philly, you’ll definitely dig this place.
alla SPINA
1410 Mt. Vernon St
Philadelphia, PA 19130
(215) 600-0017
www.allaspinaphilly.com
And that’s what’s on my plate!
~ Kappy
Andrew “Kappy” Kaplan loves food. A professionally trained chef, by day he runs Yum-o!, Rachael Ray’s charity focused on kids and cooking, and keeps special projects running smoothly for her. By night he hops course to course, place to place, all across the country. He’s Rach’s own personal dining guide! You can also follow Kappy on Twitter to see what’s On Kappy’s Plate in real-time!
August 29, 2012
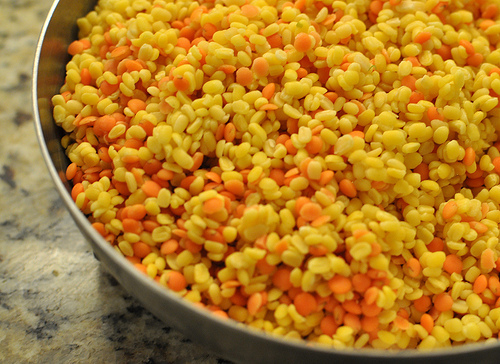
Taking Care Of Business With Yellow Lentil Soup
So it came to an end. Yes, three wonderful weeks and then I was dumped and all my love left me with was some undesirable ‘junk in my trunk’. I am talking about my vacation in London and then Dubai. From pork pies and scotch eggs one minute to shwarmas and baklava the next, is it any wonder that things are feeling a little tight at the seams?
Well, it is Day 1 and I am back in New York. The party is over and I need to cleanse. For a few days, brown will be the new ‘white’ in my life and it will cast its net over my choices for both bread and rice. I know there are no quick fixes but when I need some instant gratification, I kick off my complex carb and healthier meal plan with yellow lentil soup.
Photo by Jasleen Kaur
Also known as Moong Massar Daal, this soup is clean tasting and can be washed over some boiled brown rice, served with whole grain bread or eaten completely commando. It is made with four core ingredients and seasoned with just a couple more. It makes you feel great, but then with a clever combination of ingredients, is it any surprise? Here is a peek at what this soup is believed to be doing for you:
Photo by Stephen Jackson
Lentil – Dietary fiber and Vitamin B1, high in protein and Iron
Ginger – Apart from its characteristic fragrance, ginger helps relieve gas pains and bloating
Turmeric – Anti-inflammatory properties and also facilitates detoxification of the liver
Cumin – Aromatic in a dish with a higher purpose: Digestion
Recipe For Yellow Lentil soup
photo by Isabelle Boucher
Ingredients:
½ cup yellow lentils, washed and drained
½ cup pink lentil, washed and drained
1 medium onion, finely diced
1 tsp. cumin seeds
½ tsp. turmeric (haldi) powder
Tbsp. freshly grated ginger
2 tbsp. oil
Salt and pepper to taste
*feel free to add some carrots or spinach
Method:
1) In a saucepan, heat the oil and when hot, add the cumin seeds. They will immediately turn a couple of shades redder. Add the onions and sweat until tender.
2) Add the ginger and if using vegetables, add now. Sauté until for a couple of minutes. Add the salt, pepper and turmeric and cook for a minute.
3) Add lentils and 3 cups of hot water to the pan. Bring to a boil and reduce to a simmer. Cook for approximately 20 minutes until the lentils are tender and the soup looks cloudy. If the consistency is thick and slushy, add more water (should be as thick as cream of tomato soup). Adjust salt and pepper levels as desired
Saira Malhotra, is of British –Indian descent and is a chef, food writer and cooking instructor based in New York City. Raised in Hounslow, U.K, or rather ‘Little India’, where the air is aromatic with roasted spices, little did Saira know these moments would follow her from being a student in France and Italy to residing in NYC with her husband and kids and parlay themselves unexpectedly in to a culinary career. She is a graduate of the International Culinary Center in New York City. Come visit her at her food blog: Passport Pantry where she shares approachable and international recipes.
5 Star Bees make 5 Star Honey at the Waldorf Astoria, NYC
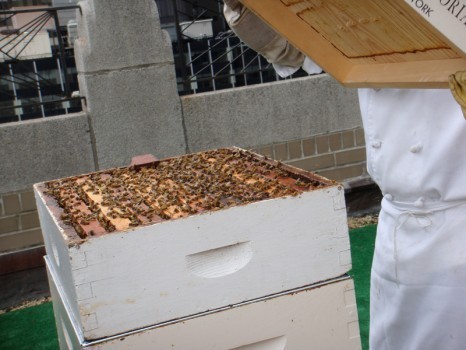
The famous hotel and historical landmark, The Waldorf Astoria, in New York City has some sweet new residents: six bee hives on the rooftop just off the 20th floor house an estimated 300,000 bees. The hives are the first step toward creating a seasonal garden which will help the hotel provide more fresh, local and sustainable food.
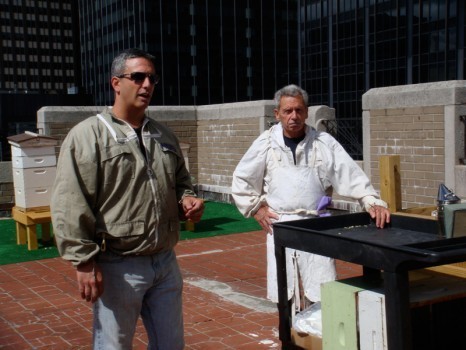
The hotel’s beekeeper, Andrew Cote, learned beekeeping from his father (right) as a boy. This former college professor never intended to go into beekeeping professionally, but he was excited about doing something related to nature in an urban environment. Plus, he loves working with his dad, so he left his teaching job to make a career out of his boyhood hobby.
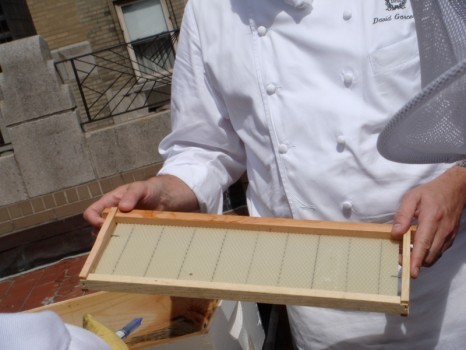
Each section of the beehive contains several frames where the bees make their honey. Before placing the frames in the hive, the frames are coated in wax to help the honey making process along.
Making honey is almost strictly women’s work with the hives containing about 1% male bees. Apparently, bees don’t produce much honey in the first year, so the hotel had to special order more mature bees from Pennsylvania, Georgia and California. The bees feed on the mostly landscaped New York City vegetation, and are quite safe and secure away from predators and other dangers way up on the hotel’s rooftop.
When the hive cover is removed, the bees seem too busy to realize their honey is about to be stolen by the chef’s at the Waldorf=Astoria, and delivered to the kitchen 18 floors below.
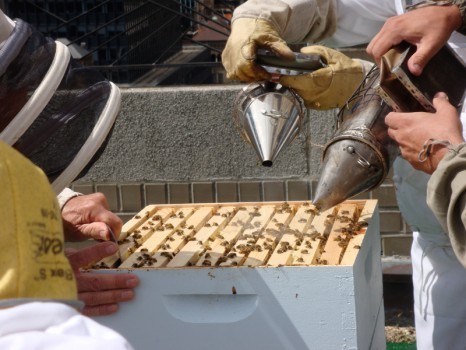
Burlap is burned in these smokers to keep the bees docile while each frame is removed. It is amazing that Andrew and his father are so comfortable around the bees they don’t wear gloves. Andrew says the gloves just get in the way, and he ends up accidentally killing bees if he wears them.
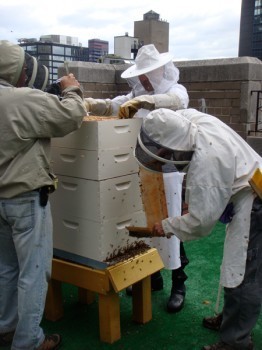
As the frames are removed, the bees are brushed away. It felt good to be watching this at a distance because the bees seem to get very annoyed during this process.
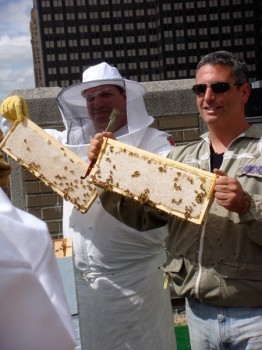
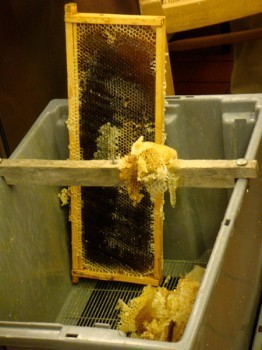
The first frames are out, and filled with honey and wax.
Once several frames are removed, Chef David Garcelon, who spearheaded the hotel’s beehive initiative, helps pack them up for transport to the kitchen.
The kitchen in the Waldorf=Astoria is quite amazing. It spans the entire building which is a full city block. Each restaurant in the hotel has its own kitchen, but this main kitchen helps with things like baking and prep work, and also prepares meals for services like room service.
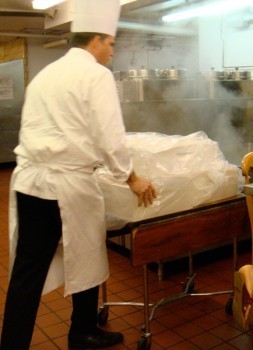
The frames from the hives are wheeled in; this is just a fraction of the honey being harvested today.
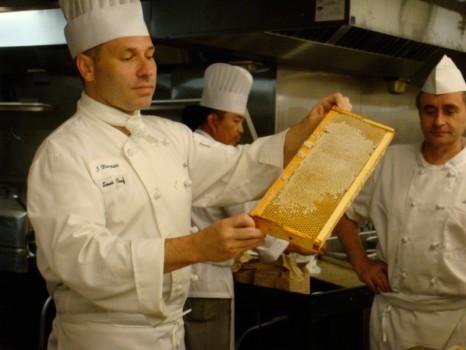
All the chefs at the hotel seem excited about this sweet addition to their kitchen. This frame is held proudly so everyone can marvel at the bees handy work.
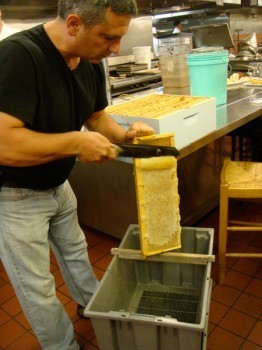
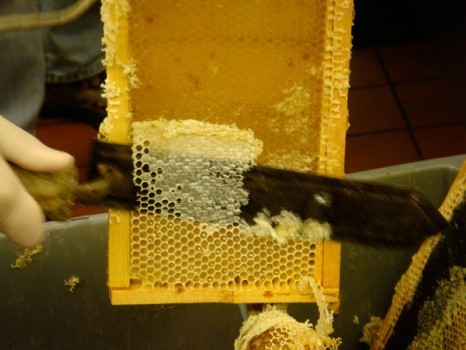
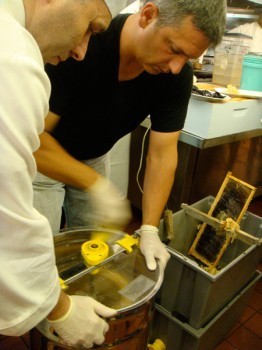
Time to extract the honey. Andrew uses a hot knife to remove the top layer of wax.
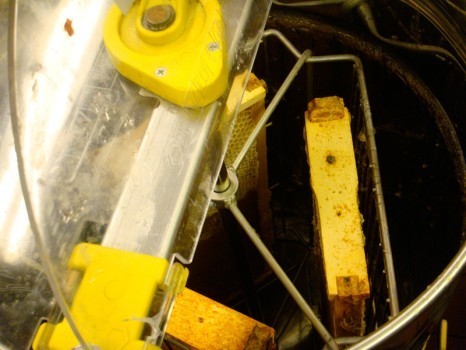
The frames are placed into the centrifuge to separate the wax from the honey. Andrew said using this type of device was kind of new to the beekeeping world, but it’s a quick and easy way to get the job done.
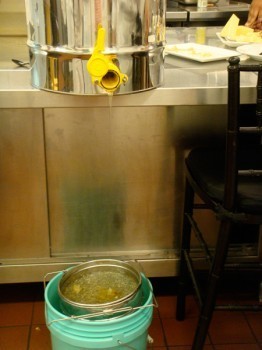
The honey is drained from a spigot and strained through a sieve.
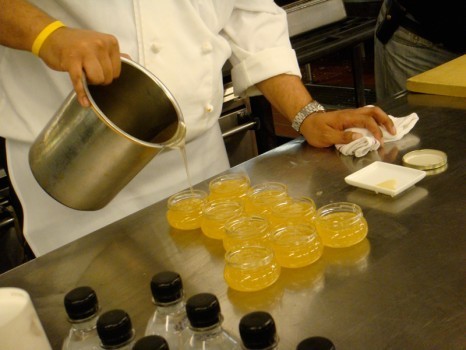
While all of this was going on, the chefs whipped up an amazing sample of the types of food that might include their home grown honey: fine cheeses and nuts drizzled with the sweet stuff, appetizers like quail eggs and caviar, beef tartar, smoked salmon and chicken skewers all flavored with a touch of honey.
Honey ice cream topped waffles with a tequila lime sauce, homemade ice cream cones and a sponge cake topped with honey whipped cream and strawberries ended our luncheon.
There’s something about eating in the kitchen that makes food better. Of course, it can be really special getting dressed up and going to a beautiful hotel like the Waldorf=Astoria for a great meal, but there’s nothing like the coziness of eating in the kitchen—even in one as expansive as this.
Our hosts at the hotel were nice enough to bottle up a little honey to take home. I can’t decide what to make first. Maybe just a drizzle over an English muffin with some tea, or maybe I’ll try to make my own version of honey ice cream—yum!
Special thanks to everyone at the Waldorf=Astoria for making this a really amazing experience!
Waffle Recipe
Ingredients Needed
15 ounces flour
1 1/2 teaspoons salt
3 1/2 ounces Roof Top Honey (or whatever honey you have)
2 eggs
1 ounce of dry active yeast
10 1/2 ounces of butter
6.75oz sparkling water (room temp)
9-1/2 ounces pearl sugar or scone sugar
Mixing method:
Allow eggs and sparkling water to come up to room temperature. Melt the butter on the stove or in the microwave and allow to cool to lukewarm. Beat the eggs well and add the butter, yeast, honey and water. Mix well to incorporate. Place the flour in a mixing bowl with a dough hook, than slowly add the egg, butter, yeast and honey mixture. Beat the dough for about ten minutes on speed 3. After mixing the dough allow to rise in a warm place for 15-30 minutes, keep covered with towel or plastic wrap. 5 to 10 minutes before baking, add the pearl sugar. Pre-heat the waffle iron then place dough in the center. Bake until golden browned. Serve with your favorite toppings and ice creams.
Roof Top Honey Ice Cream makes about 12 cups of ice cream!
11 cups heavy cream
5 1/4 ounces sugar
19 ounces of Roof Top Honey (or whatever honey you’ve got)
32 egg yolks
Mixing method:
In a large sauce pot bring cream, sugar and honey to a boil, then lower the heat. Take some of the hot cream and slowly add it to the yolks to temper them. Place the egg yolk mixture back into the hot cream and cook, stirring constantly on low heat until the mix slightly thickens to coat the back of a spoon. Once thickened take off the stove and immediately cool down in an ice bath with cubes and water. The Ice cream base is best the next day out of the cooler.
Find me on Facebook!
August 28, 2012
TEARS ‘N FEARS: Empty Nesting ‘n Keeping My Son’s Dorm Room Clean Enough!
OMG! I just left my lil 6ft. 1” 170 lb. son Luke at college! AND, now two boxes of tissues later and my eyes swollen from crying like a baby (thank god for sunglasses!), I’m realizing the words ‘empty nester’ apply to me! Yikes, where did the last 18 years go! Wasn’t it just the other day that Luke and I were sitting in an empty kiddie pool laughing and being silly?
Now, here he is smiling and all and happy with his roomie Nick….
And, here I am sitting and writing this in a pool of happy/sad tears reminiscing about those days…Along with another box of tissues and a really, really big glass of vino!
The good news is the vino’s working and I’m thinking about the visions I had as I shopped for Luke’s dorm room of it looking like a scene from the classic flick Animal House. As a result, I outfitted his room with just enough items to keep it clean enough. So if you too have a bird leaving your nest read on so that when you visit your ‘lil one you don’t have to wear a bio-hazard suit or gas mask - A glass of vino while reading is optional!!
1. SURFACES: Two words: Disinfecting Wipes! I use them like tissues at home and have a container on my bathroom and kitchen sink (and even one in my car!). Hoping he’ll use them at least when and if he calls me (SEE P.S. at end) and I remind him to clean his doorknob, Game boy remote, mini-fridge handle, etc as we talk…NOT! And, yes a mother’s work is never done, I used a wipe to hopefully sanitize the mattress!
2. AIR: Given all the allergens, odors and other yuck that will be floating through his pint-sized space for deux. I went to Walmart and got him the Homes Personal Space Home Purifier (less then $34 and comes with a filter too!) which is a space-saving air purifier which traps and locks up to 99% of the germs, odor, dust and allergens in his room and uses my fave multi-taskin product: Arm & Hammer baking soda. So all he’ll have to do is turn on…did I say ‘all’? I meant all I had to do before I left!
3. DRAWERS AND CLOSETS: God knows what’s been in there or will be so first I cleaned his dresser drawers with a disinfecting wipe and then put in cedar and lavender drawer liners. The cedar repels pests and the lavender absorbs odors. Check out the ones at www.containerstore.com which are only $9.99 for a package of 6 and also get some hanging cedar blocks for their tiny closet.
4. MATTRESSES ‘N PILLOWS: I don’t even wanna know who nor what’s been on that mattress, but I do know dorm room beds are notorious havens for dust mites and even bed bugs! GROSS! So I bought CleanRest’s Zip ‘n Lock mattress and pillow encasements. I really like them since mites and bed bugs can enter where the zipper closes and these have a cool little plastic closure over the zipper so nuttin’ can get in. They’re avail at Bed Bath & Beyond www.cleanrest.com And, yes that’s Luke helping with his eyes closed!
5. BEDDING: Microfiber is what you want to buy for sheets, blankies and comforters since they’re STAIN resistant (and your child’s bed is going to be their dining room table and chairs not to mention the venue for other activities I’m trying not to imagine). They’re also WRINKLE resistant and dry much faster when and if they ever wash them. My son did volunteer that he thinks they’re incredibly comfy too!
6. STORAGE: As you can see in the pix above, I went for those that are clear, stackable, and on wheels so they’re easy to access. I opted for the type that close tightly like these Sterilite ones from Walmart since who knows what will be crawling around his room or if it’ll ever be cleaned. I put warmer clothing in one and extra toiletries etc in the other. Doesn’t Luke look thrilled that I did LOL!
7. LAUNDRY: I know lots of peeps suggest collapsible laundry baskets cause they’re space savers, but pre going off to college I used Luke as my very own lab rat and found that if the bag was folded i.e. not in obvious site-the floor became his laundry basket. Thus, I got one that is mesh i.e. ventilated since he will be throwing sweaty, damp stuff in there and mold ‘n mildew will come to roost quickly. I also attached with a string to the stand a sprinkle container of Arm ‘n Hammer Baking Soda which he can sprinkle into the bag to help absorb odors…
Ok, will he do this? Probably not, but ‘tis nice to dream and remember I am having that glass of vino! Oh, yes another idea to increase the possibility that they will throw it into the basket vs. on the floor is to make a sport of it and place a basketball hoop over the top. I’ll let you know if that works!
a. DOING IT! OK, so when they actually do laundry make it as idiot proof as possible: Get them TIDE PODS which I love and use as well. No mess, no measuring since one pod has detergent, stain remover, and brightener so all they’ll do is toss one of those babies in before putting in a load. Wish they made one that we could toss in their room to clean it…Hmmmm now maybe that’s my ticket to fame and fortune…or maybe it’s time for me to stop drinking!
P.S. PHONE HOME: Couldn’t resist this pillow and red ‘hot’ phone that plugs into his IPhone from www.dormify.com as a gentle reminder to buzz dear ole mom. Of course that probably will only happen when he needs money, is flunking a course or that he’s coming home for the weekend with laundry for yours truly to do! And, as a loving gesture that the pillow was not going to make the cut in his room, he threw it into the garbage…
Ouch!!! Clearly, twas time for me to leave…But in the spirit of Carly Rae Jepson’s hit song “Call Me Maybe”, hope springs eternal that Luke will call to just say ‘hey’ J
Visit my website www.juliestips.com and click on ‘BLOG’ top menu to see pix of Luke and I during the big day! And, PLEEEZE if you have any tips, questions on cleaning, organizing, home repair, manicure-friendly decorating or want to know what type of wine I paired my empty nest misery with please leave your comments right here!
Til next week’s Post from Hysteria Lane…Spread the glove!
BIO
JULIE EDELMAN
The Accidental Housewife
Julie is working mom and the go to gal for easy; real life time, money, and energy saving tips that maintain our home, family, sanity and manicure. And, though her solutions and tips cause Martha, Heloise and Ty to cringe, she brings a sense of calm, humor and camaraderie to millions like her who live on what she lovingly calls Hysteria Lane.
Julie appears regularly on the Today Show with Kathie Lee ‘n Hoda, and The Doctors. She is a New York Times best-selling author of The Accidental Housewife: How to Overcome Housekeeping Hysteria One Task at a Time and penned a second book “The Ultimate Accidental Housewife”-Your Guide to a Clean Enough House’. Julie is a bi-weekly featured columnist for Scholastic’s Parent & Child Plus iPad app; hosts a webisode series for FOXNEWS.COM, has her own site, www.juliestips.com and serves as a spokesperson for Habitat for Humanity. She tweets and Facebooks with her fellow (or is it feline!) accidental housewives regularly.
My Back to School Resolutions
My kids go back to school next Thursday and we have had a long, hot, fun summer. Summer with my kids always starts with the best intentions - I require time for school work every morning after breakfast - bang out those summer math packets! - insist on beds made, clothes picked up, let’s try and train the dog while we are at it.
As summer goes on, we slowly but surely fall off track until by August 15, there is no schedule, school work has been abandoned, and I close the kids’ bedroom doors in disgust to hide the mess. My younger daughter recently celebrated eight days without a shower - and no, swimming in pools, (as my husband calls them, “chlorine showers”) and lakes do not count as bathing. My older daughter has to read two books in the next week (enjoyable for some kids, an unbearable chore for her as she would rather play Bakery Story on my iPad or watch repeats of Good Luck Charlie for the tenth time) and she did a search on Amazon yesterday for “short books for 12-year old girls.”
I am no better off than my kids as laundry is piling up, my bathrooms desperately need to be cleaned, and cheese and crackers now serves as dinner if we have had late afternoon ice cream. That said, I am looking forward to back to school for the entire family, and I have made a few resolutions:
For my 7th grade daughter, I resolve to strike a balance (or attempt to strike a balance) of keeping abreast of her school work without getting over-involved. I have swayed to both extremes in the past and neither works. A constant battle. I also resolve to be patient with her sometimes insane and irrational moods and reactions. Remind her of her talents and strengths - often. I resolve to never laugh at her, even when she is being inadvertently hilarious. I resolve to remind my husband of this as well.
For my 5th grade daughter, I resolve to be patient with her fears of kidnappers and bad guys, which of course strike in the middle of the night when I am sleeping. I resolve to see her side as the “middle child” (her term, not mine), and spend some special time with just her.
For my 3rd grade over-achieving son, no resolutions needed. He can basically run this place.
For my husband, I resolve to keep the house in order (he referred to it as a “house of squalor” just this morning), the kids in order, and us in order as he embarks on opening a new business this fall.
For my 4-year old dog, I resolve to make sure she gets two walks each day, and to remain more vigilant and consistent with our training (stop her “counter surfing,” and stealth lounging on furniture).
For my 14-year old dog, I resolve to show him how much we love him in what is sure to be his final days. We thought he would leave us last fall but through sheer will he is hanging on, with a wagging tail.
And for me? I resolve to regain control of my life (questioning the use of “regain” - was it ever even gained? Oh well). Cookies don’t count as lunch. Say “no” more. Spend more down time with my kids. Make more time for my husband. Value time as a family.
Happy Back to School!
Rachael Ray's Blog
- Rachael Ray's profile
- 296 followers


