Rachael Ray's Blog, page 56
July 1, 2013
Grilling 105: Fish, Vegetables, and Fruit? Really?
I’m not going to lie to you. I don’t burn charcoal, clean grills, and stand in front of a fire on a hot day, so that I can grill vegetables. But I also can’t tell you that grilled vegetables, at least some vegetables, are approximately 200 times better than their steam or boiled equivalents. And fish…well, fish depends.
But let’s get to the tips right away.
Vegetables don’t slow cook on a grill. They brown and blister. You need to cut them about as thick as a thriving magazine, like Every Day With Rachael Ray or Esquire. You need to oil them, because oil makes them blister quickly, and helps keep them from sticking. And you need to salt them liberally with kosher salt, because you need to sprinkle everything with kosher salt that you plan on putting in a grill. I’m not kidding. I can’t think of a single food I have grilled without salting first. Well, there is one thing. And that is a peach.
The same goes for fruits. Most grilled fruit is a disaster. Grilled pipeapple is a wet mess. Grilled pear or apples just aren’t good. But you know what is good? Grilled peaches. It’s summer, so getting sweet peaches shouldn’t be a problem. Even if you live in Thunder Bay, Ontario, you can always get the Chilean ones. Cut them into thick wedges, find a hot but not crazy part of the grill.just sear them quickly: the only evidence of heat should be hot grill marks. All you are doing with grill here is caramelizing the surface, which was already sweet anyway, and then warming the rest, because warm things have more flavor than cold things. I have this for dessert, with a scoop of ice cream. You can’t beat it. You really can’t.
Fish is hard for even an expert cooker. Animals are all pretty much the same, once they are cut up into pieces. Look at a rib lamb chop, a rib pork chop, and a bone-on ribeye steak sometime. You are looking at the same part, performing the same function, in pretty much the same animal. The difference between a trout or sea bass vs. a greasy creature like a mackerel or salmon is enormous. Then you can add in the meat-like fishes, whose densely muscular bodies so resemble steak: tuna, swordfish, etc. They all cook at different rates and respond to hot fire in different ways. The best that I can do in advising you here is to do the following.
Don’t plan ahead what fish you want to cook. Go to a good seafood store, if you have one, or failing that the best grocery store in town. Ask the man what is best, and buy that. (I actually have never taken this advice, but I know I should.)
Big fishes should be cut up into thick steaks, and their skin should always be left on. Crispy salmon skill is one of the great delicacies, I think. Smaller, lighter, and / or flakier fishes need to be cooked whole. All kinds of fishes need quick, hot cooking.
Oil, salt….You’ve heard this one before.
An oily fish like a mackerel or sardines are going to tend to cause flares, given their tendency to drip melting fat onto open fires. This is actually a good thing, because the faster the heat blast, the less likely you are to burn the meat. That is assuming that you like your salmon steaks medium rare, like I do.
You don’t need to only use olive oil to flavor the surface; I’ve used everything from iberico ham and bacon grease to chile-infused grapeseed or peanut oil. It wouldn’t hurt to shutp whole fishes with springs of fresh rosemary and thyme and garlic. And of course, any kind of crispy browned fish needs oil squeezed over it at the end,
The stickiness factor. Whether you are cooking fruits, vegetables, or fish, is that you are really going to need a clean grill. It needs to be scrubbed hard, and then lubricated either with oil or some kind of weird product like Pam.
If I had to sum up all my advice on cooking fish, vegetables and fruit, it would basically boil down to this: use a medium-hot fire, clean grates, and cut it into the right size pieces to keep it from drying out. One of these days I’m going to make a serious effort to do all these things. But right now I just want a hamburger.
June 30, 2013
Asian Style Turkey Burgers With Apple Slaw
BBQ season is upon us and during this time of year I always find myself working on new burger recipes. I love playing around with flavor combos and different ground meats to make up something special and unique. Plus, it’s always fun to offer up a unique type of burger traditional beef one when you are entertaining.
I’m a big fan of turkey and chicken burgers because I don’t eat red meat but I find they are a hard sell to the die-hard beef lovers. I consider it a challenge to impress the traditionalists with exciting chicken and turkey burger flavors and try to top myself each year. This year I know I have found my winning burger and it’s my Asian Style Turkey Burgers with Apple Slaw. It’s the most incredible combination of sweet and salty. The sweet/tart flavor and crunchy texture of the apple slaw works perfectly on top of the hearty turkey burger. It’s flavorful without being overpowering and is such a nice alternative to traditional BBQ fare— perfect for summer entertaining. Enjoy!
Apple Slaw
Serves 4
Ingredients:
2 tablespoons rice wine vinegar
1/4 teaspoon salt
1 teaspoon sesame oil
1 small carrot, shredded or thinly sliced
1 scallion, thinly sliced
2 Granny Smith or fuji apples, thinly sliced or shredded
Instructions:
1. In a large bowl, whisk together vinegar, salt and oil. Add in carrots, scallion and apples and toss to coat. Refrigerate for once hour.
Asian Style Turkey Burgers
Makes 4
Ingredients:
1 lb ground turkey or chicken
1 clove garlic, minced
1 1/2 tablespoons sesame oil
1/3 cup Panko bread crumbs
4 tablespoons soy sauce
1/2 teaspoon ground black pepper
1 large scallion, thinly sliced
4 brioche buns or any hamburger bun you prefer
Instructions:
1. Preheat your outdoor grill to medium.
2. In a large bowl combine turkey, garlic, oil, soy sauce, pepper and scallions. Mix with your hands until just combined. Form mixture into four equally sized patties. Oil grill grates and cook burgers until well browned on both sides and completely cooked through, about 7 minutes per side. Serve on buns topped with apple slaw.
June 28, 2013
The Easiest 4th of July Party Decor EVAH!
You don’t have to spend a lot of time and money to make your place look festive for the 4th of July holiday. You don’t even have to be good at making stuff. These tips will make even the most artistically challenged Americans look like a patriotic design expert.
Independence Day Banner
This banner looks great indoors or out. All you need to make this adorable decoration is:
Red, white and blue napkins (paper or fabric)
Small binder clips
Any kind of twine or string
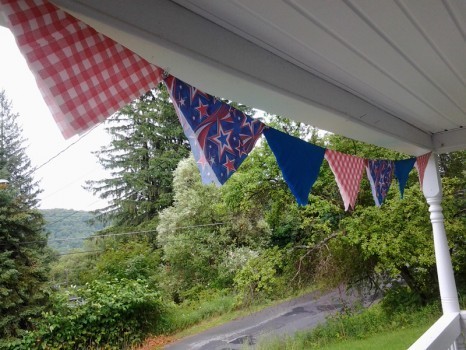
Measure the twine. I wanted my banner to run the length of the porch, so I brought the twine outside, ran it along the length of the railing, and cut—no rulers or tape measures required.
Hang the twine on some small wire nails (I used the existing nails usually reserved for my Christmas lights).
Unfold the napkin from the square it’s normally folded into, and refold it into a triangle.

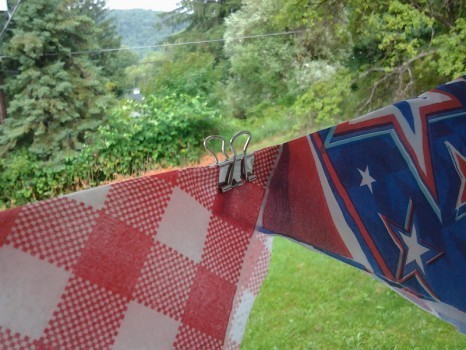
Using small binder clips (you could even use paper clips if you don’t have binder clips), clip the napkins onto the twine. I overlapped the edges of my napkins to cut down on the number of clips needed.
If using several different styles of napkin, alternate them for a festive look. This banner is so easy you could have the kids do it while you’re grilling your feast!
Potted Flags
This project is even simpler than the last.
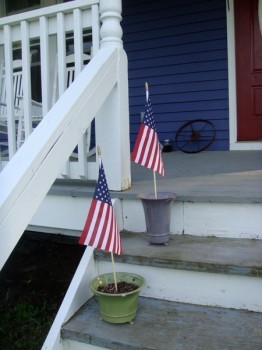
I would love to hang an American flag on the porch, but I just don’t have one big enough…so to make the house look festive, simply fill some decorative pots with soil (you could use galvanized buckets or window boxes too), and plant a little flag. These look so cute on the front steps!
Glow Stick Lanterns
If you’re planning on having your afternoon barbeque run into the night, these lanterns are the perfect decoration to come home to after the fireworks.
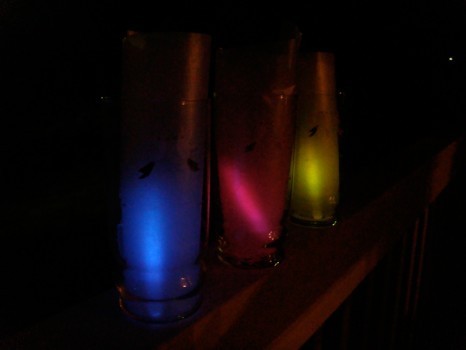
Simply, roll a pice of waxed paper or parchment paper into a drinking glass (or any kind of clear cylinder).
At dusk, unwrap a glow stick and bend it to crack it which activates it. Then place it into the glass. You’ll have a few hours of glowing light without using any fire.
Martha Washington’s Shrub: drink like the founders did
This recipe takes a little time an effort, but it can be done way in advance, so by the time your 4th of July party rolls around, you’ll be all set for cocktail hour.
I first had this drink in Philadelphia at the City Tavern which has been in business since Paul Revere road to Philadelphia to bring the news of the British government closing the port of Boston.
Apparently, Martha Washington used to make this cocktail. Usually it is made with rum, but the City Tavern also offers it mixed with champagne.
The raspberries give it a fruity flavor, while the vinegar keeps it from being too sweet. Mixing the berries with the vinegar and sugar helps to preserve them which is probably why it was so appealing in colonial times. Plus, the syrup probably helped to cut through the strong taste of the homemade alcohols of the day.
To make the raspberry syrup you will need:
raspberries
apple cider vinegar
sugar
water
I had use use frozen berries (10-oz. package) because the berries haven’t quite ripened in my part of the country yet.
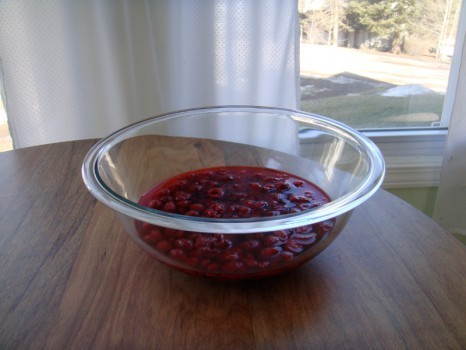
Use just enough vinegar to cover the berries so they are not floating. Let sit overnight.
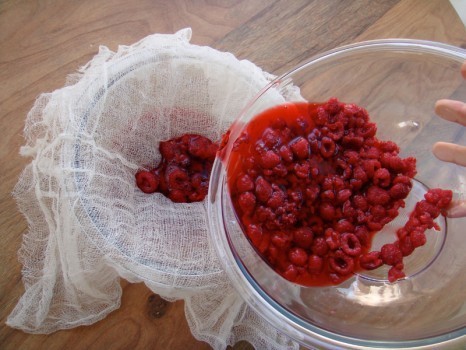
Strain the mixture through cheesecloth.
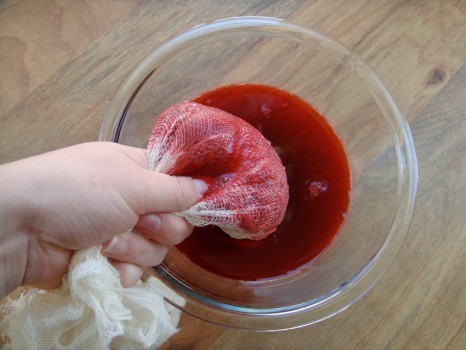
Squeeze as much liquid as you can from the cheesecloth. Discard the remaining berries and cloth (I threw mine in the compost pile).
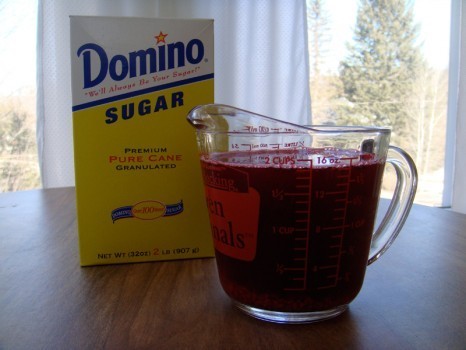
Measure the amount of liquid. You will need one part liquid to one part sugar. Since I had about two cups liquid, I needed about 2 cups sugar.
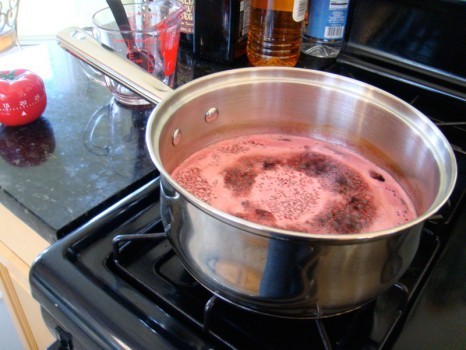
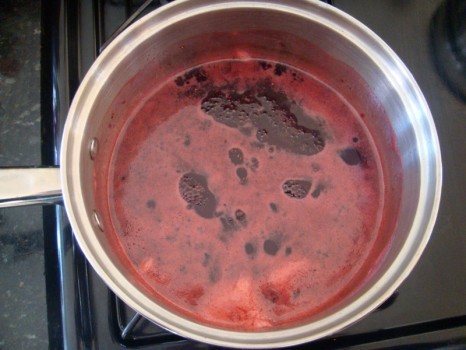
In a saucepan, add the raspberry liquid and sugar. Stir to dissolve and bring to a boil. Simmer for 20 minutes.
The mixture will reduce to a nice syrup.
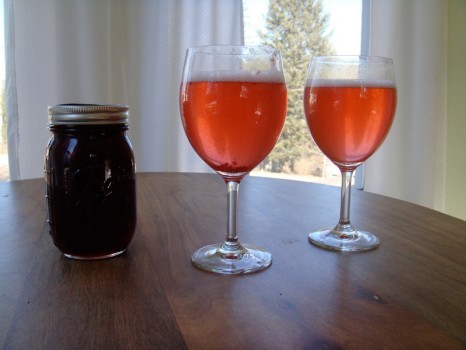
Let cool and bottle or jar the mixture. Store in a cool, dry place.
For the champagne cocktail, mix one part syrup to four parts water or seltzer water. Pour the diluted syrup into a glass a little less than halfway to the top. Then, fill the rest of the glass with champagne.
For the rum drink add two shots of rum to the diluted syrup and water mixture and serve over ice.
This is a tasty drink that should be able to bridge any political divide. Happy Independence Day everyone!
Find me on Facebook!
The Easiest 4th of July Party Evah!
You don’t have to spend a lot of time and money to make your place look festive for the 4th of July holiday. You don’t even have to be good at making stuff. These tips will make even the most artistically challenged Americans look like a patriotic design expert.
Independence Day Banner
This banner looks great indoors or out. All you need to make this adorable decoration is:
Red, white and blue napkins (paper or fabric)
Small binder clips
Any kind of twine or string
Measure the twine. I wanted my banner to run the length of the porch, so I brought the twine outside, ran it along the length of the railing, and cut—no rulers or tape measures required.
Hang the twine on some small wire nails (I used the existing nails usually reserved for my Christmas lights).
Unfold the napkin from the square it’s normally folded into, and refold it into a triangle.

Using small binder clips (you could even use paper clips if you don’t have binder clips), clip the napkins onto the twine. I overlapped the edges of my napkins to cut down on the number of clips needed.
If using several different styles of napkin, alternate them for a festive look. This banner is so easy you could have the kids do it while you’re grilling your feast!
Potted Flags
This project is even simpler than the last.
I would love to hang an American flag on the porch, but I just don’t have one big enough…so to make the house look festive, simply fill some decorative pots with soil (you could use galvanized buckets or window boxes too), and plant a little flag. These look so cute on the front steps!
Glow Stick Lanterns
If you’re planning on having your afternoon barbeque run into the night, these lanterns are the perfect decoration to come home to after the fireworks.
Simply, roll a pice of waxed paper or parchment paper into a drinking glass (or any kind of clear cylinder).
At dusk, unwrap a glow stick and bend it to crack it which activates it. Then place it into the glass. You’ll have a few hours of glowing light without using any fire.
Martha Washington’s Shrub: drink like the founders did
This recipe takes a little time an effort, but it can be done way in advance, so by the time your 4th of July party rolls around, you’ll be all set for cocktail hour.
I first had this drink in Philadelphia at the City Tavern which has been in business since Paul Revere road to Philadelphia to bring the news of the British government closing the port of Boston.
Apparently, Martha Washington used to make this cocktail. Usually it is made with rum, but the City Tavern also offers it mixed with champagne.
The raspberries give it a fruity flavor, while the vinegar keeps it from being too sweet. Mixing the berries with the vinegar and sugar helps to preserve them which is probably why it was so appealing in colonial times. Plus, the syrup probably helped to cut through the strong taste of the homemade alcohols of the day.
To make the raspberry syrup you will need:
raspberries
apple cider vinegar
sugar
water
I had use use frozen berries (10-oz. package) because the berries haven’t quite ripened in my part of the country yet.
Use just enough vinegar to cover the berries so they are not floating. Let sit overnight.
Strain the mixture through cheesecloth.
Squeeze as much liquid as you can from the cheesecloth. Discard the remaining berries and cloth (I threw mine in the compost pile).
Measure the amount of liquid. You will need one part liquid to one part sugar. Since I had about two cups liquid, I needed about 2 cups sugar.
In a saucepan, add the raspberry liquid and sugar. Stir to dissolve and bring to a boil. Simmer for 20 minutes.
The mixture will reduce to a nice syrup.
Let cool and bottle or jar the mixture. Store in a cool, dry place.
For the champagne cocktail, mix one part syrup to four parts water or seltzer water. Pour the diluted syrup into a glass a little less than halfway to the top. Then, fill the rest of the glass with champagne.
For the rum drink add two shots of rum to the diluted syrup and water mixture and serve over ice.
This is a tasty drink that should be able to bridge any political divide. Happy Independence Day everyone!
Find me on Facebook!
June 27, 2013
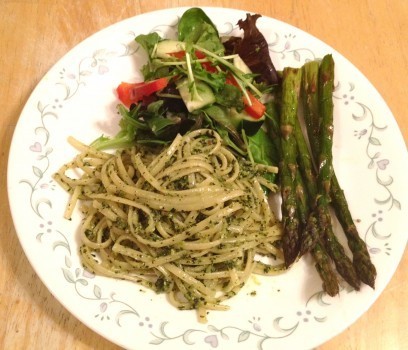
An Easy Pesto Linguini and Asparagus Dinner!
Making pesto makes you really seem like you know what you are doing in the kitchen. It’s one of those easy peasy sauces that can really impress. On top of that pesto is something that you can make it in advance and store it or even freeze it! And now that basil is in season, it is the time to stock up and make plenty of pesto!
Here is how!
Basil Pesto
2 cups of basil leaves, tightly packed
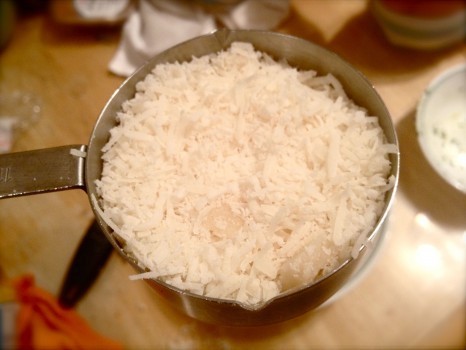
1/2 cup aged parmesan cheese, freshly grated
1/2 cup pine nuts
1/2 cup olive oil, or as needed to make saucy
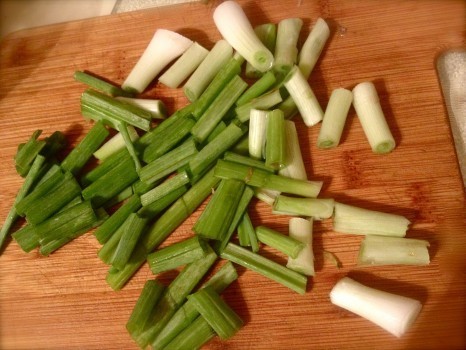
3-4 stalks of scallions
salt and pepper to taste
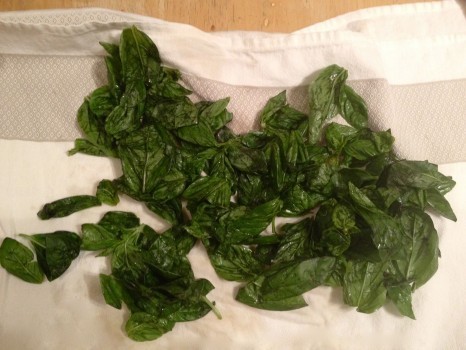
1. Thoroughly wash basil leaves, as they tend to carry a lot of sand/soil. Wash in large bowl of cold water. Let stand still for a minute until sand sinks to bottom of bowl. Lift up leaves. Repeat process.
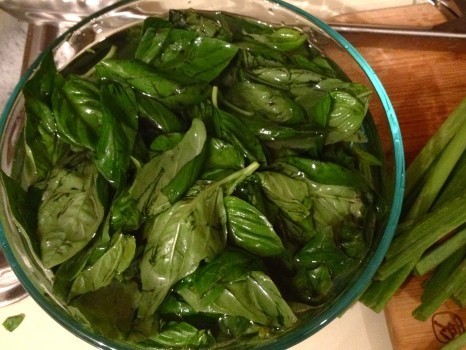
2. Dry basil leaves on clean hand towel. Using a paper towel will not properly absorb all excess water.
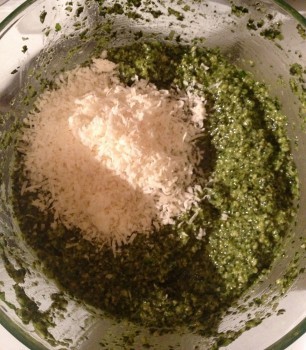
3. Pulse basil, pine nuts, scallions in food process until smooth. Slowly pour in olive oil and pulse while doing this. Add salt and pepper*. *Parmesan cheese is already salty so be careful to add salt sparingly. You can always adjust later.
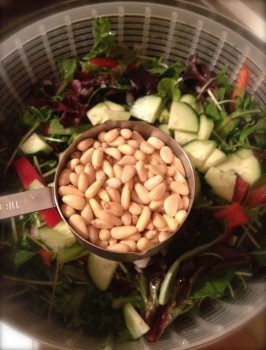
4. Mix in parmesan cheese without pulsing.
5. Reserve sauce.
Basic Salad
Mesclun lettuce
1 Red bell pepper
1/2 Shallot
1 Cucumber
1. Wash and dry mesclun lettuce.
2. Julienne red peppers.
3. Coarsely chop 1/2 shallot.
4. Quarter and salt cucumbers.
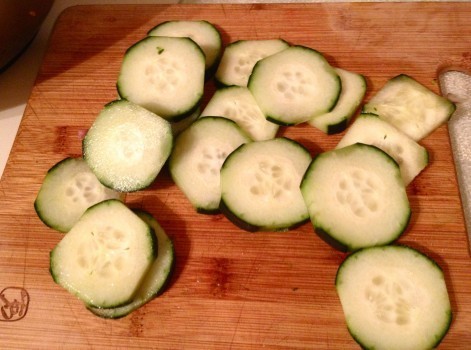
5. Reserve in fridge.
6. When ready to serve, toss all ingredients together with very little olive oil* and salt and pepper.
*Alternatively, you can leave salad undressed, as pesto is naturally oily and it may be preferable to have a fresh salad. Your choice.
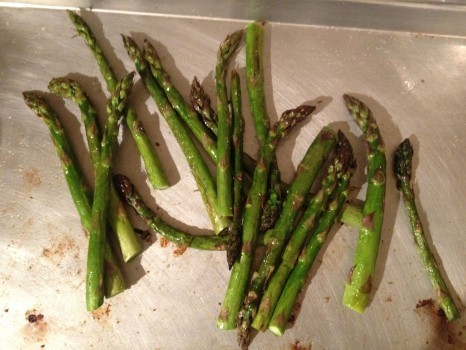
Roasted Asparagus
1. Cut 1-2 inches off bottom of asparagus.

2. Drizzle olive oil. Add salt and pepper.
3. Roast in oven at 350 degree for 20 minutes or until asparagus is slightly blistered and cooked, but still has a crunch.
Linguine
1. Bring water with a pinch of salt and olive oil to rolling boil. I like to add celery stalks to my water and remove later to make it flavorful and flagrant.
2. Add linguine. Cook as directed on product label. I like pasta al dente, but you can cook to however doneness preferred.
3. When pasta is cooked, toss with pesto sauce. Plate with asparagus and salad. Enjoy!
Evette Rios is a Puerto Rican lifestyle expert, writer, television host and native New Yorker. She is one of the stars of ABC’s The Chew, where she serves as field correspondent and roving reporter, covering events and dishing on new ways of using ordinary household items. She has also been a contributing design expert on Rachael Ray, where she’s known for hands-on advice, innovative crafts and dramatic room revisions. She is also National Spokesperson for Goodwill International. Learn more about Evette at http://evetterios.com.
Entertaining With Sting and Trudie Styler’s Focaccia bread
Summer calls for entertaining. The only deterrent is who wants to spend hours cooking? This summer I am determined to not let that get in the way of good conversations, intimate moments and ‘happy days’. Feeling inspired by Sting and Trudie’s products grown in their very own garden, when ingredients are that beautiful, let them go commando.
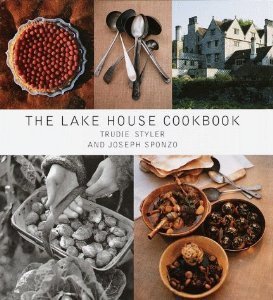
Yesterday for example, friends came over for chilled white, a couple of carefully selected cheeses (herby disc of goat’s cheese and a wedge of queso blanco), small plates of olives and artichokes (from a jar), chorizo and some fine EVOO for dunking. But dunk what? I took a leaf from Trudie and their personal chef, Joe Sponzo’s recipe book – The Lake House Cook Book.
Photos by Fabrizio Ferri, The Lake House Cook Book
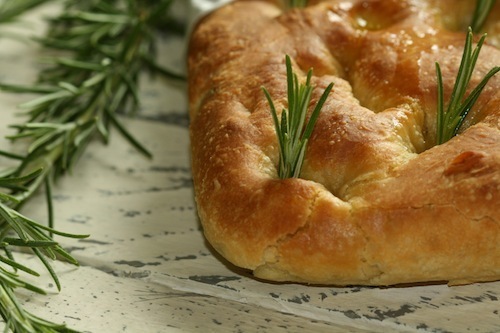
I was required to do about 10 minutes of kneading and the rest was done by the oven. Within 45 minutes fresh-baked focaccia made it’s way to meet the clan. Can you imagine the aroma it brought to the room? The tufted-looking bread was a welcome addition to a chilled assortment of small plates. As for my friends, they thought I totally rocked it by making home-made bread – I could have told them just how easy it was, but a reveling in flattery can be so much fun!
Photo by Glamorous Glutton
Chef Joe’s tips for great focaccia
1) 00 flour, found at specialty and Italian stores, gives the bread a unique crispness when added to bread flour
2) Adding salt to yeast water gives it sourness
3) Wait until the dough doubles even if you need to wait longer – room temperature and other factors determine how long it can take
Recipe For Focaccia By Chef Joe Sponzo
Ingredients
5 tablespoons olive oil and extra for greasing
1 tablespoon active dry yeast
1 ½ teaspoons of salt
2 ½ cups 00 flour/ pastry flour or All Purpose
2 2/1 cups bread flour
1-3 sprigs fresh rosemary
2 tsp. coarse salt
*Yield: 2 ½ pounds
Preparation
1) Whisk 2 cups warm water in large mixing bowl with olive oil, yeast and 1 ½ cups of 00 flour until combined
2) Cover with paper towel in a draft free place for 1 hour until mixture bubbles like sponge
3) Remove towel and with wooden spoon, mix remaining 00 flour and bread flour until dough is soft (should not be wet)
4) Place dough on lightly floured surface and knead 8-10 minutes. Return dough to oiled bowl and allow to double in size for about 45 minutes
5) Grease an 18×13 ½ inch baking pan. Place dough in the pan stretching to edges. Indent the dough with dimples for that rustic, dimpled look
6) Cover the dough for an hour to let it rise. Preheat oven to 450 degrees. Stud the dough with rosemary leaves and sprinkle with sea salt. Bake for 20-25 minutes until golden. Brush with remaining olive oil. Serve immediately
Saira Malhotra, is of British–Indian descent and is a chef, food writer and cooking instructor based in New York City. Raised in Hounslow, U.K, or rather ‘Little India’, where the air is aromatic with roasted spices, little did Saira know these moments would follow her from being a student in France and Italy to residing in NYC with her husband and kids and parlay themselves unexpectedly in to a culinary career. She is a graduate of the International Culinary Center in New York City. Come visit her at her food blog: www.passportpantry.com where she shares approachable and international recipes
An Oily Situation
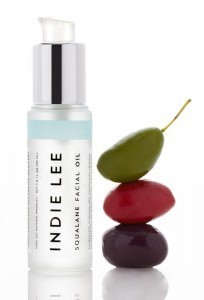
Let me share a little secret with you; I have a new favorite beauty product. And while you may be surprised, this little wonder has been available (and used), for centuries. I’m talking about oil. A little while ago I started using facial oil, and it seems the beauty world has been going crazy for oils too. Not just for your face (I’ve been using Indie Lee’s Squalane Facial Oil), oils are great for your skin, your hair, and your nails. And honestly, can you think of nothing better than relaxing in a bath full of luxurious smelling oils and enjoying a glass of champagne? Here are my favorite oil products, with some tips on why they’re great for you.
Indie Lee Squalane Facial Oil, $32
Contrary to what most people believe, you actually need oil on your face. Most folks with oily skin try and remove the oil using harsh exfoliants or masks, which actually works against them. When skin is stripped of its natural oils it automatically produces more, causing skin to appear even oilier. Instead, use a facial oil every week as a mask or, if you have dry skin, every night. Indie’s version helps to reduce sunspots.
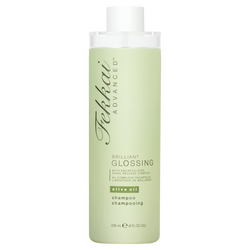
Frederic Fekkai Olive Oil Shampoo, $23
Hair gets dry very easily, and by using an oil-based shampoo you ensure that both your roots and your scalp (which is where great hair starts) are well hydrated.
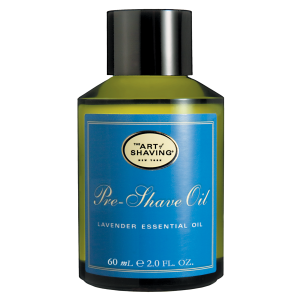
The Art of Shaving Pre-Shave Lavender Oil, $25
Oils aren’t just for the girls. It’s extra important for guys to take care of their skin whilst shaving, and adding a pre-shave oil is a great idea. Not only will oil moisturize and hydrate skin, it helps to soften hairs and reduce inflammation. Plus, the lavender oil in this formula is great for calming sensitive skin.
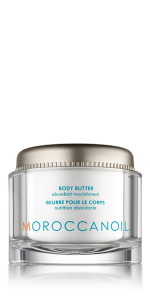
With an oil-based formula, this body butter is like a super-charged moisturizer for your skin. Anything oil-based is going to hydrate you more, and Moroccan Oil’s unique combination of Argan oils and shea, mango, and coconut butters will make sure every inch of you is silky soft.
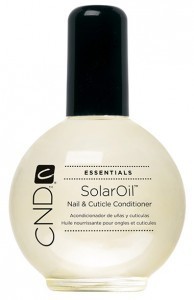
Cuticle oil is essential for healthy nails. Our hands are exposed to the harshest elements every day and in order for them to look the best that they can they need extra care. Apply cuticle oil just before you go to bed, when there is plenty of time for your hands to absorb it.
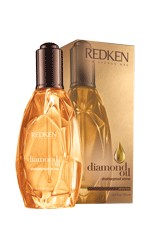
Redken Diamond Oil Shatterproof Shine,
Oil is the latest product to take the hair world by storm. Redken’s latest formula is designed to be left in your locks and works to reduce frizz and split ends, as well as improving the strength and health of your hair. Those with oily scalps should only apply at the ends of their locks, avoiding the roots.
Burt’s Bees Lemon and Vitamin E Bath and Body Oil, $8
While we look to water to hydrate, it actually does nothing when applied to the outside of our bodies. Skin is designed to repel water, whereas oil is easily absorbed. This means that bath oil should become your new best friend. Not only is it incredibly relaxing, soaking in a bath with bath oil will nourish and hydrate skin better than outside moisturizer.
June 26, 2013
Egg Cups - good go-to (and to-go) breakfast
I don’t know about you but I eat breakfast in my car or on-the-go at least a few times each week. This usually consists of a bar of some sort (my favorite is a Clif Crunchy Peanut Butter granola bar). I try to also have a banana or piece of fruit. If I am really planning ahead, I have some hard boiled eggs in my fridge and will grab one for the road, or half a PB&J does the trick as well. The driver’s seat in my car is usually covered in crumbs (and dog hair).
I made these egg cups recently and I wondered why I hadn’t made them since my last South Beach diet stint five years ago. There is nothing “dietetic” about them - they are satisfying and delicious. You basically take any leftover veggie(s) you have - chopped, cooked broccoli, asparagus, spinach, mushrooms or zucchini, raw chopped tomatoes would be good too - combine with beaten eggs, place in muffin tin, top with cheese and bake. Crumbled sausage or bacon or diced ham would be good additions. The beauty of these is that you can individually freeze them and pop them in the microwave for a satisfying breakfast (I have two at a time). Here is the base recipe - give them a try. (PS: The photo does not do the egg cups justice - they taste much better than they look!)
Egg Cups
Ingredients:
5 eggs
Splash of milk
1 (10 oz) package frozen chopped spinach, thawed and squeezed dry
2 chopped scallions
1 cup shredded cheese of your choice (you can also use feta or goat cheese)
Salt and Pepper, to taste
Directions
Preheat the oven to 375F. Spray a 12-cup muffin tin with non-stick cooking spray. Beat eggs with the splash of milk. Season with salt and pepper. Evenly distribute the spinach and scallions in each muffin cup. Next, pour the egg mixture on top - evenly distributing among the muffin cups. Sprinkle the cheese on top of each cup. Bake for about 20-23 minutes, or until the egg cups are well set and a tester/toothpick inserted in the center comes out clean. Serve immediately.
If you want to freeze the egg cups, let cool completely then wrap each egg cup individually in plastic wrap and transfer to a large freezer zip lock bag. Freeze up to one month. To serve from freezer, either thaw overnight in the fridge then re-warm in microwave or oven, or take directly from the freezer to the microwave and heat until thawed and warmed. Remove from the plastic wrap before placing in microwave!
Plan B Mom is a mostly-stay-at-home mom of 3 who works from home but sees her main job as managing her family. When she is not taking care of her 13-year old and 11-year old girls, 9- year old son, yellow lab, and husband - she is baking, running, carpooling, or helping with homework. She tries to stay organized to keep life running smoothly - or at least catastrophes at bay. Follow her on Twitter at @PlanBMom.
Grilling 104: What To Do When Things Go Wrong
Here’s the thing about experienced grillers: they don’t panic. They don’t panic when fires flare up, and threaten to turn the cook into the Phantom of the Opera. They don’t panic when sausages burst, splattering hot grease everywhere. They don’t panic when the brisket is still tough and covered with creosote, and everybody is about to sit down. In short, they never panic. And neither should you. After all, it’s only a meal; if worse comes to worse, you can always order Chinese food. Or just throw something else on the fire, something cheap and easy, like hamburgers or hot dogs or chicken wings. (Chicken wings are an underrated grill food.)
Even if things do go wrong, even catastrophically wrong, there are some emergency treatments. Here a few, and their respective remedies.
Overcooking. The old saying that you can’t reverse overcooking is true, but you can stop it in its tracks. When I see that a steak or chop or chicken has gone too far, I immediately take it off the grill and pour whatever is cold onto it, which is usually beer. The classic method is to plunge it into cold veal stock, but I am going to go out on a limb and guess that you don’t have cold veal stock sitting around. Hot meat absorbs whatever liquid is around it when hot, which changes its flavor, but it also stops cooking. There are worse things than crusty, medium-well meat softened and flavored with beer, juice, or soda. Even ice will do the job if need be. If the meat is brutally blackened and charred, just got the black parts off. If the meat underneath is completely overcooked and devoid of juice, cut it up into thin strips and mix it with some sauce; it will work as sandwiches, if you cut it finely enough and put some coleslaw on top.
Undercooking. Nothing is more dismaying to your guests that seeing a steak cut open to reveal a raw, hideous, wound-like center. Which is one reason never to carve in front of guests. The fix for this one is surprising easy; some would even say that it’s a huge improvement. You simply cut the meat into thick slices, season them, and throw them back onto the grill.
Gas grills. Nothing is more depressing to a serious griller than being reduced to the use of a gas grill. Worse still is when the gas grill is underpowered and weak, as they so often are. While any heat source will eventually cook meat through, a gray, necrotic surface is revolting, and defeats the whole purpose of grilling. It might as well be cooked in a crock pot. The answer is simply to put charcoal on top of the burners. Even the weakest gas flame is sufficient to light lump charcoal or even briquetts, and if you have some wood chips to put atop the hot coals, you are back in business.
Uncontrollable fires. There are times when, for whatever reason, a hot fire will explode, shooting flames several feet in the air and threatening to scorch the feathers of birds flying high above. There is one very easy fix for this one: just cover it with the lid. Obviously, you should try to take the food off it, but if that’s not an option, write it off. The lid is made of metal; it won’t catch on fire. And by shutting off the fire’s oxygen, it will immediately quench it. But don’t open it right back up! The fire that emerges may be even more violent than it was before. If you don’t have a lid, just stand back and let the fire do its worse. It will burn itself down quickly enough. And if it doesn’t, and is near something flammable that simply stand back and throw water or beer or whatever is handy from a distance. Smoke will billow but the fire will go out, and then you can pour more beer on it still.
Tepid, dying fires. This one is tricky. Coal burns down eventually, and even a pro griller can sometimes overestimate how much heat he or she can get from the embers. If the heat source is not doing its job, remove all the meat, recoal in a chimney, and add the hot coals. The meat isn’t going to go bad; in fact, sitting for a few minutes may even serve to temper it.
Burns. Sooner or later you are bound to get burned. You know the usual treatments. I would suggest keeping an aloe plant in your back yard. It’s always close at hand, doesn’t run out, and is a more effective salve than any I know.
Just keep your head, no matter what happens. And even if there is nothing to do, there is always egg fu young.
June 24, 2013
Cut the snacks! Make healthy Kale Chips & Hummus!
Recently I have felt chunky, really chunky. And listen, I am not saying that I think I am fat, or that I have a weight problem, I still manage to squeeze into a size 4 or 6 pant, but I can’t wear dresses without spanks, and a nice, clean, form fitting white T-shirt shows a small canyon in my mid section like I was the Pillsbury Dough Boy that someone took poking liberties with.
I have decided that this summer I am going to do something about it! I would love to lose 15 pounds, but I would gladly take, 10, 5, heck I would even take 2. So the first dietary change that I am making is getting rid of the salty, carb-y snacks and introducing some protein packed tasties. So I decided to try my hand at kale chips, I first saw them at my local health food store. I really dig kale, in salads, steamed, even grilled, but I have never tried to make chips out of them! So after much trial and error here is a simple (and easy way) way to make kale chips. Paired with one of my favorites, hummus, this is a protein packed snack that is easy and delicious. Try it and let me know what you think!
Kale Chips
Bushel of Kale
Olive oil, as needed
Salt to taste
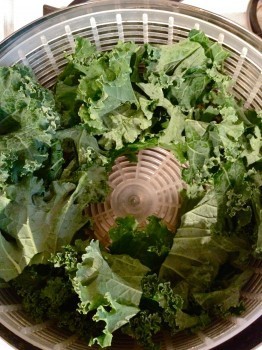
1. Wash kale. Dry in salad spinner. Dry thoroughly otherwise kale will cook unevenly in oven - resulting in some burnt and some undercooked parts.
2. Cut stems off kale and discard.
3. Cut kale leaves into small pieces the size of regular chips.
4.. In a bowl, drizzle enough olive to gently coat leaves (probably no more than 2-3 tbsp). Do not over-pour oil or chips will come out too oily. Using gloves, rub the oil into each leaf with your hands. Add salt. Sample a leaf to make sure you can taste the salt. Should be noticeably salty.
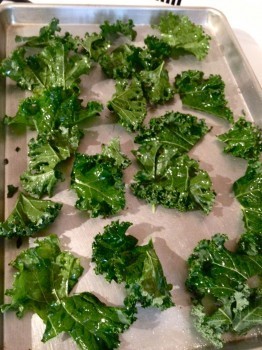
5. Place kale chips onto half sheet tray equal distance from each other. Avoid overcrowding - better to cook in batches, as needed.
6. Cook at 350 degrees for approximately 10 minutes. Check after 7-8 minutes, and rotate half sheet tray to cook evenly.
6. Chips are done when they are dry like a chip - some may be a little darker in color but most should retain their original green color. Set aside.
Creamy Hummus
1 1/2 cans of cooked chickpeas (1 can = 15 oz.) Label on can should read chickpeas, salt, & water only.
1/4 cup water from chickpeas
1-2 stalks of green onions
2 cloves of garlic
1/4 tsp salt
1/2 tsp cumin
2 tbsp olive oil (garnish)
2 tbsp chopped parsley (garnish)
Juice of 1 lemon
Pinch of red pepper
1/3-1/2 cup of tahini
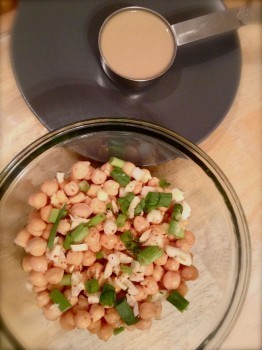
1. Remove shells* of chickpeas. They come off easily. Set aside and reserve a small handful chickpeas to use as garnish. Reserve water from chickpeas. *Removing the shells results in a really creamy hummus. This step takes a little while but is so worth it!
2. Coarsely chop green onions and garlic. Add to chickpeas.
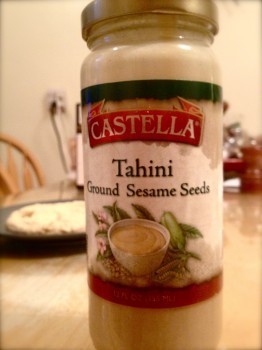
3. Add tahini, salt, cumin, lemon juice, red pepper, & water. [insert photo of tahini bottle]
4. Pulse in food processor for a second, then puree for about 2-3 minutes or until creamy. There shouldn’t be any lumps. Texture should be consistently smooth throughout.
5. Garnish with chopped parsley, olive oil*, and chickpeas.
*Using a high-quality olive oil is essential. An easy tricky to identifying quality olive oil is picking a dark-colored bottle. This is because good olive oil should not be exposed to light.
6. Add hummus to kale chips and enjoy a protein-rich snack!
Evette Rios is a Puerto Rican lifestyle expert, writer, television host and native New Yorker. She is one of the stars of ABC’s The Chew, where she serves as field correspondent and roving reporter, covering events and dishing on new ways of using ordinary household items. She has also been a contributing design expert on Rachael Ray, where she’s known for hands-on advice, innovative crafts and dramatic room revisions. She is also National Spokesperson for Goodwill International. Learn more about Evette at http://evetterios.com.
Rachael Ray's Blog
- Rachael Ray's profile
- 296 followers


