
Vickie Howell's Blog: Vickie Howell's Website, page 27
June 13, 2019
June YarnYAY! Boxes Now Available!
YarnYAY! June Boxes
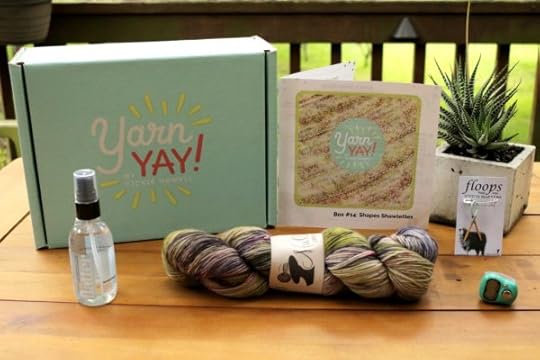
YarnYAY! June boxes are now available. This month, we only have 60 new-subscriber spots open, so grab one while you can!
Subscription is $35 + $6 flat rate (US) shipping. This month’s box is valued at over $48! Here’s what it includes:
1 hank of Mrs. Crosby Satchel (100% Merino; 370 yds) in color: Bahama Woodstar
Boomerang Shawlette KNIT Pattern by VH
Triangle Shawlette CROCHET Pattern by VH
Flatter Blocking Spray by Soak
Flox Stitch Marker Tool by Floops
Finger Digital Row Counter
Access into our Facebook group where we stitch along, do exclusive giveaways, post tutorials, and host interview/events with industry experts.
June (Box #14) supports FIVE independent, women-run business.


The post June YarnYAY! Boxes Now Available! appeared first on Vickie Howell.


June 10, 2019
Rope Coasters
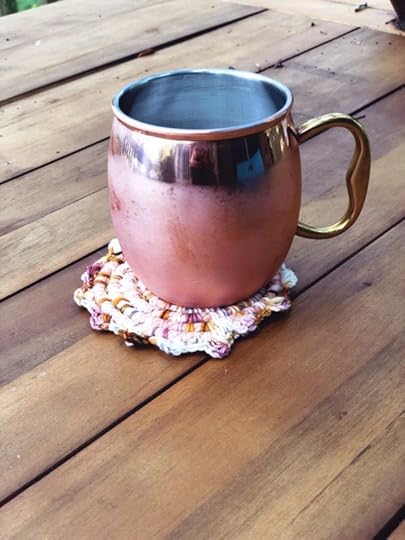
Rope Coasters Pattern
This week on Ask Me Monday, I show how to create circles using rope and crochet which can be used as a base of a basket or for our project, Rope Coasters. In this tutorial, I show how to create the center ring to begin the circle, how to join the rope and crochet around it, how to crochet in a spiral, and how to create a sweet, bobble edging. Watch the tutorial, then follow the pattern below to make this week’s project!

This episode of Ask Me Monday is sponsored by Knitter’s Pride/ KnitPro
See more KP products during “Vic’s Tips” segments of The Knit Show!

Cotton Rope Coasters Pattern
MATERIALS
Approx 50 yds of sock to dk weight yarn
Approx 4-5 yds. (.9-1 oz.) light-weight cotton rope
Size G/4 mm Knitter’s Pride Waves crochet hook
Removable stitch marker
FINISHED SIZE
4” wide
SPECIAL STITCH
Bobble = [YO, insert hook and pull through next st] four times, YO and pull through all loops on hook.
DIRECTIONS (Make 2)
With yarn, ch 2.
Base:
Round 1: 6sc in 2nd ch from hook. Join round; place marker. — 6 sts
This is the only time you’ll join rnds. From here, you’ll work in a spiral, moving the marker up as you go, and using it as your guide. Please note, the marker will a space to the left every spiral round.
Spiral Round 2: Hold rope parallel to piece, leaving an inch or so overlapping. Insert hook into next stitch (counts as sc), YO over rope, sc over rope in next st, *2sc over rope in next st, sc over rope in next st; rep from * around spiral to marker. Do not join. Pull rope so it’s buried under stitches — 12 sts
Spiral Round 3: Continue around spiral as follows: *2sc over rope in next st, sc over rope in next 2 sts; rep from * around spiral to marker. Do not join. — 18 sts
Spiral Round 4: Continue around spiral as follows: *2sc over rope in next st, sc over rope in next 3 sts; rep from * around spiral to marker. Do not join. — 24 sts
Spiral Round 5: Continue around spiral as follows: *2sc over rope in next st, sc over rope in next 4 sts; rep from * around spiral to marker. Do not join. — 30 sts
Spiral Round 6: Continue around spiral as follows: *2sc over rope in next st, sc over rope in next 5 sts; rep from * around spiral to marker. Do not join. — 36 sts
Cut and bury rope.
Edging:
Using YARN ONLY, work edging round as follows:
Next Round: *[Sl st, ch 3, bobble, ch 1] into next st, sc in next 2 sts; rep from * around. Join with a sl st.
Fasten off.
FINISHING
Weave in ends.

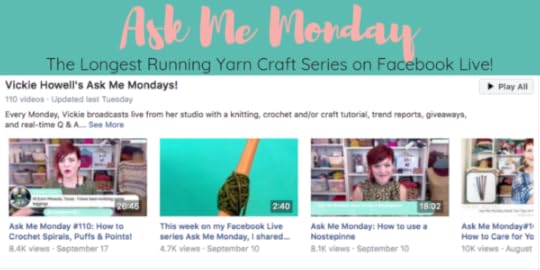
Ask Me Monday is the longest-running Facebook Live series in the needlecraft genre. It’s on hiatus until May 2019. Until then, though, you can find all past episodes of this series under the Ask Me Monday playlist on the Videos section of my Facebook page. Enjoy!
The post Rope Coasters appeared first on Vickie Howell.
June 3, 2019
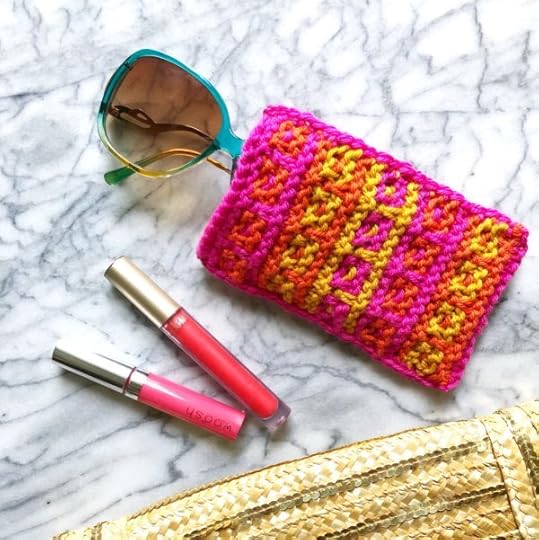
Mosaic Stitch Sunglasses Sleeve

Mosaic Stitch Sunglasses Sleeve
This week on Ask Me Monday I show how to knit in color using the mosaic knitting method. Watch the replay of the video to see how easy it is to create intricate looking color work, without ever working with more than one color yarn at a time. Once you’ve got the gist of the technique, then take it for a spin by making the Mosaic Stitch Sunglasses Sleeve pattern below. Once you do, don’t forget to tag @vickiehowell with your finished project!
This episode of Ask Me Monday is sponsored by Knitter’s Pride/ KnitPro
See more KP products during “Vic’s Tips” segments of The Knit Show!
Mosaic Stitch Sunglasses Sleeve Pattern
MATERIALS
Small amounts (approx 15-20 yds) each of Valley Yarns Superwash Colors by Vickie Howell (100% superwash merino wool) in colors A) Manic Panic, B) Siracha, and C) Golden Girls –or equivalent worsted-weight yarn
Size U.S. 8/5mm Knitter’s Pride Needles (I used Zing! Needles)
Optional: Knitter’s Pride Row Counter Ring
Optional: Knitter’s Pride Waves H/5mm Crochet Hook
FINISHED MEASUREMENTS
6″/15.25 cm Tall x 31⁄4″/8.25 cm
GAUGE
18 sts x 32 sts = 4″/10 cm in Garter Mosaic Stitch Pattern
Find ABBREVIATIONS here.

DIRECTIONS
Front:
With A, CO 15 sts.
Rows 1-2: Knit.
Rows 3-4: Knit
Join B.
Row 5 (RS): With B, *k3, sl 1 wyib; rep from * to last 3 sts, k3.
Row 6: With B, *K3, sl 1 wyif; rep from * to last 3 sts, k3.
Row 7: With A, *Sl 1 wyib, k1; rep from * to last 3 sts, k3.
Row 8: With A, *Sl 1 wyif, k1; rep from * to last 3 sts, k3.
Row 9: With B, *k3, sl 1 wyib; rep from * to last 3 sts, k3.
Rows 10: With B, *K3, sl 1 wyif; rep from * to last 3 sts, k3.
Rows 11-12: With A, knit.
Rows 3-12 establish Garter Mosaic Stitch Pattern.

Cut A.
Rows 13-14: With B, Knit.
Join C.
Row 15: With C, *k3, sl 1 wyib; rep from * to last 3 sts, k3.
Row 16: With C, *K3, sl 1 wyif; rep from * to last 3 sts, k3.
Row 17: With B, *Sl 1 wyib, k1; rep from * to last 3 sts, k3.
Row 18: With B, *Sl 1 wyif, k1; rep from * to last 3 sts, k3.
Row 19: With C, *k3, sl 1 wyib; rep from * to last 3 sts, k3.
Row 20: With C, *K3, sl 1 wyif; rep from * to last 3 sts, k3.
Rows 21-22: With B, Knit.
Cut B.
Rows 23-24: With C, Knit.
Join A.
Row 25: With A, *k3, sl 1 wyib; rep from * to last 3 sts, k3.
Row 26: With A, *K3, sl 1 wyif; rep from * to last 3 sts, k3.
Row 27: With C, *Sl 1 wyib, k1; rep from * to last 3 sts, k3.
Row 28: With C, *Sl 1 wyif, k1; rep from * to last 3 sts, k3.
Row 29: With A, *k3, sl 1 wyib; rep from * to last 3 sts, k3.
Row 30: With A, *K3, sl 1 wyif; rep from * to last 3 sts, k3.
Rows 31-32: With C, knit.
Cut C.
Rows 33-44: Repeat Rows 3-12.
Cut A; join B.
Rows 45-54: Repeat Rows 13-22.
Sleeve Bottom:
Rows 55-58 : With A, knit.
Cut A; join B.
Back:
From here, you’re going to reverse what you did for the Front as follows:
Rows 59-68: Repeat Rows 13-22.
Rows 69-78: Repeat Rows 3-12.
Rows 79-88: Repeat Rows 23-32.
Rows 89-98: Repeat Rows 13-22.
Rows 99-108: Repeat Rows 3-12.
Cut B.
Rows 109-112: With A Knit.
BO.
FINISHING
Fold the piece in half and seam up the sides using A and either a tapestry needle and mattress stitch, or a crochet hook and single crochet.
Weave in ends. Block if necessary.
Ask Me Monday is the longest-running Facebook Live series in the needlecraft genre. It’s on hiatus until May 2019. Until then, though, you can find all past episodes of this series under the Ask Me Monday playlist on the Videos section of my Facebook page. Enjoy!
The post Mosaic Stitch Sunglasses Sleeve appeared first on Vickie Howell.
May 20, 2019
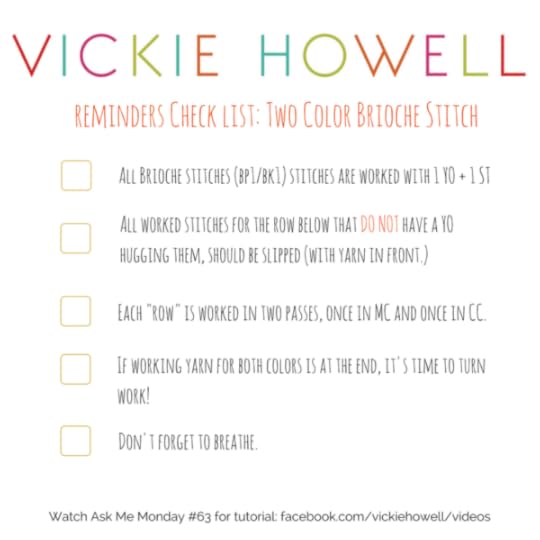
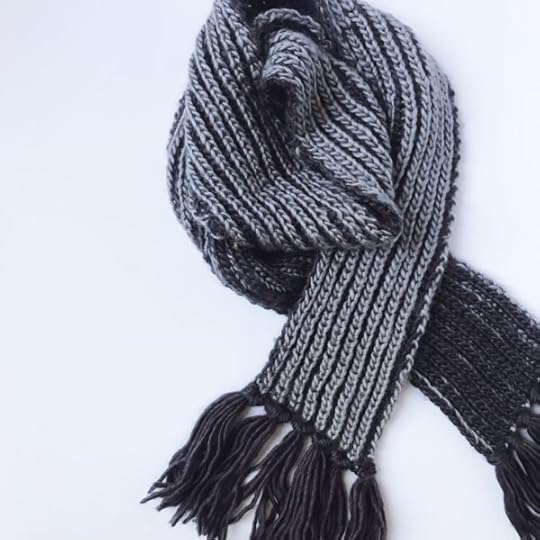
Brioche Stitch Pot Holder

Brioche Stitch Pot Holder
This week on Ask Me Monday, we revisit bi-color brioche stitch applied to make a Brioche Stitch Pot Holder. In this episode, I cover the Brioche stitch prep row, Brioche Purl stitch, Brioche stitch and bind off. Watch the video tutorial, then use the free pattern below to make your own pot holder. Be sure to tag @vickiehowell when you do!
This episode of Ask Me Monday is sponsored by Knitter’s Pride/ KnitPro
See more KP products during “Vic’s Tips” segments of The Knit Show!
Brioche Stitch Pot Holder: How-to
MATERIALS
25 yds Bulk-weight cotton or wool yarn, in colors: A and B. I used this.
Size U.S. 10.5, Knitter’s Pride Ginger Circular Needle (any length)
Tapestry needle
Optional: Size L Knitter’s Pride Waves Crochet Hook
This pot holder can be made with worsted-weight yarn, too. I’d suggest a CO number of 18 sts and a needle size of US 6/4 mm or smaller.
FINISHED MEASUREMENTS
7″/18 cm wide x 7 1/2/19 cm tall
GAUGE
11 sts x 10 rows = 4″/10 cm in Brioche Stitch
SPECIAL STITCHES (See video for demonstration)
BP1 = Brioche Purl 1, purl together the slipped stitch and the YO from the row below.
BK1: Brioche Knit 1, knit together the slipped stitch and the YO from the row below.
DIRECTIONS
With A, CO 12 sts. Do not turn work.
Prep Row: (RS B, forms purl columns in B on RS) Slide work to other tip of needle and attach B wyif, *sl 1, yo, p1; rep from * across. Turn work.
Row 1: (WS A, forms purl columns in A) Wyif, *sl 1, yo, bp1 (purl together the slipped stitch and yo from row before); rep from *across. Do not turn, slide sts to opposite end of needle where B is attached.
Row 1: (WS B, forms knit columns in B) With B, *bk1 (knit together the slipped stitch and yo from row before), yf, sl 1, yo; rep from * across. Turn work.
Row 2: (RS A, forms knit columns in A) Maintain the B yo of last worked st by holding it under left needle to the back; with A, *bk1, yf, sl 1, yo; rep from * across. Do not turn, slide sts to opposite end of needle where B is attached.
Row 2: (RS B, forms purl columns in B) With B, wyif, *sl 1, yo, bp1; rep from * across. Turn work.
Repeat Rows 1 and 2 RS and WS with colors indicated, until pot holder measures 7 1/2″/ 19 cm and finishing with a RS B row.
BO using A as follows: K1, bp1, pass second stitch over first stitch on the RH needle (one st BO off.) Cont in this matter, knitting the knit stitches and bp1 ( the sl st and YO) while binding off.
FINISHING
Make Hanging Loop:
With a slip knot and crochet hook, attach A to corner of pot holder. Ch 12; join yarn in same place as you began; fasten off with a sl st.
Weave in ends.

Looking for More Brioche Stitch Primer Projects? Try these!

The post Brioche Stitch Pot Holder appeared first on Vickie Howell.
May 15, 2019
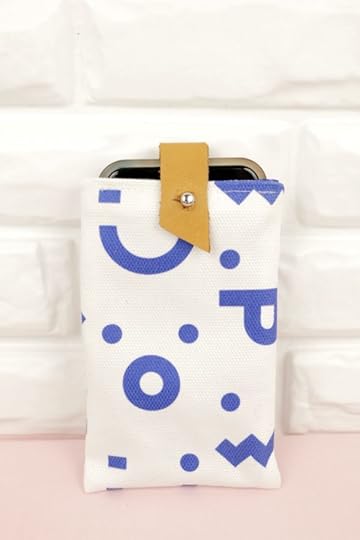
How to Sew a Smart Phone Cover


This tutorial is brought to you by Visible Mobile, an app-based cell service offering unlimited talk, text and data for only $40/month!
Sew a Smartphone Cover : Learn How!
MATERIALS
1/8 – 1/4 yard (depending on width of your phone) canvas
1/8 – 1/4 yard lining fabric
1, 3 1/2″ x 3/4″ piece leather or faux leather
Button Stud
Hole punch or awl
Craft knife
Sewing pins or clips
Thread
Sewing machine or sewing needle
Iron
DIRECTIONS
Measure Your Smart Phone
Measure the width (including around half the sides).
Measure the length beginning from the top front, down and around to the top back.
TIP: Leave the case ON your phone while measuring to ensure that the cover will fit.
Add Seam Allowances
Add a 1/4” seam allowance on each side measurement and front and top back. In other words, add 1/2″ total to your width measurement. Here’s an example:
Phone width: 3 1/4″ + 1/2″ = 3 3/4″
Phone length: 12″ + 1/2″ = 12 1/2″
Final measurements: 12 1/2″ x 3 3/4″
Cut Fabric
Cut 1 piece of canvas, and 1 piece lining fabric to measurements from above.
Optional: Cut leather piece end at an angle.
Sew Pieces
With right-sides together, fold canvas piece length-wise. Using 1/4″ seam allowance, sew up side seams. Trim edges, turn right-side out.
With right-sides together, fold lining piece length-wise. Using 1/4″ seam allowance, sew up side seams. Trim edges. Wrong-sides will remain out.
Assemble & Finish
Fold top-edge of canvas piece under by 1/4″ ; press.
Fold top-edge of lining over by 1/4″ ; press.
Slip lining piece inside of canvas piece.
Slip leather piece in between lining and canvas piece, at the middle of the top-back edge. Pin into place.
Top-stitch around entire top edge.
Using a hole punch or awl, put a hole through both layers of the lining and canvas, about 1/4″ from the top-center edge. Screw button stud into place.
Using craft knife cut an X in the leather piece, to correspond with button stud.
Press the whole piece.
The post How to Sew a Smart Phone Cover appeared first on Vickie Howell.
May 13, 2019
Linen Stitch | How to Knit & Crochet this Textured Pattern

This week on Ask Me Monday I show how to knit and crochet linen stitch patterns. This pattern is great for easy-breezy Summer garments or home decor items. I show you how to work the patterns both flat and in-the-round. Watch the episode, then practice by making your own swatches using the instructions below.
This episode of Ask Me Monday is sponsored by Knitter’s Pride/ KnitPro
See more KP products during “Vic’s Tips” segments of The Knit Show!
Knitter’s Pride products featured in this episode: Marblz DPNs Ginger Circular Needles, Waves Crochet Hook, & Magnetic Knitter’s Necklace
Post a Topic Idea or Question for a Future Ask Me Monday Episode (by Friday May 17th at midnightCT) in the comments section for this video on Facebook!
Linen Stitch | How to Knit
Worked Flat (aka back and forth)
CO an odd amount of sts.
Row 1 (RS): *K1, sl 1 wyif (with yarn in front); rep from * to last st, k1.
Row 2: *Sl 1 wyib (with yarn in back), p1; rep from * to last st, sl 1.
Repeat Rows 1-2 for pattern stitch.
Worked in-the-Round
CO an even amount of sts. Join Rnd.
Rnd 1: *K1, sl 1 wyif (with yarn in front); rep from * to end.
Rnd 2: *Sl 1 wyif, k1; rep from * to end.
Repeat Rnds 1-2 for pattern stitch.

Linen Stitch Cowl Pattern Available in May YarnYAY! Box
Linen Stitch | How to Crochet
Worked Flat (aka back and forth)
Ch an even amount of sts.
Row 1 (RS): Sc in 4th ch from hook (counts as sc, ch1, sk 1), *ch 1, sk 1, sc; rep from * to end. Turn.
Row 2: Ch2 (counts as sc, ch 1), *sc in ch-1 sp, ch 1, sk sc; rep to end. Turn.
Repeat Row 2 for pattern stitch.
Worked in-the-Round (spiral)
Ch an even amount of sts. Join rnd, place stitch marker.
Note: This piece is worked in a spiral, so stitch marker is used to mark the beginning of rnds.
Rnd 1: Ch 2, sk 1 *sc, ch 1, sk 1; rep from * to end.
Rnd 2: *Sl 1 wyif, k1; rep from * to end.
Repeat Rnds 1-2 for pattern stitch.

Linen Stitch Cowl Pattern Available in May YarnYAY! Box
Love this stitch? Want to make a breezy cowl in my exclusive color? Nab a YarnYAY! Anniversary box!

The post Linen Stitch | How to Knit & Crochet this Textured Pattern appeared first on Vickie Howell.
May 10, 2019
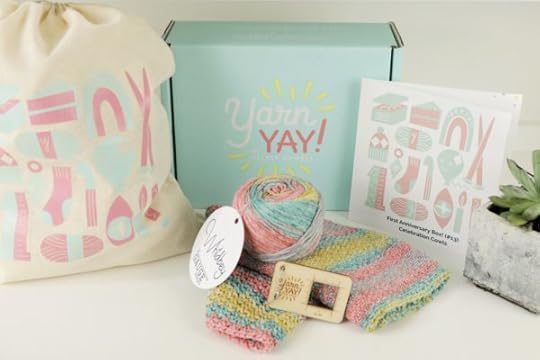
YarnYAY! Anniversary Box + Trip Giveaway!
It’s YarnYAY!’s 1 year anniversary this month, and we’re celebrating with a box full of, well, YAY! See below for the goods, plus the scoop on our HUGE New York giveaway.

Gauge is a new brand from the founders of Maker’s Mercantile! Whidbey is a brand-spankin’-new chainette yarn, debuting exclusively in this YarnYAY! box. It’s a breezy mix of bamboo, superwash wool & merino, so perfect for Summer stitching! The color is a limited edition developed especially for us, in self-striping logo colors, to celebrate YarnYAY!’s first anniversary.
The rest of the line doesn’t hit stores until this Fall, but you can see the forthcoming colors at makersmercantile.com.

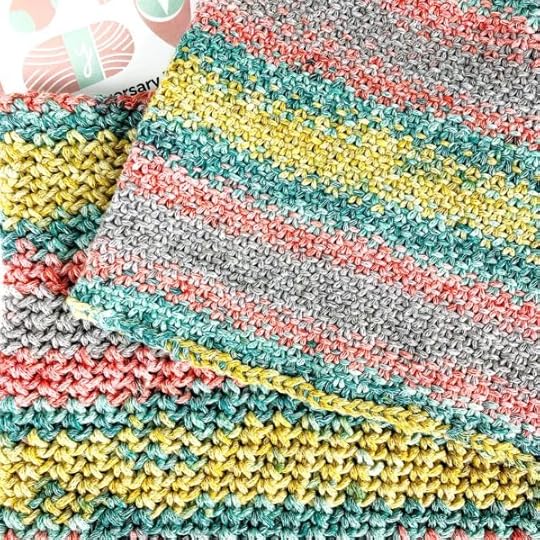
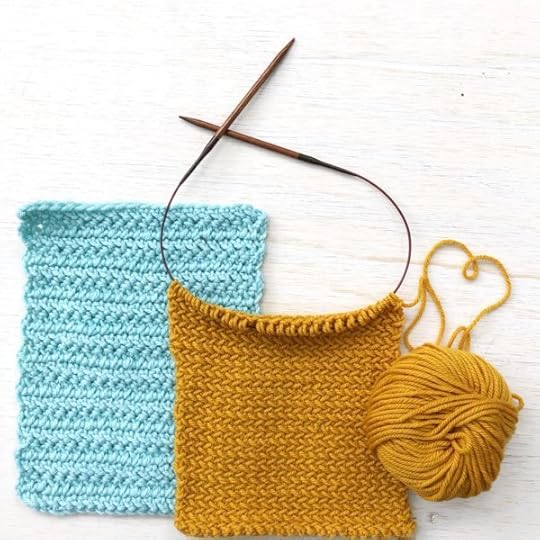
Linen stitch and self-striping yarn make for a clean, simple, but head-turning result. These knit and crochet cowls make for nice, drapey neckwear for warmer weather while adding a pop of color to any outfit.
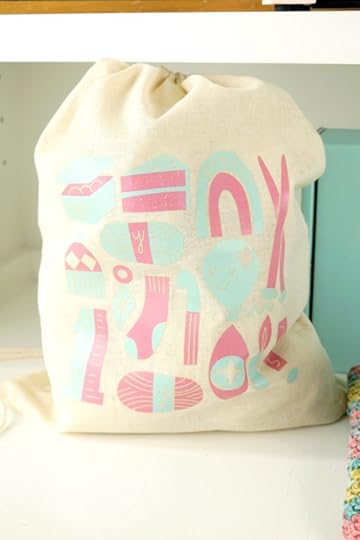
Our anniversary is in the bag with this cotton, drawstring sack adorned with exclusive, commemorative artwork. Lightweight and roomy, this is the perfect pouch for taking small to mid-sized projects on-the-go. Hip, hip, handmade hooray!
Anda Corrie is an American illustrator, author & fabric designer, based in Berlin. For more info go to andacorrie.com

You know that thing when you’re swatching on-the-run, and just need to know how many stitches and rows equal 1″? Well, friend, this keychain has you covered. Attach it to your project bag handle, and you’ll be good-to-gauge go! Katrinkles is owned by Katy Westcott. For more info go to: katrinkles.com
YarnYAY! Anniversary Box Giveaway

Go Big (Apple) or Go Home!
To celebrate our anniversary, how about a little YarnYAY! getaway? Each May box subscriber will be automatically entered to win a trip to Vogue Knitting Live New York, 2020!
Big Apple Weekender Package
4 (3-hour) classes, 3 lectures, 3-Day Marketplace
Ticket, Cocktail Reception Ticket, Gala Dinner Ticket,
Vogue Knitting LIVE Tote Bag, fabulous dinner swag bag
with contents valued at more than $100, copy of Vogue
Knitting: Norah Gaughan: 40 Timeless Knits, $150 coupon
to vogueknitting.com
2 nights at the Omni Times Square Hotel
$300 travel voucher
Trip valued at over $1600
Subscribe & Be Entered to Win!
The post YarnYAY! Anniversary Box + Trip Giveaway! appeared first on Vickie Howell.
May 6, 2019
Herringbone Stitch | Warm Up America Knit & Crochet Rectangles

Ask Me Monday is back from hiatus this week with the scoop on Knitter’s Pride’s partnership with Warm Up America. By May 31st, their goal is to drive as many knitters and crocheters, like you, to make squares towards blankets for those in need. In the episode, I show how to knit and crochet the Herringbone stitch for a warm, dense fabric that are great alternatives for a blanket square. Watch the video for the tutorial, then see below for the patterns.
Interested in knitting and crocheting squares along with others? See the Knitter’s Pride, Warm Up America KCAL thread on Ravelry here.
This episode of Ask Me Monday is sponsored by Knitter’s Pride/ KnitPro
See more KP products during “Vic’s Tips” segments of The Knit Show!
Products shown in this video tutorial: Knitter’s Pride Ginger Interchangeable Needles & Waves Crochet Hooks
Herringbone Stitch: Knit 7″ x 9″ Rectangle
SUPPLIES
Worsted-weight superwash wool or acrylic yarn
Size 8/5 mm Knitter’s Pride Ginger Needles — or size needed to obtain stitch gauge
GAUGE
6.5 stitches = 1″
Note: Easily adapt this pattern work with any weight yarn and corresponding needle. Check gauge and CO appropriate even amount of stitches.
DIRECTIONS
CO 46 sts.
Row 1: K1, * sl 1 knitwise, k1, psso knit st without letting it fall off the needle but instead ktbl; rep from * to last st, k1.
Row 2: *P2tog without letting the sts drop off needle, p first of two loops on needle again letting both stitches fall off needle; rep from * to end.
Repeat Rows 1-2 until piece measures 9″ from CO ends.
BO.
Weave in ends. Block piece.

Herringbone Stitch: Crochet 7″ x 9″ Rectangle
SUPPLIES
Worsted-weight superwash wool or acrylic yarn
Size H/5 mm Knitter’s Pride Waves Hook– or size needed to obtain stitch gauge
GAUGE
3 stitches = 1″
SPECIAL STITCH: Herringbone Half Double Crochet (Hhdc)
Yarn over, insert hook through stitch, draw through loop; draw same loop through next loop on hook; yarn over and draw through that same loop (as for a chain stitch); yarn over draw through remaining two loops on hook.
DIRECTIONS
Ch 22.
Note: Crochet gauge is highly subjective. Be sure to check your gauge and go up or down hook sizes accordingly.
Row 1: Hhdc in 3rd ch from hook and in every ch to end. Turn. –21 sts.
Row 2: Ch 2, Hhdc in next st and every st across. Turn.
Repeat Row 2 until piece measures 9″.
Fasten off.
Weave in ends.

Where to Send Pieces
Warm Up America!
3740 N. Josey Lane, Suite 152
Carrollton, TX 75007
The post Herringbone Stitch | Warm Up America Knit & Crochet Rectangles appeared first on Vickie Howell.
April 17, 2019
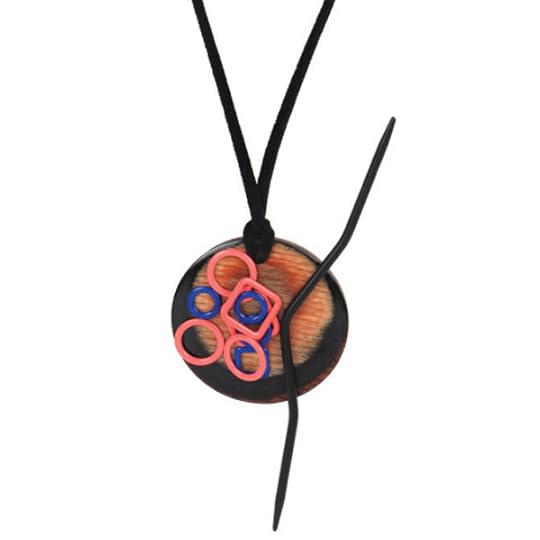
Third Eye Beanie | Chunky Cotton Hat for Spring

Third Eye Beanie
The “eyes” have it with this chunky, cotton hat that’s perfect for the transition between frigid Winter weather, and cool Spring. The Third Eye beanie was inspired by the tuning into one’s creative, higher self. I had the pleasure of spending a couple of days at the Visible Mobile summit with a collection of visionaries, across creative realms, whose candor, and energy reinvigorated that tuning in, for me.
Grab your needles, focus within, and enjoy!
This tutorial is brought to you by Visible Mobile, an app-based cell service offering unlimited talk, text and data for only $40/month!
Third Eye Beanie: How-To
MATERIALS
1 ball each Loopy Mango Big Cotton (100% cotton’ 48 yds), in colors: A and B.
Size US 15, 16″ circular needle
Large-eyed tapestry needle
Stitch marker
FINISHED MEASUREMENTS
9″/23 cm Tall
21″(22″)/53 cm(56 cm) Circumference
GAUGE
9 sts x 11 rnds = 4″/10 cm
ABBREVIATIONS
Find the list here.
DIRECTIONS
Brim:
With A, CO 42 (44). Place marker; join, taking care not to twist.
Rnd 1: Knit.
Join B.
Rnds 2-6: *With B K1, with A p1; rep from * around.
Cut B.
Body:
Rnd 7: With A, knit.
Repeat Rnd 7 until piece measures 7″(7 1/2″) 17 3/4 cm(19 cm) from CO edge.
Crown:
Rnd 1: Knit, decreasing 2(4) sts evenly around. –40 sts
Rnd 2: *K6, k2tog; rep from * around. –35 sts
Rnd 3: Knit.
Rnd 4: *K5, k2tog; rep from * around. –30 sts
Rnd 5: Knit.
Rnd 6: *K4, k2tog; rep from * around. –25 sts
Rnd 7: Knit.
Rnd 8: *K3, k2tog; rep from * around. –20 sts
Rnd 9: Knit.
Rnd 1o: *K2, k2tog; rep from * around. –15 sts
Rnd 11: Knit.
Rnd 12: *K1, k2tog; rep from * around. –10 sts
Rnd 13: Knit.
Rnd 14: *K2tog; rep from * around. –5 sts
Cut yarn, leaving a long tail. Using tapestry needle, feed yarn through live stitches letting them drop of the needles. Cinch shut.
FINISHING
Using desired method, make a pompom. Sew onto top of hat.
Using Color B, tapestry needle, and the photo and video as a guide, embroider eye on front of hat.
Weave in ends.
Wear it!
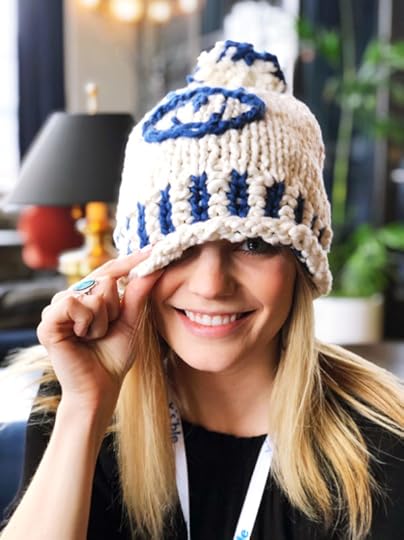
Modeled by Graphic Artist, Becca Reitz
The post Third Eye Beanie | Chunky Cotton Hat for Spring appeared first on Vickie Howell.
April 10, 2019
YarnYAY! April Subscription Box

YarnYAY! April Subscription Box
Love knitting and crochet? Obsessed with gorgeous yarn? Can’t get enough of knitterly tools and novelty items? Then, the YarnYAY! April subscription box is for you! This month’s box features:
Luxury Springtime Yarn, Big Cotton by Loopy Mango in One of Their Top 4, Best-selling Colors
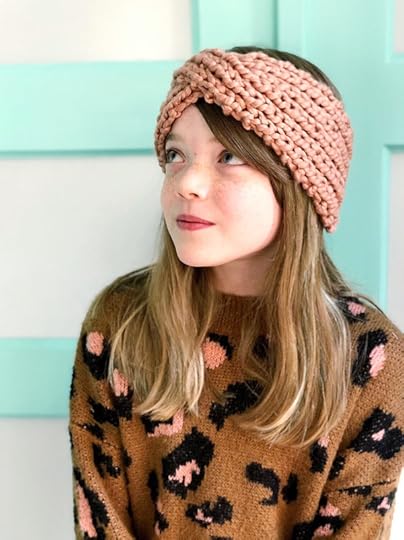
1 Knit and 1 Crochet Pattern for Hot in Here Headbands
Loopy Mango Large-eyed Tapestry Needle|
Cocoknits Iron Yarn Snips with Leather Cover
YarnYAY! Logo Measuring Tape
Access into the YarnYAY! Facebook Group for stitch-alongs, video tutorials, community, special events, and exclusive giveaways.

The post YarnYAY! April Subscription Box appeared first on Vickie Howell.


