
Vickie Howell's Blog: Vickie Howell's Website, page 31
September 10, 2018
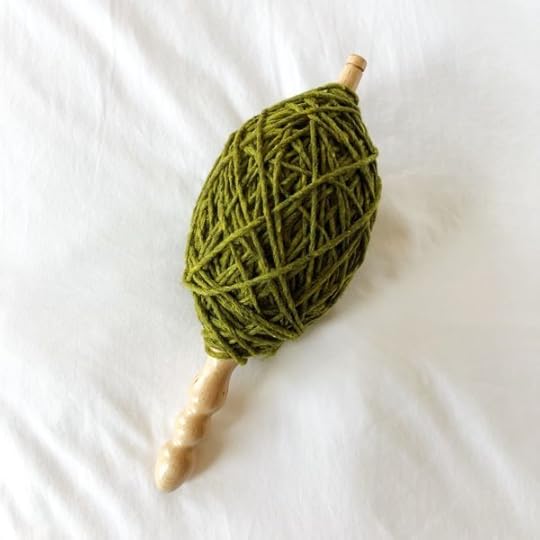
How to Use a Nostepinne

How to Use a Nostepinne
This week on Ask Me Monday, I showed how to use the Nostepinne, an old-school tool for winding center-pull balls. This tool may seem archaic, compared to the hand-crank or electronic ball-winders, but it’s actually still relevant to yarn crafters. It’s highly portable (I recently threw mine in my suitcase during a trip), making it ideal for taking on knitter’s retreats or wool festivals. It’s also perfect for low-yardage, super bulky yarns for which the effort of setting up a swift and winder is hardly worth it.
Here’s how you use a Nostepinne:
***This episode of Ask Me Monday is sponsored by Knitter’s Pride/ KnitPro***
See more KP products during “Vic’s Tips” segments of The Knit Show!
Knitter’s Pride Product Featured in this Video:
Nostepinne

Step 1: Untwist a hank of yarn and place it on a swift or over a chair back.

Step 2: Leaving a tail (this will be your center-pull strand) wrap yarn around the nostepinne, in a spiral formation, and covering about 2″-3″ of the rod.

Step 3: Make one to two figure 8s around the nostepinne rod.

Step 4: Rotate the nostepinne a quarter turn; repeat Step 3.
Step 5: Repeat Step 4, rotating and making figure 8s with yarn until finished. Take care not to wind completely over the center-pull strand.
Slide ball off of nostepinne. You’re ready to yarn craft!
As always, you can find all episodes of this series under the Ask Me Monday playlist on the Videos section of my Facebook page. Enjoy!
The post How to Use a Nostepinne appeared first on Vickie Howell.


September 7, 2018
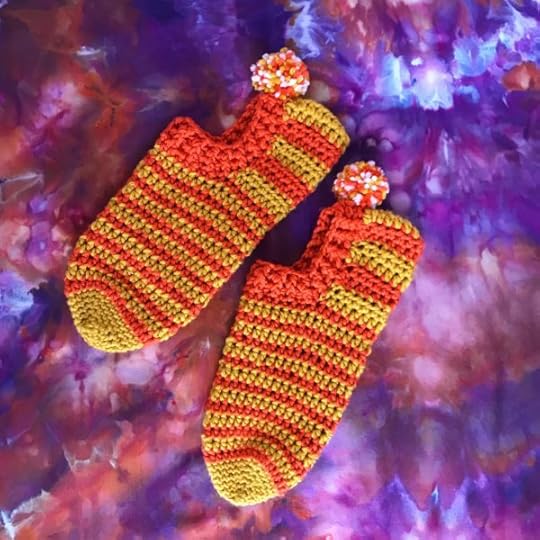
That 70’s Slipper Sock Crochet Pattern

That 70’s Slipper Sock Crochet Pattern
Hey, crocheters! Here to remind you again that YarnYAY! doesn’t forget about you. In fact, we’re the only subscription box business that includes both knit and crochet patterns for the SAME project. That means, no one gets left out!
In July’s box, we crocheted The 70’s Slipper Socks, the sister project to the knit version. This project is a nostalgic delight, perfect to add to your holiday gift-making list!
Now that the July box is no longer available, I’ve put the pattern for purchase in my Ravelry Shop. Nab it now for only $5!
That 70’s Slipper Sock Crochet Pattern Materials
Approx 194 yds of Valley Yarns Superwash Colors by Vickie Howell, or equivalent worsted-weight yarn
Size U.S. H/5 mm hook
Tapestry needle
Pompom maker (optional)
For more information on YarnYay! by Vickie Howell click below.


The post That 70’s Slipper Sock Crochet Pattern appeared first on Vickie Howell.
August 27, 2018
10 Tips on Caring for Knitting Needles

Care for Knitting Needles: 10 Tips for Lengthening the Life of Your Favorite Tool
This week on Ask Me Monday, I give ten tips on how to care for needles so that they last you as long as possible!
***This episode of Ask Me Monday is sponsored by Knitter’s Pride/ KnitPro***
See more KP products during “Vic’s Tips” segments of The Knit Show!
Knitter’s Pride Needles Featured in Video
Marblz
Zing!
Royale
Dreamz
Karbonz

10 Tips on Caring for Knitting Needles
1. Stay moisturized. High-quality wooden needles will naturally become slicker with use (from the lanolin in wool and oil from knitters’ hands) but it’s a good idea to occasionally clean and moisturize the needles with beeswax and a muslin or shammy.
2. There’s a wax for that. Polish bamboo needles with waxed paper to add a sheen when they become dull or “grabby” from use.
3. Smooth operator. To avoid potentially snagging yarn when knitting, use a very fine sandpaper or emery board to smooth out any rough patches on a bamboo needle.
4. Pretend they’re vampires. Keep needles out of extreme temperatures and when possible, avoid direct sunlight.
5. Get to the point. Use point protectors on needles, especially smaller gauges and when tossed in your project bag, to prevent tips from chipping.
6. Don’t be a McGyver. To keep needles undamaged, use them for knitting ONLY (and not to open a wine bottle, poke holes in packaging, or help reach something from a high shelf.)
7. Shine on. If nickel-plated or electroplated brass needles start to tarnish, use a microfiber cloth to polish them back to their original shine.
8. Stay calm; dip and pull. To calm down curling circular needle cords, dip them in hot (but not boiling) water for a few seconds. Pull out and give a gentle tug to straighten. Repeat, if necessary.
9. Knit the straight and narrow. To straighten out plastic knitting needles, boil water in a pot on the stove; hold needles over the arising steam; remove from steam and straighten with your fingers; plunge straighten needles in cold water to set.
10. Know when to say goodbye. If metal, plastic or weed needles get a significant nick in them, in most cases, it’s time to let them go so you don’t damage your yarn by snagging or tearing it on the gash.

As always, you can find all episodes of this series under the Ask Me Monday playlist on the Videos section of my Facebook page. Enjoy!
Resources
The post 10 Tips on Caring for Knitting Needles appeared first on Vickie Howell.
August 20, 2018
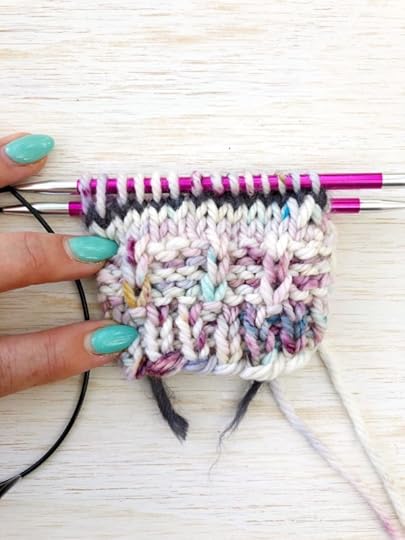
Afterthought Heel: How to Knit Socks Two-at-a-Time, Part 2

Afterthought Heel: Two-at-a-Time Socks … and beyond!
This week on Ask Me Monday we finished off our Two-At-A-Time socks by learning a technique that can be used with any method of knitting socks (ie., one at a time on a circular needle or dpns): the Afterthought Heel. First made notable by the legendary Elizabeth Zimmerman, the Afterthought Heel is a handy method for knitting the entire foot of a sock and not fussing with the heel until, well, after your finished with everything else. I especially like this heel when knitting two socks at a time, because it leaves less to navigate whilst dealing with the strands from two balls of yarn and the long cord of the circular needle, allowing you to just keep on keepin’ on with knitting the cuff and foot in the round. Give it a shot and let me know what you think!
***This episode of Ask Me Monday is sponsored by Knitter’s Pride/ KnitPro***
See more KP products during “Vic’s Tips” segments of The Knit Show!
Afterthought Heel: Watch and Learn
MATERIALS
Superwash wool of any weight (Shown: Koigu Chelsea Merino)
Knitter’s Pride Marblz, Zing, Royale, or Karbonz circular needle (at least 32″ long), in the corresponding size
Tapestry needle
Waste yarn
Optional: Removable stitch marker
Afterthought Heel: Prep
PREP STEP:
Note: regardless of the size of sock, or weight of yarn, you’ll always use half of the total socks to make the heel of a sock.
After desired length cuff is worked, knit 2 rounds.
Next Round: With waste yarn, knit half of stitches. These are your heel stitches.
Slip the stitches just knit on waste yarn back onto left-hand needle.
Re-knit the heel stitches with main yarn.
Continue knitting foot and toe until finished. Graft toe stitches using Kitchener Stitch. (See the tutorial from my Basic Sock Recipe video here.)
Afterthought Heel: Knit
STEP 1:
Using the point of a needle, carefully pick out waste yarn, freeing up the heel stitches.
STEP 2:
Holding your circular needle with the needles parallel, place Top heel stitches on one needle, and Bottom heel stitches on the other needle. You’ll notice that you have an uneven amount of stitches on top and bottom. Pick up an additional stitch in the gap and place it on the needle with less stitches, PLUS one more stitch at that gap and an additional stitch on the opposite end’s gap. 3 stitches increased.

STEP 3:
The beginning of the round marks the one decrease point and the cable loop made at the gap at the opposite end marks the other, however, you may also want to place a stitch marker at that end as a visual reminder. Knit one round.
STEP 4:
Begin heel decreases as follows:
Rnd 1: Ssk (slip, slip, knit two together through the back loop), k to end of needle (so, first half of stitches), rotate piece and adjust circ cord, k2tog, k to end of second needle (so, to end.
Rnd 2: Knit.
Repeat Rnds 1-2 until half of the sts have been decreased, OR until you’re happy with the heel shape. Cut yarn, leaving a long tail for seaming.
STEP 5:
Using tail and tapestry needle, use Kitchener stitch to graft heel closed.

Repeat for the second sock.
That’s all there is to it!
Don’t forget to tag @vickiehowell if you post photos of your own Two-at-a-Time Socks, or the Afterthought Heel!
As always, you can find all episodes of this series under the Ask Me Monday playlist on the Videos section of my Facebook page. Enjoy!
How to Knit Socks: More Tutorials
Looking for a basic sock recipe? Learn how to knit a sock here.
Want a sock pattern that makes for the perfect, holiday gift? Try That 70’s Sock pattern!

Interested in a more intensive, step-by step tutorial for one-at-a-time socks? Take my Knit Maker 202: Socks Class on Creative Live!
More of a Loom Knitter? Check out my loom knit ankle tutorial here.
Looking for a Toe-Up Sock pattern? Try this one by Lydia Gluck from The Trends Episode of The Knit Show!
The post Afterthought Heel: How to Knit Socks Two-at-a-Time, Part 2 appeared first on Vickie Howell.
August 14, 2018
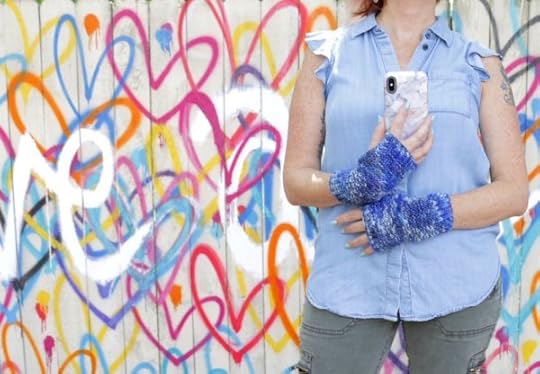
Swiper Fingerless Mitts: New Knitting Pattern!

Photos: Tristan Howell
Swiper Fingerless Mitts
Fingerless mitts are a must-have for a mobile maker! After all, you can’t have impeded digits while trying to text someone else’s. Nor can your fingers be confined while you’re crafting — or Instagramming pics of — your latest project! No worries, though, I’ve got you covered with these textured stitch wrist warmers. Oh, and while we’re talking texting and posting, Visible (the new app-based cell service on the Verizon Network) also has you covered by offering an unlimited talk, text, and data plan for a flat $ 40/month! Both my mitts and their service are perfect for small business owners, college-bound peeps, teenagers, and anyone whose life and work are cell-bound. I’ll keep you cozy, they’ll keep it cost effective!
Currently Visible is only available by invitation. Consider this yours! Download the app and use code: FEB13 to check it out!
This post was brought to you by:

Swiper Fingerless Mitts: How-To
MATERIALS
1 hank Manos Del Uruguay Maxima (100% wool); 219 yds), in color: Freshwater.
Set, US 7/4.5 mm double-pointed needles
Tapestry needle
SIZES
Unisex S/M(L/XL)
FINISHED MEASUREMENTS
8”(9”)/20(23) cm Circumference
7”(7 1/2”)/18(19) cm Tall
DIRECTIONS (Make 2)
CO 36(40). Distribute stitches evenly amongst dpns; join, taking care not to twist.
Rnds 1-10: *K1tbl, p1; rep from * around.
Rnd 11 and all odd Rnds: Knit.
Rnds 12 & 14: *K1, p3; rep from * around.
Rnd 16 & 18: P2, *k1, p3, rep from * around to last 2 sts, k1, p1.
Repeat Rnds 11-18, once more
Thumb opening:
This section is worked back and forth in rows.
Row 1 and all RS rows: Knit.
Rows 2 & 4: *K3, p1; rep from * across.
Rows 6 & 8: K1, p1, *K3, p1; rep from * to last 2 sts, k2.
Repeat Rows 1-8, once more.

Revert back to working in rounds, in established pattern stitch (i.e. Rnds 11-18), until piece measures 6”(6 1/2”)/15(16.5) cm from CO edge.
Next Rnd: *K1tbl, p1; rep from * around.
Repeat last rnd, three times more.
BO in pattern stitch.
FINISHING
Weave in ends.
The post Swiper Fingerless Mitts: New Knitting Pattern! appeared first on Vickie Howell.
August 13, 2018
How to Knit Socks Two-at-a-Time: Part 1

This week on Ask Me Monday we dive into the first part of how to knit socks two-at-a-time on a circular needle, and using the Magic loop method. In this episode, I go over prepping your yarn, choosing a needle, casting on, joining the rounds, and knitting the legs of both socks.
***This episode of Ask Me Monday is sponsored by Knitter’s Pride/ KnitPro***
See more KP products during “Vic’s Tips” segments of The Knit Show!
MATERIALS
Superwash wool of any weight (Shown: Koigu Chelsea Merino)
Knitter’s Pride Marblz, Zing, Royale, or Karbonz circular needle (at least 32″ long), in the corresponding size
Tapestry needle
2 Stitch markers in different colors
Note: This tutorial will work with any weight yarn and size socks. Please see my Basic Sock Recipe post for how to calculate the number of cast on stitches you need for your desired size and yarn.

Knit Socks Two-at-a-Time: Setting Up
Knitting socks two-at-a-time requires having two balls of yarn prepped and ready. If you’re working with a yarn with less yardage, you may have to purchase two balls anyway so no extra prep is required. Sock yarn, however, usually comes in a hank or ball with enough yardage in one to make a pair of socks. If this is the case in your situation, then before beginning to knit the one ball will need to be separated into two by (re)winding it into equal parts.
Pro-Tip: Using a food or postage scale weigh your yarn before winding, then divide that number in half to know approximately how large to make each ball of yarn. By re-weighing the yarn as you go, you’ll know when the first ball has enough. What’s left will be your second ball!
Knit Socks Two-at-a-Time: Casting On
Using one of the two balls of yarn and the desired method (long-tail, single tail, and German all work great!), cast on the number of stitches required for Sock A. (If you don’t have a pattern, see above note for reference on calculating that number.)
Push the first sock’s stitches down the circular needle’s cord a bit and with the second ball of yarn, cast on the number of stitches required for the Sock B.
Push all stitches towards the left-hand needle so the tails and working yarn are farthest away from what will be your working needle. Ok, now you’re ready to start joining rounds!
Knit Socks Two-at-a-Time: Joining Rounds
You’ll begin with Sock A, ignoring the stitches for Sock B for now. Just let them hang all free and easy on the cord.
Divide Sock A’s stitches into two (or as close to it as possible, if you’re working with an odd number), pulling a length of loop through the opening of the space created by the division.
Slide the half of the stitches furthest from the working yarn onto what will become the needle in your left hand. The second half of the stitches will be on the cord, leaving a long length of cord for wiggle room while you knit with the right-hand needle.
Taking care not to twist, join round by knitting with the working yarn from the cord (closest to the right-hand needle, but not loaded onto it as you need the aforementioned cord to maneuver with.)
Work the first half of the stitches in desired stitch (shown in k1, p1 rib), rotate the piece and push the second half of the stitches on the left-hand needle, while also pulling the center loop and readjusting the already knit stitches onto the cord. Finish knitting round. Place one stitch marker to signify that this is Sock A. Push Sock A into a holding position on the cord. It’ll rest under your right hand — think of it as any knitted work in a row that has already been worked, which would always be on the right side while you worked on the rest of the row. I know, we’re working in rounds here, but you get the gist.
Repeat the process for Sock B.
Knit Socks Two-at-a-Time: Knitting the Legs
Alternating between socks, letting the unused sock rest on the cords while it waits, knit the cuff stitches of each respective sock for an inch or two.
Switch to desired stitch pattern for leg (shown in multiples of 4: Rnd 1: P3, sl 1; rep around. Rnd 2: P3, k1; rep around.) for as long as you’d like the leg.
Once leg is the length you want: ankle, calf, knee, thigh, you choose — you’ll be ready yo knit the heels!

Join me back on August 20th at 12pmCT, for Part 2 of How to Knit Socks Two-at-a-Time, when we’ll cover knitting the heels and gussets.
As always, you can find all episodes of this series under the Ask Me Monday playlist on the Videos section of my Facebook page. Enjoy!
How to Knit Socks: More Tutorials
Looking for a basic sock recipe? Learn how to knit a sock here.
Want a sock pattern that makes for the perfect, holiday gift? Try That 70’s Sock pattern!
Interested in a more intensive, step-by step tutorial for one-at-a-time socks? Take my Knit Maker 202: Socks Class on Creative Live!
More of a Loom Knitter? Check out my loom knit ankle tutorial here.
Reference: 2-at-a-Time Socks by Melissa Morgan-Oakes
The post How to Knit Socks Two-at-a-Time: Part 1 appeared first on Vickie Howell.
August 3, 2018
Dots Trio Inspired Crocheted Coffee Sleeve

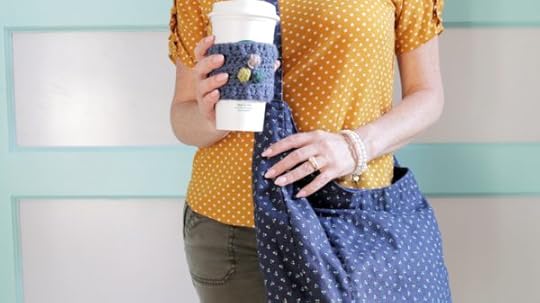
Dots Trio Inspired Coffee Sleeve, pictured with Metro Retro Hobo Bag
Dots Trio Crochet Coffee Sleeve
Inspired by the Dots Trio print bags from Thirty-One Gifts
MATERIALS
Small amounts of worsted-weight yarn in four colors: (A) Navy, (B) Green, (C) Yellow, and (D) Grey
Size US H/8 mm hook
Tapestry needle
To-go Coffee Cup
ABBREVIATIONS
ch = chain
BPhdc = back post half double crochet
FPhdc = front post half double crochet
Hdc = half double crochet
rep = repeat
st(s) = stitches
WS = wrong side
yo = yarn over
SPECIAL STITCH
MB = Make Bobble
Yarn over and insert hook into next stitch, pulling up a loop; [yo, and insert hook in the SAME stitch, pulling up a loop] 3 times; yo, pull through ALL loops on hook, ch to close off.
DIRECTIONS
Crochet a long enough chain to fit the circumference of the middle portion of a coffee cup, and also is a multiple of 2.
Row 1 (WS): Hdc in 2nd ch from hook, and to end.
Row 2: Ch 2, *FPhdc, BPhdc; rep from * to end.
Row 3: Ch2, hdc in next st and to end.
Row 4: Hdc to 3 sts before middle of row, join Color B, MB, with A hdc, join Color C, MB, with A hdc to end.
Cut B and C.
Row 5: With A, ch 2, hdc in next st and to end.
Row 6: Ch2, hdc to the center of row (the stitch in the middle of the two bobbles, 2 rows below), join Color D, MB, with A hdc to end.
Row 7: Rep Row 5.
Row 8: Repeat Row 2.
Fasten off, leaving a long tail for sewing.
FINISHING
With tail and tapestry needle, sew the two sides together to create sleeve shape.
Weave in ends.
Need a half double crochet refresher? Check out my video tutorial:
The post Dots Trio Inspired Crocheted Coffee Sleeve appeared first on Vickie Howell.
July 30, 2018
How to Knit a Flower
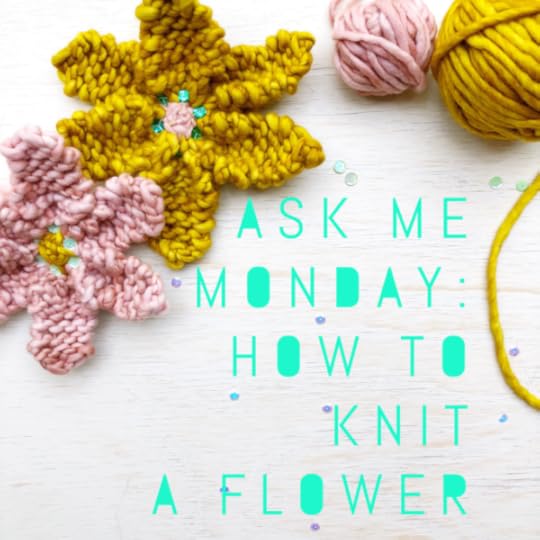
How to Knit a Flower
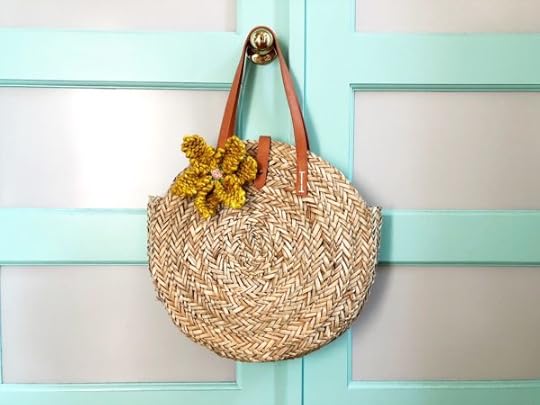
Where I live in Austin, Texas, it’s too hot to go outside much during the Summer. That doesn’t mean though, that I can’t bring a little nature inside! This week’s episode of Ask Me Monday focuses on how to knit a flower. These boho beauties make the perfect embellishment for a pillow or purse, or a stand-out accessory when turned into a brooch or headband. Planning ahead for gift-giving season? Using any weight yarn scraps from your stash, make a bunch of these to adorn your presents with!
***This episode of Ask Me Monday is sponsored by Knitter’s Pride/ KnitPro***
See more KP products during “Vic’s Tips” segments of The Knit Show!
Knit Flower Materials
Any weight yarn in Main Color and Contrast Color. (Shown in Malabrigo Rasta, color: Frank Ochre, Manos Del Uruguay Franca, in color: Blush, and Knit Collage Wildflower, in color: Ochre Rose)
Appropriate Sized Circular Knitting Needle, any length (Shown in video: Knitter’s Pride Zing and Marblz)
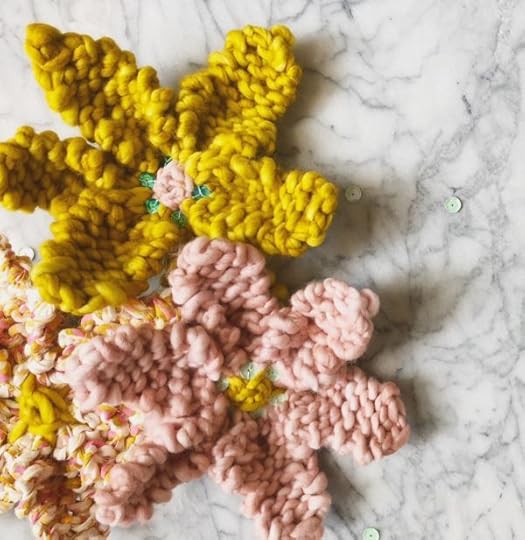
How to Knit a Flower: Directions
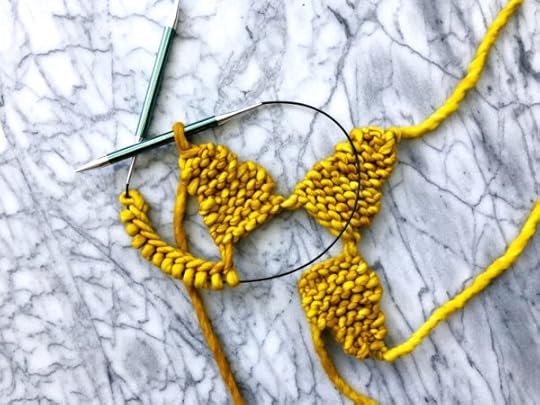
Note: This flower is knit flat, one petal at a time.
With MC, CO 36 sts, leaving a long tail for seaming.
PETAL ONE:
Rows 1-6: K 6 sts; turn, leaving the rest of the sts on hold.
Row 7: Ssk, k 2, k2tog; turn.
Rows 8-12: Knit.
Row 13: Ssk, k2tog, sl 2nd st over 1st st and let it drop of the needle. — 1 st.
Cut yarn and feed through loop to fasten off.
PETAL TWO:
Rejoin yarn and repeat as for petal one.
PETALS THREE-SIX
Repeat as for PETALS ONE and TWO.
Finishing
Using a Wool Needle, join petals in a circle, weave in yarn tail (see video for method) through all 6 petals and cinch. Sew remaining hole shut.
With CC and Wool Needle, embroider flower center as follows:
Make a long stitch from one petal across to the opposite petal. Repeat around until a star formation is created.
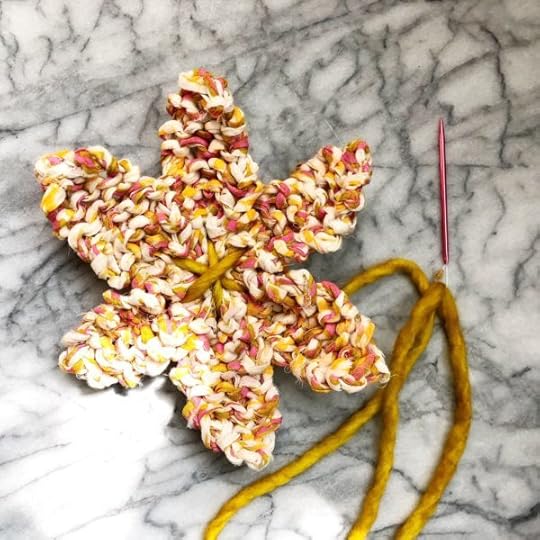
Weave over and under round the sts created in the last step. Continue in this manner until center looks finished. Fasten off.
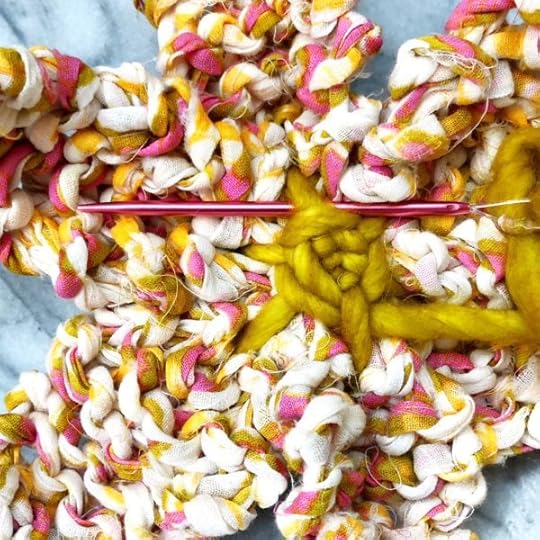
Weave in ends.
OPTIONAL:
Using sewing needle and thread, hand sew sequin to flower center.
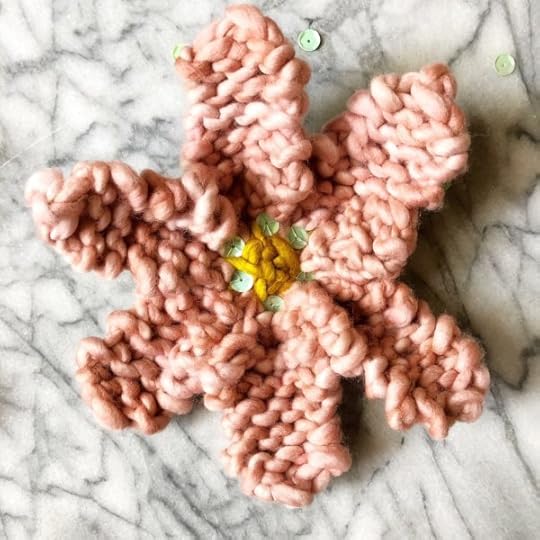
Don’t forget to follow and tag @vickiehowell on Instagram and Facebook, with photos of your knit flowers!
Want to make other yarn embellishments? Try crocheting decorative buttons. See the tutorial here!
Tune in weekly to my Ask Me Monday series, on Facebook at 12pmCT. Watch past episodes on the playlist here.
The post How to Knit a Flower appeared first on Vickie Howell.
July 28, 2018
Cashmere Bandit Scarf Crochet Pattern Now Available
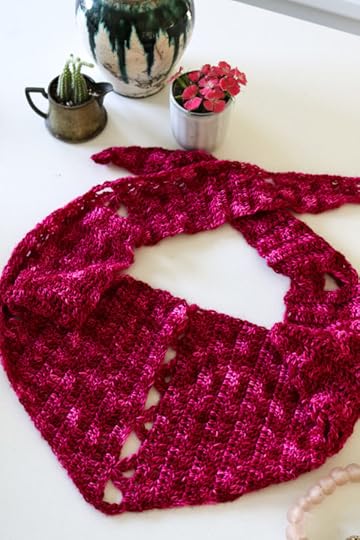
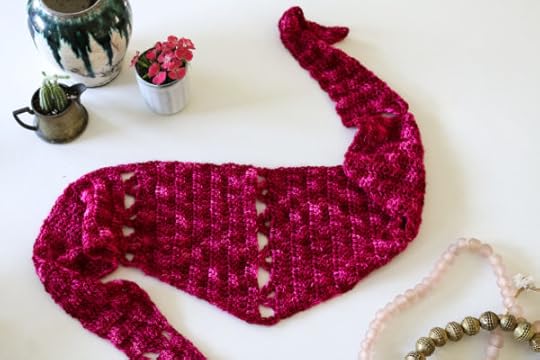
Cashmere Bandit Scarf Crochet Pattern
Hey, crocheters! YarnYAY! doesn’t forget about you. In fact, we’re the only subscription box business that includes both knit and crochet patterns for the SAME project. That means, no one gets left out!
In June’s box, we crocheted the Cashmere Bandit Scarf, the sister project to the knit version. It’s rare to see luxury yarn like Dream in Color Jilly with Cashmere used for crochet. Why is that? Upon occasion, crocheters like to go top-shelf, too! This pattern speaks to treating yo’self!
Now that the June box is no longer available, I’ve put the pattern for purchase in my Ravelry Shop. Nab it now!
Cashmere Bandit Scarf Crochet Pattern Materials
Approx 220 yds of Dream in Color Jilly Cashmere, or equivalent fingering-weight yarn
Size U.S. G/4 mm hook
Stitch marker
Tapestry needle
Blocking supplies
For more information on YarnYay! by Vickie Howell click below.
The post Cashmere Bandit Scarf Crochet Pattern Now Available appeared first on Vickie Howell.
Cashmere Bandit Scarf Knitting Pattern Now Available!
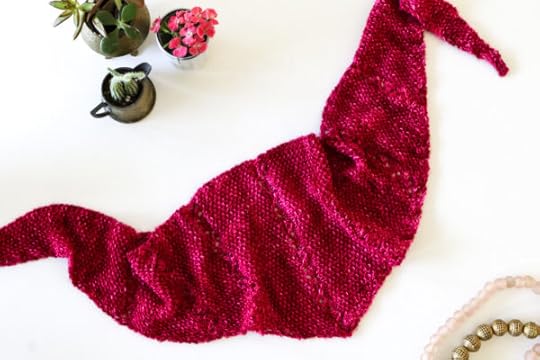
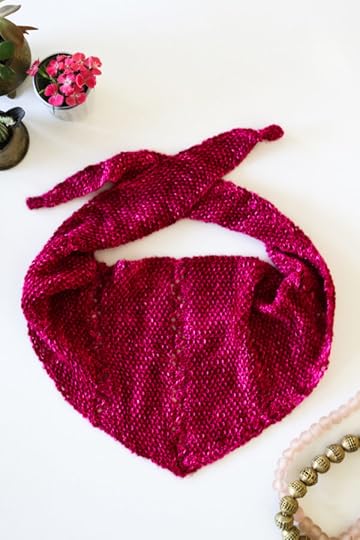 Cashmere Bandit Scarf Knitting Pattern
The June 2018 YarnYAY! subscription box featured exclusive half-hanks of gorgeous, Dream in Color Jilly Cashmere yarn and the Cashmere Bandit Scarf knitting pattern designed especially for this yarn and yardage.
Now that the June box is no longer available, I’ve put the pattern for purchase in my Ravelry Shop. Nab it now!
Cashmere Bandit Knitting Pattern Materials
Approx 220 yds of Dream in Color Jilly Cashmere, or equivalent fingering-weight yarn
Size U.S. 5/3.75 mm needles
Stitch marker
Tapestry needle
Blocking supplies
This piece is the perfect gateway into lace-knitting and knitting a piece from side-to-side. You can make approximately 2 of these scarves with 1 full hank of fingering-weight yarn, which means your holiday gift making just got affordable! Wear this in the summer with a tank top, or use it as a layering piece during the colder months.
Oh, and look how cute you’ll look wearing the Cashmere Bandit scarf!
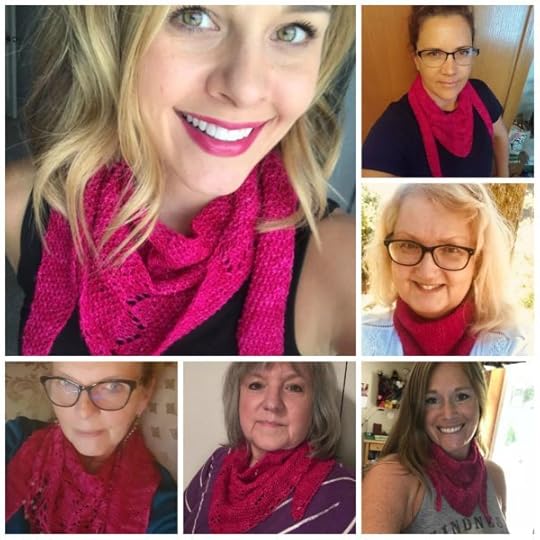
Just a few of my lovely, YarnYAY! June Box Subscribers donning their Cashmere Bandit scarves!
For more information on YarnYay! by Vickie Howell click below.
The post Cashmere Bandit Scarf Knitting Pattern Now Available! appeared first on Vickie Howell.


