
Vickie Howell's Blog: Vickie Howell's Website, page 26
August 9, 2019
YarnYAY! August Subscription Box

YarnYAY! August Boxes
YarnYAY! August boxes are now available. We only have a limited amount of new-subscriber spots open, so grab one while you can!
Subscription is $35 + $6 flat rate (US) shipping. This month’s box is valued at $45! Watch the unboxing below to hear about the companies you’re supporting and info on the products!
YarnYAY! August Boxes: What’s inside
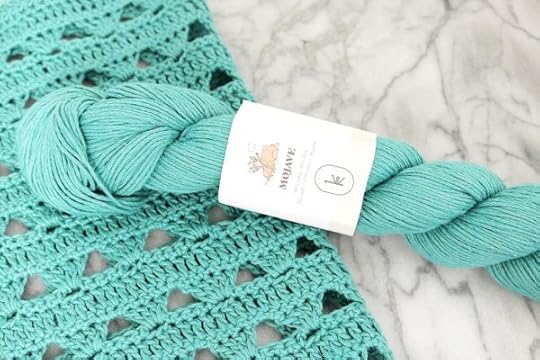
2 hanks of Kelbourne Woolens Mojave is a lovely, drapey blend of cotton and linen, making it pretty much the perfect yarn to work with during the summertime. This month’s color selections are Cactus, Turquoise, and Seafoam.
Kelbourne Woolens is a Philadelphia-based yarn and distribution company. It was founded in 2008 and is owned by Courtney Kelley and Kate Gagnon Osborn. Vickie met the duo for the first time when they were guests on PBS’ Knitting Daily during her tenure as host/producer. See the rest of their yarns at: kelbournewoolens.com
Al Fresca Placemat & Coaster Set Pattern (print & digital) by Vickie Howell
We were dreaming of picnics and patio dining when putting together this month’s box, so pop-y placemats seemed the natural project choice. The knit version is made with a lacy herringbone stitch for airy, textured pieces. 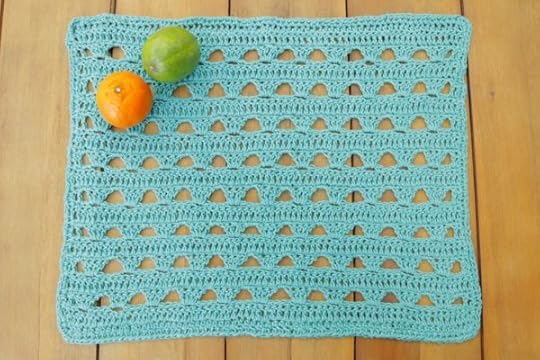
Al Fresca Placemat Pattern (print & digital) by Vickie Howell
The crochet version of this month’s project uses shell stitches for a still lacy, but sturdier option. For more of Vickie’s patterns, go to the YarnYAY! shop or here.

Sublime Stitch Epic Alphabet Embroidery Transfers
You’ll be able to personalize everything with this easy-to-use pack of alphabet transfers. We suggest monogramming some napkins to go with this month’s project, thus completing your handmade dining experience, but you do you. Monogram all of the things!
Sublime Stitching is owned by Jenny Hart, who founded the business 20 years ago. She and Vickie were a part of the Austin Craft Mafia together before the group disbanded and Jenny moved her business to the Los Angeles area. She’s a pioneer in the needlearts world as well as a fine artist. showing here work worldwide. To see more Sublime Stitching products, go to: sublimestitching.com
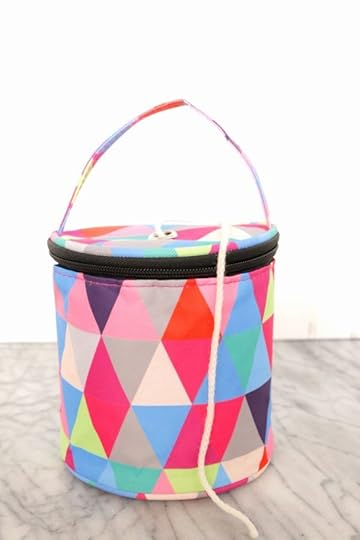
Stitch-in-public Yarn Carrier
While you’re out enjoying your summer plans, or dining al fresca on your new, beautiful linen placemats, take your yarn with you. This wristlet carrier keeps your yarn at bay while you’re stitching on the go!

YarnYAY! Community
Access into our Facebook Group where we stitch along, do exclusive giveaways, post tutorials, and host interview/events with industry experts.


The post YarnYAY! August Subscription Box appeared first on Vickie Howell.


August 5, 2019
Tunisian Honeycomb Stitch | Tutorial + Pillow Pattern

Tunisian Honeycomb Stitch
This week on Ask Me Monday we chatted Tunisian Honeycomb Stitch. I showed how to work the Tunisian Simple and Purl Stitches in combination to create the overall pattern. Watch the replay below, then put your skills to work by making a pillow. Enjoy!

This episode of Ask Me Monday is sponsored by Knitter’s Pride/ KnitPro
See more KP products during “Vic’s Tips” segments of The Knit Show!


Tunisian Honeycomb Stitch Pillow
MATERIALS
Valley Yarns Superwash Super Bulky, colors by Vickie Howell: 5 balls (A) Aqua Oasis, and 1 ball each (B) Moontower Mustard and (C) Peacock
FINISHED SIZE
16″ square
GAUGE
8 3⁄4″ stitches x 6 rows = 4″10 cm in Tunisian Honeycomb Stitch
SPECIAL ABBREVIATIONS
Tps = Tunisian purl stitch
Tss = Tunisian simple stitch
See video above, about 10 minutes in, for a demonstration.
DIRECTIONS
Note: Each row in Tunisian Crochet requires two passes: the forward pass picking up the loops (noted in the instructions) and the backward pass getting rid of the loops (not noted.)
FRONT:
With A, ch 35.
Work Foundation Row.
Row 1: *Tps, Tss; repeat from * to end. –35 sts
Row 2: *Tss, Tps; repeat from * to end.
Row 3: Repeat Row 1.
Join B; cut A.
Row 4: With B, *Tss, Tps; repeat from * to end.
Row 5: *Tps, Tss; repeat from * to end.
Row 6: *Tss, Tps; repeat from * to end.
Join C; cut B.
Row 7: With C, *Tps, Tss; repeat from * to end.
Row 8: *Tss, Tps; repeat from * to end.
Row 9: *Tps, Tss; repeat from * to end.
Join A, cut C.
Row 10: With A, *Tss, Tps; repeat from * to end.
Row 11: *Tps, Tss; repeat from * to end.
Row 12: *Tss, Tps; repeat from * to end.
Join B; cut A.
Row 13: With B, *Tps, Tss; repeat from * to end.
Row 14: *Tss, Tps; repeat from * to end.
Row 15: *Tps, Tss; repeat from * to end.
Join C; cut B.
Row 16: With C, Tss, Tps; repeat from * to end.
Row 17: *Tps, Tss; repeat from * to end.
Row 18: *Tss, Tps; repeat from * to end.
Join B; cut C.
Row 19: With B, *Tps, Tss; repeat from * to end.
Row 20: *Tss, Tps; repeat from * to end.
Row 21: *Tps, Tss; repeat from * to end.
Join C; cut B.
Row 22: With C, Tss, Tps; repeat from * to end.
Row 23: *Tps, Tss; repeat from * to end.
Row 24: *Tss, Tps; repeat from * to end.
Fasten off.
BACK
With A, ch 35.
Work Foundation Row.
Row 1: *Tps, Tss; repeat from * to end. –35 sts
Row 2: *Tss, Tps; repeat from * to end.
Rows 3-24: Repeat Rows 1-2.
Fasten off.
FINISHING
Weave in ends.
With WS facing and using Wool Needle and yarn, seam together sides and bottom. Insert pillow; seam top shut.
Looking for another Tunisian Crochet project? Try this post:
Tunisian Crochet Lace Summer Scarf (Ask Me Monday Episode 74)
Ask Me Monday is the longest-running Facebook Live series in the needlecraft genre. It’s on hiatus until May 2019. Until then, though, you can find all past episodes of this series under the Ask Me Monday playlist on the Videos section of my Facebook page. Enjoy!
The post Tunisian Honeycomb Stitch | Tutorial + Pillow Pattern appeared first on Vickie Howell.
July 16, 2019
July YarnYAY! Boxes Now Shipping!

July YarnYAY! Boxes
YarnYAY! July boxes are now available and shipping. As of today, this month, we only have 100 new-subscriber spots open, so grab one while you can!
Subscription is $35 + $6 flat rate (US) shipping. This month’s box is valued at over $62! Here’s what it includes:

2 Skeins (over 600gr!) We Are Knitters The Fabric Yarn
Fabric Yarn is made from reused leftovers from t-shirt production. Its sturdiness and structure will ensure long-lasting projects, perfect for home decor. This month’s color selection is Mint.

Organize knIT! Basket Pattern by Vickie Howell
This month’s box is all about organization, so baskets seemed like the natural project choice. The knit version is worked from the top down in Honeycomb stitch for a nice, thick fabric. Find my tutorial on this stitch pattern here.

Hooked on Home Basket Pattern by Vickie Howell
The crochet version of this month’s project is worked from the base up in single crochet for a sturdy construction. Need a single crochet refresher? Check out my YouTube tutorial .

Llamarama Tray by Danica Studios
Llamas (and alpacas) are the unofficial mascot of us fiber-loving types. The Llamarama tray is designed with the cutest little llama, and makes for a smile-worthy holder for loose stitch markers, pins, and buttons.

Yarn Bobbins by Clover
Yarn bobbins may be intended to hold small amounts when working in intarsia or stranded colorwork, but they also work great for organizing scrap yarn!
YarnYAY! Community
Access into our Facebook Group where we stitch along, do exclusive giveaways, post tutorials, and host interview/events with industry experts.

The post July YarnYAY! Boxes Now Shipping! appeared first on Vickie Howell.
July 15, 2019
Honeycomb Stitch for Home Decor
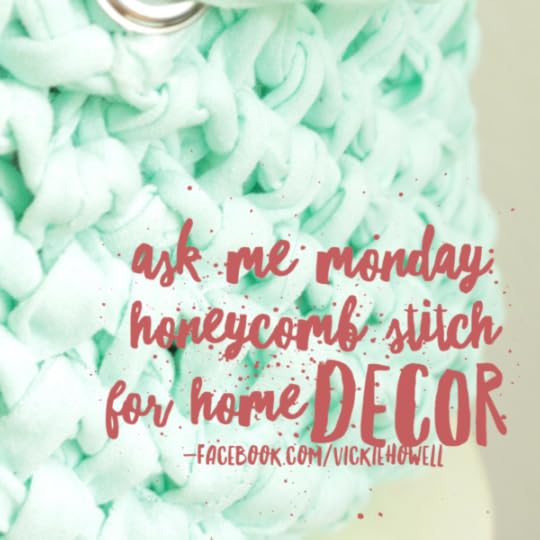
Honeycomb Stitch for Home Decor
This week on Ask Me Monday I show two ways how to knit the Honeycomb Stitch, a great and hearty stitch option for home decor items like the Organize knIT basket (see bottom of post). Keep this stitch pattern in mind (or better yet, Pin this page so you’ll have it) for making pillows or trivets in super chunky yarn, or super-warm garments in lighter weight fibers. Enjoy!
This episode of Ask Me Monday is sponsored by Knitter’s Pride/ KnitPro
See more KP products during “Vic’s Tips” segments of The Knit Show!
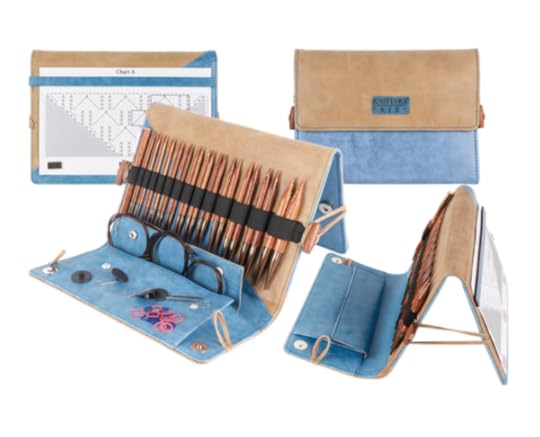
FEATURED PRODUCT: Knitter’s Pride Deluxe Interchangeable Knitting Needle Set. Now Available in my YarnYAY! Shop.
Honeycomb Stitch Swatches
MATERIALS
Any weight yarn (Super Chunky works great for home decor!)
Knitter’s Pride Knitting Needles (I especially dig their Ginger Interchangeable set)
Optional: Stitch Marker
SPECIAL STITCH
k1B = knit 1 below. Insert needle into the next stitch, 1 row down; knit.
Honeycomb Stitch (Worked Flat)
Worked over an odd number of stitches.
CO 11 sts.
Note: I used super chunky yarn and size U.S. 17 needles. If working at a smaller gauge, CO a larger amount of stitches.
Row 1: Knit.
Row 2 (RS): *K1, k1B; rep from * to last st, k1.
Row 3: *K1, pick up extra loop created from K1B and place it on your LH needle, k2tog the loop with the next st; rep to last st, k1.
Row 4:*K1B, k1; rep from * to last st, k1B.
Row 5: *Pick up extra loop created from K1B and 0pkace it on your LH needle, k2tog the loop with the next st, k1; rep to last st, pick up extra loop created from K1B and place it on your LH needle, k2tog the loop with the next st.
Repeat Rows 2-5 for pattern stitch, and until swatch is desired length.
Knit 1 row.
BO.
Honeycomb Stitch (Worked In-the-Round)
Worked over an even number of stitches.
CO as many even sts as needed to fill up your circular needle. Place marker and join round, taking care not to twist.
Rnd 1: Purl.
Rnd 2 (RS): *K1, k1B; rep from * around.
Rnd 3: *P1, pick up extra loop created from K1B and place it on your LH needle, p2tog the loop with the next st; rep from * around.
Rnd 4:*K1B, k1; rep from * around.
Rnd 5: *Pick up extra loop created from K1B and 0pkace it on your LH needle, p2tog the loop with the next st, p1; rep from * around.
Repeat Rnds 2-5 for pattern stitch, and until swatch is desired length.
Knit 1 row.
BO.
Honeycomb Stitch: Make This!
Now that you’ve got this stitch pattern down, are you ready to put it into action? The Organize knIT basket is a great application for the technique! This basket can be used as a planter cozy, or a catch-all for anything in your home. The pattern. along with the upcycled t-shirt We Are Knitters Fabric Yarn, come in The July YarnYAY! Subscription Box. Get yours today!
Ask Me Monday is the longest-running Facebook Live series in the needlecraft genre. It’s on hiatus until May 2019. Until then, though, you can find all past episodes of this series under the Ask Me Monday playlist on the Videos section of my Facebook page. Enjoy!
The post Honeycomb Stitch for Home Decor appeared first on Vickie Howell.
July 10, 2019
You Might Be Biased Scarf


You Might Be Biased Scarf
The You Might Be Biased Scarf plays with sock-weight yarn, and alternating between traditional knitting and what I call chain plying (sometimes also called Navajo Knitting), to create a beautifully textured piece.

Project Materials
NOTE: You’ll only need about 1/3 of each hank of the three yarns listed below.
1 hank Neighborhood Fiber Co Studio Sock (100% Superwash Merino; 400 yds.), in color (A.) Victorian Village
1 hank each Manos Del Uruguay Alegria (75% superwash/25% polyamide; 445 yds), in colors: (B) Peach and Chia, and (C) Spirulina
Size US 10 1/2 (6.5 mm) needles

Never tried chain plying? Here’s how to do it.
The post You Might Be Biased Scarf appeared first on Vickie Howell.
July 8, 2019
Broomstick Lace Tree Wall Decor | Christmas in July

Broomstick Lace Tree Wall Decor
This week on Ask Me Monday, I show how to combine a traditional crochet method with thoughtful increases and chunky yarn to create playful Broomstick Lace Tree Wall Decor. This project can be made as kitschy, classic or modern as one wants, simply by choosing colors and embellishments that speak to the individual style. It works as a Christmas decoration for those who celebrate, or a woodland ode to nature for those who don’t. Regardless it’s fun to create and makes for a great gift. Get started now on making a bunch for the holidays, or bookmark this project for later when we get closer to festivities.
Happy Christmas in July!
This episode of Ask Me Monday is sponsored by Knitter’s Pride/ KnitPro
See more KP products during “Vic’s Tips” segments of The Knit Show!
Featured Products: Jumbo Birch Knitting Needles, Dreamz Crochet Hooks, and Wool Needles
Broomstick Lace Tree Wall Decor Pattern
MATERIALS
1 ball each Valley Yarns Superwash Super Bulky in colors: (A) AstroTurf by Vickie Howell OR White and (B) Chocolate, or equivalent super-bulky yarn
Size 12mm Knitter’s Pride Dreams Crochet Hook
Size US 50/25 mm Knitter’s Pride Jumbo Birch Knitting Needle
Optional: Flower sequin, mini pompoms, or other decorations
GAUGE
Not important for this project.
FINISHED MEASUREMENTS
9″/23 cm tall, excluding hanging loop and tassel
NOTES: This project is made using the Broomstick Lace technique.

DIRECTIONS
Tree:
With A, ch 4.
Row 1: Place loop from hook onto knitting needle; *using hook pull loop up from the next ch and place onto knitting needle; repeat from * to end. Turn. — 4 loops
Row 2: *Holding knitting needle in left hand, slip 4 loops from needle to crochet hook; [YO, pull through loops, YO pull through rem loop to close], 8 sc in center of hole just created; repeat from * to end. Turn. — 1 hole, 8 sts
Row 3: Place loop from hook onto knitting needle; *using hook pull loop up from the next ch and place onto knitting needle; repeat from * to end. Turn. — 8 loops
Row 4: *Holding knitting needle in left hand, slip 4 loops from needle to crochet hook; [YO, pull through loops, YO pull through rem loop to close], 6 sc in center of hole just created; repeat from * to end. Turn. — 2 holes, 12 sts
Row 5: Place loop from hook onto knitting needle; *using hook pull loop up from the next ch and place onto knitting needle; repeat from * to end. Turn. — 12 loops
Row 6: *Holding knitting needle in left hand, slip 4 loops from needle to crochet hook; [YO, pull through loops, YO pull through rem loop to close]**, 5 sc in center of first hole created; repeat from * to ** , 6 sc in center of second hole; repeat from * to ** , 5 sc in center of last hole. Turn. Turn. — 3 holes, 16 sts
Row 7: Place loop from hook onto knitting needle; *using hook pull loop up from the next ch and place onto knitting needle; repeat from * to end. Turn. — 16 loops
Row 8: Holding knitting needle in left hand, slip 4 loops from needle to crochet hook; [YO, pull through loops, YO pull through rem loop to close], 5 sc in center of hole just created; repeat from * to end. Turn. — 4 holes, 20 sts
Row 9: Place loop from hook onto knitting needle; *using hook pull loop up from the next ch and place onto knitting needle; repeat from * to end. Turn. — 20 loops
Row 10: Holding knitting needle in left hand, slip 4 loops from needle to crochet hook; [YO, pull through loops, YO pull through rem loop to close], 5 sc in each center of first TWO holes created; repeat from * to ** , 4 sc in center of third hole; repeat from * to ** , 5 sc in each center of last TWO holes. Turn. — 5 holes, 24 sts
Row 11: Place loop from hook onto knitting needle; *using hook pull loop up from the next ch and place onto knitting needle; repeat from * to end. Turn. — 24 loops
Row 12: Holding knitting needle in left hand, slip 4 loops from needle to crochet hook; [YO, pull through loops, YO pull through rem loop to close], 4 sc in center of first hole created; repeat from * to ** , 5 sc in each center of next FOUR holes; repeat from * to ** , 4 sc in each center of last hole. Turn. — 6 holes, 28 sts
Fasten off.
Hanging Loop:
Join A at top of tree with a sl st. Ch 10, sc in same space as join. Fasten off.
Note: For a taller, skinner tree, add a non-increase row (meaning, work the same number of sc into each of the 4 loop groupings as there are groupings) in between of eah increase row.

FINISHING
Weave in ends.
Make Tassel:
Wrap B 12
or so times around desired length cardboard piece. Slip an additional piece of yarn through the top loops of all of the strands; tie.
Carefully slide yarn off the cardboard, and pinch together about 1″/2.5 cm down from top, cinching tightly, using an additional strand of yarn.
Cut the bottom loops to create tassel strands.
Sew or tie tassel to center bottom of tree.
Optional:
Sew or glue decorations onto tree front.
Ask Me Monday is the longest-running Facebook Live series in the needlecraft genre. It’s on hiatus until May 2019. Until then, though, you can find all past episodes of this series under the Ask Me Monday playlist on the Videos section of my Facebook page. Enjoy!
The post Broomstick Lace Tree Wall Decor | Christmas in July appeared first on Vickie Howell.
July 1, 2019
Great Cast Ons for Ribbed Cuffs, Waistbands, and Beyond
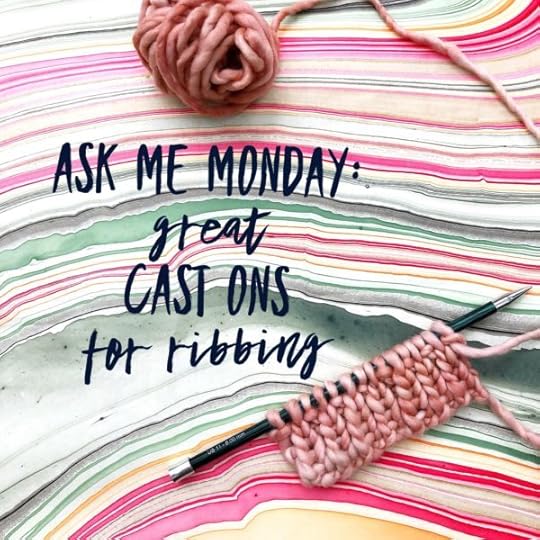
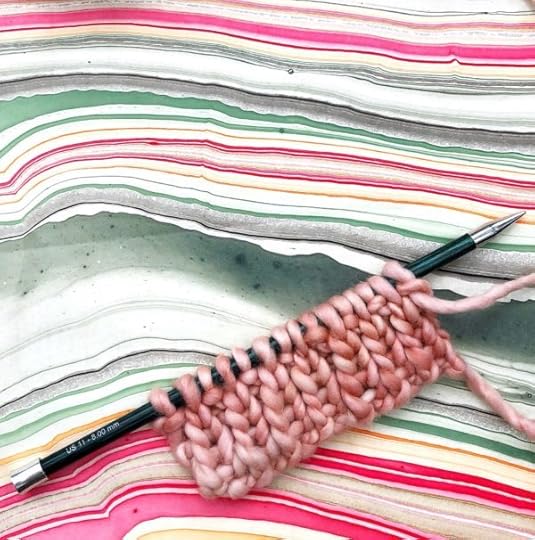
Best Cast Ons for Ribbing
This week on Ask Me Monday I show two of the best cast ons for ribbing: the Alternating Cable Cast On and a version of the Tubular Cast on for 1×1 rib. Both great options when knitting cuffs, necklines and waist bands!
This episode of Ask Me Monday is sponsored by Knitter’s Pride/ KnitPro
See more KP products during “Vic’s Tips” segments of The Knit Show!
Featured Products: Knitter’s Pride Royale Set and Zing! Straight Needles
Best Cast Ons for Ribbing: Alternating Cable Cast On for 1×1 Rib
Set Up:
Leaving a tail for weaving in, tie a slip knot on needle. This is your first stitch. Counts as a P1.
Insert RH needle into first stitch on LH from front to back; yarn-over knitwise and pull through a loop; place loop on LH needle. Counts as K1.Now you’re set-up, and ready to begin the process!
With yarn in front, insert RH needle into space BETWEEN the two stitches closest to the tip, from back to front, yarn-over purlwise and pull through a loop; place loop on LH needle. Counts as p1.
With yarn in back, insert RH needle into space BETWEEN the two stitches closest to the tip, from front to back, yarn-over knitwise and pull through a loop; place loop on LH needle. Counts as k1.
Repeat Steps 3-4 for as many stitches as desired.
Alternating Cable Cast On for 2×2 Rib
Set Up:
Leaving a tail for weaving in, tie a slip knot on needle. This is your first stitch. Counts as a P1.
Insert RH needle into first stitch on LH from back to front; yarn-over purlwise and pull through a loop; place loop on LH needle. Counts as p1.Now you’re set-up, and ready to begin the process!
With yarn in back, insert RH needle into space BETWEEN the two stitches closest to the tip, from front to back, yarn-over knitwise and pull through a loop; place loop on LH needle. Counts as k1.
Repeat Step 3
With yarn in front, insert RH needle into space BETWEEN the two stitches closest to the tip, from back to front, yarn-over purlwise and pull through a loop; place loop on LH needle. Counts as p1.
Repeat Step 5
Repeat Steps 3-6 for as many stitches as desired.
Best Cast Ons for Ribbing: Tubular Cast On for 1×1 Rib
Using a long enough tail for desired number of stitches, tie a slip knot onto needle. Counts as p1.
Using your pointer finger and thumb, separate tail and working yarn, while holding those two strands together with your remaining three fingers. Bring needle down lower than the hand holding yarn so that you see a slingshot shape.
With the tip of the needle, swoop UNDER the strand around the centermost strand that’s wrapped around your thumb, then swoop OVER the centermost strand that’s wrapped around your pointer finger and grab loop. Counts as a k1.
(You’ll notice that your stitch will be improperly mounted. Don’t worry, we’ll fix that later!)
With the tip of the needle, swoop UNDER the strand around the centermost strand that’s wrapped around your pointer finger, then swoop OVER the centermost strand that’s wrapped around your thumb and grab loop. Counts as a p1.
Repeat Steps 2-3 for desired stitches.
Set-up knit rows:
Taking care to hold tail down so the last stitch cast on doesn’t fall off, work row as follows:
Set-up Row 1: *K1tbl (this will properly orient your knit stitches), wyif sl 1; rep to end.
Set-up Row 2: *K1, wyif sl 1; rep from * to end.
Proceed with regular pattern from here!
Ask Me Monday is the longest-running Facebook Live series in the needlecraft genre. It’s on hiatus until May 2019. Until then, though, you can find all past episodes of this series under the Ask Me Monday playlist on the Videos section of my Facebook page. Enjoy!
The post Great Cast Ons for Ribbed Cuffs, Waistbands, and Beyond appeared first on Vickie Howell.
June 30, 2019
BIPOC Yarn, Fiber & Craft Industry Professionals

Want to be supportive of the BIPOC knitting, crochet and craft community? Put your money where your mouth is. Here’s a work-in-progress **list of BIPOC designers and business owners to shop from, hire to speak at your next conference, interview for your podcasts, or commission to design for your publication.
BIPOC Fiber Arts
BIPOC Other Art/Craft
*Note: Listings are all at least 50% BIPOC owned and/or operated. All have active e-commerce shops or design portfolios.
**This list is in no way complete. Please help me to make it as comprehensive as possible by submitting more BIPOC companies to add to the list by e-mailing submissions@vickiehowell.com
Resources:
Creative Bug
Industry Colleagues
JillianMoreno.com
TheYarnMission.com
Bluprint
The post BIPOC Yarn, Fiber & Craft Industry Professionals appeared first on Vickie Howell.
June 19, 2019
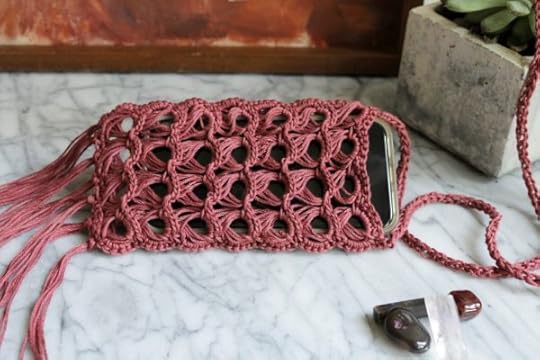
Boho Broomstick Lace Cell Phone Bag
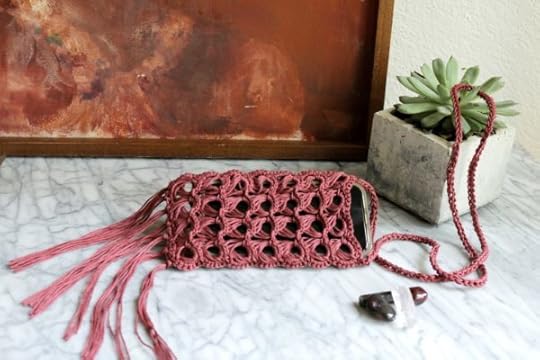
Boho Broomstick Lace Cell Phone Bag
For those times when you don’t need to schlep your big ol’ bag, but want to carry the device that keeps you connected, here’s a Boho Broomstick Lace Cell Phone Bag. Make it today, take it to the beach with you tomorrow!

This tutorial is brought to you by Visible Mobile, an app-based cell service offering unlimited talk, text and data for only $40/month!

Boho Broomstick Lace Cell Phone Bag Tutorial
MATERIALS
1 hank Tahki Yarns Cotton Classic Lite
Size US D/3.25 mm crochet hook
1, Size US 35/19 mm knitting needle
Tapestry needle
FINISHED SIZE
3 1/2″ wide x 6 1/2″ long, excluding fringe and handle.
DIRECTIONS (Make 2)
Ch 20.
NOTE: to make wider or narrower, just add or subtract 5 stitches!
Row 1: Place loop from hook onto knitting needle; *using hook pull loop up from the next ch and place onto knitting needle; repeat from * to end. Turn.
Row 2: *Holding knitting needle in left hand, slip 5 loops from needle to crochet hook; [YO, pull through loops, YO pull through rem loop to close], 5 sc in center of hole just created; repeat from * to end. Turn.
Rep Rows 1-2, six times more.
Next Row: Ch 1, sc in same st and every st across.
Fasten off.
FINISHING
With WS together, sc two pieces together.
Handle:
Join yarn at top-edge of one side of the bag. Esc (extended single crochet) for 34″, or desired length, join at top-edge of the opposite side of the bag.
(Note: This technique can also be called foundation single crochet, when used as the beginning of a project that’s being built upon.)
Fasten off.
Weave in ends.
Fringe: (Make 6)
Cut 3, 12″ strands to make one fringe bunch.
Attach to bottom of the bag. Fold fringe bunch in half; insert hook through the right side of bag edge and lay bunch at the folded point over the hook; pull the bunch through, from back to front, just enough to create a loop; set aside hook and use your hands to fold the loop over the edge of the project, and pull the ends of the strand through the loop. Pull tight.
Repeat evenly across. Trim, if necessary.

The post Boho Broomstick Lace Cell Phone Bag appeared first on Vickie Howell.
June 17, 2019
Boomerang Shawl Basic Recipe
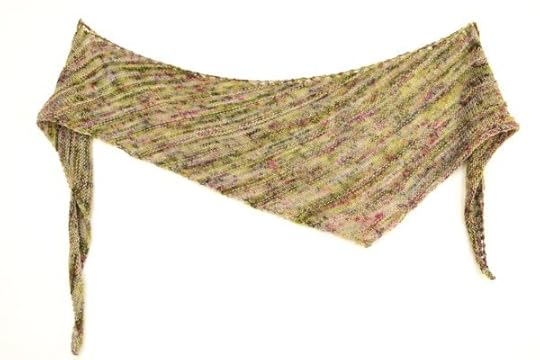
Boomerang Shawl Basic Recipe
This week on Ask Me Monday, I show how easy it is to design your own Boomerang Shawl (or shawlette) using a basic recipe. This method works with any weight yarn and corresponding sized needles and is a great option when you’re unsure if you have enough yardage for a traditional, triangle shawl, as the shape forms almost immediately which makes it wearable at any point that it’s long enough to drape around your neck or shoulders.
This episode of Ask Me Monday is sponsored by Knitter’s Pride/ KnitPro
See more KP products during “Vic’s Tips” segments of The Knit Show!
Boomerang Shawl Basic Recipe: Video Tutorial
MATERIALS
Any weight yarn
Knitter’s Pride Ginger Circular Needles
Tip: Using a sock to dk weight yarn on larger needles (like US 8-9/5-5.5 mm results in a really nice, drapey piece.
RECIPE: Cast on 3 or 5 stitches. Working over two rows, increase TWO stitches at end of a Right Side row, decrease ONE stitch at the end of a Wrong Side row. That’s it!
Boomerang Shawl Basic Recipe: How-to
A boomerang shawl is worked from one tip to the opposite, side angle edge. To create this shape, you’ll need to repeat 2 rows in a basic stitch like Stockinette, but you may choose to alter that by working in an occasional design feature like Garter ridges (as I did with the YarnYAY! boomerang shawlette, shown above), welts, a lace panel, or whatever. The only thing important to remember is that the increase/decrease recipe needs to be maintained throughout.
PATTERN SAMPLE V.1
CO 5 sts.
Row 1: K to last 2 sts, inc 1 (ex. YO, M1, lifted increase, etc.), k1, inc 1 (ex kfb, M1).
Row 2: P to last 3 sts, p2tog, p1.
Repeat Rows 1-2 until the piece is desired size. BO.
Something to consider: The above pattern is written in straight, Stockinettte stitch. That means that the edges may roll. If that’s an issue for you, simply adding 1-3 k sts on the ws edge rows will fix that. See below for what thay might look like.
CO 5 sts.
Row 1: K to last 2 sts, inc 1 (ex. YO, M1, lifted increase, etc.), k1, inc 1 (ex kfb, M1).
Row 2: K2, p to last 3 sts, k2tog, k1.
Repeat Rows 1-2 until the piece is desired size. BO.
Have fun experimenting. Don’t forget to tag @vckiehowell when you do!
Ask Me Monday is the longest-running Facebook Live series in the needlecraft genre. It’s on hiatus until May 2019. Until then, though, you can find all past episodes of this series under the Ask Me Monday playlist on the Videos section of my Facebook page. Enjoy!
The post Boomerang Shawl Basic Recipe appeared first on Vickie Howell.


