
Sam Turnbull's Blog, page 37
November 13, 2019
The Best (and easiest) Vegan Garlic Mashed Potatoes
 The Best (and easiest) Vegan Garlic Mashed Potatoes
Ok, this is serious. This isn’t just any regular old mashed potato recipe, this is truly the best vegan garlic mashed potatoes you will ever have. Not only is this the best vegan recipe, but I’ve also heard reviews that it’s the best-mashed potatoes people have ever had- vegan or not! These vegan mashed potatoes...


November 2, 2019
Vegan Stuffed Acorn Squash
Today I’ve got a recipe for you that is easy enough for a weeknight meal, but fancy enough that you could serve this as the main dish at your Thanksgiving or Christmas feast! Don’t you love dishes like that? These vegan stuffed acorn squash are perfect warming winter deliciousness and they can even be made...
October 27, 2019
Vegan Mini Halloween Pizza
Vegan mini Halloween pizza, have you ever seen a cuter pizza!? …Er…scary… I mean scarier pizza. Ghosts and stuff. Spooky! These little pizzas would be a great activity for kids, but I also had so much fun making them and I’m a grown-up… sometimes. Super fun and easy to make. Only 6 ingredients, 15 minutes...
October 20, 2019
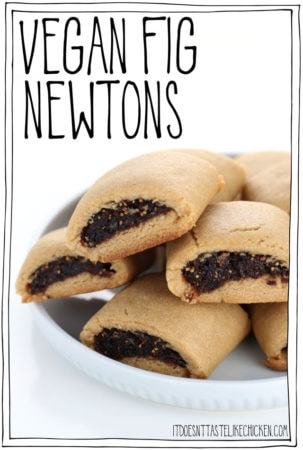
Vegan Fig Newtons
Raise your hand if your mom (or other guardians) put fig newtons in your lunch box! Making these vegan fig newtons brought me back down memory lane. That sweet fig filling wrapped in a cakey cookie for the perfect delicious chewy sweet treat. Whether you carry a lunchbox or not, these fig filled cookies are one of my favourite delights.

The cool thing about this recipe is that the cookies get better the next day making them a perfect make-ahead snack. When freshly baked, the cookies are a little crisp and crumbly, but the magic happens when you store them overnight. The moisture in the figs softens to cookie crust, taking these vegan fig newton from crisp to tender cakey cookie perfection!
They keep for about 1 week so you can make them on the weekend to supply your lunchbox all week long. Or if you’re like me, enjoy them with a cup of coffee in the morning.

I admit that these fig cookies take a little bit more effort to make than a classic drop cookie, but it’s worth it! The classic fig filled shape is so cute. I did my best to make each step as clear as possible to make this recipe as easy for you. So roll up your sleeves and let’s make these classic treats!
To make vegan fig newtons:

For the fig filling: in a medium pot add the chopped figs and water. Bring to a simmer and cook for about 25 minutes until the figs are tender and there is only 2 – 3 tablespoons of liquid left in the bottom of the pan.

Add the figs and leftover liquid to a food processor along with the lemon juice. Blend to a paste, stopping to scrape the sides as needed.

For the cookie dough: use a mixer to combine the vegan butter and brown sugar until fluffy. Add the milk and vanilla extract and mix. Then add the flour, baking powder, and salt and mix to form a dough.

Divide the dough into three even-sized balls. Cover and chill in the fridge until ready to use, minimum 10 minutes.
To shape the cookies:

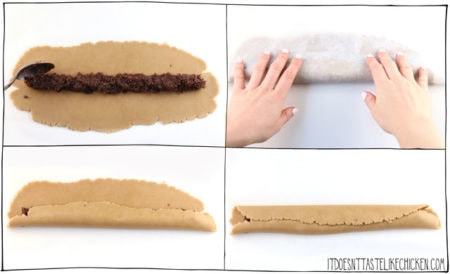
When ready, place one ball of dough between two sheets of parchment paper and roll a rough rectangle shape about 12″ x 5″. It’s ok if the rectangle has messy edges like mine does.

Remove the top layer of parchment paper and spoon 1/3 of the fig paste down the center of the cookie dough in a straight line going lengthwise.
From the bottom, lift the sheet of parchment paper that’s under the cookie dough to help fold the bottom edge of the cookie dough up over the fig filling. Then use the same method to fold the top edge of the cookie dough down overlapping the bottom edge so that the fig filling is wrapped completely with the dough. (See photo above for reference).

Use the parchment paper to flip the cookie roll over so the seam is on the bottom. Use a sharp knife to cut the roll into cookies about 2″ long.

Place the cookies on the prepared baking sheet and bake for 13 – 16 minutes until golden on the bottom. Remove from the oven and let cool on pan.

The cookies will be a little crisp when freshly made. To soften the cookies, simply store in an air-tight container for the classic cakey chewy texture.
Bon appetegan!
Sam
Vegan Fig Newtons
They taste even better the next day, so it's the perfect cookie to make ahead of time and enjoy all week. Perfect for your kid's lunchbox or as a sweet snack for yourself.
For the fig filling:
8 ounces dried figs (8oz), (stems removed and quartered)
2 cups water
2 teaspoons lemon juice
For the cookie dough:
6 tablespoons vegan butter
3/4 cup brown sugar
2 tablespoons non-dairy milk
2 teaspoons vanilla extract
1 3/4 cups all-purpose flour
1/2 teaspoon baking powder
1/4 teaspoon salt
For the fig filling:
In a medium pot add the chopped figs and water. Bring to a simmer and cook for about 25 minutes until the figs are tender and there is only 2 – 3 tablespoons of liquid left in the bottom of the pan.
Add the figs and leftover liquid to a food processor along with the lemon juice. Blend to a paste, stopping to scrape the sides as needed.
For the cookie dough:
Preheat your oven to 350F (180C). Line a large baking tray with parchment paper.
Use a mixer to combine the vegan butter and brown sugar until fluffy. Add the milk and vanilla extract and mix in. Then add the flour, baking powder, and salt and mix to form a dough. Divide the dough into even-sized three balls, cover and chill in the fridge until ready to use, minimum 10 minutes.
When ready, place one ball of dough between two sheets of parchment paper and roll into a long rectangle about 12" x 5". It's ok if the rectangle has messy edges. Remove the top layer of parchment paper and spoon 1/3 of the fig paste down the center of the cookie dough in a line going lengthwise.
From the bottom, lift the sheet of parchment paper that’s under the cookie dough to help fold the bottom edge of the cookie dough up over the fig filling. Then use the same method to fold the top edge of the cookie dough down overlapping the bottom edge so that the fig filling is wrapped completely with the dough. (See photo above for reference). Use the parchment paper to flip the cookie roll over so the seam is on the bottom. Use a sharp knife to cut the roll into cookies about 2″ long.
Place the cookies on the prepared baking sheet and bake for 13 – 16 minutes until golden on the bottom. Remove from the oven and let cool on pan. The cookies will be a little crisp when freshly made, but store in an air-tight container overnight and they will soften to the classic cakey chewy texture. Cookies will keep for 5-7 days stored at room temperature.


This post Vegan Fig Newtons appeared first on It Doesn't Taste Like Chicken
October 13, 2019
The Best Easy Vegan Cranberry Sauce
First of all, yes, most cranberry sauce is vegan. Even the canned kind is usually vegan. BUT there’s a reason I wanted to share this recipe with you. You see, this is the best easy vegan cranberry sauce out there. Not only is it super simple to make- just 4 ingredients and takes just 15 minutes to whip up, but it is also the perfect combo of sweet and tart, with a final touch of lemon zest for the perfect zing.
This easy cranberry sauce tastes SO much better than that canned stuff (isn’t homemade always better)?

Better yet, this vegan cranberry sauce is best made ahead of time and will keep for up to a week (or even a little longer) when stored in an air-tight container in the fridge. Talk about a perfect stress-free addition to your Thanksgiving or Christmas holiday feast!

I’ve actually shared this recipe before in my post of 8 Traditional Thanksgiving & Christmas Sides Made Vegan, but since that post is super old and multiple recipes were combined into the same post, the recipe was a little difficult to track down on my blog. I love this recipe and make it every year, so I wanted to bring it to your attention again.
I also plan to do the same for many of the other recipes in that post. Which ones would you like me to refresh?
How to make the best easy vegan cranberry sauce:

Add the cranberries, sugar, water, and lemon zest to a medium saucepan.

Bring to a simmer and cook for 10-15 minutes, until the cranberries have popped and it looks all saucy and delicious. It will be thin when the sauce is hot, but will thicken up as it cools.

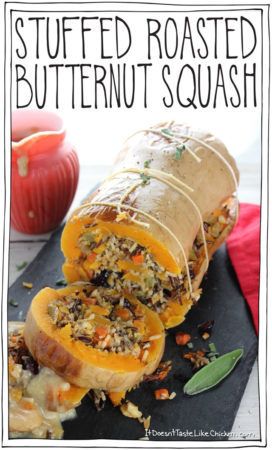
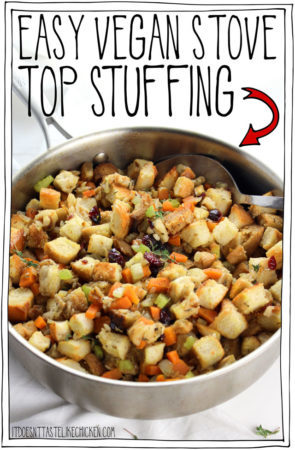
This cranberry sauce goes with other vegan holiday favourites such as my puff pastry wrapped lentil loaf, stuffed butternut squash, vegan creamed corn, cheesy scalloped potatoes, stovetop stuffing, or my lentil shepherd’s pie (to name a few).
Bon appetegan!
Sam.
The Best Easy Vegan Cranberry Sauce
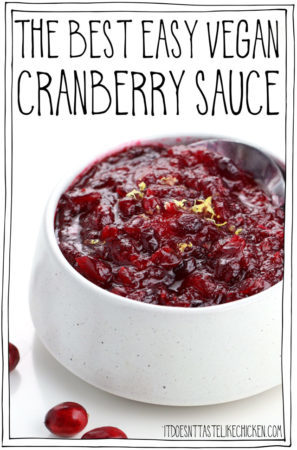
Just 4 ingredients and 15 minutes to make. It's best made ahead of time making this the perfect stress-free addition to your Thanksgiving or Christmas holiday feast.
12 oz fresh or frozen cranberries
1 cup white sugar
1 cup water
1 lemon, (zested)
Add all of the ingredients to a medium sauce pan. Bring to a simmer and cook for 10-15 minutes, until the cranberries have popped and it looks all saucy and delicious. It will be thin, but will thicken as it cools.
Vegan cranberry sauce is perfect made ahead of time and can be stored in an air-tight contianer in the fridge for up to one week, or can be frozen for later.

This post The Best Easy Vegan Cranberry Sauce appeared first on It Doesn't Taste Like Chicken
October 6, 2019
5 Minute Vegan Creamed Corn
This 5 minute vegan creamed corn is the perfect side dish for your holiday feast. It’s super quick to whip up with just 8 ingredients and will pair beautifully with Thanksgiving or Christmas dishes, or for any meal you like!

Sweet pops corn in a super creamy savoury sauce that will have you licking up every last drop.
The secret to making my vegan creamed corn is to use full-fat coconut milk. Coconut milk is extra rich making the sauce incredibly luscious. The coconut flavour gets cooked out and so it isn’t very noticeable, but regardless, I love the combo of coconut and corn. That said if you prefer to use another non-dairy milk, you absolutely can, but coconut will always be my favourite.

This creamed corn is super fast to make but you can also make it ahead of time if you prefer. Just reheat over low heat, stirring in a splash of water or non-dairy milk if needed to loosen it.
I love to serve this alongside holiday dishes such as my puff pastry wrapped lentil loaf, easy vegan stovetop stuffing, cheesy vegan scalloped potatoes, vegan Italian seitan sausages, seitan steaks, almond rosemary lemon crusted tofu, crispy breaded tofu steaks, or my stuffed roasted butternut squash. The other day I had some leftovers and I added them to my Buddha bowl style dinner and it was even amazing there!
To make vegan creamed corn:

In a medium skillet or pot melt the vegan butter over medium heat. When melted add the garlic and cook for about 30 seconds. Whisk in the flour to make a paste and cook for another 30 seconds, whisking continually.
Add the coconut milk, nutritional yeast, salt, and pepper and whisk to combine. Stir in the corn kernels and continue to cook for 2 – 4 minutes, until you reach desired consistency.
If you prefer a thicker creamed corn cook a little longer, and if you prefer a thinner creamed corn then remove from the heat earlier. You can also add an extra splash of coconut milk or water to thin if needed. Serve hot.

Don’t be surprised when your vegan creamed corn dish gets gobbled up first!
Bon appetegan!
Sam.
5 Minute Vegan Creamed Corn
This 5-minute, 8 ingredient vegan creamed corn is the perfect side dish for your holiday feast. It will pair beautifully with Thanksgiving or Christmas dishes, or for any meal you like!
1 tablespoon vegan butter
2 cloves garlic, (minced or pressed)
1 tablespoon all-purpose flour ((sub-gluten-free all-purpose flour if preferred))
1 3/4 cups full-fat coconut milk ((see notes))
2 tablespoons nutritional yeast ((optional for cheesy taste))
1/2 teaspoon salt
1/2 teaspoon black pepper
3 cups corn kernels ((fresh or frozen))
In a medium skillet or pot melt the vegan butter over medium heat. When melted add the garlic and cook for about 30 seconds, then whisk in the flour to make a paste and cook for another 30 seconds, whisking continually. Add the coconut milk, nutritional yeast, salt, and pepper and whisk to combine. Stir in the corn kernels and continue to cook for 2 – 4 minutes, until you reach desired consistency. If you prefer a thicker creamed corn cook a little longer, and if you prefer a thinner creamed corn then remove from the heat earlier. You can also add an extra splash of coconut milk or water to thin if needed. Serve hot.
I prefer using full-fat coconut milk for an extra rich vegan creamed corn. If you prefer to use a different kind of non-dairy milk, try to use one that is higher in fat to keep the dish rich and creamy.
If you wish to make it ahead of time, store the prepared dish covered in the fridge for up to 3 days. Reheat in the microwave or in a pot over low heat, stirring in a splash of water or non-dairy milk if needed to loosen it.
This post 5 Minute Vegan Creamed Corn appeared first on It Doesn't Taste Like Chicken
September 29, 2019
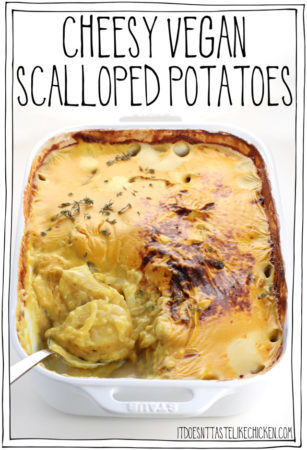
Cheesy Vegan Scalloped Potatoes
Want to wow your family and guests at your next Thanksgiving or Christmas dinner? Make these cheesy vegan scalloped potatoes! Layers of potatoes and onions in a creamy garlicky sauce, all topped with gooey delicious dairy-free cheddar goodness. These scalloped potatoes are cheesy glorious heaven…

So creamy delicious, no one will even know they’re vegan! I swear. They just taste awesome. And the best part is that they are pretty darn easy to make too!
The creamy sauce is made of just 4 ingredients, whipped up in a blender. Or if you don’t have a blender, you can whisk by hand.
The bulk of the dish is just two ingredients, potatoes and onions thinly sliced. I don’t even bother peeling the potatoes as they just blend in with the rest of the potato in the finished dish.
For extra speedy slicing, use the slicing blade with your food processor if you have one (I have this Breville food processor) or use a mandoline. Don’t have either of those? It’s honestly not even that big of a deal to slice them by hand with a good chefs knife.
Then you make the vegan cheese. Now I know it may seem fussy to make homemade vegan cheese, but my recipe takes only 15 minutes to whip up and is so much more affordable and so much more delicious than store-bought. I make the vegan cheese while the potatoes are baking in the oven. Multitasking level ninja!

These vegan scalloped potatoes are perfect paired with some other fall favourites such as my stuffed roasted butternut squash, easy vegan stovetop stuffing, vegan Italian sausage, vegan seitan steaks, the easiest and most delicious cornbread, crispy breaded tofu steaks, puff pastry wrapped lentil loaf, and/or chipotle black bean kale salad. So basically everything. Talk about a feast!!
To make cheesy vegan scalloped potatoes:

Slice the potatoes and onions into thin rounds about 1/8″ thick. If you have a slicing blade on your food processor, this just can get done very quickly. I use my Breville food processor to get the job done.

Make the creamy vegan sauce by adding the non-dairy milk, all-purpose flour, garlic, and salt to a blender, and blending until completely smooth. Set aside.
*If you do not have a blender, simply mince or press the garlic and whisk everything together in a bowl instead.

Layer the potato and onions slices by spreading about 1/3 of the potatoes across the bottom of the baking dish. Spread 1/2 of the onion slices over the potatoes. Cover the onions with another third of the potato slices, followed with the remaining half of the onions. Top with the rest of the potatoes slices.
This just ensures there will be layers of deliciousness.

Pour the creamy vegan sauce over the potato and onion layers and cover with foil. Bake for 30 minutes, the liquid should be lightly bubbling around the edges. Remove the foil and bake for another 25 to 35 minutes until the potatoes are cooked through.

the vegan cheese layer:
While the potatoes are cooking, I like to prepare the vegan nacho cheese as it only takes 15 minutes to make. The vegan cheese topping is optional and you can skip it if you prefer. (My mom prefers scalloped potatoes without the cheesy topping so that note is for her). What a weirdo. Kidding!
I use my Melty Stretchy Gooey Nacho Cheese recipe found here on my blog, or my Nacho Cheese Love recipe found in my cookbook to top the scalloped potatoes. When making either of these cheese recipes add 1/2 cup more water to the recipe so that the cheese will be easier to spread over the scalloped potatoes. If you make the cheese ahead of time, it may tighten up as it cools, feel free to add more water if needed to thin.
If you prefer to use a store-bought vegan cheddar, use 2 cups grated cheese. Note that store-bought vegan cheese usually doesn’t melt as well.
Spread the Melty Stretchy Gooey Vegan Nacho Cheese across the surface of the potatoes then return to the oven for another 5 – 10 minutes to melt the cheese. You can optionally put the baking dish under the broiler to brown the cheese for just 1 – 2 minutes, keeping a close eye so it doesn’t burn.

Serve hot, garnishing with fresh thyme leaves, chopped chives, or nothing at all.
I love these vegan scalloped potatoes served as a side at Thanksgiving, Christmas, or Easter, but you will find that they are so easy to make so they might just end up on your table more often than that!
Bon appetegan!
Sam.
Cheesy Vegan Scalloped Potatoes
These are the best and easiest vegan scalloped potatoes! So creamy delicious and perfectly cheesy. No one will know they are vegan. These can be made oil-free too! The perfect side for Thanksgiving, Christmas, or Easter.
For the creamy vegan sauce:
3 cups non-dairy milk ((such as soy or almond))
6 tablespoons all-purpose flour
4 cloves garlic
1 1/2 teaspoons salt
For the scalloped potatoes:
2 small yellow onions, (sliced)
4 pounds yukon gold potatoes, (sliced into thin rounds about 1/8" thick)
1 recipe Melty Stretchy Gooey Vegan Nacho Cheese ((made with an extra 1/2 cup of water) (optional) *see notes)
Fresh thyme leaves or chopped chives, (for garnish (optional))
Preheat your oven to 400F (200C). Grease a 9" x 13" baking dish with vegan butter, oil, or omit for an oil-free version.
Make the creamy vegan sauce by adding the non-dairy milk, all-purpose flour, garlic, and salt to a blender, and blending until completely smooth. *If you do not have a blender, simply mince or press the garlic and whisk everything together in a bowl instead. Set aside.
Layer the potato and onions slices by spreading about 1/3 of the potatoes across the bottom of the baking dish. Spread 1/2 of the onion slices over the potatoes. Cover the onions with another third of the potato slices, followed with the remaining half of the onions. Top with the rest of the potatoes slices.
Pour the creamy vegan sauce over the potato and onion mixture, cover with foil and bake for 30 minutes. The liquid should be lightly bubbling around the edges. Remove the foil and bake for another 25 to 35 minutes until the potatoes are cooked through.
Spread the Melty Stretchy Gooey Vegan Nacho Cheese across the surface of the potatoes then return to the oven for another 5 – 10 minutes to melt the cheese. You can optionally put the baking dish under the broiler to brown the cheese for just 1 – 2 minutes, keeping a close eye so it doesn't burn.
Serve hot, garnishing with fresh thyme leaves, chopped chives, or nothing at all.
Notes on the vegan cheese:
The vegan cheese topping is optional and you can skip it if you prefer.
I use my Melty Stretchy Gooey Nacho Cheese recipe or my Nacho Cheese Love recipe found in my cookbook to top the scalloped potatoes. When making these cheeses add 1/2 cup more water to the recipe so that the cheese will be easier to spread over the scalloped potatoes. If you make the cheese ahead of time, it may tighted up as it cools, feel free to add more water if needed.
If you prefer to use a store-bought vegan cheddar, use 2 cups grated cheese. Note that store-bought vegan cheese usualy doesn’t melt as well.

This post Cheesy Vegan Scalloped Potatoes appeared first on It Doesn't Taste Like Chicken
September 22, 2019
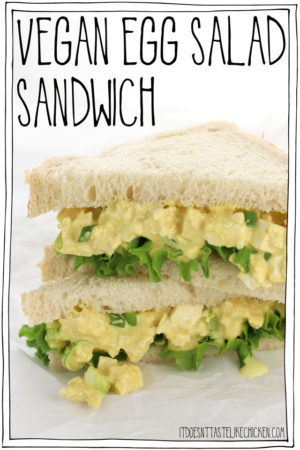
Vegan Egg Salad Sandwich
This vegan egg salad sandwich is even easier to make than a traditional egg salad! It takes just 10 minutes to whip up and only 7 ingredients are needed. No fussing about with boiling, cooling, and peeling eggs. A super easy and super tasty lunchtime favourite- veganized. No stinky eggs and cholesterol-free!

The key ingredient in this vegan egg salad sandwich recipe is black salt which is also called kala namak. This is what provides the egg flavour in all of my egg recipes including my vegan fried egg, vegan egg yolk, tofu scramble spice mix, and deviled potatoes. Yum!
Black salt (which is actually pink in colour) tastes and smells just like eggs! It’s so very strange and cool. You can buy black salt (kala namak) at Indian grocery stores or you can order black salt on Amazon here.

Once you have the black salt this recipe is so quick in easy you can whip it up in a pinch, or make the vegan egg salad filling ahead of time for lunch another day. Serve along with some veggies and hummus, or (my fave) some salty potato chips.
Let me tell you, tasting this sandwich is like the ultimate throwback to my before vegan days. It reminds me of being a kid and enjoying lunch with my grandma on a summer day. Isn’t it nice that we can recreate those taste memories?
To make the vegan egg salad sandwich:

Chop the tofu into a small cube. For the best result, make sure you use medium-firm tofu which has the most egg-like consistency.

Add the tofu to a large bowl along with the vegan mayonnaise, nutritional yeast, yellow mustard, green onions, black salt, and turmeric. Gently mix. If desired add table salt and pepper to taste. You can store it covered in the fridge for 2 – 3 days or enjoy right away!

When ready to enjoy, toast the bread if desired. Layer a slice of bread with a lettuce leaf and then follow with a generous serving of the vegan egg salad. Top with the remaining slice of bread and serve.
Bon appetegan!
Sam.
Vegan Egg Salad Sandwich
Only 10 minutes to make and it tastes just like eggs! Perfect for a quick lunch. Make this salad ahead of time for meal prep.
For the vegan egg salad:
1 block (454g) medium-firm tofu, (drained and patted dry)
6 tablespoons vegan mayonnaise
2 tablespoon nutritional yeast
2 teaspoon yellow mustard
2 green onions, (chopped)
3/4 teaspoon black salt
1/4 teaspoon turmeric
salt and pepper to taste ((optional))
To make sandwiches:
8 slices bread ((gluten-free if preferred) )
4 lettuce leaves
To make the vegan egg salad: chop the tofu into a small cube. Add the tofu to a large bowl along with the vegan mayonnaise, nutritional yeast, yellow mustard, green onions, black salt, and turmeric. Gently mix. If desired add table salt and pepper to taste.
To make vegan egg salad sandwiches: toast the bread if desired. Layer 4 slices of bread with a lettuce leaf and then follow with a generous serving of the vegan egg salad. Top with the remaining slices of bread and serve.
*Nutrition is based on one serving of the vegan egg salad without bread and lettuce. One serving is 1/4th of the recipe.
*Vegan egg salad can be made ahead of time and stored covered in the fridge for 2 – 3 days. If it looks watery, just give it a gentle stir to reincorporate.

This post Vegan Egg Salad Sandwich appeared first on It Doesn't Taste Like Chicken
September 15, 2019
Vegan Sunflower Seed Cheese
Ever since I started posting my vegan cheese recipes, I have gotten asked (probably a million and twelve times) if I had a nut-free version. Well, my friends, I finally do! Welcome to my new shiny vegan sunflower seed cheese recipe. Applause!

This vegan cheese is also so super simple to make! Just 9 ingredients, blend, chill, done. The result is a vegan cheese that is creamy, tangy, spreadable, and completely addictive. You can taste the sunflowers seeds in this cheese but it just adds to the depth of flavour. And because this cheese is nut-free that also makes it school safe so you can pack it in your lunch box!

You know this vegan cheese is a keeper because as I was testing this recipe, some non-vegan family stopped by and had a taste. They immediately asked for the recipe -it’s a win for vegan cheese!
To make vegan sunflower seed cheese:

You will first need to soften the sunflower seeds. Softening them will make them easier to blend and will result in a smoother cheese. You can either boil or soak the seeds. To boil: put the sunflower seeds in a medium-sized pot and cover with water. Bring to a boil and continue to boil for 10 – 15 minutes until the sunflower seeds have softened. Drain and rinse before using. Or to soak: place the sunflower seeds in a bowl and cover the seeds with water. Soak overnight until tender. Drain and rinse before using.
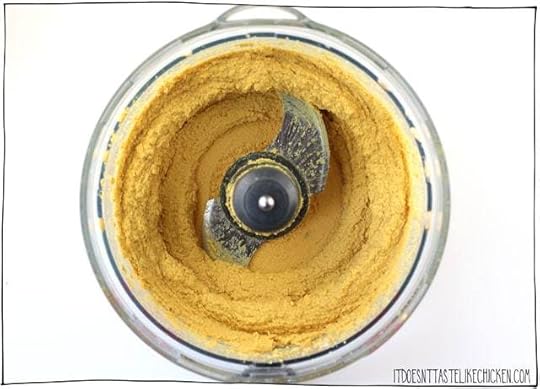
Add all of the ingredients to a food processor and blend until the mixture is as smooth as possible, stopping to scrape the sides as needed.

Prepare your mold(s) by lining them with plastic wrap or parchment paper, or you can use a silicone mold. You can use any mold, dish or bowl you like, I used two of these mini springform pans to make two wheels of cheese about 4 inches wide, perfect for a cheeseboard.
Once the cheese is blended, scoop the cheese mixture into a mold of choice and smooth the top. Cover and chill in the fridge for 4 hours or overnight to let the cheese firm up. The cheese will be firmer right out of the fridge but will soften as it sits out.

The vegan cheese will keep well in an air-tight container in the fridge for about a week or this sunflower seed cheese also freezes well. Just wrap tightly then store in an air-tight container and freeze.
Serve this vegan cheese with crackers or bread, spread on a sandwich, add to a salad, or use it anywhere you like!
Bon appetegan!
Sam.
Vegan Sunflower Seed Cheese
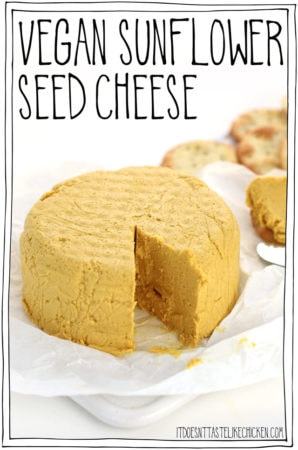
This nut-free vegan cheese is quick and easy to make with just 9 ingredients. Serve this vegan cheese with crackers or bread, spread on a sandwich, add to a salad, or use it anywhere you like! School safe!
2 cups raw sunflower seeds, (softened (see step 1))
1/4 cup nutritional yeast
1/4 cup lemon juice
1/4 cup refined coconut oil
4 teaspoons white miso paste
1 teaspoon garlic powder
1 teaspoon smoked paprika
1/2 teaspoon salt ((or to taste))
1/2 teaspoon turmeric
To soften the sunflower seeds:
You will first need to soften the sunflower seeds. Softening them will make them easier to blend and will result in a smoother cheese. You can either boil or soak the seeds. To boil: put the sunflower seeds in a medium-sized pot and cover with water. Bring to a boil and continue to boil for 10 – 15 minutes until the sunflower seeds have softened. Drain and rinse before using. Or to soak: place the sunflower seeds in a bowl and cover the seeds with water. Soak overnight until tender. Drain and rinse before using.
To make vegan sunflower seed cheese:
Add all of the ingredients to a food processor and blend until the mixture is as smooth as possible, stopping to scrape the sides as needed.
Prepare your mold(s) by lining them with plastic wrap or parchment paper, or you can use a silicone mold. You can use any mold or dish you like, I used two of these mini springform pans to make two wheels of cheese. Once the cheese is blended, scoop the cheese mixture into a mold of choice and smooth the top. Cover and chill in the fridge for 4 hours or overnight to let the cheese firm up. The cheese will be firmer fresh out of the fridge but will soften as it sits out. Serve this vegan cheese with crackers or bread, spread on a sandwich, add to a salad, or use it anywhere you like!
*nutrtion is for 1 wheel of cheese or half of the recipe.
*The vegan cheese will keep well in an air-tight container in the fridge for about a week or this sunflower seed cheese also freezes well. Just wrap tightly then store in an air-tight container and freeze.

This post Vegan Sunflower Seed Cheese appeared first on It Doesn't Taste Like Chicken
September 8, 2019
Vegan Double Chocolate Muffins
1 bowl, 10 ingredients, 30 minutes and you have yourself some warm, fudgy, super chocolatey, tastes like dessert but you get to eat it for breakfast, easy to make vegan double chocolate muffins. Yeah… life is pretty great, isn’t it?

You know what I love about muffins? They’re like cupcakes, but they’re totally acceptable to eat for breakfast. These vegan double chocolate muffins are everything you want in a good muffin- rich, moist, satisfying, and they pair perfectly with coffee or a good cup of tea.
The secret ingredient to these muffins is instant espresso powder. I always have a jar of this stuff in my baking cupboard because adding espresso to chocolate baked goods enhances the chocolate flavour making them taste even richer. You don’t taste the espresso, you just taste gorgeous vegan double chocolate muffin goodness. It’s also handy to have for those mornings when I run out of coffee beans- I know I can get at coffee fix in a jiff if need be! BUT if you aren’t into the idea of espresso powder, you can totally skip it and these muffins will still be gorgeous.

The weird ingredient in these muffins is apple cider vinegar. If you have made some of my other baked good you have seen this used in everything from my chocolate cake, to donuts, to quick bread, and waffles. Apple cider vinegar is a great substitute for eggs as it helps baked goods fluff up when reacting with the baking soda in the recipe. I know it sounds weird, but the flavour cooks right out and you would never know it was there. Trust me on this one. Follow this recipe and homemade vegan chocolate muffins will be coming out of the oven in no time.
To make vegan double chocolate muffins:

For medium-sized muffins, line 12 wells of a muffin pan with paper liners or lightly grease the pan. For larger sized muffins line or grease only 9 wells of a muffin pan.
In a large bowl whisk together the flour, sugar, cocoa powder, baking powder, instant espresso powder and salt.
*Instant espresso powder will enhance the taste of the chocolate making these muffins taste even richer, but if you prefer not to use it or don’t have it on hand you can skip it.
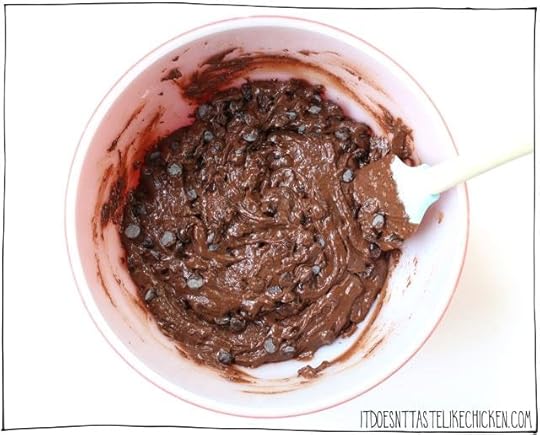
Then add the non-dairy milk, light oil, and apple cider vinegar and stir until just combined. Don’t over mix! Now gently fold in the chocolate chips.

Divide the batter evenly among the 12 or 9 wells of the prepared muffin pan. Bake 20 to 26 minutes for until the muffins have cracks on the top and a toothpick inserted into the center comes out clean. *Test several spots with the toothpick as you may hit a melted chocolate chip which could mislead you into thinking they aren’t cooked.
If making 12 muffins the timing will be on the lower side and if making 9 muffins it will be on the higher side. Let the muffins cool in the pan before removing.

These muffins are amazing served still a little warm from the pan but they also keep fresh for several days when kept at room temperature or can be frozen in an air-tight container.
Bon appetegan!
Sam.
Vegan Double Chocolate Muffins
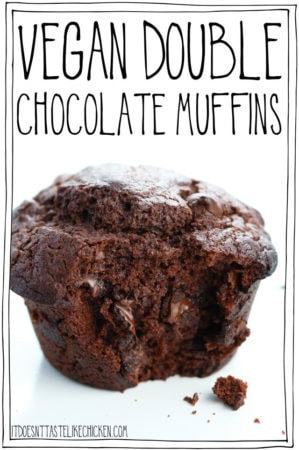
1 bowl, 10 ingredients, and only 30 minutes to make! So easy with no weird or hard to find ingredients. Moist, chocolatey, and perfect for breakfast or a snack.
1 1/4 cups all-purpose flour
3/4 cup white sugar
1/2 cup cocoa powder
2 teaspoons baking powder
1 teaspoon instant espresso powder ((optional, see notes))
1/2 teaspoon salt
1 cup non-dairy milk ((such as soy or almond))
1/2 cup light oil ((such as canola or vegetable))
1 tablespoon apple cider vinegar
1 cup vegan chocolate chips or chunks
Preheat your oven to 400F (200C). For medium-sized muffins, line 12 wells of a muffin pan with paper liners or lightly grease the pan. For larger sized muffins line or grease only 9 wells of a muffin pan.
In a large bowl whisk together the flour, sugar, cocoa powder, baking powder, instant espresso powder and salt. Then add the non-dairy milk, light oil, and apple cider vinegar and stir until just combined. Don't over mix! Now gently fold in the chocolate chips.
Divide the batter evenly among the 12 or 9 wells of the prepared muffin pan. Bake 20 to 26 minutes for until the muffins have cracks on the top and a toothpick inserted into the center comes out clean. *Test several spots with the toothpick as you may hit a melted chocolate chip which could mislead you into thinking they aren't cooked. If making 12 muffins the timing will be on the lower side and if making 9 muffins it will be on the higher side. Let the muffins cool in the pan before removing.
Instant espresso powder will enhance the taste of the chocolate making these muffins taste even richer, but if you prefer not to use it or don’t have it on hand you can skip it.
Apple cider vinegar is used instead of egg to help rise the cupcakes. Although it may seem weird, I promise you can’t taste it once they are baked.
Nutrtion is for 1 medium sized muffin. Recipe makes 12 medium sized muffins.

This post Vegan Double Chocolate Muffins appeared first on It Doesn't Taste Like Chicken
Sam Turnbull's Blog

- Sam Turnbull's profile
- 35 followers

