
Cassie Stephens's Blog, page 26
March 15, 2020
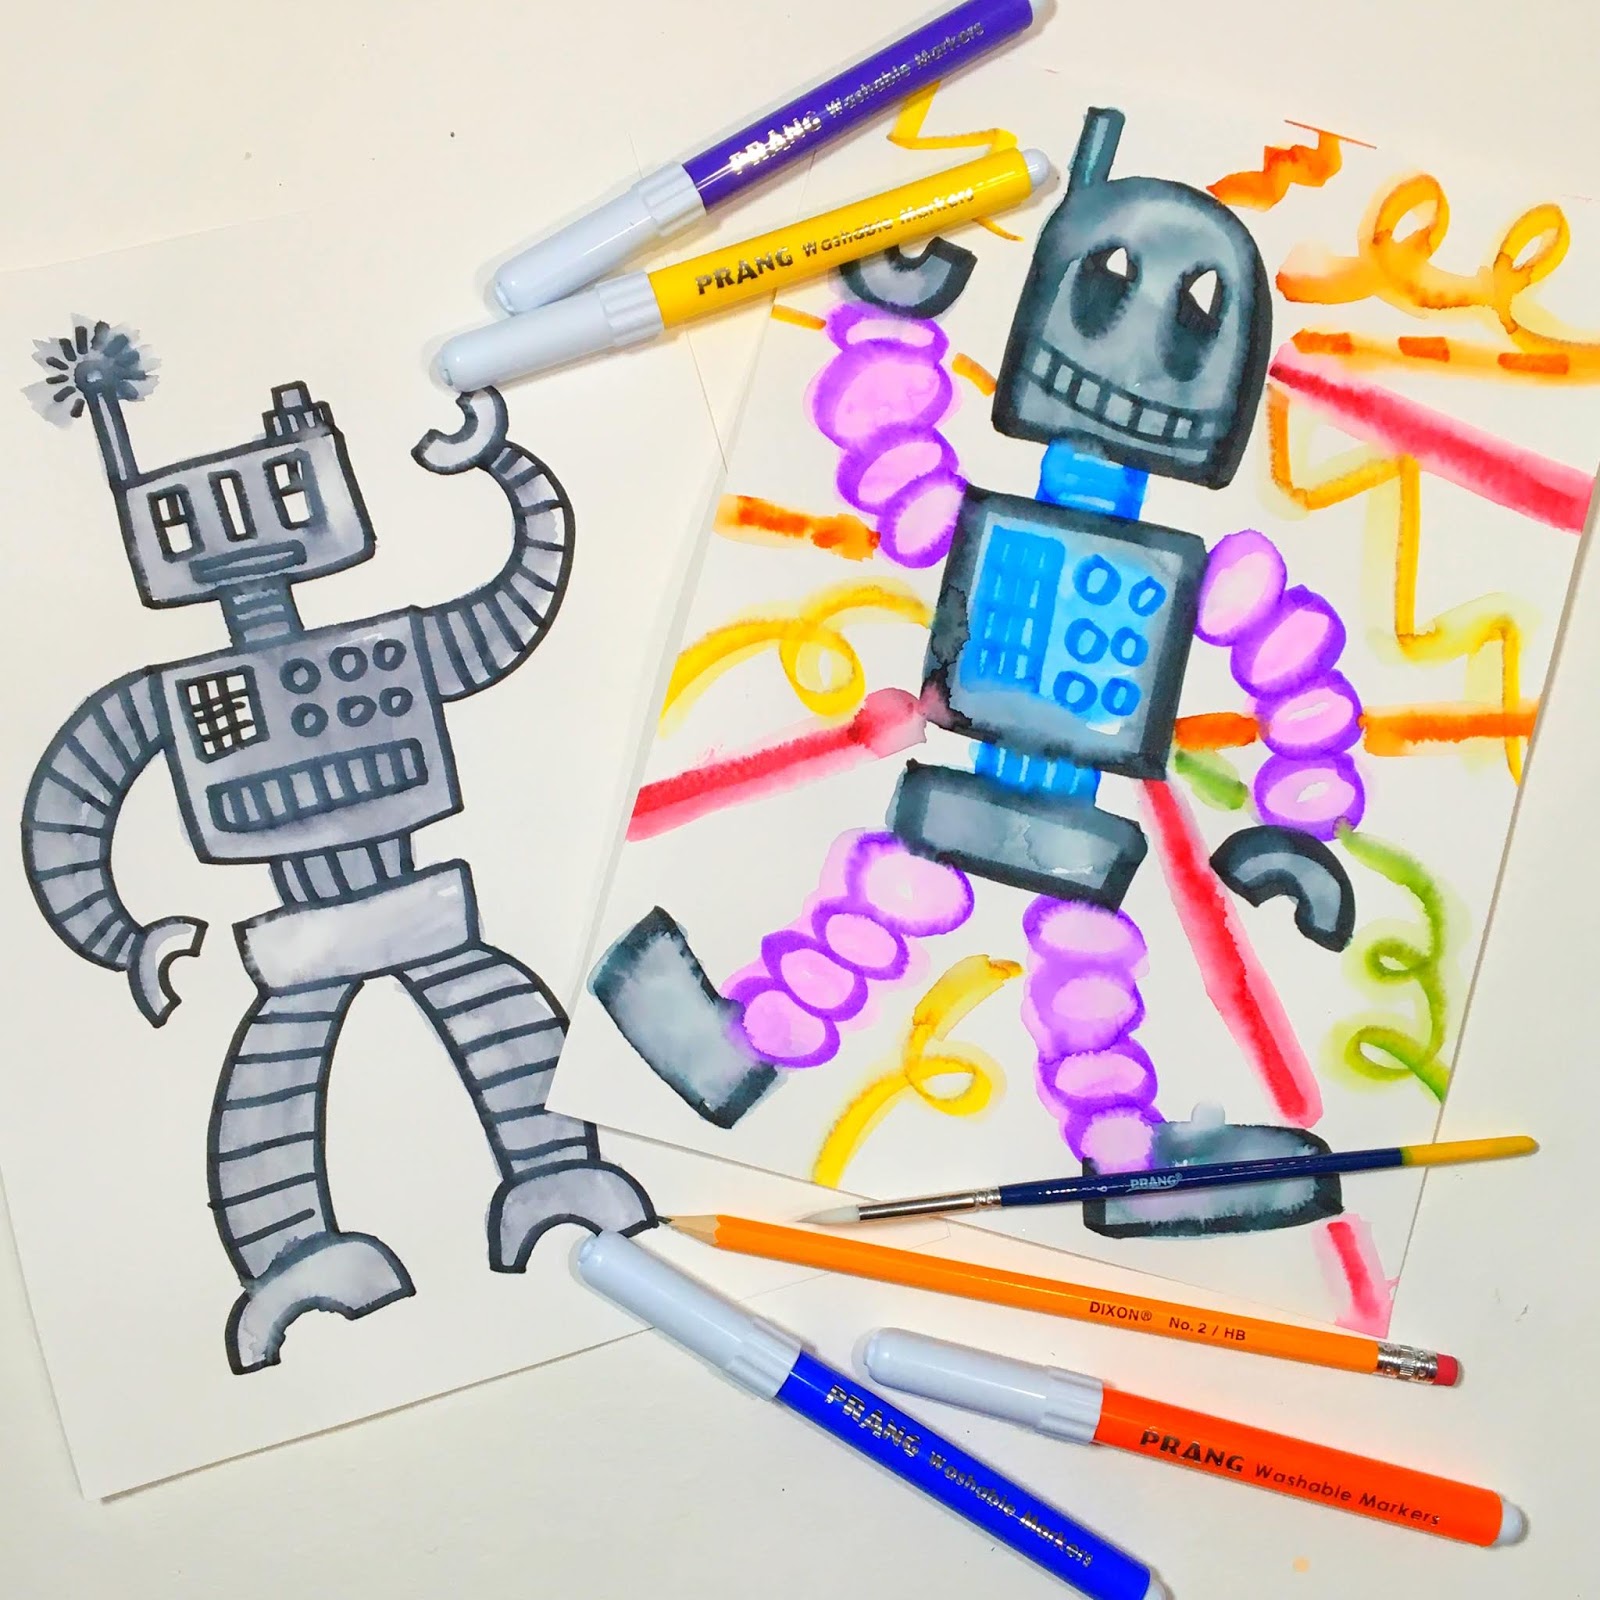
Robot Week! Home-Based Art Making
 Knowing that so many of us are teaching and creating remotely, I thought it would be fun to do a little art teacherin' online. I shared yesterday all of the resources of mine that are free and able for you to use if you need to prepare art lessons for at home artists. However, I wanted to create something fresh and new and do a little LIVE art teaching as well. So...here's what I came up with: Robot Week!
What's Robot Week? Well, it will be a daily dose of creating centered around the theme of Robots. I'll kick it off on Monday this this lesson that I'll be doing LIVE but I will also attempt to archive to my YouTube channel.
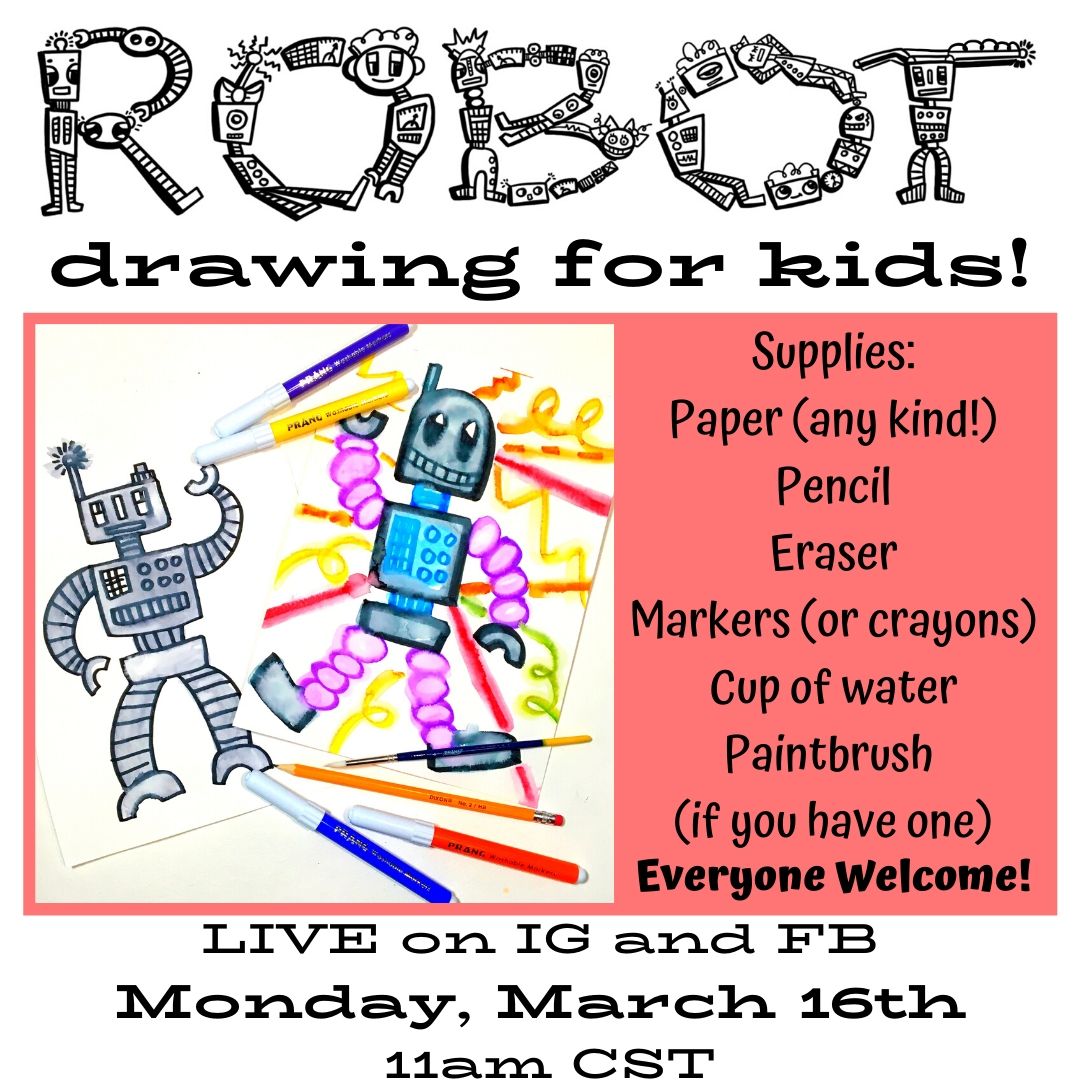 For this first LIVE, I'll probably go for about 30-45 minutes. We'll just play it by ear. If you and your young artists can make it, great!
 You can join me on my Facebook page here or on my Instagram here!
 Big thanks to our sponsor Dixon Ticonderoga for joining the fun!
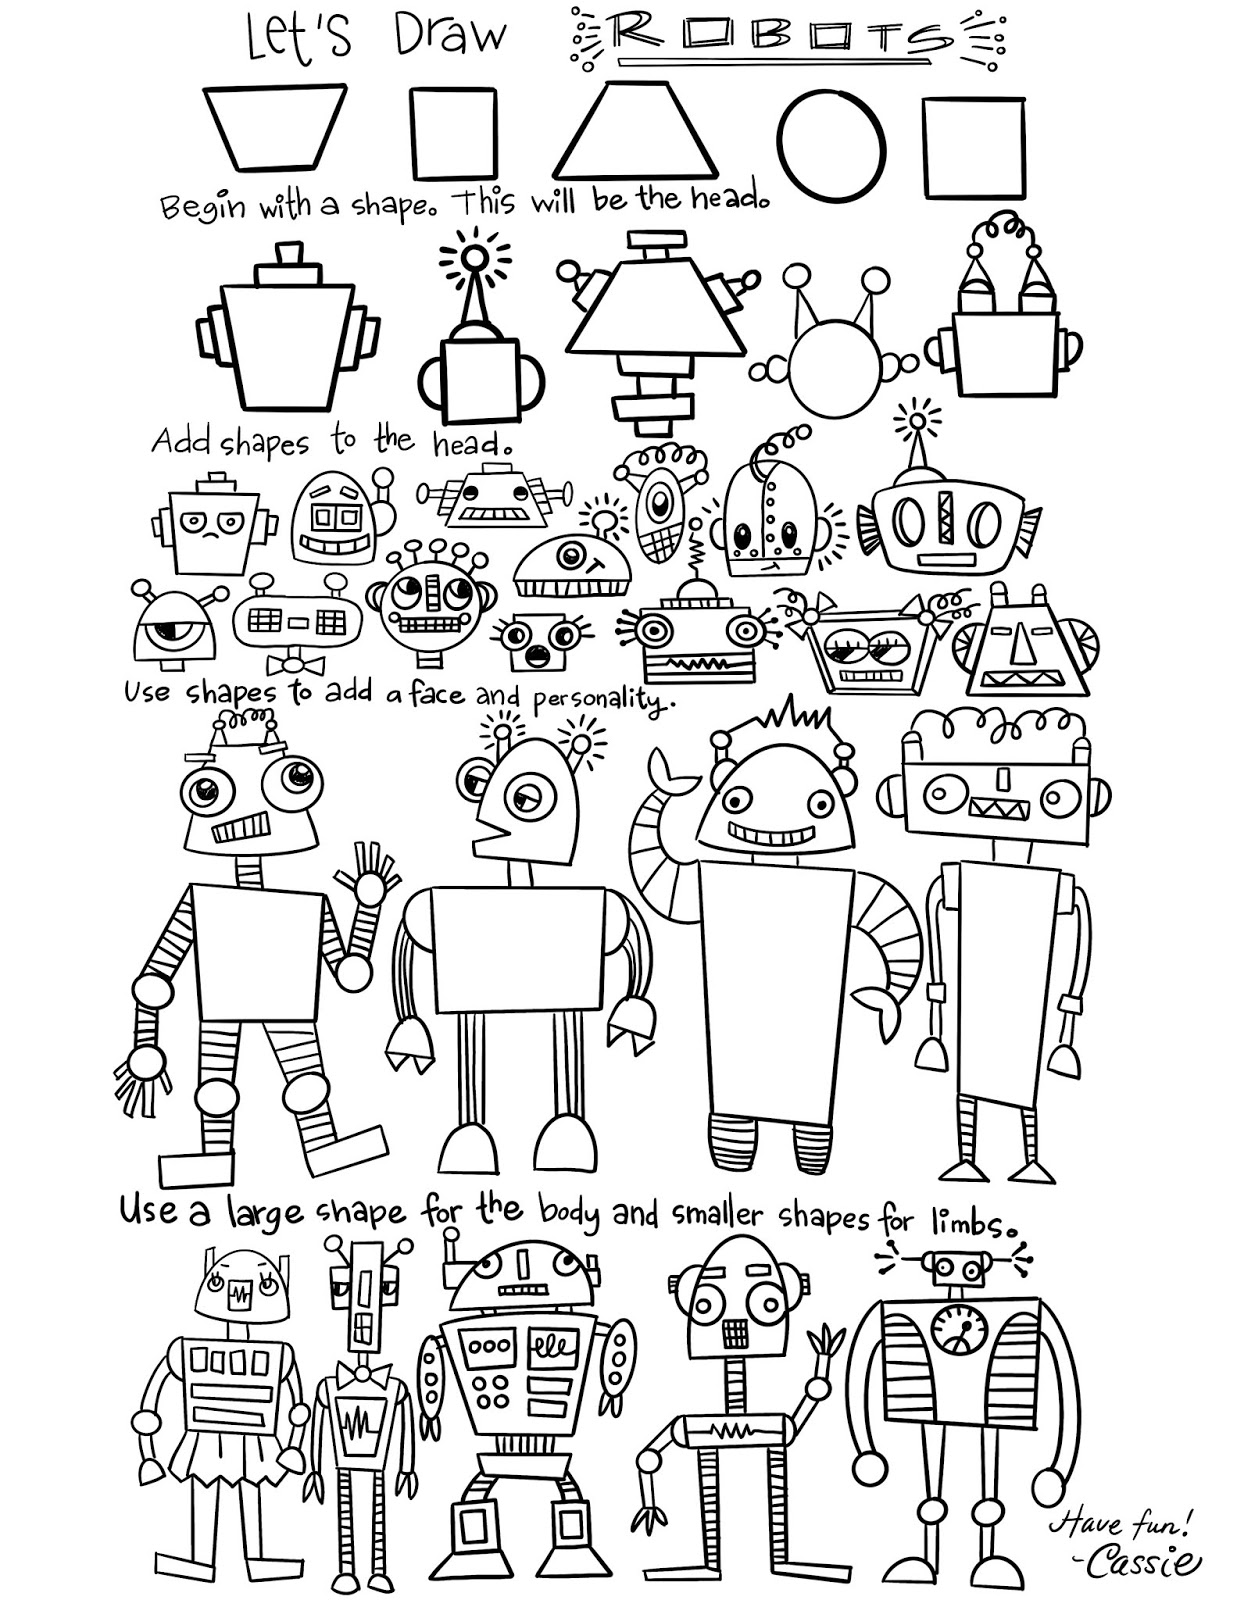 Free How to draw Robots resource for you! To practice, inspire or color!
 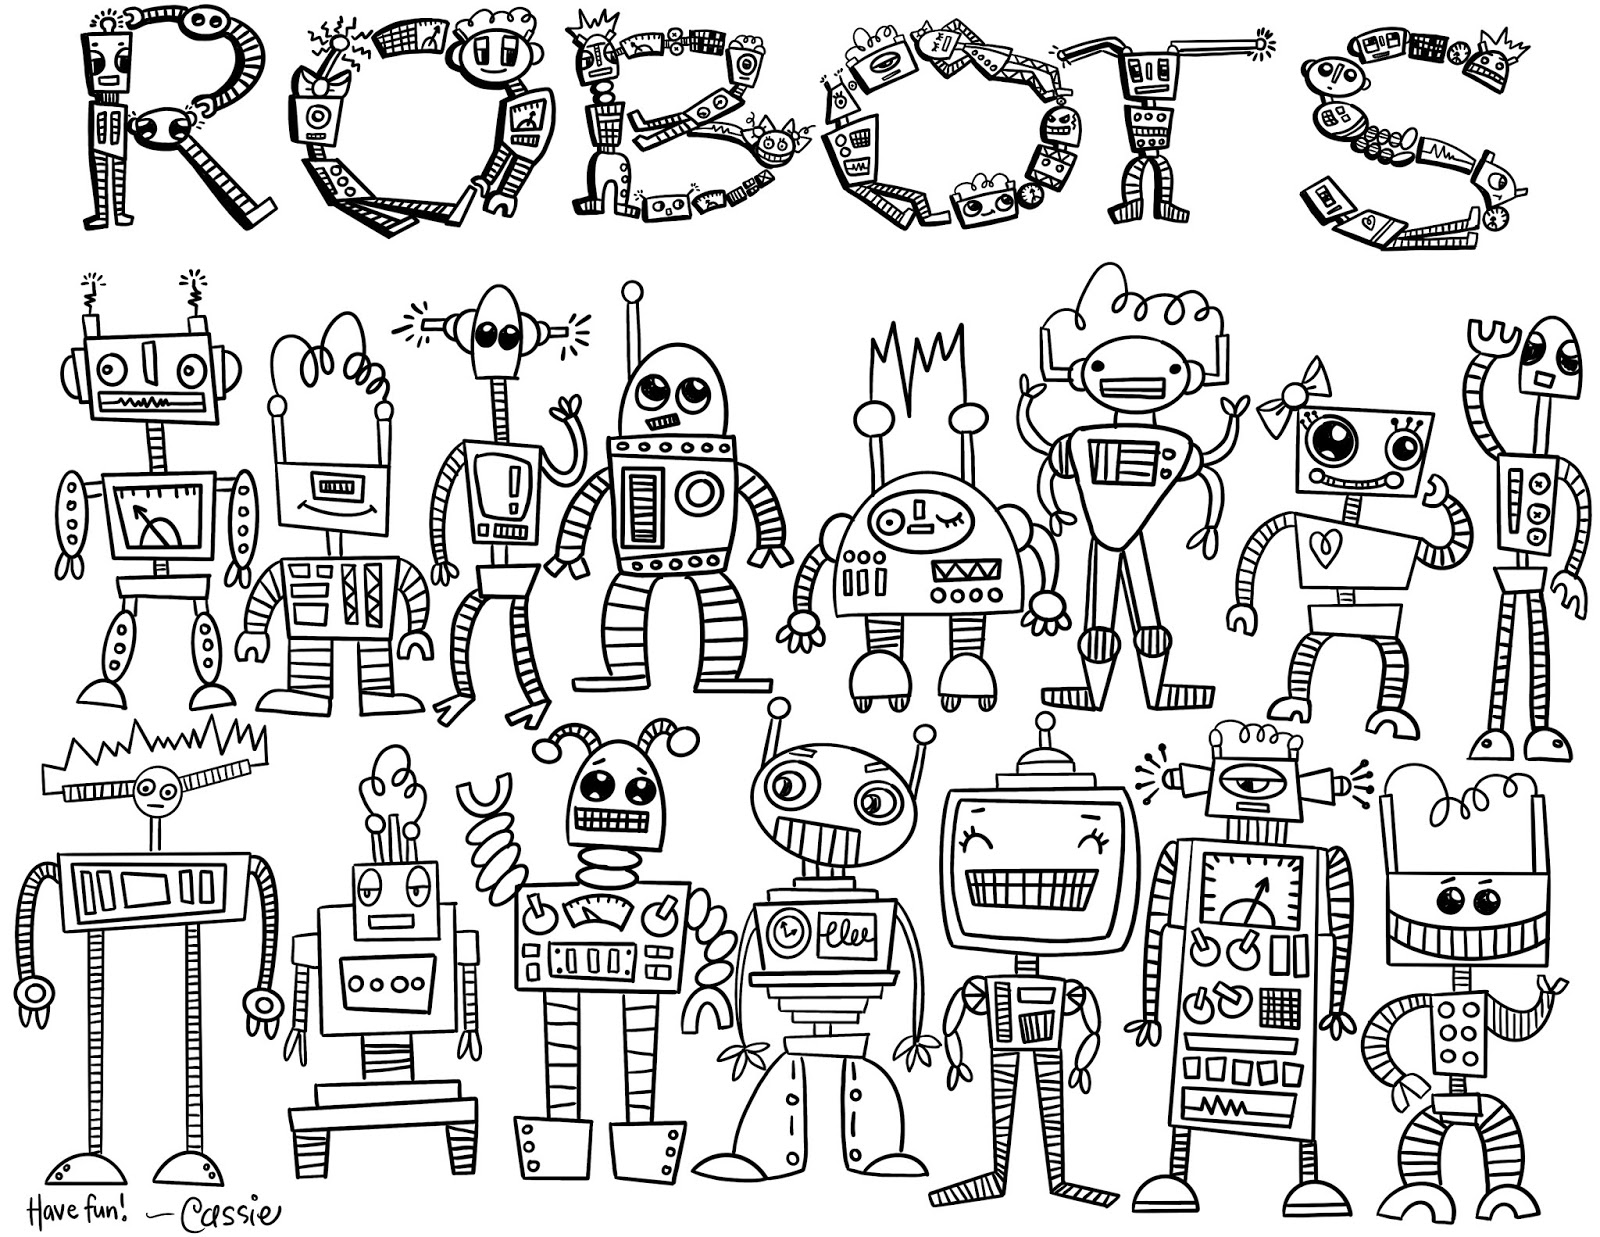 In my art room, we call these Idea Sheets. This one is yours here!
 Mitch said I should make y'all a coloring sheet...so here you go!
  On Tuesday, I won't be live but I will be posting a video on how to create robots that look more three-dimensional on my YouTube channel! Again, simple supplies can be used or swapped out for whatever you have on hand.
  I am super stoked about this one, stay tuned!
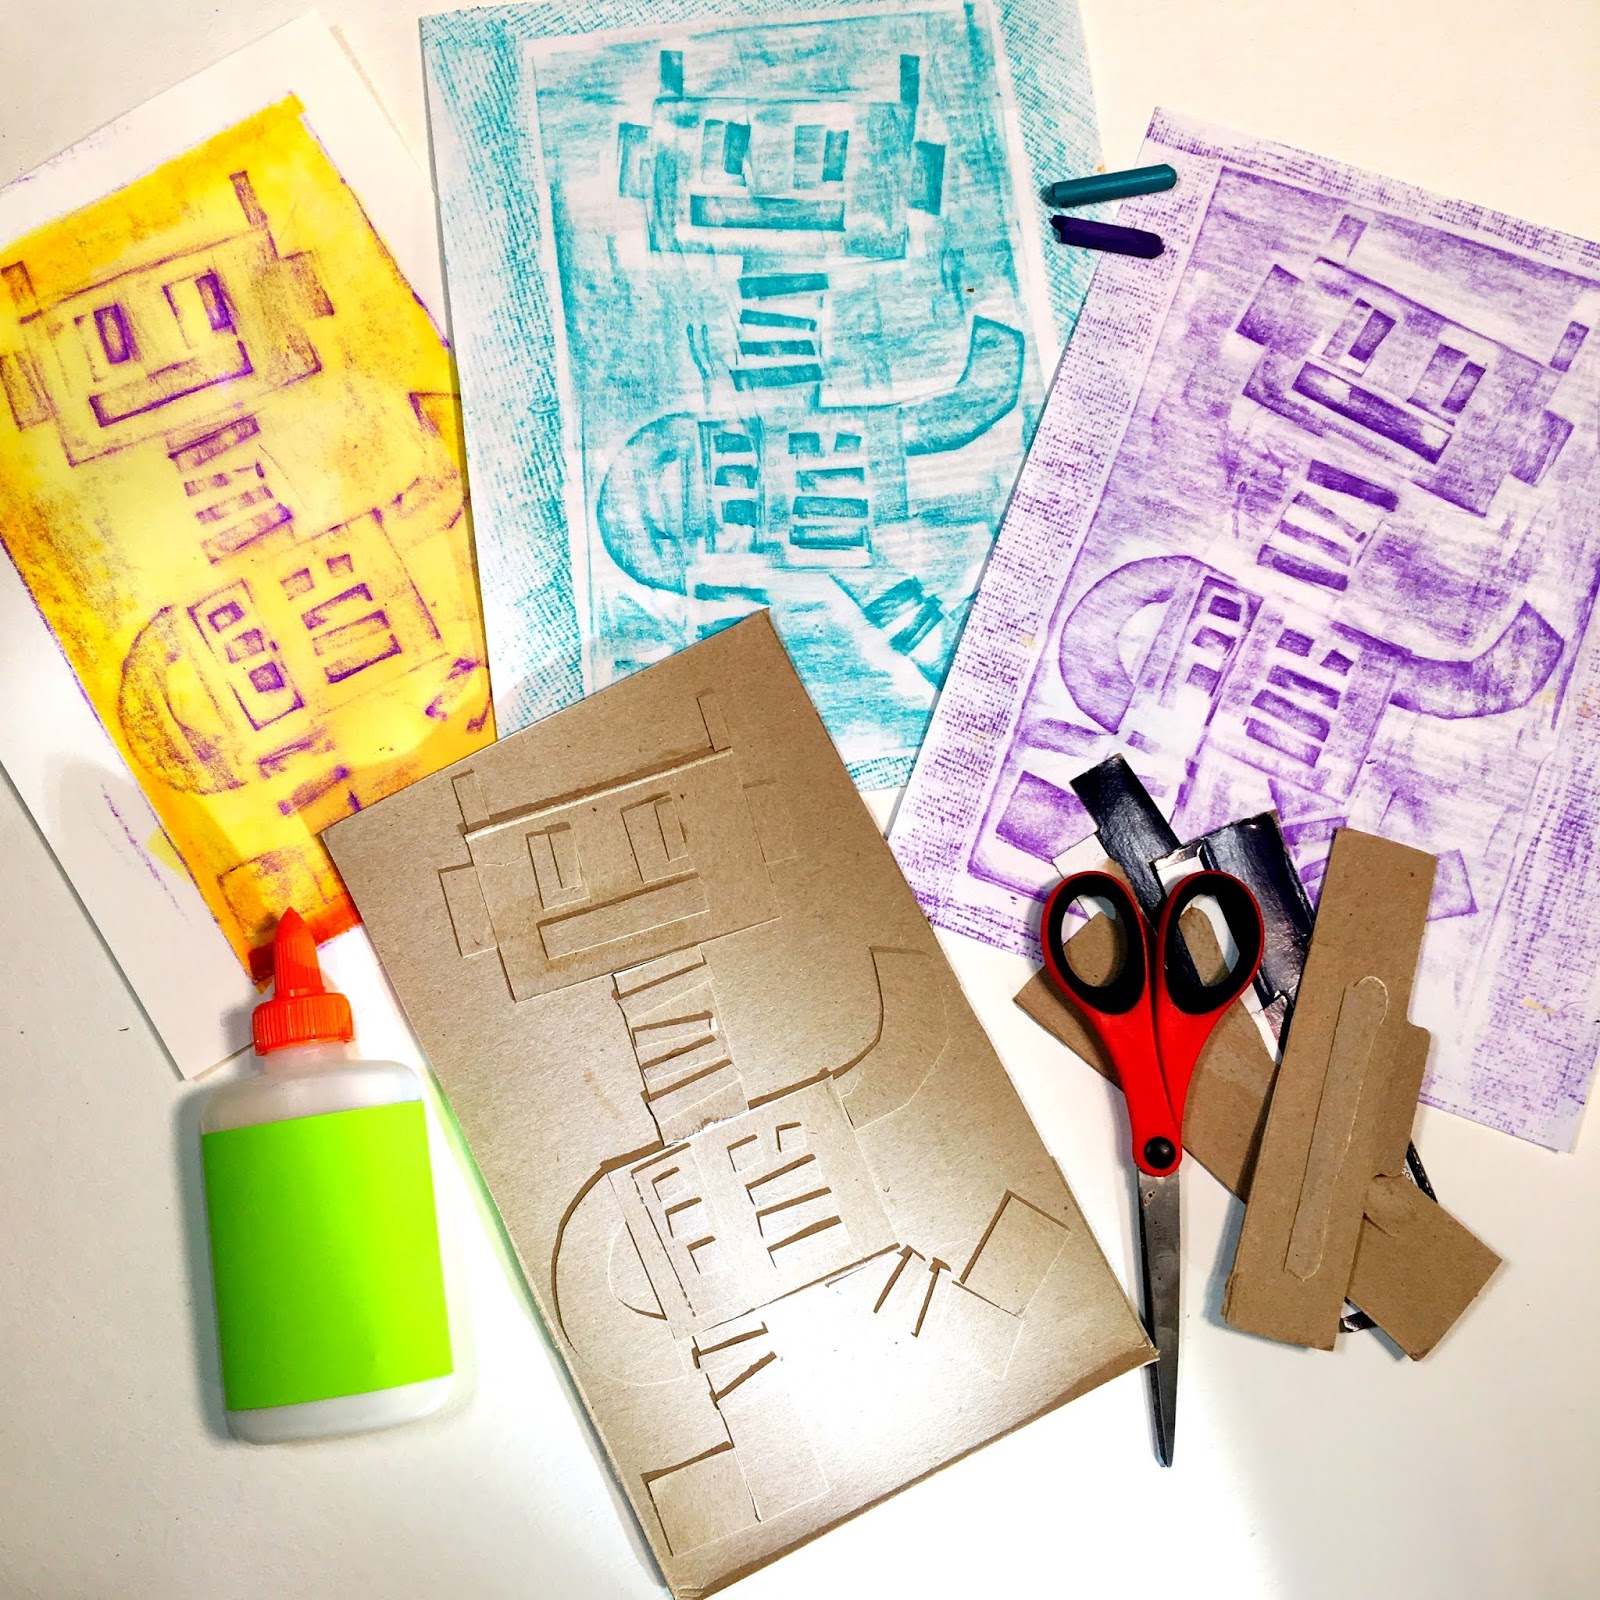
 I know we probably all have a couple of cereal or snack boxes laying around. For that reason, why not try your hand at a collagraph rubbing? It's when you cut and glue shapes to a surface, lay a piece of paper on top and then, using a "sleeping" crayon (one on its side), rub over your design. I then added a watercolor wash to some of mine!
 It's a Build-Your-Own-Bot kind of Wednesday!
 What to do with that cereal box collage? Well, on Thursday, I'll show you how to cover it in foil and make a print with just markers and water!
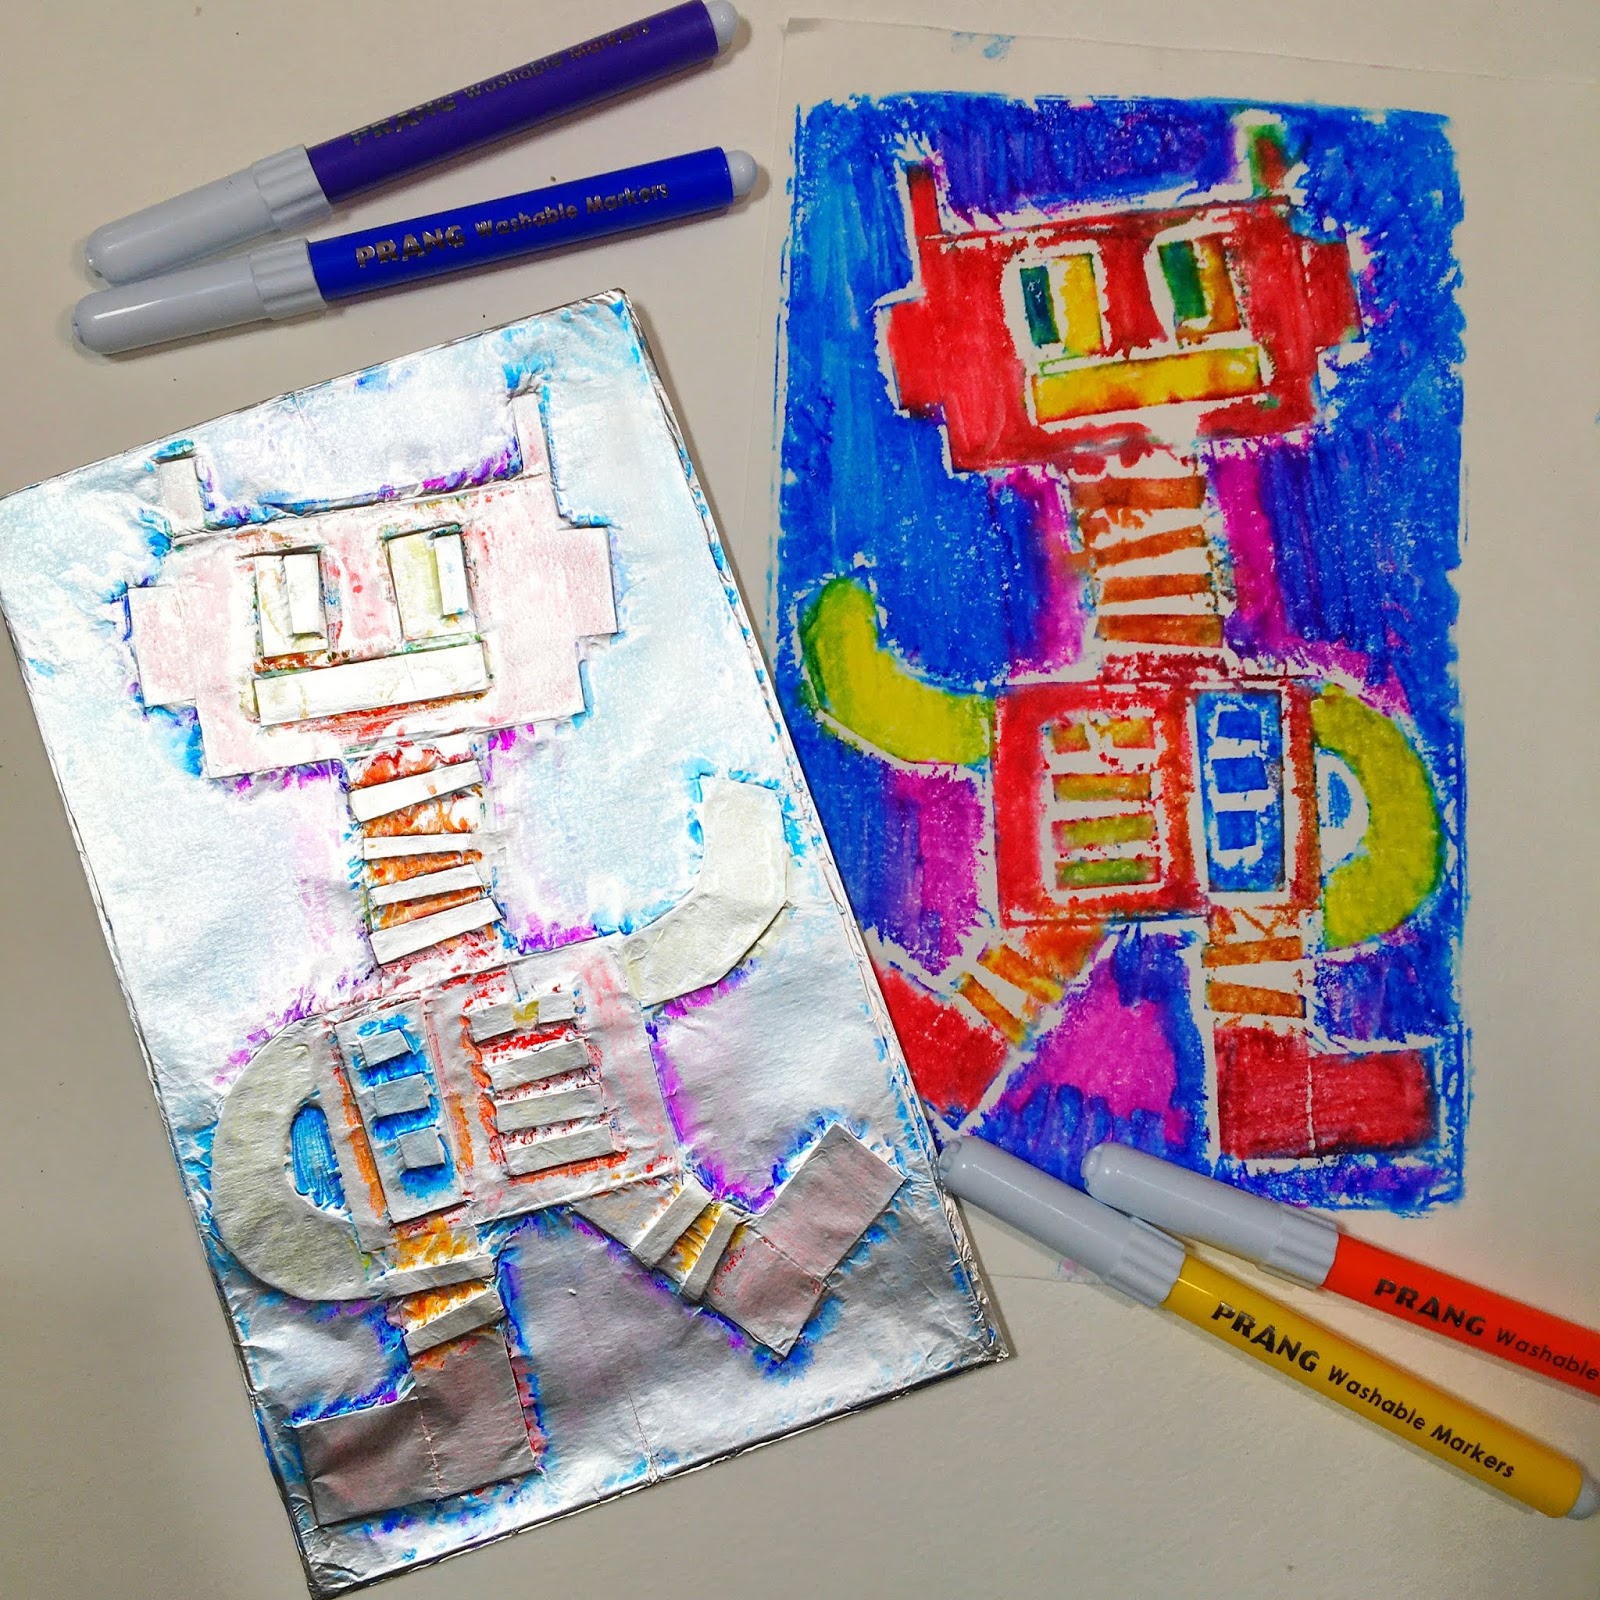 Oh yeah, this one's magical!
 On the final day of Robot Week, we'll make a collage with one of my favorite papers to collage with: business envelopes! They have the coolest patterns and designs.
  I do hope you'll join the fun! If you do, I would love to see what you and your awesome artists create. You can email me your images at artteacherin101@gmail.com and I'll try to feature them right here!


March 13, 2020
My Favorite Lessons for Home-Based Art Education!
 Hey, y'all! I'm about to share some of my fave home-based learning projects but...this is just the tip of the iceberg! I have a TON of art lesssons on my YouTube channel for you and your artists to explore. Be sure and subscribe as I'll be adding many more!
Currently, we as educators find ourselves in the most unusual of situations: away from our students for an unforeseeable amount of time and wanting to still connect, teach and create. If you are like me then your district has requested that you attempt to do just that with home-based learning. Because this is unchartered territory, the idea of teaching remotely is confusing, daunting and overwhelming. Where to even start?
 I've been putting some serious thought into this topic for the last couple of days as I create fun art activities for my students to do at home. I'll be sharing them all right here (for free, of course!) but in the meantime, I wanted to share with you the home-based art lessons I plan to use. Each of these lessons, videos and PDFs are FREE for you and your students can use right now. Feel free to include in your take-home packets or modify to fit your student's needs. Let's begin with this Monochromatic Self-Portrait lesson that is appropriate for kindergarten on up!
Just click for the video! Because many students may not have markers at home, you might suggest crayons for them to add color.
 This Colorful Village lesson was one that all of my students loved! I did it with my first through fourth graders and it was a huge hit. In case students don't have paint at home, markers and crayons can be used. Without those supplies, this could simply be a great drawing task for them to work on creating three-dimensional buildings. Here's the video:
These colorful houses were so fun to create!
 My fourth graders always loved this Romero Britto-inspired self-portrait project. I do think that younger children would love it too.
 Again, consider suggesting students swap out supplies used for what they have on hand at home.
 Chris Uphues is easily my student's favorite artist! And can you blame them for loving him so much, his work is just so full of joy! You can check out the entire lesson here.
 The link to this blog post also includes free downloadable PDFs!
 Introduce your students to both James Rizzi and Vincent van Gogh with this fun lesson. Click the link for free handouts! Here's the video:
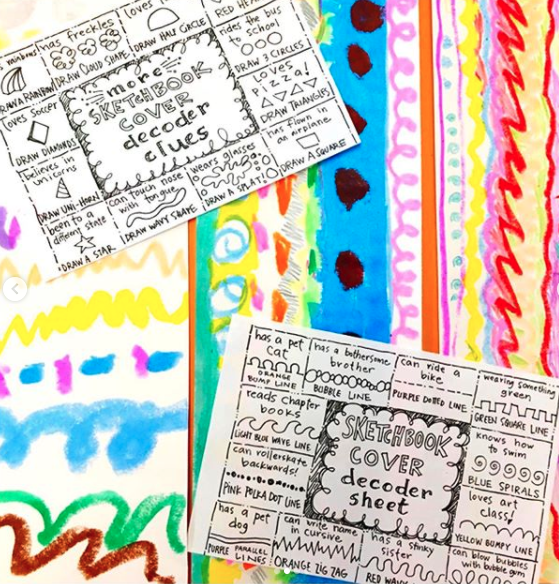
Of course, if you want to get kids creating, then you could always have them create their own sketchbook! I plan to create a video to show kids how to create one easily. In the meantime, they could use the Sketchbook Decoder Sheets found here to personalize their sketchbooks!
 If these look kinda familiar, we have done a similar project with my Getting to Know You sculptures. That project is also one that could be done at home with improvised materials!
 Times like these could get you down...but we can't let it! So why not have students create drawings of people, places and things that they are grateful for? Click here for two free PDFs!
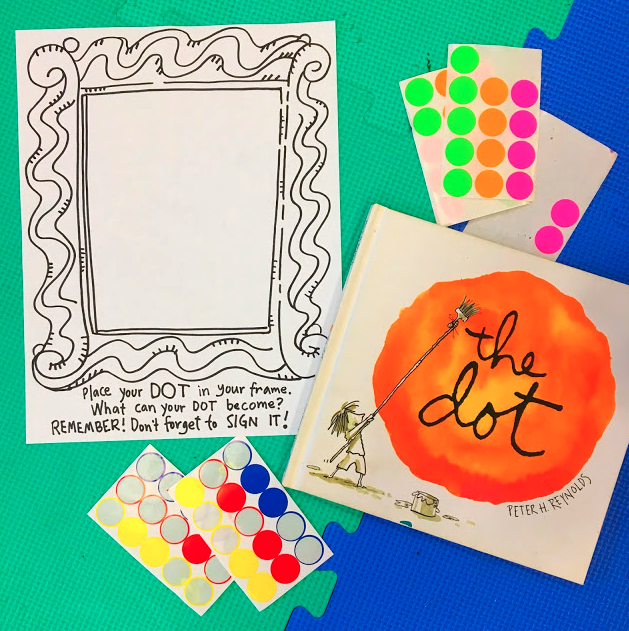 If you are required to send home a packet as we were in my district, you might consider downloading and printing out this sheet and including a circle sticker. These can be found at the dollar store. Children could access a telling of The Dot on YouTube and create their own work of art in the frame!
 If your students have access to paper, scissors and glue, this easy Greg Mike-inspired project would be a blast for them! Without access to construction paper, students could simply use the paper that they have on hand.
 A lesson that is always a hit with my students is making this pop-out star. They love creating the patterns and then writing about themselves. Again, think of an alternative set of supplies for students to use so they can create at home.Alright, y'all! Stay tuned as I have much more to come. I hope that gives you and all the young artists out there a fun place to start!
March 8, 2020
Printingmaking Made Easy!
 Since I've spent the last couple of weeks in Printmaking Land with my second and third graders, I thought I'd share everything I know about printmaking in the elementary art room! I started to record a podcast episode which quickly turned into TWO podcast episodes. There's a lot to printmaking in the elementary art room but none of it is scary, difficult or even all that messy! My kids love it and so do I. So I'll be sharing both podcast episodes here as well as my favorite lessons. Be sure and click the link as it will take you directly to the lessons which often feature a video for you and your students!
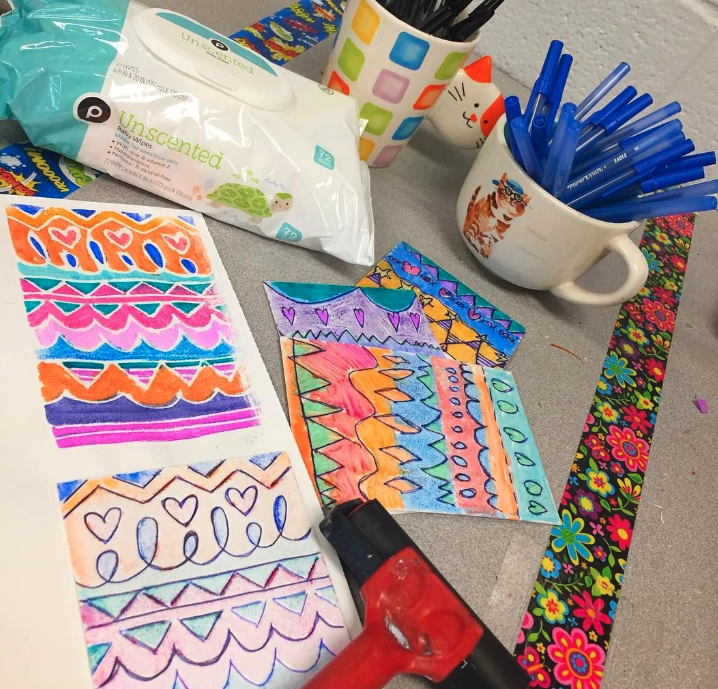 In the first episode in this series, I focus a lot on printing with Styrofoam sheets. They are a great alternative to having small children carve into linoleum or wood blocks (lord, I can see the lawsuit now!) and can produce beautiful results. Here's everything I could think of about printing with Styrofoam sheets!
 My favorite tip is to have kids use ink pens when incising the lines into the foam. I have them use a blue pen first and a black pen second. This ensures that they'll incise the lines deeply enough by doing it twice. When I see the black ink pen, I know they've traced their lines not once but twice.
 In this episode, I talk a lot about supplies and set up. Here's a visual! My second graders are doing a rainbow roll in this photo. Notice the dollops of ink at the top of the tray where they are to dip their brayer, not roll through the ink. Then, in the space below, they are to roll their brayer up and down only (so as not to mix the colors) to cover the brayer before rolling it onto their printing plate. Messy mats are used to help keep the table clean. Students also place all of their prints on the messy mat during clean up (without stacking them as they will stick together) and slide the entire mat onto our drying rack. Then we toss our printing plates in one sink, brayers and trays in another for me to do a quick wash after school.
 In the episode, I also mention printing on newspapers, painted papers, wrapping paper, metallic papers and much more. The results are stunning!

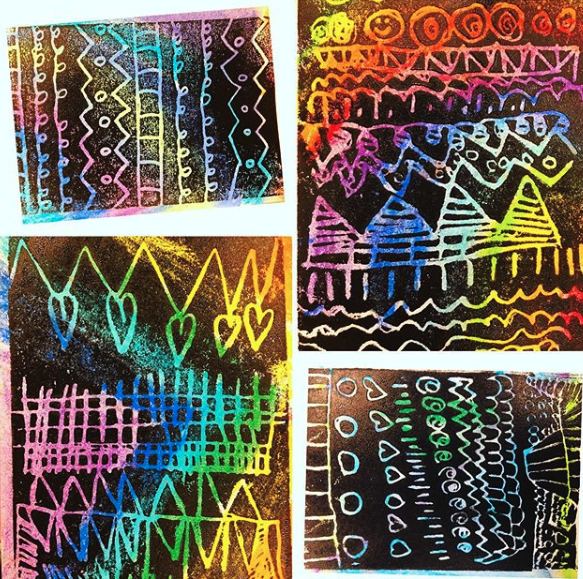
 In the follow-up episode, I talk about printing in 30-minute classes. On the first day, we do a single color print like these third-grade robots you see here. The following art class, we do a rainbow roll like you saw above.
  On our third day of printing, we spend a hot minute adding more designs to our printing plates before doing a reduction print. The kids were fascinated by this process.
 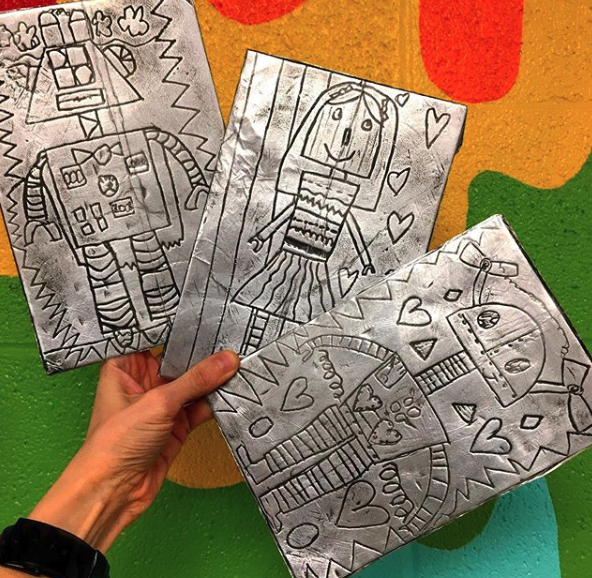 And on the last day, we make these! Never throw away those printing plates or simply send them home. You can make such cool works of art with them with inexpensive foil sheets, steel wool and spray paint. Take a listen to find out how!
 Third Grade Cities! This lesson was a hit as the kids were allowed to swap cities to create some diversity in their finished piece. The complete lesson in the link!
 Winter Portraits by Second Grade
Need a fun way to introduce printmaking and patterns? Check out this self-portrait project!
Winter Portraits by Second Grade
Need a fun way to introduce printmaking and patterns? Check out this self-portrait project! Egyptian God Portraits Fourth grade students used their knowledge of Egyptian gods and symbols to print the designs in the background of these portraits.
  Positive Four Letter Word Collages with Prints! This is a lesson I return to year after year and seem to change and tweek each time. You can see alternatives to this lesson here.

 Gelatin Prints I don't do this kind of printing anymore with homemade gelatin printing plates for a couple of reasons: I don't like using the gelatin (it's an animal product that I'm not comfortable using) and it's labor-intensive. BUT the results! There are recipes for making your own more permanent printing plates that don't seem to be difficult at all. I found several on YouTube.
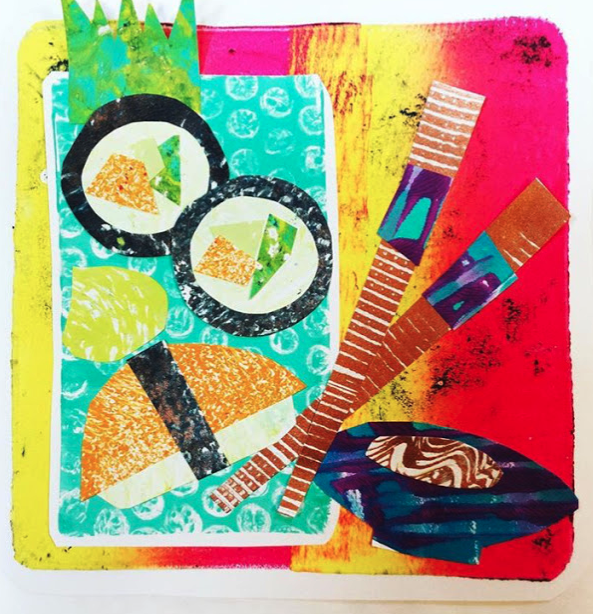
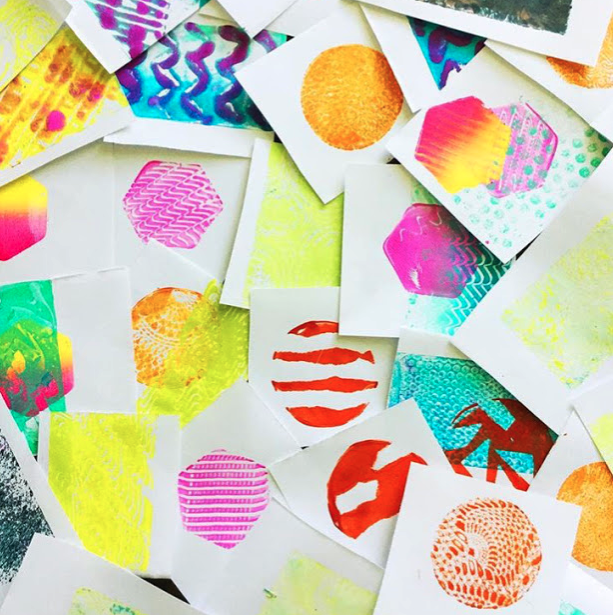
Sushi Collage with Gelli-Plate Prints I do have a class set of Gelli-Plates and we love them. The best thing to do is just let your kids go crazy exploring different methods of printing on the surface with stencils and texture and color. In the end, you'll have a fun stack of papers like you see below that can then be used to create collages like you see above!
 If you would like a video to walk you through more of these processes, be sure and check out this blog post!
  Collagraph Prints are ones created by adding things to a surface. This is different that the Styrofoam prints which are a subtractive kind of printing. Collagraphs are additive. My fourth graders created these prints a couple years ago in celebration of dot day!
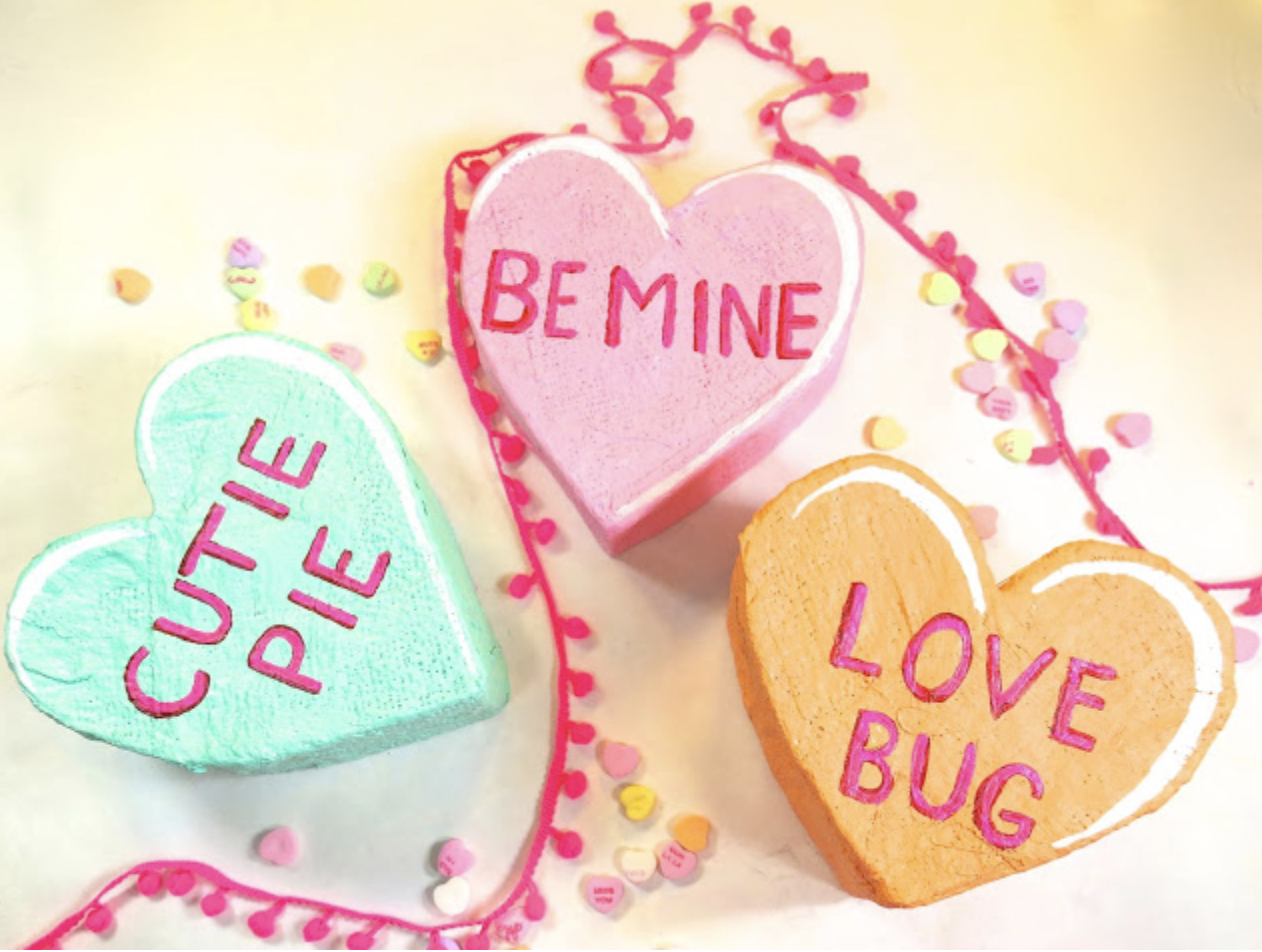
 That project was very similar to one I did just last year with my kindergarten friends! We used foam hearts from the Dollar Tree as the base and sticky-backed foam stickers for the design. You can see the complete lesson here.
  We collaged our completed hearts for these sweet masterpieces.
 We then wrapped our lesson by wrapping our hearts and doing a little burnishing as I mentioned at the start of this blog post! I hope that gives you a bunch of ideas for printmaking in your art room and removes any fear that you may have! Happy Printing!
March 3, 2020
Art Teacherin' Extravaganza!
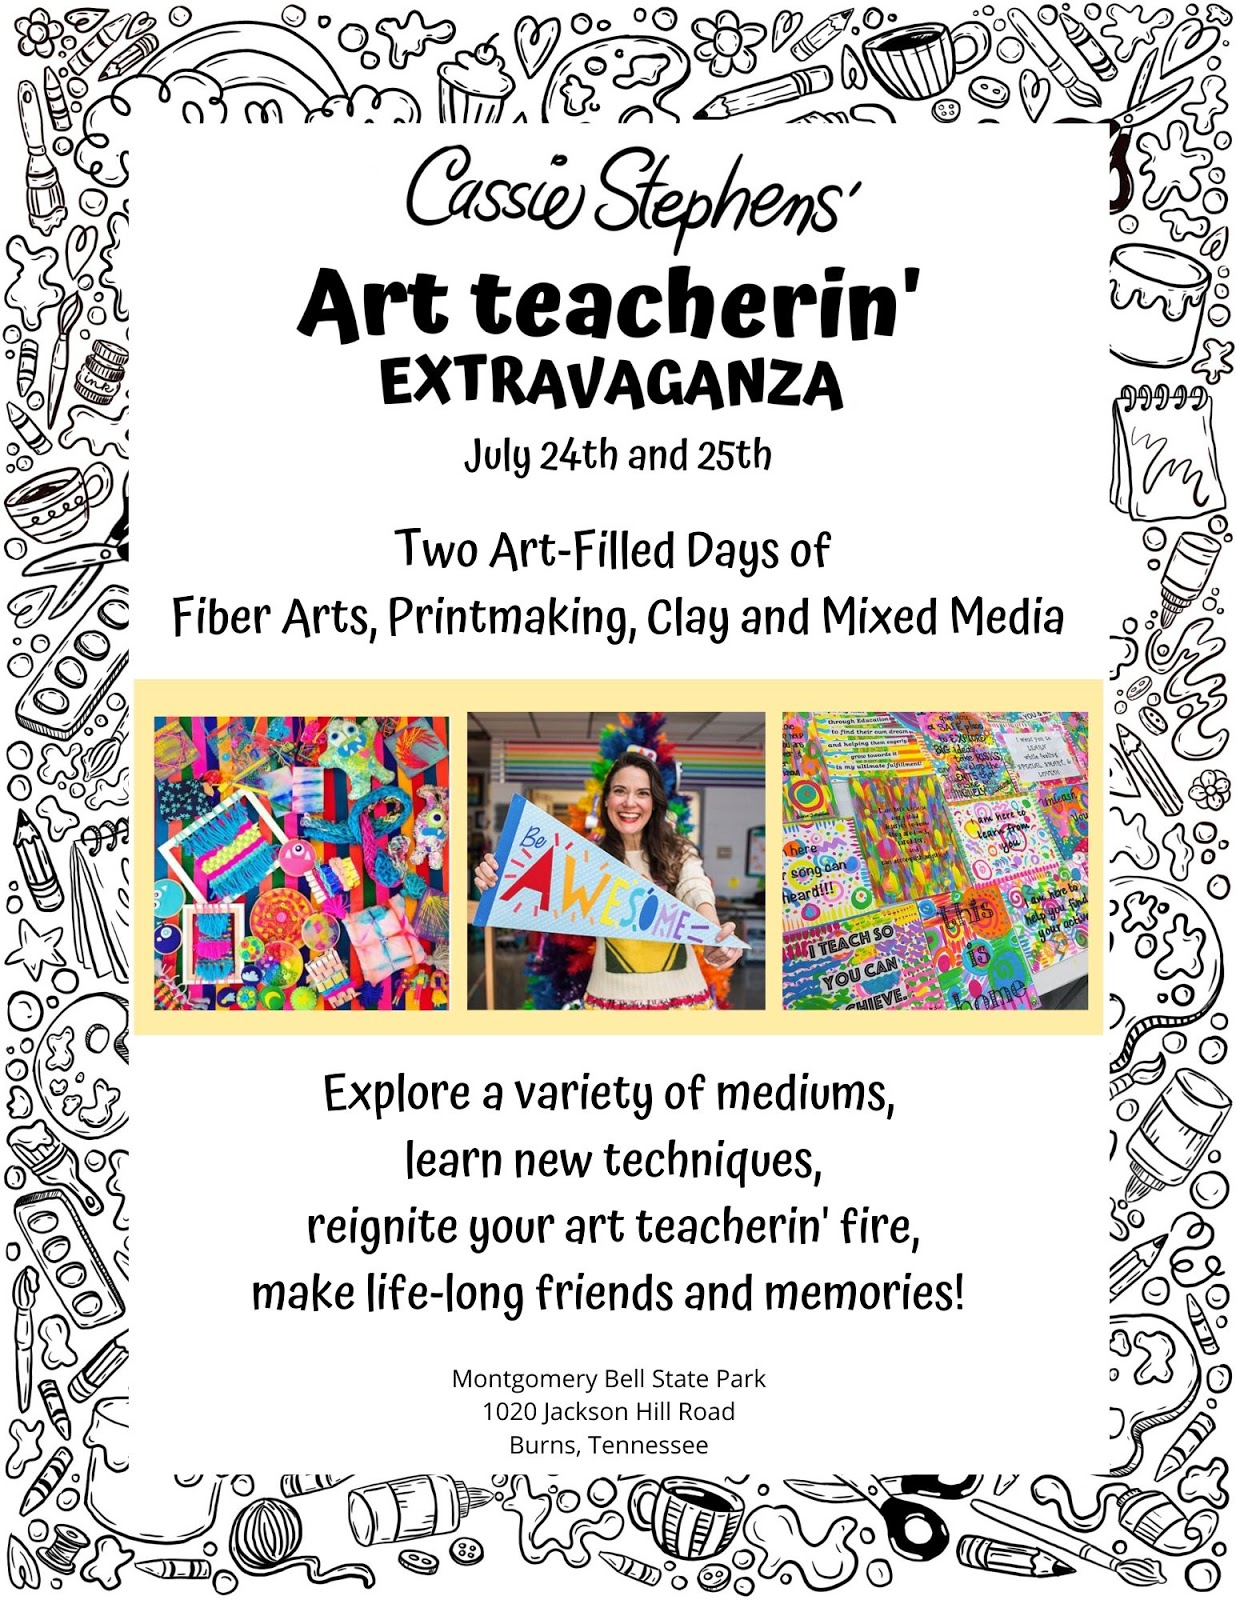 Hey, y'all! If you follow me on Instagram or you have signed up for my email newsletter, then you've heard the big news: I'm throwing an Art Teacherin' Extravaganza! I'll be sharing more details here but if you just wanna jump on board and reserve your spot, go ahead and do so here!
 I've been working on putting together this experience for the last couple of months although, to be honest, it's been on my mind for years! So often there are not professional development opportunities for art teachers or when we do have them, they don't offer what it is we really need and want: hands-on creating! Here's a little more:
 But, really and truly, the real reason I created this extravaganza is that I want to see you. I want to spend time with you. I know in my bones...IN.MY.BONES...how lonely teaching art can be. I spent the first ten years of my teaching career carrying around that shadow of loneliness. I know I've chatted about it at length on my podcast which you can hear here:
Knowing of my experience with loneliness, I wanted to carve out a time for you and me this summer to spend time together, meet other like-minded folks, make new friends and, best of all, create! Here's where the extravaganza will be held:
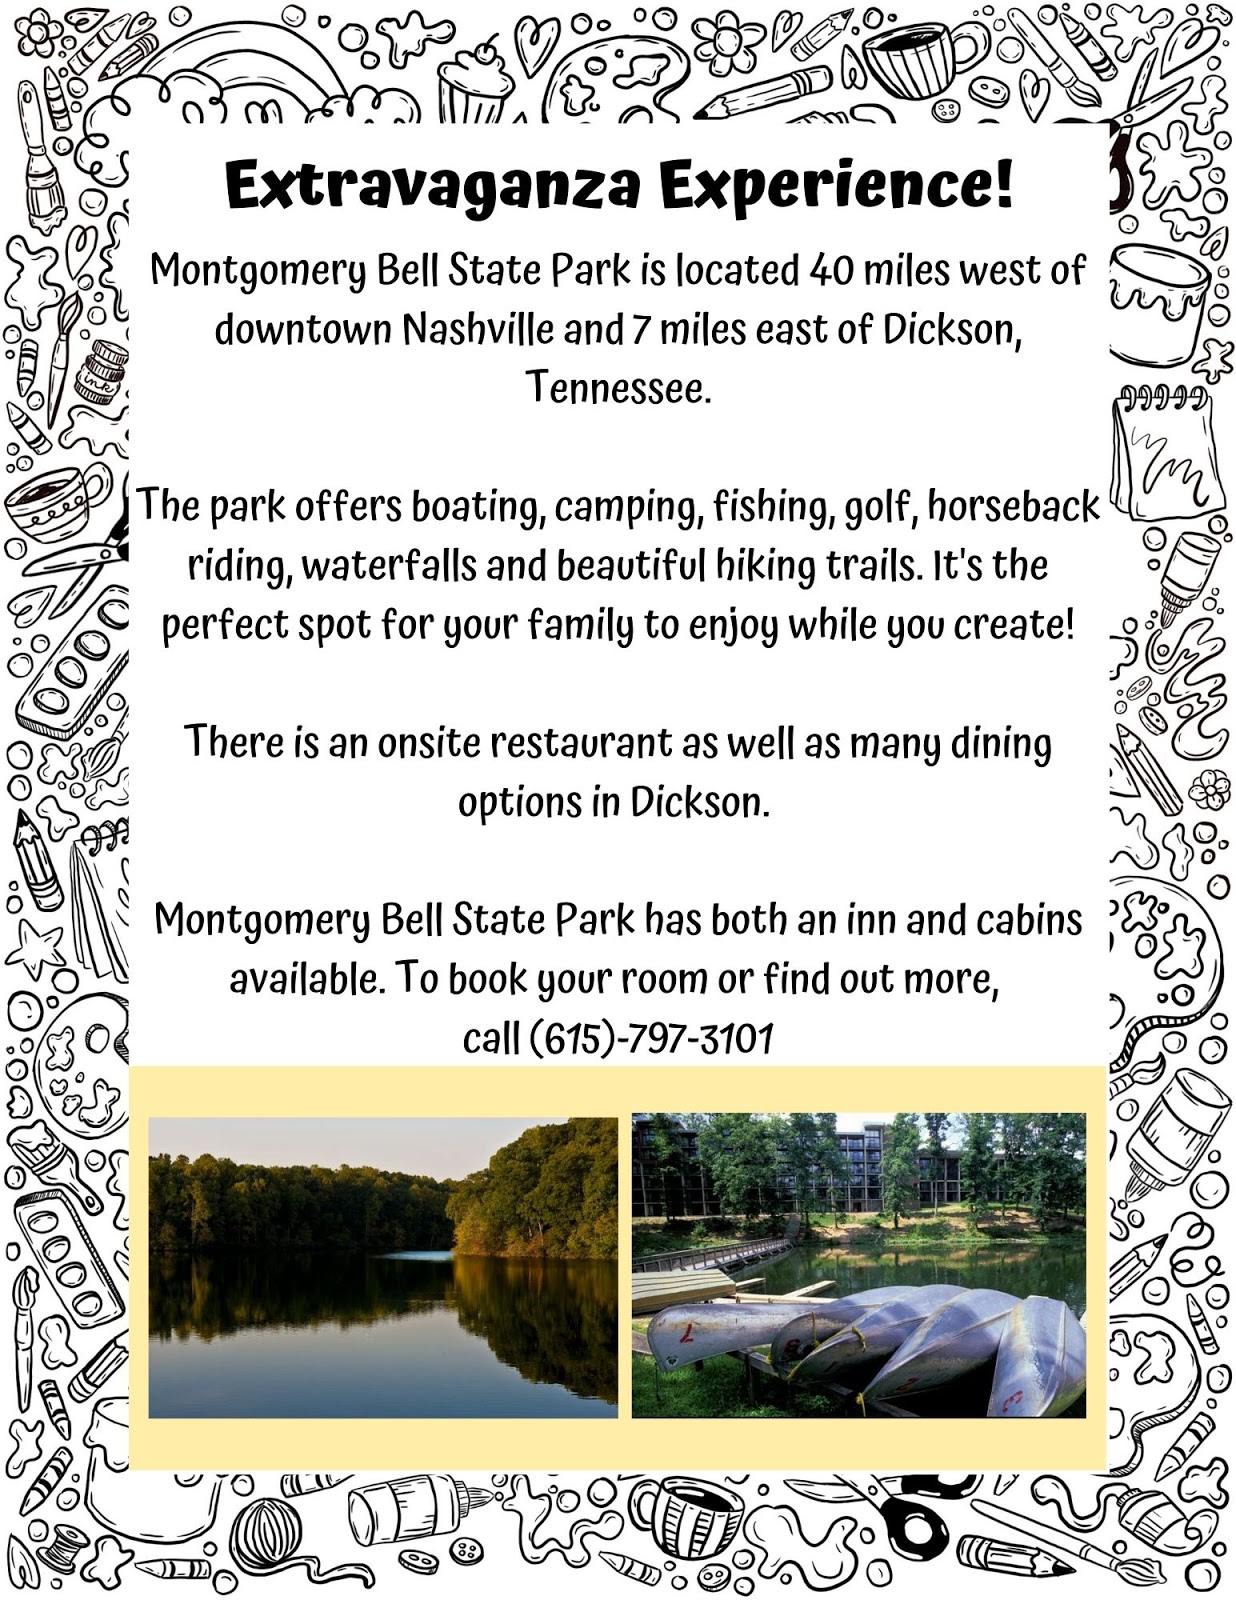 Montgomery Bell State Park has so much to offer! There's canoeing, fishing, hiking, swimming, horseback riding and much more. This might just be a great little vacation for you and your family this summer. While you are hanging with me, they could explore the park and all that is has to offer. Not to mention that Nashville is just 45 minutes away and is a buzz with stuff to do! For those attending, I'll be creating a list of my favorite things to share with you soon so you can plan your trip!
 The Inn at the park has a very limited amount of rooms set aside for attendees. However, there are a ton of hotels just five miles down the road in the town of Dickson. I included a list of those hotels here. I'd recommend getting in on Thursday night so you are ready for everything on Friday morning. I'm working on creating a Facebook group for attendees to chat with friends and meet potential roomies to lower the accommodation costs.
 I tried my best to think of every question you may have but I am sure I've forgotten something. So feel free to drop me a line! You can email me at artteacherin101@gmail.com. Love to hear from you and, hopefully, see you real soon!
February 15, 2020
In the Art Room: Marker Hacks in the Art Room!
 Hey, y'all! Today I'm sharing my very favorite marker hacks! In this post, I'll be sharing my favorite lessons involving these hacks but be sure and listen to the podcast episode where I share even more details. Be sure to click on the link and visit the posts I'm sharing...these are free lessons and many of them include a video as well as free handouts for you and your students! Here's the podcast episode:
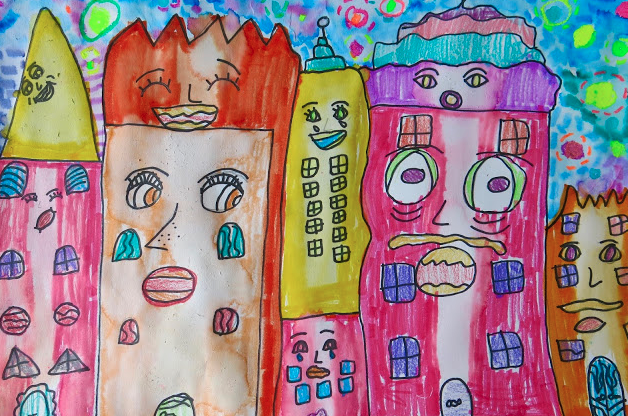 James Rizzi meets Van Gogh Cities! This project was a huge hit with my third and fourth grade students. What I loved is that my students had a chance to explore painting but without the mess! I did this project near the end of the year when we were completely out of watercolor paint. Did you know that you can use markers as watercolor paint?! All you do is color and add water! I loved the technique so much I did it for the next lesson too.
 Chris Uphues Hearts! This lesson began as a sub plan and quickly became a kid and teacher favorite! I know many of you have done this one in your art rooms and it makes me so happy. Again, we outlined the hearts in marker and then used paint to "wake up" the marker and turn it into paint.
 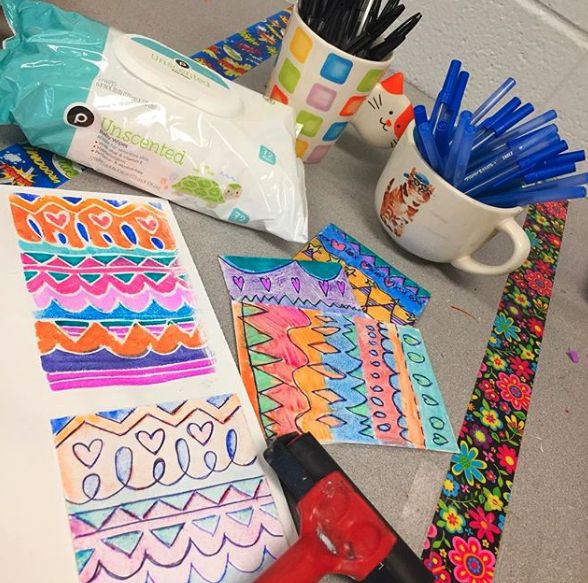 Marker Prints! In the podcast episode I mention printing with markers and it being a little tricky when you dampen the paper. I had totally forgotten about the photo I shared above...last year we used baby wipes instead of a sponge and water and it proved to be great at getting the paper just damp enough to pull a print. You can hear more about this in the episode and definitely check out more in the link!
 I mean, how fun is that?!
 Color Diffusing Coffee Filters! I think many of us know about this hack BUT...did you know...that after your students are done coloring their filter they should LEAVE THEM ON A STYROFOAM PLATE when you spray with water and allow to dry. Why? So that the marvelous marker color stays on the filter and doesn't drain out and get on the surface below. Hear more about that in the podcast episode.
 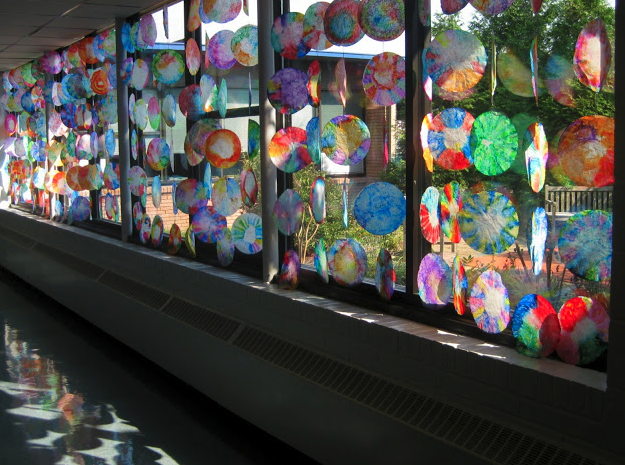 We attached these using paperclips and hung them in the windows of our school for Dot Day!
 Self Portraits in Kimonos! Here is another use for those coffee filters! This lesson was a kid favorite and look how precious they are! More details in the link.
  Children's Day! These color diffusing fish came from our sponsor, Roylco. I love using color diffusing papers with markers and these were a huge hit!
  We used permanent markers for details we wished to remain and waterbased markers for ones we wanted to spread. We also used watercolor paint for more pops of color. Notice how the fish is on a plastic bag...this is how the fish dried as well so that the color would remain on the fish!
 Again, we hung these in our large bank of windows and they looked so beautiful.
  To attach one to the other, I used paperclips. I also used paper clips to attach the fish to the ceiling tiles.
 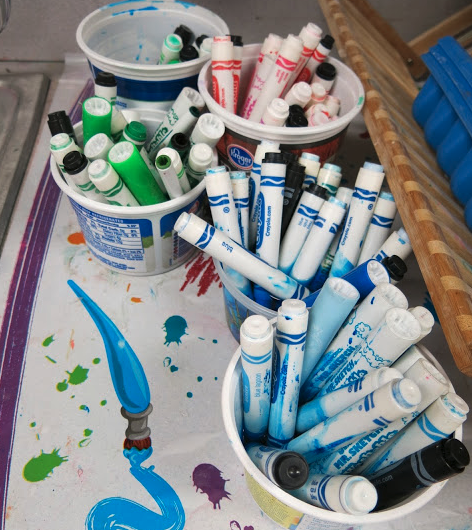 Making Marker Juice! What to do with all of those dried out markers?! Make Marker Juice! Now in the podcast, I share an easy way (as seen above) and the hard, better results, way. We used these paints to create a background for our "Ain't Gonna Paint No More" self portraits.
  My kindergarteners had a big time making these!
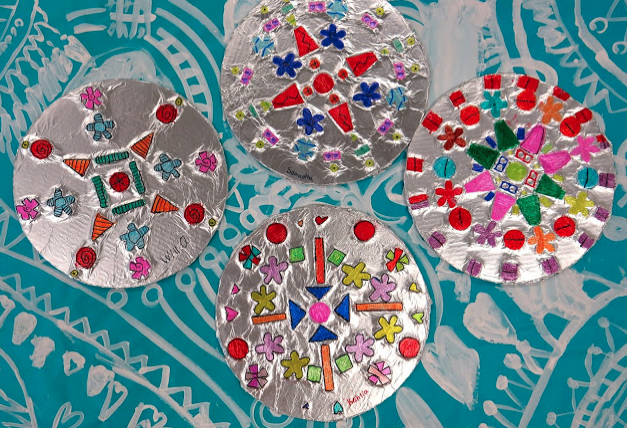 Foil-Covered Printing Plates! What to do with printing plates once printmaking is complete? Cover them with foil and make a new work of art! I don't talk about permanent markers in the podcast but I did want to share the projects we've done with them here. Permanent markers are great for many reasons but one is when coloring over foil. They make the most beautiful shimmery effect.
  Dot Day Sparkle! Check out this beauty! These were made with Styrofoam plates, foil and permanent marker.
  Foil Relief! When weaving one year, my students were stressed about the amount of waste yarn we were throwing away. We decided to keep it and then create with it! Check out the blog post for details.
  Speaking of not wasting a thing, we also do something similar with our printing plates! Follow this link for more.
 I hope you learned a fun and new marker hack today!
February 3, 2020
In the Art Room: My Favorite Oil Pastel Projects, Hacks and Techniques
 Okay, today I'm talking and sharing all about every art teachers favorite art supply: the oil pastel. In this week's podcast, I'm not only excited to share our sponsor Creativity Street's Oil Pastels but also my favorite hacks, my four favorite kinds of oil pastels (from fluorescent to water-soluble) and my favorite lessons. I'm also talking about how to clean oil pastels (yes! you can clean them!) and also how I easily remove the paper wrapper and store these babies. You can hear it all right here!
 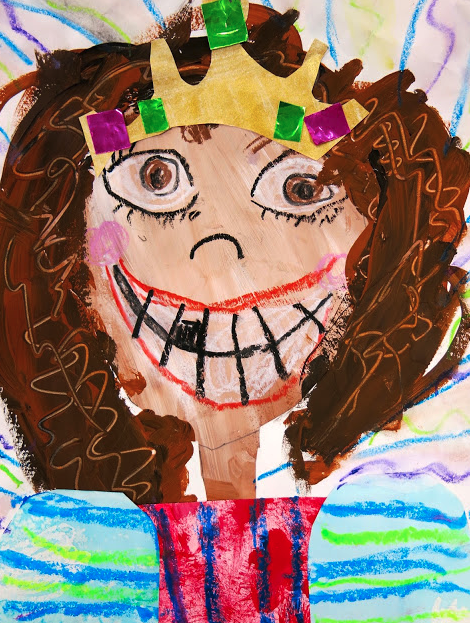 I don't often repeat lessons but when I do, it's this first grade hit! We call these our Royal Self Portraits and they are a great use of both oil pastels and water-soluble pastels. Check out the full lesson here.
  My second graders truly are super heroes and it shows in this project! Fluorescent oil pastels were used in the background of this Vincent van Gogh inspired sky and it really pops with a watercolor wash. Lesson here!
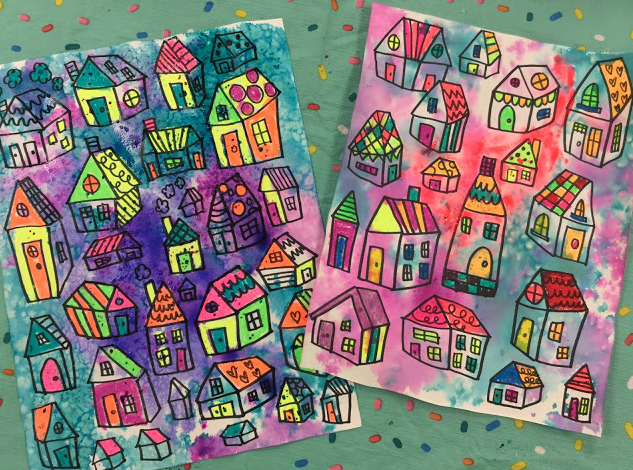 Y'all need some of them sub plan things? I got you right here...and your kids will learn about a contemporary artist too!
 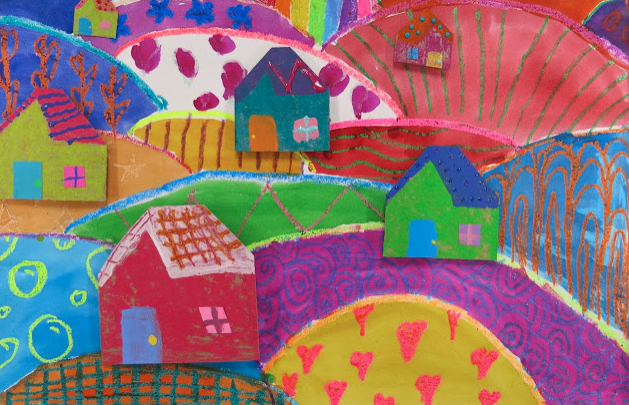 Nothing like oil pastel pattern-y landscapes, says me. The pop-up houses with puffy paint also made these a huge hit with the kids. Lesson right here!
 Speaking of puffy paint...do y'all use it in your art room? My kids are HUGE fans. I admit, I love the stuff too. But, back to oil pastels. We used them once again to create a great textured resist for this piece.
  Can you guess what household item we used for this piece? Guess you'll have to take a listen or click the link to find out! Video tutorial included!
  These kindergarten pigeons bring me so much happiness! Lesson with video right here!
 Speaking of kindergarten, I know they can be a struggle but I got you. I have so many kindergarten lessons on this blog! Just search kindergarten in the search bar or try this fun lesson on for size.
  I mention several different scraffito projects in the podcast episode and this is definitely one of my favorites. More here.
 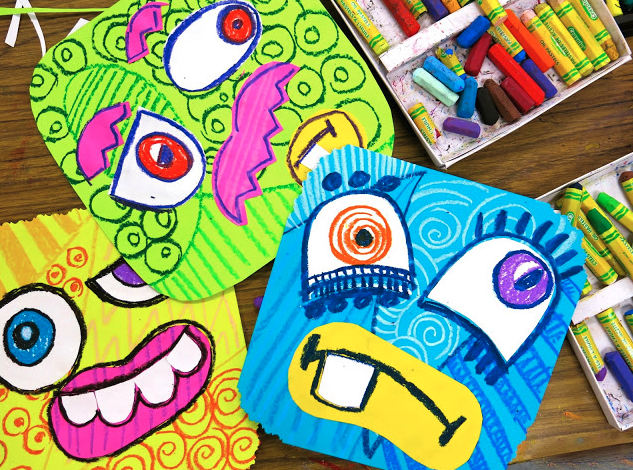 Need another mental health day? Boo-boo, I hear you. Here's another sub plan favorite!
  First grade and kindergarten love this pattern-y landscape lesson. More here!
 Have you checked out my Glow Gallery?! AH!! So fun, see it all and learn all about it here.
January 26, 2020
In the Art Room: My Favorite Chalk Pastels Projects and Techniques!
 Hey, friends! We are currently up to our elbows in chalk projects in my art room and it got me thinking...I should share my Top 12 Chalk Pastel Projects with y'all AND my tips and tricks. I steered clear of chalk for the longest time because of the mess; the lack of understanding how to set the stuff and because the chalk I had on hand for my kids was, well, crap. So I'm gonna debunk all of this chalk nonsense and hopefully help you get excited to bring this beautiful and vibrant medium into your art room. In this post, I'll share my fave projects but if you want even more details, check out this podcast episode:
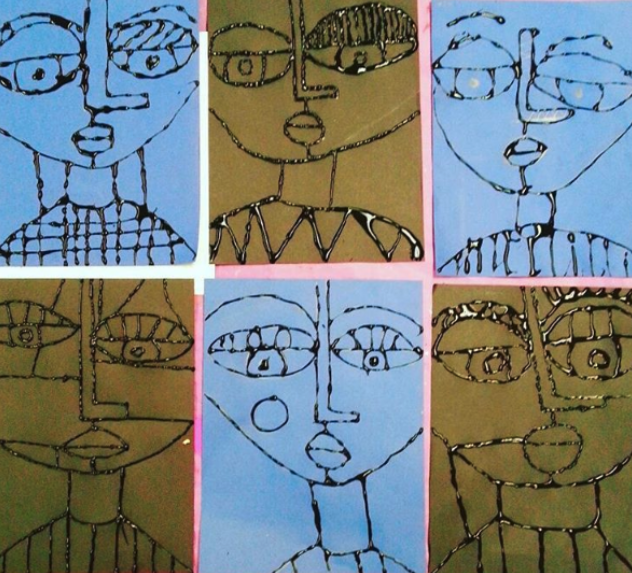 Sandra Silberzweig Inspired Abstract Portraits I don't often repeat lessons, but this one is a hit year after year. Follow the link to a video that you can share in your art room.
 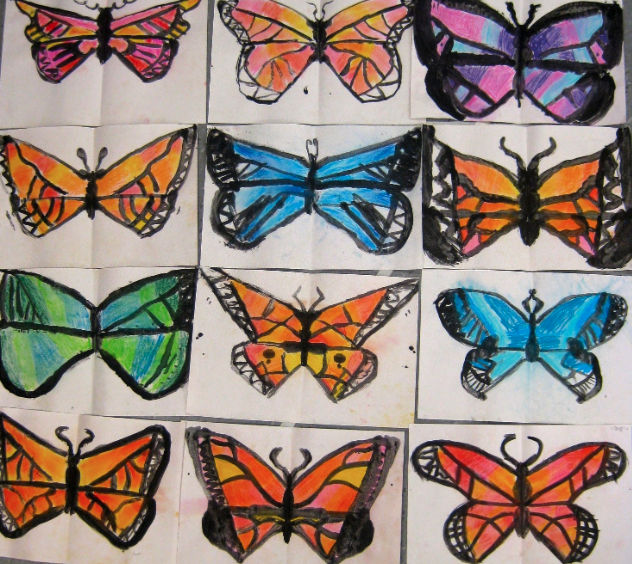 Symmetrical Butterfly Project with Second Grade This lesson includes a video! It was a fun project that I did with my second graders and each one was a beauty.
 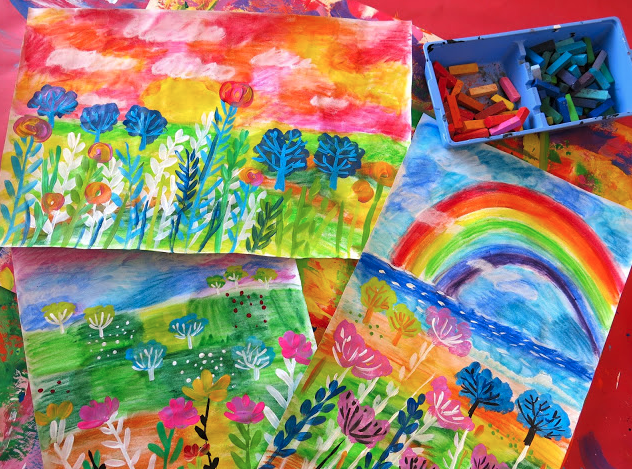 Claire West Inspired Landscapes with Chalk and Liquid Starch If you've never used liquid starch with chalk before, oh boy, y'all are in for a treat! This hack is magical and I cannot wait for you to give it a go. More details in this blog post.
 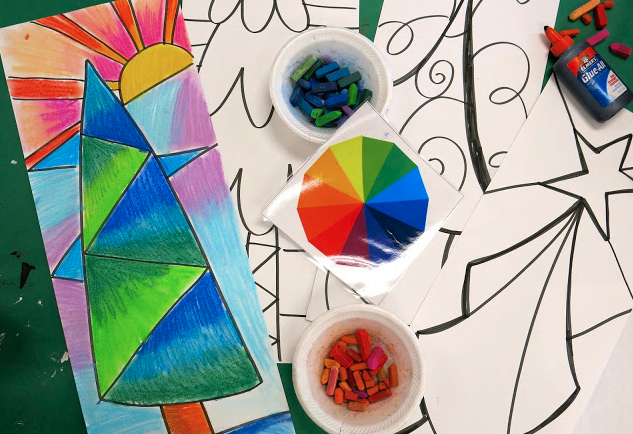 Faux Stained Glass Project We did this a few years back and the results were so striking! You can find more details here.
  Sandra Silberzweig Inspired Fish! I love Sandra Silberzweig and her work as do my students. Anytime I can share her with the kids, you better believe I'm gonna. This project did just that. Video included!
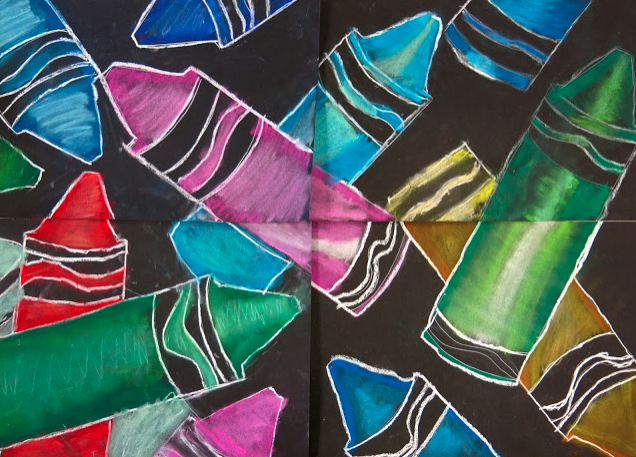 Crayon Chalk Collaborative Working together, my students created these large pieces that were so fab. You can see all the details here.
  Fourth Grade Fauve Portraits This project uses the chalk and liquid starch trick and the results are so vibrant. More details here.
  Desert Landscapes with Third Grade Stencils and chalk go so well together. More details on this fun lesson here.
 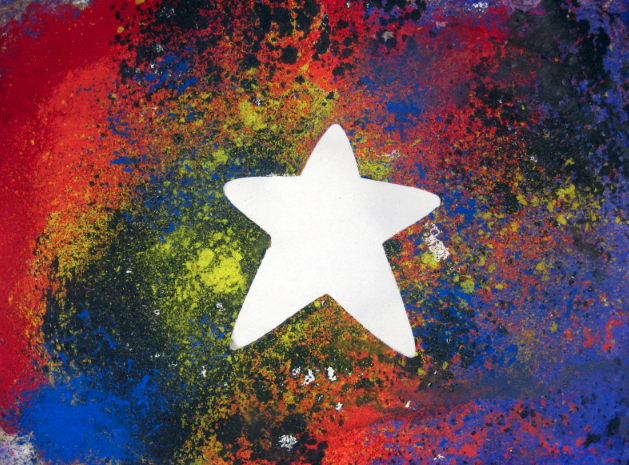 Floating Chalk Prints! Behold! This is the coolest thing you can do with chalk. Don't believe me? Check this link!
  James Russo Inspired Animals with Chalk and Oil Pastel We're the tigers at my school so this project was just perfect. More here.
 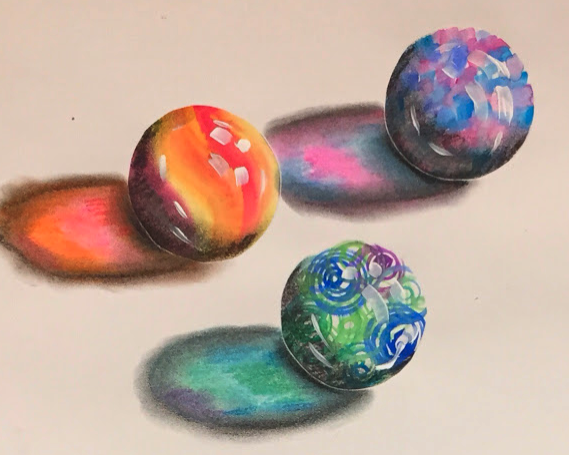 Glennray Tutor Inspired Marble Project This one was fun and had the kids so excited to work in the third dimension!
 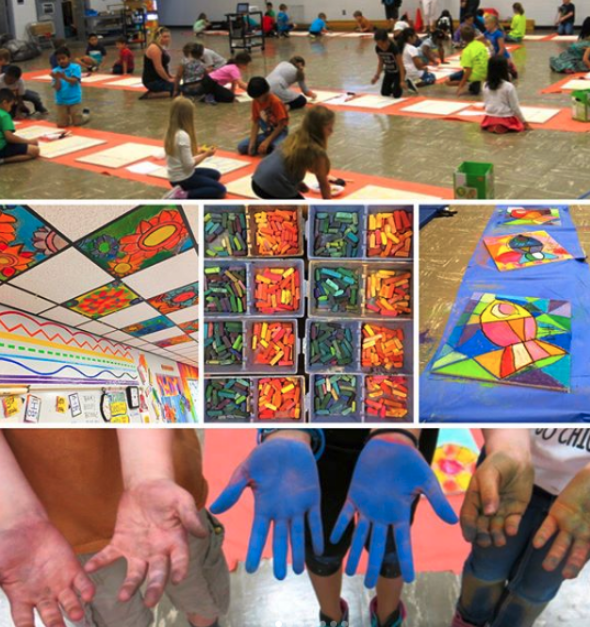 Annual Ceiling Tile Legacy Project! This is a massive undertaking I do every year with second-grade students. They create chalked ceiling tiles that are then placed in the ceiling permanently. How fun is that? More here.
January 12, 2020
In the Art Room: Heather Galler-Inspired Hot Chocolate Paintings, Part 1
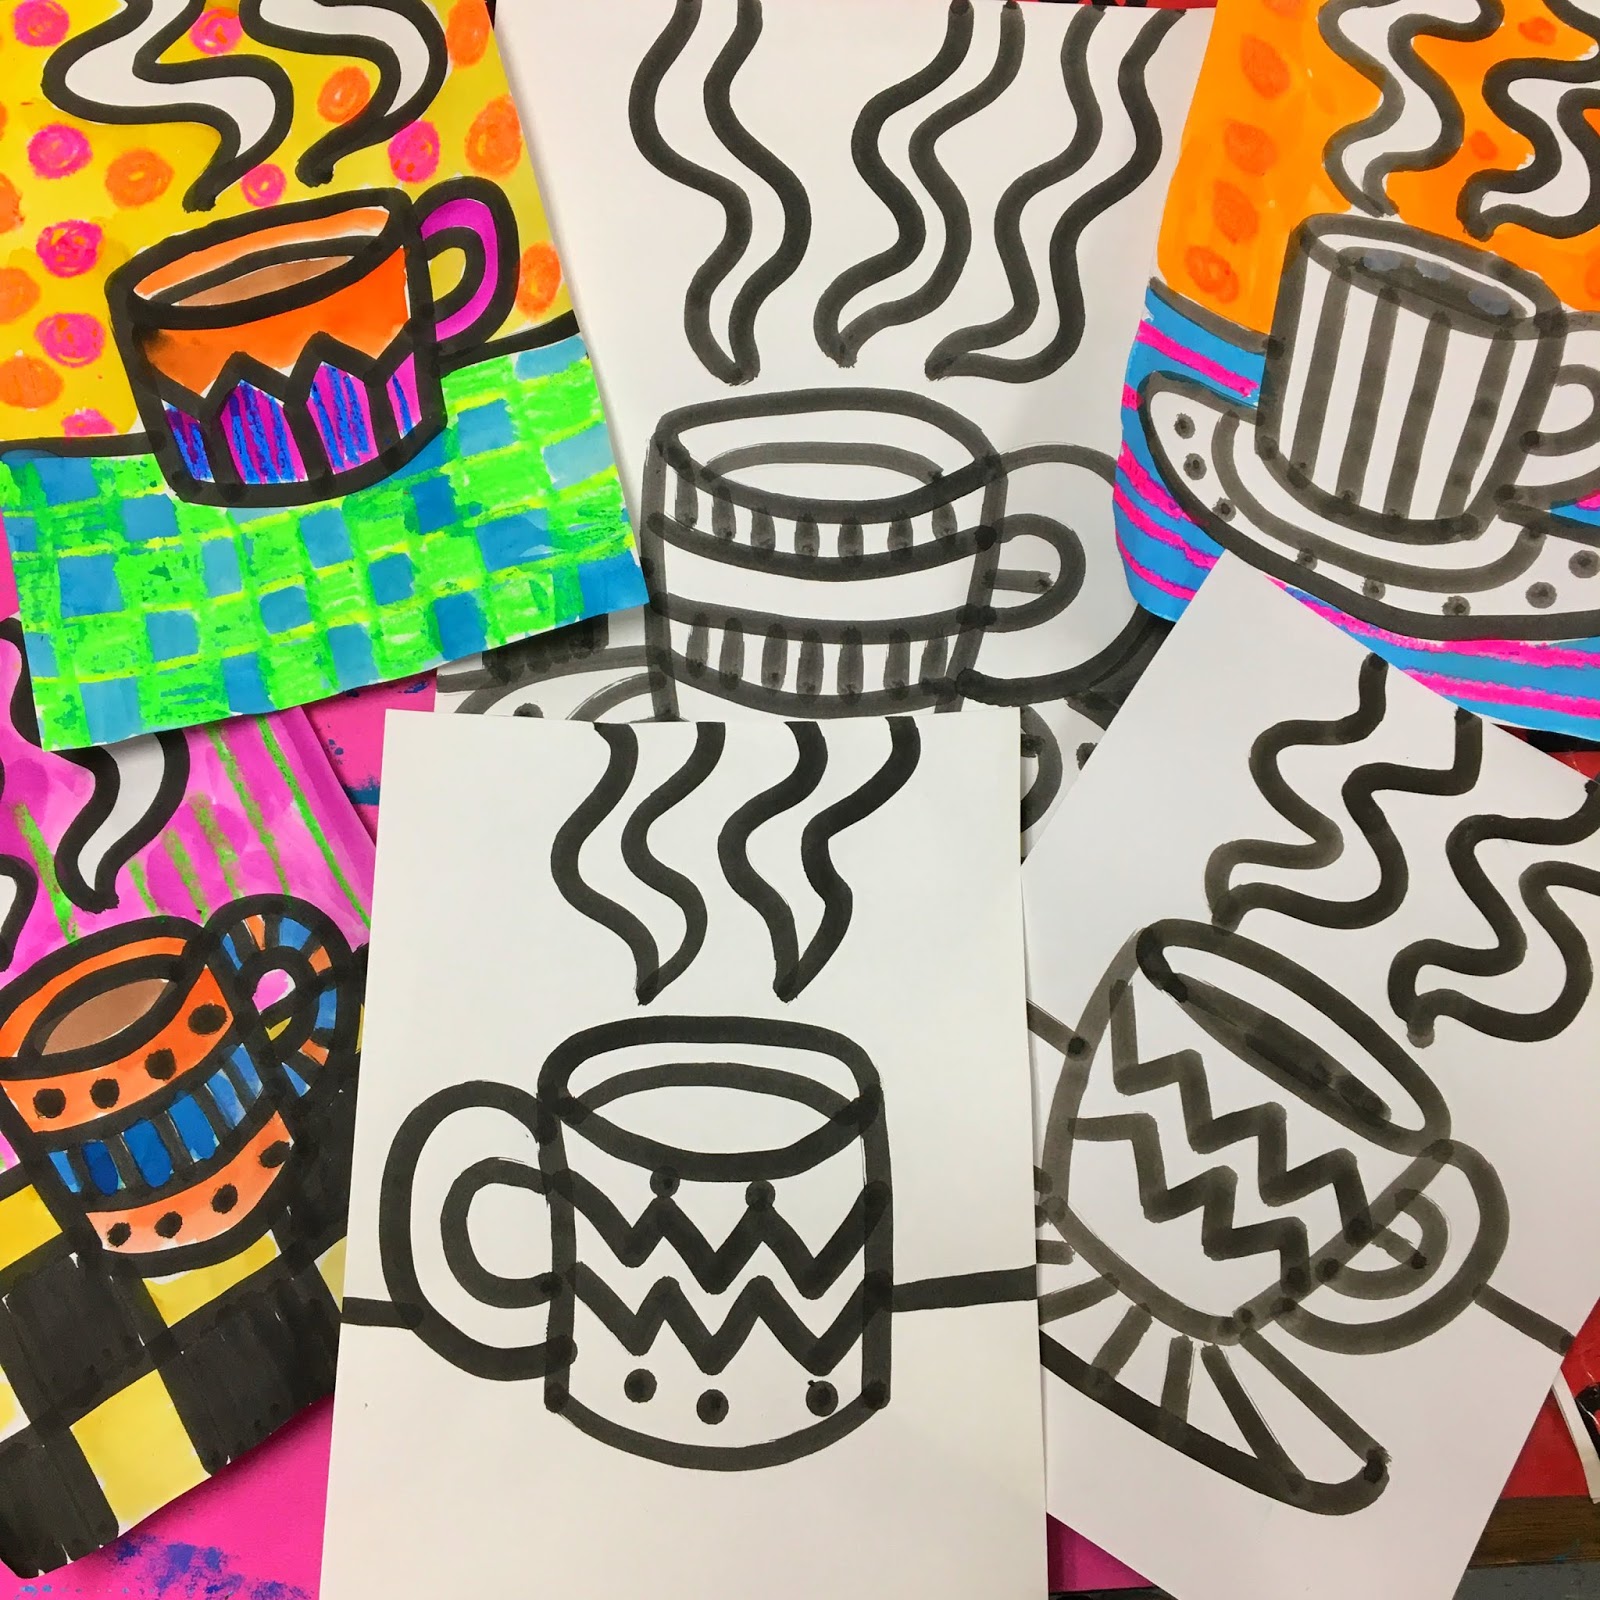
Hey, y'all! I started a new lesson with my first graders this week. They are really enjoying it and I thought your students might as well. So I quickly created a lesson video for you, if you are interested. In my art class, we learned more about the artist Heather Galler and looked at her work, her love of pattern, color and bold line designs. Afterward, we spent our first thirty-minute art class sketching together in our sketchbooks in preparation for the following day's painting.
The next day, we sat on the floor (see last photo) and, using an ink-filled bingo dauber, we drew these masterpieces together. No pencils first, we just dove right in. My students were excited by the results and I can't wait to see how they go about adding color with oil pastels and watercolor paint.
Here is a quick lesson video I created for you and your students if you are interested!
And here's me hanging out with a class of first grade masterpieces. I didn't intend to match their work but when one of them pointed it out to me, I had to laugh. I do love me some black and white!

January 7, 2020
My Favorite Lovey-Dovey Lessons (Just in Time for Valentine's!)
 Welcome back! It's been a minute (okay, several) since I last blogged and while I missed you all dearly, you guys: I needed a break! In all truth and honesty...a couple things have been going around here on the homefront that have kept me away. First of all, I'm just not feeling it this year. There, I have said it. I've actually said it quite a bit here. And I know this is normal, a season in the art teacherin' life, it's still frustrating. I'm not hopping out of bed with excitement about the day ahead. Sure I can fake it but...I know that it's not my normal, you know? I do think a large project I'm working on has been a contributing factor. I've worked on big projects while teaching before ('member this book?) But this new thing it's, well, bigger and unlike anything I've tried. So other things are starting to slide. Blogging and being completely present and excited in the art room.
 BUT Y'ALL DIDN'T COME HERE FOR ALL THIS, did you? Sorry, not sorry. We all need to overshare sometimes and you just happened to be a good listener. Thank you
Now, let's talk about projects that are perfect for this time of year: Valentines Day-ish lessons! Be sure and click on all the following links as MANY of them have videos for you to share in your art room with your students. Here we go:
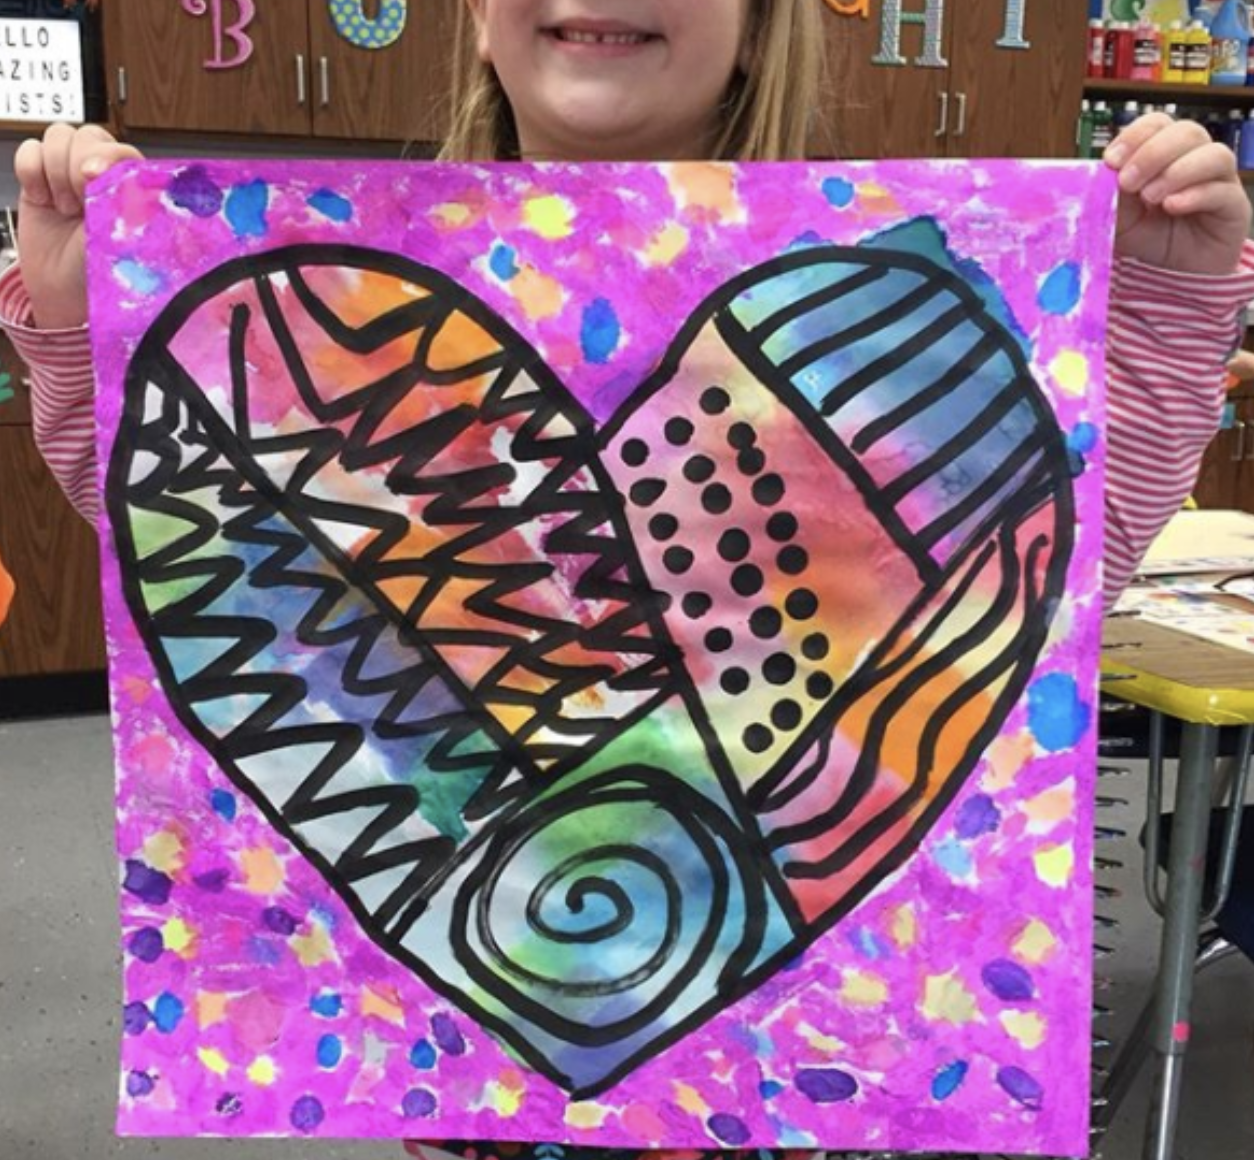
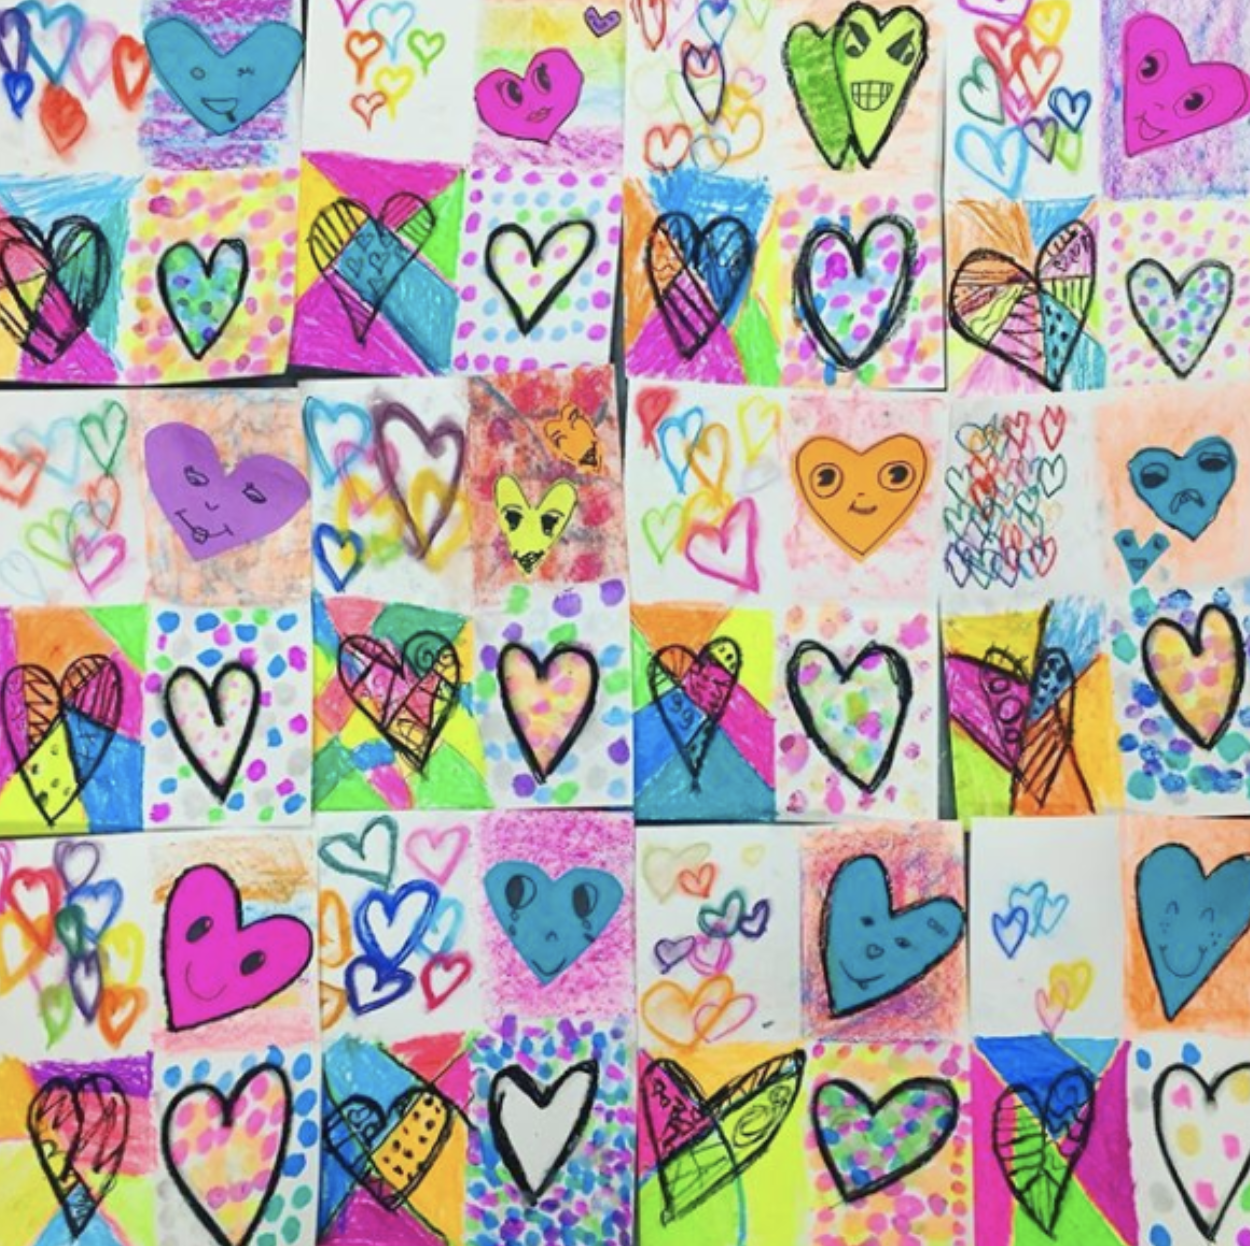
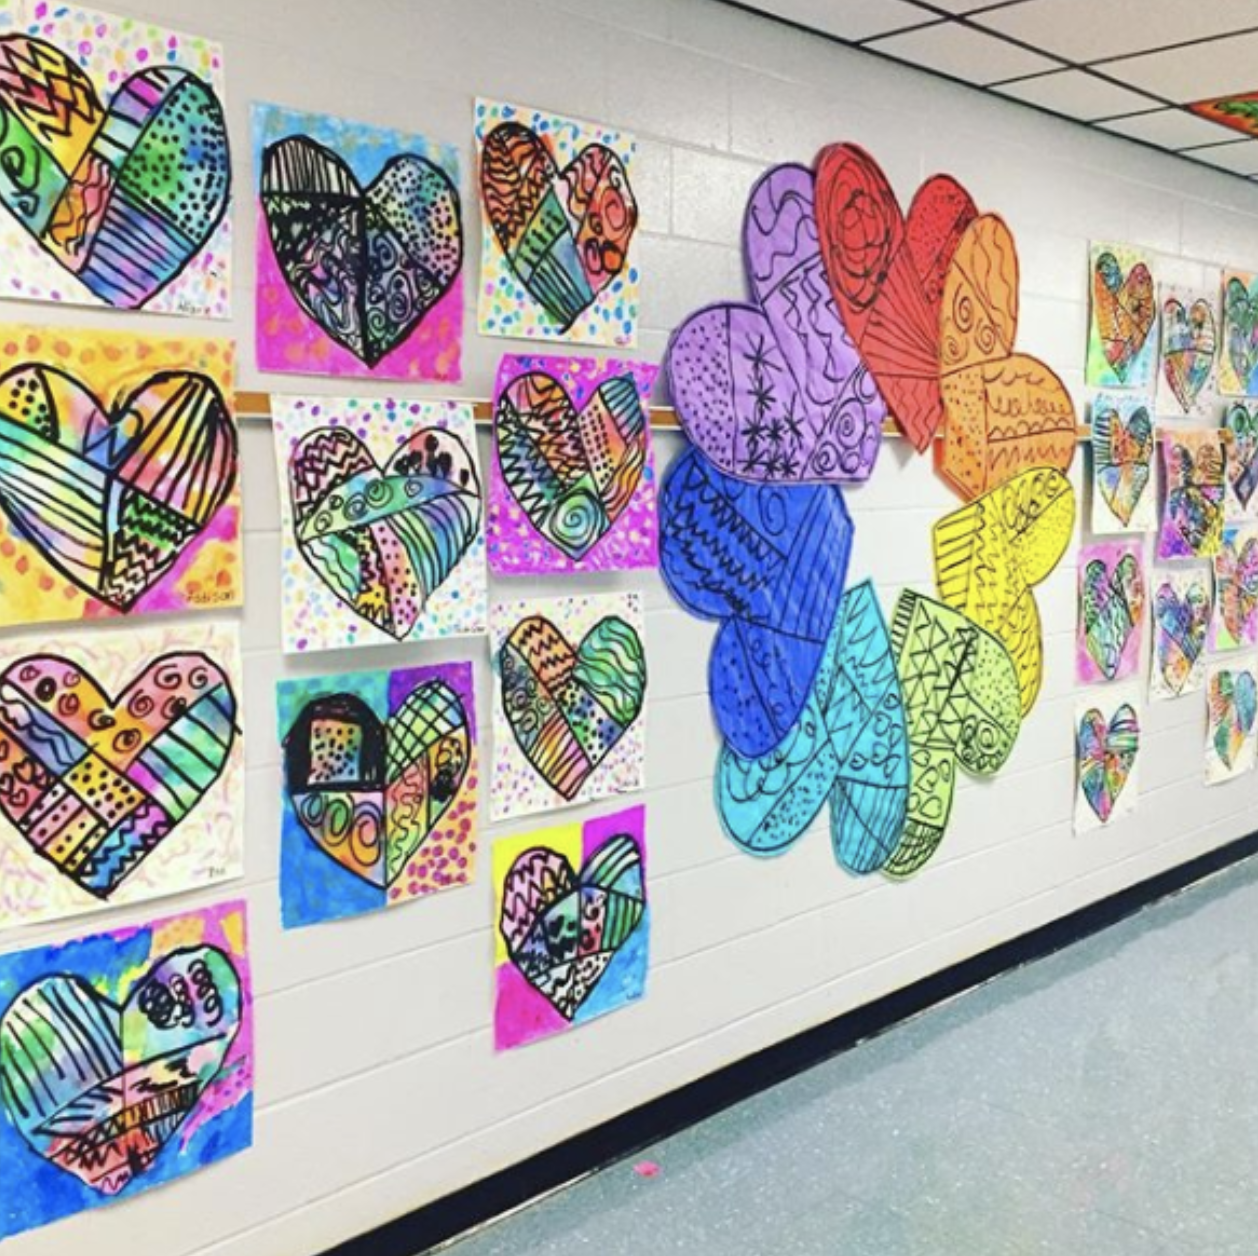 Romero Britto-Inspired First Grade Hearts this lesson was a huge hit with my students and involved line and pattern review as well as some fun color exploration with tissue paper and paint sticks!
 Heart Prints with Kindergarten was such a fun way to share printmaking with kindergarten in a way where each student was successful!
  Foil Relief Heart from Kindergarten Printing Plate this was a fun way to do a cool project with our leftover printing plates. Kindergarten then painted the background in a rainbow review.
 Robert Indiana Love Prints by First and Second Grade my kids love printmaking. We explored making a ton of prints on styrofoam plates before adding the paper letters on top.
 Chris Uphues-Inspired Project for All Grades You'll definitely want to check this lesson out, it's perfect for a sub, comes with a video and free handouts!
 James Goldcrown Hearts for All Another easy lesson and a quick one too...and one that introduces a contemporary artist. Win-win-WIN!
 First Grade Woven Hearts with Stitched Edge We just finished up weaving in my art room and we just might be doing this next.
 This Our School Has Heart mural is a blog post with so many ideas! One for each grade level, be sure and check it out!
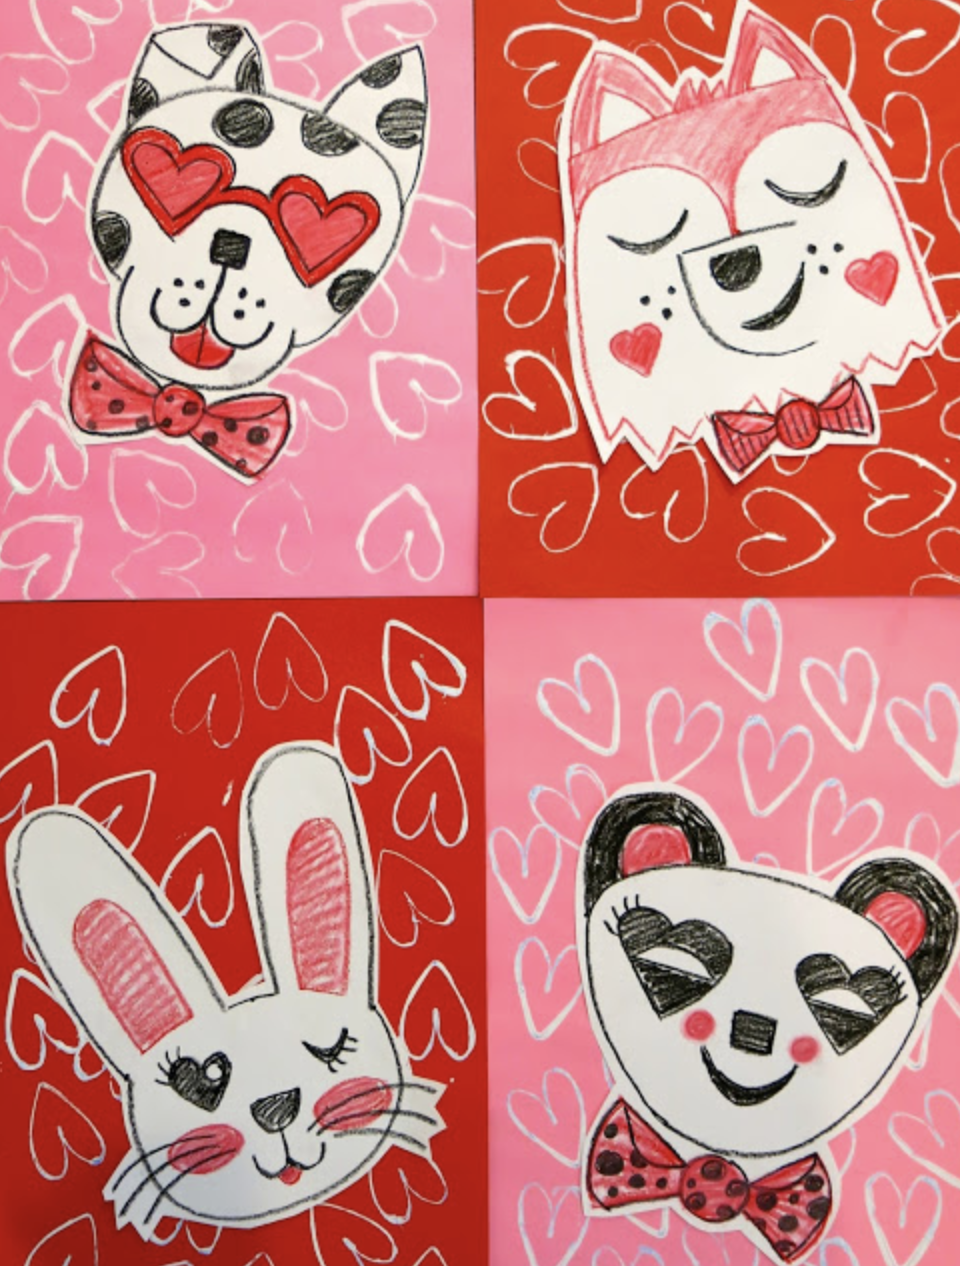 Valentine Animals for All my kids loved this project and I'm sure yours will too. All the videos and details here!
 A Contemporary Artist Review! This one was one I did with my older students and it was a blast. We learned about four contemporary artists who use hearts in their work. Video included!
 But wait, there's more! So many more Valentine's lesson ideas here. Hope you enjoy!
December 15, 2019
DIY: Paintbrush Gnomes! Or Santas! Or Bearded Dudes! Your choice!
 Last weekend was our annual art teacherin' Christmas party where we do a little drinking, dining, ornament swapping and crafting. Exactly two days before I was to host the event, I had no idea what we were gonna make. Nothing like procrastination to get the wheels turning, right?
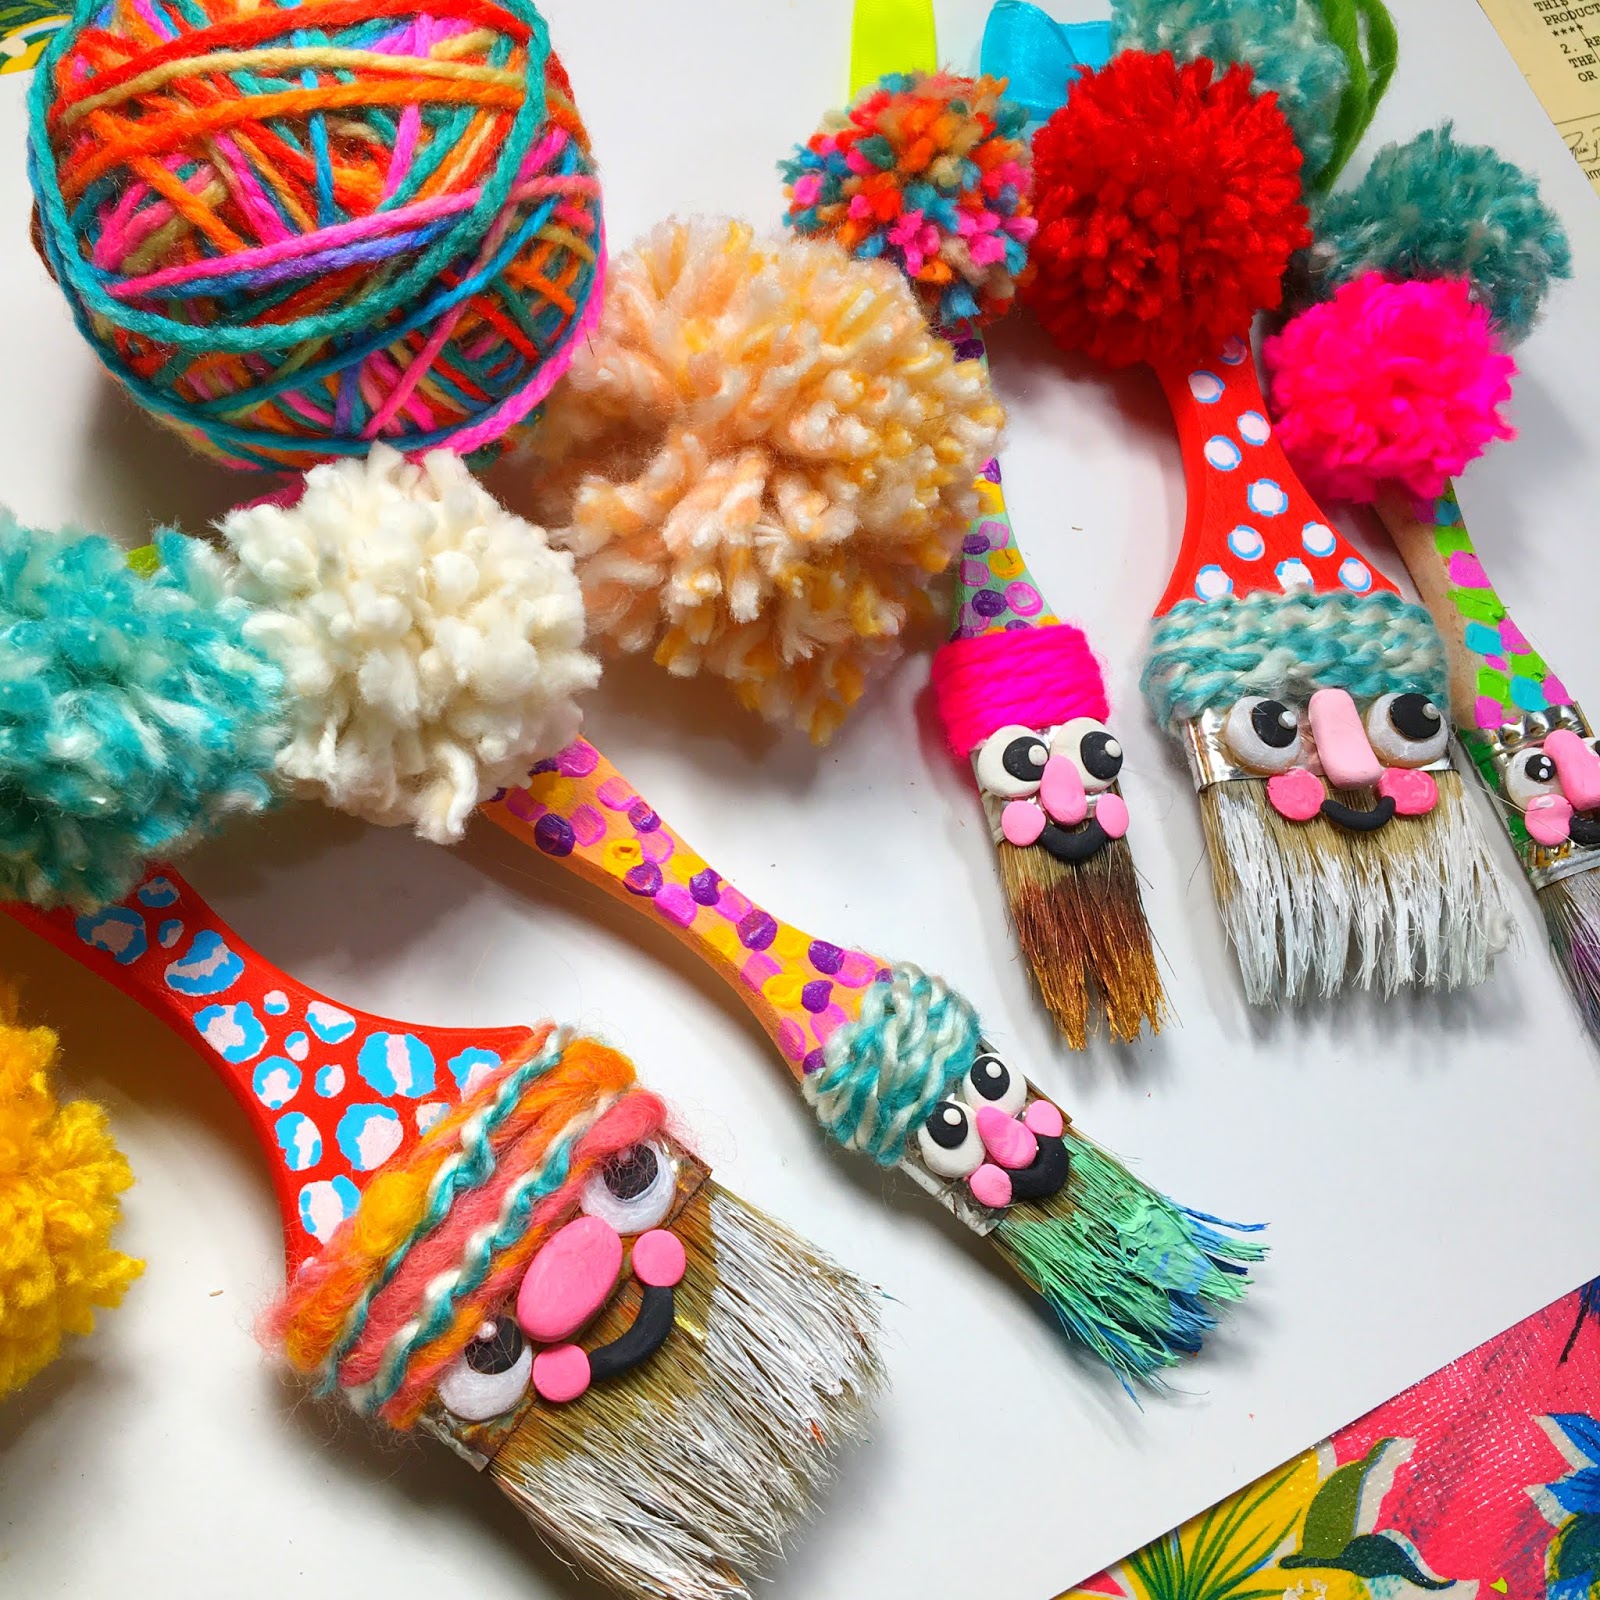 I have exactly a million old crusty paintbrushes that I just cannot bear throwing away. So, with those in mind, I decided to have our craft be Paintbrush Gnomes! Or Santas...or bearded dudes resembling my husband. Whatever you wanna call them, it doesn't really matter. I mean, look at this epic cuteness. And, good news, they are so super simple to make. Here, let me show you how:
One thing I failed to mention in the clip is that I created the faces, popped them into the toaster oven, painted and then put them back in to speed up the paint drying process. Probably not something I would recommend unless you got that heat down on to a low 200 and you keep a close eye out. Nobody wants their kitchen smelling like burnt gnome hair.
 Here's a little peak at the brushes created at my craft night before they went into the oven. So cute!
 And here's how they looked when they came out! Also what I didn't share in the clip is that the yarn was added by just yarn bombing the part above the ferrel and attaching with hot glue.
  I love how silly and fun each one came out, don't you?
 And so you can make them all year round, call 'em Paintbrush Gnomes! I want to make them into the new Quiet Critter for my art room. Noiseless Gnomie, if you will.
  So if you need a fun craft for winter break, here you go! Have fun, y'all!
Cassie Stephens's Blog

- Cassie Stephens's profile
- 34 followers
Cassie Stephens isn't a Goodreads Author
(yet),
but they
do have a blog,
so here are some recent posts imported from
their feed.

