
Mike Elliott's Blog, page 2
April 6, 2025
How to Repair Rotted Rib Tops in Wood-Canvas Canoes
by Mike Elliott, Kettle River Canoes
email: artisan@canoeshop.ca
While repairing your wood-canvas canoe, you may come across some ribs that are perfectly good except for a small portion attached to the inwale. Rather than replacing the ribs, it is possible to repair the rib tops.

First of all, you need access to a substantial portion of the damaged ribs in order to do the repair. Remove the planking along the sheer line to expose all of the damaged rib tops. Identify each piece of planking as it comes off since you may be able to replace the original pieces once the repairs are completed.

Now, machine new cedar to replace the damaged rib tops. Sometimes the rib-tops are tapered, so make sure each replacement piece is cut and shaped to match the original wood.

Cut the rotted top off the rib to be repaired. I use a Japanese utility saw with 14 teeth per inch.

Create a scarf angle in the original rib. For a solid scarf joint, the glued surface ought to be at least six times that of the rib thickness. Therefore, ribs 3/8” thick have a scarf angle with a surface area approximately 2¼” long. You can use a rasp to make the scarf. I use a 4” angle grinder that is set up with a 24-grit sandpaper disc. It makes quick work of the job – perhaps too quick, so careful attention and a light touch are needed.

Line up the new wood with the original rib and mark the location of the matching scarf.

Create the matching scarf in the new cedar.

Glue the new wood to the original rib and clamp it in place with spring clamps. I use either a water-proof resorcinol glue (such as Weldwood or Dural) or a polyurethane glue (such as Gorilla Glue). The resorcinol glues are water-based which makes clean up a breeze. After clamping the new piece in place, wipe away any excess glue with a damp rag. When dry, it sands easily and blends well with the wood. Polyurethane glue sets more quickly, sands easily once cured and creates a very strong bond. Paint Thinner (mineral spirits) is used to clean up polyurethane glues. I use these two glues interchangeably.

The repaired rib top is fairly rough at first.

However, a quick sanding evens out the joint and creates a clean repair.

Attach the rib top to the inwale (I use 7/8” 14-gauge bronze ring nails, copper canoe nails or brass canoe tacks) and trim the rib top flush with the top edge of the inwale.

When faced with rib top repairs next to each other, it is easiest to do every second rib top to avoid clamping difficulties. Therefore, it takes a couple of days to complete all of the repairs.

If most of the rib tops in your canoe are rotted, it is still possible to repair the ribs rather than replace every rib in the canoe. Since every rib will be cut, the original sheer line will be lost. Therefore, the first step is to establish a reference line for the sheer-line. Go around the canoe with a carpenter’s pencil and mark a position 5” below the top of each rib. Where the entire top of the rib has rotted away, skip to the next rib and mark the reference point there. This will give you enough reference points to create a fair line the full length of the canoe. Now, tack a spruce batten (approximately ¼” x ¾” x 16’) at the reference points to create a fair reference line.

As mentioned before, every second rib will be repaired. Unless you have hundreds of 3” spring clamps, it will take a week or two to splice new wood into every rib. Once done, mark each new rib top 5” above the reference line and cut every rib to re-create the original sheer line of the canoe.

Reattach the original planking and replace damaged planking with new cedar. Stain the new wood to match wood in the rest of the canoe.

The finished product is strong and solid. Many of the rib tops repairs extend less than an inch below the inwales, so it was difficult to realize that they had been replaced.

All of this (and much more) is described in my book – This Old Canoe: How To Restore Your Wood Canvas Canoe.
If you live in Canada, CLICK HERE to buy the book.
If you live in the USA, CLICK HERE to buy the book.
If you live in the UK, CLICK HERE to buy the book.
Si vous habitez en France, CLIQUEZ ICI acheter le livre.


March 31, 2025
Bill Greenwood and his Wood-Canvas Canoes
by Mike Elliott, Kettle River Canoes
email: artisan@canoeshop.ca

Unless you live in British Columbia, you have probably never heard of Bill Greenwood or Greenwood canoes. And if you want to start a fight amongst wood-canvas canoe enthusiasts, just ask them to name the prettiest canoes ever made. In Maine, you would hear names like Morris, Gerrish and White. In Ontario, Peterborough canoes are top of the list. But in British Columbia, people speak about Greenwood canoes in hushed tones and bow down to Bill Greenwood’s exquisite water craft.

The information presented here has been collected from people who bought their canoes directly from the builder at his shop as well as some anecdotes from Jim Kinzell, who worked with Bill as an apprentice from 1969 to 1975. Dave Lanthier from Kamloops gave me a small biography produced in 1972 as an assignment for a physical education course at a college. My information is incomplete. That said, Bill Greenwood and Greenwood Canoes deserve recognition in the world of wood-canvas canoes.

As I understand it, Bill was born in 1912 and was an active outdoorsman who loved hiking, skiing, canoeing — just about anything that got him outside. Then, he suffered a stroke while hiking in the mountains. He was 24 years old. As part of his rehabilitation, Bill decided to learn how to build canoes. He boarded a train in Vancouver, BC and made his way to Old Town, Maine. He hung around the Old Town Canoe Company shop and absorbed everything he could about canoe building until they realized what he was doing and kicked “the spy” out. Bill spent some time at other canoe factories including the Peterborough Canoe Company in Ontario before returning to British Columbia and setting up Greenwood Water Craft Company. The shop location changed a number of times over the years until he established a large shop complex on Mitchell Island in Richmond, BC in the late 1960′s.

Not surprisingly, the lines and details of Greenwood Canoes borrow heavily from the “Maine Guide” canoes of Old Town and other builders in Maine. They all sport wide, flat bottoms and have very little rocker. The stem profile is heavily curved (often forming a complete half-circle similar to the stems on “Huron” canoes built in Quebec) and the hulls all contain a lot of tumblehome. Bill’s 16’ (4.9 meter) canoes did not have a centre thwart, but instead had both bow-quarter and stern-quarter thwarts as was typical of Maine Guide canoes. Many of the canoes had bottoms reinforced with half-ribs between the main ribs to create a strong comfortable floor. And Bill absolutely refused to make a canoe without a keel. In fact, one of my clients asked Bill to leave the keel off the canoe he was ordering. Apparently, Bill said something like, “My canoes have keels.” When my client told Bill that many Chestnut Canoes paddled very well without a keel, Bill said, “If you want a Chestnut canoe, then buy a Chestnut canoe.” My client told me that story while I was preparing the restoration work order on his 17’ (5.2 meter) Chestnut Cruiser.

The workmanship in Greenwood canoes is outstanding. He used “aircraft quality” Sitka Spruce for the double-tapered ribs. The 4″ (10 cm) wide planking was made of air-dried, quarter sawn (edge grain) old-growth Western Red Cedar. Following the tradition at Old Town canoes, the planking is perfectly tight with absolutely no gaps. The stems (and slat seats) were White Oak while the rest of the canoe was trimmed in Philippine Mahogany (Luan). All of the woodwork was flawless – graceful lines and elegant detailing. The one drawback in many Greenwood canoes built in the early 1970’s is the fact that he used steel screws to attach the mahogany outwales. Apparently, Bill was feuding with one of his suppliers. He wanted 1.5” (37 mm) #8 brass wood screws in lots of 1,000 while the supplier insisted on selling lots of 10,000. Bill ordered steel screws from another supplier in lots of 1,000. I have had to cut that beautiful mahogany into hundreds of tiny pieces because the steel screws had corroded to the point of being fused into the wood. I’m sure Bill thought he had won the war with his supplier, but it has made the restorer’s job much more difficult 40 years later.

The quality of the workmanship is all the more impressive when you consider the fact that Bill worked almost entirely with one hand. The stroke affected his left side. Consequently, his left hand was crippled to the point that he had limited use of it. His daughter, Susan, told me that Bill referred to his left hand as “Duddy” – his dub of a left hand. My understanding is that he used jigs for almost every step of production. That and a few very good assistants in the shop (including George Fletcher and Jim Kinzell) made it all work beautifully.

Greenwood Canoes came in lengths from 15’ (4.6 meter) to 18’ (5.5 meter). He had two basic models – the Pleasure Model (12” – 30 cm – deep) and the large volume Prospector Model (14” – 36 cm – deep). He built a full range of lengths in both models (as well as a 12′ car-top boat) until 1970. One client of mine has a beautiful home in North Vancouver overlooking the entire Lower Mainland. He had ordered a canoe from Bill in 1970 and was expecting a call any day to say that the canoe was ready. Then, he heard a news report of a large fire on Mitchell Island in Richmond. He looked out over the valley from his home and saw a big cloud of smoke. The Greenwood Water Craft shop was engulfed in flames. The next day, my client went to the site and saw Bill kicking through the ashes that used to be his shop. He said, “I only had time to grab two canoes. The yellow one over there — that’s yours.”

Bill rebuilt the business with a limited number of building forms and continued building canoes until he sold the business in 1975. According to Doug Ingram of Red River Canoe and Paddle, the forms ended up in Cranberry Portage (a small community in Northern Manitoba east of Flin Flon). Apparently, they were never used again and are now in very poor condition. Bill died in 1979. His contribution to the world of wood-canvas canoes is significant here in British Columbia. People bow their heads in reverence to these stunning works of art.
All of this (and much more) is described in my book – This Old Canoe: How To Restore Your Wood Canvas Canoe.
If you live in Canada, CLICK HERE to buy the book.
If you live in the USA, CLICK HERE to buy the book.
If you live in the UK, CLICK HERE to buy the book.
Si vous habitez en France, CLIQUEZ ICI acheter le livre.
March 24, 2025
A Restorer’s Guide to a Rushton Indian Girl Wood-Canvas Canoe (c. 1905)
by Mike Elliott, Kettle River Canoes
email: artisan@canoeshop.ca

John Henry Rushton built canoes and small boats in Canton, New York, from 1875 until his death in 1906. His son incorporated the business and kept it going until 1917. In 1902, Rushton hired M. Roundry from the B. N. Morris Canoe Company to build canvas-covered canoes. The result is the Indian Girl canoe that became Rushton’s best-selling model. It was first built with double gunwales until about 1906, when the open-gunwale system was adopted. The dimensions for components in a closed-gunwale Indian Girl (c. 1905) present pocketed inwale construction.


Gunwales – Prior to 1906, the inwales were built with pockets for the rib tops and the outwales were wide to create a stylish double gunwale. The gunwales are made with solid cherry.


Stems – The stems are highly curved.


Decks – Even though Rushton decks are short, the solid cherry is soaked, steamed, and bent to fit the upswept sheer line at the ends.

Keel – The keel is coved on the bottom surface.

Planking – Canvas-covered Rushton canoes are known for a 6” wide sheer plank. Sourcing cedar wide enough to replicate this plank is a challenge.

Seats – The stern seat is a trapezoidal and is attached directly to the under surface of the inwales. The seat frames are solid cherry.


Thwarts – Rushton used wide kneeling thwarts in his canoes. Some of his canoes had a center thwart and a bow-quarter thwart, while others were arranged with bow- and stern-quarter thwarts.

Floor Rack – According to a reference for a 15’ Indian Girl, the longitudinal slats in the floor rack are 7/8” wide, spaced 1” apart at the center, for a width of 10.25” at the center. I did not have a floor rack for reference when I built one, so I took a guess. In my floor rack for a 16’ Indian Girl, the longitudinal slats are 1” wide, spaced 1.25” apart at the center, for a width of 12.25” at the center.


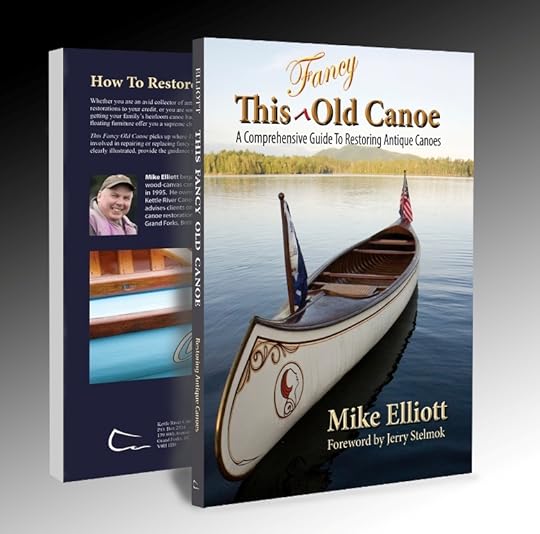
All of this (and much more) is described in my book – This Fancy Old Canoe: A Comprehensive Guide to Restoring Antique Canoes.
If you live in Canada, CLICK HERE to buy the book.
If you live in the USA, CLICK HERE to buy the book.
If you live in the UK, CLICK HERE to buy the book.
Si vous habitez en France, CLIQUEZ ICI acheter le livre.
March 16, 2025
A Restorer’s Guide to an Old Town Otca Wood-Canvas Canoe
by Mike Elliott, Kettle River Canoes
email: artisan@canoeshop.ca

The brand name Old Town is synonymous with canvas-covered canoes in the United States. They are one of the only canoe companies to survive to the present day from their humble beginnings behind the Gray hardware store in Old Town, Maine, in 1898. George and Samuel Gray incorporated the Old Town Canoe Company in 1901. They were entrepreneurs who hired others to design and build their canoes. The company kept meticulous build records that are available through the Wooden Canoe Heritage Association (WCHA) online discussion forum (https://forums.wcha.org/forums/serial-number-search.3/). Note: All of the dimensions in this chapter are in feet and inches because those are the units used in the original catalogs.

The Otca Model
The Otca was the best-selling of all the Old Town canoes. It was introduced in 1908, and began with a narrow hull (with a 34.5” beam in the 16’ length), and later adopted the wide, flat bottom of the Yankee model (36” beam in the 16’ length). According to the 1938 catalog, “The Otca model is the widest, deepest and roomiest. These features make it the steadiest, safest and most capacious canoe we build. The floor is flat and wide, and carries far into the ends. The sides are convex, thus producing a handsome tumblehome. . . This model is not designed for speed but comfort, safety and fine appearance.”
The Otca caters to novice canoeists, and those looking for a leisurely day on the water. Rocker is minimal at the ends, so it tracks very well. As a friend explained, “It goes in a straight line. If you want to turn, just paddle until you reach the opposite side of the lake, get out, turn the canoe around, and head back.”


Gunwales – Depending on the grade, the inwales are made of either spruce or mahogany. The ends are tapered to 1/8” wide. Again depending on the grade, the outwales are made of either spruce or mahogany. The elegant upswept ends of the gunwales require steam bending on dedicated forms prior to installation.


Decks – The Otca decks were either 16″ long with an ogee shape at the base or 20″ solid mahogany decks with a low coaming covering the end grain.

Stem Tops – It is unlikely you will ever have to replace the entire stem. However, I rarely see an original stem top that is not partially or completely rotted away. The stem profile is curved, which means that repairs require steam bending the stem material first.

Keel
– The keel is made of vertical-grain white oak, and has a 1/16″ cove at the base. If the canoe is fitted with outside stems, the keel tapers gradually to join with them at each end. Otherwise, the ends taper to 3/8″ wide while the height feathers gradually to nothing.

Ribs – The ribs are 5/16” thick, and 2.25” wide. The top edges are rounded off. The rib tops are tapered gradually to 1.25” wide on the side closest to the center of the canoe. Some Old Town canoes are fitted with half ribs between the regular ribs. They are 5/16″ thick and 1″ wide.

Planking – Old Town Canoe Company planking is edge-grain Western red cedar 3.75” wide and 5/32” thick.

Seats – Otca seats have hand-woven cane in white oak frames. Corner holes are sometimes present and sometimes not. The weave pattern varies since the seat caning was contracted to outside sources, each of which used their own patterns. The pattern used most often is a standard 6-stage warp-and-weft pattern with 3 mm natural cane (rattan). The seats are hung from the inwales with 4” #10-24 silicon bronze carriage bolts, and use hardwood dowels as spacers.


Thwarts – Old Town Canoe Company thwarts are beautiful, with smooth shaping and elegant form throughout. The thwarts are made of either mahogany or white oak 7/8” (22 mm) thick and are 2-3/16” (54 mm) wide. Hand thwarts at each end like small thwarts. They are 1.25″ wide and 3/4″ thick.

Floor Rack – The floor rack was an option that was regularly included in the Otca model. It is made of fir and consists of six longitudinal slats 1-3/8″ wide and 1/4″ thick. Five transverse braces are 1″ wide and 5/16″ thick.


All of this (and much more) is described in my book – This Fancy Old Canoe: A Comprehensive Guide to Restoring Antique Canoes.
If you live in Canada, CLICK HERE to buy the book.
If you live in the USA, CLICK HERE to buy the book.
If you live in the UK, CLICK HERE to buy the book.
Si vous habitez en France, CLIQUEZ ICI acheter le livre.
March 10, 2025
Old Town Canoe Company: A Brief Guide to their Wood-Canvas Canoes
by Mike Elliott, Kettle River Canoes
email: artisan@canoeshop.ca
In the United States, the Old Town Canoe Company set the standard by which all other canvas-covered canoes are measured. With more than 170,000 produced over the course of seven decades or more, Old Town canoes are ubiquitous. So let’s look at a few of their classic models and compare them. From this, you ought to be able to identify your Old Town. However, be prepared for any American canoe to be called an Old Town.

The Old Town Canoe Company
The brand name Old Town is synonymous with canvas-covered canoes in the United States. They are one of the only canoe companies to survive into the present day from their humble beginnings behind the Gray hardware store in Old Town, Maine in 1898. George and Samuel Gray incorporated the Old Town Canoe Company in 1901. They were entrepreneurs who hired others to design and build their canoes. The company kept meticulous build records which are still available through the Wooden Canoe Heritage Association (WCHA). Their designs appealed to customers across the full range of styles from working canoes to elegant showpieces. So, let’s look at some of these quintessential canoes.

The Otca Model
Probably the best selling of all the Old Town models, the Otca was introduced in 1908 and began with a narrow hull (34.5” beam in the 16’ length) and later adopted the wide, flat-bottom of the Yankee model (36” beam in the 16’ length). According to their 1938 catalog, “The Otca model is the widest, deepest and roomiest. These features make it the steadiest, safest and most capacious canoe we build. The floor is flat and wide, and carries far into the ends. The sides are convex, thus producing a handsome tumblehome. This model is not designed for speed but comfort, safety and fine appearance.”

The Otca caters to novice canoeists as well as those looking for a leisurely day on the water. There is little to no rocker at the ends, so it tracks very well. As a friend of mine explained, “It goes in a straight line. If you want to turn, just paddle until you reach the opposite side of the lake, get out, turn the canoe around and head back.”
It comes in 16’, 17’ and 18’ lengths and usually has a floor rack installed. It sports elegant, up-swept ends with a variety of deck styles over the years including a 16” solid-wood, pre-bent deck, a 20” one-piece deck with a low coaming and a 30” framed-veneer deck with a king-plank and coaming. The ribs in the Otca are standard-issue (5/16” thick, 2.25” wide spaced 1.5” apart and tapered on the side facing the center to 1.25” wide at the sheer line). The 16’ model weighs 75 pounds.

The Yankee Model
This canoe (known as the Livery Model prior to 1920) was phased out in favor of the Otca in the 1940’s. It is a very easy paddling canoe. The flat bottom and soft chine makes it both steady and quick. It is 16’ long, 36” beam, 12” deep and weighs approximately 73 pounds. With fine entry lines and moderate rocker at the ends, it is a delight to paddle.


The Ideal Model
The Ideal comes in 16’ and 17’ lengths. It has a flat bottom, soft chine, straight sides, moderate rocker and fine entry lines making for a quick, responsive canoe. The floor is furnished with half ribs to make it strong and comfortable. The ends sweep up with an elegant rise in the sheer-line. It is a quick, easy paddler and becomes more stable as it is loaded.


The Charles River Model
This canoe (introduced in 1903) is the same as the Ideal without the half ribs. It was often furnished with a floor rack and was built with elegance and showy good looks in mind. That said, its flat bottom, soft chine and fine entry lines produce in a canoe that was just as much fun to paddle as it was a delight to look at. Both the Ideal and Charles River were phased out in 1929.


The Guide’s Special Model
This is a slow, steady working canoe that comes in 18’ and 20’ lengths. The 18’ model has a 36” beam and is 13” deep. It has a flat-bottom, slight tumblehome, very little rocker and full ends. This workhorse is meant to be loaded and will get you where you want to go. Just don’t expect to get there quickly.

The H. W. Model
The Heavy Water Model is the consummate back-country traveler. It has moderate rocker, a semi-arch “yawl” hull, mild tumblehome through the entire length and full ends. With a narrow beam, this canoe is very quick on the water. Stability is traded for a canoe which is agile and responsive. It takes a little getting used to and once you do, it dances through river rapids. In my books, it is a delightful recreational canoe. The 16’ model has a 33” beam, is 12” deep at the center and weighs about 70 pounds. It is my favorite of all the Old Town canoes.


The 50-LB. Model
The 50-LB (50-pound) model is a series of light-weight versions of the H. W. model. They come in 11’, 13’ and 15’ lengths and weigh 50, 53 and 58 pounds respectively. They are constructed with ribs ¼” thick to produce canoes which are easy to portage. Modest tumblehome extends the entire length of the canoe and the bottom has a semi-arch and fine entry lines. The result is a versatile all-purpose canoe. Personally, I enjoy the 15’ model. It is light, quick and both steady and agile to handle rivers and lakes with ease.
All of this (and much more) is described in my book – This Fancy Old Canoe: A Comprehensive Guide to Restoring Antique Canoes.
If you live in Canada, CLICK HERE to buy the book.
If you live in the USA, CLICK HERE to buy the book.
If you live in the UK, CLICK HERE to buy the book.
Si vous habitez en France, CLIQUEZ ICI acheter le livre.
March 6, 2025
How to Repair a Rib-and-Batten Canoe — Part 2
by Sam Browning
edited by Mike Elliott, Kettle River Canoes
email: artisan@canoeshop.ca
Note: In 2016, I put out a call for someone with a wide-board raised-batten canoe to bring it to my shop in British Columbia, Canada for me to restore and document as part of my second book ̶ “This Fancy Old Canoe”.

I was contacted immediately by Sam Browning. He was about to start restoring one of these canoes. He offered to take pictures of the project as he worked. I offered to come to his shop to see the canoe and meet him in person until he let me know he lived in Ely, Cambridgeshire, England.
A few months later, I received a USB flash drive in the mail from Sam. It contained 300 images and a copy of the posts he presented on the ‘Song of the Paddle’ web forum as he documented the restoration. For my blog (and eventually my book), I have edited Sam’s posts and added a few notes of my own (presented in italics). For this article, I am presenting the wide-board repairs.
Many thanks to Sam for his excellent work and generous contribution to my book.
*****************

My plank repairs consist of three boards that need to be replaced. There is a small piece missing from the bilge-plank at the stern. It starts at the last rib and runs to the internal stem. The second is a bilge-plank on the port side spanning across six ribs and the third is a long bilge-plank on the starboard side spanning across 17 ribs. My plan is to do the repairs in order from smallest to largest in order to learn on the small repairs and hone the process for the Big One.

Copper canoe nails (14-gauge 1″ or 25 mm long) are harder to get out than tacks on a cedar-canvas canoe as they are driven through a basswood (or Spanish cedar) plank as well as rock elm ribs before being bent over (dubbed) and clinched. The nails aren’t tapered either (apart from the point) and they hold well despite their age.

Getting rid of the heads and punching them through to the inside works best. I use an angle grinder set up with a 24-grit sanding disk to grind off the heads of the copper nails. Care must be taken to ensure that only the board to be removed is touched by the grinder.

For the first repair, I tidy up where the new piece of plank has to start, removing nails and chamfering the edge so that the new nails will go through both the new and existing wood.

The new plank is a piece of basswood cut carefully to its final dimensions and planed to match the thickness of the original boards (¼” or 6 mm). The end of the new plank butts up again the existing board and laps over it with a chamfered edge to match the chamfer on the existing board.

When I am happy with the fit, I drill pilot holes for the canoe nails at the join and push them through from the outside.

Next, whilst pushing them firmly from the outside, I bend (dub) the nails over with a clinching iron.

I wet the outside of the new plank with hot water so the nails sink into the wood without doing any damage.

Then, while holding a clinching iron on the bent nail inside, I hammer the outside until the nail is flush with the surface.

I repeat this along the top and bottom edge as well as two rows of nails in the stem. The end of the new plank extending past the stem is trimmed to complete the job.
I now turn my attention to the second plank repair. Because of what I’ve done already, I’m confident about the nailing procedure. For this repair, I have to learn to fit a plank that bends in two directions. In the factory, the planks would have been cut from patterns which (sadly) are not available to me. When the flat shape had been cut, the outside of the plank was soaked with boiling water poured over it. This swells the grain causing it to cup until the correct curve was reached. Then, it was nailed into place. My plan for the repair is to cut the plank oversize, hold it in place with a strap at each rib, then pour boiling water over it to cause it to curve. As it bends, I should be able to tighten the straps and hold it in place until it dries. I will then mark out the dimensions of the gap and work from there.

The first step is to fit basswood strips onto the outside surface of the exposed ribs. These spacers create a flush surface upon which to bent the oversized plank. To make spacers, I cut strips and poured boiling water over them. They bend into a suitable curve with very little pressure. I then tape the spacers into place.

I chamfer the edges of the old plank so the chamfer on the new plank fits precisely and allows a line of nails to go through both.

To spread the tension from the straps evenly along the new plank, I put battens along the both the top and bottom edges.

I use steam from a wallpaper stripper rather than pouring boiling water to help the plank curve into shape.

Two people would have made things easier, but after holding the steamer in place for a minute or so, then moving it along the plank and holding it with my knee, I am able to pull the straps progressively tighter. I work my way up and down the plank until it is tight against the hull along its full length. At both ends, I use ratchet straps and a couple of wedges to hold the curve tight to the hull. I allow the plank to dry for a couple of days.

Before I remove the straps, I clamp some blocks under the plank and at the ends. These act as reference points so I can put the plank back in exactly the same place while I mark, trim and fit the top edge.

A planking gauge is used to mark the position of the gap’s edge even though the plank covers it and I can’t see.

The ‘L’ part of the gauge slides behind the plank and is moved along the edge of the gap while a pencil sits in the notch and draws a line.

Once the plank is marked, I use an apron plane to bring the plank dimension down to just outside the line. Then, a series of testing fitting, shaping, fitting, shaping until I have it just right. Then, the inside edges at the ends were chamfered to match the existing planks. The whole process takes about two hours before I am happy with it. I run a line of masking tape above and below the gap. On the tape, I mark where the ribs are so I can drill from the outside and place straps and blocks just to the sides of the ribs. This way, I can get the nails in, dubbed and clinched without worrying about the straps being in the way.

I nail the ribs, five in each, with a double row on the ends, then along the top and bottom edges into the battens – about 90 nails in all, drilled, pushed through, dubbed and clinched.

With the process honed, I turn to the Big One. I begin by making 16 basswood spacers for the ribs.

I steam and tape the spacers to the ribs.

I make two 12′ (3.7 meter) battens, arrange 16 straps and two ratchet straps. I make an oversized piece of basswood to fit over the gap. I steam the plank and tighten the straps, then steam and tighten again.

I check to make sure it is all tight with no gaps showing, then leave it for a couple of days.

The marking, cutting, fitting, shaping routine is the same as for the second plank.

The final fitting and nailing proceeds smoothly.

It’s great how once you have done a job, you wonder what all the fuss was about. I suppose, at any time, I could have pulled a strap too tight and split a plank. I could have planed too much off and left a gap. A plank could have split while I was nailing. If you need a plank for your board and batten canoe just let me know, I have a spare plank waiting in reserve.
All of this (and much more) is described in my book – This Fancy Old Canoe: A Comprehensive Guide to Restoring Antique Canoes.
If you live in Canada, CLICK HERE to buy the book.
If you live in the USA, CLICK HERE to buy the book.
If you live in the UK, CLICK HERE to buy the book.
Si vous habitez en France, CLIQUEZ ICI acheter le livre.
February 24, 2025
How to Repair a Rib-and-Batten Canoe — Part 1
by Sam Browning
edited by Mike Elliott, Kettle River Canoes
email: artisan@canoeshop.ca
Note: In 2016, I put out a call for someone with a wide-board raised-batten canoe to bring it to my shop in British Columbia, Canada for me to restore and document as part of my second book ̶ “This Fancy Old Canoe”.
(Photo by Nick Dennis.)
I was contacted immediately by Sam Browning. He was about to start restoring one of these canoes. He offered to take pictures of the project as he worked. I offered to come to his shop to see the canoe and meet him in person until he let me know he lived in Ely, Cambridgeshire, England.
A few months later, I received a USB flash drive in the mail from Sam. It contained 300 images and a copy of the posts he presented on the ‘Song of the Paddle’ web forum as he documented the restoration. For my blog (and eventually my book), I have edited Sam’s posts and added a few notes of my own (presented in italics). For this article, I am presenting the rib repairs as well as some general history and description of the canoe.
Many thanks to Sam for his excellent work and generous contribution to my book.
*****************

(Canadian Canoe Company catalogue, 1929)
My canoe was made by the Canadian Canoe Company in Peterborough, Ontario. The company started in 1892. The last canoes of this type were built around the mid 1930’s. From the 1929 catalogue, my canoe is the 15′ 6″ No. 4 all wood canoe F quality (varnished, basswood boards). It has a 29½” (75 cm) beam and a depth of 11½” (29 cm) amidships. It is interesting to note that the garboards (the two planks on the bottom of the canoe) in my canoe are Spanish cedar ̶ a true mahogany.

(Photo by Sam Browning.)
This particular canoe was imported to England by Salter Bros. Ltd. of Oxford. Looking at the Salter Bros. history, they mention importing 21 canoes from Canada in 1930. My canoe may be one of those.

(Illustration by Sam Browning.)
The exact origin of wide-board raised-batten canoe construction on a solid wood form is up for debate, but it was probably developed in a combined effort by Tom Gordon and John Stephenson in 1857. Construction began by laying down a white oak keelson. Rock elm ribs were then bent over the form and fitted into notches cut into the keelson. Wide basswood boards (three or four on each side) ran longitudinally and were attached to the ribs with copper canoe nails. Nail holes were pre-drilled and the nails were driven straight into the solid-wood form. The hull was then pulled free of the form and turned right-side up.

(Photo by Sam Browning.)
The nails were then ‘dubbed’ (bent over) to lie flat along the ribs (with the points towards the keelson) and then clinched tight with a clinching iron and cobblers hammer. The seams between the basswood boards were covered with ironwood battens between the ribs held in place with copper canoe nails.
If this was a cedar-canvas canoe with damaged ribs, I’d just take them out and replace them. With one of these canoes, you can’t do that without taking the whole thing apart. What I plan to do is bend new rib material which will extend from the keelson to the sheer-line and nail it in place alongside the existing rib (this process is commonly used in wooden boat repair and is known as sistering ribs).

(Photo by Sam Browning.)
Because the canoe has had broken ribs for many years, it needs a bit of reshaping before I can bend and install the new rib material. Straps around the canoe with a couple of lengths of timber to push in the right places helps to reshape.

(Photo by Sam Browning.)
I bend the new rib material inside (straight-grained English oak cut to size and shaped to replicate the original before it is soaked overnight and steamed for an hour), on top of the old rib. Any spring-back should result in the right size and curve. The end of the new rib at the keelson is held in place by a scrap piece of hardwood wedged between it and a length of timber positioned above the keelson and clamped on top of the thwarts. The rest of the new rib is held in place with G-clamps (C-clamps) and spring clamps. This process is facilitated by the fact that one of the basswood planks is missing. The missing plank allows me to use a couple of spring clamps to hold it in the middle.

(Photo by Sam Browning.)
Once the new rib has dried overnight, I decided to cut the battens first as it has to be easier than removing them and installing new ones. With over ten copper nails dubbed and clinched in each batten, it would be impossible to remove them in one piece, and they do have to fit exactly. I cut the battens with an inlay saw (3″ or 76 mm blade with 20 teeth per inch and a 0.011″ or 0.3 mm kerf). Its curved blade allows me to remove a small piece of the batten with less chance of damaging the planks.

(Photo by Sam Browning.)
The battens are carefully marked and cut. I have to make sure the plank is clean where the new rib will go. I clamp the rib in position making sure it fits well against the keelson and the original rib.

(Photo by Sam Browning.)
When the new rib is in place, I drill a pilot hole through the rib and plank at the center of each rib. Then, I push a 19 mm (¾”) copper canoe nail in from the outside. The nail is then dubbed towards the keelson and clinched tight. Then, I pilot, dub and clinch three more nails into each plank as well as one at each batten. I cut the rib flush with the sheer-line and shape the rib top to match the existing ribs.

(Photo by Sam Browning.)
At the gap, where the broken rib is exposed, I cut it off in line with the battens.

(Photo by Sam Browning.)
In some sections, retention of the original hull shape was facilitated by clamping a hardwood batten on the outside of the exposed original ribs.

(Photo by Sam Browning.)
The broken sections of original rib were cut away with the inlay saw as well as the sections of batten required to allow for positioning of the new rib which was then soaked, steamed and clamped in place.

(Photo by Sam Browning.)
A total of twelve broken ribs were sistered in this canoe. The ribs were repaired in stages, doing every second rib along the length of the canoe in order to maintain the shape of the hull as much as possible.
All of this (and much more) is described in my book – This Fancy Old Canoe: A Comprehensive Guide to Restoring Antique Canoes.
If you live in Canada, CLICK HERE to buy the book.
If you live in the USA, CLICK HERE to buy the book.
If you live in the UK, CLICK HERE to buy the book.
Si vous habitez en France, CLIQUEZ ICI acheter le livre.
February 17, 2025
How to Replicate Pocketed Inwales for a Double Gunwale Canoe
by Mike Elliott, Kettle River Canoes
email: artisan@canoeshop.ca

In the early days of wood-canvas canoe construction (late 1800’s until about 1906), builders (primarily in up-state New York and Maine) tried to emulate the birch bark canoes in the region. Like birch bark canoes, they constructed their hulls with cedar ribs and planks. They also emulated the look of the gunwales. The inwales and outwales of birch bark canoes are lashed together and the rib-tops are whittled to wedges which are forced up between the inwales and outwales.

To replicate this look, the builders cut pockets in the inwales into which the rib-tops were fitted and nailed. The outwales were attached (with brass screws) directly to the inwales to create a closed gunwale. This looks beautiful. However, with regular use, water collects in the pockets and creates a moist environment perfect for the growth of the fungi that cause wood rot. Around 1906, all of the builders transitioned to an open gunwale system which allows water to drain quickly from the canoe.


To describe and document the replacement of pocketed inwales, I worked on a J. H. Rushton Indian Girl canoe (c. 1905). This particular canoe was in pretty rough shape when it arrived in my shop, but I was able to determine the original dimensions of the component parts from salvaged pieces.

Replacing the original inwales is complicated by the fact that the canoe is already built. In 1905, the builder started constructing the canoe by making the inwales first (complete with pockets already cut). He then placed them in the building mould and fit the rib tops into the pockets. The process of replacing the inwales is the exact opposite. The inwales must be fitted to the canoe. Then the position of each pocket is marked and cut before the inwale is installed.

Rushton trimmed his Indian Girl canoes with cherry. The first step is to cut new cherry stock 1″ (25mm) wide and 7/8″ (22mm) high. Then, run the stock through the table saw with the blade angled 8° and 5/8″ (16mm) high to create a rabbet on the outside face ¼” (7mm) from the top surface and 3/16″ (5mm) deep at the top.

Arrange two 10′ (3 meters) pieces for each inwale and mark the location and orientation of a scarf joint on the four pieces of inwale stock. Soak about 7′ (2 meters) of each piece at the non-scarf joint end for three days. Meanwhile, build a bending form for the ends of the inwale stock.

Heat the ends of the inwale stock with boiling water and bend them onto the form. The bend is not severe, so a backing strip is not required. Allow the wood to dry for about a week before removing them from the form.

Cut a scarf joint angle into the end of one of the pieces (I arbitrarily chose the bow piece) to be used for each inwale. Fit the bow and stern pieces of inwale stock for one side of the canoe into the canoe and match the curve at the ends to the rib-tops in the canoe. Clamp them in place with lots of spring clamps.


Overlap the bow and stern pieces and mark the position of the scarf joint on the stern piece for the inwale.

Cut the scarf joint angle in the stern piece, use polyurethane glue to splice the bow and stern pieces into a full-length inwale and allow it to cure overnight. Perform this sequence on the other side of the canoe to create two inwales.
Once the glue has cured, sand the joint smooth. Then, clamp one of the full-length inwales into the canoe. Use a pencil to mark the position of every rib-top in that inwale. Remove it and do the same thing for the other side. Be sure to label each inwale so you know to which side it belongs.

Set up a drill press as illustrated and prepare in-feed and out-feed supports for the inwale.

Cut the pockets on both inwales. You will need help from a second person to guide the inwale through the curves at the ends.

Install one inwale and secure it with clamps at every second rib top. Pre-drill two ¾” bronze ring-nails in each rib-top.

Use a clinching iron as backing while you drive in the nails. Once the first inwale is fully installed, repeat this process for the second inwale.


Meanwhile, make new cherry decks for each end.


Soak the wood for three days, steam the wood for 60 minutes, bent the decks in a press and allow the wood to dry in the press for a week.

Use a flexible straight edge and a permanent ink pen to mark the inwale tapers at both ends of each inwale.

Use a saber saw to cut the tapers into each inwale-end.

Smooth the tapers with a random orbital sander and 80-grit sandpaper.

Hold the new stem top (either a new piece spliced into the original stem or, in this case, a completely new stem) against the inwale ends and mark where the stem top meets the underside of the new inwale ends.

Use a Japanese cross-cut saw to cut the stem-top. It is best to cut it a little long initially and sand it gradually (while checking frequently with dry fitting) until the stem top fits snugly under the inwale ends. The process of replacing the stems in a 1905 J.H. Rushton Indian Girl will be described in a separate blog (to be posted soon).

Use a ratchet strap to pull the end of the canoe together. Then, dry fit the deck. Line up a straight edge with the centerline of the canoe directly above the stem end at each inwale end. Then, mark the angle for the inwale joint.

Release the ratchet strap and cut the inwale joint on each inwale end.

Sand the joint faces smooth with a random orbital sander.

Re-attach the ratchet strap and pull the end of the canoe together again. This time, draw the inwales together until the deck fits properly. Check the inwale joint and make any adjustments to the angle until it fits exactly.

Install the deck and attach it to the inwales with 1½” #8 bronze flat-head wood screws (countersunk).

Use a random orbital sander set up with 60-grit sandpaper to sand the deck and inwales until they are perfectly flush.
All of this (and much more) is described in my book – This Fancy Old Canoe: A Comprehensive Guide to Restoring Antique Canoes.
If you live in Canada, CLICK HERE to buy the book.
If you live in the USA, CLICK HERE to buy the book.
If you live in the UK, CLICK HERE to buy the book.
Si vous habitez en France, CLIQUEZ ICI acheter le livre.
February 10, 2025
How to Rebuild the Ends of an Old Town Otca Wood-Canvas Canoe ̶ Part 2
by Mike Elliott, Kettle River Canoes
email: artisan@canoeshop.ca

I started describing the process involved in rebuilding the end of a 1967 18′ Old Town Otca canoe in part 1 of this blog. In it, I described how to replicate the deck. Now, I will describe how to rebuild the stem top and inwale ends of this canoe.

Unless the stem top repair is very short, it will require the use of a new piece of ash that is pre-bent to fit the curve of the original stem. Since you are not replicating the entire stem, the curved section can be created by bending the new ash onto any stem form. I used a stem form built to make new stems for a 1905 J.H. Rushton Indian Girl canoe. The 4/4 stock was soaked for four days , steamed for 60 minutes and bent over the form with a backing strip. It was left to dry for a week before removing it from the form.

Hold the newly bent stock up to the OTCA stem and shift it around until you find a section that matches the portion to be repaired. Mark the new stock as well as the point on the inwales where the stem meets them. Cut a scarf joint in the original stem and match the scarf joint in the new ash stock. Use polyurethane glue and clamp the new section of stem into the original overnight.

Use an angle grinder fitted with a 24-grit sanding disk to shape the new section roughly to the dimensions of the original. Leave extra material until you are ready to carve the stem top to its final dimensions near the end of the project.

Since the inwale ends have to be pre-bent to match the original curve of the sheer line, the first step is to build a bending form. Clamp a large piece of cardboard to the sheer line of the canoe at one end.

Use a permanent ink pen to mark the curve of the sheer line on the cardboard.

Remove the cardboard from the canoe and cut out the sheer line profile. You now have a template to transfer onto the bending form stock.

The original curve was increased to compensate for spring back. Here is the diagram of the bending form used for the OTCA gunwale ends.

I used two pieces of 2×8 spruce held together with 2½” deck screws to create a 3×8 bending form.

The white oak stock is wide enough to create two bent inwales at the same time. Once the stock is bent, it will be sliced into two inwales on the table saw. Soak the white oak stock for three days and steam it for about 60 minutes. Then, you have about 30 seconds to bent it onto the form. The bend is not large, so a backing strip is not required. Allow the wood to dry in the form for about a week.

Use a flexible straight edge (I use a steel rule) and a permanent ink pen to mark the angle of the scarf joint on the original inwale at a location well into solid wood. Also, mark the point at which the underside of the inwale meets the new stem-top.

Use a saber saw or Japanese cross-cut saw to remove the rotted inwale end along the scarf angle line.

Smooth the scarf angle with a random-orbital sander set up with 60-grit sandpaper.

Cut the newly bent inwale stock on the table saw to create the desired dimensions for both port and starboard inwales.

Hold the new inwale directly under the original inwale and shift it around until you match the bend. Use a permanent ink pen to mark the location of the scarf joint on the new inwale. Check to make sure the new inwale end meets the new stem-top in the same place as the original. Use a band saw to cut the scarf angle (other saws can do this job, but the band saw is the safest option and gives the best control).

Dry-fit the new inwale end and clamp it in place.

Use a flexible straight edge and a permanent ink pen to mark the taper in the inwale end.

Cut the taper in the new inwale end on the inside surface of the new stock. Be sure to leave extra material in order to allow for precise fitting later. Then, dry-fit the tapered inwale-end.

Sand the inside surface of the new inwale end until it is a precise fit. I use a belt sander turned upside down.

Create new inwale ends for both the port and starboard sides. Use polyurethane glue, clamp them in place and allow them to cure overnight.


The next day, cut the new stem-top to length so it fits snugly under the new inwale ends. I find it best to cut the stem a little long and sand it gradually (checking frequently) until it fits. Then, sand the sides of the stem until it is flush with the outside surfaces of the new inwale ends. Again, work gradually and check often.

Dry-fit the new deck and make sure everything is lined up with the centerline of the canoe. Mark the location of the deck and attach it with 1½” #8 flat-head bronze screws (counter-sunk into the inwales).

Use a random-orbital sander and 60-grit sandpaper to bring the deck flush with the top of the inwales.

Cut the inwale ends flush with the outside surface of the stem. Then, sand the deck and inwales smooth. Complete the project by staining the new wood to match the original.
All of this (and much more) is described in my book – This Fancy Old Canoe: A Comprehensive Guide to Restoring Antique Canoes.
If you live in Canada, CLICK HERE to buy the book.
If you live in the USA, CLICK HERE to buy the book.
If you live in the UK, CLICK HERE to buy the book.
Si vous habitez en France, CLIQUEZ ICI acheter le livre.
February 2, 2025
How to Rebuild the Ends of an Old Town Otca Wood-Canvas Canoe — Part 1
by Mike Elliott, Kettle River Canoes
email: artisan@canoeshop.ca

Water tends to collect in the ends of wood-canvas canoes when they are used on a regular basis. This moist environment creates perfect growing conditions for the fungi that cause wood rot. I have described the process of rebuilding the rotted ends of a wood-canvas canoe in my book ̶ This Old Canoe. However, when the canoe is built with a stylish upward sweep in the sheer line at both ends, the repair job is much more involved. For this discussion, I rebuilt the rotted end of a 1967 Old Town Otca.

Often, the damage is not apparent until the end is taken apart. Only then can you see the rotted inwale-ends and stem-top.

In this canoe, the bow deck was also rotted in the end. There are many ways to approach this repair. Sometimes, all that is required is the application of wood-hardener and two-part epoxy putty. In other cases, a new tip of solid wood can be spliced into the original deck with a scarf joint. However, the damage is most often so severe that an entirely new deck has to be made. In many canoes with highly-curved ends, the solid wood decks (almost an inch thick) are bent to follow the curve in the sheer line.

I have seen some people make a new deck by carving the curve into a piece of 8/4 (2″ or 5 cm thick) hardwood. Others laminate several thin slices of hardwood together on a form to create the curved deck. In this example, I employed the same methodology used by the original builders ̶ namely stem-bending the curve using a press. The first step is to cut a new deck from a piece of 4/4 (1″ or 25 mm thick) hardwood (in this case I used white oak).

The set-up is comprised of the new deck steam-bent between two solid-wood bending forms. They are both fashioned from a number (in this case, four) of 2×8 pieces of spruce lumber sandwiched together into a 6×8 block (held together with 2½” deck screws). The bottom block has the concave shape of the deck-bend cut into its top surface while the top block has the convex shape cut its bottom.

The curve required to achieve the correct bent in the replica deck is greater than the actual curve. This is due to the fact that a solid piece of wood will spring-back a little once the tension is removed in the press. To save you the trial-and-error process involved in getting the proper curve, I present a diagram that will allow you to get it right the first time.
Pressure for bending the deck is generated with an automotive scissor-jack forcing the bending forms together in the middle of a press frame constructed from 2×6 lumber. In this case, the inside dimensions of the press are 26½” (67.3 cm) high by 31″ (79.7 cm) wide.
The new deck is left in the press for a week to dry completely. When removed, the new deck has exactly the same bend as the original. Once the deck is ready, new inwale ends have to be spliced into the original inwales. This will be discussed in part 2 of this blog.
All of this (and much more) is described in my book – This Fancy Old Canoe: A Comprehensive Guide to Restoring Antique Canoes.
If you live in Canada, CLICK HERE to buy the book.
If you live in the USA, CLICK HERE to buy the book.
If you live in the UK, CLICK HERE to buy the book.
Si vous habitez en France, CLIQUEZ ICI acheter le livre.


