Stephanie Pedersen's Blog, page 6
September 22, 2016
The Whole30—What You Need To Know
The Whole30— it’s something I get a lot of questions about from clients and followers. Will The Whole30 help me lose weight, get into my skinny jeans, get rid of the bloat, feel more energetic, look younger? Is it safe? Will it hurt my metabolism? Is it difficult? Is it for me?
More on this in a bit, but first: Do you know what The Whole30 is?
It’s a 30-Day eating system created by certified sports nutritionist Melissa Hartwig and her husband, functional medical practitioner Dallas Hartwig, back in 2009. Somewhat similar (though definitely less Vegan-friendly) to my own food plan, and nearly identical to the Paleo food plan, The Whole30 centers around whole food.
Seeds are a yes. Grains of all kinds are a no. Veggies are a yes. Most fruits are a no—or are allowed in severely limited quantity. Meat, poultry, seafood and specialty meats are a yes. Dairy products are a no (bye-bye Greek yogurt!), as is soy and any form of sugar. And, believe it or not, legumes—a darling in my own diet—are forbidden.
The Hartwig’s developed The Whole30 as a way to fight inflammation, which leads to an array of health concerns—from poor sleep to cardiovascular disease, skin conditions to cancer.
You eat this way for 30 consecutive days, cleansing your body, nourishing your body with whole food ingredients, giving your system a chance to heal, and resetting your eating habits. At the end of the month, there’s a good chance you’ll be bloat-free and have lost some weight.
Fans talk about “doing a Whole30,” meaning they’ve made it through 30 days on the program, much like someone may do a 7-Day cleanse or a three-week sugar detox. At the end of their 30 days, many people go back to their old ways of eating, but others incorporate some of the things they’ve learned during their Whole30 month.
Like any diet, however, there are pitfalls and potential health disturbances that can arise. If you’re interested in learning more about The Whole30 system, keep reading to learn the possible downfalls and hurdles you may face, as well as find tools to help you.
Ask yourself why. Why are you interested in The Whole30, and what results do you hope you’ll see after completing it? This is a question I ask each of my own clients before they make any type of changes in their diets. Getting clear on your intention helps you determine whether a specific diet is for you.
Are you vegan, do you adore beans or grains or fruit, or do you thrive on a raw diet? The Whole30 is a very Paleo-style eating plan espousing most whole foods—with the exception of legumes, grains and many fruits—with an emphasis on vegetables and animal protein. If your body does best on a clean, green, animal-free diet, The Whole30is not for you. Nor is it for you if you eat mostly raw, or thrive with grain, beans and/or large amounts of fruit in your life.
Read the official book, It Starts With Food: Discover The Whole30 and Change Your Life in Unexpected Ways, from cover to cover before committing to the diet.You’ll learn not only why the Hartwig’s created the diet (including what health conditions it was originally designed to heal), you’ll get a sense of whether The Whole30 eating plan jives with your personality and your desires around your health and weight. If you’re still unsure after reading it, take a look at the follow-up book, Food Freedom Forever: Letting Go of Bad Habits, Guilt, and Anxiety Around Food by the Co-Creator of the Whole30. One of the most common reasons that people lose interest in a diet plan is it is incompatible with their lifestyles or doesn’t work with their food preferences.
Are you okay doing this alone, or do you need support? Book-based programs, likeThe Whole30, are so popular because they are easy and inexpensive to dive into. But consider your personality. Do you like to dig in and work solo? Or do you enjoy having cheerleaders and people to share the experience with. Fall into the second category? Consider creating a diet group. Or, join a nutritionist-led group. Stay tuned—I’ll be announcing my own group program in a couple of weeks. Details to come.
Invest in a few good Whole30-friendly cookbooks before you start. It’s tough to start a new eating plan and not know what you should be eating. Purchase at least one The Whole30 cookbook before you start your 30 days and make a few things before beginning. This will give you a chance to see if you feel good eating this way, if you enjoy the recipes, and will help you get a better sense of how much kitchen work the diet requires (and if that’s going to be doable with your current schedule). If you don’t want to purchase cookbooks, reserve them from the library for free. Official The Whole30 cookbooks worth looking at: The Whole30: The 30-Day Guide to Total Health and Food Freedom and The Whole30 Cookbook: 150 Delicious and Totally Compliant Recipes.
Be prepared to cook. A lot. Whole foods are amazing. And eating a diet based on whole foods is a great way to get healthy and maintain your health. BUT for many people, the term “whole foods” is synonymous for “raw ingredients.” Which is why so many whole foods-based eating plans require a lot of cooking. Yes, you can always find a personal chef or The Whole30-compliant meal delivery service or health food store hot bar to take care of your whole food meals, but these can get expensive. If you undertake The Whole30 and don’t have discretionary funds for a personal chef, plan on putting an hour or so aside each evening to prep your breakfasts, lunches, snacks and dinners.
If you are someone who gets bored easily, there are other, unofficial The Whole30-compliant cookbooks out there, which can give you another view of the diet. Check out these inexpensive Kindle books: Whole: 30 Day Whole Food Challenge,The Ultimate Diet Guidebook, and The Healthy Whole Foods Eating Challenge – 250+ Approved Recipes & 2 FULL Months Meal Plan for Rapid Weight Loss.
Make sure you have plenty of food containers ready for all of that homemade food!I can say from experience that if you don’t have enough or the right food storage containers, you won’t continue to pre-prep and make meals ahead of time. Spend a couple dollars and a few minutes and get enough (BPA-free) containers to let yourself make a week’s worth of meals ahead of time. A few to consider: Popit Little Big Box Food Plastic Container Set 8 Pack, Rubbermaid TakeAlongs Assorted Food Storage Container 40 Piece Set, Glasslock 18-Piece Assorted Oven Safe Container Set and 50 ct Plastic Food Storage Containers with Lids.
Be prepared for cravings the first few days. Anytime you give up foods you eat a lot of, you will experience cravings. Because The Whole30 diet requires that you give up most fruits, beans, grains, as well as dairy and processed food, you may find yourself intensely craving these items. Give yourself three days, after which your cravings will lessen. I find distraction to be a wonderful way to handle cravings: If you have a painting you’ve been meaning to finish, a vision board you want to make or a piano piece you want to learn, this is a great time.
Think ahead to challenging food situations. For many people, any social gathering—be it a barbecue, picnic, potluck or party—is a difficult time to stay loyal to a diet. With a plethora of new, exciting, tantalizing foods, it’s hard to stick with diet fare. A busy, crammed-with-appointments kind of day is another time when people are likely to give up their diets—it’s so much easier ducking into a deli for a muffin or bag of chips than it is to think ahead and pack a homemade whole food snack. By taking a look at instances when you traditionally make junky food choices, you can plan ahead. Maybe you double tonight’s dinner recipe and take half with you to tomorrow’s book club potluck. If you know you have a day of errands tomorrow, stashing a healthy snack in your handbag may be just what you need to avoid grabbing a street vendor hot dog. Purchasing a few premade The Whole30 compliant snacks can make this even more convenient.


Bring Your Lunch, Change Your Life: 5 secrets to becoming a “lunch-bringer”
If you’re looking for surefire action you can take to lose weight, heal a health condition, maintain weight loss, improve your looks and boost energy, I’ve got an easy piece of advice.
Pack a lunch.
That’s it: Pack a lunch
If you’re like most people, you probably purchase your lunch from a lunchcart, deli, local restaurant or nearby fastfood joint.
Convenient, yes, but it isn’t helping your weight or your health.
According to a recent study by researchers at Tufts University in Boston, 92 percent of restaurant meals have too much fat, sodium, sugar and calories. Even “healthy” restaurants, or food joints’ “healthy menus” are suspect: only 32 percent of meal combinations at fast-food restaurants and 22 percent of those at sit-down restaurants met USDA healthy guidelines for fat, saturated fat, sodium and calories.
Then there’s the cost. According a recent survey by Visa, Americans spend anywhere from $20 to $53 each week on lunches, totaling from $1,001 to $2,746 yearly.
Making and bringing your lunch to work puts you in control—of your weight, your health, your looks and your wealth.
But you’re right: There are so many roadblocks to bringing a lunch—from scheduling regular shopping trips for ingredients to setting aside time to assemble the thing. Some people even struggle with what to pack their lunch in and where to keep their lunch while they’re working.
These are real-life obstacles, ones that I can help you surmount.
Here are 5 super easy, surprising secrets to packing a delicious workday lunch (that not only supports your health goals but has your co-workers looking at your meal with longing). Take a look. You can become “a lunch-bringer,” too. One week of bringing your own fantastic lunch and you’ll see a big difference in your weight, skin, energy levels and wealth.
Finding time for shopping. When do you shop for groceries? If your answer is “rarely,” then I’m not going to strongarm you into changing your ways. Do a quick Internet search for local grocery stores that will deliver, then place a standing weekly order. If you’re not used to shopping regularly, this will seem like a huge expense, but let me put this to you in another way: The groceries you buy weekly will be cheaper and provide healthier meals than the takeout food you are currently purchasing every day for lunch. If you live somewhere that does not have grocers who deliver, sign up for an online delivery service, such as Amazon Prime (which has a 30-Day free trial). If you are shopping weekly, purchase double portions of your favorite foods to bring to work.
Find time for putting your lunch together. For many people, finding time to put together a lunch is more difficult than finding time to shop. Here’s how I make this easy: Each evening, as I clean the kitchen, I earmark some of the night’s leftovers for tomorrow’s lunch, then pack them into a small air-tight container and stash in the fridge. While I have the fridge door open, I do a survey of what else I can add to my lunch. Maybe there are a few baby carrots or grapes in the produce drawer, or some arugula leaves I can quickly commandeer as tomorrow’s lunchtime salad. I may go a step further and check out the cupboards (Any nuts in there? Dried cherries? Anything?) and freezer (Any single-sized freezer containers of chili or stew or soup? Perhaps some grain or beans that I made at another time and packed away in single-serving containers?). I’ve even been known to raid my kids’ Halloween bags and Easter baskets for lunchtime treats.
Have the right lunch tote + containers. This is a big one. Each morning my husband used to go into the kitchen and, as he drank his morning coffee, he would grab a cleaned-up takeout container that he got from last week’s Chinese lunch special. After randomly filling it with food from the fridge, he would slip the container as-is straight into his briefcase. If he had packed something especially liquidy,he may wrap the container in a plastic bag. As you can probably guess, the inside of his briefcase was a mess. And soon he gave up, saying that bringing his lunch was too messy for him to deal with. Don’t let this happen to you! There are a host of fun, inexpensive lunch totesout there, from bento’s to bags and boxes. There are also all kinds of sturdy, airtight food containers to put inside these lunch totes. Think about how you like to eat and choose one that makes sense. If you’re addicted to quinoa bowls, look for a large, single container. If chilis and stews are your thing, find a thermos bowl. If you love a bit of everything, try a bento box.
Get enough protein and veggies. One of the biggest lunchtime mistakes I see clients make is consuming too many carbs midday. When you purchase your lunch, carbs are a tempting option: They are plentiful, they are so much cheaper than protein and veggies, and as pure comfort food, they are incredibly tempting. But a career of this will leave you unfocused, fatigued, grouchy, puffy, and in no state to meet your professional goals. For your own health and the good of your career, I urge you to pact a healthful lunch featuring protein and veggies, two foods that will keep you focused and energized until the end of the day, while also contributing to a stable mood and increased mental acuity. A serving of protein is about the size of a deck of playing cards. So think a cup of quinoa or millet or another grain with a one-cup serving of veggies and some beans or leftover salmon or poultry. Or a container of chickpea soup and a green side salad. Or anything else that strikes your fancy. For some recipes that can help, go here.
Include a treat. And maybe a drink. For those of you who don’t take your lunch because homemade food isn’t as exciting as the stuff you can buy at the takeout shop up the street (the one with the amazing chocolate chip cookies sitting near the cash register!), I have advice: Never pack a workday lunch without including a treat. And perhaps a travel thermos or bottle of something fun to drink (I like water with cucumber slices or homemade ginger drink). By showing yourself that homemade lunches can be just as fun and treat-filled as anything you can pick up the corner deli, you will be more likely to consistently pack and bring your own healthy (and yes, yummy) food. Suggestions for healthy treats include this delectable strawberry pudding, a container of homemade nut butter popcorn, store-bought or homemade kale chips or whole grain tortilla chips with a side of guacamole.
Bonus tip: Where to store your lunch. If you’re lucky enough to work in an office with a dedicated kitchen (featuring a fridge large enough to store everyone’s home-brought lunches), fantastic. Just make sure you either label your lunch bag or use a container that is so different-looking from everyone else’s that no one will mistake it for their own. If you’re one of the folks who must store your lunch at your desk, you’re in luck. Many lunch containers come with their own cold packs. But you can also buy thesecooling packs separately. (A multi-pack of these typically runs under $8.) How to use these cold packs: Simply store in your home freezer overnight and slip into your lunch bag each morning before leaving the house. Most can keep an average-sized lunch col for up to 8 hours.
Why people drink bone juice….
Have you noticed that bone broth is—as my kids say—a “real thing” now?
How many emails have you received in the last month (this one included) talking about the stuff? Hashtags are devoted to it. Broth tasting bars are popping up in en vogue restaurants. Blogs are dedicated to it. Books are written on it. There are even bone broth cleanses out there! (I just did one of these with five private clients and it was both wonderful and hilarious. More on this in a future newsletter.)
Bone broth is a bona fide health food fad.
This thick, rich broth is made by simmering broken meat or poultry bones in water for 8 to 48 hours. It’s the kind of broth your grandmother—and her grandmother—cooked with.
While bone broth’s exact nutritional makeup depends upon what bones you use and how long you simmer them, there are a few nutrients that all bone broths contain: collagen, proline, glycine, glutamine, monosaturated fats, omega-3-fatty-acids, conjugated linoleic acid, calcium, magnesium, phosphorus, silicon, sulphur, plus chondroitin sulfate and glucosamine, two compounds sold as pricey supplements to reduce inflammation, arthritis and joint pain.
While there hasn’t yet been a single scientific study into the benefit of bone broth, there are plenty of studies on the above nutrients and their role in everything from improving sleep toincreasing energy levels, reducing inflammation to protecting joints, inhibiting cancer growthand even reducing body mass.
It seems like everyone is jumping on the broth bandwagon.
If you’re interested in using bone broth to lose weight or heal a health condition, here are a few resources to help you:
Books: In my world, the measure of a trend’s popularity is in the number of books I can find on the topic. There are a lot on bone broth! Some, like the gorgeous Broth and Stock from the Nourished Kitchen, are culinary based. Some, such as Dr. Kellyanne’s Bone Broth Diet, are health-oriented. Some, such as Nourishing Kitchen, are slow-food general cooking favorites. Some even make big age-reversing claims, such as the humoursly titled Bone Broth Power: Reverse Grey Hair and Bring Back Morning Wood. A few to look at include: The Bare Bones Broth Cookbook, Dr. Axe’s Bone Broth Breakthrough, Bone Deep Broth, and Bone Broth: 101 Essential Recipes. Most are similar in content. Get one or two and you should be set. Or wait until next year, when my own broth book (definitely more green than any of the above) will be out!
Add veggies, please! Many broth-based diets and cleanses come up short in the produce department, if you know what I mean. I love the idea of using traditional broths to support health, reduce inflammation, help speed weight loss and address specific health conditions. But, but, but…. Not at the expense of fruits and vegetables. If you want to supercharge your health, you need the phytonutrients and fiber—as well as the cancer-preventing, disease-fighting benefits—contained in fruits and vegetables.
My thoughts on dried broth powder. Many online health coaches, celebrity doctors and nutritionists sell and market freeze-dried broth. Think of this as a kind of high end “bullion cube.” But in truth, if you want to make broth a part of your daily life, it should be fresh or frozen. These are higher in nutrients.
Bone broth supplements. Yep, almost any food trend that comes along eventually ends up in pill form. Bone broth included. If you’d like to take a bone broth supplementfor the additional collagen, chondroitin sulfate and glucosamine (very helpful for joints; grab some chia for further joint help) it may provide, then be my guest. But you can’t take a few pills and expect to “do” a bone broth diet. Just saying.
Pre-made stock. I am always trying to get people into the kitchen. Making your own food—even trendy “health foods,”—gives you an opportunity to nourish yourself and control what you put in your body. Plus, I personally believe that the world would be a healthier place if everyone knew how to cook. That said, I’m a realist. I know that not everyone has the time or inclination to make broth. If you can’t find a local restaurant culinary student or foodie friend to make batches of broth for you, you can contact local restaurants. Or, yes, you can order it online. Dr. Kellyanne has premade “SLIM Collagen Broth,” many Paleo companies offer broth “snack packs,” or bone broth “To-Go Cups,”and some soup companies, such as Pacific Foods, offer sampler packs of different flavors.
Make your own. Check out the beginner’s recipe below for a standard, easy-to-make, easy-to-customize, yummy broth recipe. If you would like to make your own and need help, stay tuned in the weeks to come from some serious stock-making tutorials. I am waiting for the weather to cool off a bit!
Get a good stockpot. You can’t use your little saucepan for broth. You’ll need a large, wonderful pot to catch all the great brothy goodness. Luckily, these are not expensive and can be bought in any local store that carries kitchen supplies. Or you can order online. If you need a suggestion, this 11-quart Faberware beauty is perfect.
A colander, a skimmer, and a kitchen spider or hand-held strainer couldn’t hurt, either, and make broth-brewing so much easier.
Store correctly. You don’t want to go to the work of making beautiful stock and have it go bad in the fridge. Trust me. I have done this before. More than once. No longer! Now I immediately decant the broth into single-serving glass or BPA-free, freezer-safe containers and store away. I keep a few in the fridge for use within the following two or three days, but most go directly into the freezer. Broth really should be used within three or four days or it starts to spoil. You can taste this, too, which makes the entire broth diet experience a bad one. Trust me.
Get some guidance. I am running a bone-broth cleanse in October, when the weather cools down. If you’d like guidance in doing a broth diet in a healthy, nutrient-packed way—that won’t affect your blood cholesterol levels, make your skin dull or affect your thyroid— stay tuned!
Chicken Broth
Makes about 3 quarts
This is a great beginner’s recipe, one that will create a lovely chicken broth that can be used for a cleanse or to enjoy daily. It is also wonderful for cooking with. As you get more advanced, feel free to add in bones you’ve saved from T-bones, pork shoulders, chicken wings, and so on, that you’ve saved in an air-tight container in the freezer. I always use a mix of saved bones when I make broth.
About 4 quarts water
1 (4-pound) chicken, whole; or the carcasses of two or three chickens (parts or whole, such as from a rotisserie chicken)
1 medium onion, peeled and quartered
2 medium carrots or parsnips or a large sweet potato, quartered,
2 stalks celery, quartered
1 teaspoon whole black peppercorns
1 to 3 tablespoons salt (start with one tablespoon and adjust with more at the end of cooking)
Optional: The green part from leeks or scallions (as many as you’d like; just make sure they are clean!)
Optional: Parsley stems, thyme sprigs left whole, fennel fronds, bay leaf
Optional: One apple, halved
Place ingredients in a large stockpot and cover with about 4 quarts of water. (I never measure this. Instead, I just add water until all ingredients are covered by about an inch.)
Place pot over high heat, add cover and cook until it comes to a rolling boil.
Reduce the heat to a very low simmer and cook for four hours. If you feel ambitious and happen to be in the kitchen, feel free to skim off any fat that collects on the top during cooking. I personally leave the fat, but some people don’t like it.)
Turn off heat and allow broth to cool in the pot for up to two hours.
Carefully strain out the solids. You can use a spider or other type of strainer and remove solid material. (I feed the boiled chicken to our dog and cat—but you can do what you will with it. The veggies are best composted.) Or you can pour broth into a colander that has been set over a large bowl.
Decant broth into 1-cup serving containers to use for daily drinking, in a cleanse, or to cook with. Or, if you’ll be using the broth for cooking, go ahead and pour into larger containers.
Store any broth you need for the upcoming three days in the fridge. Everything else should be placed in the freezer.
12 Proven Secrets To The Best Picnic Ever
Hello Gorgeous!
Summer will soon be ending and my question to you is: Have you had a picnic yet? Not a “grab some fast food and sit outside” meal, but a real-life, bona fide picnic.
Taken from the 17th Century French word picque-nique, meaning “a social gathering involving shared food”, the modern word picnic means an “outing that involves taking a packed meal to be eaten outdoors.”
Sounds like fun, doesn’t it?
But if your experiences are like mine, picnics are often anything but fun: There’s nowhere to sit, the food is soggy, bugs are everywhere, it’s too hot. And and on and on and on.
It doesn’t have to be this way. In fact, instead of giving up on this beautiful activity, check out this foolproof guide to having the most fun, most effortless, healthiest picnic ever. Keep reading. Here are my secrets to having the best picnic of your life! (You’ll notice that my top 5 picnic secrets have nothing to do with food!)
Scout out the right spot. Ahead of time. The right spot for a picnic is an individual thing. Some people like to sit at a picnic table. Some people love to stretch out on the ground. Some people like to perch atop rocky outcroppings. Some people like to bring their own lounge chairs. Some people like public parks (good if you want to be close to water fountains and bathrooms!). Others like private, quite spots. Whatever you enjoy is right. If you don’t already have location in mind, do an online search to narrow your choices. Then make sure to physically visit the spot at least twice before you commit.This is important. If the spot is consistently wet or muddy, buggy, smelly, or you notice signs warning you about bears, find somewhere else.
Choose the right time. Without a bit of planning, picnicking can be hot, sweaty, bug-bitten business. The heat of midday is often when most people picnic, but it can be the most uncomfortable time to spend time outdoors. If this is the best time for you, consider finding a shady area, bringing a canopy and some outoor fans. Evening is a beautiful time to picnic, but gnats and other small flying insects are most active around sunset. Come equipped with repelling candles ( I love Murphy’s Mosquito Candle) orbug-away incense and natural bug repellent ( I like straight coconut oil or, if bugs are heavy, Amerta All-Natural Insect Repellent Spray, which comes with a money-back guarantee. There are also fun bug-repelling bracelets, which kids love. A mid-morning brunch is often the best solution—the day hasn’t become too hot, and the bugs aren’t too active.
Invite “picnic perfect” people. We all have lovely people in our lives who are simply not picnickers. Being outdoors too long is boring. Or they don’t want the sun on their skin. Or there are too many bugs. Or they don’t play well with others. Or they don’t want to sit on the ground, get dirty, or put their iphones down long enough to connect. Don’t invite any of these people—or anyone else who will not add to the experience. A picnic is supposed to be fun, and some people are simply best enjoyed in other venues. The absence of negative or simply “wrong” picnickers is one of the best-kept, most difficult-to-swallow picnic secrets ever. If you follow none of my other advice, heed this one and see how amazing your next picnic is.
Gather helpful picnic accessories. At the very least, you’ll need a waterproof picnic “tarp” or waterproof blanket for the ground. (This 68″ x 70″ beauty, with strap, is my fave.) Look for something large enough to fit the food, as well as all guests. This can be used as a tablecloth if you are on picnic tables. Further, make sure to have enough napkins, “wet wipes,” sunscreen, pop-up wind and sun shelter, maybe a mesh table-top cover to keep away flies, band aids, a few towels, and anything else that makes sense for your group. May I suggest this novel inflatable serving bar? It’s genius!
Go with “picnic appropriate: tableware, utensils, containers and more. When I was growing up, there weren’t a lot of disposable, recyclable picnicware. Now there is. If you can afford it, you’ll find disposable tableware and utensils make your al fresco life very easy. (My favorite picnic used carnival food trays.) Make everything look pretty with a portable organizer, such as this Picnic Organizer or a napkin holder. A few that I like: recyclable paper straws, But if you’d rather, there are wonderful sets of unbreakable (always choose unbreakable) picnicware (I adore this 16-piece set from StarBox and these picnic trays from NordicWare) that can be loaded up at the end of your picnic and brought home to be cleaned.
Make a menu. When I grew up, picnics were ad-hoc affairs filled with bags of cheap chips and containers of quickly-made potato salad. Not that any of that is bad, but making a menu beforehand helps you create a healthier, more memorable event. If you need some help, there are some wonderful cookbooks out there to help you. I like:Picnics: Create A Magical Event, Food with Friends, and The Picnic.
Bring fabulous beverages. Yes, it’s easier to pick up a few liters of cheap ice tea and bottles of water, but make your picnic beautiful, healthy and memorable by making your own beverages, which you can pack in coolers. A few gallons of water with floating mint leaves and cucumber slices, real home-brewed black tea barely sweetened, and homemade lemonade are three easy, economical choices. If you need a few recipes, check out these recipes for Sun Tea and Ginger Drink.
Pack at least 3 vegan dishes at are soy-free and gluten-free. Even if your picnickers are wheat-loving carnivores, bringing a few healthy options makes everyone feel good and it covers any guests who may be trying to improve their diet. I love this Spiced Sweet Potato Salad, Black Bean Burger and Mexicali Superfood Salad.
Bring activities. Great picnic activities include frisbees, kite-flying, rock hunting, crafts,coloring books—anything but electronic games. Ask everyone to put away their electronics for the duration of the picnic.
Ask for help. Build help into the picnic by asking people on the invitation to bring a dish or activity with them. Let people know at the picnic what time you plan on cleaning up and how they can help.
Don’t put all the food out at once. Once people have eaten, the picnic is over, so setting food out in stages is an easy way to make the day flow more gracefully. Encourage play and interaction: Drinks while you play Frisbee. Appetizers while the grownups visit. Entrees. A nature walk to hunt for pretty rocks. Then dessert while everyone indulges in a fun craft, like rock painting.
Have a system for fast clean-up. Make sure to have two big garbage bags placed in an obvious spot during the picnic—and encourage your guests to use them as needed: One for recyclables and one for food scraps (use a biodegradable bag and you can literally bury the compostable material once you get back home to your garden.) Announce the end of your picnic 30 minutes beforehand and ask guests to work together to make a sweep of your picnic spot to collect refuse. Another thing you’ll need two of:Two big plastic laundry hampers: One loaded with soiled tarps, blankets, towels and other linens, and the other with dirty tableware and utensils. These are loaded in the trunk of your car at the end of the picnic and taken home to be dealt with!
September 5, 2016
The Whole30—What You Need To Know
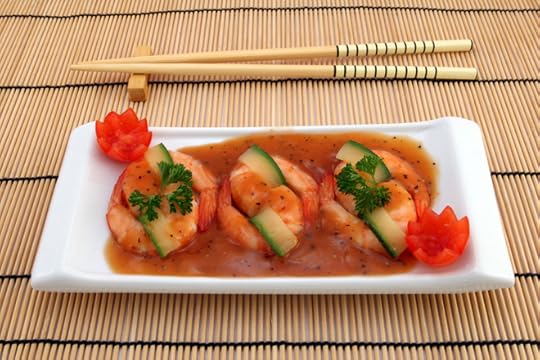
Chinese food, gourmet tiger king prawns served with a vegetables and tomato garnish with chop sticks on a bamboo mat
The Whole30— it’s something I get a lot of questions about from clients and followers. Will The Whole30 help me lose weight, get into my skinny jeans, get rid of the bloat, feel more energetic, look younger? Is it safe? Will it hurt my metabolism? Is it difficult? Is it for me?
More on this in a bit, but first: Do you know what The Whole30 is?
It’s a 30-Day eating system created by certified sports nutritionist Melissa Hartwig and her husband, functional medical practitioner Dallas Hartwig, back in 2009. Somewhat similar (though definitely less Vegan-friendly) to my own food plan, and nearly identical to the Paleo food plan, The Whole30 centers around whole food.
Seeds are a yes. Grains of all kinds are a no. Veggies are a yes. Most fruits are a no—or are allowed in severely limited quantity. Meat, poultry, seafood and specialty meats are a yes. Dairy products are a no (bye-bye Greek yogurt!), as is soy and any form of sugar. And, believe it or not, legumes—a darling in my own diet—are forbidden.
The Hartwig’s developed The Whole30 as a way to fight inflammation, which leads to an array of health concerns—from poor sleep to cardiovascular disease, skin conditions to cancer.
You eat this way for 30 consecutive days, cleansing your body, nourishing your body with whole food ingredients, giving your system a chance to heal, and resetting your eating habits. At the end of the month, there’s a good chance you’ll be bloat-free and have lost some weight.
Fans talk about “doing a Whole30,” meaning they’ve made it through 30 days on the program, much like someone may do a 7-Day cleanse or a three-week sugar detox. At the end of their 30 days, many people go back to their old ways of eating, but others incorporate some of the things they’ve learned during their Whole30 month.
Like any diet, however, there are pitfalls and potential health disturbances that can arise. If you’re interested in learning more about The Whole30 system, keep reading to learn the possible downfalls and hurdles you may face, as well as find tools to help you.
Ask yourself why. Why are you interested in The Whole30, and what results do you hope you’ll see after completing it? This is a question I ask each of my own clients before they make any type of changes in their diets. Getting clear on your intention helps you determine whether a specific diet is for you.
Are you vegan, do you adore beans or grains or fruit, or do you thrive on a raw diet? The Whole30 is a very Paleo-style eating plan espousing most whole foods—with the exception of legumes, grains and many fruits—with an emphasis on vegetables and animal protein. If your body does best on a clean, green, animal-free diet, The Whole30 is not for you. Nor is it for you if you eat mostly raw, or thrive with grain, beans and/or large amounts of fruit in your life.
Read the official book, It Starts With Food: Discover The Whole30 and Change Your Life in Unexpected Ways, from cover to cover before committing to the diet. You’ll learn not only why the Hartwig’s created the diet (including what health conditions it was originally designed to heal), you’ll get a sense of whether The Whole30 eating plan jives with your personality and your desires around your health and weight. If you’re still unsure after reading it, take a look at the follow-up book, Food Freedom Forever: Letting Go of Bad Habits, Guilt, and Anxiety Around Food by the Co-Creator of the Whole30. One of the most common reasons that people lose interest in a diet plan is it is incompatible with their lifestyles or doesn’t work with their food preferences.
Are you okay doing this alone, or do you need support? Book-based programs, like The Whole30, are so popular because they are easy and inexpensive to dive into. But consider your personality. Do you like to dig in and work solo? Or do you enjoy having cheerleaders and people to share the experience with. Fall into the second category? Consider creating a diet group. Or, join a nutritionist-led group. Stay tuned—I’ll be announcing my own group program in a couple of weeks. Details to come.
Invest in a few good Whole30-friendly cookbooks before you start. It’s tough to start a new eating plan and not know what you should be eating. Purchase at least one The Whole30 cookbook before you start your 30 days and make a few things before beginning. This will give you a chance to see if you feel good eating this way, if you enjoy the recipes, and will help you get a better sense of how much kitchen work the diet requires (and if that’s going to be doable with your current schedule). If you don’t want to purchase cookbooks, reserve them from the library for free. Official The Whole30 cookbooks worth looking at: The Whole30: The 30-Day Guide to Total Health and Food Freedom and The Whole30 Cookbook: 150 Delicious and Totally Compliant Recipes.
Be prepared to cook. A lot. Whole foods are amazing. And eating a diet based on whole foods is a great way to get healthy and maintain your health. BUT for many people, the term “whole foods” is synonymous for “raw ingredients.” Which is why so many whole foods-based eating plans require a lot of cooking. Yes, you can always find a personal chef or The Whole30-compliant meal delivery service or health food store hot bar to take care of your whole food meals, but these can get expensive. If you undertake The Whole30 and don’t have discretionary funds for a personal chef, plan on putting an hour or so aside each evening to prep your breakfasts, lunches, snacks and dinners.
If you are someone who gets bored easily, there are other, unofficial The Whole30-compliant cookbooks out there, which can give you another view of the diet. Check out these inexpensive Kindle books: http://pastamoon.com/, , and The Healthy Whole Foods Eating Challenge – 250+ Approved Recipes & 2 FULL Months Meal Plan for Rapid Weight Loss.
Make sure you have plenty of food containers ready for all of that homemade food! I can say from experience that if you don’t have enough or the right food storage containers, you won’t continue to pre-prep and make meals ahead of time. Spend a couple dollars and a few minutes and get enough (BPA-free) containers to let yourself make a week’s worth of meals ahead of time. A few to consider: Popit Little Big Box Food Plastic Container Set 8 Pack, Rubbermaid TakeAlongs Assorted Food Storage Container 40 Piece Set, Glasslock 18-Piece Assorted Oven Safe Container Set and 50 ct Plastic Food Storage Containers with Lids.
Be prepared for cravings the first few days. Anytime you give up foods you eat a lot of, you will experience cravings. Because The Whole30 diet requires that you give up most fruits, beans, grains, as well as dairy and processed food, you may find yourself intensely craving these items. Give yourself three days, after which your cravings will lessen. I find distraction to be a wonderful way to handle cravings: If you have a painting you’ve been meaning to finish, a vision board you want to make or a piano piece you want to learn, this is a great time.
Think ahead to challenging food situations. For many people, any social gathering—be it a barbecue, picnic, potluck or party—is a difficult time to stay loyal to a diet. With a plethora of new, exciting, tantalizing foods, it’s hard to stick with diet fare. A busy, crammed-with-appointments kind of day is another time when people are likely to give up their diets—it’s so much easier ducking into a deli for a muffin or bag of chips than it is to think ahead and pack a homemade whole food snack. By taking a look at instances when you traditionally make junky food choices, you can plan ahead. Maybe you double tonight’s dinner recipe and take half with you to tomorrow’s book club potluck. If you know you have a day of errands tomorrow, stashing a healthy snack in your handbag may be just what you need to avoid grabbing a street vendor hot dog. Purchasing a few premade The Whole30 compliant snacks can make this even more convenient.
September 1, 2016
Bring Your Lunch, Change Your Life: 5 secrets to becoming a “lunch-bringer”

If you’re looking for surefire action you can take to lose weight, heal a health condition, maintain weight loss, improve your looks and boost energy, I’ve got an easy piece of advice.
Pack a lunch.
That’s it: Pack a lunch
If you’re like most people, you probably purchase your lunch from a lunchcart, deli, local restaurant or nearby fastfood joint.
Convenient, yes, but it isn’t helping your weight or your health.
According to a recent study by researchers at Tufts University in Boston, 92 percent of restaurant meals have too much fat, sodium, sugar and calories. Even “healthy” restaurants, or food joints’ “healthy menus” are suspect: only 32 percent of meal combinations at fast-food restaurants and 22 percent of those at sit-down restaurants met USDA healthy guidelines for fat, saturated fat, sodium and calories.
Then there’s the cost. According a recent survey by Visa, Americans spend anywhere from $20 to $53 each week on lunches, totaling from $1,001 to $2,746 yearly.
Making and bringing your lunch to work puts you in control—of your weight, your health, your looks and your wealth.
But you’re right: There are so many roadblocks to bringing a lunch—from scheduling regular shopping trips for ingredients to setting aside time to assemble the thing. Some people even struggle with what to pack their lunch in and where to keep their lunch while they’re working.
These are real-life obstacles, ones that I can help you surmount.
Here are 5 super easy, surprising secrets to packing a delicious workday lunch (that not only supports your health goals but has your co-workers looking at your meal with longing). Take a look. You can become “a lunch-bringer,” too. One week of bringing your own fantastic lunch and you’ll see a big difference in your weight, skin, energy levels and wealth.
Finding time for shopping. When do you shop for groceries? If your answer is “rarely,” then I’m not going to strongarm you into changing your ways. Do a quick Internet search for local grocery stores that will deliver, then place a standing weekly order. If you’re not used to shopping regularly, this will seem like a huge expense, but let me put this to you in another way: The groceries you buy weekly will be cheaper and provide healthier meals than the takeout food you are currently purchasing every day for lunch. If you live somewhere that does not have grocers who deliver, sign up for an online delivery service, such as Amazon Prime (which has a 30-Day free trial). If you are shopping weekly, purchase double portions of your favorite foods to bring to work.
Find time for putting your lunch together. For many people, finding time to put together a lunch is more difficult than finding time to shop. Here’s how I make this easy: Each evening, as I clean the kitchen, I earmark some of the night’s leftovers for tomorrow’s lunch, then pack them into a small air-tight container and stash in the fridge. While I have the fridge door open, I do a survey of what else I can add to my lunch. Maybe there are a few baby carrots or grapes in the produce drawer, or some arugula leaves I can quickly commandeer as tomorrow’s lunchtime salad. I may go a step further and check out the cupboards (Any nuts in there? Dried cherries? Anything?) and freezer (Any single-sized freezer containers of chili or stew or soup? Perhaps some grain or beans that I made at another time and packed away in single-serving containers?). I’ve even been known to raid my kids’ Halloween bags and Easter baskets for lunchtime treats.
Have the right lunch tote + containers. This is a big one. Each morning my husband used to go into the kitchen and, as he drank his morning coffee, he would grab a cleaned-up takeout container that he got from last week’s Chinese lunch special. After randomly filling it with food from the fridge, he would slip the container as-is straight into his briefcase. If he had packed something especially liquidy,he may wrap the container in a plastic bag. As you can probably guess, the inside of his briefcase was a mess. And soon he gave up, saying that bringing his lunch was too messy for him to deal with. Don’t let this happen to you! There are a host of fun, inexpensive lunch totes out there, from bento’s to bags and boxes. There are also all kinds of sturdy, airtight food containers to put inside these lunch totes. Think about how you like to eat and choose one that makes sense. If you’re addicted to quinoa bowls, look for a large, single container. If chilis and stews are your thing, find a thermos bowl. If you love a bit of everything, try a bento box.
Get enough protein and veggies. One of the biggest lunchtime mistakes I see clients make is consuming too many carbs midday. When you purchase your lunch, carbs are a tempting option: They are plentiful, they are so much cheaper than protein and veggies, and as pure comfort food, they are incredibly tempting. But a career of this will leave you unfocused, fatigued, grouchy, puffy, and in no state to meet your professional goals. For your own health and the good of your career, I urge you to pact a healthful lunch featuring protein and veggies, two foods that will keep you focused and energized until the end of the day, while also contributing to a stable mood and increased mental acuity. A serving of protein is about the size of a deck of playing cards. So think a cup of quinoa or millet or another grain with a one-cup serving of veggies and some beans or leftover salmon or poultry. Or a container of chickpea soup and a green side salad. Or anything else that strikes your fancy. For some recipes that can help, http://pastamoon.com/.
Include a treat. And maybe a drink. For those of you who don’t take your lunch because homemade food isn’t as exciting as the stuff you can buy at the takeout shop up the street (the one with the amazing chocolate chip cookies sitting near the cash register!), I have advice: Never pack a workday lunch without including a treat. And perhaps a or bottle of something fun to drink (I like water with cucumber slices or homemade ginger drink). By showing yourself that homemade lunches can be just as fun and treat-filled as anything you can pick up the corner deli, you will be more likely to consistently pack and bring your own healthy (and yes, yummy) food. Suggestions for healthy treats include this delectable strawberry pudding, a container of homemade nut butter popcorn, store-bought or homemade kale chips or whole grain tortilla chips with a side of guacamole.
Bonus tip: Where to store your lunch. If you’re lucky enough to work in an office with a dedicated kitchen (featuring a fridge large enough to store everyone’s home-brought lunches), fantastic. Just make sure you either label your lunch bag or use a container that is so different-looking from everyone else’s that no one will mistake it for their own. If you’re one of the folks who must store your lunch at your desk, you’re in luck. Many lunch containers come with their own cold packs. But you can also buy these cooling packs separately. (A multi-pack of these typically runs under $8.) How to use these cold packs: Simply store in your home freezer overnight and slip into your lunch bag each morning before leaving the house. Most can keep an average-sized lunch col for up to 8 hours.
August 23, 2016
Why people drink bone juice….

Have you noticed that bone broth is—as my kids say—a “real thing” now?
How many emails have you received in the last month (this one included) talking about the stuff? Hashtags are devoted to it. Broth tasting bars are popping up in en vogue restaurants. Blogs are dedicated to it. Books are written on it. There are even bone broth cleanses out there! (I just did one of these with five private clients and it was both wonderful and hilarious. More on this in a future newsletter.)
Bone broth is a bona fide health food fad.
This thick, rich broth is made by simmering broken meat or poultry bones in water for 8 to 48 hours. It’s the kind of broth your grandmother—and her grandmother—cooked with.
While bone broth’s exact nutritional makeup depends upon what bones you use and how long you simmer them, there are a few nutrients that all bone broths contain: collagen, proline, glycine, glutamine, monosaturated fats, omega-3-fatty-acids, conjugated linoleic acid, calcium, magnesium, phosphorus, silicon, sulphur, plus chondroitin sulfate and glucosamine, two compounds sold as pricey supplements to reduce inflammation, arthritis and joint pain.
While there hasn’t yet been a single scientific study into the benefit of bone broth, there are plenty of studies on the above nutrients and their role in everything from improving sleep to increasing energy levels, reducing inflammation to protecting joints, inhibiting cancer growth and even reducing body mass.
It seems like everyone is jumping on the broth bandwagon.
If you’re interested in using bone broth to lose weight or heal a health condition, here are a few resources to help you:
Books: In my world, the measure of a trend’s popularity is in the number of books I can find on the topic. There are a lot on bone broth! Some, like the gorgeous Broth and Stock from the Nourished Kitchen, are culinary based. Some, such as Dr. Kellyanne’s Bone Broth Diet, are health-oriented. Some, such as Nourishing Kitchen, are slow-food general cooking favorites. Some even make big age-reversing claims, such as the humoursly titled Bone Broth Power: Reverse Grey Hair and Bring Back Morning Wood. A few to look at include: The Bare Bones Broth Cookbook, http://pastamoon.com/, , and Bone Broth: 101 Essential Recipes. Most are similar in content. Get one or two and you should be set. Or wait until next year, when my own broth book (definitely more green than any of the above) will be out!
Add veggies, please! Many broth-based diets and cleanses come up short in the produce department, if you know what I mean. I love the idea of using traditional broths to support health, reduce inflammation, help speed weight loss and address specific health conditions. But, but, but…. Not at the expense of fruits and vegetables. If you want to supercharge your health, you need the phytonutrients and fiber—as well as the cancer-preventing, disease-fighting benefits—contained in fruits and vegetables.
My thoughts on dried broth powder. Many online health coaches, celebrity doctors and nutritionists sell and market freeze-dried broth. Think of this as a kind of high end “bullion cube.” But in truth, if you want to make broth a part of your daily life, it should be fresh or frozen. These are higher in nutrients.
Bone broth supplements. Yep, almost any food trend that comes along eventually ends up in pill form. Bone broth included. If you’d like to take a bone broth supplement for the additional collagen, chondroitin sulfate and glucosamine (very helpful for joints; grab some chia for further joint help) it may provide, then be my guest. But you can’t take a few pills and expect to “do” a bone broth diet. Just saying.
Pre-made stock. I am always trying to get people into the kitchen. Making your own food—even trendy “health foods,”—gives you an opportunity to nourish yourself and control what you put in your body. Plus, I personally believe that the world would be a healthier place if everyone knew how to cook. That said, I’m a realist. I know that not everyone has the time or inclination to make broth. If you can’t find a local restaurant culinary student or foodie friend to make batches of broth for you, you can contact local restaurants. Or, yes, you can order it online. Dr. Kellyanne has premade “SLIM Collagen Broth,” many Paleo companies offer broth “snack packs,” or bone broth “To-Go Cups,” and some soup companies, such as Pacific Foods, offer sampler packs of different flavors.
Make your own. Check out the beginner’s recipe below for a standard, easy-to-make, easy-to-customize, yummy broth recipe. If you would like to make your own and need help, stay tuned in the weeks to come from some serious stock-making tutorials. I am waiting for the weather to cool off a bit!
Get a good stockpot. You can’t use your little saucepan for broth. You’ll need a large, wonderful pot to catch all the great brothy goodness. Luckily, these are not expensive and can be bought in any local store that carries kitchen supplies. Or you can order online. If you need a suggestion, this 11-quart Faberware beauty is perfect.
A colander, a skimmer, and a kitchen spider or hand-held strainer couldn’t hurt, either, and make broth-brewing so much easier.
Store correctly. You don’t want to go to the work of making beautiful stock and have it go bad in the fridge. Trust me. I have done this before. More than once. No longer! Now I immediately decant the broth into single-serving glass or BPA-free, freezer-safe containers and store away. I keep a few in the fridge for use within the following two or three days, but most go directly into the freezer. Broth really should be used within three or four days or it starts to spoil. You can taste this, too, which makes the entire broth diet experience a bad one. Trust me.
Get some guidance. I am running a bone-broth cleanse in October, when the weather cools down. If you’d like guidance in doing a broth diet in a healthy, nutrient-packed way—that won’t affect your blood cholesterol levels, make your skin dull or affect your thyroid— stay tuned!
Chicken Broth
Makes about 3 quarts
This is a great beginner’s recipe, one that will create a lovely chicken broth that can be used for a cleanse or to enjoy daily. It is also wonderful for cooking with. As you get more advanced, feel free to add in bones you’ve saved from T-bones, pork shoulders, chicken wings, and so on, that you’ve saved in an air-tight container in the freezer. I always use a mix of saved bones when I make broth.
About 4 quarts water
1 (4-pound) chicken, whole; or the carcasses of two or three chickens (parts or whole, such as from a rotisserie chicken)
1 medium onion, peeled and quartered
2 medium carrots or parsnips or a large sweet potato, quartered,
2 stalks celery, quartered
1 teaspoon whole black peppercorns
1 to 3 tablespoons salt (start with one tablespoon and adjust with more at the end of cooking)
Optional: The green part from leeks or scallions (as many as you’d like; just make sure they are clean!)
Optional: Parsley stems, thyme sprigs left whole, fennel fronds, bay leaf
Optional: One apple, halved
Place ingredients in a large stockpot and cover with about 4 quarts of water. (I never measure this. Instead, I just add water until all ingredients are covered by about an inch.)
Place pot over high heat, add cover and cook until it comes to a rolling boil.
Reduce the heat to a very low simmer and cook for four hours. If you feel ambitious and happen to be in the kitchen, feel free to skim off any fat that collects on the top during cooking. I personally leave the fat, but some people don’t like it.)
Turn off heat and allow broth to cool in the pot for up to two hours.
Carefully strain out the solids. You can use a spider or other type of strainer and remove solid material. (I feed the boiled chicken to our dog and cat—but you can do what you will with it. The veggies are best composted.) Or you can pour broth into a colander that has been set over a large bowl.
Decant broth into 1-cup serving containers to use for daily drinking, in a cleanse, or to cook with. Or, if you’ll be using the broth for cooking, go ahead and pour into larger containers.
Store any broth you need for the upcoming three days in the fridge. Everything else should be placed in the freezer.
August 17, 2016
Chocolate + Cherries
How is summer treating you? I’m having a great time enjoying the season’s slower pace, writing my next book and continuing my work with clients. Oh, and hanging out with my family. In fact, one of the highlights of my summer has been driving from my home in NYC to Ludington, MI (on the Western shores of Lake Michigan). I’ve got family in Michigan—every year we go, stay on the lake and sample the local foods. One of our Michigan favorites? Cherries!
In Michigan, folks use this gorgeous stone fruit in everything from burgers to smoothies. Whether the sour variety or sweet, the light Queen Anne types to the deeply colored Bing varieties, you’ll get fiber, minerals, and antioxidants (such as anthocyanins, flavonoids thought to protect against cancer and improve heart and brain function).But I’ve got to admit, one of my favorite ways to enjoy the fruit is this elegant recipe.
CHOCOLATE CHERRIES
Chocolate Cherries is a take on two confectionary favorites: candy-box cordials and dipped strawberries. Use fruit that still has its stems for easier dipping. If you can’t stand the thought of pits, feel free to pit the cherries first: The finished product won’t be as elegant, but it will make for easier eating.
Ingredients
2 cups sweet cherries
1.5 ounces melted organic dark chocolate (feel free to use milk chocolate, though you won’t get the hit of antioxidants you would with dark chocolate)
Directions
1. Dip the lower half of each cherry in chocolate. Allow excess chocolate drip off.
2. Transfer to a parchment-lined baking sheet and refrigerate about 20 minutes.
Enjoy!
Much love,

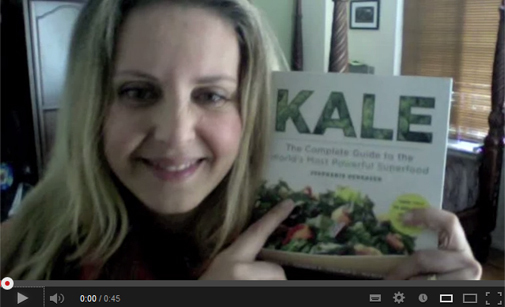
P.S. In celebration of Kale: The Complete Guide To The World’s Most Powerful Superfood I have gathered up some of my favorite superfood cookbook and health authors. I am hard at work creating an online learning event with these superfood rockstars where you can learn everything you want to know about using superfoods to get and keep you slim and healthy. Look for announcements in upcoming newsletters.
KALE IS SEXY!
I have a story: When I was working as a copy and marketing writer at Institute of Integrative Nutrition, one of my responsibilities was to interview program graduates for the Alumni section of IIN’s website. One of the questions I asked everyone was: What is your favorite healthy food?
Guess what food 197 out of the 200 IIN grads I interviewed named as their fave? Kale!
It could be because kale is delicious. It’s versatile. It does amazing things for your skin. It is detoxifying, making it great for green juice and smoothies. One cup of kale contains 36 calories, 5 grams of fiber, and 15% of the daily requirement of calcium and vitamin B6 (pyridoxine), 40% of magnesium, 180% of vitamin A, 200% of vitamin C, and 1,020% of vitamin K. It is also a good source of minerals copper, potassium, iron, manganese, and phosphorus.
If you love kale as much as I do, this recipe is for you. If you do not love kale at all, this recipe is also for you! It comes from page 119 of my latest book, Kale: The Complete Guide to the World’s Most Powerful Superfood, published by Sterling Publishers and available now on Amazon
Garlicky Kale and Spinach Dip
Makes 1 1/2 cups
This glorious dip is vegan, low-cal, and filled with antioxidants and powerful phytonutrients. Make this often—it’s as delicious as it is virtuous.
Ingredients:
1 bunch kale, washed and tough stems removed (about 7 ounces)
1 bunch spinach, washed and tough stems removed (about 5 ounces)
2 medium garlic cloves, peeled
3 tablespoons toasted pine nuts (feel free to play with other nuts or seeds)
4 teaspoons balsamic vinegar
1/3 cup extra virgin olive oil (feel free to play with walnut or hazelnut oil and add more or less oil as desired)
Directions:
Bring a large pot of salted water to a boil. Prepare an ice water bath by filling a bowl halfway with ice and water; set aside.
Add kale and spinach to the boiling water and cook until wilted, about 2 minutes. Remove from the boiling water and plunge into the ice bath. Once the greens are cool, remove them from the icebath, shake off any excess water, and place in the bowl of a food processor.
Add garlic, pine nuts, and vinegar and, while puréeing, slowly pour in the oil. Continue puréeing, stopping to scrape down the sides of the bowl with a rubber spatula as necessary, until all of the oil is incorporated and the mixture is smooth, about 4 minutes. Season with salt and serve.