
Tim McGiven's Blog, page 11
November 4, 2024
How to Quickly Write a Blog Post Outline (Template)
Imagine you’re sitting in your favorite coffee shop. Your latte is hot, your laptop is open, and you’re ready to write your next brilliant blog post. Where others see a blank page, you see a limitless sea of possibility, waiting to be filled with your persuasive prose and captivating copy.
You start tapping away at the keys, sipping your coffee, thrilled with your progress.
Then you try reading what you’ve written and realize it’s hard to follow. In fact, you’re not exactly sure what you’re even trying to say. If you’re confused, your readers will be confused too. The awesome article you hoped to write is turning into a mess.
Where did you go wrong? You started writing without creating an outline first.
It’s an easy mistake to make. Fortunately, it’s also a mistake you never need to make again. We’re going to show you how to create effective blog post outlines that will help you write better articles more quickly. Plus, we’ll give you a copy-and-paste template to make the task even easier.
Table of Contents:
The essential elements of an effective outlineStep 1: Figure out your topicStep 2: Figure out your angleStep 3: Determine the format for your postStep 4: Figure out the main points of your postStep 5: Nail down the specific subpoints you’ll make in each sectionStep 6: Think about your conclusionStep 7: Review the structure of your outlineAn example blog post outline you can followUse this copy and paste templateWhen should you write an outline?Does it ever make sense to skip an outline?Now you’re ready to make your writing life easierThe essential elements of an effective outlineBlog post outlines are simple documents that describe the angle and structure of your article. They make it easier to write clearly and efficiently while staying focused on your topic. At a minimum, a good outline should include the following items:
Your topic: What are you writing about?Your angle: What’s your perspective on that topic?Your structure: What specific points will you make to support your angle?You can also include working titles, though some writers prefer to write headlines after their post is finished. This helps make sure your selected headline actually fits the finished article.
Different writers have different approaches to creating outlines. Steal this process to get started, then feel free to adapt it to fit your own needs.
 Photo by Suzy Hazelwood on Pexels.comStep 1: Figure out your topic
Get specific with what you want to write about.
Let’s say you want to write about your most recent vacation. You had an awesome time and you’re sure your readers want to hear about it. But rather than summarizing the entire trip, you want to share a story about something specific. You could start narrowing down your topic by asking:
These are simple questions but there is a purpose to this exercise. I’ll share some example answers from an actual vacation my wife and I went on:
Where: Acadia National Park in Bar Harbor, Maine.Why: To see the fall colors, to see a state we’ve never been to before, and to see where the sun first rises in the United States.When: In the fall (to see those leaves along the mountainside turning colors).How: Plane and two rental cars (the first car got hit by a semi-truck).What we did: All kinds of stuff! Hiking, climbing, catching lobsters in a net, and more.From this simple list, you can see there are a ton of topics I could write about. What happens when you get into a vehicular accident with a rental car on vacation (and how did we survive)? What’s it like taking a tour on a lobster boat? What does it look like when the leaves hit peak fall colors in New England?
Suddenly, our blog post about a vacation just got a lot more interesting, and it might actually turn into multiple different blog posts on specific topics that people might enjoy. By asking yourself the five W’s (what, when, where, why, and the honorary 5th W, how), you can break down any broad topic into more specific points too.
If you need a spark of inspiration, here’s over 100 ideas for blog posts you can borrow.
Anyone can copy content they’ve found through Google but not everyone can bring a unique perspective to their topic. That’s where developing an angle for your blog post comes in.
An angle is the intersection of your topic and your perspective. It’s part of what blog post introductions are intended to establish, helping the reader to understand not only what they’re about to read, but why they should care about it in the first place.
For example, to continue with the vacation example from the previous section, let’s say our blog post is about Acadia National Park. Some good angles might include:
Why is Acadia National Park the best place to see the fall colors in New England?What do you wish you knew before tackling the toughest trails in the park?Where is the best destination to find a lobster roll near the park?These angles not only address the topic but also the perspective. Instead of dry facts and information, they give the reader an incentive to care, and they’ll be more likely to click, read, and stick around the blog. That’s the power of having an angle.
Step 3: Determine the format for your postDifferent topics will lend themselves more easily to different formats. Here are some types of posts you could consider and when each one might make the most sense for your article:
Type of blog postBest suited for these types of topicsExample headlineHow-toInstructional guide on completing a task or learning a skill.How to Get Started With Mountain ClimbingWhat-isAn extended definition of a term or topic.What is the Most Difficult Mountain to Climb?Why-isAnswering a question that people commonly ask (or perhaps don’t ask often enough).Why is [PRODUCT] the Best Option for [TASK] When Mountain Climbing?WhenInforming readers about what to do in a given set of circumstances.When Should You Avoid Mountain Climbing If You’re Unsure About the Weather?EssayWriting about a personal experience.What I Learned From Climbing a MountainReviewCovering a product you’ve used or want to recommend.Why I Recommend [PRODUCT] for Mountain Climbing ListRounding up your favorite things or options within a category or topic.10 Things You Should Know Before Mountain ClimbingComparisonStacking two products or options against one another.[MOUNTAIN A] vs. [MOUNTAIN B]: Which One Should Beginners Climb First?InterviewSharing a Q&A with an individual or a feature article based on an interview.A Conversation With a Famous Mountain ClimberFeature ArticleDeep dive into an interesting story based on interviews and research.The Interesting Story About the World’s Best Mountain ClimberThere are more types of blog posts that could consider writing, but these are some ideas for common formats that you might choose. What matters most is that you understand which one you are writing before you begin, rather than getting too deep into your post, and realizing that you need to change direction after you have already spent time working on a draft.
If you do decide to pivot or start over, that’s okay too. This process is only meant to avoid that from happening, but there’s no shame in changing your mind.
Step 4: Figure out the main points of your postOne blog post isn’t enough to cover everything about our vacation, so we’ve narrowed down one specific topic. We’ve also narrowed down an angle that combines our topic with our perspective. Next, we need to identify the main points that our blog post needs to make, in order to follow through on our angle.
In order to construct our outline, we’ll identify three to five points we want to make (you can include as many as you need, but if you have fewer than three main sections in your blog post, you might not need to write an outline).
Going back to our vacation example, let’s say I’m writing about what I wish I knew before hiking in Acadia National Park. Here are some things I might want to cover:
Know your skill level and choose trails accordingly. Make sure you have the right footwear for the terrain.If you’re afraid of scaling rock faces, how can you overcome that fear?If you only have enough time for a few trails, which ones should you prioritize?What times are the trails usually the most crowded?That looks like a solid list. Next, we’ll need to figure out what we’ll say for each of these items.
Step 5: Nail down the specific subpoints you’ll make in each sectionOnce you have the main points of your blog post mapped out, think about what you’ll say for each one. This can be as simple as two or three bullet points per section.
Let’s take the first item from the list of trail tips in the previous section:
Know your skill level and choose trails accordinglySome trails will stretch your abilities but some are for experts onlyYou can get a trail map that will help you find ones you’re comfortable withDifficult trails sometimes have alternate routes you can take if you get tiredStraightforward stuff, right? Continue with each subsection until you have two or three subpoints for all of them.
Step 6: Think about your conclusionGenerally speaking, a conclusion should wrap up the main points of your blog post, and bring your topic to a resolution. But there may be other details here to consider. Take a moment to think through the following:
Is there a specific action I’d like the reader to take after reading the post, such as signing up for emails, making a donation, purchasing a product, or registering for an event?Is there a specific point you really want to drive home before the reader moves on?Are there other similar articles on your blog that you could direct the reader toward (and continue to hold onto their attention)?It’s okay if the answer to one or all of these questions is “no,” but it’s worth taking the time to be intentional about how you’ll end your post.
Step 7: Review the structure of your outlineFollow steps one through four, and before you know it, you’ll have a completed outline. Take a moment to read it over and make sure your angle fits your topic and everything flows in a logical order. If it doesn’t, try moving some sections around, and see if it clicks. The time you spend on this now can save you much more time later.
An example blog post outline you can followNow, let’s take a look at an example outline you can follow. Here’s what the finished product might look like when it’s all said and done:
Headline: Five Things I Wish I Knew Before Hiking in Acadia National ParkFormat: ListIntroduction (angle): Acadia National Park is a great place to hike, but it’s even better when you know what to be prepared for. Here’s my personal experience.Tip 1: Know your skill level and choose trails accordinglySome trails will stretch your abilities but some are for experts onlyYou can get a trail map that will help you find ones you’re comfortable withDifficult trails sometimes have alternate routes you can take if you get tiredTip 2: Bring the Right FootwearGood hiking boots are a must on most trailsHowever, decent sandals may be sufficient for some trailsBring multiple pairs of boots and shoes for different situationsTip 3: Overcome Your Fear of Treacherous TrailsSome trails will take you up rocky portions of mountainside on very narrow walkwaysThey are safe as long as you’re careful (just don’t look down)The rewards are worthwhile when you see the views from the topTip 4: Prioritize Trails to Make the Most of Your TimeIf you know there are certain types of scenery you want to see the most (mountains, forest, ocean, etc.) choose trails that provide those types of terrain and viewsTip 5: Hike at Off-Peak Hours (If Possible)The park is very busyConsider hiking in the early morning or evening to beat the crowdsTiming your trip outside of peak vacation season can also help alleviate crowdingConclusionEnd with a link to the park’s website to find more informationThis is a very quick and simple outline but it’s sufficient for demonstration purposes.
Use this copy and paste templateNow that we’ve walked through the entire process of crafting an outline, here is an easy-to-use template that you can copy and paste into a document. You can edit and update this template however you’d like (some suggestions might be to add sample headlines or a brief two or three-sentence section describing your angle):
Introduction (what’s the angle of this post?)Type of Post:Main point 1Subpoint 1Subpoint 2Subpoint 3Main point 2Subpoint 1Subpoint 2Subpoint 3Main point 3Subpoint 1Subpoint 2Subpoint 3ConclusionOptional CTA When should you write an outline?If you landed on this article, then odds are you already knew you wanted to write a blog post outline. But you might still have some questions about why we actually take the time to write them in the first place.
Personally, I know some writers who are meticulous about outlining, and some who skip them entirely. Sometimes you just want to let your consciousness flow onto the page and sometimes that can produce great writing that can’t be planned. I’ve even bounced between being in both camps, sometimes choosing to write outlines, and sometimes choosing to skip them.
So, when does it make sense to put one together, and when can they safely be skipped? Here are some thoughts based on personal experience:
You’re writing a long-form post (approximately 1,000 words or more).You’re writing about a complex topic that requires a lot of research to accurately cover.You’re assigning a post to another writer for your blog and need to make sure they understand what you want the post to touch on.Does it ever make sense to skip an outline?The point is to clarify your thinking so you can clarify your writing and produce better content more quickly. However, the point is not to follow rules for no reason, and there are times when it may not be necessary to write an outline.
For example, if you’re writing a personal essay for your blog, you might prefer to let your thoughts flow in a more stream of consciousness sort of way. Or if you’re crafting a short news blurb, you could probably write your entire post in the time it’d take to outline it. Use your own judgment, because when it comes to learning what works for you, experience will be your best teacher.
Writing outlines doesn’t have to take too much time in order to be an effective exercise. Once you get into the habit of writing them before starting on blog posts, and start to see the benefits of doing so, you won’t want to break the habit. Now, go forth and write better blog posts, faster!
Ready to start your own blog? Find out why more bloggers and creators choose WordPress.com. Start your journey here.


October 31, 2024
5 Powerful Gutenberg Blocks for Developers to Create Custom Layouts
In the world of web development, creating custom layouts often feels like a balancing act between functionality and design. But with Gutenberg, WordPress’s powerful block editor, developers now have the tools to craft complex, unique layouts—all without the need for third-party page builders. Whether you’re building a site from scratch or looking to enhance an existing one, Gutenberg offers a streamlined, flexible approach to layout design.
In this post, we dive into five specific Gutenberg blocks that stand out for their versatility and power.
Group Block : Allows you to group multiple elements and apply consistent styling across them. Columns Block : Enables developers to create multi-column layouts that are fully responsive across all devices. Cover Block : Combines visuals with layered content, like text and buttons, to create immersive, standout sections. Spacer Block : Provides an easy way to manage consistent spacing throughout a layout without adjusting individual block settings. Query Loop Block : Dynamically displays lists of posts or other content, offering flexible filtering and layout options.These blocks are essential tools for developers who want to create custom layouts that are both visually stunning and fully functional. Keep reading to explore how each block works, see examples of them in action, and learn about potential use cases that can elevate your next project.
Unlock Custom Layouts with the Group BlockWhen it comes to crafting custom layouts in WordPress, the Group block is one of the most versatile tools in your arsenal. This block allows you to combine multiple elements—such as text, images, and buttons—into a single, cohesive section. By grouping elements together and utilizing the Group block variations, you gain greater control over their positioning, styling, and responsiveness.
Why the Group Block is PowerfulThe strength of the Group block lies in its ability to simplify your design process. Instead of having to adjust settings on each element individually, the Group block allows you to apply consistent styling to an entire section. This not only saves time but also ensures that your layouts are cohesive and visually appealing across different devices. It’s also the primary block used for creating fixed elements, such as a sticky header or sidebar.
How to Work with the Group BlockIn the screen recording below, you’ll see how the Group block enhances the process of building a hero section by combining elements like images, text, and buttons into one cohesive section. Notice how easily you can adjust the spacing, colors, and alignment, streamlining your design workflow.
Putting the Group Block into ActionThe Group block excels at creating reusable modular sections, such as a call-to-action or feature area, that can be deployed consistently across multiple pages. This block is also essential for organizing complex content arrangements into a single, unified section that can be easily updated site-wide. Whether you’re crafting a sticky header or organizing a product showcase, the Group block gives you precise control over how these elements are positioned and styled.
Design with Flexibility Using the Columns BlockThe Columns block offers flexibility in organizing content side-by-side, allowing developers to create multi-column layouts that can accommodate grids, comparison sections, or any layout where parallel information is key.
Why Developers Love the Columns BlockThe true power of the Columns block lies in its versatility for designing structured layouts. Its flexibility allows you to customize the number of columns, their width, and spacing, from simple two-column layouts to more complex grids. The Columns block is also fully responsive, ensuring layouts automatically adjust across different screen sizes, providing developers with seamless control over visually balanced designs.
See the Columns Block in ActionThis recording showcases the Columns block used to create a three-column layout featuring services or products. Notice how columns with multiple components can be duplicated and edited.
When to Use the Columns Block for Maximum ImpactThe Columns block is ideal when content needs to be displayed side by side, such as in service comparisons, product grids, or team member profiles. Combining it with the Group block allows for more complex, unified sections with consistent styling while still leveraging the flexibility of columns.
Create Stunning Visual Impact with the Cover BlockAfter organizing your content with the Group and Columns blocks, the Cover block steps in to add a bold, immersive visual experience. Whether it’s a full-width section with a background image or a full-screen video, the Cover block helps create standout moments on your page, perfect for grabbing your audience’s attention as they scroll.
Why the Cover Block Stands OutWhat sets the Cover block apart is its ability to combine beautiful visuals with layered content like text and buttons. This block allows for a sleek, modern look with customizable overlays, and its parallax effect creates a sense of depth as users scroll. It offers developers a visually striking way to engage visitors and direct attention to key content.
How to Use the Cover Block as a Section BreakThe following video demonstrates the Cover block being used to create a dynamic section break with a full-width image, overlay text, and a contrasting color filter. Pay attention to how this visually striking break guides users from one section to the next.
Where the Cover Block ShinesWhether for a hero section, a banner to break up sections, or a feature area to emphasize important content, the Cover block works best where you want to make an impression. It’s ideal for landing pages, events, or promotional areas where a mix of powerful visuals and actionable text is needed to guide visitors toward their next step.
Create Balance and Breathing Room with the Spacer BlockFor developers, clean, balanced layouts are crucial to a great user experience. The Spacer block might seem simple at first glance, but its ability to fine-tune the spacing between elements gives you precise control over your design. Rather than manually adjusting margins or padding across multiple blocks, the Spacer block offers a streamlined approach for maintaining consistency throughout your layout.
Why Developers Choose the Spacer BlockOne of the key benefits of the Spacer block is its ability to apply consistent spacing without needing to modify each block’s individual settings. For developers managing complex layouts, this can be a huge time-saver. You can insert Spacer blocks between sections to ensure consistent spacing, avoiding the need to repeatedly jump between block settings. This results in a cleaner workflow and a more polished design.
Simplifying Layout SpacingThis clip highlights how the Spacer block ensures balanced spacing between sections. You’ll see how adding Spacer blocks keeps the layout clean and cohesive without needing to adjust individual padding and margins for each element. Plus, see how changing the height of multiple Spacer blocks is one step when you create a Spacer synced pattern.
Where the Spacer Block Adds EfficiencyThe Spacer block shines when you need to maintain uniform spacing throughout a project. You can preset its default dimensions or sync it within design patterns, and any future adjustments can be done in one place, saving you time when managing entire page or site-wide updates. For added flexibility, you can apply custom CSS classes to synced Spacer block patterns, making it simple to adjust spacing for different screen sizes. This not only improves the speed of implementation but also ensures consistency across your layouts, whether for landing pages, posts, or custom templates.
Dynamically Display Content with the Query Loop BlockThe Query Loop block allows you to easily pull in lists of posts, pages, or custom post types, dynamically displaying content based on specific parameters such as categories, tags, or author. It’s an essential tool for developers who want to showcase content in customizable layouts without needing to manually curate each section.
Why Developers Rely on the Query Loop BlockThe Query Loop block provides developers with powerful filtering and display options that are fully customizable. With complete control over how posts are pulled and arranged, developers can customize the Query Loop block to display filtered content based on categories, tags, or other criteria, allowing for tailored blog grids, portfolios, or archive pages that fit seamlessly into their overall site design.
Creating and Enhancing a Custom Query Loop LayoutThis example shows how the Query Loop block is configured to display a custom set of blog posts, filtered by category. Notice the versatility and how integrating blocks together enhances the layout, resulting in a dynamic, visually balanced blog section that updates automatically.
Where the Query Loop Block ShinesOn sites with frequently updated content, the Query Loop block provides a dynamic solution for showcasing new material. When integrated with other blocks it helps developers create visually engaging layouts that update automatically while keeping a consistent design structure.
Elevate Your Layouts with These 5 Powerful BlocksThese five versatile Gutenberg blocks—Group, Columns, Cover, Spacer, and Query Loop—can transform your layouts, helping you build dynamic, fully customized designs. Whether you’re creating responsive multi-column sections with the Columns block, adding visually striking breaks with the Cover block, or displaying dynamic content with the Query Loop block, these tools empower you to build and refine layouts with precision and creativity.
Each block offers unique strengths, and when used together, they give developers a powerful toolkit to craft sophisticated designs directly within the WordPress editor. By combining these blocks, you can streamline your workflow, maintain consistency, and create layouts that are both visually appealing and highly functional.
Try It Yourself!Now it’s your turn. Experiment with these blocks in your next project and explore the different ways they can work together to create custom layouts tailored to your needs. In the comments below, share your unique Gutenberg-powered layouts and show us how you’ve applied these blocks to your projects. We’d love to see what you come up with!
October 29, 2024
Meet the Studio Assistant: Your Smart Companion for Building WordPress Sites Locally
Get ready to meet your new development best friend: the Studio Assistant.
The Studio Assistant is a smart chatbot integrated within Studio, our free and open source local development app, and it’s now available for all Studio users to assist you in building WordPress sites effortlessly.
The Assistant leverages WordPress.com infrastructure and our WordPress knowledge base to provide helpful responses using Retrieval Augmented Generation, so you’ll get tailored-to-WordPress responses every time.
Download Studio for freeYour handy development companionBuilding WordPress sites locally has never been easier. With the Studio Assistant, you can quickly configure new sites, manage existing sites, and run complex WP-CLI commands—all through a simple and intuitive chat interface.
Check out what the Assistant can do directly within the Studio app:
Why you’ll love the Studio AssistantThere are many reasons to love the Studio Assistant, but here are just a few:
You can speak to the Assistant in any language, and it will respond in the same language, so that you can learn in the language that’s best for you.The Assistant gives you the ability to open site files with just one click, so you won’t need to go digging in your site files manually.The Assistant uses context about your specific site (like what themes and plugins are installed) to give you tailored responses and suggestions.But seeing is believing, right? Here are some exciting use cases for the Assistant:
Ask and discoverSay you’re looking for an SEO plugin but are unsure of your options. Ask the Assistant, and you’ll get specific recommendations.
 Code and content blocks written for you
When you ask the Assistant to write posts or code, it will provide you with Gutenberg blocks or code that you can simply copy and paste.
 Tailored to your site
Moreover, the Studio Assistant is trained on WordPress-specific documentation and has access to a bunch of context about your site; therefore, it’s able to respond with site-specific information and recommendations.
 WP-CLI commands with just one click
The Assistant is extra slick because you can run commands inline, removing the steps of installing WP-CLI and running commands in your terminal––simply click Run, and your recommended commands will be run for you:
 Elevate your expertise
You’ll also get a handy output about what the suggested commands do, helping you learn as you use the tool. This aligns with our desire to continue giving developers more ways to level-up their development skills and knowledge.

And if that isn’t enough to convince you to incorporate the Studio Assistant into your development workflow, here’s what Hoang Hxn said after he got early access to the feature:
Ready to get started with the Studio Assistant?After more than two months of using the Studio Assistant, it has become a great tutor that has helped me learn WordPress 100 times faster. I can ask questions in my native language, and the Studio Assistant can return Vietnamese results, in both complex terms and simple, easy-to-understand language for beginners like me.
In addition, I can execute CLI commands directly and quickly without knowing the technicalities, and I can create sample posts and pages quickly. I can also ask questions for beginners (like “what is the purpose of WordPress plugins?”) without being afraid that they’re “too beginner.”
The Studio Assistant answers these basic questions quickly, accurately, and directly in the Studio app; it prevents me from having to go to forums and wait for my questions to be answered.
We thought you might be.
Start leveraging Studio Assistant’s powerful capabilities in just a few steps:
Download and install Studio––for free on Windows and Mac.Login with your WordPress.com account (free or paid).Create a new Studio site.Click on the Assistant tab.Start chatting.Let us know what you think!We’re thrilled to finally share the Studio Assistant with you. We’d love to hear about some of the tasks you hope to automate with the Studio Assistant in the comments below.
As a reminder, Studio is a free, open source tool, so we welcome any and all feedback in GitHub. Explore other Issues and create your own here.
You can also explore the Studio documentation for more tips on using the Assistant.
Download Studio for freeOctober 28, 2024
Why Your Favorite Recipes Come with a Side of Story
If most food bloggers had their way, a recipe blog post would likely be simpler—a few images, a short introduction with helpful tips, and the recipe itself. Sadly that’s not the reality of the internet today with flashing ads taking over your screen while you’re up to your elbows in focaccia dough. But it hasn’t always been that way.
In the beginning, think early aughts, food blogging was entirely disconnected from ad revenue and Google’s algorithmic whims. Most food bloggers then were in fact food writers, using an online audience to develop their voice and share a much-loved recipe.
There were so few recipe publishers, we hung onto their every word and looked forward to each new post—100% ad-free. A few would get cookbook deals or become contributors to our favorite food magazines. We giddily followed them off the screen and into print. It was the golden age of food writing.
Modern recipe publishingThen came the flood. Aspiring food bloggers popped up in droves, eager to replicate the success of what those early pioneers had made look so effortless. Along the way, the terrain had shifted dramatically.
You need to be more than just a great recipe developer and writer now—you need to be a professional photographer, videographer, food stylist, marketer, and SEO expert. If you could do it all, and do it well, you could make a very comfortable living from your home kitchen.
All of this expertise from one person requires a lot of time and financial investment. Beyond the basic costs of running a website—like hosting, recipe plugins, and software—there’s the need for high-end camera equipment, online courses, and endless food styling props. For new bloggers, these expenses add up fast.
Today, crafting a single recipe optimized for both Google (more on that below) and social media can easily take over 20 hours. And that’s before you’ve even nailed down a version of the recipe that’s consistently reliable and simple to follow.
As the saying goes, time is money. Enter ad placements—the lifeline that generates the revenue food bloggers rely on to keep the lights on.
How food bloggers earn moneyThis is where RPMs come in, aka the soft, gooey center of why food blogs can seem so tediously long.
For food bloggers, ad revenue is based on RPMs (Revenue Per Mille), which is the amount earned per 1,000 sessions. This amount can fluctuate based on a number of factors, including time of year, device, traffic source, time on page, and ad density. Ad density is one of the few factors a blogger can control and plays a big role in boosting RPM—more ads mean higher earnings and longer posts create more opportunities for ad placements. More content, more ads, more revenue!
But it’s not as simple as it sounds. There are millions of food blogs, and only a small percentage are highly profitable. Early-stage food bloggers are often fueled by sweat equity, working hard in hopes of eventually breaking into the top tier of high-earning bloggers.
To qualify for some of the larger ad networks, food bloggers need at least 100,000 monthly pageviews. With that level of traffic, a food blogger might earn between $2,000 and $3,000 per month, or around $24,000 to $36,000 annually. Longer posts can drive up those RPMs.
The ad networks were primarily responsible for this initial push to longer posts, even if you were just waxing poetic about your weekly trip to Costco while losing sight of that blueberry muffin recipe your readers are after.
Then Google said enough. We’ll reward the sites that demonstrate expertise, through a combination of high-quality, relevant content and author credibility—aka the helpful content update.
Nowadays, personal stories have largely given way to detailed instructions and practical tips, such as where to buy the author’s go-to Thai curry paste online (which, of course, will be an affiliate link—because yes, food blogging is a real job, and bloggers need to earn a living too).
This added information above the recipe serves two main purposes:
First and foremost, to ensure even the most inexperienced home cook feels confident following the recipe.To provide Google with plenty of tasty SEO tidbits to boost the recipe’s ranking in search results.Better rankings lead to more traffic—and more revenue.
Advice for food bloggersIf you’re a food blogger trying to maintain the delicate balance between performing well in search and keeping your readers happy, do your best to ensure that the content above the recipe card offers value to your readers.
Here are some suggestions for relevant content to include:
Ingredient substitutionsDietary considerations (can this recipe be made vegan or gluten free?) Where to find uncommon ingredientsPreparation tips, along with process shots Storage, freezer, and meal prep tips Alternative methods, like Instant Pot or slow cooker variations Recipe FAQsWith literally millions of food sites to choose from, think of personality as the sprinkles that set you apart, but relevant content is what establishes your expertise and keeps readers coming back for more.
Even John Mueller, who coordinates Google Search Relations efforts, recommends making content for your readers first. What makes you, your recipe, and your corner of the internet unique, helpful, and relevant?
 How to support online publishers
Food is a highly personal topic, filled with memories and experiences food bloggers are generous enough to share. Whether they’re helping us recreate a beloved restaurant dish at home or offering a comforting family recipe, they’re here to guide us every step of the way.
Now that you’ve gotten a glimpse behind the scenes, here are a few ways you can support the recipe publishing community:
Leave a review after trying the recipe—it helps others and gives valuable feedback to the creator.Share any tips or questions that might help fellow home cooks.Remember your dinner party manners when commenting—be kind and respectful, even if the recipe didn’t turn out as expected. Spread the word by sharing a recipe you love with friends and family.Make the recipe and post about it on social media—bonus points if you tag the author!Let those video ads play while you gather ingredients. You can close them afterward, knowing you contributed to the creator’s RPM. Be patient with ads, especially during Q4 (the last three months of the year). This is when bloggers earn the most—RPMs spike, traffic increases, and ad placements get more aggressive.If you find ads and anecdotes distracting, simply use the “Jump to Recipe” button at the top of most recipe posts. It’ll take you straight to the recipe. While you may still encounter a few ads within the recipe card, it’s a small trade-off for a well-written, free-to-you recipe.
For a completely ad-free experience, consider buying a cookbook, a paid recipe subscription service, or better yet—give your grandma a call. She probably has a recipe and a story you’ll love, and let’s face it, you’re probably overdue for a chat.
Start a food blog on WordPress.comStart sharing your favorite recipes with a blog hosted on WordPress.com.
Run ads and install plugins on our Business plan, and let us manage the rest. Get unlimited traffic, unstoppable security, and the power of WordPress, all for one low price.
Get WordPress.com hostingOctober 22, 2024
How to Get Web Design Clients: 12 Practical Tactics That Work
One of the biggest struggles in the life of a freelance web designer or developer is figuring out how to get web design clients – especially at the beginning of your career. It can be frustrating when you’ve spent a lot of time honing your skill set, educating yourself, and staying on top of the latest trends, and yet your client roster stays empty.
Failing to find clients can be very disconcerting. Not only do you not know where your next paycheck will come from, it can also introduce self-doubt. You might start questioning whether striking out on your own was the right choice after all and if you have what it takes.
Luckily, there are plenty of things you can do to build a clientele for your services, and in this post, we’ll share them in detail. Below, you’ll learn 12 ways to get web design clients that will want to work with you (along with tips on how to implement each idea). From understanding business basics, to reaching out to prospects, to closing deals, you’ll find everything you need to start landing clients here.
Tip: Are you an agency developer interested in partnering with Automattic? Apply to join Automattic for Agencies.
1) Determine your web design niche
There is an old marketing adage that says, “if you try to appeal to everyone, you end up appealing to no one”. In this case, it means that simply providing “web design” is too broad an offer. Most of the time, it’s more effective and lucrative to cater to a specific clientele who you create websites for.
Why?
For one, doing so allows you to target your marketing much more specifically. You can address the needs of a certain target group and speak to their pain points directly instead of very generally.
Imagine you are a mental health provider. Which web design offer would you rather go for?
It’s most likely the second one, right? That’s because it is a lot more targeted.
Focusing your offer increases your credibility and the perception of the value you can provide. It allows you to position yourself as an expert and charge accordingly.
In addition, niching down means you compete with fewer people. Instead of all “web designers,” now you only contend with “web designers for industry X.” That group, by definition, is much smaller.
However, what target group should you go for? The best niche is one that is made up of both something that you enjoy and in which there is a clientele willing and able to pay.

To figure it out more specifically, it’s a good idea to look at both your past work and what you do in your free time. First, consult your portfolio. Think about what projects you enjoyed doing the most.
In addition, consider which hobbies or personal passions you indulge in and the industries you interact with in those endeavors. For example, you might have built a website for a dental lab in the past, and you also like to knit, surf, and do CrossFit.
Now it’s time to see if any of these industries offer enough earning potential to become your niche. In this case, knitting is probably not a good fit. However, dentistry, surfing, and CrossFit are all niches with members who likely have a large enough marketing budget to be profitable.
Once you have decided on your niche, what’s left is to research it extensively. Get to the point where you really understand your clientele and their needs. Become the expert they need you to be to help them achieve their website goals.
2) Establish your pricing for web design projectsThe next step is deciding on your pricing. It’s much easier to negotiate for a new project when you have thought about what you want to offer and how much you will charge for it beforehand. Otherwise, when put on the spot, you might not know what to say. Plus, you need to make sure you get paid what your services are worth.
The web design process has become more complex over time. A lot goes into creating a user-friendly, mobile-responsive, accessible, search-engine-optimized, and fast-loading website – which is what it takes to compete in today’s online environment. It also involves several stages, from setting up the site architecture over wireframing to testing.
In addition, a website is one of the main considerations for most businesses these days and one of the main ways of presenting themselves. Therefore, you are not simply providing a website; you are building a business asset for them.
Plus, it’s not just the design and programming work; you also offer strategic advice for marketing their business online (at least, if you have done your homework earlier in step one). This might include creating the branding, writing copy, and helping with a content strategy.
You can determine your pricing for a project by following this process:
List all the steps required for to complete the project (ex: research, wireframing, design, copywriting, etc.).Estimate how much time you anticipate each step will take. ProjectManager has a great guide on how to do this.Determine the hourly rate for your labor.So, how much should you charge?In the end, your pricing depends a lot on how you position yourself. If you go the “I am a freelance web designer” route, you can ask for anywhere from $2,000 to $5,000 for a simple website and $10,000 to $20,000 for a complex site with a variety of templates, features, and intricate functionality.
On the other hand, if you niche down enough and acquire the necessary expertise for your industry, you get to position yourself as an agency that builds bespoke web presences for an exclusive client pool. In that case, your pricing can be higher, starting at $10,000 for simpler sites and ending at $75,000+ for more complex projects.
Be sure, however, that you can back up what your price tag promises and are able to achieve the requisite results for your clients.
3) Build a strong web design business website and portfolioOnce you have settled on both your niche and price points, it’s time to build your own web presence. As a web designer, that shouldn’t be too big a challenge. However, make sure it looks the part since potential clients will likely judge your skills on your own website design.
Also, use your earlier research to gear it clearly toward your target group. That means you should consider that group’s needs for your site’s aesthetics and, most importantly, copy. Your written content will be the most persuasive tool to show them that you offer what they need. So, be sure to address their needs and pain points in your website copy.
Another crucial tool here is your portfolio. It not only allows you to stress your expertise, but it also acts as a filter for the kind of work you want to do more of. For that reason, a) show off your strongest work, b) choose examples that are relevant to your chosen niche, and c) and focus on the kind of projects you want to do.
However, what if you haven’t done any projects in your niche yet? In that case, do the best you can and try to look for portfolio items that represent the principles you are trying to sell. In short, focus all your appearance and marketing on your ideal client and work.
4) Be active on social mediaSocial media has become a ubiquitous tool to advertise your products and services. Everyone and your mom is on it by now (seriously, my mom is on more platforms than I am). It’s also an ideal environment to talk and listen to your target audience as well as work on your personal brand. Therefore, it should definitely be part of how you try to get web design clients.
A short caveat beforehand: Remember that you are not trying to close a deal with every message you put out there. Social media is about visibility, getting-the-word-out, top-of-funnel kind of stuff. So adjust your strategy and expectations accordingly.
5) Be active in web design communitiesHowever, where to start? Well, an obvious choice is to go where people talk about web design. That means Facebook groups, Slack communities, subreddits, and forums.

These are good places to take part in discussions, share your expertise, and ask for feedback.
Why should you do that in front of other web designers? Aren’t these not the kind of people who want to hire you?
Well, maybe not directly. However, being active in the web design sphere allows you to build connections and present your work. And who knows? Someone might hire you for a project they are working on.
In addition, where would you go as a potential client who is looking for a web designer? Probably a place where web designers are known to hang out, right? Therefore, taking part in those communities is also a way to get noticed for potential work.
At the very least, you can network, learn from others, and get some critique for your work.
Join communities and platforms frequented by your ideal clientsOf course, if you want to connect with people who might want to hire you, the best way is to go directly where they are. For that reason, a second step is to look for similar resources as above but for your niche and target group.
That might not always seem super easy. After all, is there an online forum for dentists? A Twitter group for accountants? A subreddit where organic grocers hang out?
The funny thing is, the answer often is – yes.

That’s one of the best parts of the Internet. It connects people with similar interests from across the world, meaning there are groups for almost any profession online. You can find them on LinkedIn and Facebook, you can search for “[your target group] + forum” on Google, subscribe to relevant hashtags, and all the other ways you would use to find members of your own profession.
Offer value, be authentic, and have a unique point of viewThe challenge in trying to get web design clients via social media is that you need to find a good balance between selling your services and simply being a pleasant and helpful person to talk to. Too much of the first, and you’ll annoy people with being too salesy, too much of the latter, and you’ll have a hard time closing deals.
The best way here is to simply be friendly, knowledgeable, and genuinely interested in helping others. Seriously, that’s what it usually comes down to.
Think about how you can create value for your target group in the easiest way. How can you help them with their problems and make their life easier? Then, do that.
Be generous with advice and input, share your opinions, be polite, and genuinely try to contribute to other people’s success. You’d be surprised at how many clients would be willing to continue a conversation about working together with a person like that.
6) Publish helpful content about web design on your blogYou have probably heard that content has been elevated to royalty. While this notion is a bit overdone, the fact is that content is a staple of inbound marketing. Consequently, if you want web design clients to come to you instead of chasing them down, you would do well to start producing content as well. That also gives you material for your social outlets.
Publish on your own blogIn most cases, blogging will be a part of content marketing. A blog is easy to add to your website, and it’s one of the cheapest marketing tools out there as it mainly costs time.

However, the most decisive part here is what to write about. Reflexively, you might want to publish articles that show what a good web designer you are. In a way, that’s what you’ll do.
However, this is not about demonstrating your skills to your peers. Instead, you need to think about problems that your target group has and provide solutions for them. This shows off your expertise, allows you to target keywords that clients will type into Google, and builds trust in your skills.
This is why settling on a niche and doing extensive research on it is so important. Instead of very general content that likely has a lot more competition, you can create articles that are hyper-focused on your defined target group. Those are usually much easier to rank for and speak directly to the people you want to attract.
Aside from that, there are other types of content you can produce:
podcastscase studiesa newsletterguest postsebooksFinally, start collecting email addresses on your blog from the very beginning. Having a good list of subscribers is one of the most effective ways to sell your services. For WordPress.com users, there are several tools and methods you can use to add email subscribers to your blog.
Syndicate your posts on Medium and LinkedInOnce you are in the habit of creating content (on your WordPress website), it’s a great tactic to repurpose and republish it in other places. Two great candidates for that are Medium and LinkedIn.
Why is that?
Because those two platforms have readership automatically built in. They have an existing user base who spend a lot of time consuming content specifically on there. For that reason, if you also post your content on these platforms (under your name, with a link back to your own website), you can reach additional readers and members of your clientele. That helps further spread your expertise and brand.

By the way, you can take this even further by repurposing your blog content into social media updates, YouTube videos, infographics, or downloadable content. You have already done the bulk of the research, now you simply need to bring it into a different format.
7) Search job boards for clients and contract workAnother classic way to get web design clients is to use job boards. They offer the advantage that you find a lot of warm leads there, meaning people actively looking for help with their web design. The disadvantage is that they can have a lot of competition. You also want to stay away from those sites that purely compete on price (think Fiverr or Guru).
Instead, here are a few resources where you can get started:
Here, too, it pays to do a bit of legwork beforehand. Research potential clients and tailor your offer towards them. Demonstrate the value you can create for them and make it easy for them to say yes.
8) Go to conferences and industry eventsIn-person meetings are another way to find client work. They are especially suited if you are more of an extrovert who thrives on interacting with others. Talking to clients directly also makes it easier to find out their pain points and discuss their needs in detail without a lot of back-and-forth emailing. If you want to take this to the next level, consider speaking at events, it’s a great way to get more visibility.
Consider business eventsMost places have business associations, such as local Chambers of Commerce, that regularly run networking events. They can be general or more specific in nature. What they have in common is that they bring people together in a business setting.

The advantage here is the same as for job boards: attendees come specifically to make business connections, so you don’t have to prime the pump too much so to speak. Everyone is on the same page, making it much easier to speak about commercial issues including offering your services.
The disadvantage is that at general business meetings, it’s harder to meet someone who actually belongs to your target group. You don’t know who exactly is going to be there, so it can be a bit of a gamble.
As usual, it’s always a good idea to be prepared. Have your business cards with you, practice your elevator pitch, and dress professionally. That makes it much easier to make a good impression.
Besides in-person meetings, there are also virtual networking events. For example, you can find them on Eventbrite.
 Attend the same networking events as your ideal customers
In order to eliminate the element of randomness, attending occasions that are specifically for members of your target group is a better idea. Doing so makes it much more likely to run into someone who needs what you are offering.
This can be a bit challenging as you are specifically there to hawk your services. However, remember what we talked about before. Don’t be too salesy. Listen to what the other person is talking about, try to uncover issues they are having with their website, and offer insights for what could be helpful. If they like what they hear, it could possibly turn into a job.
You can even think outside the box a bit. Bring your laptop and a sign offering free website reviews. Let people come to you, go over their sites together, offer your insight, and point out how you would improve their current website. It should be easy to make connections that way.
9) Consider WordCamps and WordPress conferences
It’s no secret that WordPress is the most popular CMS in the world and that it powers a large part of the web. For that reason, WordPress in-person events are a hotbed for people interested in web design and companies working with WordPress.
That also makes them a good place to make connections with like-minded people (again, for potential collaboration) as well as companies looking for expertise. This is especially true if you have made building websites with WordPress part of your niche.
In addition, WordCamps are simply a great place to meet people. You automatically have something in common with everyone there, so it’s easy to get a conversation going.
10) Email businesses you’d like to work with (that have websites that look like they need a redesign)Another way to get web design clients is to directly contact companies in your niche who obviously have needs in that area. Use business directories to find them and check out their sites.

As usual, tailor your offers to each particular case. Spend some time analyzing the websites, point out concrete things that could use improvement, then add a solution.
You can even do so in the form of a prototype or wireframe or a quick video in which you talk about their site live on screen. That’s much better than sending the same form email to everyone and, again, makes it much easier for them to say yes.
So, do your homework beforehand. In addition, be sure to follow up when you don’t hear back. Most people are very busy, so it helps to be a bit tenacious. Even if they end up saying no, at least then you know for sure.
11) Ask past clients and your network to refer you to their connectionsOnce you have the ball rolling a little bit, one of the best ways to extend your client pool is actually to ask existing clients for referrals. Word of mouth is a very powerful way to get new web design clients for two reasons:
First of all, you have instant social proof. If someone hears about you from a person they know and probably trust, that’s worth more than any third-party testimonial you can put on your website.Secondly, it’s automatically a warm prospect. We are not talking about someone you found on the Internet who has no idea who you are and receives an email from you out of the blue. Instead, it’s someone you have a personal connection with through a middle-person. Possibly even someone who asked their network for recommendations. That instantly creates a better relationship.So, make it part of your web design process to email clients after finishing a project and ask them for referrals. In fact, be sure to stay on friendly terms with them and check in now and again. That makes it more likely they will recommend you by themselves.
You can also reach out to other freelancers or people you know in the industry and ask them for referrals, even your friends and family. You can form beneficial partnerships with them and recommend clients to each other for your respective services.
12) Partner with web design agenciesA final way you can get more web design clients is to work with agencies. Many of them hire freelancers in order to increase their work pool when they have too many projects. It’s always worth getting on their list for when that happens.

When you pitch yourself to an agency, treat it with the same regard as when interacting with one-to-one clients. Make sure to send along your portfolio and tailor your application toward each agency you contact.
Plus, of course, do your best work and be as professional working for them as when doing your own projects. That way, you make it more likely that they will send more work your way.
That only leaves the question, where do you find web design agencies to pitch yourself to?
Use business directories to find agenciesSimilar to what we talked about above, there are specific directories that you can look into to find web design agencies. Two online resources for that are Clutch and Dexigner.

Both list a large number of web design companies. It’s easy to find potential studios to collaborate with and their contact information is right there as well.
In addition, look into local business directories. Working with local design companies has the added benefit that it’s also possible to introduce yourself personally and take face-to-face meetings. That’s always good for relationship building.
Or conduct a simple Google searchOf course, there is always Google. You can use the search engine to look for web design agencies for potential collaboration and easily apply your own filters like location, industry, or any other categories.
 Are you considering developing websites on WordPress.com?
A big factor in winning and keeping web design clients is the tools you work with. One primary consideration here is hosting, both for your personal website and portfolio as well as your client sites.
At this point, we want to humbly suggest considering WordPress.com for your web design projects. Here are just a few features that make us a great option for your new web design or development project:
You are free to use (custom) plugins and themes on any Business plan and above. You also get access to SFTP-SSH, WP-CLI, and Git tools.The REST API, with its plethora of endpoints, allows you to fetch a wide range of information and build applications on top of WordPress. What’s more, you can test live JSON data and explore it with the Developer Console.Use wpcom.js, the official JavaScript library for the WordPress.com REST API. It’s compatible with Node.js and all modern web browsers and allows you to easily build back ends for your web and mobile apps.Photon is an image acceleration and modification service available on WordPress.com and via Jetpack. It automatically compresses and caches images as well as serves them from a distributed CDN.For more information and additional features, check out our developer resources. If you run or work for an agency, you may also be interested in Automattic for Agencies.
Now, go land more web design clientsWhile it would be nice if being a freelance web designer or developer only consisted of being creative all the time, unfortunately, learning business skills, such as how to get web design clients, is a necessary part of the job. At the same time, however, it’s also not the insurmountable obstacle it can sometimes seem to be.
By being crystal clear about the industry you are targeting, figuring out your pricing, and building a strong web presence, you can create a solid basis for your business from which to start your acquisition efforts.
After that, there are many options to get on the radar of your clientele. From inbound measures like social media marketing and blogging to outbound marketing such as frequenting job boards, going to events, cold outreach via email, asking for client referrals, and partnering with design agencies, there is a lot you can do to get hired.
Pick what plays to your personal strengths and inclinations to get started. At the same time, don’t be afraid to experiment with what seems outside your comfort zone. Then, double down on what works and keep building your business. Also, don’t forget to have a strong hosting partner by your side who can support you in your efforts.
This article was originally published on wordpress.com/go on March 31, 2023. It was lightly updated by Ben Sailer and republished on Oct. 22, 2024.
October 17, 2024
Top 4 WordPress Shortcuts to Save You Time and Boost Productivity
While there are no shortcuts to success, there are shortcuts to a more efficient workflow. We may not think about them much, but these keyboard shortcuts have helped millions of people make their daily—even hourly—workflows faster and more efficient.
Some of our favorite shortcuts at WordPress.com help us bypass menus, create post drafts with a single click, quickly access bulk management options, and effortlessly find useful blocks in the editor. Let’s take a look and see how you can use these same shortcuts right now.
1. Command Palette with ctrl+K (or cmd+K)First up is the Command Palette—think of it like a Swiss Army knife for your site.
What It Does: Instead of clicking around menus and hunting for the right setting or page, you can press ctrl+K on Windows or cmd+K on Mac to instantly open a WordPress-specific search bar. From there, you can access pages, posts, settings, and even plugins. It’s your shortcut to just about anything you need in WordPress. The Command Palette is accessible when you are logged into your site and have a Block theme activated.
How to Use It: Press ctrl+K on Windows or cmd+K on Mac to open the command palette. Start typing what you’re looking for, like “new post” or “theme settings,” and hit enter when the option pops up. Voilà! You’re instantly taken where you need to go.
Productivity Boost: This shortcut is a lifesaver when you’re deep in your workflow and don’t want to break your concentration by clicking through menus. It’s especially useful for developers or site owners juggling multiple tasks.
 2. Quick Post drafts from the toolbar
If you’ve ever been struck by a brilliant idea while browsing your site, you know the frustration of having to navigate to the dashboard to jot it down. Enter the Quick Post Draft shortcut! This lets you start a new post directly from the admin toolbar without breaking your flow.
What It Does: Start drafting a post from anywhere on your WordPress site (while logged in) by clicking the “+ New” icon in the admin toolbar and selecting “New Post.” No more navigating to the dashboard, and no more interruptions.
How to Use It: While logged in, click the “+” icon in the toolbar, select “New Post,” and start typing. That’s it! You’re already in draft mode, ready to get your thoughts down. Simply save the post as a draft for later, or let those creative juices fly right then and there.
Productivity Boost: This is perfect for those moments when inspiration strikes, whether you’re looking at your homepage or checking your latest blog post. Instead of wasting time going to the dashboard and clicking through menus, you’re writing instantly.
 3. Bulk Edit posts, pages, or products
If you’re managing a large WordPress site with a lot of content, you’re probably familiar with the hassle of updating multiple posts or products, one by one. The Bulk Edit feature can save you loads of time by letting you edit several posts, pages, or WooCommerce products all at once.
Note: In order to use the Bulk Edit feature for Posts, ensure you’re using the Classic view. Follow this support guide for more details .
What It Does: You can modify categories, tags, status, author, and more across multiple items in just a few clicks. Whether you’re managing a blog, an eCommerce store, or a portfolio, bulk editing makes site management much faster.
How to Use It: Go to the Posts, Pages, or Products section of your WordPress dashboard.

Select the items you want to update using the checkboxes on the left-hand side, choose “Bulk actions,” then select “Edit.” Clickk Apply.

From there, you can change multiple settings at once, including categories, tags, and visibility.

Productivity Boost: This shortcut is a game-changer for anyone managing content-heavy or product-rich sites. You can handle mass updates without touching each individual post or product, making it a must-have for developers, content managers, and site owners.
4. Use / to search for blocks in GutenbergIf you’re using the Gutenberg block editor, you might have found yourself scrolling endlessly through the block library to find the exact block you need. Well, guess what? You don’t have to! The slash-command (/) lets you search for any block instantly, speeding up your workflow.
What It Does: Typing / followed by the block name (like /image or /heading) pulls up the block you need instantly and without endless scrolling.
How to Use It: While in the Gutenberg editor, type / followed by the name of the block you want to add (e.g., /image or /quote). Select the block from the dropdown, and boom, you’re good to go!

Productivity Boost: This shortcut is a massive time-saver for anyone working in the block editor. Whether you’re building complex layouts or writing a blog post, it eliminates the need to manually search for blocks.
Ready to save time with keyboard shortcuts?There you have it—four simple yet powerful shortcuts that can dramatically improve your WordPress experience. Whether you’re looking to speed up content creation, navigate more efficiently, or manage large batches of posts, these tips will help you work smarter, not harder.
And remember, WordPress is packed with these kinds of hidden gems, so don’t hesitate to explore and find even more ways to streamline your workflow.
Time is precious—let WordPress help you make the most of it. Looking for a powerful managed WordPress host? Check out WordPress.com’s plans that offer unmatched speed, unstoppable security, and unlimited site visitors.
October 11, 2024
Ian Stewart to Lead WordPress.com
We are pleased to announce that Ian Stewart (blog, LinkedIn, GitHub, X) has been chosen to lead end-to-end customer experience for WordPress.com as its Artistic Director and product lead.
In a nod to LVMH’s organizational structure, Ian will lead in the style of a maison head, ensuring that every part of WordPress.com remains the best managed WordPress experience available. He has been a part of the WordPress.com team for over 14 years, and we’re excited to see what changes he will implement on WordPress.com in this new role.
“I got involved with WordPress after growing tired of using Blogger for my personal blog,” Ian says. “This quickly led to the demise of my regular blogging habits as I spent most of my time messing around with my theme…My fooling around with WordPress themes quickly became a delightful obsession as I tried to publicly figure out what I thought about them.”
We’re grateful for your obsession with WordPress, Ian, and we certainly know the feeling.
Please join us in welcoming Ian in his new role.
What is PHP? A Thorough Explanation for Absolute Beginners
If you find yourself diving deeper into the topic of WordPress, content management systems, and websites, a term you will quickly stumble upon is “PHP.” You will likely hear how crucial PHP is for the Internet and that it is what’s powering WordPress websites.
However, what exactly is PHP, and why is it so important?
The short answer is that it’s a general-purpose, server-side scripting language. That said, unless you are already knowledgeable in programming and web development, that probably doesn’t make things much clearer.
In order to help you better understand this topic, we’ll cover PHP in detail below. You’ll learn what PHP is, why it matters, and how it relates to WordPress and pretty much everything you do online. We promise you’ll be surprised to hear how much you likely rely on PHP every day.
What is PHP? History, features, and benefitsPHP featuresBenefits of PHPHow PHP works: Creating dynamic web contentPHP and WordPress: The CMS’ heart and soulPowering themes and pluginsWithout PHP, there would be no WordPressPHP in everyday life: You rely on it more often than you thinkOther abilities of PHPWhat is PHP? It is the web’s backboneWhat is PHP? History, features, and benefitsThe original developer of PHP was a Danish-Canadian programmer named Rasmus Lerdorf. He first created the language in the mid 1990s to build tools for his own website; that’s why PHP originally stood for “Personal Home Page.” Today, it stands for the recursive acronym “Hypertext Preprocessor” and development and support has been taken over by the PHP Group.
 PHP features
PHP has some notable features, many of which are applicable to the way WordPress works:
Open Source: The first thing that is important to note is that, like WordPress, PHP is open source. That means it does not belong to any one business entity. It also means that it’s free to download and use for any purpose.
Also like WordPress, PHP is maintained by a number of volunteers around the world. The next major release, 8.4, will be available November 21, 2024.
Finally, both WordPress and PHP are community-funded––while WordPress has the WordPress Foundation, The PHP Foundation’s mission is to “ensure the long-term prosperity of the PHP language.” Automattic is a proud Platinum Sponsor of The PHP Foundation.
Server Side: PHP is a server-side language, which means it executes on the server and not in the user’s browser.
For example, PHP’s most frequent application is for creating HTML documents for websites. Even though there are PHP files on the server, the browser does not receive the PHP code; instead, it receives the finished HTML documents for display. This is different from client-side languages like JavaScript where the processing happens directly in the user’s browser after downloading the JavaScript files.
To make things clearer, server-side languages are a bit like going to a restaurant. You send an order to the kitchen, they prepare the meal, and it arrives at your table ready to eat. Client-side languages, on the other hand, are like meal-delivery services. While they provide you with all the necessary ingredients, you still have to put them together in your own kitchen.
General Purpose: PHP is also a general-purpose programming language. You can use it for command-line scripting, creating desktop applications, and more. However, its primary application is in web development.
Ubiquitous: According to W3Techs, the language is present on 75.7% of all websites. That includes some famous ones, as you will see below.
In addition, it forms the backbone of many content management systems like Drupal, Joomla!, and—the most popular of them all—WordPress.
PHP is one of the biggest open source success stories, as much of the modern Internet depends on it to work.
Benefits of PHPYou might be asking yourself why the usage of PHP is so widespread. There are many good reasons for that, but here are just a few:
Beginner-Friendly: PHP is relatively easy for beginners to learn due to its intuitive syntax. There are also plenty of tools and frameworks available to make coding easier.Wide Community: The language has a vast and active community of developers worldwide. This means there are loads of online resources, forums, and other places where users can seek help and find ready-made solutions to common problems.Cross-Platform Compatibility: PHP is compatible with popular operating systems, including Windows, MacOS, Linux, and Unix. It also works on various web servers such as Apache, NGINX, and Microsoft IIS.Database Connectivity: In addition, it works with a number of different database formats, such as MySQL, MongoDB, PostgreSQL, SQLite, Oracle, and more. PHP can execute SQL queries, retrieve, update and delete data, and handle database connections and transactions.Cost-Effective: As we have already learned, the programming language is free to use, distribute, and modify. That eliminates the need for expensive licensing fees and reduces development costs, making it an economical choice for web development projects.Scalability: PHP is capable of handling high traffic loads and can easily scale. You can use it together with caching techniques and other optimization strategies to enhance performance. Plus, it’s generally faster than some other programming languages, such as Python.How PHP works: Creating dynamic web contentOne of the main reasons why PHP is so popular for web development is that it seamlessly integrates with various technologies and services commonly used in this area. Examples include HTTP, POP3, IMAP, and more.
One of its main advantages is that it is highly compatible with HTML, the main language used to create and display websites. In fact, it’s possible to use PHP code in HTML files and vice versa.
Above you can see how both languages appear in the same file. The PHP markup is delineated by opening and closing brackets ( and ?>) so that the server knows where it ends and begins. However, the PHP code itself is inside an HTML
element. The _e function is a WordPress function used for localization, which allows for easy translations across the WordPress software.The main benefit of this is that using PHP allows web developers to display dynamic content in otherwise static web pages. For example, PHP is able to pull content directly from databases, making it great for templating. You can create a fixed layout for all web pages but then display different content depending on the page a user is on.

This is vastly different from pure HTML, where the content needs to be hard-coded in the page file in order for the browser to show it. PHP, on the other hand, can add it on the fly as needed. That’s one of the main benefits of this programming language—the ability to dynamically combine and display content from different sources and of different kinds according to what the user requests.
PHP and WordPress: The CMS’ heart and soulAs a WordPress user, PHP is especially important. The programming language forms the basis of much of what WordPress can do. It’s what allows you to create, edit, and delete pages, posts, media, and other content. That’s why you see that a lot of files that end in .php when you look in the directory of any WordPress installation.

It’s also why, when installing WordPress on a server, the system requirements insist that PHP be present. In recent years JavaScript has been playing a bigger and bigger role in the WordPress ecosystem, mainly because of the adoption of the Gutenberg editor. That said, PHP is still the main workhorse in the background.
Powering themes and pluginsWhat are some of WordPress’ main tasks powered by PHP? Before the advent of block themes, WordPress themes were all written mostly in PHP, especially page template files. In fact, if you look at the template hierarchy, you can see that WordPress has PHP files for pretty much all pages and theme components.
 Image from WordPress.org
Why? So we have the ability to create a single layout for one type of content and then dynamically display what’s saved in the database for a particular piece of content.
That way, if you have 300 pages of the same kind on your site, you don’t need a file for each as you would on a pure HTML website. Instead, you just need one single page template file; PHP can then populate each individual page with its specific content.
PHP also makes it easy to compartmentalize different parts of your theme. For example, it’s very common to not have the markup for a footer in each file. Instead you can create a separate footer.php file and call it into your templates where needed. That way, if you want to modify the footer layout, you only have to make changes in a singular place—the footer.php file.

The same is true for plugins, aka collections of PHP files that contain the necessary markup for adding extra functionality to your WordPress site. When you activate a plugin, it gets added to the rest of your website code and can provide the functionality you are looking for.
Without PHP, there would be no WordPressAll of the above is only made possible by the flexibility that PHP offers. Besides the benefits we have discussed before, this is the main reason why WordPress relies on PHP to the extent that it does; PHP offers a ton of flexible functionality specifically for web development. PHP’s capabilities in content management, working with databases, and its modularity all make it a perfect candidate for powering the most popular website builder there is.
This also means that if you know PHP, it opens up a lot more possibilities to modify your WordPress website. You can write custom plugins, make changes to (non-block) themes and page templates, introduce functionality to functions.php, and so much more. So, if you want to improve your WordPress skill set, learning PHP is not a bad place to start.
PHP in everyday life: You rely on it more often than you thinkBesides WordPress, you might actually be unaware how much of your general everyday online interactions are enabled by PHP. There are a number of very well-known websites that use PHP to run and many common processes that the programming language performs online:
Facebook: The largest social network in existence was initially built using PHP. While they have moved away from the programming language over time, it still plays a significant role in their infrastructure.Wikipedia: The world’s biggest online encyclopedia also relies heavily on PHP for its back end operations, content management, and user interactions.Tumblr: This microblogging and social networking platform employs PHP to power its vast network of user-generated content and social interactions. We’re actually in the process of migrating Tumblr’s backend to run on WordPress; if you’re interested in being a part of this exciting project, leave your information here.Slack: This widely-used team collaboration and communication platform utilizes PHP for its back-end operations, real-time messaging, and API integrations.And this is just the tip of the iceberg. There are countless other examples of well-known web staples that exist in part because of PHP.
Other abilities of PHPUp until this point, we’ve mostly talked about PHP in the context of creating and outputting HTML markup; however, the programming language is involved in a lot more that you probably take advantage of on a daily basis:
Form Processing: PHP can process and validate data submitted by users via forms. It’s also capable of performing actions such as storing data in a database, sending email notifications, or generating dynamic responses based on user input. Plus, it comes with encryption to keep the submitted data safe.User Authentication: It can also handle user authentication by verifying login credentials. PHP allows you to implement user registration and login/logout functionality, and it can control access to different areas of your website or application. For example: user roles.Session Management: PHP can also manage user sessions, store session data, and track user activity. Among other things, this allows you to save user preferences. PHP can also set cookies and receive cookie data.File Manipulation: The programming language provides a wide range of functions for file manipulation, such as reading and writing files, uploading files from forms, creating directories, and modifying file permissions. This comes in handy for managing files on the server through other applications (like WordPress).Email Handling: PHP comes with functions to send emails from a server. This allows you to build features like contact forms, email notifications, and automated email responses.Third-Party Communication: With PHP you can interact with external APIs and web services. It makes it possible to integrate with other applications, retrieve data from remote servers, and perform actions like posting to social media platforms.What is PHP? It is the web’s backboneIf you’re an everyday WordPress user or non-developer, you probably don’t spend a lot of time thinking about how much of your online experience is possible thanks to the humble PHP. However, the more you dive into this topic, the more you’ll realize how much you rely on it.
Who knew an open source solution was at the heart of what makes the World Wide Web tick? From the largest content management system in the world to well-known web entities, so much of what we take for granted exists because of it.
There are good reasons why it’s so widespread; from its powerful capabilities over its wide support system to ongoing development and support, there is a lot that speaks for PHP as the go-to solution for web projects.
Since it’s also beginner friendly, learning some PHP skills is definitely a good place to start if you want to dive deeper into the technical aspects of WordPress and web development.
October 9, 2024
Hot Off the Press: New WordPress.com Themes for October 2024
Want to give your website a fresh new look? This month, we’re showcasing four new themes designed by the WordPress.com theme team for personal portfolios, creative projects, startups, and podcasting. These new designs are both beautiful and functional, sharing a focus on setting your work, business, or podcast apart.
As a reminder, you can access a range of beautiful premium themes on the Personal plan and above, or you can even add your own third-party themes with the Business and Commerce plans. So it’s worth taking a look at the WordPress.com hosting plans and checking out all available themes in case there’s an even better fit for your site.
Let’s take a closer look at this month’s featured themes:
Dossier
Dossier brings a sophisticated, minimalist design to your site, making it perfect for professionals looking to showcase their skills and accomplishments. The theme emphasizes clean typography and ample white space, creating an elegant digital portfolio or resume. With customizable sections for projects, skills, and testimonials, Dossier puts your work front and center with a polished, modern layout.
StartOrg
StartOrg is designed for nonprofits, startups, and organizations looking to make a strong impression. The theme’s structured layout, vibrant accent colors, and intuitive design help you communicate your mission, highlight team members, and share updates. Whether you’re showcasing research, community projects, or educational programs, StartOrg’s versatile sections make it easy to connect with your audience and grow your reach.
Impressionist
Inspired by the Impressionist art movement, this theme offers a refined space for visual storytelling. With a minimalist layout, delicate typography, and emphasis on white space, Impressionist is ideal for showcasing artwork or creative content. The design draws from the aesthetics of an art gallery, allowing your visuals to take center stage. For artists, designers, and historians, Impressionist provides a beautiful online gallery to exhibit your creations.
Podbase
Podbase is designed specifically for podcasters who want a sleek, modern platform to host their episodes. Its dark theme with vibrant accents highlights podcast cover art and episode descriptions, creating a visually engaging experience. Integrated features like an audio player, episode lists, and subscription buttons make it easy for listeners to navigate your content. Podbase is a great choice for podcasters looking to build a dedicated following with a professional theme that reflects the quality of their content.
Ready to give your site a makeover? Try any of these themes on for size by clicking the Demo button on each theme page to see which one speaks to you. Whether you’re showcasing professional achievements, building a community, sharing artistic creations, or launching a podcast, you might just find the perfect starting point with one of these themes.
Most premium themes are available to use at no extra charge for customers on the Personal plan or above. Partner themes are third-party products that can be purchased for $99/year each on the Business or Commerce plans, so if you haven’t found what you’re looking for today, there are plenty of alternatives available.
You can explore all of our themes by navigating to the “Themes” page, which is found under “Appearance” in the left-side menu of your WordPress.com dashboard. Or you can click the button below:
Explore all WordPress.com themesOctober 3, 2024
Building Studio in Public: How Open Source Collaboration Enhances Studio
It’s now time for Part 3 of our “Building Studio in Public” series! In today’s post, we’ll explore how the Studio app connects with other open source projects, with a focus on its key relationship with WordPress Playground. We’ll also dive into the benefits and challenges of this symbiotic relationship, showing how both projects mutually benefit from improvements and bug fixes.
If you’re following the series, be sure to check out past posts:
Using WordPress Components and Tailwind CSS in our Local Development App.Maintaining High Performance in Our Local Development App for Enhanced UXAs a reminder, Studio is our free and open source local WordPress development app.
Download Studio for freeHow Studio connects to other open source projectsStudio relies on various open source projects, with the primary one being WordPress Playground which provides a local WordPress server, handling everything from running PHP code to serving static files and managing a database. This allows developers to test WordPress sites, plugins, and themes in a local, sandboxed environment.
WordPress Playground utilizes Emscripten to compile the PHP interpreter to WebAssembly, enabling PHP to run in the browser and other platforms—a significant leap for WordPress development.

By way of WordPress Playground, Studio also makes use of other open source tools like the SQLite integration plugin.
Studio itself is open source, which means the codebase is available for review, contribution, and forking by the community. This openness fosters collaboration, encourages innovation, and enables rapid identification and resolution of issues.
Because of the open source nature of Studio and the projects it uses like WordPress Playground, we are not blocked by missing or undesired behavior of our libraries but can instead help uncover issues or opportunities for enhancement in these projects and contribute the necessary fixes and improvements. Instead of building workarounds, we can directly enhance Studio’s performance and capabilities by submitting fixes to the actual problems.
This creates a virtuous cycle of improvement, showcasing how open source collaboration drives innovation and helps solve complex challenges.
Challenges we discovered working with WordPress PlaygroundWordPress Playground is powerful, but since it makes WordPress run in an unusual environment–the browser instead of a server–some things work differently than developers expect. While using it to power Studio allows us to achieve all the good things, like a fast setup, we also had to overcome some challenges:
Cross-platform compatibility: Ensuring that WordPress Playground runs smoothly on different operating systems (Windows, macOS, Linux) and across browsers requires extensive testing and fine-tuning.Performance: Managing multiple resources (PHP interpreter, WordPress site, database, and file system) while running multiple sites in Studio can strain performance. You can learn more about how we maintain high performance in Studio here.Plugin and theme compatibility: Although WordPress Playground creates a full environment for running sites, some plugins and themes rely on extensions that are not included in WordPress Playground by default. Adjustments are often necessary to accommodate support for the different plugins and themes.
Database handling: WordPress Playground uses an SQLite database instead of MySQL, fundamentally altering how WordPress operates. This shift requires adaptations for database queries and compatibility with plugins and themes.
These complexities sometimes lead to incompatibilities, bugs, or performance issues. However, we believe the benefits of WordPress Playground far outweigh the challenges, and we are committed to addressing them by contributing to the Playground project. Thus not only Studio works better, but everyone who uses Playground has a better experience.
In turn, Studio also benefits from contributions from other Playground users.
Our recent contributions to WordPress Playground and other open source projectsAs part of our contributions to the Studio app, we recently focused on improving the compatibility of plugins, themes, and workflows in sites. The following are some of the fixes we made that contributed to the projects.
MySQL database compatibilityWith a pull request, we helped improve the compatibility of sites connecting to MySQL databases, making Studio more flexible in handling various site configurations and expanding its capability to support more diverse WordPress setups.
Symlink supportWe submitted two contributions (PR 1, PR 2) to add crucial support for handling symlinks in sites, greatly improving file system compatibility and flexibility. This enhancement significantly improves the development workflow, enabling developers to maintain cleaner project structures and more efficiently manage their themes and plugins across multiple projects. It also facilitates easier version control and collaboration by allowing links to external repositories without duplicating files.
Windows media upload fixA fix resolved critical issues with uploading media on sites when using the Windows version of the Studio app, ensuring a smoother experience for Windows users. This contribution addressed a significant functionality gap, ensuring that Studio provides a consistent and reliable media management experience across all supported operating systems.
WordPress core and extension upgradesAnother contribution fixed the process of upgrading versions of WordPress, plugins, and themes. This improvement streamlined the update process within Studio, allowing developers to maintain their WordPress installations and associated extensions easily.
WooCommerce compatibilityThis pull request significantly improved compatibility with the WooCommerce plugin, expanding Studio’s utility for e-commerce development. This contribution addressed specific database queries and operations that were incompatible with the SQLite database used in sites created with Studio. The SQLite integration plugin involves different complexities to allow seamless integration with the WordPress ecosystem, and this contribution addresses one of the main pain points of using WooCommerce in local WordPress environments.
cURL extension compatibilityWe contributed the ability to enable the cURL extension on PHP used with Playground which turned out to be a requirement by a significant number of plugins for external API calls or remote data fetching. This broadens the range of plugins that can be used effectively within Studio and WordPress Playground.
File creation compatibilityA fix improved compatibility with plugins that create files using umask to set file permissions, enhancing the file system operations. This was crucial for plugins that generate caches, create custom CSS or JavaScript files, or manage uploads in non-standard ways. By resolving these file operation issues, we ensured that a broader range of plugins could function correctly within Studio, providing a more accurate representation of how sites would behave in a production environment.
All the above examples demonstrate how collaborative contributions help Studio evolve, making it more compatible with the vast array of plugins and themes in the WordPress ecosystem.
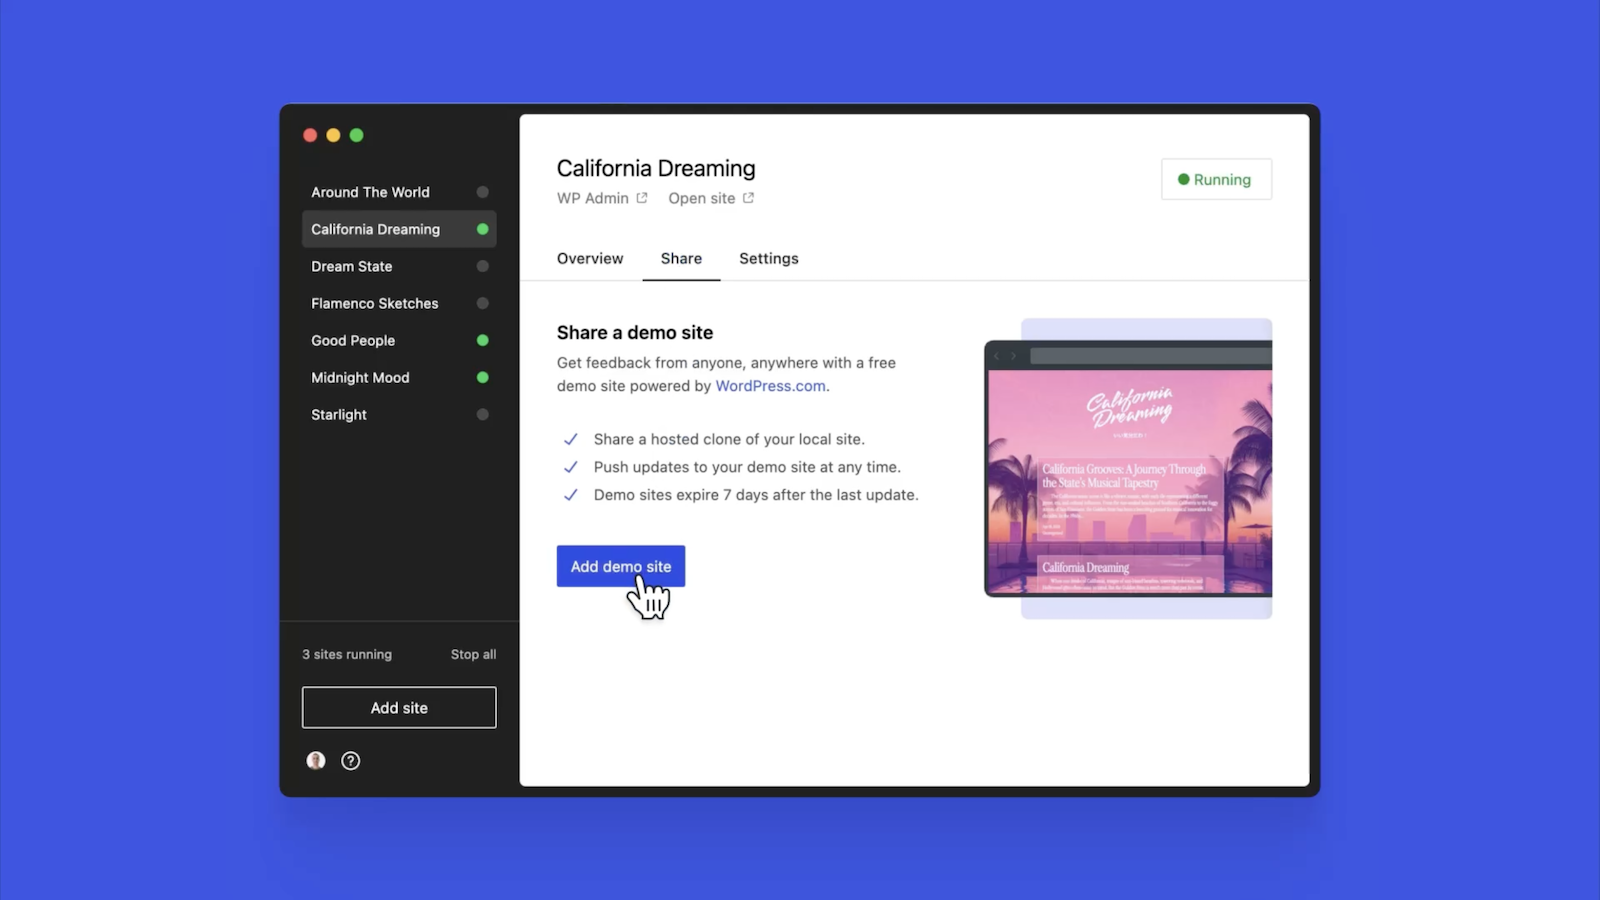 How to contribute
If this post has inspired you to contribute to open source projects (we’re big fans), here’s how you can get involved with some of our favorite open source projects:
Contribute to the Studio app projectContribute to the WordPress Playground projectContribute to the WordPress projectTogether we can build incredible tools for the community! 
If this information has piqued your interest, or if you’re developing WordPress sites, start leveraging the power of Studio today. It’s free, it’s open source, and it seamlessly integrates into your development workflow.
Download Studio for freeAfter downloading Studio, connect it to your WordPress.com account (free or paid) to unlock features like Demo Sites.
Tim McGiven's Blog

- Tim McGiven's profile
- 1 follower


![[image error]Pexels.com](https://en-blog.files.wordpress.com/2024/10/pexels-photo-210661.jpeg)