
Becca Hillburn's Blog, page 5
December 5, 2019
How Do You Find Your Own Art Style
Recently, a wonderful young artist I'm mentoring via email posed an excellent question:
How did you find your own manga art style? Do you have any advice for me on how to find my own manga art style?
This isn't an uncommon question- it pops up a lot! From kids to teens to adults, people want to know how to develop their own artstyle.
Don't stress about it too much- just practice drawing
The more you draw from reference, draw fanart, and draw your original characters, the more you're going to find elements that you want to use in your style. Reading a wide variety of comics, watching animation, and consuming illustration will give you inspiration.
Think about art that inspires you, and works that you love
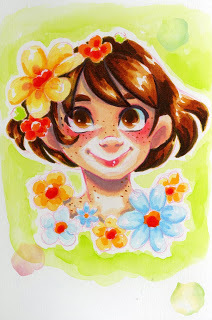
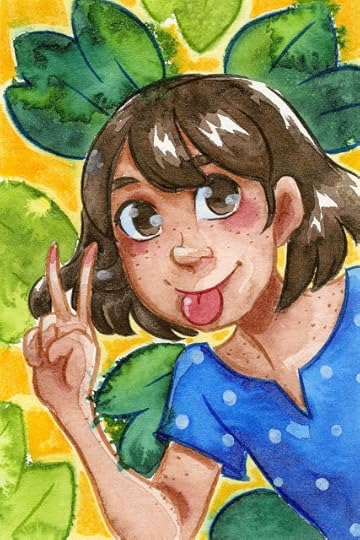
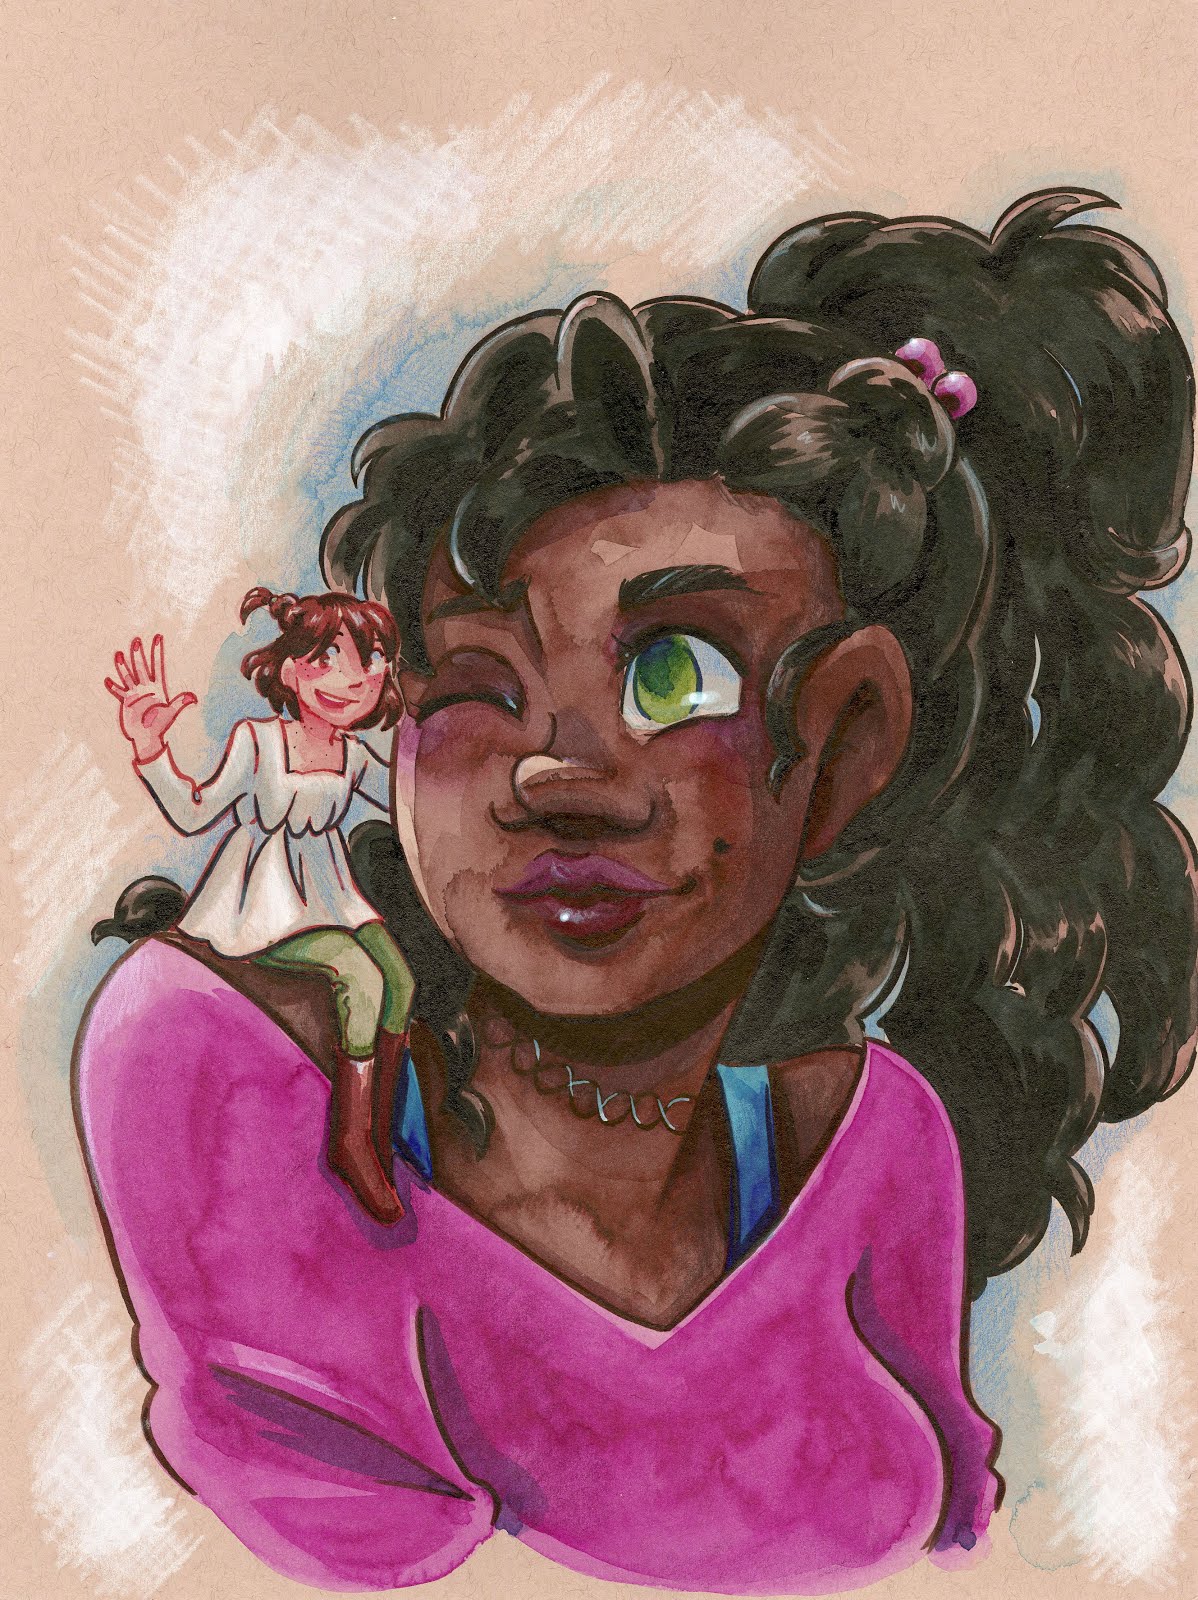
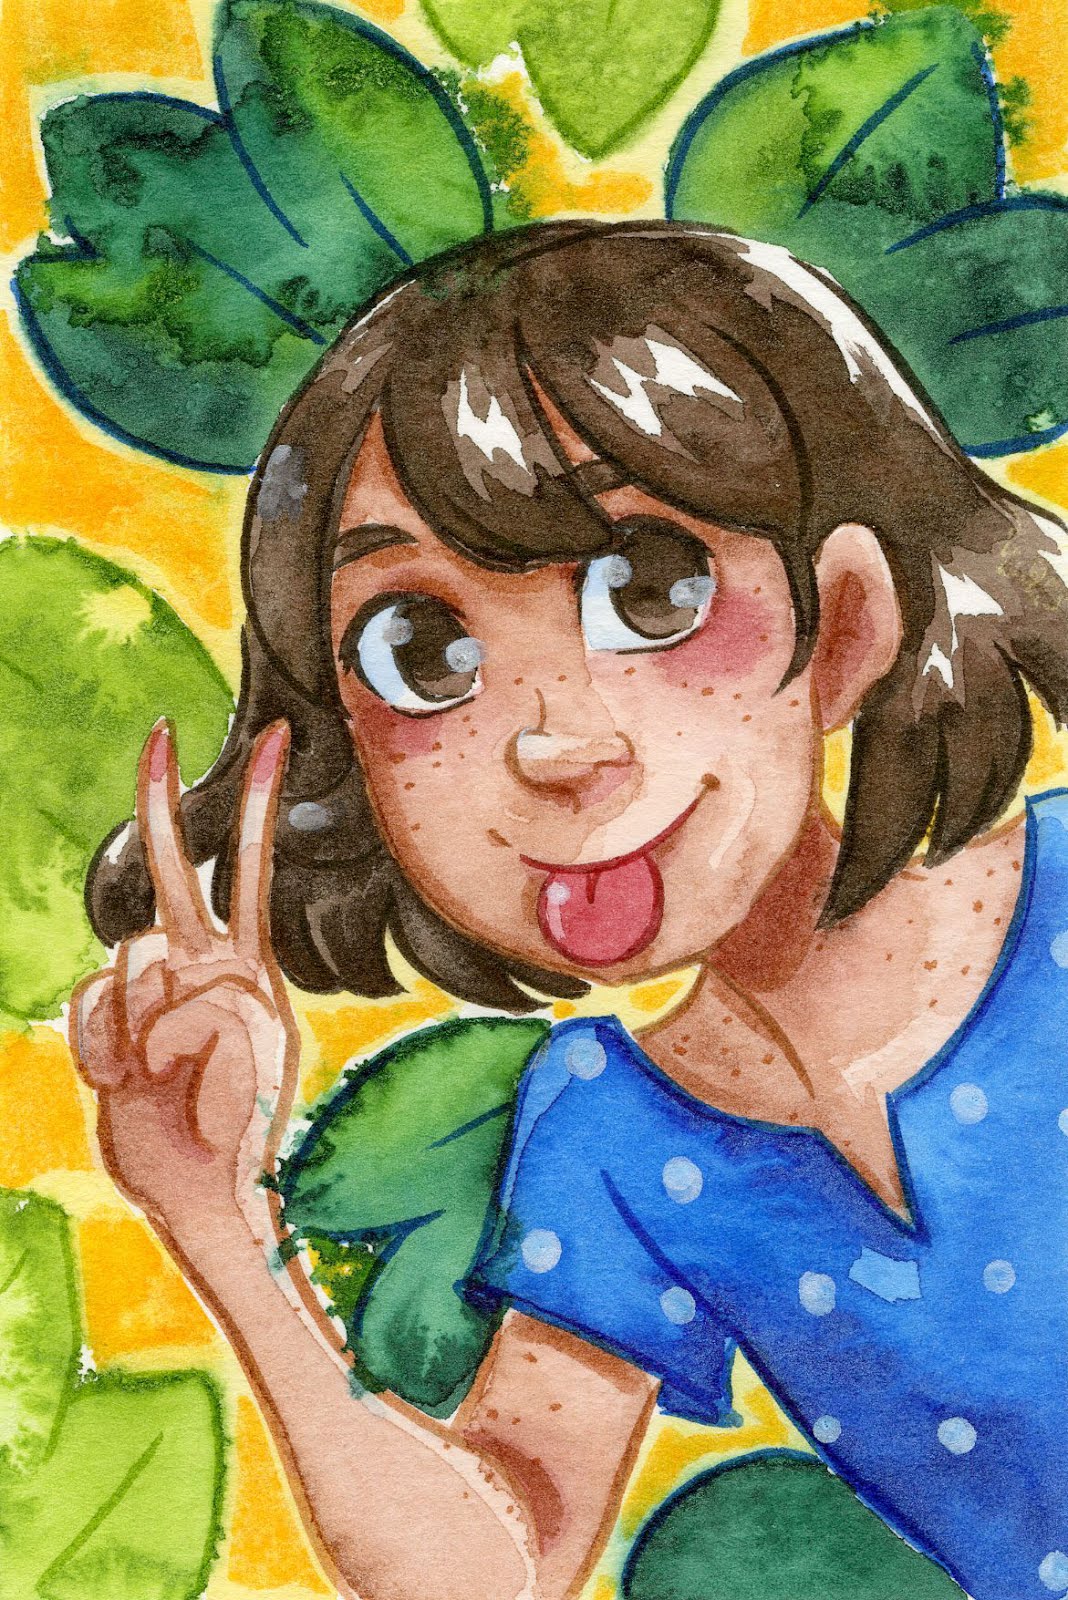
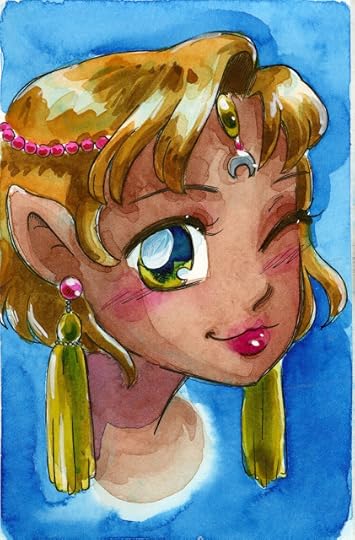
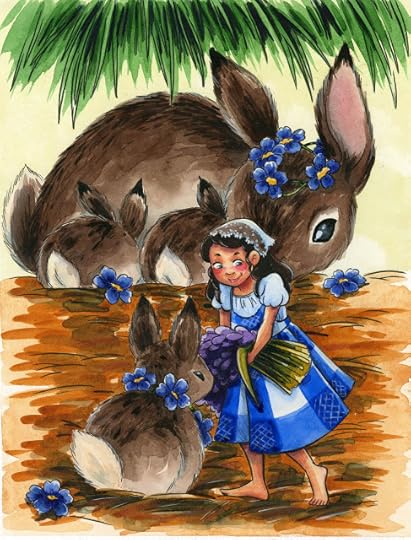
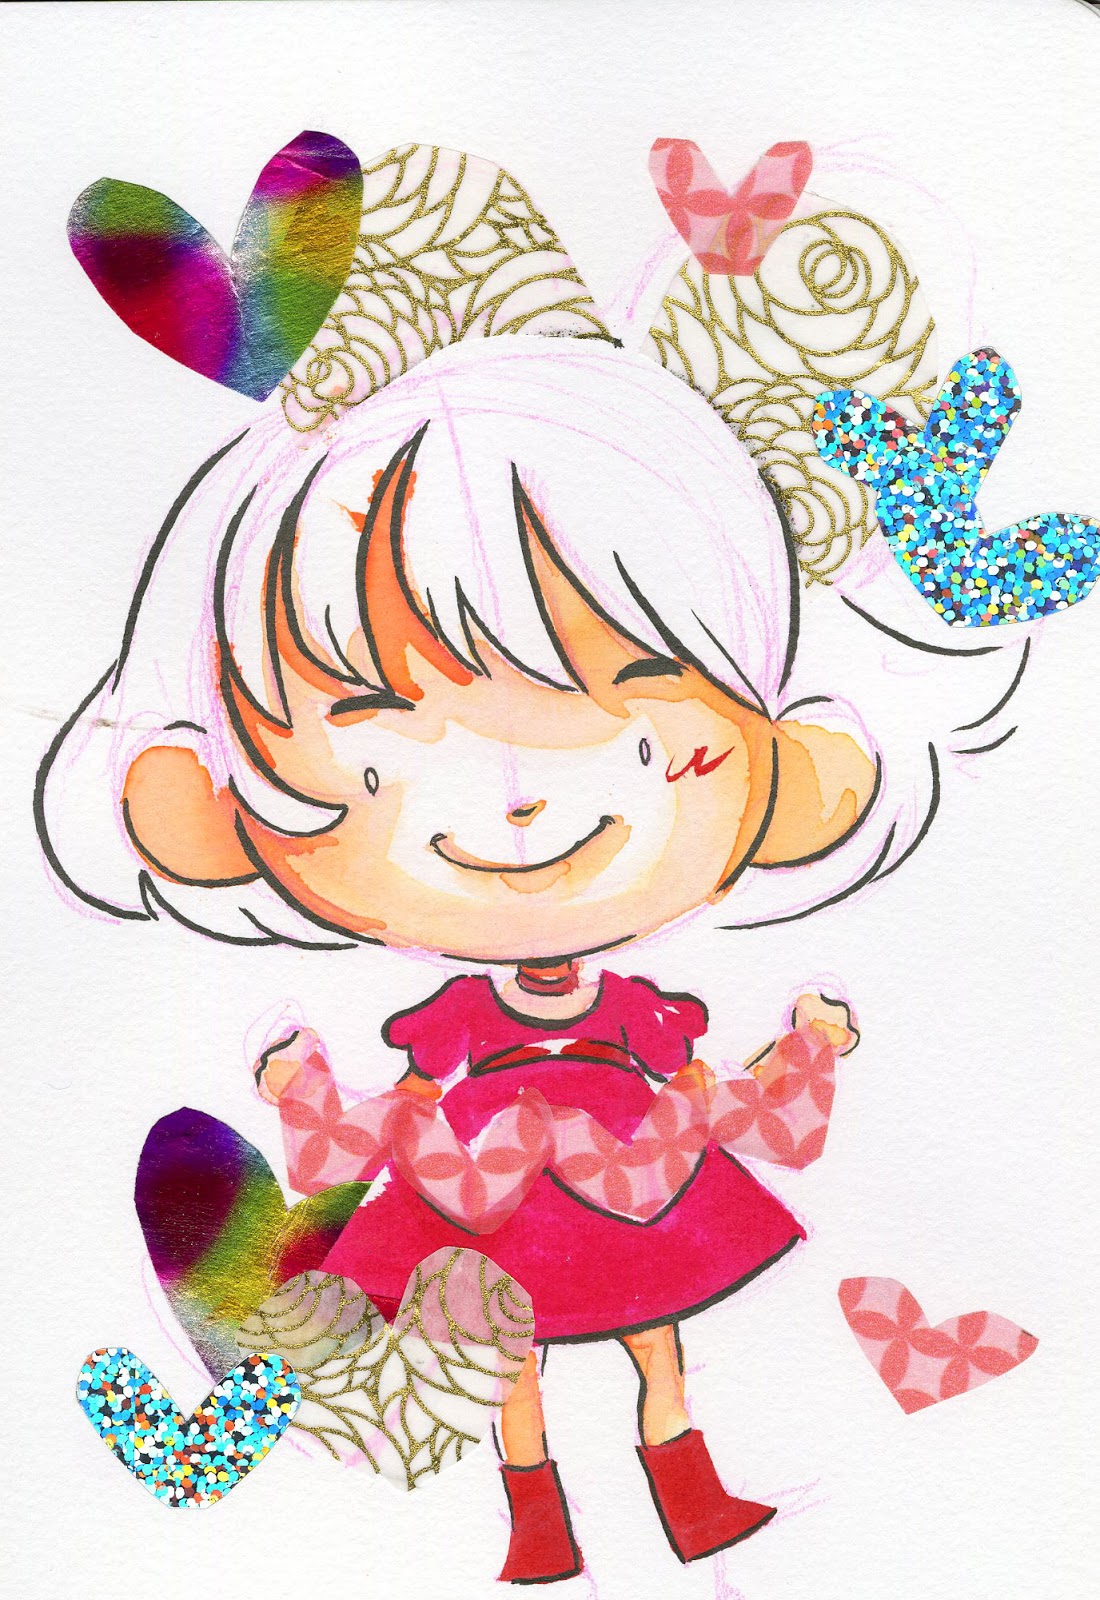
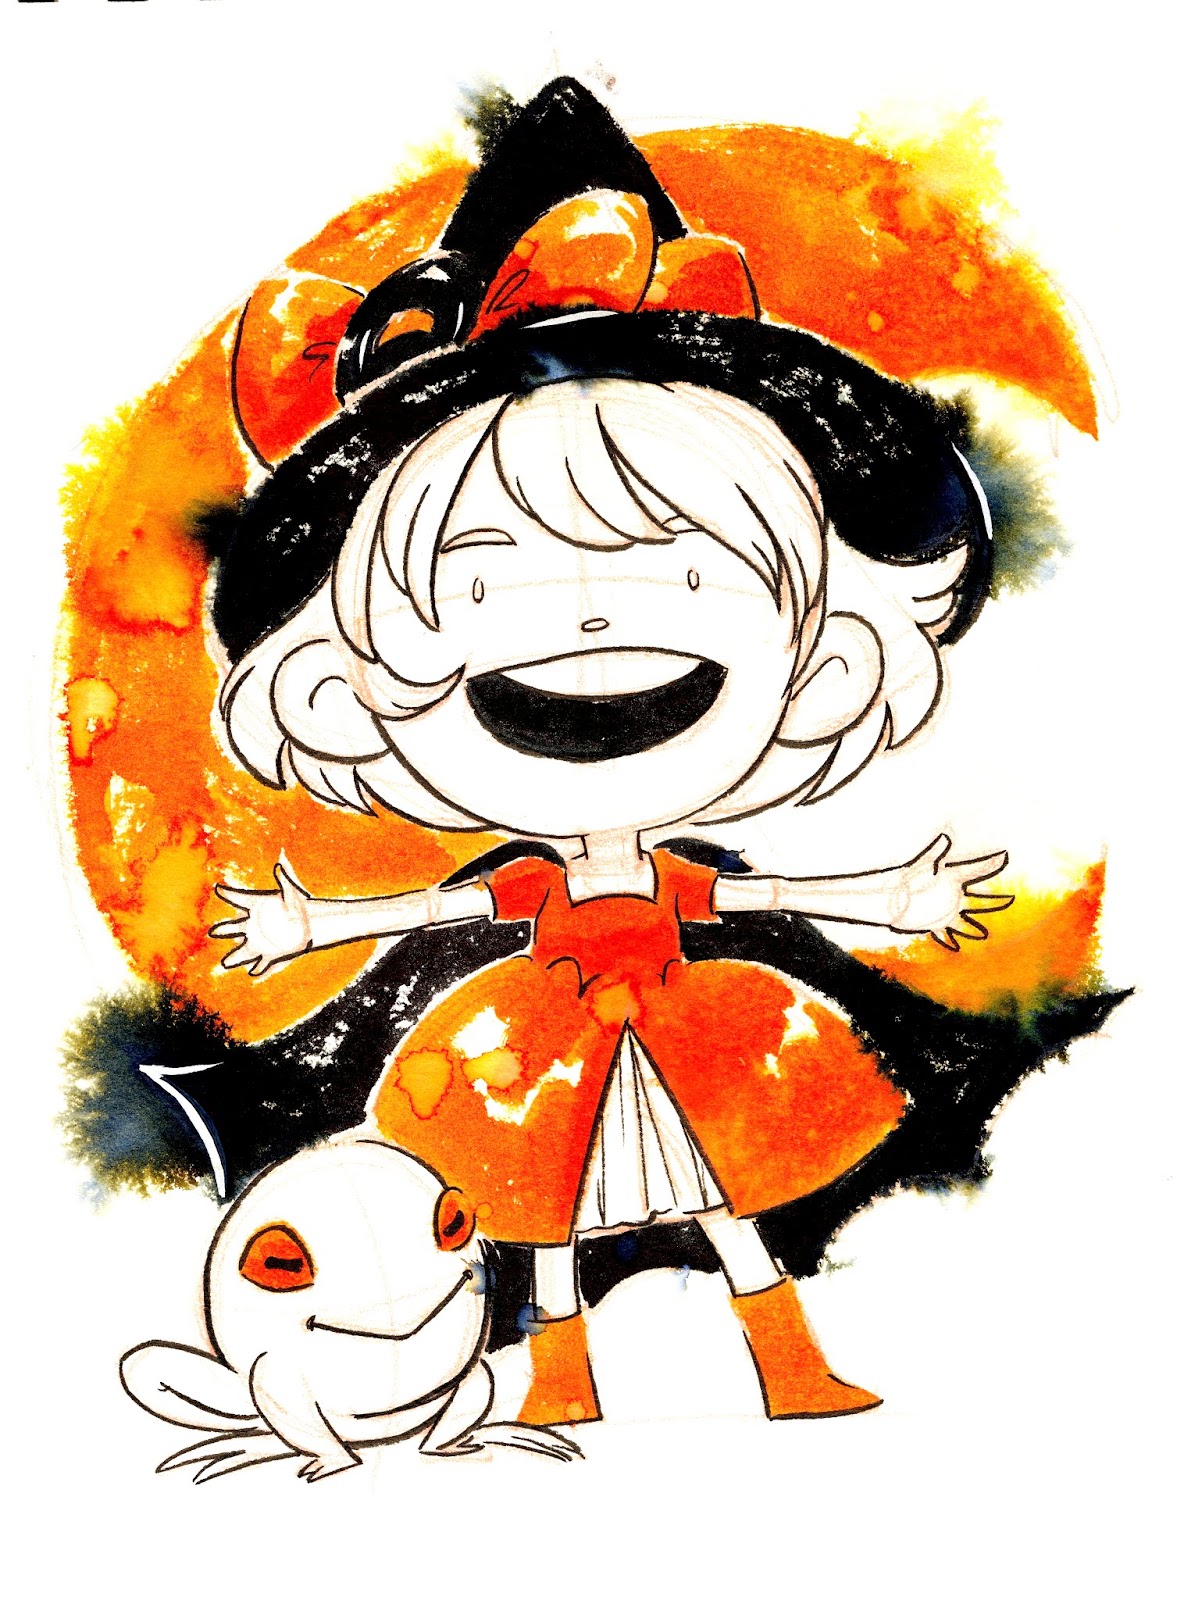
For finding your own artstyle, I think it's important for you to combine what inspires you with what you love. For example, my style is a combination of the artists and studios that initially inspired me to draw (so Rumiko Takahashi, Adachi Mitsuru, Kiyohiko Azuma, Studio Ghibli, Disney Renaissance artists like Glen Keane) and elements I think are cute (big hair, big eyes, big mouths, large ears, freckles, easily excited personalities, lots of animals, and flowers). Your personal style will develop and change over time, but a great exercise for figuring out a base style that you like drawing in is to do style tests!
Consider what you're passionate about, and find ways to work it into your artstyle
This is going to vary from person to person, but what's important to me:
Reflecting real-life diversityCreating characters that feel like people the reader knowsReflecting American culture and physical appearancesCartoony, expressive faces with fairly realistically proportioned bodiesRepresenting healthy body imagesArt that feels like a relaxing escape to the readerDepicting a variety of hair texturesDepicting a variety of facial features without diving into stereotypesTaking traits from manga and anime and making it my own- transforming my inspiration into something personally important
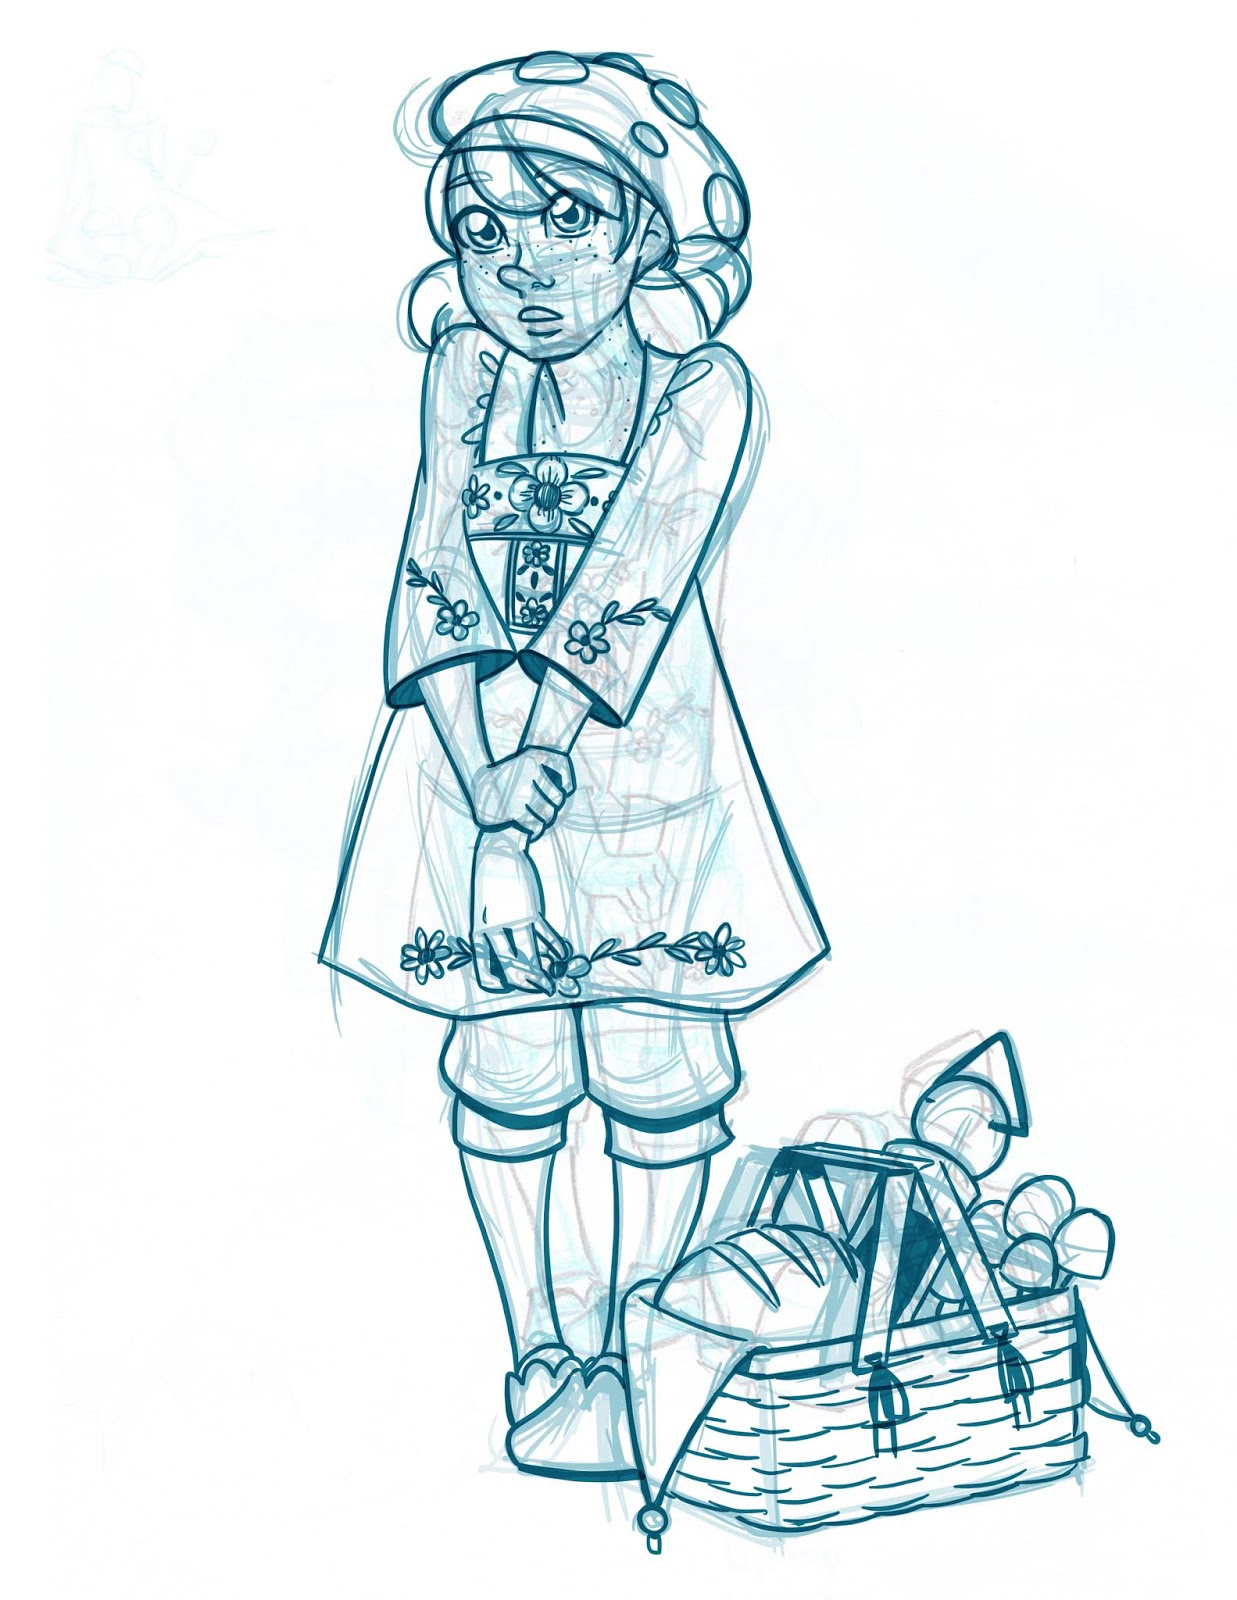
While there may not be room in 7" Kara for all of these traits, I try to touch on them through various projects and challenges throughout the year, such as Inktober.
Emulate artists you admire through exploration and practice:
Practice with Style Tests

Style tests involve drawing an original character (or yourself!) in the style of artists you admire- even if you think you're never going to draw in that type of style! Carefully analyze WHY artists draw things a certain way- why they draw noses the way they draw noses, why they draw lips the way they draw lips, ect, and interpret your character in that art style. This will help you figure out a shorthand for human facial features. Once you've done about a dozen style tests, start combining elements you like from different styles! Don't worry about copying- this is how all artists learn and find inspiration. And once you have a base character style you like- draw a minicomic to put your character through their paces! Doing expression studies is also a great way to figure out your style, and how your character's face moves.
Learn a System for Drawing
 Example of simple head construction from Manga MadnessI personally really recommend constructive drawing! This is the system that really made the difference for me, artwise. It's a helpful method of breaking down and understanding the world, and it's particularly helpful for learning human anatomy and drawing figures! It's also GREAT for breaking down the face's landmarks and memorizing them!
I love this system so much that I teach it in my 6 week comic classes, and offer it as in standalone classes! You can sign up to my class mailing list to learn more about my classes, or you can join my Patreon and get access to the presentations:
From Stick to Figure Presentation
Manga Madness Presentation
Practice Drawing Other's Characters in Your Style
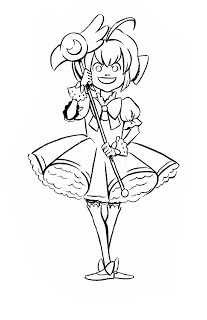
 Sakura (CCS), Mei and Satsuki (My Neighbor Totoro)
 Tsukimi (Princess Jellyfish) and DeeDee (Dexter's Lab)

 Kiki and Jiji (Kiki's Delivery Service) Laura Ingalls (Little House on the Prairie)
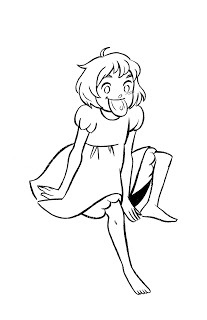
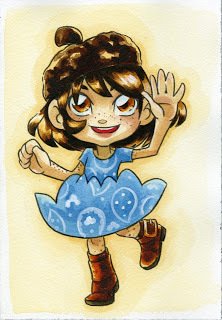
 Ponyo (Ponyo), Kara (7" Kara)
Interpreting other characters, particularly those in drastically different styles from your own is a great way to problem solve issues that may come up while you're designing characters, is a great way to pay homage and explore your inspirations, and is a wonderful way to get some additional practice in. Above are some of my Favorite Fictional Femmes, an Inktober exercise where I interpreted 31+ favorite fictional females in a b-style I was developing.
Its natural for your style to change over time


Your style will change and develop as you consume more media, follow more artists you admire, improve your technical skills, and develop muscle memory from drawing. I recommend you don't stress yourself out by attempting to be consistent- see where your style and imagination takes you!
It's ok not to have a specific style or to not draw consistently in the same style
Speaking of inconsistent styles- most artists have several different styles they utilize depending on the mood of the piece, or even the mood of the individual page.
Play around and find what you like! The more you experiment, the faster you'll improve. It's important to draw just for yourself, for the sake of study and improvement.

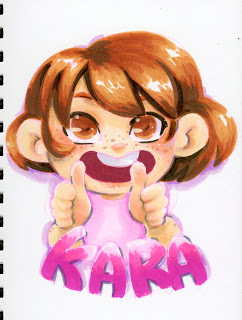

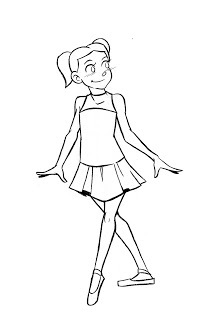
These are all the same character- Kara- drawn in a variety of different styles. Even just changing the coloring style can change the feel of the piece!
Practice (and refinement!) make perfect!
Favorite resources:
SenshiStock
Humanae
Glen Vilppu Drawing Manual
Drawn to Life Volume 1&2
Naoki Urasawa's Manben
Concept art books:
Art of Studio Ghibli
Art of various Disney movies

How did you find your own manga art style? Do you have any advice for me on how to find my own manga art style?
This isn't an uncommon question- it pops up a lot! From kids to teens to adults, people want to know how to develop their own artstyle.
Don't stress about it too much- just practice drawing
The more you draw from reference, draw fanart, and draw your original characters, the more you're going to find elements that you want to use in your style. Reading a wide variety of comics, watching animation, and consuming illustration will give you inspiration.
Think about art that inspires you, and works that you love
For finding your own artstyle, I think it's important for you to combine what inspires you with what you love. For example, my style is a combination of the artists and studios that initially inspired me to draw (so Rumiko Takahashi, Adachi Mitsuru, Kiyohiko Azuma, Studio Ghibli, Disney Renaissance artists like Glen Keane) and elements I think are cute (big hair, big eyes, big mouths, large ears, freckles, easily excited personalities, lots of animals, and flowers). Your personal style will develop and change over time, but a great exercise for figuring out a base style that you like drawing in is to do style tests!
Consider what you're passionate about, and find ways to work it into your artstyle
This is going to vary from person to person, but what's important to me:
Reflecting real-life diversityCreating characters that feel like people the reader knowsReflecting American culture and physical appearancesCartoony, expressive faces with fairly realistically proportioned bodiesRepresenting healthy body imagesArt that feels like a relaxing escape to the readerDepicting a variety of hair texturesDepicting a variety of facial features without diving into stereotypesTaking traits from manga and anime and making it my own- transforming my inspiration into something personally important
While there may not be room in 7" Kara for all of these traits, I try to touch on them through various projects and challenges throughout the year, such as Inktober.
Emulate artists you admire through exploration and practice:
Practice with Style Tests

Style tests involve drawing an original character (or yourself!) in the style of artists you admire- even if you think you're never going to draw in that type of style! Carefully analyze WHY artists draw things a certain way- why they draw noses the way they draw noses, why they draw lips the way they draw lips, ect, and interpret your character in that art style. This will help you figure out a shorthand for human facial features. Once you've done about a dozen style tests, start combining elements you like from different styles! Don't worry about copying- this is how all artists learn and find inspiration. And once you have a base character style you like- draw a minicomic to put your character through their paces! Doing expression studies is also a great way to figure out your style, and how your character's face moves.
Learn a System for Drawing
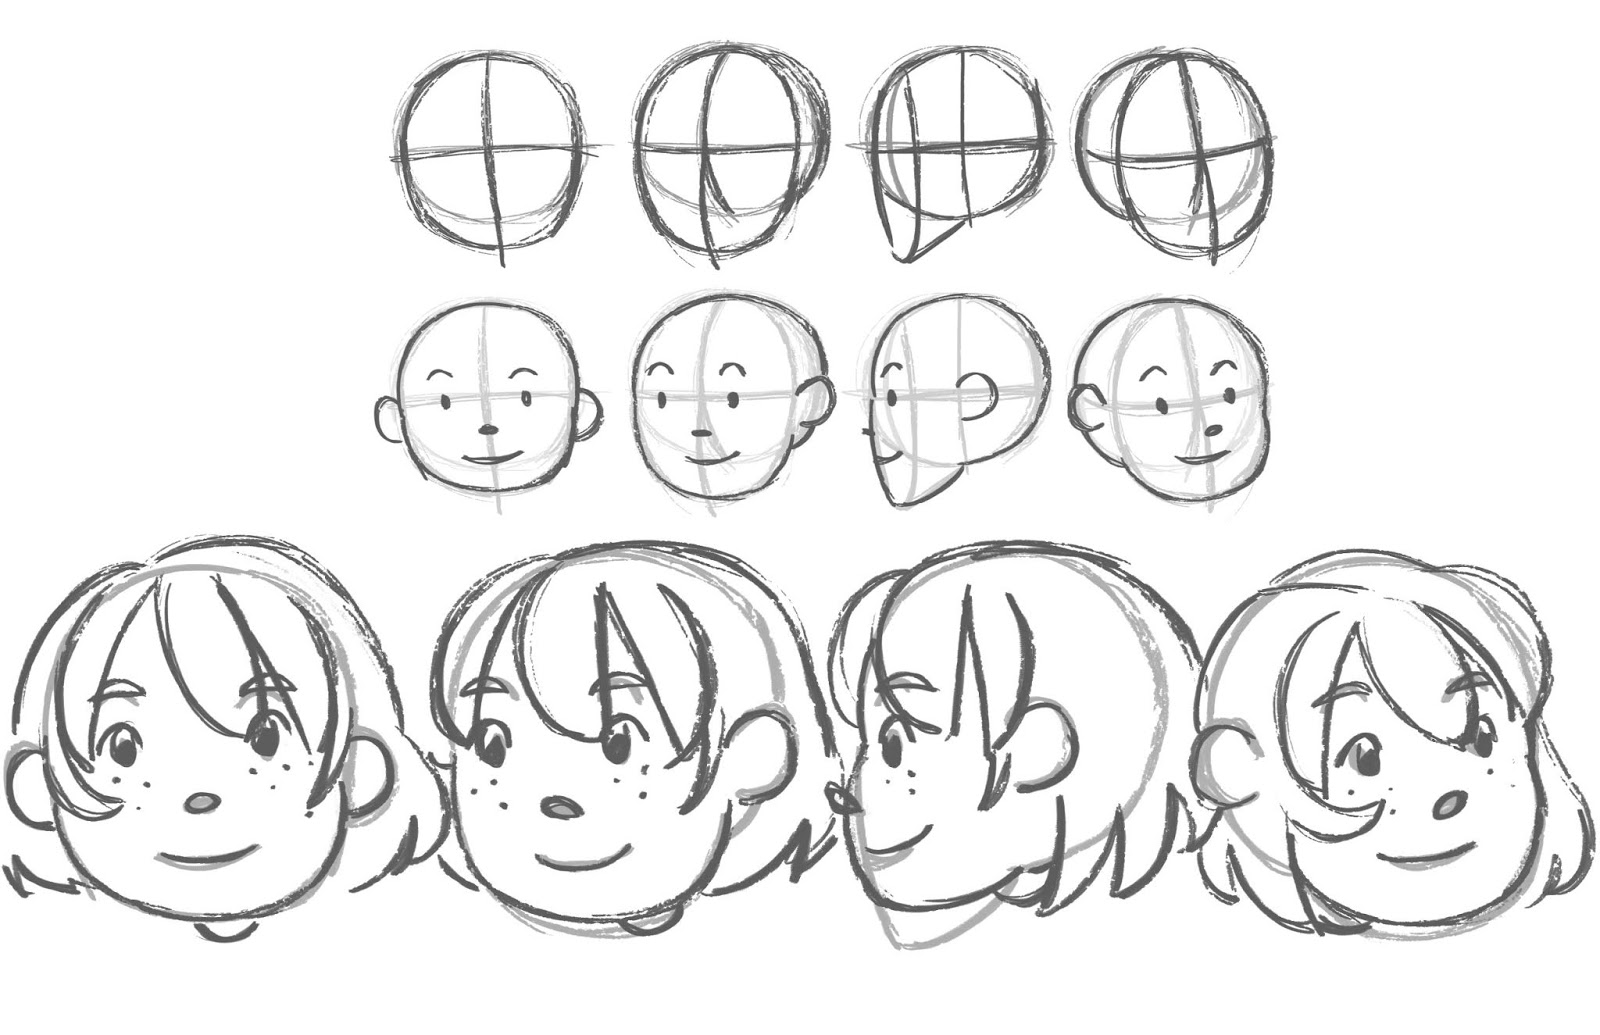 Example of simple head construction from Manga MadnessI personally really recommend constructive drawing! This is the system that really made the difference for me, artwise. It's a helpful method of breaking down and understanding the world, and it's particularly helpful for learning human anatomy and drawing figures! It's also GREAT for breaking down the face's landmarks and memorizing them!
I love this system so much that I teach it in my 6 week comic classes, and offer it as in standalone classes! You can sign up to my class mailing list to learn more about my classes, or you can join my Patreon and get access to the presentations:
From Stick to Figure Presentation
Manga Madness Presentation
Practice Drawing Other's Characters in Your Style

 Sakura (CCS), Mei and Satsuki (My Neighbor Totoro)

 Tsukimi (Princess Jellyfish) and DeeDee (Dexter's Lab)
 Kiki and Jiji (Kiki's Delivery Service) Laura Ingalls (Little House on the Prairie)
 Ponyo (Ponyo), Kara (7" Kara)
Interpreting other characters, particularly those in drastically different styles from your own is a great way to problem solve issues that may come up while you're designing characters, is a great way to pay homage and explore your inspirations, and is a wonderful way to get some additional practice in. Above are some of my Favorite Fictional Femmes, an Inktober exercise where I interpreted 31+ favorite fictional females in a b-style I was developing.
Its natural for your style to change over time


Your style will change and develop as you consume more media, follow more artists you admire, improve your technical skills, and develop muscle memory from drawing. I recommend you don't stress yourself out by attempting to be consistent- see where your style and imagination takes you!
It's ok not to have a specific style or to not draw consistently in the same style
Speaking of inconsistent styles- most artists have several different styles they utilize depending on the mood of the piece, or even the mood of the individual page.
Play around and find what you like! The more you experiment, the faster you'll improve. It's important to draw just for yourself, for the sake of study and improvement.


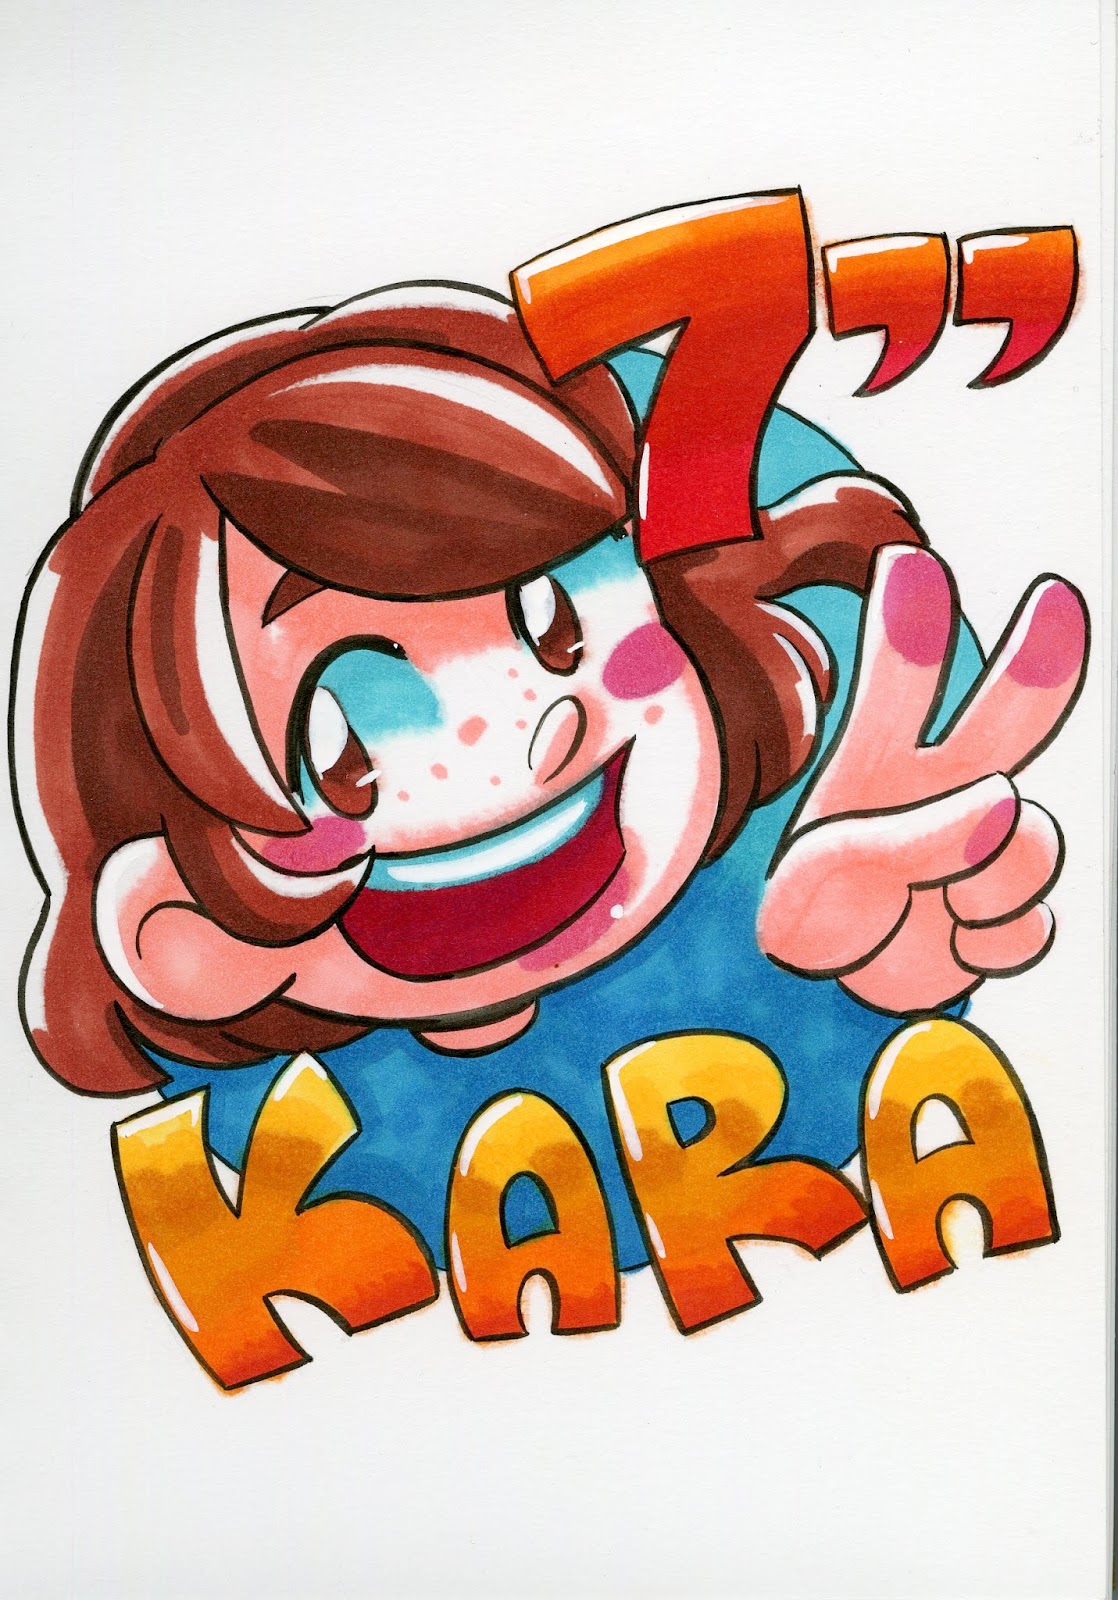
These are all the same character- Kara- drawn in a variety of different styles. Even just changing the coloring style can change the feel of the piece!
Practice (and refinement!) make perfect!
Favorite resources:
SenshiStock
Humanae
Glen Vilppu Drawing Manual
Drawn to Life Volume 1&2
Naoki Urasawa's Manben
Concept art books:
Art of Studio Ghibli
Art of various Disney movies


December 2, 2019
Tips for Teaching Comics
"Do you have any tips for teaching classes/workshops?"
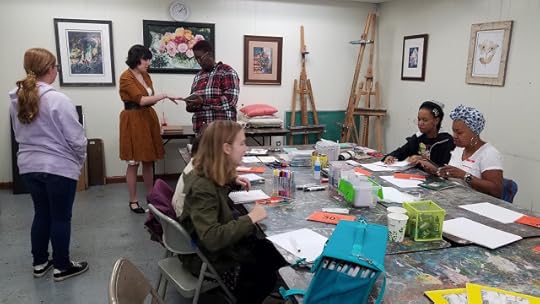 Mixed Media Marker Class- a hands on alcohol marker class taught through the Nashville Plaza Artist Materials (art supply store)
I get asked about this a lot- it's quite an open ended question that could get complicated quick, so I'm going to try to keep today's post pretty basic. If you still have questions, please don't hesistate to email me, I'm happy to revisit this topic in the future!
I've talked about my experiences with teaching with NCE , why teachers should offer a comic craft module in their classes, as well as my recommended reading lists (see sidebar of blog) and recommended materials for teaching classes , and methods you can use to promote your classes.
How I develop my classes:
Decide what you want to teach, or what you're best suited to teachMake an outline of what you want to cover in the time you haveDecide if you want to do a presentation, handouts, or pure demonstrationSpend the next week actively practicing and preparing your materialsTeach the class, and request feedback from students-actively pay attention to what they say, and where you lose themAnalyze how the class went after- what can be improved, what should be cut
 Writing Comics- A class taught through St Charles Parish Library
The best advice my mother, a teacher of 25 years, has ever given me was:
Be flexible.
And when teaching comics, flexibility and patience are huge assets.
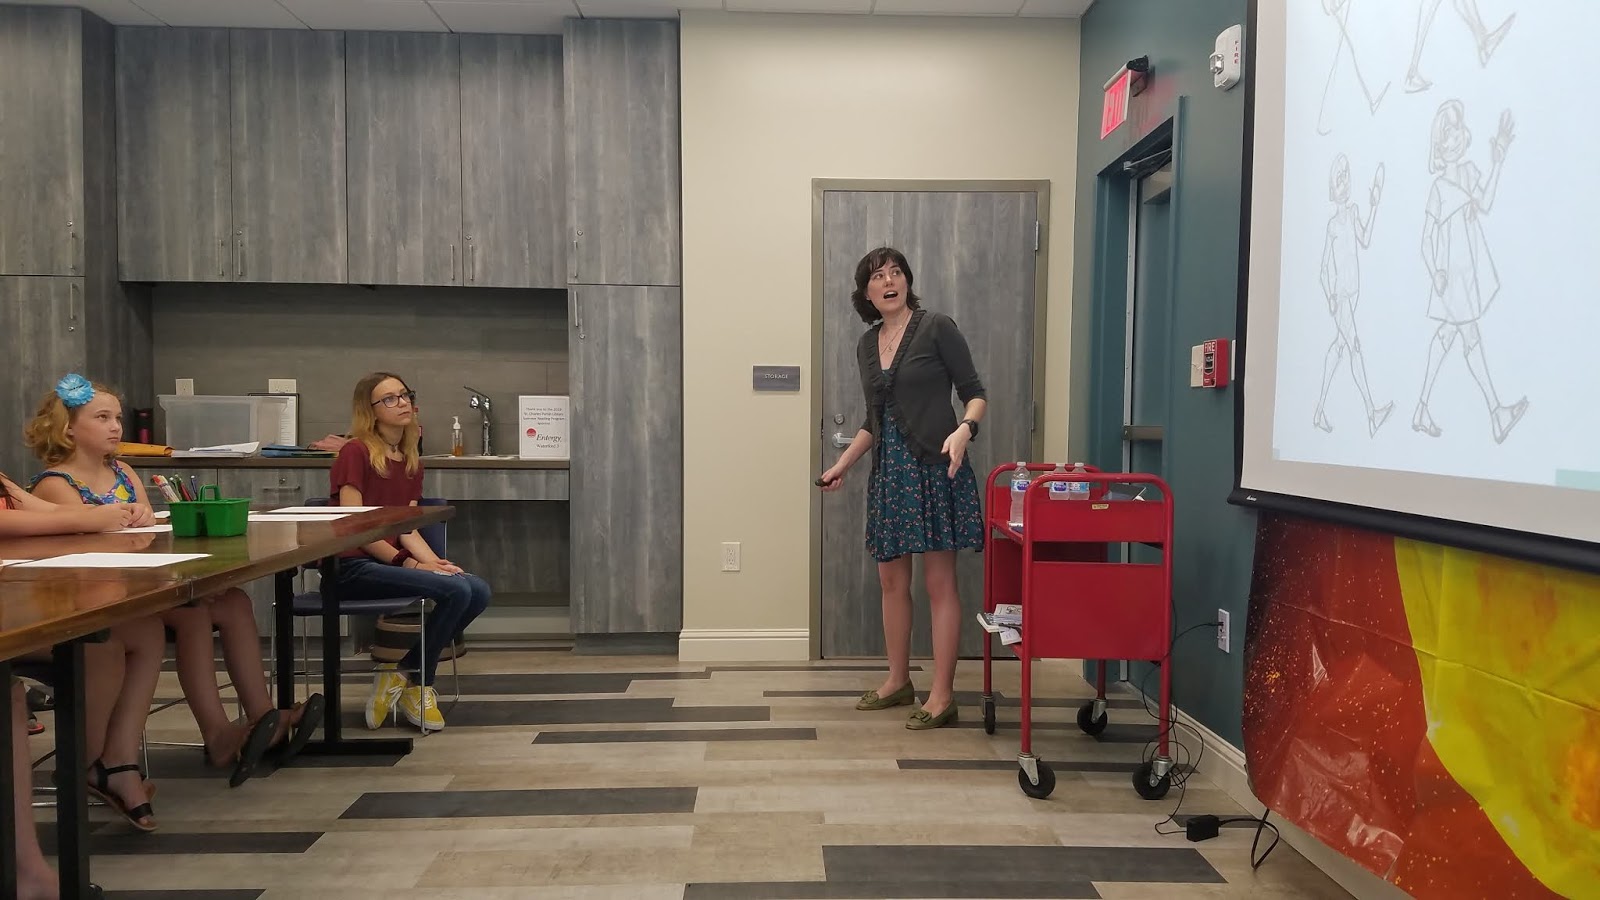
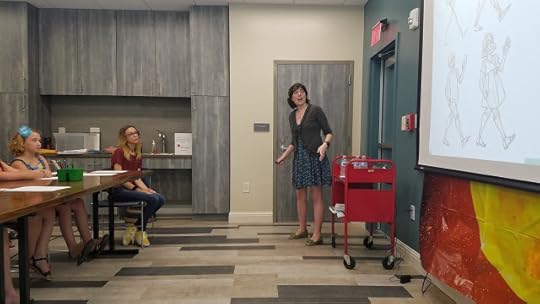 From Stick to Figure- A drawing class taught through the St Charles Parish Library
Study how other teachers are teaching similar content.
My Artnerds on Patreon have access to all my class materials! So if you'd like an in depth look at how I teach my classes, want to check out my presentations and take a look at my handouts, you can join the Artnerd community now! I even have a special teachers tier that allows you to use my materials, with my consent. Your support on Patreon allows me to continue to devote time to updating this blog, helping artists like you! If you're not a fan of commitment, show your love by leaving me a tip on Ko-fi!
Try to focus on one topic per class session
For example, when I'm teaching a six week comic class, we cover:
Planning and Writing Your ComicLayouts and ThumbnailsRoughs- Character Design and Human AnatomyRoughs- EnvironmentsInkingAssembling Your Zines/ Exchange
But I also offer standalone classes sometimes, and then it's necessary to make sure the class is entirely self contained. A few of the self contained classes I've offered:
Comics BootcampDIY Zines and ComicsManga MadnessFrom Stick to FigureIntroduction to Alcohol MarkersMixed Media Markers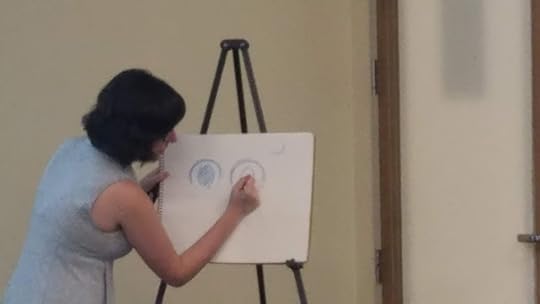 Live demonstrations allow you to answer questions and keep the audience engaged
Know whether your employer is providing the materials or if you're responsible for providing materials
This makes a huge difference, because art supplies, especially enough for a class, gets expensive! If they're providing the materials, try to find out what they're willing to offer so you can gain experience working with those tools ahead of time. If they're willing to buy and you need to prepare a materials list, its important to know what stores they're willing to buy from when you make your list.
Are you being paid hourly (that's class hours, usually) or per head? Budget your time and materials accordingly, or be willing to absorb the cost.
I will say that getting paid an hourly rate has been more fair for me, as a teacher, than getting paid per head, as PPH puts the onus of promotion on me. In the past, working with employers who pay per head, I've found that they usually do very little in terms of promotion, and I'm expected to do all the work, which is not factored into the per head cost.
Who's handling the printing?
Printing may seem like a small cost, but when you're printing handouts, drawing templates, and handling zine and minicomic printing, it gets expensive fast.
Give yourself ample prep time.
If it's a new class, I recommend spending the week before the class prepping. If it's a class you've taught before, I recommend dedicating a couple hours to revising
Know your teaching style
I teach with a LOT of energy and kindness, which leaves me absolutely wiped out after class. This means on days before I teach or days after I teach, it's best if I conserve my energy or recovery, because burnout is a real issue.
Who's responsible for filling the class?
I touched on this earlier, but it bears repeating. Who's handling promoting the class and pushing enrollment? While self promoting a class may not feel like a big deal, it can quickly become exhausting and may overwhelm your followers on social media.
If they are: How do they plan on promoting the class?
If you are: What methods are you going to use to promote the class in the local area?
Is this for a grade or is it for fun?
If it's fun, the class is going to be really reliant on you and your attitude for motivation, so it's important to be encouraging and positive. Building trust with your students is an important component of getting them to actually do the work.
Take notes after each class on what went well and what went wrong.
Be open to students' suggestions and critique- they can provide invaluable insight that will allow you to improve future classes.
Good time management is a must
If this is a weakpoint for you now, it's going to get worse as you're handling student work, designing classes, collecting and maintaining materials, and driving to and from class.
Don't be afraid to say "I don't know, but I know how to find out!"
This is what Google is for!
Bringing snacks
This is usually out of your own pocket, and will vary based on location, but bringing snacks helps students stay focused and helps develop trust and goodwill
Plan breaks
People need time to process information- breaks give students a chance to stretch their legs, get some water, have a snack, and ask questions. It also gives YOU a chance to take a break- so if you need to go to the bathroom or get some water, don't allow your students to deter you from utilizing your break as well!
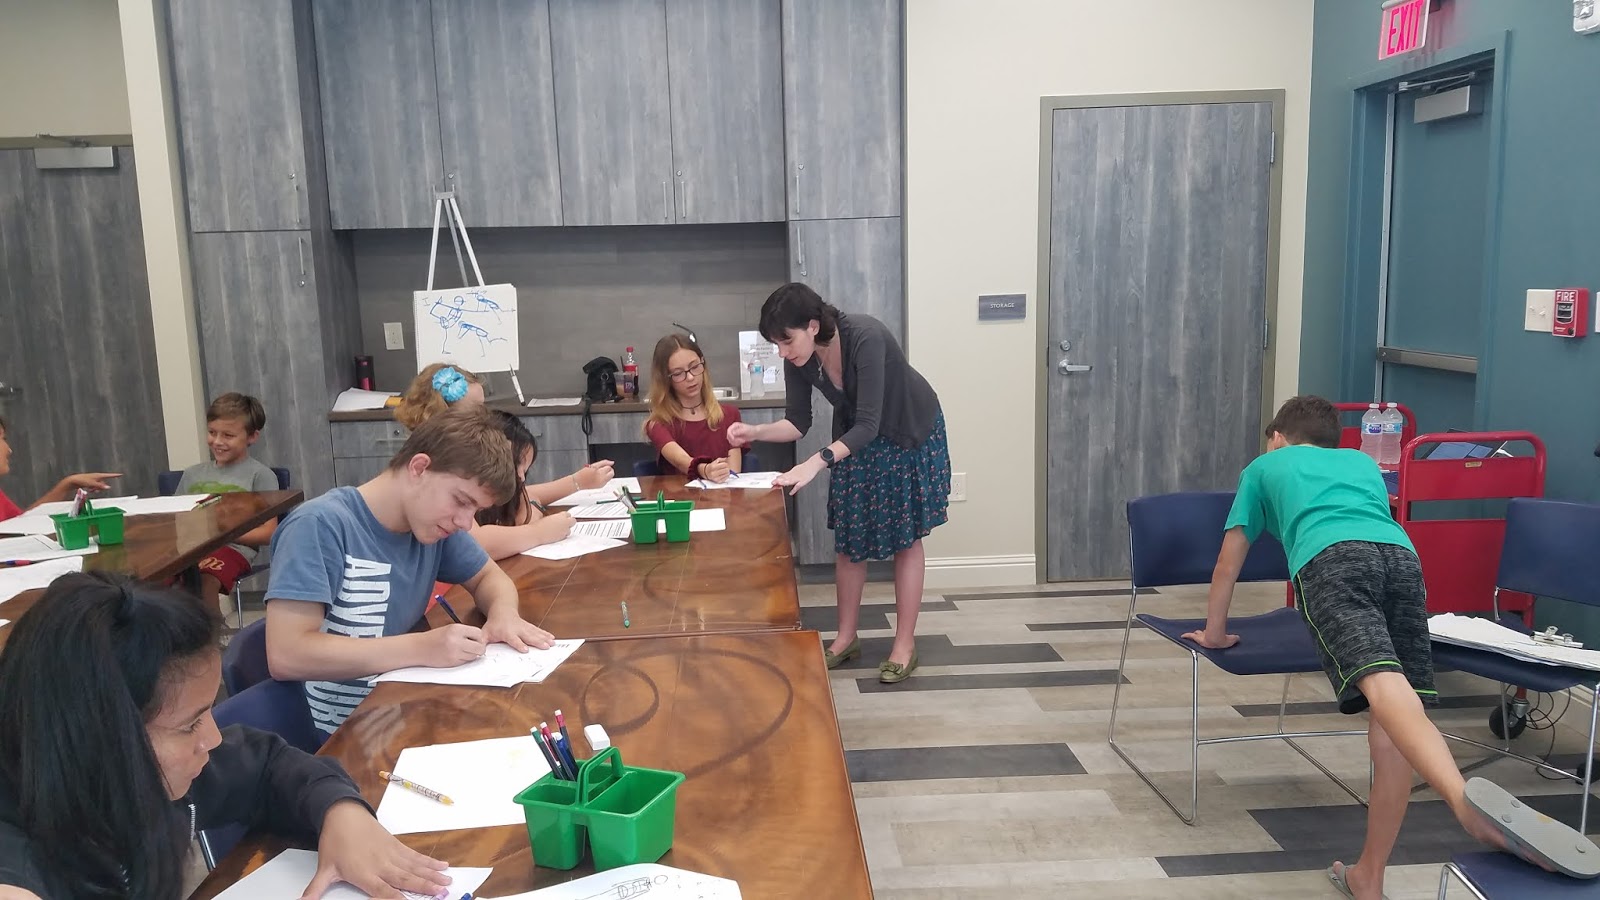
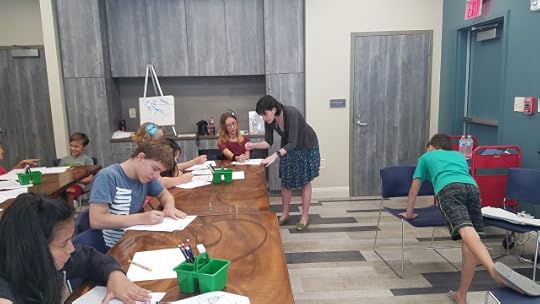 Student posing during figure drawing while I answer student questions
Bring hands on activities
Don't just lecture the whole time- give them a chance (and the materials) to explore their own ideas and projects. At the very least, allow them to doodle while you talk (it helps many students stay focused!)
Encourage class participation/interaction as frequently as possible
Engaged students are more likely to retain information, so if you can, make the classes fun!
Get them to pose as models for figure drawing and gesture practice
Ask them questions frequently to check understanding
You can't always rely on technology like wi-fi and projectors
Even if they do have this technology, Murphy's Law says it'll be broken or go down mid presentation, so you have to be prepared to think on your feet.
Don't expect your students to keep up with emails
You can utilize it, and act like you expect it when talking to them, but they probably won't actually read all your emails or respond to emails, so don't take it personally.
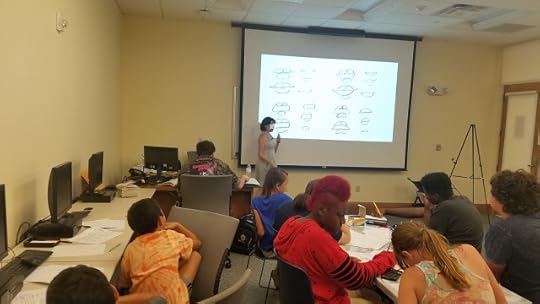 Manga Madness, a drawing class taught through St Charles Parish Library
Great Resources:
Drawing Words and Writing Pictures
Drawing Comics Lab
Lynda Barry's Syllabus
 Mixed Media Marker Class- a hands on alcohol marker class taught through the Nashville Plaza Artist Materials (art supply store)
I get asked about this a lot- it's quite an open ended question that could get complicated quick, so I'm going to try to keep today's post pretty basic. If you still have questions, please don't hesistate to email me, I'm happy to revisit this topic in the future!
I've talked about my experiences with teaching with NCE , why teachers should offer a comic craft module in their classes, as well as my recommended reading lists (see sidebar of blog) and recommended materials for teaching classes , and methods you can use to promote your classes.
How I develop my classes:
Decide what you want to teach, or what you're best suited to teachMake an outline of what you want to cover in the time you haveDecide if you want to do a presentation, handouts, or pure demonstrationSpend the next week actively practicing and preparing your materialsTeach the class, and request feedback from students-actively pay attention to what they say, and where you lose themAnalyze how the class went after- what can be improved, what should be cut
 Writing Comics- A class taught through St Charles Parish Library
The best advice my mother, a teacher of 25 years, has ever given me was:
Be flexible.
And when teaching comics, flexibility and patience are huge assets.
 From Stick to Figure- A drawing class taught through the St Charles Parish Library
Study how other teachers are teaching similar content.
My Artnerds on Patreon have access to all my class materials! So if you'd like an in depth look at how I teach my classes, want to check out my presentations and take a look at my handouts, you can join the Artnerd community now! I even have a special teachers tier that allows you to use my materials, with my consent. Your support on Patreon allows me to continue to devote time to updating this blog, helping artists like you! If you're not a fan of commitment, show your love by leaving me a tip on Ko-fi!
Try to focus on one topic per class session
For example, when I'm teaching a six week comic class, we cover:
Planning and Writing Your ComicLayouts and ThumbnailsRoughs- Character Design and Human AnatomyRoughs- EnvironmentsInkingAssembling Your Zines/ Exchange
But I also offer standalone classes sometimes, and then it's necessary to make sure the class is entirely self contained. A few of the self contained classes I've offered:
Comics BootcampDIY Zines and ComicsManga MadnessFrom Stick to FigureIntroduction to Alcohol MarkersMixed Media Markers
 Live demonstrations allow you to answer questions and keep the audience engaged
Know whether your employer is providing the materials or if you're responsible for providing materials
This makes a huge difference, because art supplies, especially enough for a class, gets expensive! If they're providing the materials, try to find out what they're willing to offer so you can gain experience working with those tools ahead of time. If they're willing to buy and you need to prepare a materials list, its important to know what stores they're willing to buy from when you make your list.
Are you being paid hourly (that's class hours, usually) or per head? Budget your time and materials accordingly, or be willing to absorb the cost.
I will say that getting paid an hourly rate has been more fair for me, as a teacher, than getting paid per head, as PPH puts the onus of promotion on me. In the past, working with employers who pay per head, I've found that they usually do very little in terms of promotion, and I'm expected to do all the work, which is not factored into the per head cost.
Who's handling the printing?
Printing may seem like a small cost, but when you're printing handouts, drawing templates, and handling zine and minicomic printing, it gets expensive fast.
Give yourself ample prep time.
If it's a new class, I recommend spending the week before the class prepping. If it's a class you've taught before, I recommend dedicating a couple hours to revising
Know your teaching style
I teach with a LOT of energy and kindness, which leaves me absolutely wiped out after class. This means on days before I teach or days after I teach, it's best if I conserve my energy or recovery, because burnout is a real issue.
Who's responsible for filling the class?
I touched on this earlier, but it bears repeating. Who's handling promoting the class and pushing enrollment? While self promoting a class may not feel like a big deal, it can quickly become exhausting and may overwhelm your followers on social media.
If they are: How do they plan on promoting the class?
If you are: What methods are you going to use to promote the class in the local area?
Is this for a grade or is it for fun?
If it's fun, the class is going to be really reliant on you and your attitude for motivation, so it's important to be encouraging and positive. Building trust with your students is an important component of getting them to actually do the work.
Take notes after each class on what went well and what went wrong.
Be open to students' suggestions and critique- they can provide invaluable insight that will allow you to improve future classes.
Good time management is a must
If this is a weakpoint for you now, it's going to get worse as you're handling student work, designing classes, collecting and maintaining materials, and driving to and from class.
Don't be afraid to say "I don't know, but I know how to find out!"
This is what Google is for!
Bringing snacks
This is usually out of your own pocket, and will vary based on location, but bringing snacks helps students stay focused and helps develop trust and goodwill
Plan breaks
People need time to process information- breaks give students a chance to stretch their legs, get some water, have a snack, and ask questions. It also gives YOU a chance to take a break- so if you need to go to the bathroom or get some water, don't allow your students to deter you from utilizing your break as well!
 Student posing during figure drawing while I answer student questions
Bring hands on activities
Don't just lecture the whole time- give them a chance (and the materials) to explore their own ideas and projects. At the very least, allow them to doodle while you talk (it helps many students stay focused!)
Encourage class participation/interaction as frequently as possible
Engaged students are more likely to retain information, so if you can, make the classes fun!
Get them to pose as models for figure drawing and gesture practice
Ask them questions frequently to check understanding
You can't always rely on technology like wi-fi and projectors
Even if they do have this technology, Murphy's Law says it'll be broken or go down mid presentation, so you have to be prepared to think on your feet.
Don't expect your students to keep up with emails
You can utilize it, and act like you expect it when talking to them, but they probably won't actually read all your emails or respond to emails, so don't take it personally.
 Manga Madness, a drawing class taught through St Charles Parish Library
Great Resources:
Drawing Words and Writing Pictures
Drawing Comics Lab
Lynda Barry's Syllabus
November 28, 2019
Hands on Creativity
Back in October, I participated in Hands on Creativity in a new capacity- as an art supply demonstrator. I've done Hands on Creativity for years as a customer, and have enjoyed the free workshops, demos, and samples sponsored by Plaza and the various visiting art supply company reps, and I was excited to experience it from a different perspective.
For years, I've wanted to work as a (paid) art supply company demonstrator or representative. After graduating SCAD, I pivoted the purpose of this blog for a while to reflect that desire, and started reviewing art supplies on Youtube to help facilitate that goal. Bruce, the manager at Plaza, facilitated a partnership between myself, Strathmore and Faber-Castell, which allowed me to sample some of what is on offer and create pieces of art that utilize those materials.
I have a couple Livestreams where I went over the materials sent by both Strathmore and Faber-Castell, for the curious!
Demonstrating Art Supplies Sent by Strathmore and Lyra
Swatching Faber-Castell on Strathmore
I created several new pieces using just Strathmore and Faber-Castell products to help me prepare for Hands on Creativity, and recorded the process as tutorials! Those will be available to the general public on Youtube in the future, but my wonderful Artnerds on Patreon have had them for about a month now.
Although I haven't been paid for this partnership, I appreciated the opportunity and really enjoyed connecting with the local art community and demonstrating, hands-on, Faber-Castell and Strathmore art supplies. In the future, I hope to see financial compensation for my hard work and custom artwork, but I'm grateful for the opportunity to gain some experience and hopefully make some connections.
Faber-Castell Pitt pens, Albrecht Durer watercolor pencils and watercolor markers on Canson Watercolor Artboard.

Pitt pens on Strathmore 300 series Smooth Bristol
Faber-Castell Pitt pens, Albrecht Durer watercolor markers, Polychromos color pencils on Canson Mixed Media artboard

Faber-Castell Albrecht Durer watercolor markers, Polychromos color pencils, and Pitt Pens on Strathmore Toned Blue Mixed Media Paper

Faber-Castell Pitt Pens, Albrecht Durer watercolor markers, Polychromos color pencils on Strathmore Toned Tan mixed media paper
Faber-Pitt Pens, Albrecht Durer watercolor markers on Strathmores new cottonrag watercolor paper
For years, I've wanted to work as a (paid) art supply company demonstrator or representative. After graduating SCAD, I pivoted the purpose of this blog for a while to reflect that desire, and started reviewing art supplies on Youtube to help facilitate that goal. Bruce, the manager at Plaza, facilitated a partnership between myself, Strathmore and Faber-Castell, which allowed me to sample some of what is on offer and create pieces of art that utilize those materials.
I have a couple Livestreams where I went over the materials sent by both Strathmore and Faber-Castell, for the curious!
Demonstrating Art Supplies Sent by Strathmore and Lyra
Swatching Faber-Castell on Strathmore
I created several new pieces using just Strathmore and Faber-Castell products to help me prepare for Hands on Creativity, and recorded the process as tutorials! Those will be available to the general public on Youtube in the future, but my wonderful Artnerds on Patreon have had them for about a month now.
Although I haven't been paid for this partnership, I appreciated the opportunity and really enjoyed connecting with the local art community and demonstrating, hands-on, Faber-Castell and Strathmore art supplies. In the future, I hope to see financial compensation for my hard work and custom artwork, but I'm grateful for the opportunity to gain some experience and hopefully make some connections.

Faber-Castell Pitt pens, Albrecht Durer watercolor pencils and watercolor markers on Canson Watercolor Artboard.

Pitt pens on Strathmore 300 series Smooth Bristol

Faber-Castell Pitt pens, Albrecht Durer watercolor markers, Polychromos color pencils on Canson Mixed Media artboard

Faber-Castell Albrecht Durer watercolor markers, Polychromos color pencils, and Pitt Pens on Strathmore Toned Blue Mixed Media Paper
Faber-Castell Pitt Pens, Albrecht Durer watercolor markers, Polychromos color pencils on Strathmore Toned Tan mixed media paper
Faber-Pitt Pens, Albrecht Durer watercolor markers on Strathmores new cottonrag watercolor paper
November 11, 2019
Inktober 2019
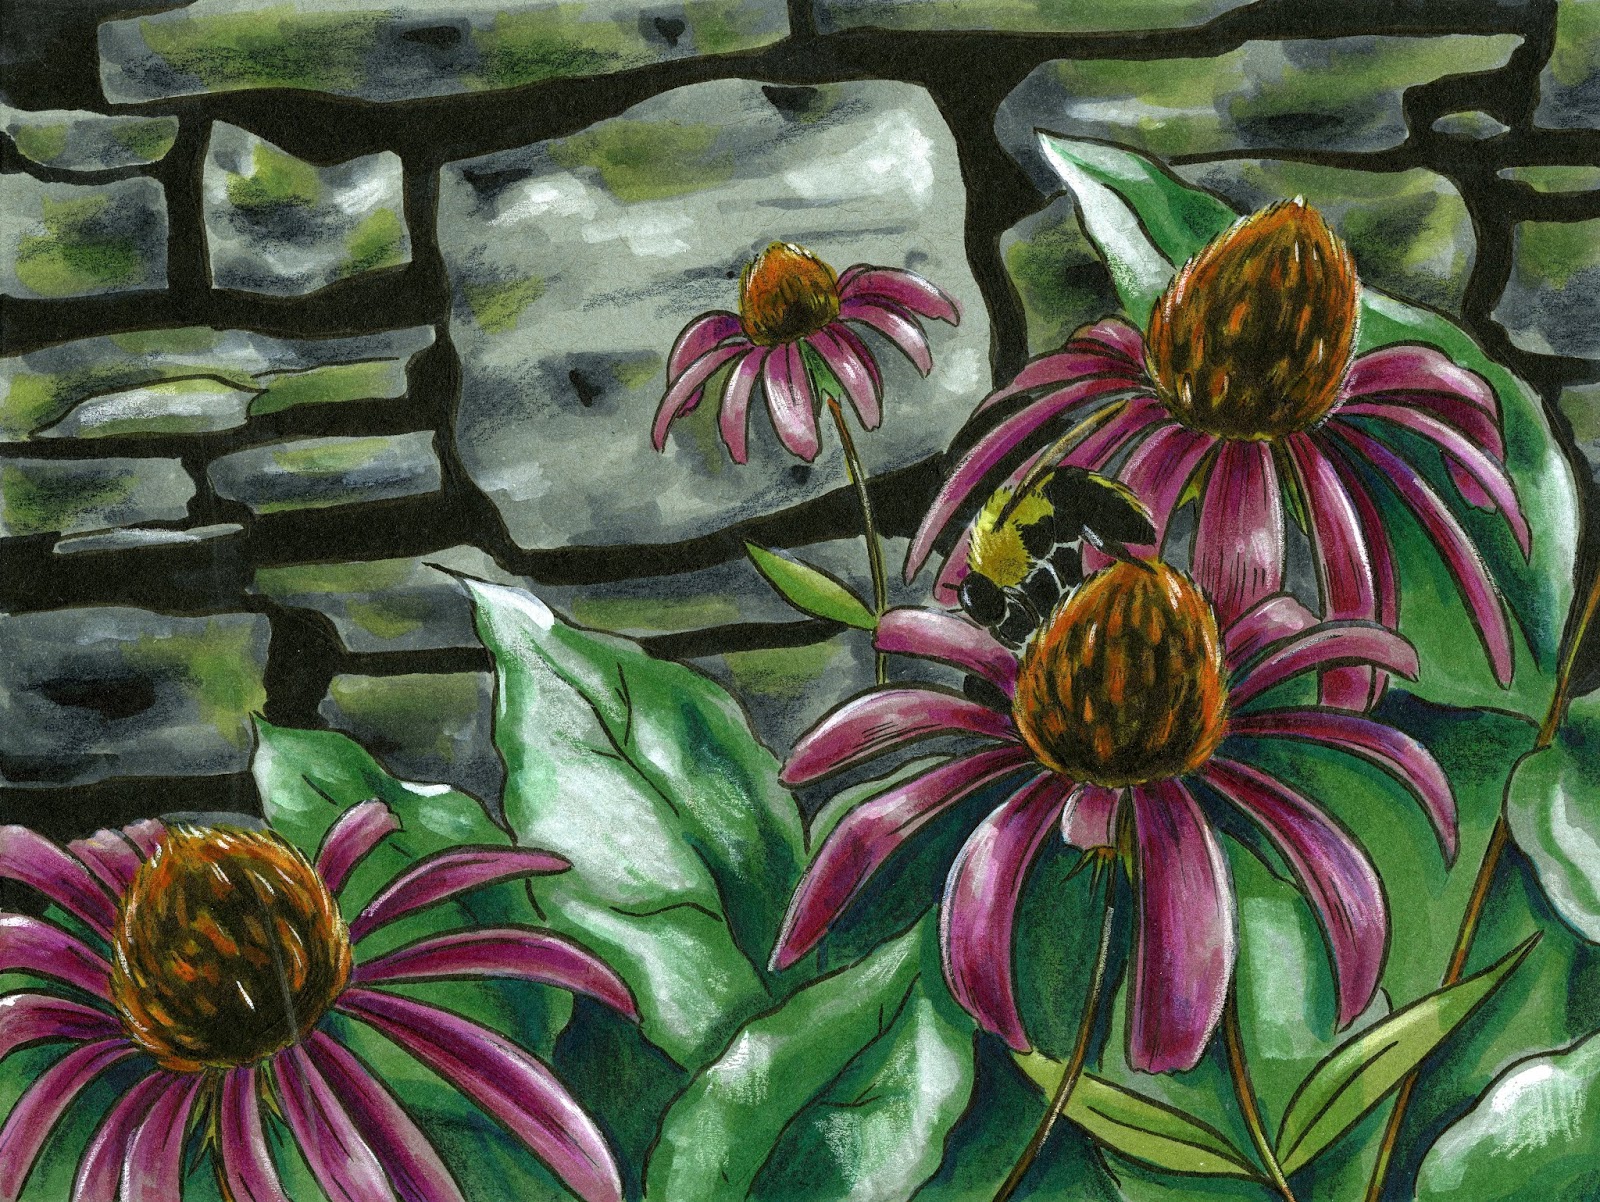
Week before last, we wrapped up our last week of Inktober. I've done Inktober for several years now, and this year, I added another Volume to Lilliputian Living, focusing on plants and insects. As with prior years, I plan on collating this year's Inktober into a zine, but I also have plans to combine all three Inktobers into a small perfect-bound book.
I really enjoyed illustrating various plants this year- inspired by Crime Pays but Botany Doesn't on Youtube, I made sure to pay particular attention to leaf shapes and how they are attached to the rest of the plant and distinctive features of the flowers.
My real challenge this Inktober was to manage to complete Inktober while teaching Making Comics/Intermediate Comics, tabling for two days, outside, at Handmade and Bound, and acting as an art ambassador for Faber-Castell and Strathmore for two days during Hands on Creativity. As an added bonus, I also managed to record and share timelapse videos for 27 illustrations and streamed my 31st Inktober as part of my Halloween stream.
My materials for Inktober were pretty simple- all materials I've used and loved.
Strathmore 500 Series Mixed Media Visual Journal
Pink Color Eno Lead
Sakura Pigma FB Brushpen
Pentel Pigment Brushpen- Extra Fine
Pentel Pigment Brushpen- Medium
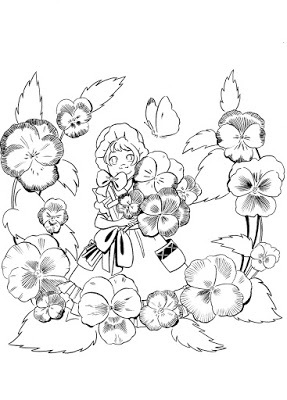
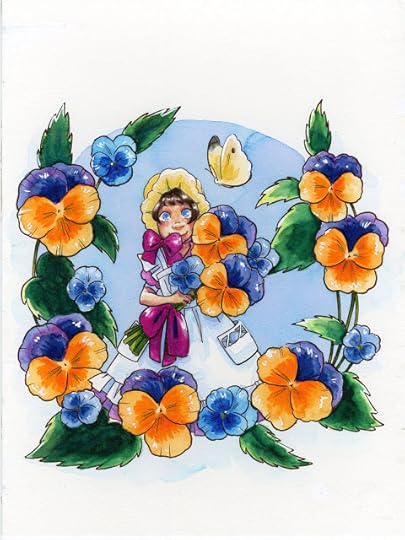
Day 1- Pansies Original Scan Vs Cleaned Scan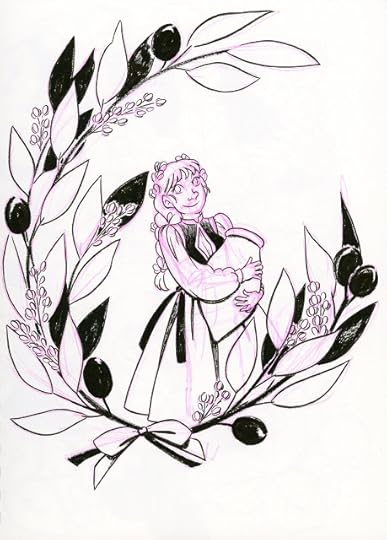 Day 3- Olives
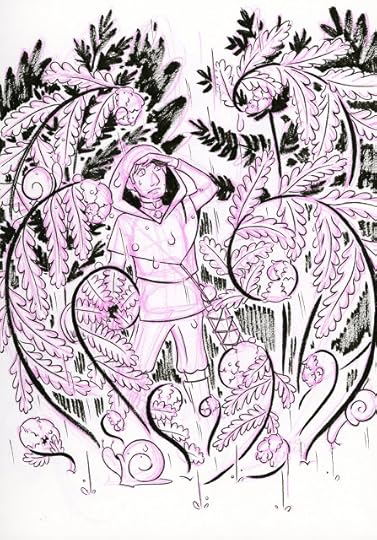 Day 5- Ferns
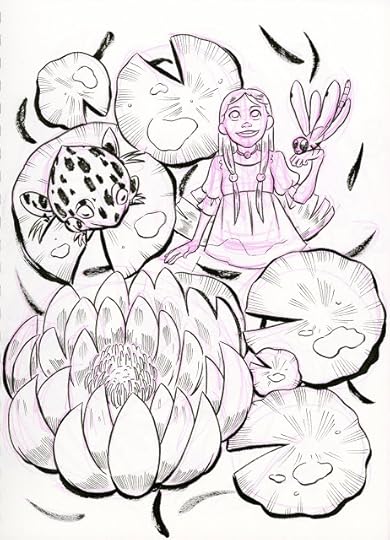 Day 13- Waterlily
 Day 16- Squash Blossom
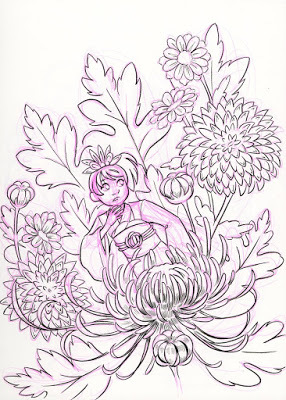
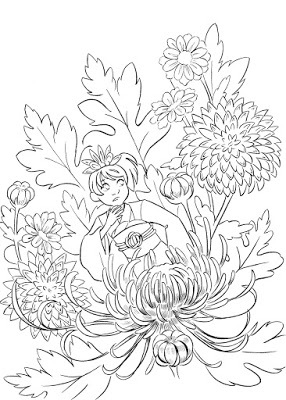
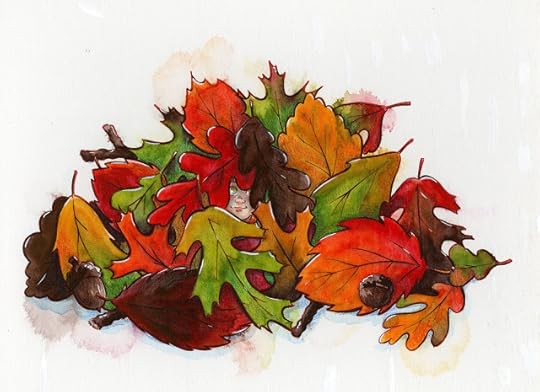
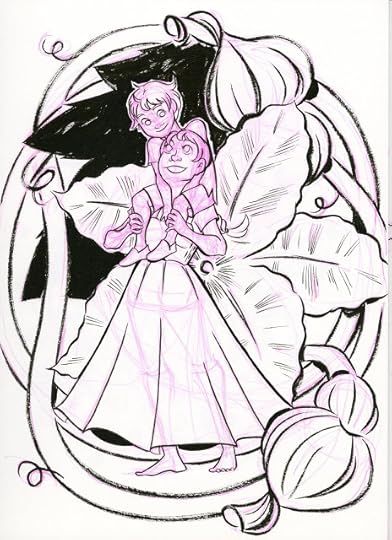
Day 25- Chrysanthemum- Original Scan Vs Clean Scan
Artnerds received all 32 illustrations, cleaned up and contrast brightened, as a printable coloring book, for free! Join me on Patreon for this awesome perk, or purchase it off Gumroad for $10. Artnerds also received a sketchbook of the scans, and will have access to a free PDF zine once that's released.
2019 Inktober Sketchbook Tour

I really enjoyed illustrating various plants this year- inspired by Crime Pays but Botany Doesn't on Youtube, I made sure to pay particular attention to leaf shapes and how they are attached to the rest of the plant and distinctive features of the flowers.
My real challenge this Inktober was to manage to complete Inktober while teaching Making Comics/Intermediate Comics, tabling for two days, outside, at Handmade and Bound, and acting as an art ambassador for Faber-Castell and Strathmore for two days during Hands on Creativity. As an added bonus, I also managed to record and share timelapse videos for 27 illustrations and streamed my 31st Inktober as part of my Halloween stream.
My materials for Inktober were pretty simple- all materials I've used and loved.
Strathmore 500 Series Mixed Media Visual Journal
Pink Color Eno Lead
Sakura Pigma FB Brushpen
Pentel Pigment Brushpen- Extra Fine
Pentel Pigment Brushpen- Medium


Day 1- Pansies Original Scan Vs Cleaned Scan
 Day 3- Olives
 Day 5- Ferns
 Day 13- Waterlily
 Day 16- Squash Blossom

Day 25- Chrysanthemum- Original Scan Vs Clean Scan
Artnerds received all 32 illustrations, cleaned up and contrast brightened, as a printable coloring book, for free! Join me on Patreon for this awesome perk, or purchase it off Gumroad for $10. Artnerds also received a sketchbook of the scans, and will have access to a free PDF zine once that's released.
2019 Inktober Sketchbook Tour
November 6, 2019
Mixed Media Marker Class
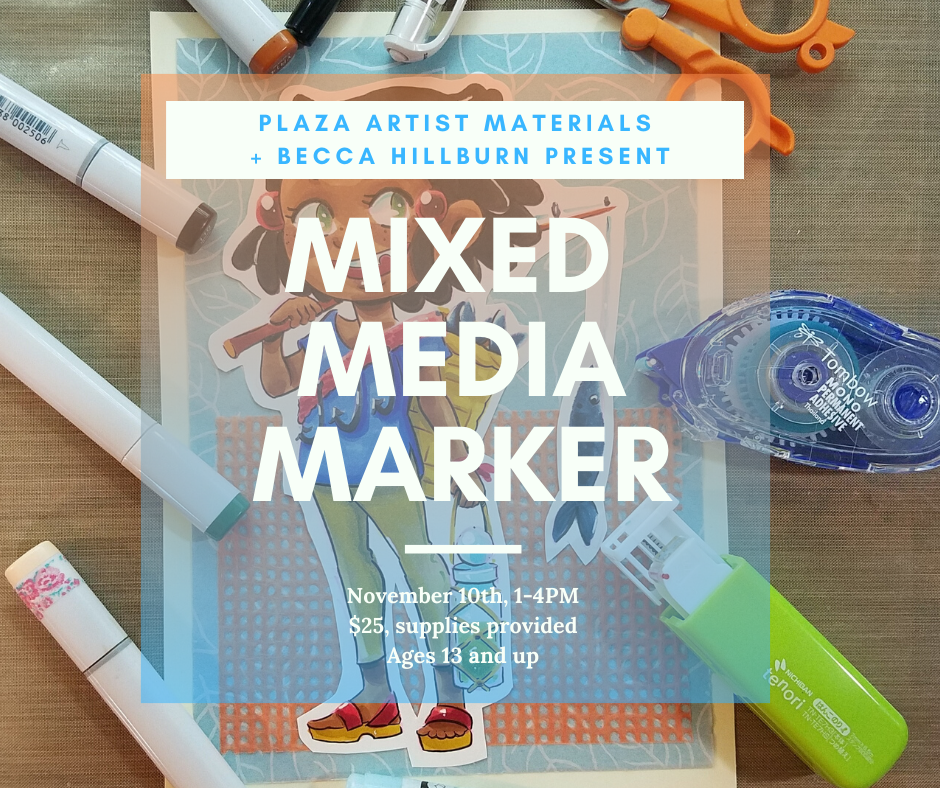
I have a marker class coming up this Sunday at the Nashville, TN Plaza Artist Materials, where I'll show you how to go mixed media with your markers!
Mixed Media Marker
November 10th, 1-4PM
$25, supplies provided
Ages 13 and up, under 13 welcome with a parent/guardian registration
Alcohol markers and watercolor? YES PLEASE! Markers with cut paper? Of COURSE! Chiyogami paper, washi tape, and stickers? PILE IT ON. Learn how to take your marker art to the next level by going mixed media!

This class is perfect for stampers and scrappers looking to take stamped marker art to the next level, seeking creative solutions to filling a page, or looking for a little inspiration. It's also perfect for marker artists with a limited collection of markers, interested in going mixed media for more rendered illustrations, or artists who want to break out of a creative rut.
You're welcome to draw and bring your favorite materials, but I'll also have linearts and various supplies on hand! This is a great way to use up that stash of cute scraps you've been saving for a rainy day.

If you have a finished piece of marker art that you'd like to utilize, bring that too! We'll make it into a finished illustration together

And if you would like for me to take a look at your art or portfolio, please email me to let me know, and show up 30 minutes early. This is available on a first come, first serve basis, and is provided as a service Register through Plaza Artist Materials: Via Phone:
(615)- 254-3368
Online: https://www.plazaart.com/stores/nashville

November 4, 2019
Handmade and Bound
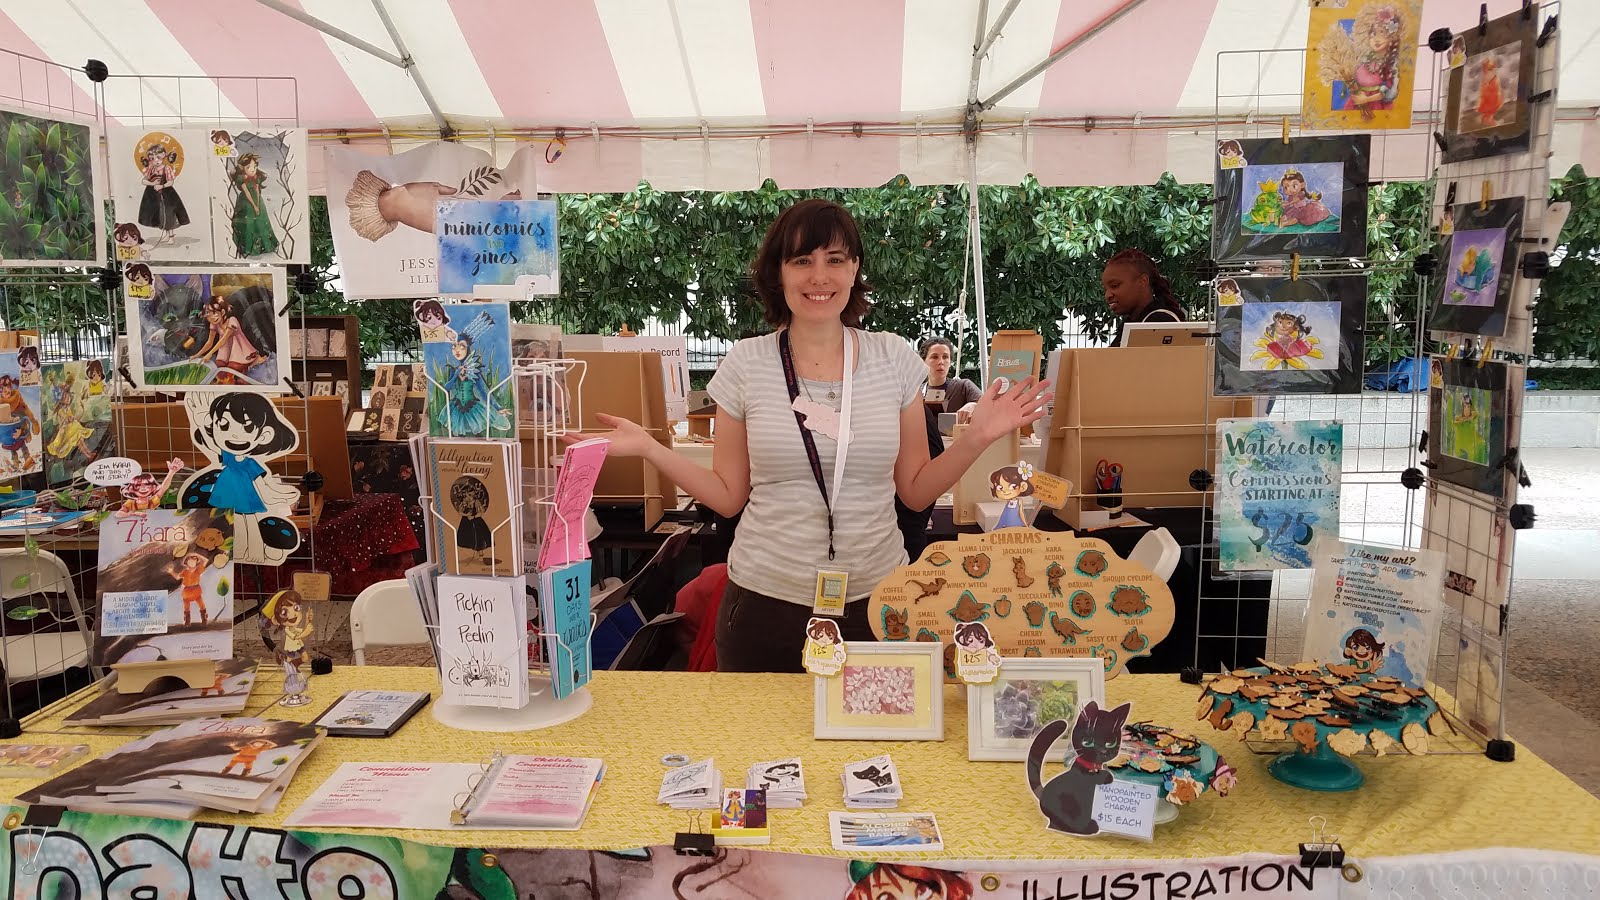 Handmade and Bound, Friday
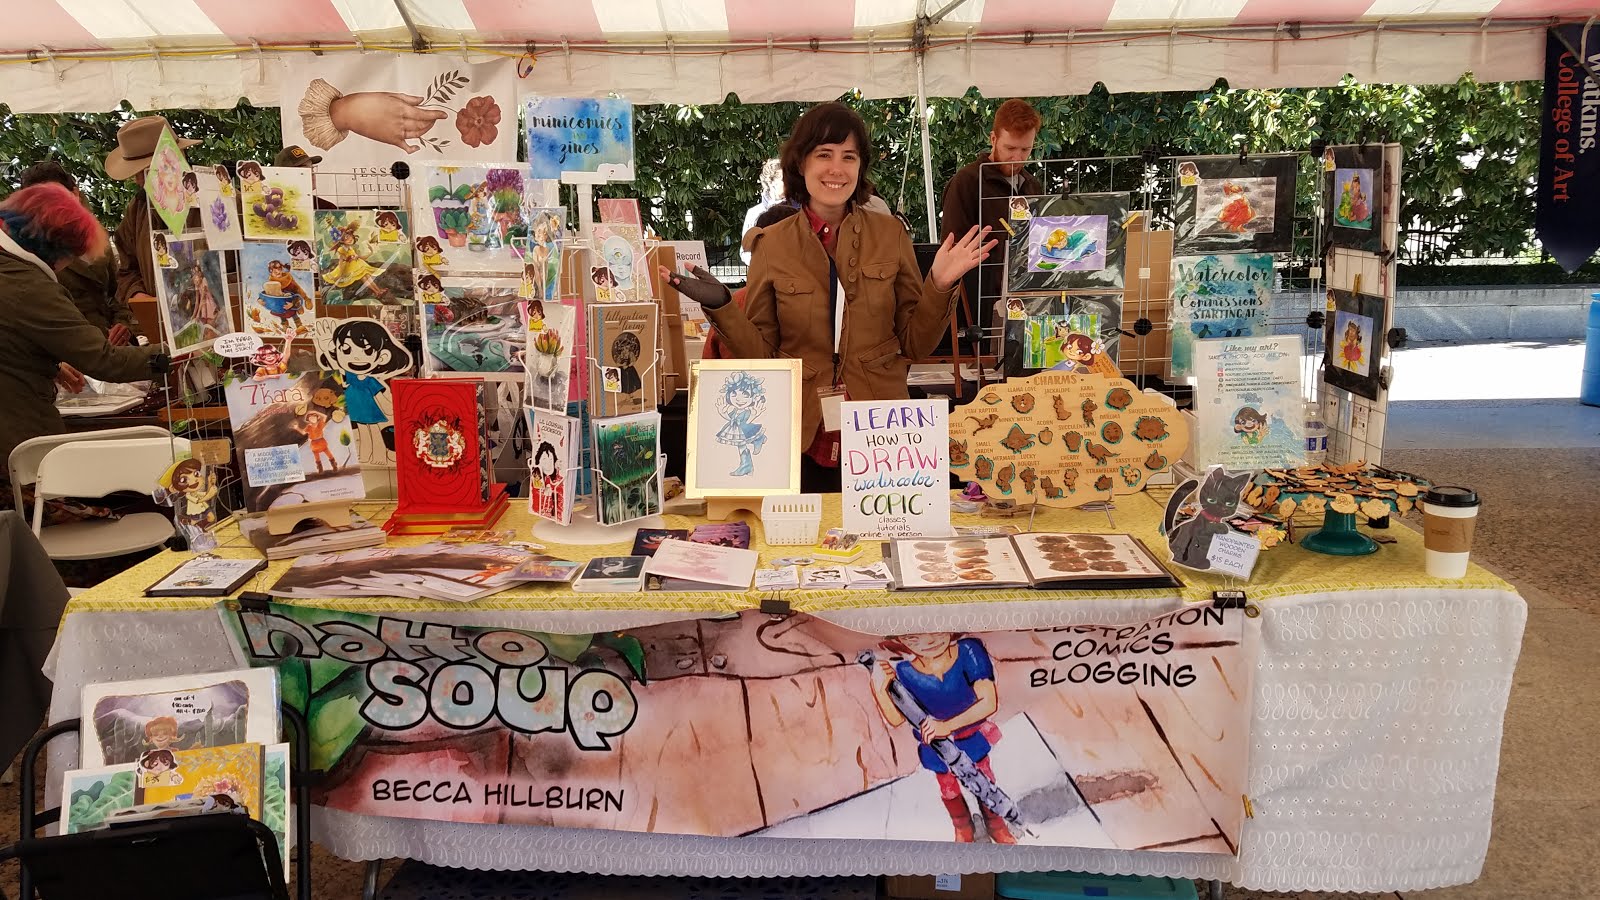 Handmade and Bound, Saturday
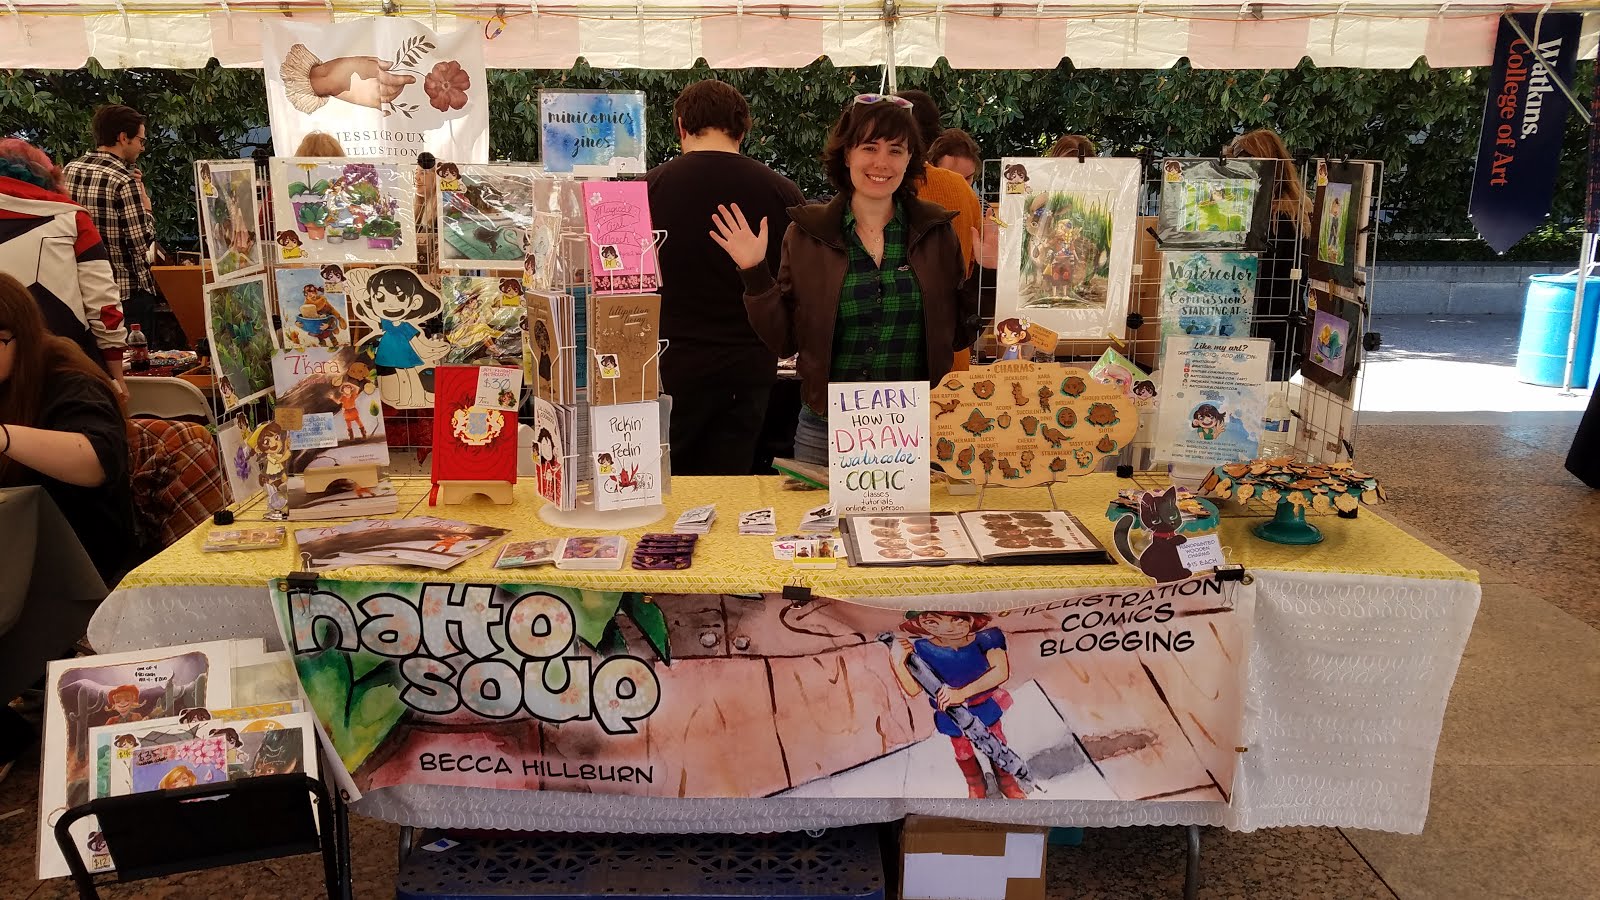 Handmade and Bound, Sunday
What is it?
Handmade and Bound is a small handmade and self published book event put on by Watkins College of Art, a Nashville area art school. Handmade book makers, zinesters, comic artists, and self-published writers are welcome to apply for a table. Handmade and Bound is part of the Southern Festival of Books, a large book event occurring in Downtown Nashville.
Had to sign a no derivative (no fanart) clause)Three days- Friday, Saturday, SundayOutside, beneath the Handmade and Bound TentVery weather reliantNo outdoor heatersWho was there:Wake Up Comics (zine/minicomic vendor)Other comic artistsBook binders and Handmade Books
Who am I?
I make comics and zines- self-published and published via anthology. I also offer original art, commissions, and laser cut charms. Everything on the table was designed or drawn by me.
Table Tour:
Table Top:
Table Cost
$25 Application fee, paid to Watkins
$60 Table Cost
Travel- negligable, it's in downtown Nashville
Parking- negligable- Joseph dropped us off and picked us up on Friday, parking was free on Saturday and Sunday
Food- Brought snacks for Friday, at at foodtruck Saturday and Sunday- $30
Total Costs: $115
Friday sales were awful- $16 total, 2 sales
Saturday sales were decent- $343 total, 24 sales
Sunday sales were low- $101 total, 12 sales
Total Sales: $460
Note: Sales were down from last year.
Pros:
Able to promote the heck out of my upcoming Alcohol Marker class with Plaza (unfortunately, this promotion was not reflected in the class attendance- I had only three students show up)
Gave away a lot of free micro mini-comics to little kids- it's always really rewarding to pass the magic of making comics and self-publishing on to the next generation
Sold a few copies of 7" Kara
Sold a few originals
A little additional income when I desperately need it- emphasis on little, as sales were slower than prior year
Cons:
Weather was cold Friday, Saturday- which is physically hard
Sales were lower than last year
Show is outside, very weather dependent
Wind knocked over my display on Friday due to gusts
Tent is not heated- Friday was really taxing physically
My post show energy was pretty bad, and the timing is awful as I had two classes to teach the following week
2018 Handmade and Bound Show Recap:

October 31, 2019
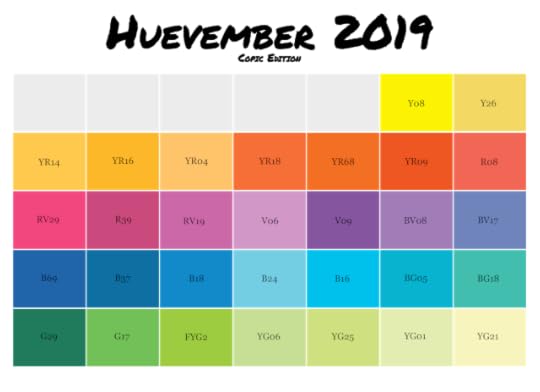
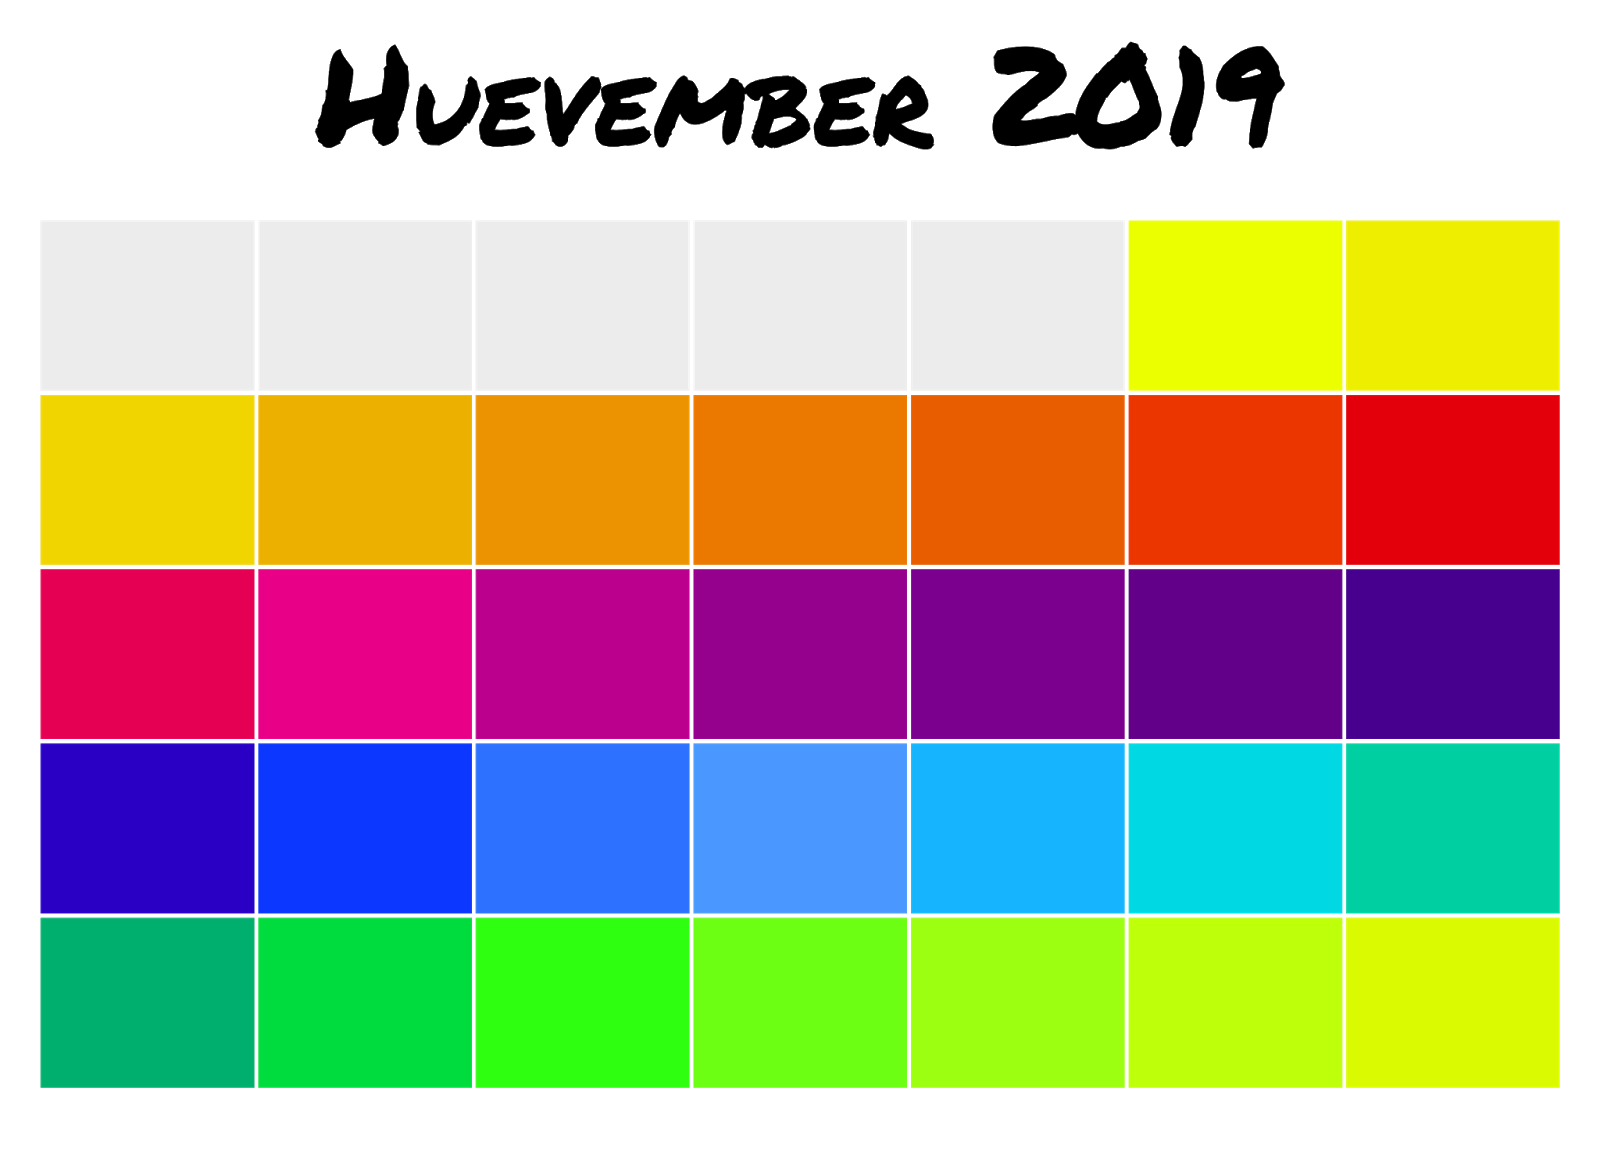
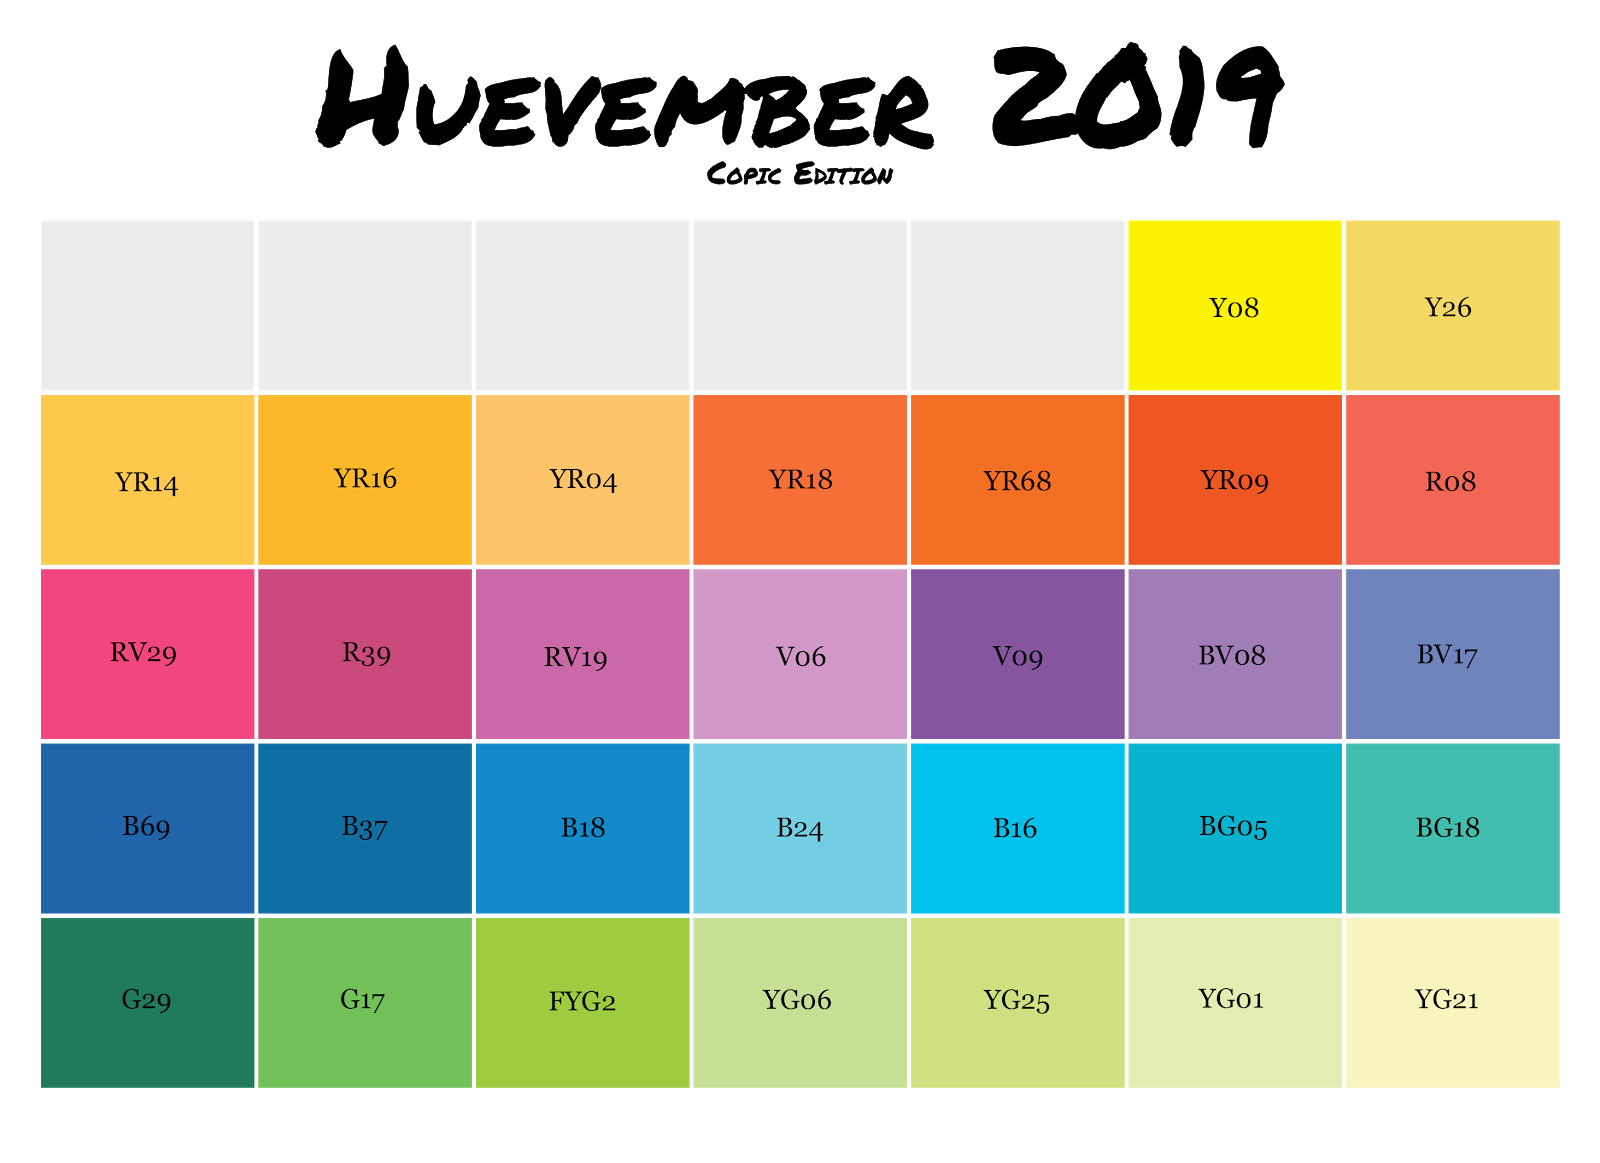
Huevember 2019
Hello, good tidings, and greetings to you all!
Now that Inktober's over, we can move right on into the next challenge - Huevember!
In case you don't know, Huevember's a daily challenge through the month of November, where you're challenged to focus on using one hue per day. You can alter the saturation and lightness, and even use other colors, but the day's color must remain your main focus.
With that said, I've come up with a couple of awesome calendars to help those of you keep track of your hues for the month. They've got transparent backgrounds and are ready to use!
 2019 Digital Huevember Calendar
For you traditional artists, I've done my best to come up with an alternative that captures the same general color progression, focusing on Copic markers. You can use it if you're a digital artist as well, just bear in mind that colors aren't exactly the same as they show up as on your monitor.
Some of the colors will definitely be darker than they appear here on the screen - and if you find these selections don't work for you, you're welcome to substitute your own!
(And of course, if you don't have Copics - use whatever you feel like!)
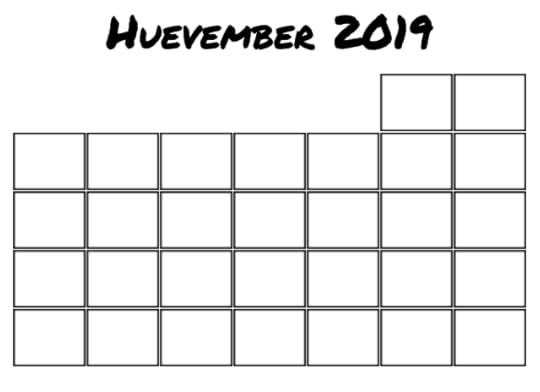
 Feeling like you wanna go freeform? How about filling in your own selections with the colors you want to use instead?
The license for these calendars is pretty lax - basically, you're free to use or modify them however you want - but if you redistribute the calendars, please credit me in some way.
Except the blank one. You don't have to credit me at all. The blank calendar is probably not... Anyway... Yeah, I'm not going to ramble about copyright. I'm not a lawyer.
You can find me on Twitter (@kibou), deviantArt (kabocha), and Instagram (@haganekitsune).
Now that Inktober's over, we can move right on into the next challenge - Huevember!
In case you don't know, Huevember's a daily challenge through the month of November, where you're challenged to focus on using one hue per day. You can alter the saturation and lightness, and even use other colors, but the day's color must remain your main focus.
With that said, I've come up with a couple of awesome calendars to help those of you keep track of your hues for the month. They've got transparent backgrounds and are ready to use!
 2019 Digital Huevember Calendar
For you traditional artists, I've done my best to come up with an alternative that captures the same general color progression, focusing on Copic markers. You can use it if you're a digital artist as well, just bear in mind that colors aren't exactly the same as they show up as on your monitor.
Some of the colors will definitely be darker than they appear here on the screen - and if you find these selections don't work for you, you're welcome to substitute your own!
(And of course, if you don't have Copics - use whatever you feel like!)
 Feeling like you wanna go freeform? How about filling in your own selections with the colors you want to use instead?
The license for these calendars is pretty lax - basically, you're free to use or modify them however you want - but if you redistribute the calendars, please credit me in some way.
Except the blank one. You don't have to credit me at all. The blank calendar is probably not... Anyway... Yeah, I'm not going to ramble about copyright. I'm not a lawyer.
You can find me on Twitter (@kibou), deviantArt (kabocha), and Instagram (@haganekitsune).
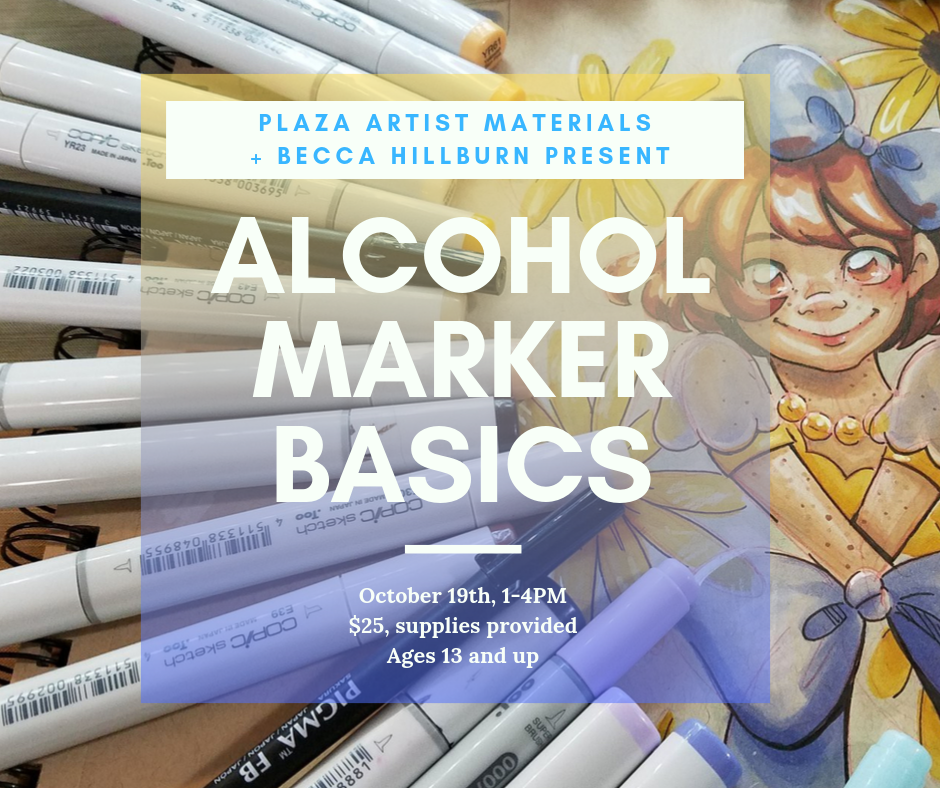
October 17, 2019
Alcohol Marker Basics Class- October 19th
Come learn the secrets of using Alcohol Markers, like Copic and Prismacolor, like a pro! Taught by the queen of alcohol marker reviews, Becca Hillburn (Nattosoup!) herself! (spoiler: it's me.)
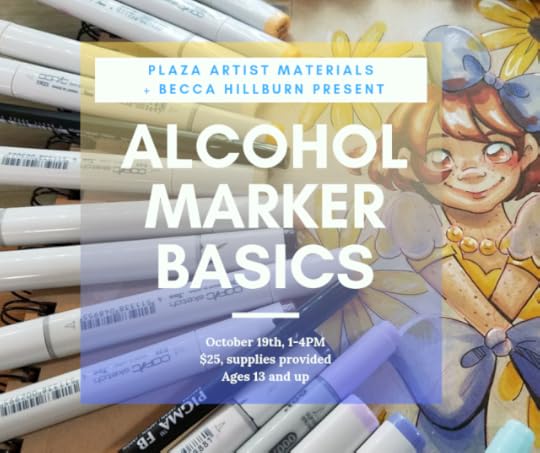
The class is at the Nashville Plaza Artist Materials, at 633 Middleton Street, on Saturday, October 19th. It's a three-hour class designed to cover everything you need to feel confident using Copic markers. Anyone age 13 and up is welcome to take the class alone, students under 13 are welcome with a parent or guardian registration.
Alcohol Marker BasicsSaturday, October 19th1-4PMPlaza Artist Materials633 Middleton Street$25 per student
Registration is still open and can be done online or by calling Plaza at 615-254-3368 and registering for Alcohol Marker Basics.

We're going to cover:
Getting started with markersMarker Brand recommendationsFavorite color blendsEssential color combosSkintone and hair color recommendationsFavorite Papers for MarkersCare and storage
Bring your own markers and receive customized instruction on how to use them, or use ours- Plaza and I will provide everything you need to get started in this three hour class. We'll have snacks on hand, but you're more than welcome to bring your own! And make sure you bring your questions- an interactive class is fun for everyone!
Don't enjoy drawing, but love to color? I've got you covered with cute lineart illustrations you can hone your skills on! You're also welcome to create your own illustrations! Paper, pencils, brushpens, and fineliners will be provided, but you are welcome to bring your own!
Don't live in the Nashville, TN area? My Artnerds on Patreon have access to the presentation and handouts- although there's nothing quite like taking a class in person!
The class is at the Nashville Plaza Artist Materials, at 633 Middleton Street, on Saturday, October 19th. It's a three-hour class designed to cover everything you need to feel confident using Copic markers. Anyone age 13 and up is welcome to take the class alone, students under 13 are welcome with a parent or guardian registration.
Alcohol Marker BasicsSaturday, October 19th1-4PMPlaza Artist Materials633 Middleton Street$25 per student
Registration is still open and can be done online or by calling Plaza at 615-254-3368 and registering for Alcohol Marker Basics.

We're going to cover:
Getting started with markersMarker Brand recommendationsFavorite color blendsEssential color combosSkintone and hair color recommendationsFavorite Papers for MarkersCare and storage

Bring your own markers and receive customized instruction on how to use them, or use ours- Plaza and I will provide everything you need to get started in this three hour class. We'll have snacks on hand, but you're more than welcome to bring your own! And make sure you bring your questions- an interactive class is fun for everyone!

Don't enjoy drawing, but love to color? I've got you covered with cute lineart illustrations you can hone your skills on! You're also welcome to create your own illustrations! Paper, pencils, brushpens, and fineliners will be provided, but you are welcome to bring your own!

Don't live in the Nashville, TN area? My Artnerds on Patreon have access to the presentation and handouts- although there's nothing quite like taking a class in person!
October 10, 2019
Handmade and Bound Volume 9
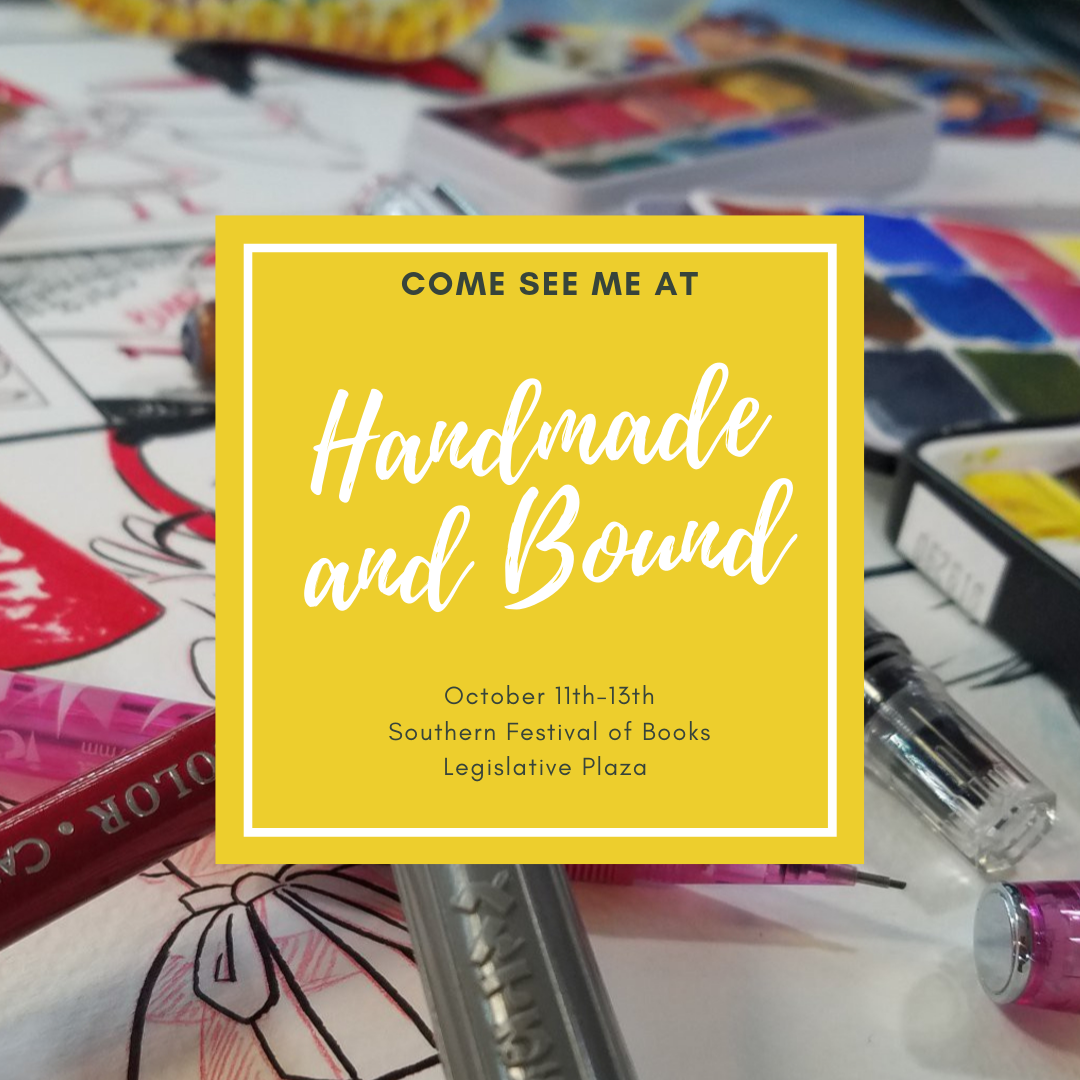
Come see me at Handmade and Bound this weekend! This is a free book lover's event in downtown Nashville, TN.Friday- 12:00pm-5:00pmSaturday- 10:00am-6:00pmSunday- 12L00pm-5:00pmtimes are approximate and based off last year's event.
Handmade and Bound is a zine, comic, and handmade book event hosted by Watkins College of art and the Southern Festival of Books. This collaboration is a great opportunity for book loving folks to get books signed, listen to author talks, and shop for awesome books! SCBWI is also there, repping the kidlit scene, and you can head down to the Nashville Public Library for their book sale! There's also live music and loads of tasty food trucks- so the Southern Festival of Books is a great free event for the whole family!
I'll be under the big Handmade and Bound tent Friday, Saturday, and Sunday! The Handmade and Bound tent features artists who make handmade books, or offer zines, comics, and other super small press goodies, so this is a great way to support indie creators and buy handmade!

These are just some of the amazing goodies I'll have for sale this weekend! I'm also going to have a lot of great original art
I'll have these (minus the baby bun illustration) and more, so if you're in the market for whimsical, original art for your home, make sure you come by!

You can find out more about Handmade and Bound here: https://www.watkins.edu/community-education-watkins/handmade-bound/
You can find out more about the Southern Festival of Books here: https://www.humanitiestennessee.org/sfb2019-main/
And here's a schedule of events: https://www.humanitiestennessee.org/sfb2019-schedule/

October 3, 2019
Recommended Papers for Inktober
When it comes to Inktober, I have opinions. Strong opinions. Opinions about great papers to use for your inky endeavors! These recommendations are mainly based off my own experiences (and include examples of finished work), but a few come from friends who are also comic artists.
Sketchbooks
Blick Studio Sketch
Get it here
Great for Brushpens and technical pensCheapSturdier paper than most sketchbooks
 Example of Brushpen in Sketchbook, from 31 Days Under the Waves
Mossery Sketchbook
Get it here
Heavier paper- like a thin watercolor paperGreat for brushpens, brushes, nibsAble to take alcohol marker and watercolor
 Example of light watercolor, watercolor brushpen, brushpen, and washi tape in Mossery Sketchbook
Marker Paper
Strathmore 400 Series Marker Paper
Get it here
Heavier paper with a smooth finishGreat for brushpens, technical pens, and dip pens. Also good for brushes.
Neopiko Color Marker Use Paper Pad
Get it here
Like a thinner cardstockUltra Smooth FinishGood for technical pens, brush pens, light dip pen inking
Comic and Illustration Paper
Deleter Neopiko Comic Paper
Get it here
A lightweight comic paperSuper Smooth FinishAble to take technical pens, brushpens, nibsAlso good for marker
Kent Paper
Get it here
A lightweight comic paperSmooth finishAble to take technical pens, brushpens, nibsGood for markerGood for Tone
Bristol
300 Series- Strathmore
Affordable
Heavyweight
Smooth
Get it here
Smooth surface is great for brush pens and dip pensDecent for brushesNice for alcohol markers
Vellum
Get it here
A bit of tooth is nice for brush inkingAlso great for larger brush pensGood for dip pens
500 Series- Strathmore
Higher quality than 300 series
Plate
Get it here
Ultra smooth surfaceGreat for alcohol markersGreat for Brushpens, Dip Pens, Technical Pens
Vellum
Get it here
Slight tooth to surfaceGreat for dip pens, brush pens, technical pens, brushesDecent for light ink washesMixed Media Paper
Mixed Media Papers
Strathmore Visual Journal 500 Series Mixed Media Paper
Get it here
Heavy weight paper designed for ink, marker, acrylic, and watercolorVellum texture is nice for brush inking and brush pensSpiral binding is convenient for travelCotton rag makes for durable paper
 Example of Inkwash in Strathmore Mixed Media Visual Journal, from Lilliputian Living Volume 2
Cellulose Watercolor Paper
Coldpress:
Strathmore Watercolor Journal
Get it here
Thicker paper (140lb, but slightly on the thick side) is durable and resilientTexture is great for drybrush, inkwashCan handle brushpens, brushes, and even nibs decently wellSpiral binding is convenientModest size travels well
 Example of inkwash (fountain pen inks) and Sakura Pigma FB on Strathmore Watercolor Journal
Fabriano Studio
Get it here
Cottonrag (25%), cellulose mix (75%)Lots of tooth to this paperGreat for brush inkingGreat for drybrushSturdy paperGood for inkwashMediocre for watercolor
 Example of brush inks on Fabriano Studio, from Mermae
Hot Press:
Fluid EZ Block Hotpress
Buy it here
Smooth paper surfaceGood for fountain pens, technical pens, brush pens, brush, nibDecent for watercolorAvailable in blocks
 Example of fountain pen ink and watercolor on Fluid EZ Block Hotpress
Fluid 100 Hotpress (cottonrag)
Buy it here
Smooth paper surfaceGreat for technical pens, brush pens, brushGreat for watercolorHeavier paper (140lb), sturdyAvailable in blocks
Stonehenge Aqua Hotpress (cottonrag)
Buy it here
Smooth paper surfaceGreat for technical pens, brush pens, brushGreat for watercolorHeavier paper (140lb), sturdyAvailable in blocks
Example of brushpen inks and watercolor on Stonehenge Aqua Hotpress
Toned Papers
Strathmore Toned- DrawingTanGreyDrawing paper weight toned paper provides color base for ink illustrationsGreat for brushpens, technical pensGreat for alcohol marker (will bleed through)Great for colored Pitt Pens
 Example of brushpen, alcohol markers, white Pitt Pen on Strathmore Toned Tan Drawing paper
Strathmore Toned- Mixed MediaTanGreyBlueHeavyweight papers provide color base for ink illustrationsReally striking with limited color palettePaper is sturdy- can stand up to brushes and nibsSmooth surface is great for technical pens, brush pens, and nibsHeavy enough for light watercolor Example of brushpen, alcohol marker, and color pencil on Strathmore Toned Blue Mixed Media PaperLet me know if I turned you on to an awesome new paper option for your Inktober inkings! And if you're doing Inktober, shoot me a message on Instagram so I can cheer you on! I'm sharing my own Inktober inkings over there, and would love it if you checked out my work as well.

Sketchbooks
Blick Studio Sketch
Get it here
Great for Brushpens and technical pensCheapSturdier paper than most sketchbooks
 Example of Brushpen in Sketchbook, from 31 Days Under the Waves
Mossery Sketchbook
Get it here
Heavier paper- like a thin watercolor paperGreat for brushpens, brushes, nibsAble to take alcohol marker and watercolor
 Example of light watercolor, watercolor brushpen, brushpen, and washi tape in Mossery Sketchbook
Marker Paper
Strathmore 400 Series Marker Paper
Get it here
Heavier paper with a smooth finishGreat for brushpens, technical pens, and dip pens. Also good for brushes.
Neopiko Color Marker Use Paper Pad
Get it here
Like a thinner cardstockUltra Smooth FinishGood for technical pens, brush pens, light dip pen inking
Comic and Illustration Paper
Deleter Neopiko Comic Paper
Get it here
A lightweight comic paperSuper Smooth FinishAble to take technical pens, brushpens, nibsAlso good for marker
Kent Paper
Get it here
A lightweight comic paperSmooth finishAble to take technical pens, brushpens, nibsGood for markerGood for Tone
Bristol
300 Series- Strathmore
Affordable
Heavyweight
Smooth
Get it here
Smooth surface is great for brush pens and dip pensDecent for brushesNice for alcohol markers
Vellum
Get it here
A bit of tooth is nice for brush inkingAlso great for larger brush pensGood for dip pens
500 Series- Strathmore
Higher quality than 300 series
Plate
Get it here
Ultra smooth surfaceGreat for alcohol markersGreat for Brushpens, Dip Pens, Technical Pens
Vellum
Get it here
Slight tooth to surfaceGreat for dip pens, brush pens, technical pens, brushesDecent for light ink washesMixed Media Paper
Mixed Media Papers
Strathmore Visual Journal 500 Series Mixed Media Paper
Get it here
Heavy weight paper designed for ink, marker, acrylic, and watercolorVellum texture is nice for brush inking and brush pensSpiral binding is convenient for travelCotton rag makes for durable paper
 Example of Inkwash in Strathmore Mixed Media Visual Journal, from Lilliputian Living Volume 2
Cellulose Watercolor Paper
Coldpress:
Strathmore Watercolor Journal
Get it here
Thicker paper (140lb, but slightly on the thick side) is durable and resilientTexture is great for drybrush, inkwashCan handle brushpens, brushes, and even nibs decently wellSpiral binding is convenientModest size travels well
 Example of inkwash (fountain pen inks) and Sakura Pigma FB on Strathmore Watercolor Journal
Fabriano Studio
Get it here
Cottonrag (25%), cellulose mix (75%)Lots of tooth to this paperGreat for brush inkingGreat for drybrushSturdy paperGood for inkwashMediocre for watercolor
 Example of brush inks on Fabriano Studio, from Mermae
Hot Press:
Fluid EZ Block Hotpress
Buy it here
Smooth paper surfaceGood for fountain pens, technical pens, brush pens, brush, nibDecent for watercolorAvailable in blocks
 Example of fountain pen ink and watercolor on Fluid EZ Block Hotpress
Fluid 100 Hotpress (cottonrag)
Buy it here
Smooth paper surfaceGreat for technical pens, brush pens, brushGreat for watercolorHeavier paper (140lb), sturdyAvailable in blocks
Stonehenge Aqua Hotpress (cottonrag)
Buy it here
Smooth paper surfaceGreat for technical pens, brush pens, brushGreat for watercolorHeavier paper (140lb), sturdyAvailable in blocks

Example of brushpen inks and watercolor on Stonehenge Aqua Hotpress
Toned Papers
Strathmore Toned- DrawingTanGreyDrawing paper weight toned paper provides color base for ink illustrationsGreat for brushpens, technical pensGreat for alcohol marker (will bleed through)Great for colored Pitt Pens
 Example of brushpen, alcohol markers, white Pitt Pen on Strathmore Toned Tan Drawing paper
Strathmore Toned- Mixed MediaTanGreyBlueHeavyweight papers provide color base for ink illustrationsReally striking with limited color palettePaper is sturdy- can stand up to brushes and nibsSmooth surface is great for technical pens, brush pens, and nibsHeavy enough for light watercolor
 Example of brushpen, alcohol marker, and color pencil on Strathmore Toned Blue Mixed Media PaperLet me know if I turned you on to an awesome new paper option for your Inktober inkings! And if you're doing Inktober, shoot me a message on Instagram so I can cheer you on! I'm sharing my own Inktober inkings over there, and would love it if you checked out my work as well.


