
Justine Allen's Blog, page 3
August 14, 2025
How Long Does It Actually Take to Build a Website? Here’s What Our Experts Say.
You’re sifting through a lot of conflicting advice on how long it takes to build a website. Some say it takes a few days, others say weeks. So, who’s right?
The truth is, most website development timelines are just guesstimates.
These generic timeframes don’t factor in variables that could make or break your development process.
That’s why we spoke to our partners at WordPress.com to get realistic timelines for building a website. Drawing on their years of experience, our website development experts also share key factors to consider when estimating these timelines.
TL;DR: Here’s how long it takes to build common types of websitesSmall site (five pages or less): ≤ 1 weekDropshipping ecommerce site (<1000 products): 2-4 weeksLarge education website (school/university): 3-4 weeksGovernment website: 4-6 weeksLarge media website: 6-8 weeksEnterprise website: Several months to over a yearThe site you’re reading right now would likely take 6-10 weeks to build.
Note: These estimates cover how long it takes to launch a site, and don’t include considerations for future content creation or maintenance.
Key factors that affect your website design timelineThere’s no universal timeline for building a website. Some sites go live in weeks, others stretch across months.
But you don’t have to rely on guesswork for your website design timeline. Here are the three factors that will determine whether your project stays on track or spirals into delays.
Planning and strategyThe planning phase sets everything in motion.
Start by identifying:
Core purpose: Do you want to show your work, generate leads, sell products, or something else?Target audience: Who exactly do you want to reach? And what can they expect to get from your site? Essential functionality: What are the must-have features of your site, like lead capture forms, payment gateways, dynamic content, and more?A week spent planning all these details upfront can save you months of revisions (and frustration) later. The goal is to keep everyone aligned on what success looks like and prevent scope creep or backtracking later.
Defining the scopeScope defines the size and complexity of your site.
Scope creep can start with something as small as adding a new page, and suddenly, you’re two months behind schedule.
That’s why you want to finalize specifics like:
Number of pages Type of features/integrationsLevel of design and animationThe more pages, integrations, or custom features you add, the more development time it takes.
As a best practice, you can divide your site’s scope into different phases. Phase 1 can include all essential features you need for the main launch, and the next phases can cover additional details.
Stakeholder alignmentNothing kills momentum like conflicting feedback from different stakeholders. It can stall your progress for weeks.
The solution: Align your key decision-makers before you start building.
Make sure all stakeholders agree on:
Overall vision and goalsTarget audience and messagingBudget and timeline expectationsWho has final approval on which aspects of the siteExperts at rtCamp, an enterprise WordPress solutions provider, emphasized the importance of these factors for realistically determining website development timelines.
Once there is clarity on scope and decisions, a competent agency can go faster than even the times mentioned above. If clarity and alignment are still being worked out after kicking off the project, it can significantly stretch the project. However, sometimes that is required too. In many cases, clarity & alignment only happen once you get started.
– rtCamp
Put simply, this alignment ensures that everyone is working toward the same vision.
Note: Not familiar with business terminology like “stakeholder”? It’s just a term referring to anyone whose input is required to get a website launched. If you’re building a website for yourself, you’ve got nothing to worry about.
How long does it take to build a website using different methodsOnce this legwork is complete, it’s time to start building.
We’ll break down two common methods for creating a website to help you determine your development timelines.
Here’s what our experts say about the timeframe for creating websites of different sizes:
Site size/scopeDIY site builderWordPress.com AI website builderProfessional agency / in-house teamSmallFew hours-2 weeks<2 days2-4 daysMedium1-4 weeks3-7 days2-4 weeksLarge — — 6-10 weeksExtra-large——6 months-1 year +Looking to build a simple website with five pages or fewer? Use our website design service to get a professionally designed website in four days.
And if you want to create a more complex custom website, we can match you with a web design agency suited to your business, budget, timeline, and expectations.
 1. Do-it-yourself approach Best for: Small business, side project owners, hobbyistsType of websites: Personal portfolios, simple brochure sites, small blogs
WordPress.com lets you build a professional website entirely on your own, even if you don’t have any coding or design skills.
With this approach, you’re investing your hours learning a platform and creating a site one block at a time. It’s a trade-off between time and money, but it’s ideal for those with tight budgets and a desire to learn.
Tip: WordPress.com lets you create sites of all kinds. Check out the different types of websites you can build with this platform.
Here’s how you might get started with WordPress.com. After you create an account, you’ll need a theme that matches your vision for your website.
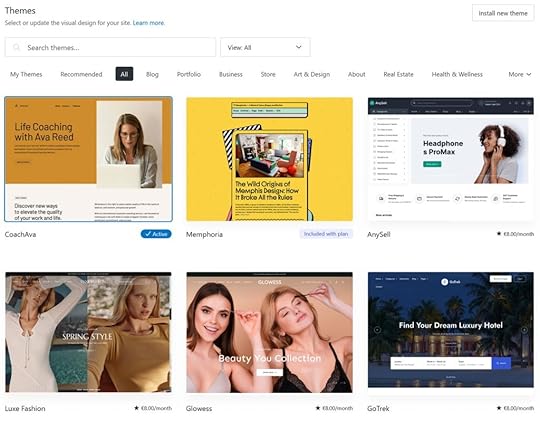
Choose from thousands of options available in WordPress.com’s library. Browse by specific use cases and industries, like real estate, health and wellness, music, and more. Plus, every WordPress.com theme is mobile-friendly by default, so you don’t have to spend more time making your site responsive.

After landing on the perfect theme, you can customize it to match your style.
At this stage, it’s tempting to tweak every color, button, and font till you find the best combination. But what really moves the needle is creating a proper structure and layout for your site. Think of this step as setting the foundation before the real work begins.
Instead of jumping straight into design edits, you should define:
Which pages your site will includeLayout for every pageNavigation structureTip: Want to learn how to build a website with WordPress, step by step? Our free video course will show you how.
How long should you expect this work to take? We chatted with Mike Ilsley, Solutions Architect for our website design service, to see how long this DIY approach takes. He shared:
For first-time WordPress users, building a five-page site can take anywhere from a few hours to several days or even weeks, depending on how comfortable they are with the tools. That includes time spent learning the platform, choosing a theme, customizing content and design, and troubleshooting along the way.
– Mike Ilsley, Solutions Architect @ WordPress.com
WordPress.com’s AI Website Builder can slash this timeline from weeks to days (or even hours).
Simply add a prompt describing the type of website you want to build. Something like: “I’m launching a freelance photography business.” Then, answer a few questions about your business and goals.
In a few minutes, you’ll get a full-fledged website designed to meet your preferences. Edit this first draft to add your creative touches and roll it out when you’re happy with the result.
 2. Working with professionals Best for: In-house teams, mid-to-large businessesType of websites: Enterprise sites, government or education sites, media or news platforms, large ecommerce sites
If you want to build a custom website that truly stands out but don’t have months to master design tools, working with professionals can be a smarter move.
Think of it this way: you could learn to rewire your house, but you’d probably rather call an electrician to save yourself all the hassle.
When hiring a professional, you have two main options:
Freelancers: They’re perfect when you need quality work without a hefty price tag. You can hire specialists for design, development, and copywriting. Agencies: They bring an entire team to cover all bases for your website design project. Work with an agency for complex sites with tight deadlines. You can choose a small or a big agency based on your budget.Unlike the DIY approach, working with professionals involves a few different steps before you can get to the final product. Plan for these phases if you take this route.
Vetting and hiringYou can expect to spend anywhere from a few days to weeks finding the right vendor to build your website. This search involves browsing portfolios, interviewing shortlisted candidates, and comparing prices.
Onboarding and briefingOnce you’ve selected a designer or agency, you want to take a week or two to clearly outline your expectations.
Create a detailed creative brief covering your goals, target audience, must-have features, and brand guidelines. Curate helpful references to share your creative vision with the designer.
The bottom line: You want to provide clarity and show what success looks like for you. The more clarity you can offer at this stage, the fewer revisions you’ll need later.
Setting timelinesFrom there, you can establish communication channels and align on milestone-based timelines. For example, week 1-2 can be about wireframing, and week 3-4 can be about creating the first draft for the homepage.
Map out clear milestones for both sides to stay accountable and prevent any delays in the web design process.
Tip: Stay involved in the process without becoming overbearing. You can plan weekly check-ins or status reports to keep tabs on your site’s progress.
Design and developmentNow, it’s time for you to take a step back and let the professionals work their magic. The timelines for this phase depend on the scope and complexity of your site.
In the design phase, you’ll see static/interactive mockups of every page.
These wireframes give you a sense of the site’s look and feel. Typically with large website design projects, you can request iterations based on your creative preferences and align on the designs before starting the development cycle.
In other words, think of it like working on your dream house.
You review detailed blueprints, request changes, and only start construction once you love the plans. Much easier to make changes on paper than after the foundation is poured.
 Source
 Once the designs are final, the development phase turns these layouts into live, functional pages.
In our chat with Mike Ilsley, he highlighted that build time depends on the site’s complexity, integrations, and the amount of content involved. Talking specifically about enterprise sites, he explained how it can take several months to complete projects of such scale:
Testing and reviewEnterprise websites can take anywhere from several months to over a year to fully build and launch. Even for experienced teams, projects at that scale typically involve multiple stakeholders, custom development, ongoing QA, and a phased rollout. It’s not uncommon for large organizations to work with dedicated teams over many months to get everything in place.
– Mike Ilsley, Solutions Architect @ WordPress.com
Finally, your site goes through several rounds of testing and review before you give the final approval.
Professionals often send a checklist or staging site for you to review. You should thoroughly check every detail on every page. Test on different devices and browsers to find any bugs or areas of friction in the user experience.
Remember that it’s much easier to fix issues before launch than after.
Ready, set, launch on scheduleBuilding a website can be messy. And you’re bound to lose time without proper planning.
Use this guide to map out everything you need to go from idea to launch and plan your timelines realistically. Remember to build in buffer time at every stage.
Want to fast-track this process?
WordPress.com’s AI website builder does the heavy lifting for you. In minutes, you’ll have a complete, professional site that would normally take weeks to create from scratch. Customize it to match your vision, and you’re ready to launch!
Try WordPress.com’s AI website builder and see how quickly you can roll out your website.


August 12, 2025
How to Choose a Web Host: 10 Factors You Should Consider
Take it from someone who’s been burned by hosting companies: you don’t want to skimp on thoroughly evaluating your hosting provider. Overwhelmed by hundreds of web hosting providers online, I shrugged, “This one looks the cheapest,” and purchased a yearly plan without a second thought.
Poor customer support, inaccessibility, and a migration later, I regretted not spending more time choosing a better web host.
Don’t make the same mistake I did. Put in the time to make the right web host choice in the beginning so you don’t have to deal with a headache later.
What should you even evaluate in a web host? There are several features on their pricing pages, and many of them look similar. Which criteria are important? What can you compromise on? We’ll cover all that (and more) in this article.
What should you know before evaluating web hosts?You can’t examine the various web hosting providers accurately if you aren’t 100% clear on what you need. Here’s a quick checklist of questions to help you nail down your requirements:
What kind of website are you building? Get clear on your website’s category — is it a portfolio or a blog? Or are you planning to run an online store? The kind of website you build determines which features are the most valuable to you in a web host.How much traffic do you expect your website to receive? Your expected traffic and plans to run ads will help you choose web hosts that can scale as you grow.
What security features do you need? If you are running a site that will store a customer’s payment details or any other sensitive information, you need a web host with strong security features.
What is your budget (now and in the future)? Your web host provider should be able to grow with you as your website’s needs evolve, without breaking the bank. Have a rough estimate of what you can spend on a web host now and in the future.
What is your technical skill level? If you can (and want to) configure everything yourself, your web host needs will look different than someone who isn’t tech savvy and/or doesn’t prefer to handle the hosting technicalities themselves.
Once you’ve answered the above questions, you’ll be much more confident in evaluating the various web hosts in the market. You should answer the above questions even if you’re migrating your site from one host to another — it will help you pinpoint what additional services you’re looking for.
Now that you know exactly what you need, let’s get into the nitty-gritty and examine each individual factor you should vet in a web host.
10 factors to consider when choosing a web hostHere’s a comprehensive list of factors you should consider for each web host you examine:
1. Type of hostingThere are several types of web hosting — each suited to unique website sizes, traffic levels, technical skills, and budgets. Pick the right one for your needs.
Shared hosting is when you share your server with other websites. This makes it more affordable, but slower.VPS hosting is when you share your server resources with other websites, but have a dedicated slice of your own. It’s more reliable and scalable than shared hosting, but it also costs more and requires technical know-how.
Dedicated hosting is when you have a server all to yourself. Your website is fast and reliable. Plus, you have complete control over every aspect of your website, but it can be expensive, and you have to manage everything (or pay someone else to manage everything).
Cloud hosting is when your site runs across multiple cloud servers. It’s reliable and fast, but may require setup and monitoring.

Some web hosts in the market provide all these hosting types, while others provide specialized hosting. Choose web hosts that offer the kind of hosting you need now and might need in the future.
For example, if you’re building a food blog from scratch, you might be A-OK with shared hosting in the beginning. However, as your website traffic grows, you might need to move to VPS or dedicated hosting to improve your site experience. In this scenario, look for web hosts that offer both shared and VPS hosting.
While you’re at it, it’s also worth evaluating the types of hosting at the service level.
Unmanaged hosts provide a barebones server that you manage yourself. This means that you have to handle any updates, firewalls, backups, etc. It’s more cost-effective, but only recommended when you want a customized server setup and have in-house technical resources to manage it.Managed hoss handle the majority of the technical tasks, such as server setup, security, backups, and more. It often costs more than unmanaged hosting, but the peace of mind (and time saved) is worth it.

Your web host always manages shared hosting. This means the host is responsible for configuring the distribution of resources and ensuring each site is secure. If you’re opting for shared hosting, it’s especially important to evaluate the quality of your management host because you don’t have control over your website’s security and resource allocation.
You can choose between managed or unmanaged hosting in all other hosting types. However, as discussed before, unmanaged hosting is the right choice only when you need to customize the server stack and know how to do it well. For everyone else, managed hosting is the better alternative because it allows you to focus on growing your site rather than doing upkeep tasks.
Tip: If you choose WordPress.com (which offers managed WordPress hosting), your site will stay fast, secure, and online without any hassle. Your whole website management — including backups, updates, and infrastructure — is on us.
2. PricingPrice is an important factor when it comes to choosing web hosts. You don’t want to make the mistake of thinking that the cheapest or the most expensive is the best option.
Instead of considering extremes, evaluate web hosts based on their ROI: are they providing you with all the features you need (and maybe a few additional perks) at a reasonable price?
Once you do that, the second step is reading the fine print. Many web hosting providers offer a lower price in the first year and significantly raise the prices the next year. The solution? Evaluate renewal rates to ensure you’re making the right long-term choice.
While you are at it, also look at the “perks” like website backups — they might be free for the first year only. Check their cost at the time of renewal, and consider fees for backups, SSL certificates, and migrations. Look closely at all of these factors and add up the total price you’ll pay at the time of initial purchase, as well as renewal.
Many web hosting providers also offer a money-back guarantee, but exclude fees for additional services — like setup, migration, or domain registration — from this promise. Ensure you know this before you sign up for a web host so you know what you can get back and what you can’t.
Regarding billing options, many web hosts offer significant discounts on yearly or multi-year payments. Commit to a web host for multiple years if you’re confident they are the one you want.
If you’re signing up for numerous years with a web host, research their price increase history first. Many hosts might increase their prices too much compared to their competitors after a few years.
Tip: In addition to monthly and annual plans, WordPress.com offers options to pay every two or every three years. All annual and multi-year plans offer discounted pricing, even after renewal, so you can save money while knowing your site’s long-term home on the web is secured.
3. SecurityYour website is prone to viruses and malicious attacks if your web hosting provider doesn’t have strong security features. Here’s what you should look for:
Access controls to ensure no unauthorized person can access your IP address.Automatic website backups and updates.Firewall and malware protection.SSL certificates.Some security features — like SSL certificates — are standard across most web hosting providers. Many even offer it for free for the first year. If your website handles sensitive customer information or has significant traffic coming in, however, you need to go beyond the basics. Monitor the security features closely to ensure it matches what you need.
Tip: If you have chosen managed hosting via WordPress.com, for example, your website’s security and safety are fully accounted for. There’s brute-force protection to protect your account password, shield from DDoS attacks, automated malware removal, and a lot more. You can sleep peacefully knowing the security of your site is in good hands.
4. Speed and reliabilityYour website’s performance depends on uptime and load time. Your host dictates both of those things. Look for hosts that offer a high uptime guarantee — the industry standard is 99.9% uptime or higher. You can also check your terms and conditions to understand if your web host offers compensation for downtime.
Your site’s speed is affected by various factors. For starters, if you choose shared hosting, you share your resources with other customers, which means if other servers experience too much traffic, your site might slow down. Examine how your web hosting provider configures resources in a shared hosting plan.
You also want to look for web hosts with data centers close to your audience’s location to speed up loading times. Or you could choose a web host like WordPress.com that offers a global content delivery network (CDN) with 28+ edge locations already built in.
 Here is a look at Automattic’s global network of data centers (which power WordPress.com). You can see a live traffic map here.
Lastly, monitor other performance features such as SSD vs. HDD storage (SSD is faster), built-in caching mechanisms, and server response time.
Tip: WordPress.com offers 99.99% uptime (seriously). However, if your site does experience downtime (Business plan or above), you will get alerts the minute downtime is detected.
5. Storage and bandwidthStorage is how much data you can store on your server, including website files, images, videos, emails, backups, etc. How much storage you need is unique to your website and needs. For example, someone building a one-page website (like a portfolio) might not need a large amount of storage space, but a small business expanding rapidly might.
In shared hosting, some web hosts might list “unlimited” storage, but restrict the number of files you can store under fair usage policies. Make sure you read the clause details properly to know your storage limitations.
On other hosting types, you can customize the storage you need based on the various web hosting plans. For example, WordPress.com offers 13 GB of storage in its Premium plan, while our Business and Commerce plans start at a generous 50 GB (with the option to purchase more storage).
When monitoring hosting storage plans, check if you can increase your storage without downtime and whether there are any file type restrictions.
Bandwidth is the amount of data transferred between you and your visitors. The amount of bandwidth you need depends on your average page size, monthly visitors, page views, and unexpected traffic spikes. You can use a website bandwidth calculator to determine how much bandwidth you might need.
 Source
Some web hosts — like WordPress.com — offer unrestricted bandwidth. Others might slow down your site after you exceed a certain limit. A few also charge for stretching the bandwidth. Choose a web host that can comfortably meet your bandwidth needs not just today, but in the future.
6. Customer supportImagine you have an online store and your website is down for a few days. This isn’t just inconvenient, it’s revenue lost. Website issues are often urgent and need to be resolved quickly.
Choose a web host with reliable 24/7 support (in multiple formats), so you get the help you need instantly. Ideally, you’d want to look for live chat or phone support to get quick responses. However, you should also look at ticketing systems and promised resolution times to understand how quickly your web host will respond to larger issues that might arise.
It’s also worth checking out the support documentation of web hosting providers. Do they answer FAQs thoroughly? Do they have video guides for beginners? Is the knowledge base regularly updated? Would you be able to resolve many issues independently?
Some web hosts, however, don’t deliver on their promises. Check reviews from third-party sites like TrustPilot or G2 to understand if the web host lives up to their promises.
Tip: In addition to top-tier customer support, look for hosts that provide high-quality support documentation.
7. Ease of useThe control panel of your web hosting provider should be user-friendly. You should be able to navigate it and manage your database, emails, backups, etc. If you need assistance doing basic tasks, too, you may get frustrated and unnecessarily waste time opening your web host account.
This is, again, where an extensive knowledge library is invaluable. If your web hosting provider has laid out tutorials and blogs on building a website using their tool, you won’t be stuck trying to figure it out.
8. MigrationIf you are moving your site from another web hosting provider, check if your new one offers a free migration service. For instance, if you want to move your site to WordPress.com, we provide a free migration service.
You also want to check the process of moving your website. Is it easy to import your site files? Are there any risks of losing your data? How much time does the whole process take from start to finish?
Understanding the above before migrating your site to a new web host will help make the process smoother and risk-free.
9. Integration with CMS/website buildersMost popular web hosts offer integration with popular CMS platforms and website builders like WordPress and others. You want to choose a web host that connects seamlessly to your CMS or website builder.
Many web hosts — like WordPress.com — are fine-tuned for a specific CMS (like WordPress). CMS-specific hosting offers tailored support, automated updates, and CMS-specific firewalls.
10. Additional features (like custom email, domain name, etc.)Can you purchase your domain name, professional email address, and web host from different providers? Of course. Many web hosting companies, however, bundle them together and offer a discounted price, helping you save money and admin work.
For example, all WordPress.com sites get a free domain for one year. There are also other perks, like tons of Jetpack-powered features at no extra cost. Look at the various perks website hosts offer and choose the ones that make the most sense for you.
A web host is your site’s homeYour website host is your website’s home on the worldwide web — make the choice with careful consideration. You don’t want to pick a home that costs less but has a leaky roof.
If you don’t want the hassle of continually working to maintain your site, opt for managed hosting via WordPress.com. We ensure your website remains online, fast, and secure regardless of traffic spikes, so you can focus on growing your business on the internet carefree.
For a Limited Time: Unlock Plugin Power on Personal & Premium Plans
We hear you. You love your WordPress.com Personal or Premium plan, but there’s that one plugin — or two — you’ve been itching to try. Normally, plugins are only available on Business and Commerce plans. From August 12 to August 25, 2025, new customers and users upgrading from free plans can now use plugins on all new Personal and Premium plans.
Explore plugins nowWhat can you do with plugins?With plugins, you can go beyond the basics and unlock powerful features for your sites:
Boost your visibility with advanced SEO tools like schema markup, redirect management, and fine-tune how your content appears in search engine results.Add niche features such as recipe cards, event calendar, booking tools, and more without coding.Design with more freedom with additional blocks, page builders, and styling controls.Streamline your workflow by adding editorial calendars, role editors, and custom content types specific to your site’s needs.Sell products or services with e-commerce plugins and many more.Think about that one feature you’ve been missing; now you can try it out for yourself.
Why now?Plugins open the door to even more ways to customize your site and bring your ideas to life. On our Business and Commerce plans, we offer these tools along with the extra support and flexibility they require to run your site smoothly. Many of you have asked for the chance to try plugins on Personal and Premium plans, so we’re making it happen for a limited time.
This window from August 12 to August 25 is your chance to explore plugins on all paid plans that usually don’t include them.
After August 25, plugin access returns to WordPress.com Business and Commerce plans only. Customers who have bought during the two-week promotion period will be able to keep plugin access as long as they keep their original plan.
Who’s this for?This offer is for anyone ready to start something new on WordPress.com — whether it’s your first site or your next one. If you purchase a new Personal or Premium plan during this two‑week window, you’ll unlock plugin access for that site.
New sites signing up for WordPress.com Personal or Premium plans during the offerFree plan users upgrading to WordPress.com Personal or Premium plansIf you already have a paid Personal or Premium plan, this offer doesn’t apply, but you can upgrade to a WordPress.com Business or Commerce plan anytime to get plugins. Offer is not applicable for downgrades and renewals at this time.
Ready to try that plugin you’ve been eyeing?This is your chance to try WordPress.com without limits. Grab a new Personal or Premium plan by August 25, 2025, and unlock plugins for that site — forever — and build the site you’ve been dreaming about.
Explore plugins nowWe’re excited to experiment with this alongside you and see what you create. This is a chance for us to learn together, discover what you build, and explore how plugins can help you achieve your goals. We look forward to hearing your thoughts and feedback as you try new things, share what works, and tell us what you would like to see next.
This offer ends on August 26 at 7 a.m. (UTC).
August 7, 2025
Find WordPress.com at WordCamp US 2025
WordPress.com is a proud sponsor of WordCamp US this year. Some WordPress.com staff members and I will be heading to Portland, Oregon from August 26th – 29th to connect with the community and contribute to the open source WordPress project. If you’re there, and you see one of us — please stop and say hi! I’d love to hear your feedback about WordPress.com directly.
I’m really looking forward to this year’s WordCamp US. It’s always such a great opportunity to learn from the people who use and shape WordPress every day.
Events like WordCamp US also help ensure we’re building in the right direction, as we work to make WordPress.com the go-to place for WordPress, for anyone, anywhere, at any scale.
Why go to WordCamp US?WordCamp US is one of the largest WordPress gatherings each year, bringing together developers, designers, bloggers, business owners, creators, and contributors from around the world.
Whether you build with WordPress, publish with it, or help shape the software itself, WCUS is where conversations happen, ideas are initiated, and the community connects over a shared desire to push WordPress and the open web forward.

With so much progress happening in the WordPress ecosystem, the WCUS agenda reads like a front-row seat to what’s next. I’m personally excited about checking out Amy Sample Ward’s talk on changemaking, James LePage’s presentation on AI, and, as always, the Keynote.
Come visit the WordPress.com boothThe WordCamp sponsor area is always a source of good conversation, connection, and (of course) swag. So why visit the WordPress.com booth at WordCamp US this year?
 A look at the WordPress.com booth at WordCamp US 2024.Demos and answers to your questions
You’re probably aware that WordPress.com offers professional WordPress hosting. But do you know just how much value we pack into our hosting plans?
Our team will be at the WordPress.com booth all week, ready to answer your questions and showcase what WordPress.com can do for you today. Whether you’re curious about our hosting features, our AI website builder, our developer tools, or WordPress Studio, visiting the WordPress.com booth is a great chance to get a hands-on look and share your feedback directly with the people building and supporting the products.
Some serious swagOf course, no WordCamp is ever complete without great swag.
This year, you can expect limited-edition pins, stickers, totes, hats, and more at the WordPress.com booth, and you’ll even have a chance to be entered to win some premium swag from all of the Automattic booths.
 Premium swag awaits you here.
And if you’re a developer or site builder, be sure to find someone from the WordPress Studio team for a chance to snag some exclusive Studio-branded swag.
Will we see you there?If so, we’d love to see you at the WordPress.com booth. If you haven’t grabbed your ticket yet, use code wpcom25 at checkout for 25% off.
We’re building WordPress.com to help more people do more with WordPress, and your ideas and feedback play a big part in that. We’d love to chat.
See you in Portland!
August 6, 2025
Subdomain vs. Subdirectory: A Guide for Site Owners
Despite Google’s official claim that it treats subdomains and subdirectories equally in indexing, website owners sometimes report substantial traffic gains after switching from the former to the latter.
The reality? It’s far more nuanced than these site owners suggest.
In order to make smart decisions about when to use subdomain or subdirectory, you need to evaluate your goals, technical capacity, and projected website growth.
That’s what this guide covers. You’ll learn the key differences between a subdomain and a subdirectory, when to use each, and how to choose the right one for your specific needs.
What is a subdomain?A subdomain is a label that appears before your main (e.g., blog.example.com, shop.example.com, support.example.com).
Contrary to what people think, a subdomain doesn’t always function as a separate website hosted elsewhere. A subdomain can point to the:
Same content (e.g., www. as a subdomain).Different content on the same hosting (e.g., fr.support.wordpress.com for localized content, a type of web content adapted to a specific language or region).Different hosting and content (e.g., hosting blog.example.com on a server completely separate from example.com).Businesses with diverse product offerings often use subdomains to organize content hierarchy and ensure easy navigation.
Take Google, for instance. It deploys its business apps and solutions through separate subdomains, such as mail.google.com, drive.google.com, and docs.google.com, improving the user experience.
When should you use a subdomain?Though requiring more technical setup (which we’ll walk you through later), subdomains excel at organizing distinctly different sections of your content.
Use them when you want to:
Host client portalsHosting dedicated portals on subdomains helps you manage each client’s project deliverables, digital assets, and legal documents in a centralized space. Depending on your web hosting provider, it can also improve security by limiting access to sensitive data.
Set up a staging environmentA staging environment is an isolated testing ground where you test updates, redesigns, and new features before deploying them to a live website. Technically, they can be created on a subdirectory instead (and we’ll cover what those are in a bit), but using a subdomain is widely considered best practice.
A staging environment hosted on a subdomain provides an isolated space where you can implement and refine changes without risking your main website. Just be sure to secure it with a password to prevent unauthorized access.
Tip: Want to set up a staging environment for your WordPress website? Start here.
Build authority in a new nicheSearch engines treat subdomains as independent entities — the backlinks and authority from your main domain won’t transfer over. This creates a fresh foundation to establish dominance in your new niche or market segment.
Imagine you’re an entrepreneur with three revenue streams: a baking membership community, a copywriting course, and a series of business ebooks.
These offerings target different customer segments with unique search behaviors. Instead of lumping your three business lines together on one domain — which risks confusing visitors and diluting your site’s authority — create subdomains with each strategically positioned to build targeted authority.
Creating distinct site subsectionsThere may be other instances where you need to add a section to your site that has its own distinct branding and functionality.
One example is WordPress Playground, a platform for users to build and experiment with WordPress on any device, all within a web browser. Note the subdomain in the URL address bar.
 The URL field in this screenshot reads playground.wordpress.net.How to connect a subdomain
For WordPress sites, creating a subdomain requires more technical steps than a subdirectory.
Your process primarily involves your DNS management system (like Cloudflare) rather than your web host. To begin, locate its support documentation and complete the step-by-step instructions for a smooth setup.
Next, follow these steps to connect your subdomain with your WordPress.com site.
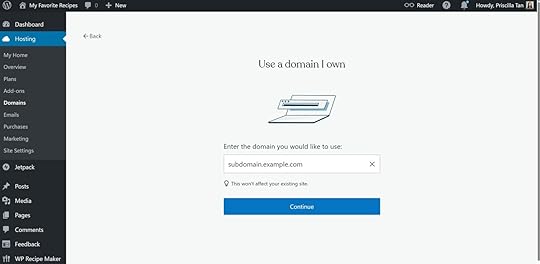
First, log in to your account and go to the WordPress dashboard of the site you want to use with your subdomain.
If you’re using WP Admin, navigate to Hosting → Domains (or Upgrades → Domains if you’re using Default View). On the top right, click the down arrow of the “Add a domain” button and select “Use a Domain I own.”

Enter your desired subdomain (e.g., subdomain.example.com) and click the “Continue” button.
In the “Connect your domain” section, click the “Select” button.
Congratulations! You’ve created your subdomain.
Since your website uses WordPress.com name servers, the DNS records for your subdomain should automatically configure. Test your new subdomain URL in a web browser to see if it’s working.
What is a subdirectory?A subdirectory is a subfolder within your main website. It appears as a page after the root domain (e.g., example.com/blog, example.com/shop, example.com/about) and is preferred by SEO professionals running smaller websites.
When should you use a subdirectory?Subdomains are overkill for smaller websites, as they unnecessarily fragment your SEO efforts. If you’re managing a smaller web presence, subdirectories offer a more practical solution.
Use them when you want to:
Simplify SEO trackingAnalyzing SEO data across multiple subdomains creates unnecessary complexity.
Unlike subdirectories, subdomains require technical overhead like configuring cross-domain tracking and modifying session cookies. If you prefer to streamline your analytics tracking under one roof, opt for subdirectories.
Organize related content for better SEOSince search engines treat subdomains as separate sites, backlinks pointing to your main website won’t transfer SEO value to them.
Subdirectories, on the other hand, consolidate your SEO equity within a single domain and amplify your overall search visibility. This makes them the preferred choice for most SEO specialists.
To illustrate how subdirectories work in practice, consider this example. If you’re a freelance writer for B2B marketing and sales companies, you could organize your website with subdirectories targeting these keywords:
Homepage: Freelance [SEO/marketing/SaaS] content writer.Blog posts: How to increase leads, conversion content, and research competitor keywords.Services: Content writing services in [country], [ebook/white paper/B2B] content writing services.By interconnecting these pages under your main domain, you create a content cluster that shares SEO equity. The “backlink juice” from other sites that link to your pages flows throughout your entire website and fuels it as a whole.
Eventually, this leads to higher domain authority, better search rankings, and increased organic traffic.
Maintain brand consistencyConsistent branding boosts revenue by up to 20% — and subdirectories play a small part in achieving it. They can provide better continuity in user experience and a cohesive brand presence, boosting recognition and trust.
How to create a subdirectoryCreating a subdirectory is easier than setting up a subdomain. You can whip one up in seconds with any website builder.
If you’re hosting on WordPress.com, here’s how it works:
Log in to your account.Go to the dashboard, click Pages → Add Page. Build and format the rest of your page as desired.Customize the URL subdirectory in the right sidebar menu.Click Publish.
Tip: You can add more subdirectories under the page you created. This step is particularly useful if you want to organize different topics on your blog (e.g., a food blog might add the following child pages: breakfast, lunch, and dinner under a Recipes parent page).
Go back to the dashboard:
Click Pages → Add Page.Click None next to Parent.Choose the parent page previously created.Build and format the rest of the page accordingly.Click Publish.
WordPress.com runs the same WordPress software trusted by over 40% of the web. Easily create new subdirectories — and leave the hosting, security, performance, and maintenance to us.
Your first year of annual hosting includes a free domain name. Register your domain today.
Differences between subdomains and subdirectoriesThe debate between subdomains and subdirectories never ends. Here’s a snapshot of their differences to help you choose the right option for your website.
First, let’s start with the fundamental structural differences.
URL structureA subdomain appears before the primary domain and is separated by a period. It looks like shop.example.com or portal.example.com.
Whereas a subdirectory appears after the main domain and is separated by a slash. It looks like example.com/shop or example.com/portal.
MaintenanceSubdomains demand more technical maintenance and resources.
Often, there are more DNS records, SSL certificates, and duplicate content to manage. Depending on your business and site setup, you may also need different content management systems (CMSs) to run each subdomain, increasing technical complexity and resources.
Subdirectories, conversely, are easier to manage. With all content in a single website architecture, you reduce technical overhead and streamline maintenance.
For example, if you run an ecommerce store with a blog, you can manage both sections through a single WordPress.com dashboard. When you update your plugins or theme, these changes apply to the entire site automatically. There’s no need to implement the same updates across multiple platforms.
Indexing and rankingSubdirectories usually see higher rankings and traffic.
Despite Google’s official stance that both receive equal treatment, many SEO professionals report substantial traffic gains after migrating from subdomains to subdirectories.
The HotPads blog is one example — it saw a 98% traffic increase after the shift.
@johnandrews we moved the HotPads blog from blog. subdomain to /blog subfolder. Replatformed TypePad -> WP. 98% increase in G organic in 2mo
— John Doherty(@dohertyjf) February 7, 2015
Take these results with a grain of salt, as the reality is a lot more complicated.
During HotPads’ migration to subdirectories, it simultaneously upgraded from Typepad to WordPress. This suggests multiple factors influence SEO performance beyond domain structure.
In HotPads’ case, it could also be the CMS, hosting environment, and internal links.
Which is better: a subdomain or a subdirectory?For most bloggers, creatives, and small business owners, subdirectories will work just fine.
That’s because subdomains create more work.
Managing additional DNS records and SSL certificates creates potential technical hurdles for non-tech-savvy users, and that’s just the tip of the iceberg. Without dedicated technical support, subdomains can become overwhelming quickly.
Moreover, subdomains excel specifically for enterprise-scale content or specialized sections that operate independently from the primary website. Smaller sites usually don’t reach the content volume threshold where subdomains become necessary.
Unless you’re managing thousands of pages needing intuitive navigation — and aiming to improve the user experience that search engines prioritize in rankings — you can get by with subdirectories.
Ultimately, it depends on three factors: your business, bandwidth, and current and projected website scale. If you’re still stuck, here’s a simple decision flowchart to help you decide which is right for you.

WordPress.com functions as a domain registrar and hosting platform (and website builder!). Manage your domain and host your website in one place.
Final thoughts: subdomain vs subdirectoryUse subdomains to separate content experiences from your primary site. Client portals, staging environments, and specialized sections targeting new market segments benefit from this approach, giving visitors a distinctive experience.
Choose subdirectories if you prefer to leverage your SEO benefits within your main site. Your hard-won “backlink juice” will beef it up as a whole.
Whether you want to connect multiple subdomains or create new pages, WordPress.com can do it all with a few clicks. We handle everything from hosting and security to performance and maintenance.
Save immediately with a free domain name included in your first year of annual hosting.
Buy a domain from WordPress.comAugust 5, 2025
Website Security: 22 Tips to Keep Your Site Safe
Imagine waking up in the morning, checking your site, and it’s an absolute mess. Your browser flashes a malware warning, your homepage is advertising questionable hair-growth pills, and your website logo has been replaced by a dancing raccoon.
Meanwhile, your inbox is exploding with emails from customers asking if the “crypto investment opportunity” sent by your “company representative” is real or not.
This might sound exaggerated, but the threats behind it are very real. If you don’t take security seriously, any one of them could hit your website sooner rather than later. Here’s how to keep your website secure against common threats.
What is website security?Website security refers to the steps you take to protect your website from cyber threats and unauthorized access. It involves every level of website architecture, from the server and website files to login credentials and user privacy.
Strong website security builds trust with visitors, keeps your site online, and protects you from potential legal action and other negative outcomes.
What are some common website security threats?The first step in protecting your site is understanding what you are trying to prevent. Threats include:
Password breaches: This often happens through brute force, where hackers automatically try out username and password combinations until they gain access to your site.Defacement: This is the online form of vandalism. An attacker changes the appearance of your website, often with a message that you’ve been hacked.Ransomware: This blocks access to your website and encrypts your files until you pay the attacker.Data breaches: Hackers steal confidential information saved on your site to sell on the black market or use for their own purposes.Malware infection: Malicious software is injected into your site to spread to visitors, for example, to hijack their computers.Denial of service attacks: DoS or DDoS attacks aim to overload your server with traffic or large amounts of data in order to make your website slow or completely inaccessible.Cross-site scripting (XSS): Malicious scripts are inserted into web pages so attackers can harvest login credentials and other information from user browsers.SQL injections: Code to run database commands and change, delete, or steal data is injected into a site. This may include creating a new user with administrator rights to your website.Spam: Filling your website with unwanted ads and malicious links.Phishing: Fake login or input forms designed to trick users into entering personal information.Botnet recruitment: Hijacking your site and server resources as part of a larger network of compromised sites to carry out attacks.The scope and variety of online threats make security an issue even for basic websites.
Why does this matter?The possible outcomes of having your website compromised include:
Loss of revenue: Downtime, ransom demands, or an otherwise non-functional website can immediately impact your income, especially for e-commerce websites. Plus, recovery usually comes with a price tag.Reputation damage: A website that has been defaced, contains spam links, or fails to protect customer data erodes visitor trust and can permanently damage your brand.SEO damage: Search engines may lose trust in your site as well, blocking it and tanking your search rankings and traffic in the process.Legal problems and fines: Exposing sensitive user data may violate data protection laws like GDPR or HIPAA, leading to potentially hefty fines. People whose personal information was stolen may also sue you.Lack of website security can greatly damage your business and income — sometimes to the point of no return. And don’t think your site being small means you’re safe. Most hacks are automated, aimed at gaining access over stealing data, and a matter of opportunity, not targeted action.
How to secure your websiteOnce you understand the risks, the next step is to protect your site. Website security is all about layering protections, not single fixes. Secure your site with these simple steps:
1. Change default CMS settingsMany attacks against WordPress target its default configuration. Therefore, an easy step to make your website safer is to change them. For example:
Avoid using the username “admin” during setup.Use a unique database table prefix instead of the default “wp”.Customize your login URL to reduce automated login attempts.2. Use a secure hosting providerYour hosting provider is your website’s first line of defense. For that reason, you want to pick one that prioritizes security.
Choose the right type of web hosting for your purpose and skill level. For example, shared hosting runs a greater risk of cross-contamination from other sites on the same server that get hacked. With isolated site infrastructure such as that on WordPress.com Business and Commerce plans, this isn’t an issue.
In traditional hosting, most of managing website security is your responsibility; your hosting provider only takes care of the server. A managed WordPress hosting provider, on the other hand, is much more involved in securing your website. For example, when you host your site on WordPress.com, you benefit from:
Server environments optimized for WordPressAutomatic software updatesDomains with domain privacyDowntime monitoringA dedicated security teamExpert WordPress supportPlus, if you host your website on WordPress.com and it gets hacked, we will clean it up for free.
3. Use SSL/HTTPSHTTPS encrypts the data transferred between your website and visitors’ browsers. This is an effective way to protect sensitive information against cross-site scripting (XSS), man-in-the-middle, or similar attacks. It also displays as a secure padlock icon in the browser and is a sign of trust for your audience.

To enable HTTPS encryption, you need an SSL certificate, which is usually easiest to obtain from your hosting provider. For example, SSL is included by default on all WordPress.com sites, with no setup needed.
4. Configure file permissions correctlyFile permissions define who can modify which files on your server. They help prevent unauthorized users or scripts from modifying core files. You can modify file permissions with SFTP/SSH.
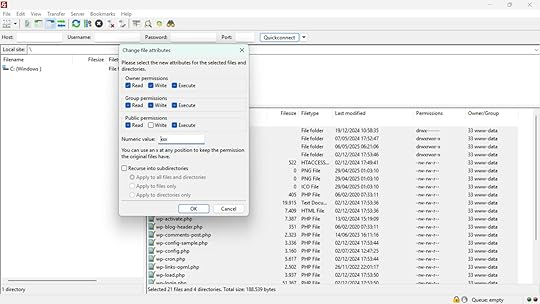
On WordPress.com, permissions are set to the above settings by default and should only be changed if it’s absolutely necessary and you know what you’re doing.
On WordPress, files should typically be set to permission level 644 and directories to 755. This balances functionality and security. Avoid setting anything to 777, which allows full read, write, and execute access.
5. Set up security headersSecurity headers add an extra layer of protection by controlling how browsers handle your site’s content. They can help prevent vulnerabilities like cross-site scripting and clickjacking, and are an important part of every website.
This topic is very technical, so it’s best to read up on security headers in depth. You can find out if your site is already using them with a security headers scanner. If they’re missing, options to enable them include:
Using a firewallUsing some CDNsUsing WordPress pluginsEditing server files6. Implement a web application firewallA web application firewall (WAF) has the ability to filter and block malicious traffic before it reaches your website. This helps defend against common threats like SQL injections and brute force attacks.
You can get a firewall through your hosting provider, plugins, or external providers. On WordPress.com, Business and Commerce plans include a built-in, managed firewall.
7. Use a content delivery networkA content delivery network (CDN) distributes your website’s content across multiple servers worldwide.
This reduces server load and is often a tool used to improve performance. It helps mitigate DDoS attacks by adding a layer between attackers and your origin server that can absorb some of the excess traffic. Cloudflare is a popular option.
WordPress.com includes CDN functionality powered by more than 28 data centers across six continents.
8. Force strong usernames and passwordsWeak login credentials are one of the most common ways hackers gain access to websites.
Here are some best practices to prevent that from happening:
Avoid predictable usernames like “admin” or “user.”Use strong passwords with a mix of letters, numbers, and symbols for all entry points to your website, including your FTP, database, and hosting account. You can generate them with the help of a password generator.Require the same for all users with access to your site, if necessary with a plugin like Password Policy Manager.Consider using separate accounts for site administration and content creation, so as not to display the admin username on your site.Be sure to balance safety and usability .To keep your login pages safe, WordPress.com offers out-of-the-box brute force protection and single sign-on (SSO).
9. Set up multi-factor authenticationMulti-factor authentication (MFA) adds an extra layer of protection to site logins. It requires a second verification step, such as inputting a code from an app or text message. This makes it much harder for attackers to log in, even with stolen credentials.
You can add this functionality to your WordPress site using MFA plugins. WordPress.com supports two-step authentication for all users by default.
 10. Apply sensible user roles and permissions
WordPress offers several user roles with clearly defined permissions. These let you control who has access to your site and what they can do on it. Here is the full list:
Administrator: Full access to all site features and settings.Editor: Can manage all content, including posts, pages, comments, categories, tags, and media.Author: Can create, edit, upload media to, and publish their own posts.Contributor: Can write and edit their own posts but cannot publish or upload media.Viewer: Can read and comment on private site content.Subscriber: Follows your site and receives updates.It’s a good idea to use the principle of least privilege when assigning roles, which restricts user access to only the functions needed for each job. This reduces the risk of someone breaking something by accident and provides extra protection if an account gets hacked.
You can upgrade permissions temporarily if needed, but be sure to review and update user roles regularly, especially after team changes.
11. Install a security pluginSecurity plugins provide extra safety with features like malware scanning, firewalls, and security headers.
For self-hosted WordPress sites, security plugins cover gaps not managed by your hosting provider. Popular choices are:
WordfenceReally Simple SecurityAll-in-One SecurityPlugin-enabled sites on WordPress.com don’t require a security plugin, because they come with Jetpack and many other protections built in. Installing a separate security plugin on these sites would likely lead to conflicts.
12. Use trustworthy extensionsPlugins and themes allow you to use WordPress for any purpose and use case, from blogs to personal websites to one-page sites.
At the same time, they can also be a security risk. Poorly coded or abandoned extensions can introduce serious vulnerabilities. In addition, plugins from untrustworthy sources can contain malware, back doors and other unpleasant surprises.
To avoid this, only install plugins and themes from reputable sources, like official WordPress directories. Everything you find there goes through a thorough vetting process before it can be installed on websites. Read reviews, check the update history, and confirm compatibility with your WordPress version before installing.
 13. Delete unused plugins and themes
Even inactive plugins and themes can create security risks if they’re outdated or vulnerable. You should deactivate and fully delete anything you’re not actively using.

You should also regularly audit your installed extensions for what you can get rid of. Fewer extensions mean fewer potential points of attack.
14. Keep your website up to dateUpdates to WordPress and its plugins and themes often include patches for known security vulnerabilities. For that reason, it’s a good idea to regularly apply them on your site.
As a managed hosting provider, WordPress.com automatically handles core updates and provides tools to update plugins and themes either automatically or manually. You can test updates on a staging site before publishing updates.
15. Set up automatic backupsBackups are one of the most central tools for website security. If you have a recent working version of your site saved somewhere safe, you can restore it to mitigate problems.
For that reason, you should regularly back up both your site files and database, preferably with an automated solution. Be sure to store backups in a secure, off-site location like cloud storage or a separate server.
On WordPress.com, real-time backups and one-click restores are included in the Business and Commerce plans.
 16. Limit personal and sensitive data saved on your site
You can’t lose what you don’t have. If your website gets hacked, attackers can only gain access to data that’s stored there. For that reason, be sure to only collect and store the information you need from your users, and follow data protection laws like GDPR when handling personal information.
17. Use an anti-spam pluginComment spam is an inconvenience every website owner has to live with. But if you’re not adept at recognizing it, you might inadvertently post links to malicious websites or software on your site, creating legal and SEO risks.
Akismet is an anti-spam plugin that automatically filters out the majority of spam submissions using machine learning and AI. It is included on all WordPress.com plans with no extra setup.
18. Log website activityActivity logs track user actions and changes made on your site. They make it easier to trace what happened in the event of a breach or other problems.
There are many plugin options to add them to your site and WordPress.com also offers built-in activity logs.
19. Stay informed on current threatsSecurity threats constantly evolve, so staying informed is essential in order to respond and strengthen your defenses quickly.
Two good resources for the latest vulnerabilities and best practices are:
US Cybersecurity and Infrastructure Security Agency (CISA)Open Web Application Security Project (OWASP) (for developers)In addition, sign up for security newsletters or alerts from your hosting provider or plugin vendors.
20. Educate and train all website usersYour website security is only as strong as your least-informed user. For that reason, make sure all team members understand security best practices. Train them to recognize phishing attempts and suspicious activity, use strong passwords and MFA, and to not share accounts and reuse credentials.
Keep in mind that website safety includes device security, so be sure to implement malware scans and other security measures on your team’s computers.
21. Scan your site regularlyScanning your website helps catch vulnerabilities, malware, or suspicious changes early. It lets you know if there is a problem in real-time and prevents threats from going undetected on your site.
You can use automated tools or services to schedule scans daily or weekly. OWASP has a detailed list of options.
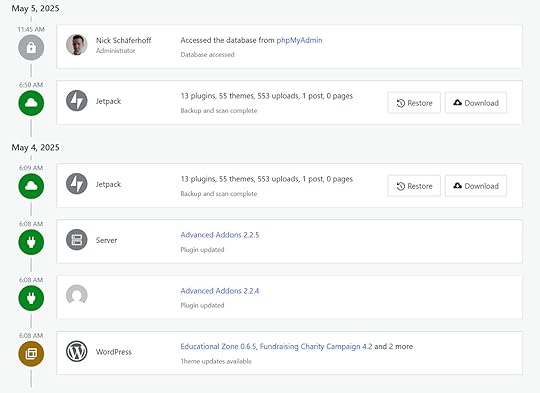
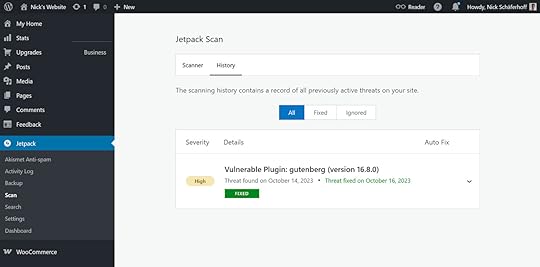
On WordPress.com, Jetpack Scan checks every site daily for dangerous plugins, themes, malware, and other vulnerabilities. On higher-tier plans, you also get access to a history of threats identified on your site.
 22. Have a recovery plan
No matter how diligent you are, the risk to your website is never zero. If the worst-case scenario happens, advanced preparation will help you stay calm and mitigate the potential damage.
Put together a recovery plan with information such as:
Step-by-step instructions for different scenariosWho to contact in case of emergency and howHow to let customers know what’s happeningLegal requirements for reporting security breachesPracticing your recovery process ahead of time can save hours or even days during a real incident. And remember, with a WordPress.com plan, site recovery is free.
An ounce of prevention is worth a pound of cureInvesting in security measures for your website is essential for protecting your content, users, and reputation. Threats are real, common, and often automated, and everyone is a target. Fortunately, many of the most effective protections are simple to implement. If you use a high-quality managed hosting provider like WordPress.com, you’re already ahead of the game.
Just keep in mind that security is not a one-time task, but an ongoing process. Regularly review your systems and processes to continue staying safe. If a breach happens, don’t panic, just recover, analyze, and make sure it can’t happen again.
August 4, 2025
What’s New With Our AI Website Builder: Improved Features, More Possibilities
In April, we launched our AI website builder, opening the door for anyone to turn their ideas into a WordPress.com website — no expertise required. We’ve been listening to your feedback and regularly rolling out improvements and new features that put more creative power in your hands.
Whether you’re dreaming up a business, building your portfolio, or sharing your passion, our goal is to make website creation inspiring, personal, and truly yours — with all the flexibility and ownership WordPress.com is known for. Here’s a quick look at what’s new — so you can spend less time building, and more time growing your ideas
Improved color palettes and font pairingsYou asked for more customization, so we delivered! The AI website builder now offers an expanded range of color palettes and designer-curated font pairings — instantly generated to fit your vibe, style, or brand. Personalizing your site is faster and easier, whether you want bold, minimal, playful, or classic — all without any design experience.
 Hero sections that stand out
Your homepage hero area is your website’s first impression — and now, our AI website builder creates even more modern, eye-catching hero areas. Instantly get modern layouts, bold headers, flexible intros, and cover images that help your homepage make a strong first impression.
 Smarter, custom logos
Site logos just got a big upgrade. Our AI website builder now generates cleaner, more customizable site logos using the latest AI models — including playful cartoon styles, niche aesthetics, bold typography, or anything in between. Just describe the vibe you want, and you’ll get a logo that’s truly yours.
No more scrambling for the right photo. Now you can whip up fresh images, cover photos, or hero backgrounds for your site in seconds — just by describing what you want (“a cozy café at sunset” or “vibrant tech workspace”), and the AI helps you find or create visuals that fit your vibe.
 Edit more, in more places
You can now use the AI website builder to edit your site’s templates — not just individual pages. That means you can easily update your homepage, about page, or any template, and make global changes to layouts, colors, or fonts — all from one place, without jumping between menus. With full template editing, you get even more flexibility and creative control across your whole site — no extra steps required.
 What’s next?
We’re committed to making our AI website builder even better. That means regular bug fixes, smarter intelligence, better taste, and an even smoother experience, all designed to help you go from idea to live website with minimal effort. Have a feature you’d love to see? Let us know — your voice shapes where we go next.
Curious? Get started with our AI website builder today.
July 31, 2025
Introduction to WordPress Plugin Development: Build Your First Plugin
WordPress powers over 40% of the web, and much of its flexibility comes from plugins. Plugins are self-contained bundles of PHP, JavaScript, and other assets that extend what WordPress can do—powering everything from simple tweaks to complex business features. If you’re a developer new to WordPress, learning how to build plugins is the gateway to customizing and scaling the platform for any need.
In this guide, you’ll learn the essentials of plugin development, set up a local environment using WordPress Studio, and build a fully functional example plugin. By the end, you’ll understand the anatomy of a plugin, how hooks work, and best practices for a maintainable and secure code.
Table of ContentsSetting up a local development environmentCreating your first pluginUnderstanding hooks: actions and filtersLoading assets the WordPress wayOptional: Adding a settings screenComplete plugin codeBest practices for plugin developmentNext steps and resourcesYour plugin journey starts hereSetting up a local development environmentBefore you write a single line of code, you need a local WordPress environment. WordPress Studio is the fastest way to get started. Studio is open source, maintained by Automattic, and designed for seamless WordPress development.

Follow these steps:
Step 1: Download and install StudioVisit developer.wordpress.com/studio and download the installer for macOS or Windows.
Step 2: Create your first local siteTo create a local site, launch Studio and click Add Site. You’ll see a simple window where you can name your new site. After entering a name and clicking Add Site, Studio automatically configures a complete WordPress environment for you—no command line knowledge needed. Once complete, your new site appears in Studio’s sidebar, providing convenient links to view it in your browser or access the WordPress admin dashboard.
 Step 3: Open your WordPress site and its admin section
Click the “Open site” link to open your site in the browser. You can also click the “WP Admin” button in Studio to access your site’s dashboard at /wp-admin. You’ll be automatically logged in as an Administrator. This is where you’ll manage plugins, test functionality, and configure settings.
 Step 4: Open the code in your IDE
Studio provides convenient “Open in…” buttons that detect your installed code editor (like Visual Code or Cursor) and let you open your project in your preferred editor. You can configure your default code editor in Studio’s settings. Once opened in your code editor, you’ll have complete access to browse, edit, and debug the WordPress installation files.

Once you have your local environment for WordPress development set up and running, locate the plugins folder . In your project root, navigate to:
wp-content/ └── plugins/This is where all plugins live. To build your own, create a new folder (e.g., quick-reading-time) and add your plugin files there. Studio’s server instantly reflects changes when you reload your local site.
 Creating your first plugin
Every plugin starts as a folder with at least one PHP file. Let’s build a minimal “Hello World” plugin to demystify the process.
In wp-content/plugins/, create a folder called quick-reading-time.Inside that folder, create a file named quick-reading-time.php.Your file structure should look like this:
wp-content/ └── plugins/ └── quick-reading-time/ └── quick-reading-time.phpAdd the following code to quick-reading-time.php:
This header is a PHP comment, but WordPress scans it to list your plugin in Plugins → Installed Plugins. Activate it—nothing happens yet (that’s good; nothing is broken).
Tip: Each header field has a purpose. For example, Text Domain enables translation, and License is required for distribution in the Plugin Directory. Learn more in the Plugin Developer Handbook.
Understanding hooks: actions and filtersWordPress plugins interact with core events using hooks. There are two types:
Actions : Triggered when WordPress does something (e.g., loading scripts, saving posts). Filters : Allow you to modify data before it’s displayed or saved.Let’s add a reading-time badge using the the_content filter:
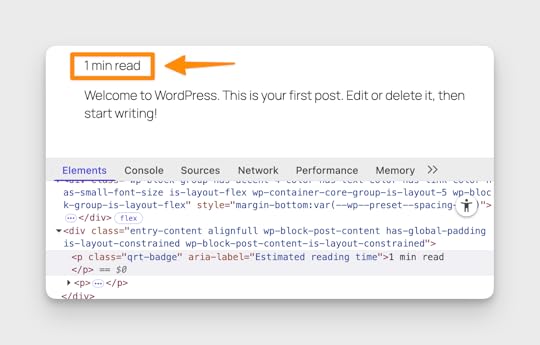
function qrt_add_reading_time( $content ) { // Only on single posts in the main loop if ( ! is_singular( 'post' ) || ! in_the_loop() || ! is_main_query() ) { return $content; } // 1. Strip HTML/shortcodes, count words $plain = wp_strip_all_tags( strip_shortcodes( get_post()->post_content ) ); $words = str_word_count( $plain ); // 2. Estimate: 200 words per minute $minutes = max( 1, ceil( $words / 200 ) ); // 3. Build the badge $badge = sprintf( '%s
', esc_attr__( 'Estimated reading time', 'quick-reading-time' ), /* translators: %s = minutes */ esc_html( sprintf( _n( '%s min read', '%s mins read', $minutes, 'quick-reading-time' ), $minutes ) ) ); return $badge . $content;}add_filter( 'the_content', 'qrt_add_reading_time' );This snippet adds a reading time badge to post content using the the_content filter. It checks context with is_singular(), in_the_loop(), and is_main_query() to ensure the badge only appears on single posts in the main loop.
The code strips HTML and shortcodes using wp_strip_all_tags() and strip_shortcodes(), counts words, and estimates reading time. Output is localized with esc_attr__() and _n(). The function is registered with add_filter().
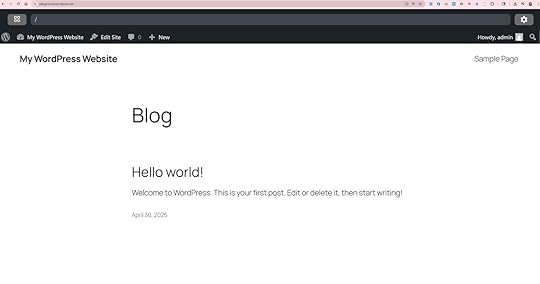
With this plugin activated, each post will now also display the reading time:
 Loading assets the WordPress way
To style your badge, enqueue a stylesheet using the wp_enqueue_scripts action:
function qrt_enqueue_assets() { wp_enqueue_style( 'qrt-style', plugin_dir_url( __FILE__ ) . 'style.css', array(), '1.0' );}add_action( 'wp_enqueue_scripts', 'qrt_enqueue_assets' );Create a style.css file in the same folder:
.qrt-badge span { margin: 0 0 1rem; padding: 0.25rem 0.5rem; display: inline-block; background: #f5f5f5; color: #555; font-size: 0.85em; border-radius: 4px;}Best practice: Only load assets when needed (e.g., on the front end or specific post types) for better performance.
With this change, the reading time info on each post should look like this:
 Optional: Adding a settings screen
To make the average reading speed configurable, let’s add a settings page and connect it to our plugin logic. We’ll store the user’s preferred words-per-minute (WPM) value in the WordPress options table and use it in our reading time calculation.
Step 1: Register the settingAdd this code to your plugin file to register a new option and settings field:
// Register the setting during admin_init.function qrt_register_settings() { register_setting( 'qrt_settings_group', 'qrt_wpm', array( 'type' => 'integer', 'sanitize_callback' => 'qrt_sanitize_wpm', 'default' => 200, ) );}add_action( 'admin_init', 'qrt_register_settings' );// Sanitize the WPM value.function qrt_sanitize_wpm( $value ) { $value = absint( $value ); return ( $value > 0 ) ? $value : 200;}This code registers a plugin option (qrt_wpm) for words-per-minute, using register_setting() on the admin_init hook. The value is sanitized with a custom callback using absint() to ensure it’s a positive integer.
Step 2: Add the settings pageAdd a new page under Settings in the WordPress admin:
function qrt_register_settings_page() { add_options_page( 'Quick Reading Time', 'Quick Reading Time', 'manage_options', 'qrt-settings', 'qrt_render_settings_page' );}add_action( 'admin_menu', 'qrt_register_settings_page' );This code adds a settings page for your plugin under the WordPress admin “Settings” menu. It uses add_options_page() to register the page, and hooks the function to admin_menu so it appears in the dashboard. The callback (qrt_render_settings_page) will output the page’s content.
Step 3: Render the settings pageDisplay a form for the WPM value and save it using the Settings API:
function qrt_render_settings_page() { if ( ! current_user_can( 'manage_options' ) ) { return; } ?>This function renders the plugin’s settings page, displaying a form to update the WPM value. It checks user permissions with current_user_can(), outputs the form using settings_fields(), do_settings_sections(), and retrieves the saved value with get_option(). The form submits to the WordPress options system for secure saving.
Step 4: Use the setting in your plugin logicUpdate your reading time calculation to use the saved WPM value:
function qrt_add_reading_time( $content ) { if ( ! is_singular( 'post' ) || ! in_the_loop() || ! is_main_query() ) { return $content; } $plain = wp_strip_all_tags( strip_shortcodes( get_post()->post_content ) ); $words = str_word_count( $plain ); $wpm = (int) get_option( 'qrt_wpm', 200 ); $minutes = max( 1, ceil( $words / $wpm ) ); $badge = sprintf( '%s
', esc_attr__( 'Estimated reading time', 'quick-reading-time' ), esc_html( sprintf( _n( '%s min read', '%s mins read', $minutes, 'quick-reading-time' ), $minutes ) ) ); return $badge . $content;}This function adds a reading time badge to post content. It checks context with is_singular(), in_the_loop(), and is_main_query() to ensure it runs only on single posts in the main loop. It strips HTML and shortcodes using wp_strip_all_tags() and strip_shortcodes()), counts words, and retrieves the WPM value with get_option(). The badge is output with proper escaping and localization using esc_attr__(), esc_html(), and _n()).
With these changes, your plugin now provides a user-friendly settings page under Settings → Quick Reading Time. Site administrators can set the average reading speed for their audience, and your plugin will use this value to calculate and display the estimated reading time for each post.
Complete plugin codeBefore we wrap up with best practices, let’s review the complete code for the “Quick Reading Time” plugin you built in this guide. This section brings together all the concepts covered—plugin headers, hooks, asset loading, and settings—into a single, cohesive example. Reviewing the full code helps solidify your understanding and provides a reference for your own projects.
At this stage, you should have a folder named quick-reading-time inside your wp-content/plugins/ directory, and a file called quick-reading-time.php with the following content:
'integer', 'sanitize_callback' => 'qrt_sanitize_wpm', 'default' => 200, ) );}add_action( 'admin_init', 'qrt_register_settings' );// Sanitize the WPM value.function qrt_sanitize_wpm( $value ) { $value = absint( $value ); return ( $value > 0 ) ? $value : 200;}// Add a settings page under Settings.function qrt_register_settings_page() { add_options_page( 'Quick Reading Time', 'Quick Reading Time', 'manage_options', 'qrt-settings', 'qrt_render_settings_page' );}add_action( 'admin_menu', 'qrt_register_settings_page' );// Render the settings page.function qrt_render_settings_page() { if ( ! current_user_can( 'manage_options' ) ) { return; } ?> post_content ) ); $words = str_word_count( $plain ); $wpm = (int) get_option( 'qrt_wpm', 200 ); $minutes = max( 1, ceil( $words / $wpm ) ); $badge = sprintf( '%s
', esc_attr__( 'Estimated reading time', 'quick-reading-time' ), esc_html( sprintf( _n( '%s min read', '%s mins read', $minutes, 'quick-reading-time' ), $minutes ) ) ); return $badge . $content;}add_filter( 'the_content', 'qrt_add_reading_time' );// Enqueue the plugin stylesheet.function qrt_enqueue_assets() { wp_enqueue_style( 'qrt-style', plugin_dir_url( __FILE__ ) . 'style.css', array(), '1.0' );}add_action( 'wp_enqueue_scripts', 'qrt_enqueue_assets' );You should also have a style.css file in the same folder with the following content to style the badge:
.qrt-badge span { margin: 0 0 1rem; padding: 0.25rem 0.5rem; display: inline-block; background: #f5f5f5; color: #555; font-size: 0.85em; border-radius: 4px;}This plugin demonstrates several foundational concepts in WordPress development:
Plugin Header: The block comment at the top registers your plugin with WordPress, making it discoverable and manageable from the admin dashboard.Hooks: The plugin uses both actions (admin_init, admin_menu, wp_enqueue_scripts) and a filter (the_content) to integrate with WordPress at the right moments.Settings API: By registering a custom option and rendering a settings page, the plugin allows site administrators to configure the average reading speed, making the feature flexible and user-friendly.Sanitization and Security: All user input is sanitized, and output is escaped, following best practices to prevent security vulnerabilities.Asset Loading: Styles are loaded using WordPress’s enqueue system, ensuring compatibility and performance.Internationalization: All user-facing strings are wrapped in translation functions, making the plugin ready for localization.By bringing these elements together, you have a robust, maintainable, and extensible plugin foundation. Use this as a template for your own ideas, and continue exploring the WordPress Plugin Developer Handbook for deeper knowledge.
Best practices for plugin developmentBuilding a WordPress plugin is more than just making something work—it’s about creating code that is robust, secure, and maintainable for years to come. As your plugin grows or is shared with others, following best practices becomes essential to avoid pitfalls that can lead to bugs, security vulnerabilities, or compatibility issues. The habits you form early in your development journey will shape the quality and reputation of your work.
Let’s explore the foundational principles that set apart professional WordPress plugin development.
Prefix everything (e.g., qrt_) to avoid name collisions. WordPress is a global namespace, so unique prefixes for functions, classes, and even option names help prevent conflicts with other plugins or themes.Escape and sanitize all output and input to prevent XSS and security issues. Always validate and clean data before saving it to the database or displaying it in the browser. Use functions like esc_html(), esc_attr(), and sanitize_text_field() to keep your plugin safe.Translate strings using __(), and _n() for localization. Internationalization (i18n) ensures your plugin is accessible to users worldwide. Wrap all user-facing text in translation functions and provide a text domain.Use version control (Git) and WP-CLI helpers (wp scaffold plugin, wp i18n make-pot). Version control is your safety net, allowing you to track changes, collaborate, and roll back mistakes. WP-CLI tools can automate repetitive tasks and enforce consistency.Ship a readme.txt for the Plugin Directory and changelog. A well-written readme helps users understand your plugin’s features, installation steps, and update history. It’s also required for distribution on WordPress.org.Debugging: Enable WP_DEBUG and use tools like Query Monitor for troubleshooting. Proactive debugging surfaces issues early, making them easier to fix and improving your plugin’s reliability.Follow the Plugin Developer Handbook and WordPress Coding Standards . These resources are the gold standard for WordPress development, offering guidance on everything from code style to security.Tip: Adopt these habits early—retrofitting best practices later is much harder. By making them part of your workflow from the start, you’ll save time, reduce stress, and build plugins you can be proud of.
Next steps and resourcesYou now have a working plugin that demonstrates the three “golden” hooks:
the_content – injects the badge.wp_enqueue_scripts – loads the stylesheet.admin_menu – (optionally) adds a settings page.Where you go next is up to you—try adding custom post types (init), REST API endpoints (rest_api_init), scheduled events, or Gutenberg blocks (register_block_type). The mental model is the same: find the hook, write a callback, let WordPress run it.
Your plugin journey starts hereEvery plugin—whether 40 KB or 40 MB—starts with a folder, a header, and a hook. Master that foundation, and the rest of the WordPress ecosystem opens wide. Experiment locally, keep your code readable and secure, and iterate in small steps. With practice, the leap from “I wish WordPress could…” to “WordPress does” becomes second nature.
Ready to build your own plugin? Try the steps above, share your results in the comments, or explore more advanced topics in our developer blog . Happy coding!
July 29, 2025
How to Prevent and Stop a DDoS Attack on Your Website
How do you stop a distributed denial-of-service (DDoS) attack? Through a mix of proactive prevention and a solid plan for the worst-case scenario.
DDoS attacks are a growing problem in their frequency, size, and sophistication. According to Statista, the worldwide number of attacks almost doubled from early 2023 to late 2024, peaking at more than half a million in a quarter — that’s almost 5,600 attacks per day.
 Source: statista.com
These attacks don’t just hit government sites or major corporations — even small websites can be targeted. That’s why, as a professional in charge of maintaining a website’s uptime and performance, understanding how to prevent and stop a DDoS attack is critical.
This article covers how DDoS attacks work, how to recognize them, and what to do before, during, and after an attack.
What is a DDoS attack and how does it work?A DDoS attack against a website or internet service sends overwhelming amounts of traffic to the underlying server or network to make it slow or unavailable. The “distributed” part of DDoS refers to the fact that the attack is carried out by multiple devices at once, usually from different areas of the world.
The devices employed in a DDoS attack are often part of a botnet — a network of machines infected with malware that allow them to be controlled remotely. They can include anything from routers and laptops to home appliances with online capabilities. In 2025, researchers discovered a botnet made of an estimated 30,000 webcams and video recorders.
The spread-out nature of DDoS attacks makes them difficult to trace and fight. The source of the malicious traffic is harder to identify, and distributed attacks can send more requests than single-source assaults. Carrying out such attacks is also increasingly easy with DDoS tools and botnets-for-hire available on the dark web.
The good news is that, due to the effort and cost involved with a DDoS attack, most of them don’t last long. According to Netscout, about 70% of DDoS attacks don’t exceed 15 minutes, and 90% are shorter than an hour.
 Types of DDoS attacks
There are three broad types of DDoS attacks that each target different parts of a website’s infrastructure:
Volumetric attacks: This is the most common type. It aims to consume all available bandwidth by flooding the network with massive amounts of traffic.Application layer attacks: A type of attack that overwhelms your website’s server and network with repeated HTTP or database requests.Protocol attacks: Also called state-exhaustion attacks, they target network equipment and infrastructure like load balancers and firewalls.Attackers may also combine several types to make fighting off the attack more difficult.
Why do websites become targets?Common reasons for being on the receiving end of a DDoS attack are:
Ideological reasons: Some attacks are politically motivated and target government websites or institutions aligned with causes that the perpetrators don’t agree with.Hacktivism: Hacktivist groups have been known to use DDoS attacks to protest war, censorship, or foreign policy decisions.Extortion: Criminals may launch attacks to extort money in exchange for stopping the disruption.Cyberwarfare: Attacks also happen between countries to disrupt each other’s essential services during a conflict.Business competition: Competitors may try to knock rival businesses offline during a key sale or launch.Experimentation: Inexperienced hackers might carry out DDoS attacks “for fun” or to test their skills.Opportunity: Many attacks are automated and simply happen because a website is vulnerable. It’s random and can even happen to a personal website.Potential consequences of being attackedWhen your website becomes suddenly unavailable to visitors, it can have many negative effects:
Loss of sales, leads, ad revenue, and other sources of incomeDamaged customer trust, loyalty, and confidence in your productLowered rankings in search resultsExpensive post-attack cleanup and hosting bandwidth feesSome attackers use DDoS as a smokescreen for other malicious activity, like hacking your site.
A real-world DDoS exampleTo give you a better idea of what these types of attacks look like, let’s look at some examples.
The largest attack ever reported was a 5.6-Tbps DDoS attack in 2024. At its peak, it was sending 666 million packets per second and lasted 80 seconds. The attack happened as part of a larger campaign of cyber attacks occurring during that period.
 How to detect a DDoS attack
The first step in fighting a DDoS attack on your website is spotting it. Here are some telltale signs to watch for:
Your website or parts of it become extremely slow to load or stop responding altogether, accompanied by error messages and timeoutsA sudden and sustained spike in traffic, especially from unusual locations and IP addressesServer resource usage suddenly maxes out without a corresponding increase in legitimate visitorsYour hosting provider, monitoring tools, and other parts of your DDoS prevention setup alert you to unusual activity or downtimeEffective DDoS prevention strategiesStopping a DDoS attack on your website requires a two-pronged approach: setting up a multi-layered defense system that makes these types of assaults difficult and preparing a response plan.
1. Use a hosting provider equipped to deal with DDoS attacksYour hosting provider is your website’s first line of defense. It’s in charge of the architecture targeted by DDoS attacks. If your host crumbles, your site goes down with it.
The right type of web hosting plays an important role. Unlike traditional, single-server hosting, cloud hosting like WP Cloud can dynamically add computing resources, helping to mitigate DDoS traffic.

In addition, look for hosting features that actively help prevent a DDoS attack. For example, all WordPress.com plans come with built-in DDoS mitigation. They don’t have traffic or visitor limits, so you don’t have to worry about extra costs in the aftermath of a DDoS attack.
2. Invest in website securityKeeping your website secure helps protect against a DDoS attack, as well as being a best practice.
To secure your site, do the following:
Use strong passwords and credentials for all site users.Implement brute-force protection.Set sensible user roles and permissions.Encrypt website traffic using SSL/HTTPS.Perform regular malware scans.Keep WordPress updated, as well as updating all plugins and themes (if you’re a WordPress.com customer, all updates are handled automatically).Perform regular backups, preferably automated and with one-click restore.These options are all available with a managed hosting provider like WordPress.com. Best of all, if your site still ends up hacked, cleanup is free.
3. Optimize website performanceAnother factor in DDoS mitigation is site performance. A well-optimized site can better withstand unexpected traffic surges. While that won’t stop the attack itself, it can help your site remain partially usable and responsive.
A helpful first step is to test your website with something like WordPress.com’s Website Speed Test Tool and follow the recommendations to improve your site’s performance.

Common ways to make your website more optimized are:
Compressing imagesUsing a fast-loading themeKeeping plugins to a minimumImplementing cachingUsing a content delivery network (CDN)Hosting is also a performance factor. On WordPress.com, performance features include servers with high-frequency CPUs and a global edge cache and CDN with 28+ locations, as well as high burst capacity. On Commerce and Business plans, you can activate the Site Accelerator CDN to deliver images and static files more quickly. More information is available in the site performance docs.
4. Monitor network traffic and uptimeYou can only identify a DDoS attack when you have the data to spot the signs of one.
An uptime monitoring service sends you alerts via email, SMS, or push notification when your site becomes unresponsive or goes offline. In addition, connecting your site to Google Analytics or a similar solution will help you understand traffic patterns and notice sudden spikes from single countries, IP ranges, or unknown referral sources.

If possible, you may also monitor server performance metrics like CPU load, memory usage, and bandwidth consumption for warning signs.
5. Use a CDNA CDN is not just a great tool for improving website performance, but also a good countermeasure to DDoS attacks. It’s able to absorb some of the malicious traffic and continue serving site visitors even when another region or the main server is under attack. Cybersecurity experts on Reddit agree that it’s one of the most effective methods.

Look for a provider with an anycast network. This is a setup with one IP address shared across servers in different locations, which allows malicious traffic to be spread out (or diffused) throughout it. This greatly reduces the risk of downtime because no single machine bears the full brunt of the attack.
Cloudflare is a popular CDN provider and it helped stop the record-breaking DDoS attack mentioned earlier in this article. Sites hosted on WordPress.com benefit from integrated Cloudflare features that don’t require extra setup.
6. Set up a web application firewallA web application firewall (WAF) acts as a gatekeeper between your website and incoming traffic. It can filter requests before they reach your site and thus block common DDoS vectors and diffuse attacks early.
Firewall plugins are one way of adding a WAF to your site. Many security plugins and CDNsinclude a WAF as part of their service.
Finally, your hosting provider can also set up a firewall for you. For example, WordPress.com includes a powerful firewall in every plan, which it manages and updates for you.
7. Apply rate limitingRate limiting controls the number of requests a single user or IP address can make to your server in a given time. During a DDoS attack, it acts as a throttle to reduce the impact of malicious traffic without completely blocking legitimate users. This buys time for other defenses to respond and is often part of a firewall.
Rate limiting can apply to login attempts (such as those covered by brute-force protection on WordPress.com), API requests, visits to specific URLs, or other levels of the network.
Use allowlists to exclude known legitimate IP numbers from rate limiting to allow yourself and other website users to continue taking action against an ongoing attack. Use blocklists to keep away repeat offenders or known botnets.
8. Develop a response planEven with solid defenses in place, no site is fully immune to DDoS attacks. Creating a clear plan for the worst-case scenario will help you quickly identify, mitigate, and recover from an attack. Do the following:
Define team roles and responsibilities, for example, who is responsible for monitoring your alarm systems so you can discover attacks quickly.Document key contacts, communication channels, and login credentials, like your hosting provider’s emergency support.Create a checklist of steps to follow when you suspect a DDoS attack is happening, including how to enable emergency WAF/CDN settings.Plan out your customer communication strategy in case your site becomes unavailable.Practice the response plan with your team along with training for general security practices.How to deal with a DDoS attack in progressThese steps will help you weather a DDoS attack:
1. Stay calmRemember, a DDoS attack is more of an inconvenience than it is a real danger to your site. In most cases, your data is safe. Plus, DDoS attacks are usually short-lived and survivable with proper action.
So, take a deep breath, avoid rushed decisions, and start implementing your response plan.
2. Confirm you’re actually dealing with an attackNot every site slowdown or outage is caused by a DDoS attack. There are other possible reasons, like plugin errors, server misconfiguration, a hosting outage, or sudden traffic increases due to a blog post going viral.
Confirm the cause so you can respond appropriately. Look for warning signs such as:
Sudden and unusual spikes in visits or requests in traffic logs or analyticsRepeated requests to the same page or endpoint, like “wp-login.php”A flood of requests from a small number of IP ranges or geographic regionsMessages or alerts from your WAF or CDN provider3. Contact your hosting providerYour hosting provider can and should be your strongest ally to stop a DDoS attack. They have the tools, infrastructure, and expertise to help mitigate the impact.
Reach out to your provider’s support team as soon as you suspect a DDoS attack. They can check whether they see the same thing on their end, and may already be taking action behind the scenes.
 4. Set your WAF and CDN to emergency mode
Most firewalls and CDNs offer special settings for high-threat situations to keep your site online. For example, on WordPress.com you can enable defensive mode to activate an automated browser challenge for visitors in order to filter out automatic bot traffic.
 5. Keep website visitors informed
During a DDoS attack, communication is key to maintaining customer and visitor trust. Use your social media profiles or a status page hosted on another service to share updates and reassure your audience.
Inform users that you’re aware of the issue and are actively working to resolve it. Let customers know which services are affected, especially if you run an e-commerce or membership site. Provide estimated timelines if possible, but avoid making promises you can’t keep.
6. Be patientDDoS attacks are scary but mostly short-lived. Once your mitigation measures are in place, the best course of action is to simply wait it out.
Focus on monitoring your systems and adjusting filters rather than overreacting or making major changes. Keep an eye on traffic patterns so you know when the attack ends. Then, slowly go back to business as usual but stay vigilant for other threats, like a compromised site or a second wave of attacks.
7. Conduct a post-mortemAfter the attack, evaluate its impact and how well your defenses worked. Check which assets were targeted, as well as which parts of your strategy worked and which didn’t. Use the knowledge you gather to improve existing systems and strengthen your site fortifications.
Equip yourself against DDoS attacks on your websiteThe defense against DDoS attacks starts long before one hits your site. By combining smart infrastructure choices, proactive security practices, and a clear response plan, you can dramatically reduce the risk and impact of an attack.
Looking for hosting with built-in DDoS protection and expert support? Choose WordPress.com and focus on growing your site, not defending it.
July 28, 2025
A New and Improved Code Editing Experience
WordPress.com just made coding from your WordPress admin more powerful and enjoyable. Whether you’re an everyday user or a developer, you’ll have access to modern features like syntax highlighting, autocomplete, and search and replace when you reach for the code editor.
Launched in the last week, we’re bringing enhanced code editors to two aspects of the WordPress.com experience:
Post and site code editorsAdditional CSS input boxLet’s dive into what this upgraded experience looks like.
Customize block code in the post and site editorsHave you ever opened the Code editor from the block or site editor and been presented with a mass block of nearly unreadable text with no syntax highlighting?

You’ve probably wished for something a tiny bit more sophisticated. Maybe even something that would help you type faster, spot errors easily, or just simply make the code easier to read.
Until now, that didn’t exist unless you installed a custom or third-party plugin to handle it.
Welcome to a new improved experience—now available to everyone:

As you can already see when comparing this screenshot to the previous one, the code is much more readable.
Beautiful CSS in additional CSS code boxesWriting custom CSS just got a lot better, too. The post and site editors were a welcome improvement, but you’re more likely to actually touch code when writing custom CSS under the Styles panel in the Site Editor.
In the past, you would see something like the following when adding code in the Additional CSS box under the Styles panel:

Now — just like the post and site code editors — you can see your CSS in all its glory, just like it was meant to be:
 What features are included?
Some features included in the new code editors are:
Syntax Highlighting: View your code colorized according to the language, which makes it much easier to understand the structure at a glance and even write your own code.Autocomplete: Save keystrokes, prevent errors, and speed up your workflow with a simple autocomplete feature.Intelligent Formatting: Enjoy features like line numbers, auto-indentation, and bracket pairing for a smoother experience.Language Support: The new editors detect and highlight both HTML and CSS—no more “plain text” boxes for your code!Oh, and there’s search and replace support too. When viewing inside a code editor, type `Command + F` on Mac or `Ctrl + F` on Windows to pull up search/replace panel at the bottom of editor:

The search/replace feature includes matching by:
Case (exact match of uppercase and lowercase letters)Regular expressionsWhole wordYou can also replace individual occurrences of found matches or all of them in one go.
What’s coming in the future?With syntax highlighting, autocomplete, and other standard code editing features, WordPress.com bridges the gap between a basic CMS and a powerful code-friendly platform. This is a step forward for developers, power users, and anyone who needs to tinker with code once in a while — without ever leaving the editor.
But this is merely a first iteration of improved code editing across the platform. So I’ll leave the question to you: How would you like to see code editing evolve over time to make your experience more empowering?
Personally, I’d like to see the new features applied to the Code and HTML blocks. Maybe I’ll even have some luck convincing the team to implement one or both.
Regardless, the future is exciting whether you like to tinker with code once in a while or dive into it every day. For now, go try out the new editors and let us know what you think!


