Carol Fenster's Blog, page 6
May 9, 2017
Chocolate Cake in a Cup: Cooking for Two
I vividly remember my first encounter with a microwave oven back in the 1970’s. Our hostess was serving a custard-based homemade pie on her silver-rimmed china. For some reason, she decided to heat each slice separately in her brand-new microwave oven.
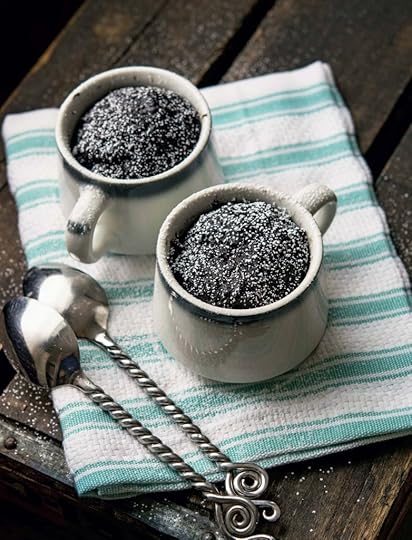
Chocolate Cake in a Cup from Gluten-Free Cooking for Two. Photo by Tom Hirschfeld
Silver-rimmed china is not microwave-safe, so she had to delicately transfer each slice of pie to a microwave-safe plate, gently reheat it, and then delicately transfer it back to the china…..trying desperately to keep each slice intact (which was not always successful). Looking back, this was probably not the best use for a microwave oven.
Today, microwave ovens are commonplace and used in far more appropriate ways than reheating custard pie. For my latest cookbook, Gluten-Free Cooking for Two, I knew I had to include this easy chocolate cake that is “baked” in a microwave oven in 60 seconds. It forms two perfectly-proportioned desserts, just right for two people.
This cake is so simple that anyone could whip it up. Even age-appropriate children could prepare this for Mom (or Grandma) for Mother’s Day. The best part is there’s no waiting. By the time you find a fork in the silverware drawer, this cake is ready to eat. Enjoy!
Chocolate Cake in a Cup
Text excerpted from Gluten-Free Cooking for Two ©2017 by Carol Fenster. Reproduced by permission of Houghton Mifflin Harcourt. All rights reserved.
These cute little individual cakes microwaved in coffee cups are just perfect for couples, and they are super quick. They can be eaten right out of the cup, once they’ve cooled a bit.
1/3 cup Carol’s Gluten-Free Flour Blend (see below)
3 tablespoons granulated sugar
2 tablespoons unsweetened natural cocoa (not Dutch-processed)
¹/8 teaspoon (dash) baking powder
¹/8 teaspoon (dash) salt
1 large egg, at room temperature
2 tablespoons canola oil
1 tablespoon water
½ teaspoon pure vanilla extract
Powdered sugar or chocolate syrup, for garnish
[1] Generously grease 2 shallow, microwave-safe 6-ounce (¾-cup) coffee cups. (My coffee cups are 3¼ inches in diameter and 2¼ inches high. The batter may spill over the edge during baking if you use a smaller cup.)
[2] In a small bowl, whisk together the flour blend, sugar, cocoa, baking powder, and salt until well blended, and then whisk in the egg, oil, water, and vanilla until smooth. The batter will be soft. Divide the batter between the two coffee cups and place the cups on saucers or plates to catch any drips.
[3] Microwave on medium-high (70%) power for 50 to 60 seconds. The cakes are done when they look firm and are no longer shiny on top. They will continue to cook after they are out of the microwave. The cooking time may vary depending on the wattage of your microwave oven. Cool slightly before eating right out of the cup, dusted with powdered sugar or drizzled with chocolate syrup — or both!
Makes 2 cakes
Per cake: 335 calories; 5g protein; 17g total fat; 3g fiber; 42g carbohydrates; 94mg cholesterol; 215mg sodium
Carol’s Gluten-Free Flour Blend
1 ½ cups brown rice flour (or sorghum flour)
1 ½ cups potato starch
1 cup tapioca flour
Whisk together until thoroughly blended. Store, tightly covered, in a dark, dry place for up to 3 months.
May 2, 2017
Celebrate Cinco de Mayo with Crispy Southwestern Tacos
Celebrate Cinco de Mayo with Crispy Southwestern Tacos
Here in the Southwest, we observe Cinco de Mayo (May 5) seriously, a day of celebrating Mexican heritage and pride. While it has some significant roots in the history of Mexico, this date is also a good excuse to indulge in Mexican food and have a little fun—and it’s an excellent excuse for a margarita. Since it falls on a Friday this year, we expect some serious partying in Denver.
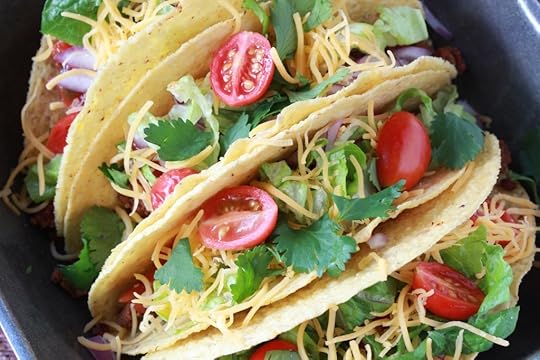
Crispy Southwestern Tacos from Gluten-Free Cooking for Two by Carol Fenster
We celebrate Cinco de Mayo with many foods, but one of the most family-friendly is simple tacos. My grandkids love them, adults love them, and they are colorful and versatile. You can use beef, as I do here, but we often use ground turkey instead and no one’s the wiser.
Also, May is National Celiac Disease Awareness Month, so let’s all celebrate how far we’ve come in our awareness of Celiac Disease.
Crispy Southwestern Tacos
Anything goes when it comes to tacos. I usually use leftover cooked meat (such as browned ground beef or shredded pork) in the fridge or freezer, but you can use browned ground turkey as well. You can also use soft white or yellow corn tortillas. Just check the label to make sure they are gluten-free since some corn tortilla brands also include wheat. This recipe makes 6 regular-size tacos; simply double the ingredients to make 12 tacos.
3/4 cup browned ground beef or turkey (or shredded pork)
Salt and pepper, to taste (optional)
1 ½ to 2 teaspoons chili powder, or to taste
1/4 cup diced red onion
1/2 diced tomato
1/4 cup store-bought Mexican salsa
1/4 cup shredded cheddar cheese or Monterey Jack cheese, or a mixture of cheese
1/2 cup shredded iceberg lettuce (or lettuce of your choice)
1/4 cup chopped fresh cilantro
4 crisp gluten-free corn taco shells
[1] In a small skillet over medium heat, toss the browned ground beef with the salt and pepper (if using) and chili powder and then heat to serving temperature.
[2] For each taco, layer the beef, onion, tomato, salsa, cheese, lettuce, and cilantro in a taco shell. Serve immediately. Makes 6 tacos.
Per taco: 505calories; 23g protein; 32 g total fat; 6g fiber; 33g carbohydrates; 79mg cholesterol; 466mg sodium
April 24, 2017
Sheet-Pan Supper: Gluten-Free Cooking for Two on PBS-TV
i recently taped three segments for a show that has aired for over 40 years called “Creative Living with Sheryl Borden” on the Public Broadcasting System (PBS). It is taped in the lovely state-of-the-art KENW-TV studio with a great kitchen on a university campus in New Mexico. Sheryl is a delightful hostess, always curious about how we prepare gluten-free food, and she is a joy to work with. I always have a great time and look forward to these taping sessions.

With PBS host Sheryl Borden, KENW-TV, “Creative Living with Sheryl Borden”
I was promoting my latest cookbook, Gluten-Free Cooking for Two (Houghton Mifflin Harcourt, 2017). The goal of the book is to help small households prepare the foods they love, using two-serving recipes. This eliminates leftovers and significantly reduces waste. Did you know that Americans throw away 30 to 40% of our food? When you cook right-size meals for two people, you will automatically cut down on food waste.
Cooking for Two
Cooking for two was the theme of all three segments: [1] Cornbread, [2] Sheet-Pan Dinner of Roasted Fish & Vegetables; and [3] Tiramisu. (I will offer recipes for the Cornbread and Tiramisu in later blogs.) Preparing for these tapings takes a lot of planning and preparation. You should see my “to-do” list! Before I leave, I write the script for each segment, emphasizing the main points that Sheryl and I will focus on.
Sheet-Pan Supper of Roasted Salmon & Vegetables
Writing this book was fun and very appropriate for me because my husband I are empty-nesters. Every recipe was something that we could use in our own lives and I no longer cook with full-size (4-to 6 servings) unless we are having guests.
One of my favorite recipes for two people involves cooking an entire dinner on a 9×13-inch rimmed baking sheet. It is called a “sheet-pan supper.” This is not a new concept, but one I had never tried until recently. Now it is one of my “go-to” dinners.
It basically consists of roasting the entire meal—potatoes, salmon, and vegetables—on the same sheet, leaving almost no dishes to clean up. If you choose colorful ingredients, it is also a gorgeous dish to look at because the “pink” of the salmon contrasts beautifully with the red and yellow tomatoes and the green asparagus. The idea of sheet-pan roasting is to first roast the foods that take longest to cook (in this case, potatoes) on the sheet, then build on those foods by adding the vegetables and fish on top and finish roasting it all together.
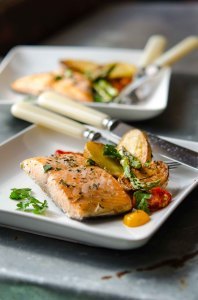
Sheet-Pan Supper of Roasted Fish & Vegetables
Sheet-Pan Supper of Roasted Fish & Vegetables
Reprinted with permission from Gluten-Free Cooking for Two by Carol Fenster (Houghton Mifflin Harcourt, 2017)
Making meals the “sheet-pan” way works especially well when cooking for two because an entire meal fits in one 9×13-inch pan. You begin roasting the food(s) that take longest to cook such as potatoes, adding additional foods (fish, vegetables) later, since they cook faster. If your vegetables are especially delicate (or if you prefer them steamed) layer them under the fish.
1/2 pound (2 cups, about 6 potatoes) small Yukon gold potatoes or fingerlings, halved
1 tablespoon olive oil
3/4 teaspoon dried herbs of your choice (I like oregano or tarragon for this dish)
1/4 teaspoon smoked paprika
1/4 teaspoon salt
1/8 teaspoon freshly ground black pepper
2 5-ounce salmon fillets
1 cup thin asparagus in 1/2-inch pieces
1/2 cup cherry or grape tomatoes, halved
1 fresh lemon, cut into 2 halves, for garnish
[1] Place a rack in the middle of the oven. Preheat the oven to 425⁰F. Line a 9×13-inch nonstick (gray, not black) rimmed baking sheet with foil and lightly grease or use a 10-inch greased ovenproof skillet.
[2] In a medium bowl, toss the potatoes, [1/4] teaspoon of the herbs, and smoked paprika with the olive oil until well coated. Arrange evenly, cut side down, on the baking sheet and roast 20 minutes.
[3] Arrange the salmon, asparagus, and tomatoes on top of the potatoes and sprinkle with the remaining [1/2] teaspoon herbs and the salt and pepper. Continue to roast until the salmon is cooked through and the potatoes are tender, about 10 to 15 minutes, depending on thickness of the fish. Serve with lemon wedges, for garnish.
Preparation time: 10 minutes. Roasting time: 30 minutes. Makes 2 servings
Per serving: 345 calories; 33g protein; 12g total fat; 4g fiber; 29g carbohydrates; 74mg cholesterol; 374mg sodium
NOTE: You can also vary this dish: instead of potatoes, use cauliflower flowerets. Use cod or sole instead of salmon, 1/8-inch red bell pepper strips instead of tomatoes, or broccoli florets or snow peas instead of asparagus—and monitor the roasting times accordingly. Generally speaking, the thinner and less dense the food, the shorter the cooking time. So, put the more delicate vegetables under the fish. You can also vary the herbs. I often use thyme, but tarragon or rosemary would be nice. If you have it, fresh dill would be superb. The smoked paprika is something I use in many foods because it lends a nice depth to the flavors. You could also try smoked salt to replace it.
Where to Watch “Creative Living with Sheryl Borden “
“Creative Living with Sheryl Borden” airs in all 50 states in over 118 PBS stations in the U.S., Canada, Guam, and Puerto Rico. For more information, go here. The segments I taped will air during the 2017-2018 season, so check your local PBS station for air times.
For more information about the contents of Gluten-Free Cooking for Two, go here.
April 10, 2017
Cooking for Two: Gluten-Free Carrot Cake Cupcakes
As a child, I looked forward to Easter—but not for a child’s usual reasons (dyeing Easter eggs, Easter candy, new Easter dress, Easter dinners with my aunts, uncles, and cousins). Nope.

Carrot Cake Cupcakes for Two
For me, it was the food. One of my favorites was a giant Carrot Cake baked in a Bundt pan, slathered with Cream-Cheese Frosting. My mother only made that cake for special occasions so it was a real treat.
My mother was one of 12 children, so there were plenty of people to eat that huge cake at these large Easter dinners. In fact, I grew up with nearly 40 first cousins in my small community so there was nary a crumb left on the plate.
Carrot Cake Cupcakes: Perfect for Small Households
Today, I still love Carrot Cake. But a full-size Carrot Cake for just the two of us (we are empty-nesters) is just too much food. But why should I give up eating one of the most heavenly desserts on earth when the solution is to simply bake smaller versions?
For the Carrot Cake, I scaled down my huge Bundt cake version to just 6 gluten-free cupcakes. There are lots of ingredients in a Carrot Cake, so there was a lot of kitchen math to make sure each ingredient remained in balance with the others and tastes great. Now I’m sharing the recipe with you. It is perfect for any small household (empty-nesters, couples, newlyweds, roommates, etc.)
Get The Carrot Cake Cupcake Recipe; Listen to My Interview with Faith Middleton on Food Schmooze
Last week, the delightful Faith Middleton—from the radio show Food Schmooze on WNPR in Connecticut—interviewed me about my new book and declared that these Carrot Cake Cupcakes “need to be on every Easter buffet table.”
If you would like the recipe and want to listen to my radio interview with Faith, go to Faith Middleton Food Schmooze. (You will find two other small-scale recipes from this new book: Asparagus Soup and Layered Bean-Tortilla Casserole.)
Introducing My New Cookbook, Gluten-Free Cooking for Two
I also downsized another 125 of my favorite full-size recipes to serve two people and it became my latest cookbook Gluten-Free Cooking for Two, which publishes this month. To learn more about the recipes in this book, go to my website.
Happy Easter! Enjoy these Carrot Cake Cupcakes!
April 3, 2017
Gluten-Free Cooking for Two – new cookbook
I was preparing dinner one night when I had a BFO (Blinding Flash of the Obvious):
Gluten-Free Cooking for Two
I realized that I live in a two-person household, yet I’ve always cooked for the standard family-of-four. That worked well when my son was growing up because he ate all of the leftovers, but now my husband and I are empty-nesters. Full-size recipes yield too much food, my husband dislikes leftovers (meatloaf! again?), and I hate wasting food.
Raised by depression-era parents (clean your plate!), my upbringing instilled a sense of guilt about wasting food. So, after scaling down all of my recipes I now prepare just enough food for two people and we have far less waste at our house.
I transformed all of this information into my latest cookbook, Gluten-Free Cooking for Two. The book has a wide variety of dishes: entrees, breads, breakfasts, soups, and desserts to entice you. Learn more about the recipes at my website.
I believe that everyone deserves food that is nourishing and suits their needs, regardless of special diets or household size. If this is you, then my new cookbook is right for you.
This is what I learned from converting 125 of my favorite full-size recipes to serve two people:
[1] Start with a Recipe for Two Servings
It is so tempting to just wing it and halve a 4-serving recipe to serve two. Trust me— it doesn’t always lead to success because not all ingredients scale down proportionately. I recently halved a simple 4-serving recipe for Butternut Squash Soup, just to prove my point. (After all, how hard could this be?) Well, the soup was under-seasoned and the ratio of liquids (broth) to solids (butternut squash) was “off” making the soup too thick. After I added more seasoning and more broth, the ingredients were balanced and the soup was perfect. Clearly, even the simplest recipes might need tweaking when downsizing them to two servings.
Balancing ingredients is even more important when scaling down recipes for baking. (How do you measure 1/3 of an egg?) My mother’s fail-proof chocolate cake—which I baked for decades—is the perfect example. I thought scaling down this recipe to fit a 5-inch cake pan would be a “piece of cake.” (Sorry, I just had to say it.) Instead, a dozen tries later, I finally balanced the ingredients to produce a miniature replica of the cake that has brought my family so much joy.
The moral of this story? Unless you like kitchen math and hours of experimentation, use a two-serving recipe to start with for best results.
[2] Think Small for Big Benefits
Small-scale cooking requires a different mind-set. You cook only what you need, using ingredients and utensils that seem impossibly small (e.g., 1/3 cup flour instead of 2 cups or a 3×5-inch loaf pan instead of 5×9). It’s almost a “dollhouse” mentality because the utensils and food are so darn cute. But the payoff is big! No leftovers and no food waste. Right-size recipes also prevent over-indulgence and offer automatic portion control if you’re trying to cut calories.
[3] Measure Accurately; No Eyeballing
Eye-balling is risky in small-scale cooking. This is because the overall volume of the ingredients is incredibly small, e.g., some batters barely measure 1 cup. So, even a tablespoon too much (or too little) of flour or liquid can upset the balance of wet-to-dry ingredients. In other words, the margin for error is quite small so correct measuring is critical.
Measuring small amounts of salt, seasonings, and leavenings requires precision. Rather than standard measuring spoons which are too big, use mini-measuring spoons for 1/8, 1/16, 1/32, and 1/64 teaspoon (the spoons are labeled as dash, pinch, smidgeon, or drop, respectively). You can find them in the baking aisle of grocery stores, in kitchen stores, or online.
[4] Use Small-Scale Baking Pans
Make sure you have the right pans. You can keep your 9×13-inch baking sheet for cookies or 5×9-inch pan for Brownies. But you may need to invest in additional, small-scale pans. For example, many recipes call for a straight-sided 2-quart saucepan (4-inch sides, 6-inch diameter) because it is just the right size to surround the entrée in enough liquid so it doesn’t boil dry. A shallower pan lets the juices evaporate too quickly and can lead to a dry dish.
In baking, use the suggested pan because the volume of dough/batter and the baking times have been carefully calibrated for that particular pan. Baking times are usually shorter than usual because smaller pans allow the heat to penetrate to the center of the dish more quickly than with larger pans.
[5] The Benefit of Cooking Small
Once you get the hang of it, cooking small becomes a way of life. Your payoff is fewer leftovers, less wasted food, and happier husbands.
******Carol Fenster now cooks all of her meals in two-serving portions and is the author of 14 cookbooks, including, Gluten-Free Cooking Two (Houghton Mifflin Harcourt, 2017). She blogs at www.CarolFensterCooks.com. Her website is www.CarolFenster.com.
Gluten-Free Cooking for Two– new cookbook by Carol Fenster
I was preparing dinner one night when I had a BFO (Blinding Flash of the Obvious): I realized that I live in a two-person household, yet I’ve always cooked for the standard family-of-four.
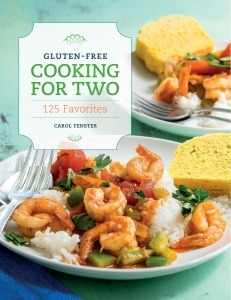
Gluten-Free Cooking for Two by Carol Fenster
That worked well when my son was growing up because he ate all of the leftovers, but now my husband and I are empty-nesters. Full-size recipes yield too much food, my husband dislikes leftovers (meatloaf! again?), and I hate to waste food.
Raised by depression-era parents (clean your plate!), my upbringing instilled a sense of guilt about wasting food. So, after scaling down all of my recipes I now prepare just enough for two. I transformed all of this information into my latest cookbook, Gluten-Free Cooking for Two, which publishes April 4.
If you cook for just two people, here is what you need to know:
[1] Start with a Recipe for Two Servings
It is so tempting to just wing it and halve a 4-serving recipe to serve two. Trust me— it doesn’t always lead to success because not all ingredients scale down proportionately. I recently halved a simple 4-serving recipe for Butternut Squash Soup, just to prove my point. (After all, how hard could this be?) Well, the soup was under-seasoned and the ratio of liquids (broth) to solids (butternut squash) was “off” making the soup too thick. After I added more seasoning and more broth, the ingredients were balanced and the soup was perfect.
Balancing ingredients is even more important when scaling down recipes for baking. (How do you measure 1/3 of an egg?) My mother’s fail-proof chocolate cake—which I baked for decades—is the perfect example. I thought scaling down this recipe to fit a 5-inch cake pan would be a “piece of cake.” (Sorry, I just had to say it.) Instead, a dozen tries later, I finally balanced the ingredients to produce a miniature replica of the cake that has brought my family so much joy.
The moral of this story? Unless you like kitchen math and hours of experimentation, use a two-serving recipe to start with for best results.
[2] Think Small for Big Benefits
Small-scale cooking requires a different mind-set. You cook only what you need, using ingredients and utensils that seem impossibly small (e.g., 1/3 cup flour instead of 2 cups or a 3×5-inch loaf pan instead of 5×9). It’s almost a “dollhouse” mentality because the utensils and food are so darn cute. But the payoff is big! No leftovers and no food waste. Right-size recipes also prevent over-indulgence and offer automatic portion control if you’re trying to cut calories.
[3] Measure Accurately; No Eyeballing
Eye-balling is risky in small-scale cooking. This is because the overall volume of the ingredients is incredibly small, e.g., some batters barely measure 1 cup. So, even a tablespoon too much (or too little) of flour or liquid can upset the balance of wet-to-dry ingredients. In other words, the margin for error is quite small.
Measuring small amounts of salt, seasonings, and leavenings requires precision. Rather than standard measuring spoons which are too big, use mini-measuring spoons for 1/8, 1/16, 1/32, and 1/64 teaspoon (the spoons are labeled as dash, pinch, smidgeon, or drop, respectively).
[4] Use Small-Scale Baking Pans
Make sure you have the right stuff. You can keep your 9×13-inch baking sheet for cookies or 5×9-inch pan for Brownies. But you may need to invest in other pans, such as:
-3×5-inch loaf pan for breads, desserts
-6-cup muffin pan for cupcakes, muffins
-5-inch cake pan and springform pan for cakes, pies, cheesecakes
-4-inch mini-tart pans (with removable sides) for tarts
-3-cup mini-Bundt pan for cakes
-4-ounce ramekins for individual desserts like puddings, apple crisp, cobblers, or Tiramisu
[5] Use the Pan Specified in the Recipe
Choosing the right size pan is critical. For example, many recipes call for a straight-sided 2-quart saucepan (4-inch sides, 6-inch diameter) because it is just the right size to surround the entrée in enough liquid so it doesn’t boil dry. A shallower pan lets the juices evaporate too quickly and can lead to a dry dish.
In baking, use the suggested pan because the volume of dough/batter and the baking times have been carefully calibrated for that particular pan. Baking times are usually shorter than usual because smaller pans allow the heat to penetrate to the center of the dish more quickly than with larger pans.
Once you get the hang of it, cooking small becomes a way of life. Your payoff is fewer leftovers, less wasted food, and happier husbands.
****Carol Fenster cooks all of her meals in two-serving portions and is the author of 14 cookbooks, including, Gluten-Free Cooking Two (Houghton Mifflin Harcourt, 2017). She blogs at www.CarolFensterCooks.com. Her website is www.CarolFenster.com.
March 14, 2017
Celebrate Pi Day (3.14) with a Personal Pizza Pie
Today is Pi Day! March 14th (3.14) is a great day to celebrate the people of math and science who dedicate their lives to knowledge based on facts. Hooray for the truth!!

Personal Pepperoni Pizza for Two from Carol Fenster’s new cookbook, Gluten-Free Cooking for Two
It’s also a good day to celebrate any kind of “pie” so let’s talk pizza. Most standard-size pizza recipes make BIG pizzas—too much for my husband and me since we are empty-nesters. He hates leftovers (meatloaf, again?) and I hate to waste food. Did you know that Americans waste 30 to 40% of our food? I was raised by depression-era parents, and I am just wired to hate wasting food!
I’m not alone. Many of you have told me you also want two-serving recipes so you can reduce unwanted leftovers and eliminate waste. Whether you are empty-nesters like us, or newlyweds, couples, roommates, or some other small-family configurations—we need two-person recipes.
The Solution: Gluten-Free Cooking for Two Cookbook
My new cookbook, Gluten-Free Cooking for Two, offers two-person recipes like this cute little Personal Pepperoni Pizza. The book focuses on foods we all love, but want to eat in small-scale versions. It publishes on April 4, and it makes a great wedding gift or Mother’s Day gift and is perfect for anyone in a small gluten-free household. The following recipe is an example of what’s in the book.
Gluten-Free Cooking for Two
Personal Pepperoni Pizza for Two
Reprinted with permission from Gluten-Free Cooking for Two by Carol Fenster (Houghton Mifflin Harcourt)
This recipe makes an 8-inch pizza, perfect for two…or one, if you’re extra hungry! The sauce makes enough for 4 pizzas; use ¼ cup for this recipe and freeze the rest for later pizzas. You can vary the toppings as you wish; perhaps a veggie pizza or just cheese only? This fabulous crust is your blank canvas to make any pizza you want. Enjoy!
PIZZA SAUCE (Makes 1 cup, enough for four 8-inch pizzas)
1 can (8 ounces) tomato sauce
1 ½ teaspoons Italian seasoning
1/2 teaspoon fennel seeds (optional)
1/4 teaspoon garlic powder
1 teaspoon sugar
1/4 teaspoon salt
CRUST FOR 8-INCH PIZZA
1 1/2 teaspoons active dry yeast
1/3 cup warm milk of choice
1/2 teaspoon sugar
1/2 cup Carol’s Gluten-Free Flour Blend (below)
1/2 teaspoon xanthan gum
1/2 teaspoon Italian seasoning
1 teaspoon olive oil (plus extra for brushing on crust)
1/2 teaspoon cider vinegar
Brown rice flour, for sprinkling
TOPPING
1/4 cup pizza sauce
1/3 cup shredded Mozzarella cheese (or more to your taste)
1/4 cup mini-pepperoni slices (or regular-size pepperoni)
[1] Place racks in the bottom and middle positions of the oven. Preheat the oven to 375⁰F. Grease an 8-inch circle on a 12-inch pizza pan or 9×13-inch baking sheet (nonstick gray, not black).
[2] Make the sauce: In a small, heavy saucepan, combine all of the ingredients and simmer, uncovered, on low heat, stirring occasionally, for 15 minutes. Set aside.
[3] Make the crust: Dissolve the yeast and sugar in the warm milk for 5 minutes. In a medium bowl, beat all of the remaining ingredients together with an electric mixer on low speed until well blended, about 20 seconds. The dough will be very soft.
[4] Place the pizza dough on the greased circle of the pan. Liberally sprinkle the dough with brown rice flour, then press into an 8-inch circle with your hands, continue to dust with flour to prevent sticking. Make the edges thicker to contain the toppings, taking care to make the dough as smooth and even as possible for the prettiest crust.
[5] Bake the pizza crust for 10 minutes on the bottom rack of the oven. Remove from the oven and brush the edges of the crust with a little olive oil. Spread ¼ cup pizza sauce on top. Arrange the pepperoni on the sauce and sprinkle with cheese. Return the pizza to the middle rack of the oven and bake until nicely browned, about 10 minutes. Remove the pizza from the oven and brush the crust lightly with olive oil (optional) for a shinier crust. Cool the pizza on a wire rack for 5 minutes, then serve hot.
Makes one 8-inch pizza
Per pizza: 810 calories; 28g protein; 42g total fat; 5g fiber; 76g carbohydrates; 84mg cholesterol; 1930mg s sodium
Carol’s Gluten-Free Flour Blend
1 ½ cups brown rice flour
1 ½ cups potato starch
1 cup tapioca flour/starch
Whisk together until thoroughly blend. Store, tightly covered, in a dark, dry place.
March 7, 2017
Get Your Copy of Gluten-Free: The Definitive Resource Guide by Shelley Case, RD
My friend and colleague, Shelley Case, sent me a copy of her latest book, Gluten-Free: The Definitive Resource Guide and I think you should know about it. The 2017 version is completely updated, wonderfully informative, and a great reference for every gluten-free household.
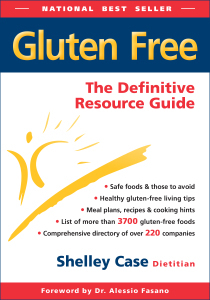
Gluten-Free: The Definitive Resource Guide by Shelley Case, RD
Shelley is one of North America’s foremost experts on the gluten-free lifestyle. Not only is she a sought-after speaker, but she has been actively involved in shaping our gluten-free world for over the past 30 years. Many of the benefits we now enjoy (such as product labeling in both the U.S. and Canada) are a direct result of Shelley’s hard work.
If you know Shelley, you know how thorough she is. This revised version reflects years of hard work to make sure it is as up-to-date as possible. It is perfect for home cooks, dietitians, and other health professionals who want to stay informed about the gluten-free lifestyle. My copy sits on the shelf next to my other trusted references so I can easily reach it when I have a question.
What the Book Contains
Here are some of the topics that Shelley covers:
[1] Latest research on Celiac disease & non-celiac gluten sensitivity
[2] What foods are safe and what foods to avoid
[3] Status of questionable ingredients such as vinegar, wheat starch, glucose syrup, oats, etc.
[4] Gluten-free and food allergen labeling in the U.S. and Canada
[5] How to prevent cross-contamination
[6] More than 3700 gluten-free products listed by company and product name
[7] Advice on dining out and traveling
Shelley also offers recipes with nutrient analysis, a comprehensive directory of over 220 companies, and lists of gluten-free books, cookbooks, magazines, and other resources. There really is no other book like this!
This book belongs on everyone’s shelf. You can get your copy at www.ShelleyCase.com where you can read more about Shelley’s amazing work or on Amazon.com.
February 7, 2017
Cooking for Two: Raspberry Tart in Buttery Crust
Cooking for Two: Raspberry Tarts for Valentine’s Day
With Valentine’s Day just around the corner, here is a delightfully simple, yet stunningly beautiful Raspberry Tart that is just perfect for a romantic dinner for two. Your significant other will be impressed.

Raspberry Tarts for Two
But for many—including me—cooking for two is a year-round event. Awhile back, I realized that I was cooking with 4-to-6-serving recipes that yielded way too much food for just my husband and me. He hates leftovers; I hate throwing away food. This went on for years. Then I asked myself, “Why cook full-size meals for just two people?”
At the same time, I began noticing “cooking-for-two” products (e.g., frozen meals) for mainstream diets, but no cookbooks for gluten-free households. The idea for Gluten-Free Cooking for Two was born and it publishes in April, 2017. To see what’s in it, go HERE.
Raspberry Tart in Buttery Crust
Reprinted with permission from Gluten-Free Cooking for Two: 125 Favorites by Carol Fenster (Houghton Mifflin Harcourt, April, 2017)
These cute little tarts are so simple, yet so gorgeous. The best part is that you just press the dough into the tart pans—no rolling pin needed! The fluted edge of the tart pans automatically shapes the dough. You will only use half of the dough, so freeze it the other half for a later pair of tarts. I like these tarts with a dollop of whipped cream or plain yogurt, but they are delicious just by themselves.
BUTTERY CRUST
1/2 cup Gluten-Free Flour Blend (see below)
1/3 cup tapioca flour
1/4 cup sweet rice flour
1 tablespoon granulated sugar
1/4 teaspoon salt or 1/16 teaspoon (pinch) if using buttery spread
1/8 teaspoon (dash) xanthan gum
1/16 teaspoon (pinch) baking soda
6 tablespoons unsalted butter or buttery spread
3 tablespoon milk of choice
RASPBERRY FILLING
1 cup fresh raspberries
2 tablespoons good-quality raspberry jam (I like Bonne Maman, found in grocery stores)
1 to 2 teaspoons water
[1] Place racks in the bottom and middle positions of the oven. Preheat the oven to 375⁰F.
[2] In a medium bowl, whisk together the flour blend, tapioca flour, sweet rice flour, sugar, salt, xanthan gum, and baking soda until well blended. With an electric mixer on Low speed, beat in the butter and milk on low speed until small clumps form. If the dough shapes into a cohesive ball with your hands, it is ready. If not, beat in water,(a 1 teaspoon at a time,) until the dough is ready. Knead the dough with your hands until it is very smooth.
[3] Divide the dough in half and freeze one -half, tightly wrapped, for another use. Divide the remaining dough in half and shape each half into a ball. Place one ball in the center of a 3.5 to 4-inch nonstick tart pan. With your fingers, press the dough evenly on the bottom and up the sides of the pan. Repeat with the remaining dough in the second tart pan. Place both pans on a rimmed baking sheet. With a fork, prick the bottoms and sides of the dough a few times.
[4] Bake the tarts on the bottom rack of the oven for 5 minutes. Shift the pans to the next middle rack and bake for another 10 minutes or until the edges of the pastry start to brown. Remove the pans from the oven and cool for 15 minutes on a wire rack.
[5] Arrange the raspberries in a single layer in the two crusts. Whisk the water into the jam until it reaches a glazing consistency. Heat the jam in the microwave on Low power just until the jam is melted, about 5 seconds. Pour the jam over the raspberries in each crust and use a pastry brush or fork to nudge the jam into the nooks and crannies between the raspberries and out to the edges of the crust. Let cool for at least 1 hour before serving.
Makes 2 tarts (each 3.5 to 4-inches in diameter)
Preparation time: 10 minutes; Baking time: 10 to 15 minutes
Per tart: 385calories; 2g protein; 18g total fat; 5g fiber; 55g carbohydrates; 47mg cholesterol; 192mg sodium
Gluten-Free Flour Blend
1 ½ cups brown rice flour (or sorghum flour)
1 ½ cups potato starch
1 cup tapioca starch/flour
Whisk together until thoroughly blended. Store, tightly covered, in a dark, dry place.
January 31, 2017
Gluten-Free Super Bowl Party
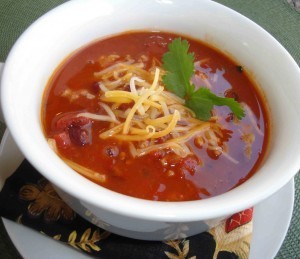
Gluten-Free Southwestern Chili for a Super Bowl Party.
I always say “simple is better,” especially when entertaining. Whether you are hosting a Super Bowl party this coming weekend, or just want a super-easy menu for a cold winter night, this flavorful, naturally gluten-free menu is sure to be a hit. It has simple ingredients and is easy on the budget.
My motto, especially for beginners, is: “Stick to simple gluten-free recipes with gluten-free dishes that everyone recognizes and serve them in a simple way.”
That way, you can be the confident host or hostess and enjoy your own party, without worry.
Gluten-Free Super Bowl Menu
~Southwestern Chili~
~Plate of fresh vegetables and basket of corn chips~
~Guacamole and Mexican Salsa Dips~
~Cornbread~
~Chocolate Brownies~
~Your favorite beverages~
Southwestern Chili
Adapted with permission from Gluten-Free 101: The Essential Beginner’s Guide to Easy Gluten-Free Cooking by Carol Fenster (Houghton Mifflin Harcourt, 2014)
This easy chili dates back to my childhood, but I have been tweaking it for several years to reflect my family’s changing tastes. We like it even better and, for added color and flair, have a plate of shredded cheese, sliced avocados, chopped green onions, and maybe a few halved grape tomatoes so guests can add their own garnishes. They will love it!
1 pound lean ground beef or turkey
1/2 cup finely chopped onions
2 cans (15 ounces) pinto or kidney beans (or both), rinsed and drained
2 cans (15 ounces) canned tomatoes
1 large garlic clove, minced
2 teaspoons chili powder (or to taste)
1/2 teaspoon ground cumin
1/2 teaspoon ground coriander
1/2 teaspoon dried oregano
1/2 teaspoon salt (or to taste)
1/4 teaspoon sugar
1 cup water (or more)
In large Dutch oven or skillet, combine ground round and chopped onion. Cook over medium heat until meat and onion are gently browned. Add remaining ingredients and bring to a boil. Add enough water to reach desired consistency. Cover and simmer on low heat for 2 hours. Refrigerate overnight. Or, prepare the morning of the party and cook in slow cooker for 4 to 6 hours. Serve with shakers of additional spices near the slow-cooker for those who want to spice it up. Serves 6 (can double or triple)
Carol’s Tips for Hosting a Super Bowl Party
[1] Choose a simple menu that is also dairy-free, since lactose-intolerance often occurs with gluten-intolerance. Stick with high-flavor, straightforward dishes that you know how to prepare and that your guests are familiar with. It’s better to serve a simple, flavorful dish that you know how to prepare than attempt a new, complicated dish that might not meet your expectations.
[2] Plan a menu that can be cooked-ahead―preferably the day before the party (or that morning)―and then reheated before the party. I cook this chili the day before, then refrigerate it overnight to let the flavors meld. It doesn’t need thickening, so there is no conundrum about which gluten-free thickener to use instead of wheat flour. Reheated on party day and served in a slow-cooker (or cooked in the slow-cooker all day), it stays hot throughout the party.
[3] Serve a simple gluten-free bread that appeals to everyone. One of my favorites is a moist, homey http://savorypalate.com/index.php/glu... which goes well with chili. Bake it on the morning of the party, cut into serving pieces earlier in the day, and pile high on a platter. Wrap in plastic wrap until party time to avoid drying out.
[4] Choose easily-served desserts. Luscious layer cakes are pretty, but require your full attention when cutting and plating―which takes you away from your guests and the TV. Instead, serve “grab and go” desserts such as gluten-free cookies (store-bought if you’re not a baker) or http://savorypalate.com/index.php/car... [Brownies] served on big platters. That way, guests serve themselves whenever they please, freeing you to focus on your favorite team.
[5] Make it easy for you and your guests. Serve the Southwestern Chili in a slow-cooker which allows guests to help themselves whenever they please. Place additional spices nearby for those who want to jazz it up a bit. Instead of bowls, use tall coffee cups so guests can balance food on their laps while watching TV―the cup’s narrow tops reduce spills, handles make hot soup easier to hold, and a spoon stands upright in tall cups so no need for saucers. Arrange gluten-free cookies or pre-cut brownies on a platter so guests can help themselves―and you won’t have to do any last-minute serving of dessert and possibly miss that game-changing touchdown.
Enjoy the game and may your favorite team win!


