Carol Fenster's Blog, page 4
November 7, 2017
Gluten-Free Dining At Inn at Little Washington
Inn at Little Washington
This restaurant has been on my bucket list for 20 years. My husband’s milestone birthday was the perfect reason for this “once-in-a-lifetime” experience. I booked our dinner almost two months in advance using OpenTable and had no trouble securing a reservation for two. I alerted them about the birthday, and our menus featured the headliner: “Happy Birthday Larry.” Nice touch!

Inn at Little Washington
Dining as Theater
From the minute you walk in the door, it is a performance—much like a play in a theater. The décor is lavish with lots of color, fabric, and pattern. Each room is decorated differently (the place started out in a converted garage and simply grew as the owner added adjacent properties). Even the ceiling of our dining area was decoratively draped in fabric. There is clearly an emphasis on the “experience” of dining and making it fun and entertaining.

A romantic table at Inn at Little Washington
The History
Chef Patrick O’Connell likes theater and wants your experience to delight you. He’s been at the helm for nearly 40 years and most restaurants don’t have this longevity. Their opening night in 1978 was marred by a major blizzard and an entrée item was $4.95. Today, the cost of the multi-course meal is $218 per person. With paired wines, the cost is $343. We couldn’t drink that much wine, so we went with the $218 menu.
The Menu
The star of this experience is the food and the way it is served. There were three menu choices: traditional, adventurous (it was actually called “Here and Now”) and vegetarian. I chose the Here and Now because it looked really different. Hubby chose the traditional menu. Gluten-free bread was delicious.

Gluten-Free Bread
From the start, I was reassured by the staff that they would meet my gluten-free needs. Discreetly, they swapped my “regular” water glass for a pretty blue cut-glass version and only after I asked did they admit that this was one of their ways to remind staff of my gluten-free status. Clever!

Popcorn with Shaved Truffles
There are four entrée choices on each menu, but that doesn’t mean you only eat four courses. The Amuse-Bouche (it means “entertain the mouth”) featured four items and they were all delicious, but three of them were outstanding: popcorn with shaved truffles, a red pepper soup and a fried potato round filled with a cream-cheese dip. Each is served in a beautiful manner, and each time waiters placed a dish in front of me they reminded me that my version was gluten-free (and sometimes explained how it was altered to be gluten-free).
My Four Entrees

Catalan Custard
-Caramelized Catalan Custard with Foie Gras and Port-Soaked Raisins
A savory pudding with a sauteed slab of foie gras on top. Unusual, but the flavors melded perfectly and I wanted more! With all this food, each serving is quite small ….which is a good thing.

Chilled Veal Tongue with Horseradish Ice Cream
-Chilled Veal Tongue with Pickled Root Vegetables and Horseradish Ice Cream.
I was most concerned about this dish because of its unusual contents. However, it was delicious and horseradish ice cream is really good. Who knew!!
-Japanese Wagyu Beef with Potato Noodles in Fragrant Broth
As part of the “theater” effect, the waiters walk around with a large, clear glass teapot of the broth and make a great show of pouring it into your bowl of beef. Again, delicious!
-Grilled King Lamb Chop Perfumed with Rosemary
A simple lamb chop (from Colorado, my state) and it was perfect. Served with two sauces which come is tiny little pitchers on your plate. Fabulous!
Cheese and Faira, The Cow
Although we didn’t order the cheese course, here’s what happens if you do: Cameron, the Fromager/Teas Master (and he’s a delight) brings “Faira” to your table, who is a full-size ceramic cow on wheels. The cheeses rest on her back and she “moo’s” along the way. Needless to say, this is a hit with diners.
Dessert
By this time, we were stuffed! But there is always room for dessert, especially chocolate dessert. So I ordered the Chocolate-Mint Surprise. There were a few small desserts served before this, including a coconut panna cotta. But it was the chocolate dessert that was amazing.
The waiter brought a chocolate “ball”, about the size of a baseball. It rested on some grated chocolate. Rather plain looking, I thought. Then the waiter raised a gold-plated hammer over the ball and struck it, creating shards of chocolate that fell away to reveal a mousse-like filling. By this time, I am captivated and then the waiter pours hot fudge sauce on top, thus creating a decadent dessert. It was fabulous! This dessert was a great example of the “fun” atmosphere that prevailed throughout the dinner. No one was serious or stuffy. Their intent is that you have a great time while you’re eating great food.
A Goodbye Gift
But dinner wasn’t over yet. The waiter brought a gift box of goodies, including chocolates and candied fruit. And the box is a replica of the Inn. Finally, we got a brief tour of the kitchen, which is beautiful.

Dessert Gift Box
Our B&B was only 3 blocks away, so we drove home to find Port and Chocolate Candy in the living room waiting for us. What a night!
Gay Street Inn, Washington, VA
The tiny village of Washington, Virginia has roughly 130 people but boasts some great hotels. The Gay Street Inn B&B was a perfect choice for me because of their careful attention to the gluten-free diet. Set in a charming 1850’s farmhouse, owners Deb & Drew served gluten-free granola parfait, gluten-free scones (made by local baker Triple Oak Bakery), and gluten-free pancakes. It was a delicious breakfast, capped by a fabulous coffee. My kind of place!!

Pancakes at Gay Street Inn

Scones at Gay Street Inn 2017
Greenbrier – America’s Resort
This famed hotel was also on my bucket list, so we drove another 3 hours to check it out. It boasts 240 years of history, served as a military hospital during World War II, and housed a secret Cold War bunker for 30 years. The idea was that if the U.S. was bombed, Congress could be secretly housed here for 60 days. The bunker was built as an exhibit hall for conventions at the hotel (to disguise its real purpose), but was in reality was a bunker as big as two football fields.
The hotel sits on 11,000 acres, boasts 5 golf courses, and has over 700 rooms. It is huge! What makes the hotel stand out is its extremely over-the-top décor. There is not a subtle room anywhere! Everything is decorated in lavish fabrics, lot of bold color and floral patterns. After a while, I started to crave neutral colors and discreet patterns.
After the Inn at Little Washington, no restaurant could compare from a dining perspective. I had several gluten-free choices in the Greenbrier restaurants and my favorite was a gluten-free breakfast sandwich which was quite good.


October 23, 2017
Egg-Allergies? Vegan? Aquafaba is the Answer!
Using the Liquid (Aquafaba) from Canned Chickpeas as an Egg Substitute
All of my life, I’ve been advised to drain off the liquid surrounding canned beans. That not only reduces the sodium content but also makes the beans look better without that cloudy stuff. Turns out, you might want to save this “cloudy stuff” because experts have found that bean liquid (called aquafaba) makes an excellent egg substitute.
I always wonder about people who discover strange things like this. Who would have guessed that beating this liquid with an electric mixer would yield an egg-like result!!!

Chocolate Mousse using aquafaba, the liquid from canned chickpeas.
What is Aquafaba?
The word “aquafaba” comes from two Latin words: aqua meaning water and faba meaning beans. Hence, aquafaba. Experts say you can use the liquid from many types of canned beans, such as cannellini or navy or kidney beans and black beans, but be forewarned—the darker color of these beans will also color your baked goods. It is generally accepted that chickpea liquid works best because it has the best viscosity, so that’s what my experiments have used.
Last year, I wrote about using aquafaba to make mayonnaise. But recently, I found an excellent article by Sharon Palmer, R.D. on the Mealtime.Org website. Sharon’s insightful advice is summarized here and I recommend that you read it, but here are a few highlights:
[1] Each 14-ounce can of beans yields about 1/2 cup or more of liquid (that can vary by brand). One-fourth cup equals one egg. You can store this liquid, tightly covered, in the fridge for up to 3 days.
[2] Experts say there are many ways to use aquafaba:
Raw: Mousse, fluffs, creams, whips, drinks, and pie toppings
Baked: Meringues, pavlova, macarons
Confections: Marshmallows, fudge, nougat, icings
Baking: Cookies, breads, waffles, pancakes, muffins
Savory: Burgers, quiches
I can’t vouch for the meringue or marshmallows, but have tried aquafaba many ways (see below).
[3] When you’re ready to use aquafaba in baking, whip it with an electric mixer until it makes stiff peaks (this may take awhile). Adding 1/8 teaspoon cream of tartar helps to stabilize it so it won’t deflate as quickly. Then fold it in to your batter. Remember, each 1/4 cup (4 tablespoons) equals one egg. Don’t worry if you only have 3 tablespoons; some large eggs yield only 3 tablespoons so that’s OK.
[4] Since the drained liquid contains salt, you may need to scale down the amount of salt in your recipe accordingly. Sodium content can vary a cross brands of canned beans (and some are salt-free) so this may require some experimentation with your recipe.
[5] If you’re fascinated with using aquafaba, you might visit www.aquafaba.com to stay abreast of new findings.
[6] I tried several brands of chickpeas and I like Trader Joe’s, Bush, and S&W best. Use the brand you can find.

Aquafaba liquid before beating

Aquafaba liquid after beating
How I Use Aquafaba
I tried aquafaba in a number of ways. In pancakes, I used 1/4 cup in place of 1 egg. I didn’t bother to whip it, just added the liquid directly to the batter. I also used 1/4 cup aquafaba in place of an egg when I made crab cakes. That worked just fine, though they seemed a little looser in texture.
In my muffins and quick bread, the crumb was a little heavier in texture but delicious nonetheless.
Finally, I tried aquafaba in one of my favorite desserts, Chocolate Mousse for Two. Instead of the usual whipped egg whites found in many mousses, I used whipped aquafaba. This means egg-allergic people or vegans can enjoy this yummy dessert. Here’s my recipe, designed just for aquafaba:
CHOCOLATE MOUSSE FOR TWO
recipe by Carol Fenster, author of the award-winning Gluten-Free Cooking for Two (Houghton Mifflin Harcourt, 2017)
Note: There is a print link embedded within this post, please visit this post to print it.
This makes two large servings (1 cup each) or 4 small servings (1/2 cup each). This is a mildly-sweet dessert; the only sweetness comes from the chocolate chips, so if you want a little sweeter dessert add sugar or other sweetener a teaspoon at a time to reach your desired level.
1/4 cup aquafaba (liquid from canned chickpeas)
1/8 teaspoon cream of tartar
4 ounces (2/3 cup) gluten-free chocolate chips
1 carton (5 to 6 ounces) lowfat plain unsweetened yogurt (or nondairy yogurt)
1 teaspoon vanilla
1 tablespoon coffee-flavored liqueur, optional (or your favorite liqueur or brewed coffee)
Optional garnishes of fresh fruit, whipped topping, shaved chocolate, ice cream, or sprinkles
[1] In a medium bowl, beat the aquafaba and cream of tartar with an electric mixer on medium until it turns white and leaves stiff peaks when the beaters are pulled out of the mixture.
[2] In a microwave-safe small bowl, gently melt the chocolate chips on very low power. Set aside. Gently stir in the yogurt, vanilla, and liqueur (if using), just until blended. Gently stir the yogurt mixture into the aquafaba or use the electric mixer on very low to gently mix together until completely blended. Divide equally between two dessert bowls, goblets, or wine glasses. Chill for 4 hours. To serve, top with your favorite toppings and serve.
per large serving without garnishes: 365 calories, 18g fat, 4mg cholesterol, 146mg sodium, 51g carbohydrate, 5g fiber, 5g protein
October 17, 2017
One-Pan Mexican Skillet Beef & Rice Dish for Busy Weeknights
School is back in session and your time just got even more precious. I remember the days when I would rush home from work after a long commute and head straight to the kitchen to start dinner. We had to eat quickly because there was always the inevitable homework for my son, office work for me, and—on some nights—a game or school/community meeting to attend.

Mexican Skillet Beef and Rice from 100 Best Quick Gluten-Free Recipes; Photo by Jason Wyche
Early on, I decided that we would not sacrifice our health by skipping meals or resorting to TV dinners or simply snacking over the kitchen sink. So, I made time to sit down and eat a meal at the table. Of course, I had my repertoire of quick recipes for nights like this but I would have loved this recipe back then.
I strongly believe in planning ahead (such as having cooked rice and browned ground beef on hand for this recipe), but I know that even the best intentions go astray. I read recently that home cooks who plan the week’s meals still tend to “fall off the wagon” by mid-week so that Thursday and Friday are more likely to be take-out meals or hastily-assembled affairs.
I can relate to this: it takes discipline and commitment to adhere to a weekly meal plan, especially if you are extremely busy. But I also feel strongly that what we eat is the most profound thing we do to our bodies, so I still prepare our own meals as often as I can. I hope you do too.
Let the quick, easy dish below become one of your late-week recipes. It’s got loads of flavor from the chili powder, oregano, and cumin plus protein from the ground beef. You serve it right from the skillet, so no extra serving bowls to wash. Super-easy, boldly flavorful, it is sure to become one of your family’s favorites.
MEXICAN SKILLET BEEF AND RICE
Excerpted from 100 BEST QUICK GLUTEN-FREE RECIPES © 2014 by Carol Fenster. Reproduced by permission of Houghton Mifflin Harcourt. All rights reserved.
Note: There is a print link embedded within this post, please visit this post to print it.
This dish is for really busy nights, when you want dinner on the table right away. Serve it with a tossed salad, along with corn tortillas wrapped in damp paper towels and heated gently in the microwave. This is a good way to use up leftover cooked brown rice that you’ve stored in the refrigerator or freezer. Or, quickly cook instant brown rice while browning the ground beef.
8 ounces lean ground beef
1/4 cup chopped onion or 1 tablespoon dried minced onion
1/2 cup water
1 1/2 tablespoons chili powder
1 teaspoon chopped fresh oregano or ½ teaspoon dried
1/2 teaspoon ground cumin
1/4 teaspoon salt
1 cup cooked brown rice
1 can (14- to 15- ounce) can pinto beans or black beans, rinsed and drained
1 can (4- ounce) can diced green chiles
2 medium Roma or plum tomatoes, seeded and chopped
2 tablespoons chopped fresh cilantro, for garnish
[1] In a large skillet, cook the ground beef and onion over medium-high heat until browned, about 5 minutes, stirring to crumble the beef. The beef will be more flavorful if it is fully browned and all the liquid has evaporated.
[2] Add the water, chili powder, oregano, cumin, and salt and stir to combine. Stir in the rice, beans, and chiles and heat to serving temperature, about 5 minutes. Top with the chopped tomatoes; garnish with the chopped cilantro. Serve immediately, right from the skillet.
Makes 4 servings
Per serving: 520 calories; 29g protein; 8g total fat; 28g fiber; 85g carbohydrates; 21mg cholesterol; 234mg sodium
October 10, 2017
Clafoutis: Easy French Dessert Using Plantain Flour
Of all the desserts in my cookbooks, Clafoutis (pronounced Clah-fute-ee) is the recipe I most often recommend to gluten-free newbies. It’s easy, fool-proof, very versatile, and just sounds so “chic” with its French sound.

Bing Cherry Clafoutis with Plantain Flour: Photo by Tom Hirschfield
With Clafoutis, you can use any flour you like, which allows many people with diverse appetites to enjoy it. So, for example, a person who is new to the gluten-free diet can make a dessert that pleases everyone— including someone who follows a Paleo diet or is dairy-free or avoids grains.
Clafoutis is not only a delicious dessert, but it doesn’t require a blend of flours, just one single flour. As you know, I am always experimenting with new flours. And, I usually turn to Clafoutis as the recipe that allows me to experiment, but always with a successful outcome. Last week, I experimented with plaintain flour, so here is what I learned.

Plantains on the left, compared to bananas on the right. Very similar looking, but do not taste the same.
Plaintain Flour
What is plaintain flour? It is made from plantains, those banana-like things you see in the grocery store that may be green, yellow, or black. In the photo above, they are a greenish-yellow. Plantains are actually a fruit but, unlike most fruits, we consume them cooked rather than raw. They are often associated with Puerto Rican foods and I have eaten them in Mexican restaurants—boiled, baked, and fried.
If you ever accidentally purchase plantains (thinking they were bananas) your first taste will tell you they’re not bananas. They taste starchy and bland, sort of like potatoes. That bland flavor allows them to be quite versatile. And, it makes plantain flour ideal for gluten-free baking because of that neutral flavor and light color.
I bought my plantain flour from Barry Farms via Amazon, but it is available in some natural food stores and even WalMart. I suspect its availability varies by region. It costs about $4 per pound, but will likely vary by where you buy it.
How To Use Plaintain Flour
Plantain flour is a light tan in color and virtually tasteless. However, that light tan color might add a somewhat darker tint to your baked goods, depending on how much you use. I have seen lots of recipes online, such as pancakes, cookies, cakes, breads, cakes, etc. for using plantain flour, but as I mentioned before I like to try new flours in a recipe I already know.
In the recipe below, I use plantain flour as a single flour. But in most other baking, I would use it to replace about 15-20% of my flour blend. That way, I get some of the advantages of plantain flour, but retain the advantages of the flours in my flour blend.
I noticed that it clumped up when mixed with liquid, so be sure to whisk it vigorously or beat the batter with an electric mixer. It also helps to blend the plantain flour with other dry ingredients before adding the wet ingredients. I didn’t notice any flavor change in the Clafouti, but that’s because plantain flour is bland.
Why Use Plantain Flour
The primary reason is that it’s gluten-free, of course. And it adds variety to our gluten-free diet. But also, it’s grain-free, so it’s useful for Paleo diets. Plantains are high in fiber, potassium, and— in lesser amounts—magnesium and some B vitamins. While plantain flour isn’t a nutrient powerhouse, it does have other nutrient advantages. For more information about the nutrients in plantain flour, go here and here.
Clafoutis
Adapted with permission from Gluten-Free Cooking for Two by Carol Fenster (Houghton Mifflin Harcourt, 2017).
Clafoutis is a French dessert that can use any type of flour, thus making it ideal for gluten-free diets. It is simple, delicious, always turns out right no matter how it looks, and lends itself to many variations. Bing cherries are featured here, but I have used figs, apricots, peaches, pears, and nectarines. I used plantain flour but you can use your flavor single flour. It can be served hot or cold, but I prefer it hot—with a dollop of whipped cream or ice cream. I like to bake it while we eat dinner, so we can enjoy its enticing aroma during dinner and enjoy it fresh from the oven.
1/2 cup Bing cherries, drained
1 large egg, room temperature
2 tablespoons milk of choice (the richer the better), room temperature
1 tablespoon canola oil
1 teaspoon pure vanilla extract or almond extract
2 1/2 tablespoons sugar, plus 2 teaspoons for sprinkling (or your favorite sweetener)
2 tablespoons plantain flour (or your favorite flour such as amaranth, millet, sorghum, or teff flour)
1/16 teaspoon salt
2 teaspoons sliced almonds, for garnish
1 tablespoon powdered sugar, for dusting
[1] Preheat the oven to 375°F. Generously grease two 3 ½ x1 ¾ -inch (4-ounce) ramekins.
[2] Arrange cherries in a single layer in each ramekin.
[3] In a small bowl, whisk together the egg, milk, oil, and vanilla until very smooth. Then gradually whisk in 2 ½ tablespoons of the sugar, flour, and salt until very smooth. Divide the batter between the ramekins, sprinkle with almonds, and sprinkle with the remaining 2 teaspoons of sugar.
[4] Bake until the tops are puffy and the almonds are golden brown, about 20 to 25 minutes. Remove from oven and dust with powdered sugar. Serve immediately.
Makes 2 servings:
Per serving: 270calories; 5g protein; 11g total fat; 2g fiber; 39g carbohydrates; 94mg cholesterol; 146mg sodium
October 3, 2017
It’s Back! Pumpkin Spice Latte: How to Make Your Own
It started right after Labor Day at Starbucks, which seems a little early if you aren’t a lover of Pumpkin Spice Lattes. But I am, so every year I look forward to this flavor and aroma.

Pumpkin Spice Latte
If you are a coffee fan—as I am— then this early start is good news since I love that Pumpkin Spice flavor. More about that word “flavor” later.
Pumpkin is Everywhere!
It appears that we are a pumpkin-loving society! That unmistakable pumpkin flavor shows up in pie filling, coffee, yogurt, milk, desserts—even dog food. (Yes, you read that right.) Pumpkin-flavored dog food fetched more than $12 million in 2014. If you would like to see where we spent our dollars on pumpkin-flavored food last year, see this Nielsen data. This might make good cocktail-party conversation, you never know!
And, now you can find (gluten-free Pumpkin Spice Cheerios–for a limited time only.
History of Pumpkin Spice Latte
Do you know the history of the Pumpkin Spice Latte? When it was developed in 2003 by the Starbucks lab, they weren’t sure it would catch on. But it became an instant hit and by 2006 it was even available as pods (K-cups) for home brewers. By 2007, other coffee chains began offering it and the Twitter handle of #PSL appeared. According to CNN, today the Starbucks’ Pumpkin Spice Latte has 85,000 followers on Twitter.
Make Your Own Pumpkin Spice Latte
If you want to make your own Pumpkin Spice Latte or PSL, we can thank the Food Network for this recipe. One of the things I like about making my own PSL base is controlling the sugar, since some lattes are too sweet for my tastes.
Make Ahead and Keep on Hand
Using the recipe from the Food Network as a base, you can modify your homemade latte as you like. Certainly less sugar for me! And, while I love nutmeg, I prefer less than this recipe uses so I cut it in half. You may have other preferences, so try the recipe and see how you like it. Of course, your homemade version will be gluten-free because you control what goes into it.
Another great thing about making your own is that you can make a base (all the ingredients except the coffee and milk) and store it in the refrigerator. Then heat the milk and coffee (or, steam the milk if you’re lucky enough to have an espresso machine that also froths milk) and stir in as much of the base as you like. Using whipped cream on top is up to you (I don’t usually do that, except as an occasional treat). And, a final dusting of grated fresh nutmeg (or cinnamon) is the perfect touch. And, of course, your homemade version will be much cheaper.
Pumpkin Flavor without the Pumpkin?
Notice that the Food Network’s recipe contains real pumpkin. It may surprise you to learn that many “pumpkin-flavored” items don’t have any pumpkin in them at all. Of course, foods such as Pumpkin Pie and Pumpkin Bread contain real pumpkin, but most commercial coffee drinks do not. Have you ever tasted pumpkin by itself? It is actually quite bland and not necessarily that inviting. In fact, it’s awful. However, when blended with all those wonderful spices it is absolutely divine.
Wondering what to do with the leftover pumpkin? If you make a lot of lattes, you will use up a 14-ounce can in a few days. Store any leftover pumpkin, tightly covered, in the fridge for up to a week and use it to bake gluten-free Pumpkin Bread.
Happy Pumpkin Spice Latte!
September 26, 2017
Zucchini Bread: Great Way to Use Summer’s Bounty
Summer is waning here in Colorado, but it is still warm enough for certain crops—such as zucchini. This is the season where you wonder why you planted so much zucchini. Or, you find surprise piles of zucchini on your doorstep from kind neighbors who want you to share in their bounty.
One year, I grew zucchini just for the blossoms. Of course, when you remove the blossoms, there is no zucchini. A hard lesson to learn!
If you have lots of zucchini here is a delicious way to use it up—Zucchini Bread! Bake several batches and freeze for later this winter. It travels well, too, so I often take some on the plane.

Gluten-Free Zucchini Bread
ZUCCHINI BREAD
Reprinted with permission from Gluten-Free 101: The Essential Beginner’s Guide to Easy, Gluten-Free Cooking by Carol Fenster (Houghton Mifflin Harcourt, 2014)
Though often maligned, most of us like zucchini in bread so bake a batch and enjoy this classic.
2 cups GF flour blend (see below)
3/4 cup sugar
2 teaspoons baking powder
1 teaspoon cinnamon
1 1/2 teaspoons xanthan gum
3/4 teaspoon salt
1/4 teaspoon baking soda
2 large eggs, room temperature
1/2 cup canola oil
1 teaspoon pure vanilla extract
2 cups grated zucchini (about 1 medium or 2 small)
1/2 cup raisins
1/2 cup chopped pecans (or your favorite nuts)
[1] Place a rack in the lower third of the oven. Preheat the oven to 350ºF. Generously grease three 6×4-inch nonstick (gray, not black) loaf pan(s).
[2] In a medium bowl, whisk together the flour blend, sugar, baking powder, cinnamon, xanthan gum, salt, and baking soda until well blended. In a large mixing bowl, beat the eggs with an electric mixer on medium speed until light yellow and frothy, about 30 seconds. Add the oil and vanilla and beat on low speed until well blended. With the mixer on low speed, beat the flour mixture gradually into the egg mixture until the batter is smooth and slightly thickened. The batter will be very stiff, but then beat in the grated zucchini and it will become softer. With a spatula, stir in the raisins and nuts. Spread the batter evenly in the pan(s).
[3] Bake until the tops are nicely browned and a toothpick inserted into the center comes out clean, about 45 to 55 minutes. Cool the bread in the pans 10 minutes on a wire rack. Remove the bread from the pan(s) and cool completely on the wire rack. Slice with an electric or serrated knife and serve slightly warm. Makes 3 small loaves
Per slice: 270 calories; 3g protein; 13g total fat; 2g fiber; 38g carbohydrates; 31mgs cholesterol; 237mgs sodium
GF Flour Blend
1 ½ cups sorghum flour or brown rice flour
1 ½ cups potato starch
1 cup tapioca flour/starch
Whisk together and store, tightly covered, in a dark, dry place.
September 19, 2017
Melon-Peach Gazpacho with Crispy Prosciutto
Summer is about to end, but here in Colorado the days are still deliciously warm. Two of my favorite fruits are about done for the season, but still available: peaches and melons, grown right here in Colorado. In fact, Colorado is known for some of the best peaches and cantaloupe in the country. The cantaloupe we look for is Rocky Ford, but any variety will do and I’m growing fond of Tuscan cantaloupe.

Melon Peach Gazpacho
I like to blend the two into a cold summer soup. Some call it fruit soup; some call it gazpacho (a Spanish soup that has been reinvented countless times by creative American chefs, usually made with tomatoes). You’ll see some gazpachos thickened with bread, so that’s why it is often off-limits in restaurants, but my version doesn’t need bread for its lovely, creamy texture.
The lovely golden color and enticing flavor of this refreshing soup is enhanced with the salty, crispy prosciutto. Because it is naturally gluten-free, so you can serve it to everyone. Just omit the prosciutto for your vegan or vegetarian friends. Enjoy!!
Melon-Peach Gazpacho with Crispy Prosciutto
By Carol Fenster
Serve this chilled soup in pretty goblets, shot glasses, or as a luncheon main dish in bowls. Pair it up with gluten-free crackers to add a little complementary crunch.
One-half medium, ripe cantaloupe, peeled and chopped
2 medium ripe peaches, chopped (no need to peel)
2 tablespoons water
1 tablespoon fresh lemon juice
1 teaspoon champagne or sherry vinegar (or better yet, dry sherry)
1 small peeled and minced shallot (or 1 tablespoon chopped white onion)
5 tablespoons finely diced prosciutto (available in deli-section or dice it yourself)
Garnishes: salt, freshly ground black pepper, and chopped fresh herbs such as basil, mint, or thyme
[1] Puree cantaloupe, peaches, water, lemon juice, vinegar, and shallots in a blender until very smooth. Divide among serving dishes (refrigerate for up to day if you aren’t serving right away).
[2] In a small skillet, fry the prosciutto over medium-low heat until very crispy. Lightly sprinkle chilled soup with salt, black pepper, crisped prosciutto, and fresh herbs. Serve immediately.
Note: I designed this version to serve 4 as a soup course (about ¾ cup each) or 8 as an appetizer (about 1/3 cup) in over-size shot glasses—using two peaches and one-half melon. To serve more people, simply scale up the recipe accordingly.
Per serving: 75 calories; 5g protein; 1 g total fat; 2g fiber; 12g carbohydrates; 10 mg cholesterol; 380 mg sodium
August 30, 2017
Banana Flour, Anyone? It’s Gluten-Free!
In my summer quest to experiment with new flours, I recently stumbled across banana flour. It seems that anything can be made into flour, and that includes bananas. Except that these aren’t your ordinary ripe yellow bananas from the grocery store. No, they’re unripe green bananas and they’re peeled, sliced, and dehydrated before being milled into flour.

Banana Bread made with Banana Flour
WON’T MY BAKED GOODS TASTE LIKE BANANA FLOUR?
My first thought was: “Won’t my baked goods taste like bananas if I use banana flour?” Oddly enough, though you may detect a slight banana taste in the raw flour and perhaps a corresponding banana aroma, that all dissipates during the baking process. The most surprising thing to me, however, was the color. I expected an off-white color (like the banana flesh itself) but the flour is actually tan, not white.
WHERE TO BUY BANANA FLOUR
The main company is Zuvii Banana Flour, formerly known as WEDO Banana Flour. The website is www.BananaFlour.com. Another excellent source is Let’s Do Organics by Edward & Sons, a company I have known for a long time. I have not found banana flour in my local natural food stores, but that doesn’t mean you won’t find it in yours. It is easily ordered from Amazon or the Zuvii website.
WHY USE BANANA FLOUR?
You may ask: “Why should I use banana flour?” Here are a few reasons to consider:
Gluten-Free
It is gluten-free and can be used in many types of baking, including cakes, cookies, bars, pancakes, waffles, and bread. However, its tan color will slightly darken any baked item. So, I would not use it in a white or yellow cake or in sugar cookies, unless you don’t mind the darker hue.
I used it in my own recipe for Banana Bread (see below) and was pleased with the outcome (see photo). In this small recipe, I simply replaced two tablespoons of my flour blend with two tablespoons of banana flour, and the recipe did not require any other adjustments. However, experts warn that banana flour (like coconut flour) soaks up a lot of liquid, so if you are making a large recipe you may need lots more liquid.
I also used it in a Pancake recipe from the Zuvii website and noticed that the flour lumped up, so using a blender (as the recipe suggests) is a good idea. The pancakes had a sweet, wholesome taste with no hint of banana flavor. The pancakes were darker in color, which was to be expected.
If you aren’t using a recipe that you’re familiar with, then I suggest that you use one from the www.BananaFlour.com or www.EdwardandSonsrecipe.org websites rather than trying to design your own recipe. The manufacturers suggest that you can use less banana flour, perhaps 2/3 cup for every cup of flour blend called for in your own recipe— but that’s hard to translate without some experimentation. So again, use a recipe that’s designed for banana flour for best results.
Health Benefits
Healthwise, banana flour contains potassium, just like ripe bananas. But more important is its resistant starch, which is not digested in the small intestine. According to the Zuveii Banana Flour website, resistant starch in banana flour:
* “resists” breaking down into sugars, resulting in lower blood sugar levels
* helps you stay full and burn more fat
* lowers pH levels in your colon, guarding against DNA and cell damage
* is a prebiotic which promotes the growth of good bacteria and feeds our cells
However, the Zuveii website cautions that the benefits of resistant starch are only available under 140 degrees, so if you’re baking with it (such as the Banana Bread below) you may not reap all of its benefits. Instead, they suggest stirring some into your morning smoothies or use it in no-bake cookies or bars.
Paleo-Friendly and Allergen-Friendly
The groups most likely to find value in banana flour are Paleo diet followers and bakers who seek an alternative starch to replace potato starch or cornstarch. Increasingly, I find people who don’t tolerate starches, so banana flour (which is grain-free and not related to potato) may be a substitute—but again, it requires lots of experimentation to successfully replace potato starch or cornstarch in baking. The function of these starches is to lighten the baked item, and banana flour may not offer this feature in your baking.
BANANA BREAD FOR TWO (made with banana flour)
Adapted with permission from Gluten-Free Cooking for Two by Carol Fenster (Houghton Mifflin Harcourt, 2017)
For efficient measuring, I place the banana flour in a ½-cup measuring cup and then add the Gluten-Free Flour Blend to reach ½ cup. Level off the mound of flour with a knife.
1 large egg, at room temperature
1/3 cup mashed overripe banana (about 1 small)
2 tablespoons canola oil
2 tablespoons banana flour
6 tablespoons Gluten-Free Flour Blend (see below, or use your own Paleo-friendly blend) )
1/3 cup sugar (or preferred sweetener)
1/2 teaspoon cinnamon
1/2 teaspoon baking powder
1/2 teaspoon xanthan gum
1/4 teaspoon salt
1/16 teaspoon (pinch) baking soda
2 tablespoons chopped walnuts or pecans
[1] Place a rack in the lower third of the oven. Preheat the oven to 350⁰F. Generously grease a 3¼ x5¾-inch nonstick (gray, not black) loaf pan.
[2] In a small bowl or measuring cup, whisk together the egg, banana, and oil until smooth. In a medium bowl, whisk together the flour blend, sugar, cinnamon, baking powder, xanthan gum, salt, and baking soda until well blended. With an electric mixer on low speed, gradually beat the flour mixture into the egg mixture just until blended. Stir the walnuts into the batter. Spread the batter evenly in the pan.
[3] Bake until the top is nicely browned and a toothpick inserted into the center comes out clean, 35 to 40 minutes. Cool the bread in the pan on a wire rack for 10 minutes, then remove the bread and cool on the wire rack for another 10 minutes. Use a serrated knife or an electric knife to cut into 4 slices and serve slightly warm or at room temperature.
Makes a 3¼ x 5¾ -inch loaf: 4 slices
Gluten-Free Flour Blend
1 ½ cups brown rice flour (or sorghum flour)
1 ½ cups potato starch
1 cup tapioca flour
Whisk together thoroughly and store, tightly closed, in a dark, dry place.
August 16, 2017
Homemade Dill Pickles (without the “canning fuss”)
Summer’s garden bounty is in full-swing and Farmer’s Markets are bursting at the seams with lovely fresh produce. I always buy far more than I need, but I just can’t resist.
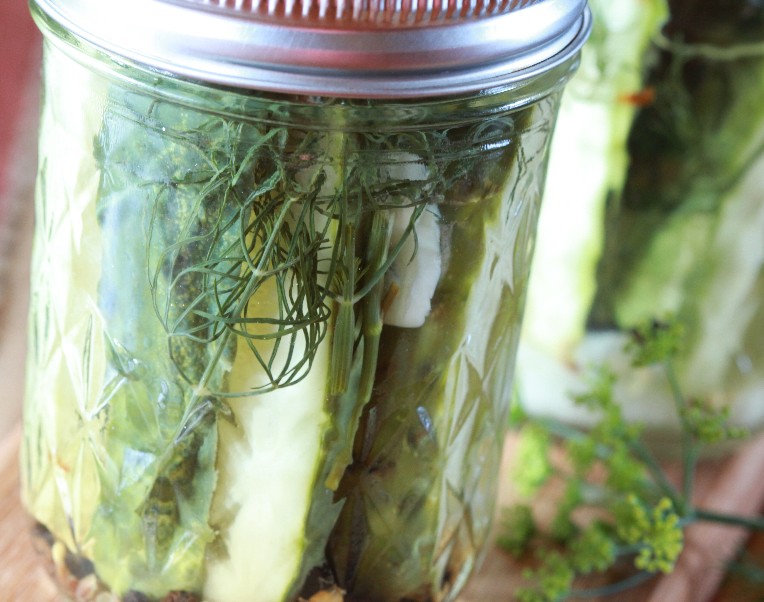
Homemade Dill Pickles are gluten-free and don’t require canning equipment.
One of the vegetables that beckons to me is small, Kirby cucumbers—just right for pickling. In fact, sometimes they are labeled “picklers” as they were this past weekend when I bought some at the Vail Colorado Farmer’s Market. But the thought of hauling out all of the usual canning equipment to make pickles does not excite me at all.
Instead, I make my dill pickles the quick way—overnight—brining in the fridge. One taste and you’re hooked: the flavor is fresh and “dilly” but low in sodium because you control the salt. And, I just step outside to my patio to pick fresh dill but you can find it in supermarkets in the produce section. The best part to me, besides the flavor, is that the pickles are crisp and crunchy.
Here is the easy recipe for these delicious pickles, which keep for about a week in the fridge. Don’t worry, they won’t last that long!
HOMEMADE DILL PICKLES
By Carol Fenster
Choose the small, Kirby cucumbers for this recipe for the best results—they fit more easily in canning jars. This small recipe makes enough for two (16-ounce) Mason jars, but use whatever size fit your pickle length. I prefer using fresh dill from my backyard herb garden, but you can use dill seed.
3 small pickling (Kirby) cucumbers
½ teaspoon black peppercorns
½ teaspoon mustard seeds
2 sprigs (about ½ ounce) fresh dill (or ½ teaspoon dill seed)
2 garlic cloves, peeled and thinly sliced
¼ small onion, sliced
1 cup water
¾ cup white wine vinegar
¼ teaspoon salt
¼ teaspoon sugar
[1] Wash and quarter the cucumbers lengthwise into spears and divide evenly between two canning jars. Divide the peppercorns, mustard seeds, dill, garlic, and onion evenly between the jars.
[2] In a small saucepan, bring the water, vinegar, salt, and sugar to a boil and stir until the sugar and salt are dissolved and then divided evenly between the two jars. Cover and refrigerate overnight. Keeps for 1 week, refrigerated. Makes 12 pickles.
Per pickle: 16 Calories ; 0g Fat; 0g Sat Fat; 1g Protein;1g Fiber;4g Carbohydrates; 48mg Sodium; 0mg Cholesterol
August 1, 2017
Tigernut Flour
Tigernuts have been around for a few years, but it wasn’t until this summer that I took some time to fully experiment with it in my baking and cooking. I know summertime isn’t always the best time for some of you to bake, yet for me it’s a time to slow down and explore new areas of cooking.

Cornbread with Tigernut Flour
I’ve had tigernut flour on my radar for quite awhile, so here is what I learned:
What are Tigernuts?
Despite the name, tigernuts are not really nuts at all (and they’re not from tigers, either). They are the tubers of a grass that grows in Northern Africa and the Mediterranean. The flour that is ground from these roots is naturally gluten-free and Paleo since it comes from a root, not a grain.
Gluten-Free Living magazine says in its blog (August, 2015) that tiger nuts are “high in fiber, iron, potassium, protein, magnesium, zinc and vitamins E and C, tiger nuts were the primary food of our ancient ancestors who lived in East Africa between 2.4 million and 1.4 million years ago, according to a 2014 Oxford University study. One ounce of these crunchy root vegetables contains 40 percent of the recommended daily fiber intake.” By my calculations, that means that just 1 ounce contains 10 grams of fiber. That’s a lot!
That same blog article goes to say “Tigernuts are also high in natural sugars, healthy fats, and resistant starch which reaches the colon intact. Resistant starch promotes prebiotic growth and supports a healthy immune and digestive track. It can also lower blood glucose levels and improves insulin sensitivity.”
Tigernut flour tastes slightly sweet and nutty—although I think the term “nutty” can be interpreted in many ways. Suffice to say, tigernut flour is pleasant-tasting and won’t dominate flavor-wise. However, it is a light beige in color and so it may slightly “color” your baked goods.
How Do I Use Tigernut Flour?
Knowing that this flour is high in fiber and sugar gives us some hints about how to use it. Its high fiber content means it’s slightly grainy so I would use it in foods where you want “crunch” such as cookies, bars, pancakes, and so on. It’s high in sugar, so you might be able to reduce the sugar in your recipe. And, its resistant starch is a good thing but avoid using too much in case it upsets your digestive tract.
Like all gluten-free flours, tigernut flour needs to be used in combination with other flours. Some Paleo bakers combine it with tapioca flour or coconut or almond flours. I’m fond of my own grain-based flour blend (sorghum or brown rice flour blended with potato starch and tapioca starch), so my approach is to replace some of my flour blend with tigernut flour in a recipe that I’m already familiar with rather than starting from scratch with a brand-new recipe.
If you are Paleo, you should rely on a Paleo-based recipe and then modify it to include tigernut flour.
Given all of these traits of tigernut flour, I am more likely to use it in sweet items, rather than savory, because of its natural sweetness. So, I would use it in cookies (maybe biscotti?), bars, a cookie-crumb (or graham cracker) pie crust), or even breakfast pancakes and smoothies.
For savory dishes, I might add some to burgers (either meat or veggie), or a no-bake pie crust made from savory crackers and tigernut flour (perhaps as a crust for quiche), or even cornbread (see below) or other quick breads. This doesn’t mean it won’t work in other savory dishes, but my experiments were confined to sweeter dishes.
CORNBREAD (WITH TIGERNUT FLOUR)
Adapted from Gluten-Free 101 by Carol Fenster (Houghton Mifflin Harcourt, 2013)
Cornbread is a staple at our house. It bakes quickly, allowing us to have fresh bread with our meals more often. I especially like it with soups or stews, but it also nicely rounds out a light salad. I use ¼ cup of tigernut flour in this recipe, but you could increase it to ½ cup if you like.
1 ¼ cups cornmeal
¾ cup Gluten-Free Flour Blend (see below)
¼ cup tigernut flour
1/3 cup sugar
2 teaspoons baking powder
1 teaspoon xanthan gum
1 teaspoon salt
1/8 teaspoon baking soda
2 large eggs, at room temperature
1 cup water, at room temperature
1/3 cup canola oil
[1] Place a rack in the lower third of the oven. Preheat the oven to 350ºF. Generously grease a 4×8-inch or 8-inch round or square nonstick (gray, not black) baking pan.
[2] In a large bowl, whisk together the cornmeal, flour blend, tigernut flour, sugar, baking powder, xanthan gum, salt, and baking soda until well blended. With an electric mixer on low speed, beat in the eggs, water, and oil until just blended. Increase the speed to medium-low and beat until the batter is slightly thickened, about 30 seconds. The batter will be the consistency of thick cake batter. Spread the batter evenly in the pan.
[3] Bake until the top is firm and a toothpick inserted into the center comes out clean, 25 to 30 minutes. Cool the corn bread in the pan on a wire rack for 10 minutes. Serve warm.
Makes 12 servings (1 slice each)
Per serving: 180 calories; 3g protein; 8g total fat; 2g fiber; 26g carbohydrates; 31mg cholesterol; 290 mg sodium
Gluten-Free Flour Blend
1 ½ cups sorghum flour or brown rice flour (color of cornbread will be lighter with brown rice flour)
1 ½ cups potato starch
1 cup tapioca flour
Whisk together until thoroughly blended. Store, tightly closed, in a dark, dry place.