
Marc Spagnuolo's Blog, page 20
May 28, 2021
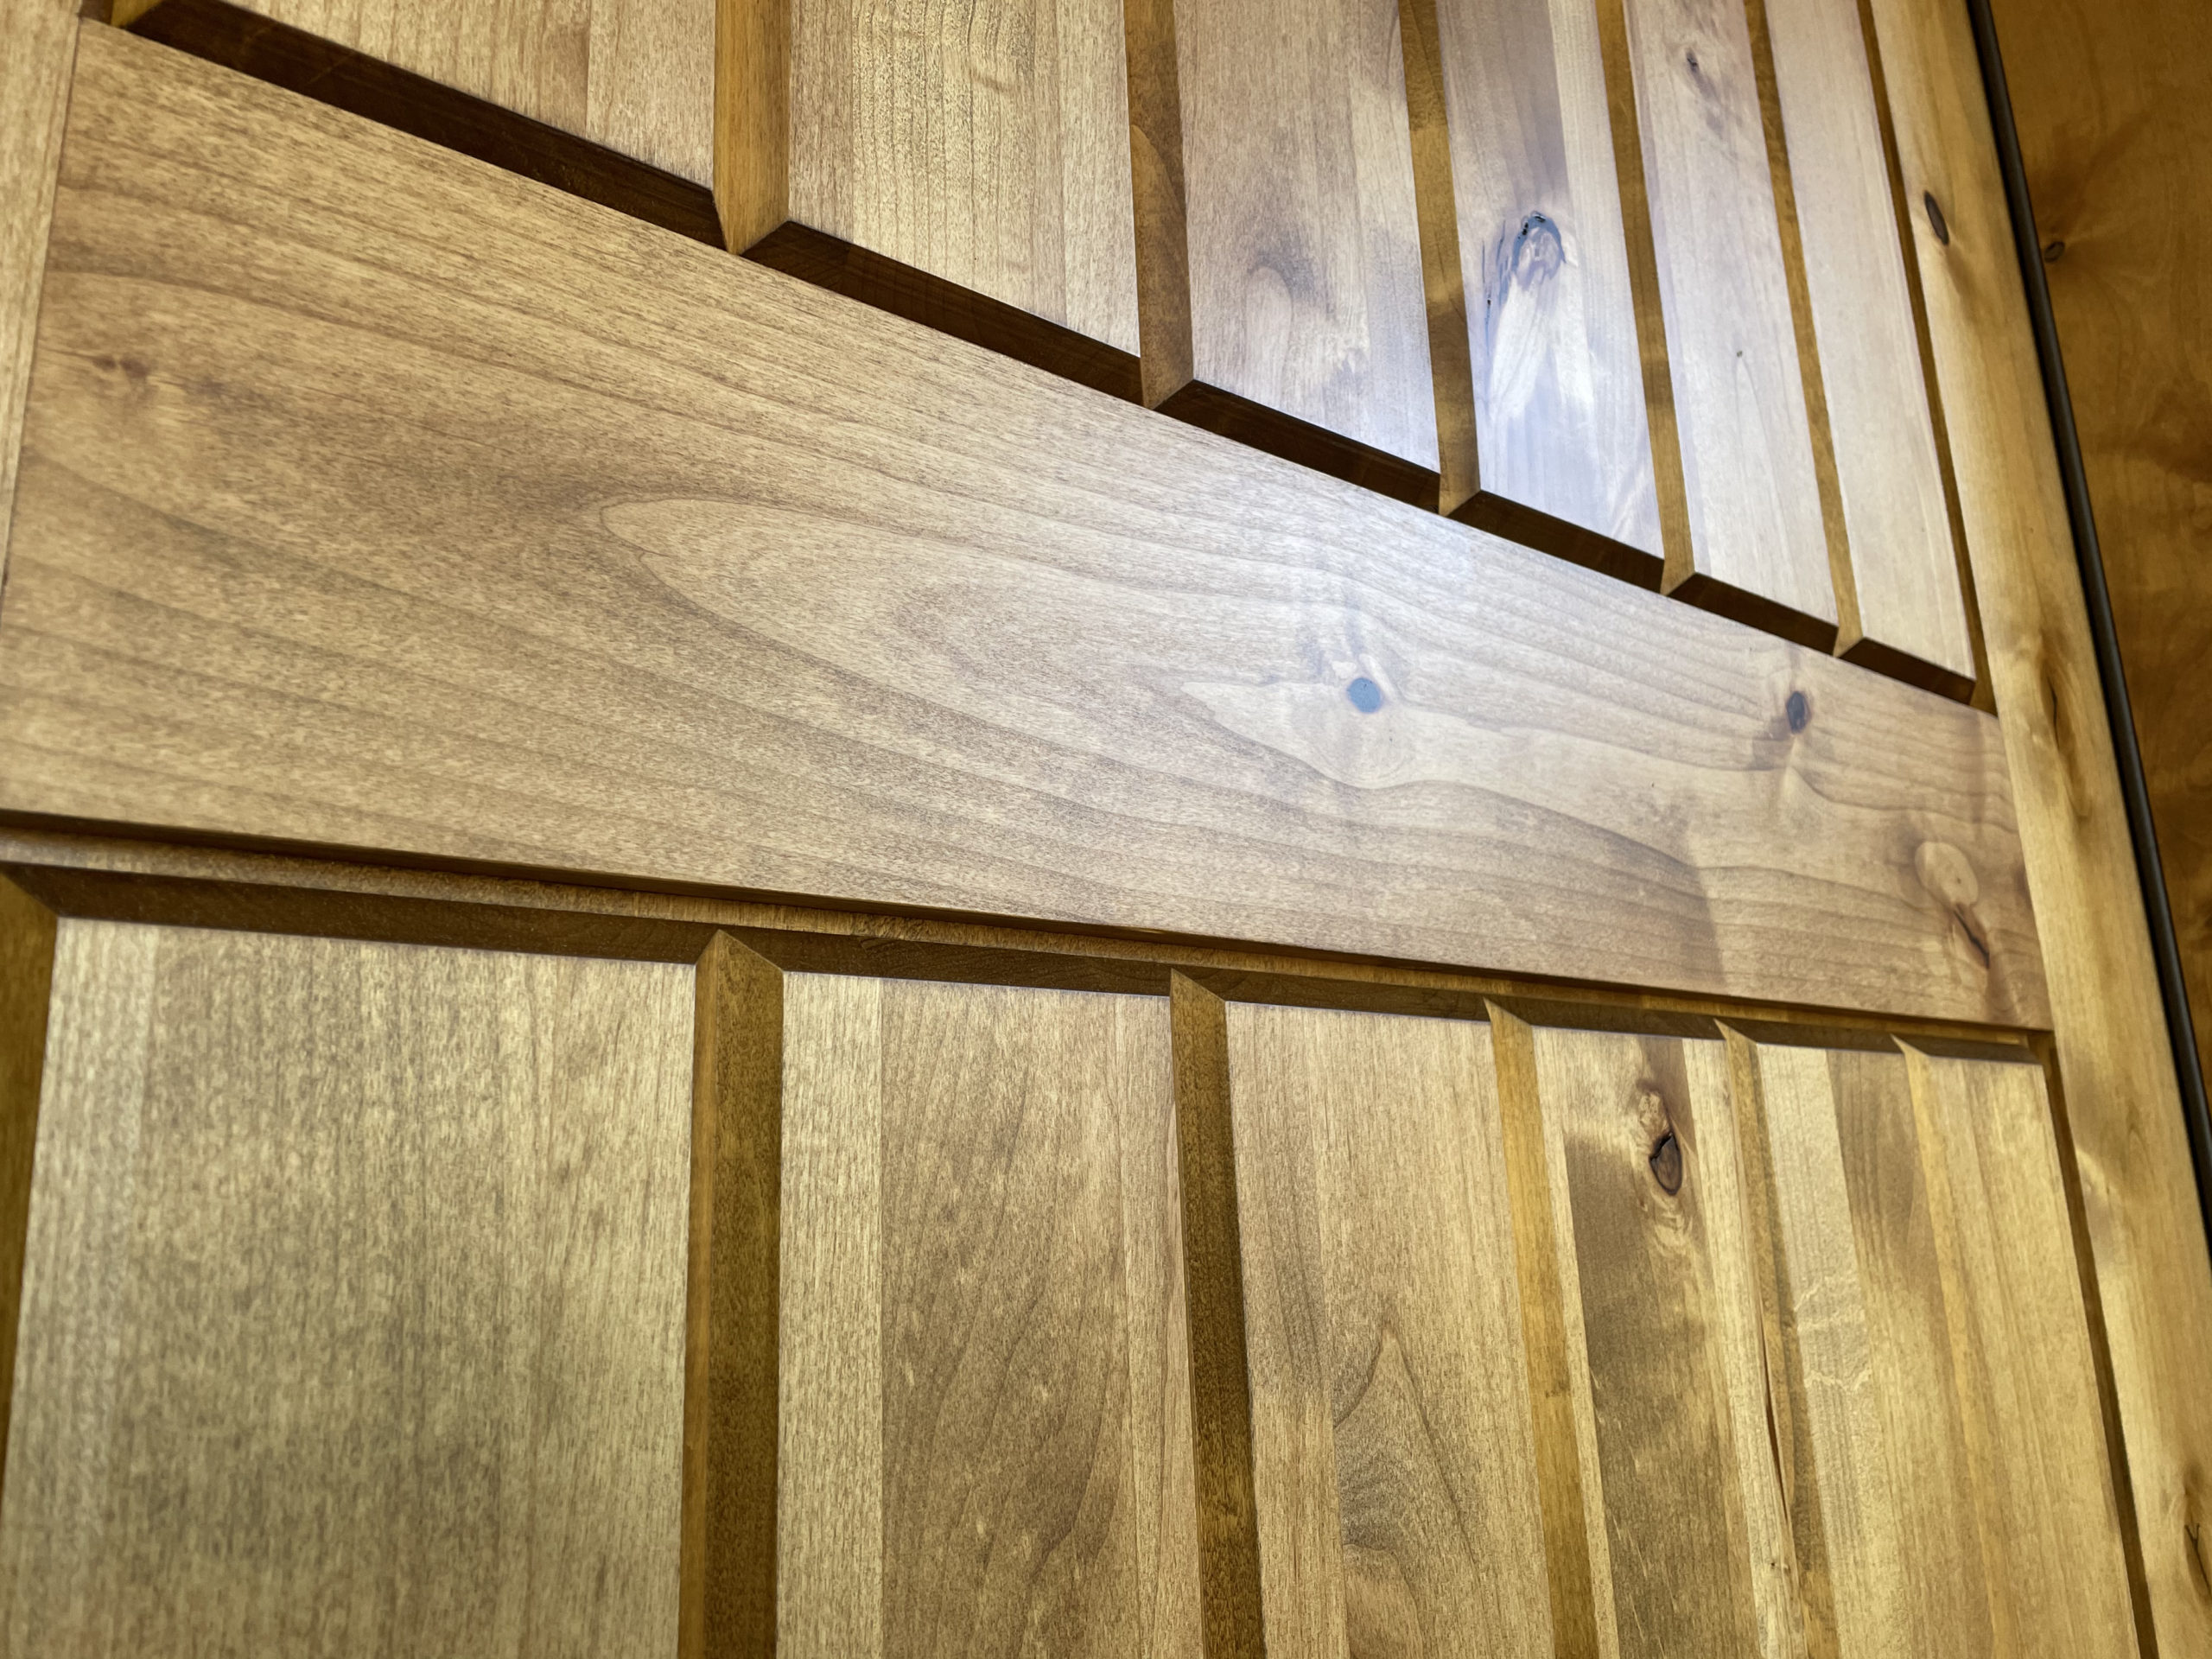
Refinishing a Door Without Taking it Off The Hinges
Few projects bring out my procrastination more than refinishing a door and wouldn’t it be nice to refinish a door without taking it off the hinges? Without a doubt the best way to get the job done is to remove the hinge pins, lift the door off, and�� set the door flat on a couple of sawhorses. It’s so much easier working on a horizontal surface than a vertical surface. But if your door is big and you’re working alone, the door removal process can be daunting. Furthermore, if you’re sanding/stripping off an old finish and then applying multiple coats of the new finish, the project could last for several days. That means you’re either putting the door back up every night or you’re leaving your house wide open while you and your family sleep. No bueno!
Fortunately, it is possible to refinish a door without taking it off the hinges. In my case, I was fortunate in that the door wasn’t in terrible shape to begin with. So all of the recessed details only needed a light sanding and cleaning instead of a full finish removal. The main flat surface of the door, however, was completely sanded down to bare wood. And since my plan was to simply replicate the previous stain color, I wasn’t concerned about the recessed sections looking different than the flat areas.�� After sanding the door is treated for blotch (alder likes to get all blotchy and splotchy when stained) and then stained using Watco Dark Walnut Danish Oil. I then top-coated with a marine varnish: Epifanes Matte.
Here’s the step by steps for the entire process I used to refinish my front door without taking it off the hinges.
Develop a strategy. Although you won’t be taking the door down, you will need to keep your door open for most of the day. Have a solid plan in place to keep kids and animals safe during this time. Baby gates are a great way to block the door while keeping the air flowing through the doorway. Also, plan out how many days the process will take. Make sure you research the dry time for each coat of finish.Remove anything from the door that you don’t want to get scratched, dusty or coated with finish. That includes the locks, strike plates, adornments, and the door sweep. By the way, the door sweep might be a sticking point. In some situations, you can’t remove the door sweep without taking the door down. If that’s the case, you may have no choice but to take the door down.Remove the old finish. The amount of time, effort and materials you need to put into this part of the process really depends on the existing finish. Thick stubborn finishes may require a chemical stripped or a heat gun and a scraper. Older worn finishes can often be removed with sanding alone, as is the case with my door. I start with 120 grit, progress to 180 grit, then finish with 220 grit.Prevent Blotch. If you plan to stain and your door is made of a blotch prone wood (alder, poplar, pine, maple, cherry, birch, just to name a few), you’ll want to apply some sort of pre-stain conditioner before staining. The homemade formula I used was 2 TBSP of Titebond Original glue, 2 TBSP of Water-based finish, brought up to 1 quart with water. The material is simply painted onto the raw wood. Once dry, I sand very lightly with 320 grit to knock down any roughness on the surface.Apply the Stain. If you plan to color the wood, now is the time to do it. Apply it as per the manufacturer’s instructions and work quickly to avoid streaks and overlaps. If you’re using something oil-based, be sure to give the stain PLENTY of time to cure. I don’t mean hours, I’m talking about days. If the oil in the stain isn’t cured enough and you apply finish on top of it, you may end up with a sticky finish that never totally cures. So give it 2-3 days or more if you can afford the time.Apply the Topcoat. An exterior door needs good protection. I have a video on Outdoor Finishes that you might want to review before selecting your final finish. I used a marine varnish called Epifanes. The finish should last a very long time on my shaded porch.Re-install the Hardware. You likely had to reinstall the hardware several times during this process but now you can do it for the final time. And if you were considering upgrading your handle or deadbolt, now’s a good time to do that. It can really help give a door a nice fresh look.
The post Refinishing a Door Without Taking it Off The Hinges appeared first on The Wood Whisperer.


May 21, 2021
Ava for the Win!
00:00:38 – Welcome back to the WoodWhisperer Live Show
00:01:02 – Thank you to our Patreon and YouTube members!
00:01:25 – Pantry project preview
00:03:40 – Are you going to anchor the pantry?
00:06:17 – Why do the drawer bottoms look darker?
00:07:10 – Is there just airflow in the front of the bottom drawer?
00:08:35 – Are there fluorescent wood finishes?
00:09:29 – Do you ever work the sole on a brand new plane?
00:12:58 – Are you going to build a table for your Recteq?
00:16:28 – How can I strip and redo my painted wooden deck?
00:17:54 – What’s the best way to keep a floating tabletop from bowing?
00:20:13 – Why doesn’t commercial-made furniture have to worry about wood movement?
00:21:30 – Do you have an opinion on the Beadlock system?
00:22:35 – Do you attach an exterior tabletop differently than an interior?
00:23:42 – How would you prevent rust when storing your cast iron tools for a couple of months?
00:25:21 – Is 5/16ths” hard maple too small for a display cabinet?
00:26:50 – What thickness is your T1-11 panel?
00:27:45 – Any thoughts on Andy Klein’s new drill press fence?
00:29:45 – What plane is just behind you?
00:33:35 – Have you heard any scuttlebutt about the Harvey table saws?
00:36:50 – Where do you get your stock?
00:40:15 – Any word on your Festool sander repair?
00:40:50 – What’s the deal with three-phase power?
00:42:18 – What’s your watering stone preference?
00:45:10 – Should I run my 2 HP table saw as 110 or 220?
00:47:43 – Systainer winner! Congratulations!
The post Ava for the Win! appeared first on The Wood Whisperer.
May 14, 2021
Marc’s Beagle Bark
Show notes coming soon.
The post Marc’s Beagle Bark appeared first on The Wood Whisperer.
May 7, 2021
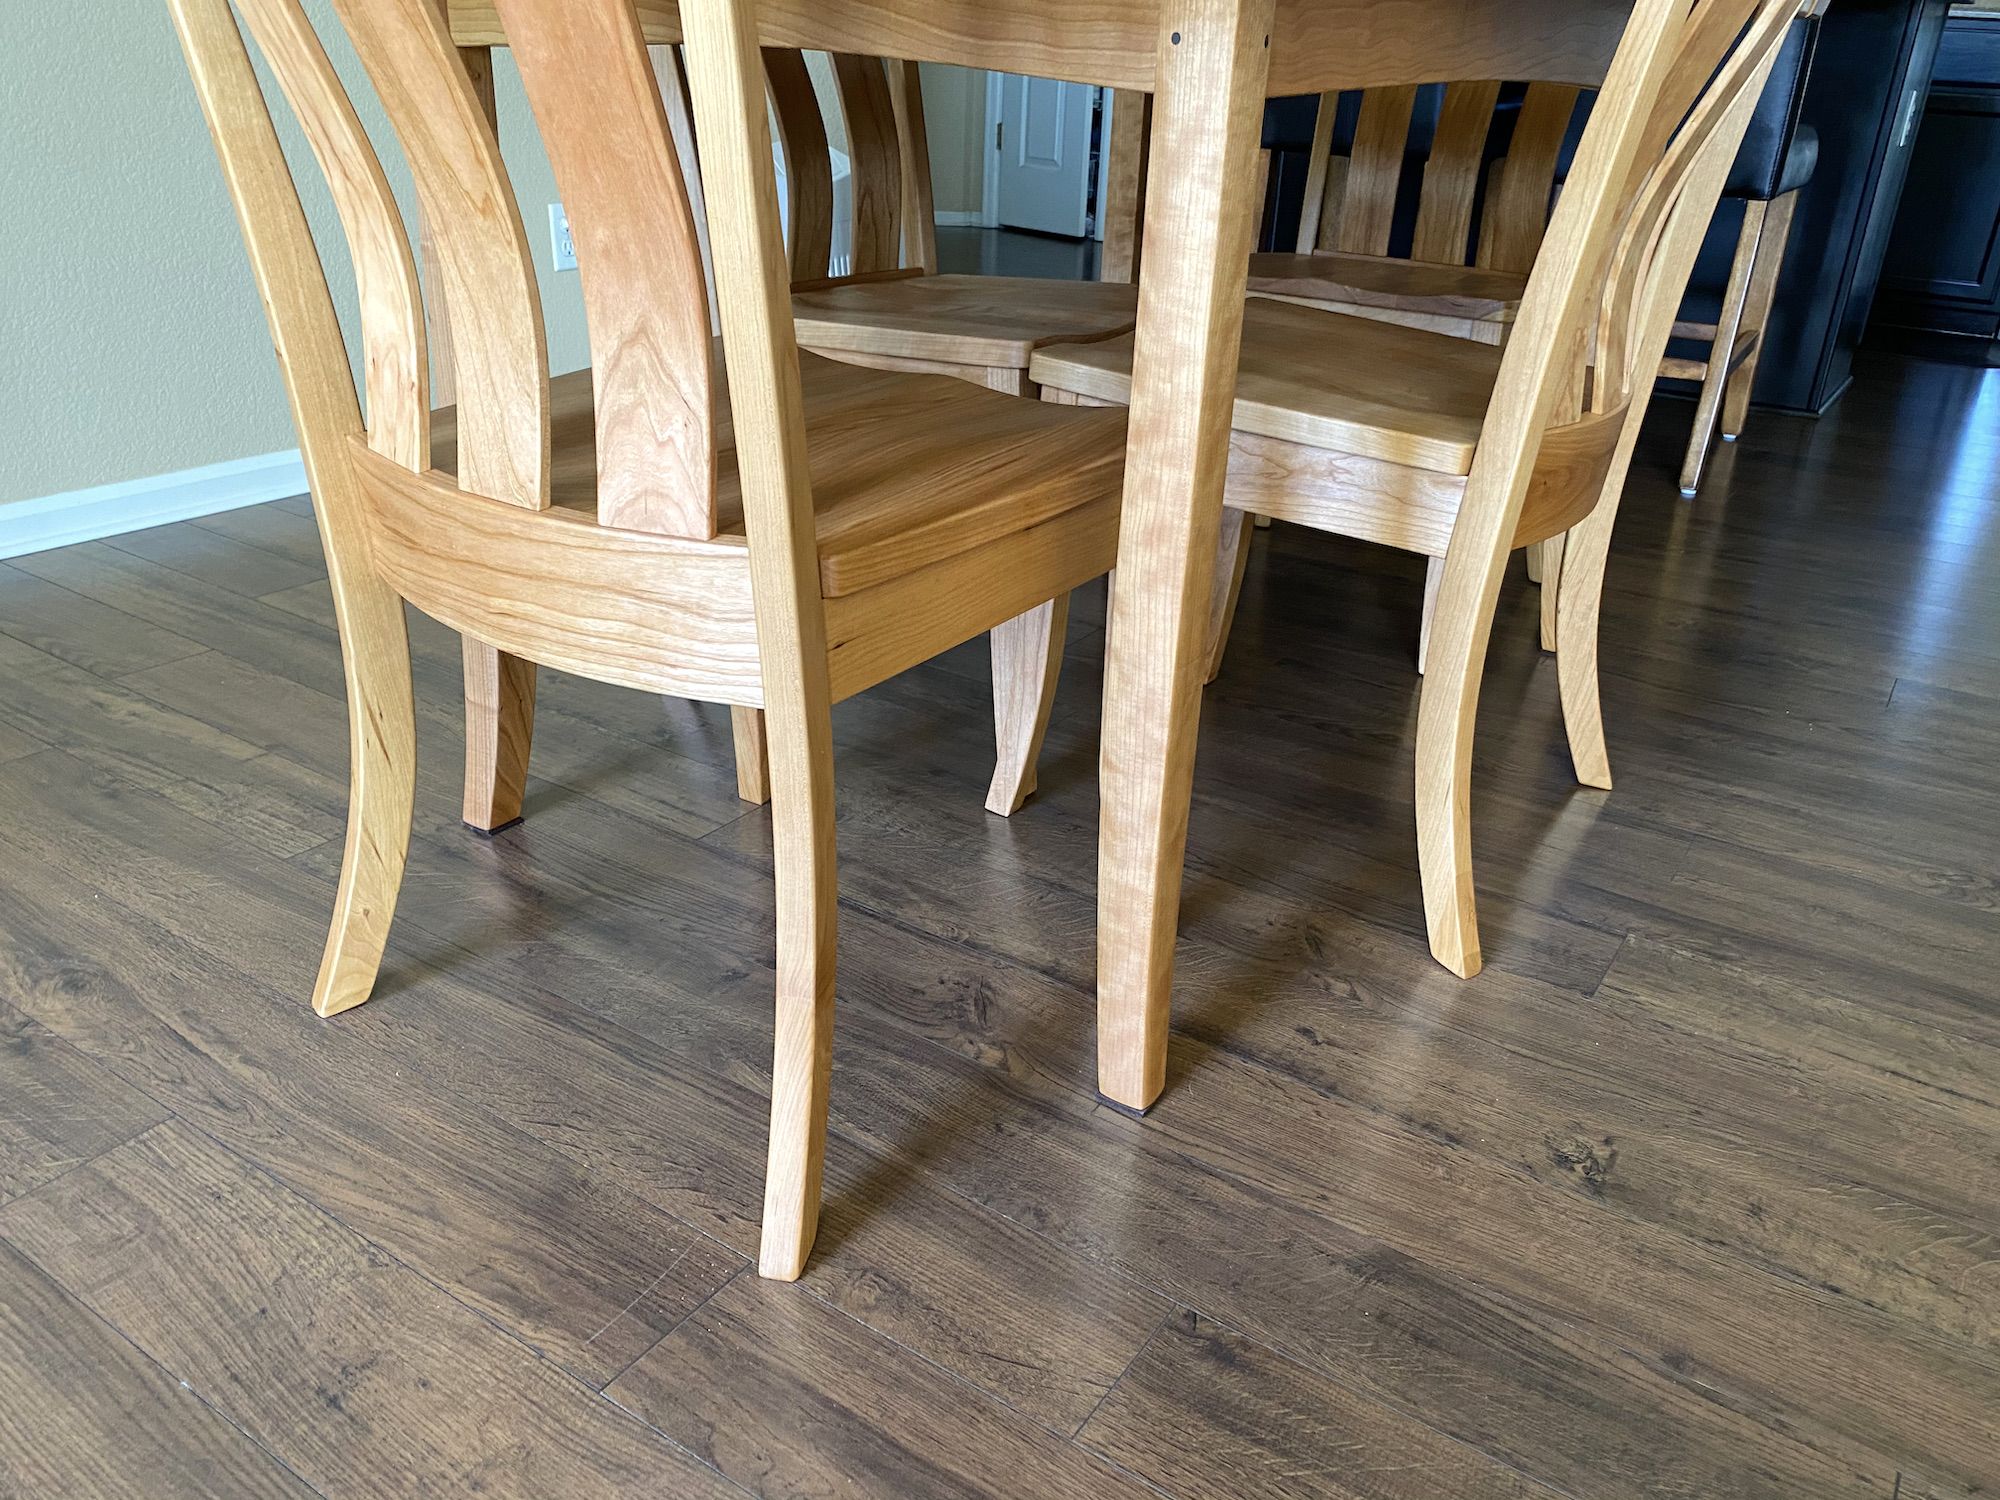
Mom’s Breadboard End Dining Table
If you like what you see in this project and you’d like even more information, you can get the full course FOR FREE in the Wood Whisperer Guild. No credit card required and no commitment.
Get access now!My mom recently moved into a new condo and wanted a table that was as small as possible while also being able to accommodate six diners. This beautiful cherry table fit the bill nicely. It features breadboards, elegant curves, and compound curved legs. The legs were shaped so that they match the chairs we picked up from my buddy Matt Cremona. His chair kits are a great compromise if you need some high quality chairs and you don’t have time/skill/desire to build your own.
Referenced Videos:Breadboard Ends: The Joint Most People Get Wrong10 Tips for Flat PanelsHow to Apply Rubio to FurnitureStuff I Used:TWW Card scraperLee Valley drawing bow (optional)Dowel Plate (optional)Flush Trim Saw3/8��� and 1/4″ upcut spiral bitsEA Chamfer Bit P14-28171/8��� Roundover Bit45 degree chamfer bitTitebond Original GlueTitebond Extend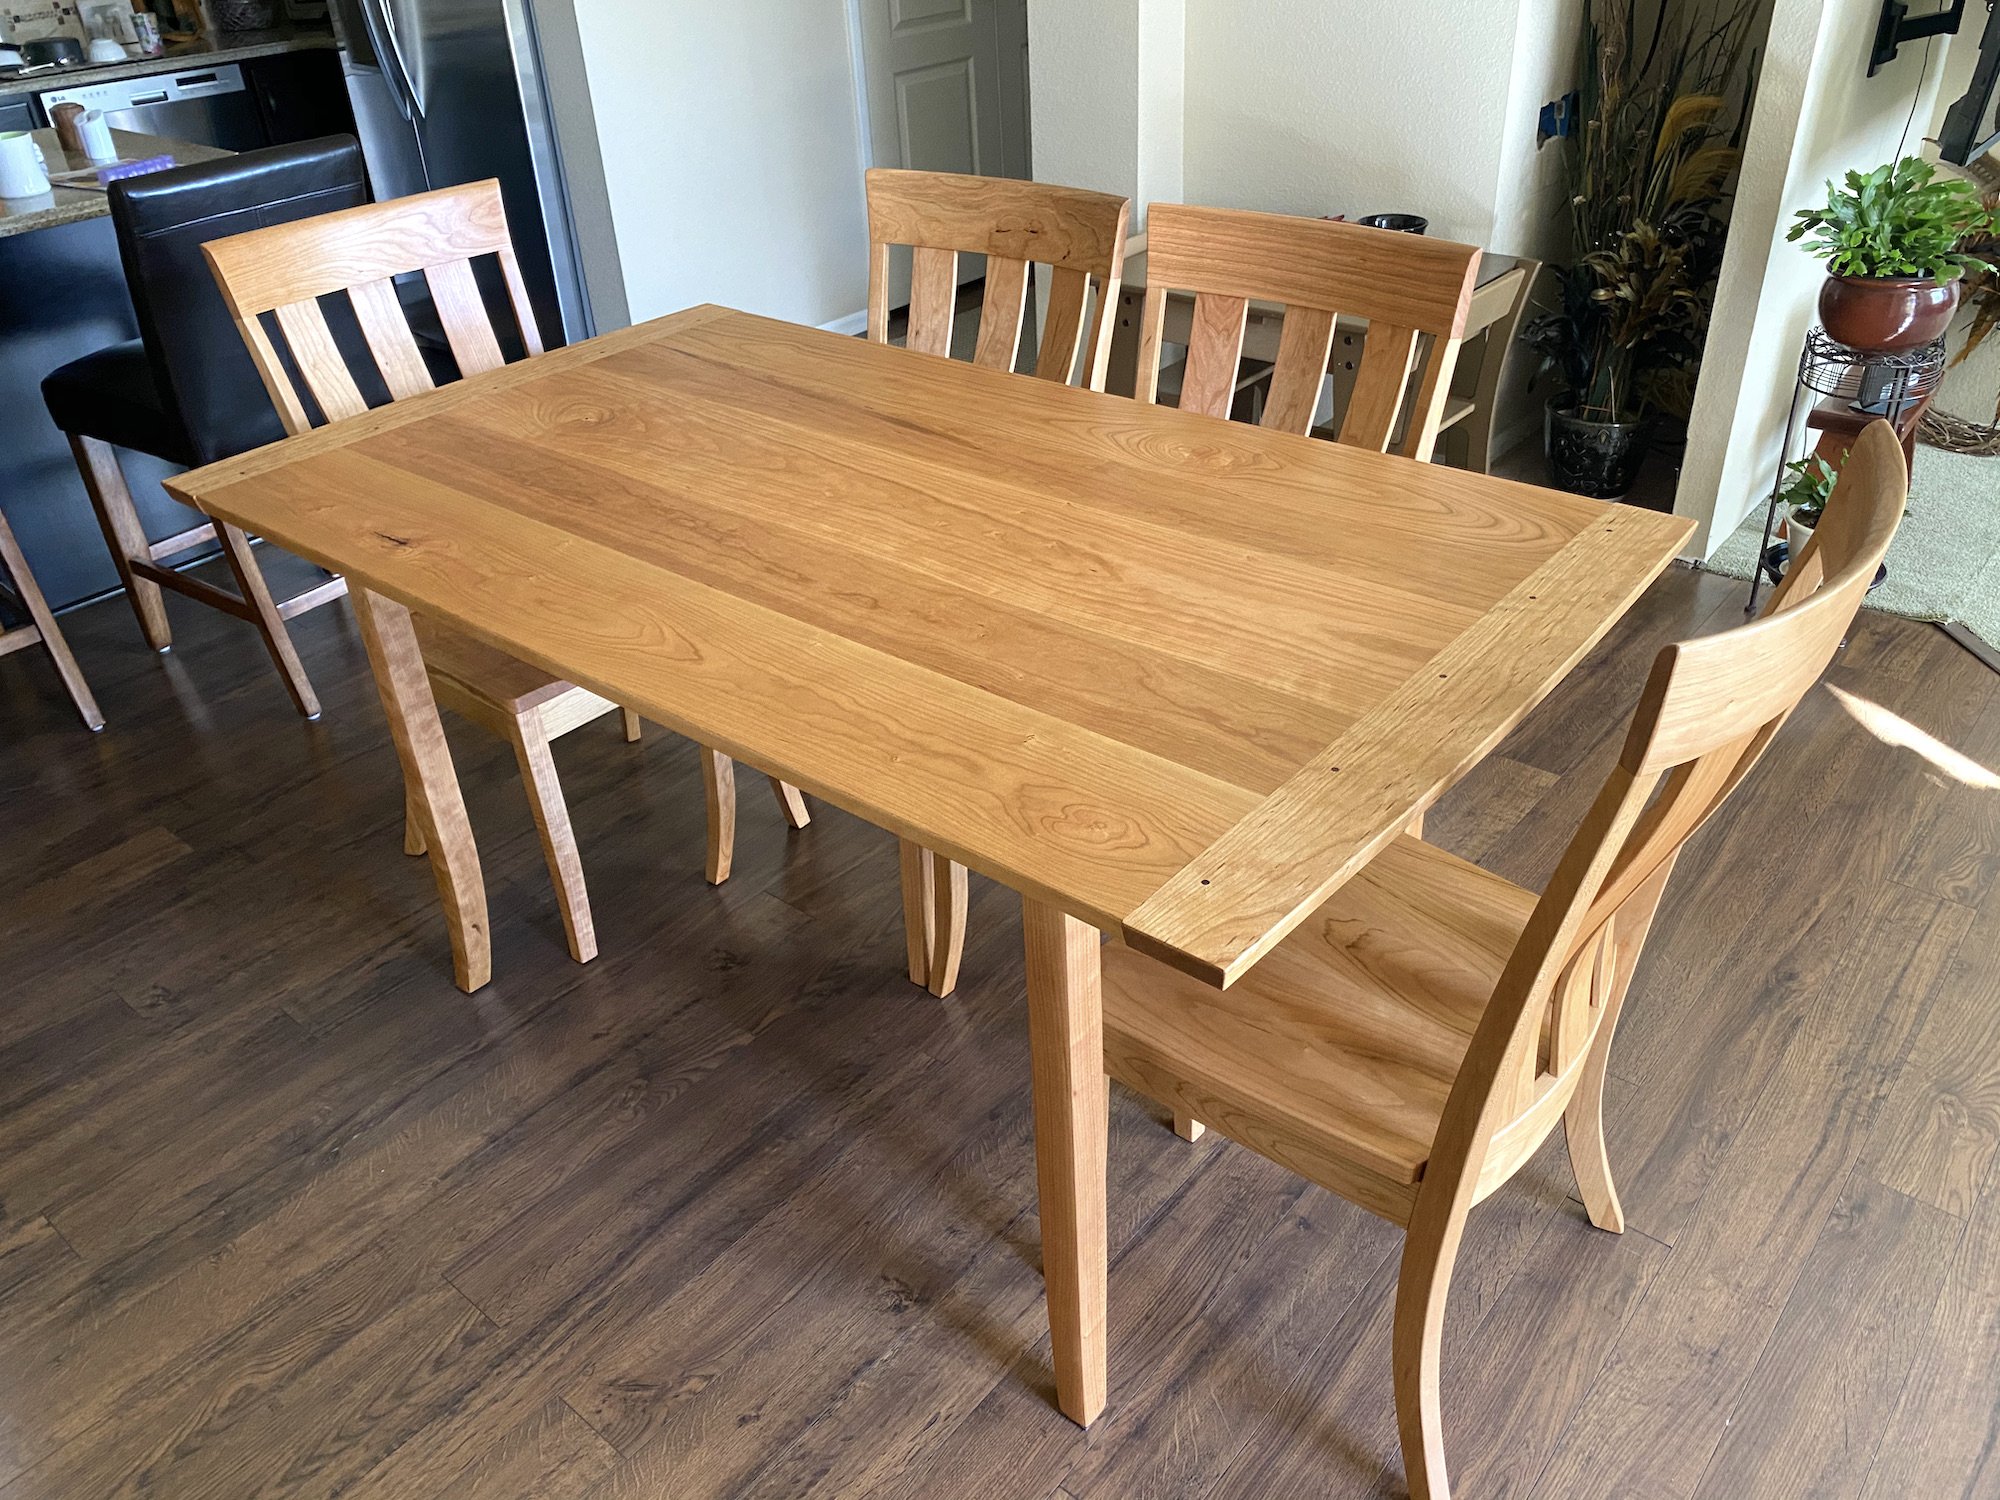

The post Mom’s Breadboard End Dining Table appeared first on The Wood Whisperer.
May 6, 2021
Woodworking Teacher Appreciation Day
show notes coming soon
The post Woodworking Teacher Appreciation Day appeared first on The Wood Whisperer.
April 29, 2021
Ugh Lumber Prices – Am I Right?
Show notes coming soon.
The post Ugh Lumber Prices – Am I Right? appeared first on The Wood Whisperer.
April 23, 2021
Outdoor Finishes | Real World Results
It’s hard to find a topic in woodworking that’s more confusing and more full of opinions and hearsay than finishing. Double that for outdoor finishing since there’s the additional variables of climate and exposure. One person will swear by one product but another person will tell you to avoid it like the plague. I’m in the fortunate position that everything I do is documented in some fashion so I will often “take one for the team” by putting a piece of furniture out in the elements with a particular finish just to see what happens. I can then report those observations in the name of SCIENCE! These real world observations add to my bank of theoretical knowledge and allow me to supply and informed opinion whenever I’m asked the dreaded “What finish should I use?” question.
In this video we’ll discuss several pieces of furniture I’ve made throughout the years, how they were finished and how they held up. In some cases, a refinish was necessary and we’ll talk about that too.
Greene & Greene Adirondack ChairsRustic Outdoor TableDurable Outdoor Finish?Repurposed Outdoor Coffee TableContemplation BenchOutdoor Sitting Bench��Crooked Garden GateFinishes Mentioned:Osmo One Coat HSCPES Clear Penetrating Epoxy Sealer��EpifanesEpifanes MatteTotal Boat Epoxy SealerSikkens Cetol Marine��Watco Teak Oil10 Helpful Outdoor Finishing TipsA finish failure does not always mean the finish doesn’t work. In many cases, there are other variables at play like wood species, application process, misuse, and exposure that lead to a finish failure.With enough exposure and neglect, ALL FINISHES WILL FAIL. The key to remember is that when the finish fails, a film finish will tend to fail more spectacularly as the finish peels and bubbles up and generally looks like crap. This is one reason why I���m gravitating to non-film finishes on my outdoor pieces.CPES/Epifanes failures were my fault. In the past I have called the CPES/Epifanes combination ���bulletproof��� and as you can see that���s not really the case. It���s a great finish and with maintenance, it can last a long time. Neglected and exposed to lots of UV, it���s an ugly mess. Not the product���s fault though. It���s my fault. And the pieces that have limited UV exposure have held up great.Know yourself and know the situation. Are you the type of person that can commit to a maintenance schedule? If not, throw on some sort of non-film finish and let it age over time. If you don���t plan to do any maintenance, don���t apply a film finish unless the piece will live in the shade.UV is far worse than moisture. This is not a fact so much as my observation that UV is the real enemy, even more so than moisture. No matter what finish I used, if direct extended UV exposure was involved the finish failed quickly.Pigments are your friend. This is why many decking products are called “stains” as they���re really just an oil with color added and that color helps block the UV rays from hitting the wood fibers. Clear finishes can have UV absorbing properties too but from my experience, nothing works better than something with actual pigments in it. This is also why one of the best finishes for outdoor pieces is������gasp���..paint!!!Make slatted table tops. I���ll never design something for the outdoors again that has a full solid top. Slats are the way to go as the water can run off and the boards can thoroughly dry. Part of the reason my big table failed multiple times was because the water and snow would collect on the top, increasing the exposure time unnecessarily.Wood species matters. Another reason the western red cedar table had such a hard time was the fact that the wood was super soft. Yes, it���s rot resistant, but every dent and scratch created a potential failure point for a film finish. And that���s exactly what happened on my table and benches. A denser wood won���t dent as easily and provides a better base for the finish so scratches and blunt impacts won���t stress the finish as much. The Sapele Adirondack chairs are a great example of how that kind of film finish can work on a harder species. From now on, if I work with Western Red Cedar I���ll be using non film-forming finishes.The epoxy foot pad technique works. Epoxy pads on the feet actually do work and are a nice insurance policy for anything with ground contact. Prevents splitting and cracking from excessive moisture wicking up into the end grain.There’s nothing wrong with letting the wood gray naturally. Some people prefer it and as you can see, it can be a lot of work maintaining outdoor wood projects. Not everyone wants to put in that kind of time. So if you don���t mind the weathered/gray look and feel, go au natural.The post Outdoor Finishes | Real World Results appeared first on The Wood Whisperer.
April 22, 2021
Nicole Gets the Big One Tonight
Show notes coming soon
The post Nicole Gets the Big One Tonight appeared first on The Wood Whisperer.
April 15, 2021
Birthday Boy
Show notes coming soon.
The post Birthday Boy appeared first on The Wood Whisperer.
April 9, 2021
Atomized Pancake Batter
00:00:48 – Welcome back to the Wood Whisperer Live Show
00:01:10 – Thank you to our Patreon and YouTube members!
00:01:45 – Nicole’s blanket ladder video!
00:03:05 – “Little and Often” book
00:05:30 – What do you keep your hands from drying out?
00:08:03 – Do you prefer shellac or varnish?
00:09:05 – What is your order of operations for creating a waterfall joint?
00:10:45 – Where do you order your Rubio online?
00:12:07 – Can you make a video on an uplifted dog feeder?
00:12:40 – What advice would you give someone before building built-in cabinets?
00:14:40 – What do Europeans use to cut dados without dado stacks?
00:16:13 – What’s the next beginner’s project?
00:17:07 – Would you go with carbide tools or traditional tools for turning tools?
00:20:43 – How would you finish a maple dining room table?
00:22:10 – Do you use steel wool on your last coats of finishes?
00:26:00 – What features or price points determine quality entry-level HVLP systems?
00:30:17 – How do you check the straightness of a straight edge?
00:33:55 – How can I adjust the belt on my Supermax belt sander?
00:35:50 – How can I ebonize ash?
00:37:00 – What are the chances of a welder getting into the WoodWhisperer shop?
00:39:03 – Is it stupid to make a raised panel door with plywood strips?
00:40:37 – Any filler recommendations for plywood edges?
00:41:28 – Any ways to prevent oils from differing woods contaminating each other?
00:43:02 – Are all long grain to long grain joints good glue joints?
00:44:35 – What’s a decent budget filtration setup?
00:46:40 – Where would you recommend a beginner woodworker start?
00:51:20 – Do you have any bandsaw blade recommendations?
00:52:20 – Have you done a video on compound miter frames?
00:55:28 – Do you think you could do the RGB gaming desktop for the executive desk?
00:59:10 – How can I remove the snipe on my jointer?
00:59:58 – How do you like your Mirka sander?
Products recommended by Marc
US https://www.amazon.com/shop/thewoodwhisperer
Canada http://amazon.ca/shop/thewoodwhisperer
UK https://www.amazon.co.uk/shop/thewoodwhisperer
Woodworking Live Show as a podcast
The post Atomized Pancake Batter appeared first on The Wood Whisperer.


