
Andrew Macarthy's Blog, page 33
July 22, 2013
How to Create a "Reveal" Effect on Vine App | Vine Marketing for Business Tutorial
As things stand, the Vine app's editing and effects options are extremely limited (read: non-existent). This being the case, it has forced video makers to get inventive with the ways that they use the app and to create videos and "special effects." One of the easiest visual effects to make using Vine is the "reveal."
Above is a quick example of the "reveal" effect I put together. All you need to do is cover the lens of the camera with a piece of paper or card, then, whilst recording, slide it off the lens slowly to let the light flood in. What you get is something like the video above.
Note: Make sure you keep the paper or card held flat and tight against the camera lens before you record, otherwise you'll have some light creeping in, like I do at the start of my Vine above. It doesn't ruin the overall recording, but it's not quite perfect.
And that's really all there is to it! You can use this effect to give a magical reveal to anything you like... new products, new ad campaigns, profiles of your staff... whatever you can think of.
ABOUT THE AUTHOR
Andrew Macarthy is the author of the #1 Amazon Web Marketing Bestseller, 500 Social Media Marketing Tips, available for Kindle and in paperback.
Buy 500 Social Media Marketing Tips
Amazon US: http://www.amazon.com/dp/B007L50HE6
Amazon UK: http://www.amazon.co.uk/dp/B007L50HE6
Follow Me:
http://www.fa
cebook.com/500socialmediatips/
https://pinterest.com/500socialmedia/
http://www.twitter.com/500socialmedia
http://www.youtube.com/5 00socialmediatips


July 18, 2013
How to Convert A Blog Post to PDF for Slideshare | Slideshare Conversion Marketing
One of the coolest functions of Slideshare is that, if you upload a PDF document to your account, it will automatically convert the file into a presentation that can be read, shared, and embedded elsewhere by anyone on the site. A good way to utilise this feature is to convert your blog posts into PDF files and then upload them to Slideshare for extra exposure. The process is really easy and only takes a couple of minutes to complete. Here's how:
1. Convert your blog into a PDF
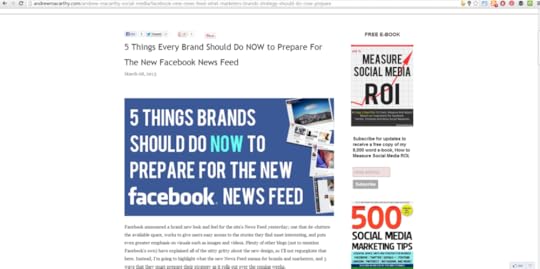
To convert your blog post into a PDF, I recommend the tool over at www.printfriendly.com. Once there, paste your blog post's URL into the bar at the top of the site and click "Print Preview." Alternatively - and this is the way I do it - install the PrintFriendly browser extension and simply click it when you're on the page of the blog post that you want to convert. I prefer the latter method as sometimes the former does not pull in the blog's images.
2. Delete unwanted text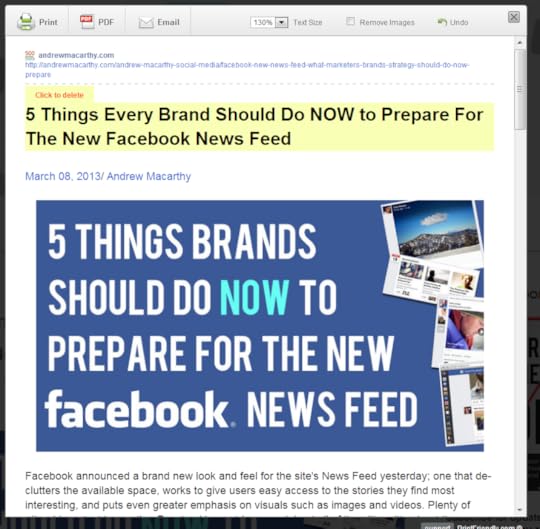
Once PrintFriendly has grabbed your blog post, hover over the different paragraphs of text and any images, and they will highlight yellow with a "Click to delete" message. Remove any unnecessary elements that will clog up your eventual Slideshare presentation. In my case, I remove the blog title at the top (reason for this coming up) and blurb about me from the bottom of the post. When you're done, click the "PDF" button.
3. Download your PDF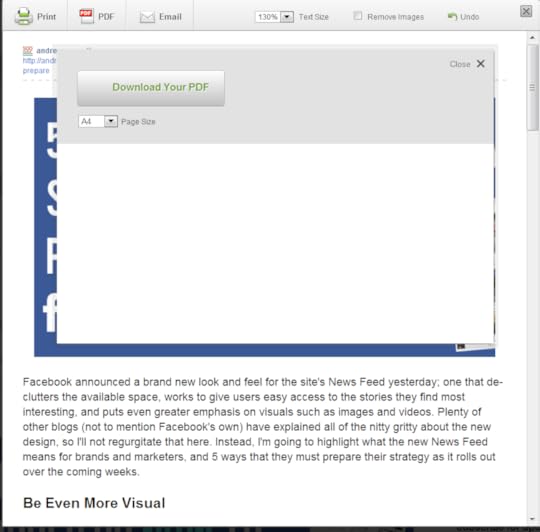
PrintFriendly will spend a few seconds generating your PDF. When it's done, choose the A4 Page Size option and click the button to download it ready for uploading to Slideshare.
4. Upload your PDF to Slideshare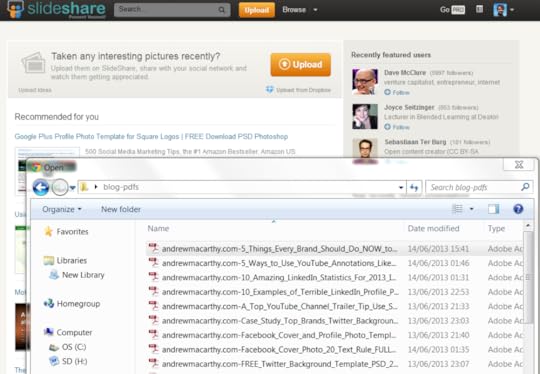
Sign into Slideshare, click the Upload button and choose the PDF you just created. Slideshare will grab the file and convert it into a presentation for the site. Nice!
5. Optimize the title, description, category, and tags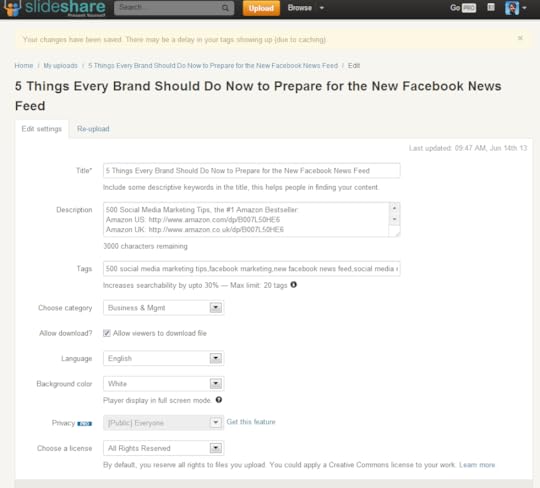
Visit your Slideshare uploads and click on the presentation you have just created to edit its settings, which by default won't be great at all. I simply copy and paste the title and tags from my blog post, and lift the "stock" description from my YouTube channel (which includes a call to action to buy my book, links to my social profiles, and a more blurb about the presentation) and paste it all in. Don't forget to choose the correct category, then save the changes.
6. You're done! ... But a tip about image use and thumbnails!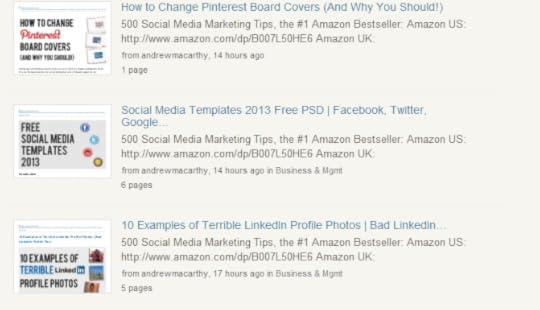
Here's an example of how your presentations will display in Slideshare search results. As you can see the thumbnail that appears is the image that appeared at the top of my blog post. If the top of your blog post is just text, then your thumbnail on Slideshare will be as well, which won't make it too visually appealing. I know it won't be possible for everyone, but if you are going to convert blog posts for Slideshare, having an image at the top of your blog post - even if temporarily while you convert to PDF - can make a huge difference.
The final result!Here it is, my blog post converted into a Slideshare presentation and embedded using the code provided. Users can click the arrows to view each page, and zoom in to read the text easier with the magnification tools, or by going full screen.
Of course, a text-heavy blog post is never going to replace a presentation built from the ground up and optimised for Slideshare, but as far as convenience and the extra exposure to millions of Slideshare users goes, it is well worth doing.
ABOUT THE AUTHOR
Andrew Macarthy is the author of the #1 Amazon Web Marketing Bestseller, 500 Social Media Marketing Tips, available for Kindle and in paperback.
Buy 500 Social Media Marketing Tips
Amazon US: http://www.amazon.com/dp/B007L50HE6
Amazon UK: http://www.amazon.co.uk/dp/B007L50HE6
Follow Me:
http://www.fa
cebook.com/500socialmediatips/
https://pinterest.com/500socialmedia/
http://www.twitter.com/500socialmedia
http://www.youtube.com/5
00socialmediatips
July 14, 2013
How to Share Instagram Photos to A Facebook Page | Post Instagram Images to Facebook Page
The introduction of hashtags on Facebook have made the effect of sharing Instagram images onto social media even mor powerful. If you want to set your Instagram app account up to share photos right to your Facebook Page - not your personal timeline - here are some simple instructions:
1. Open up the Instagram app and visit your profile page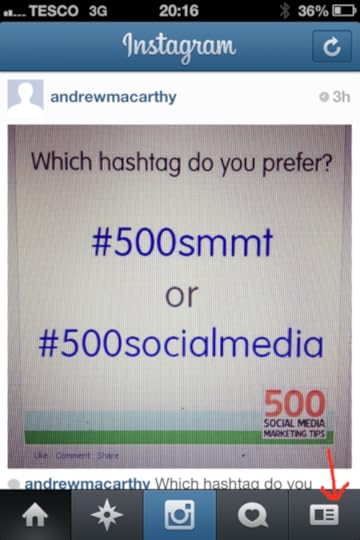 2. Click on the cog icon at the top of your profile page
 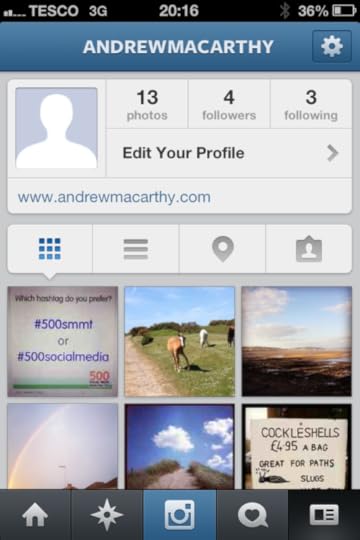 3. Click on the "Share Settings" option
 4. Click on "Facebook"
 5. Click on "Share Photos to" ...
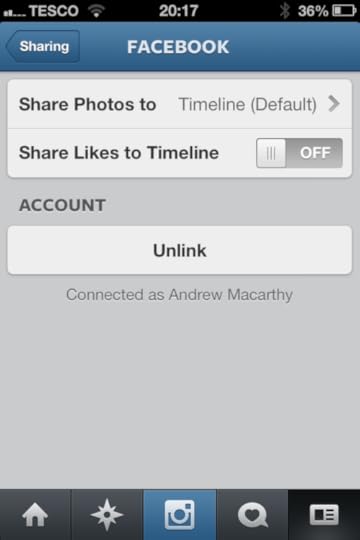 6. Choose your Facebook Page from the "Choose A Page" list
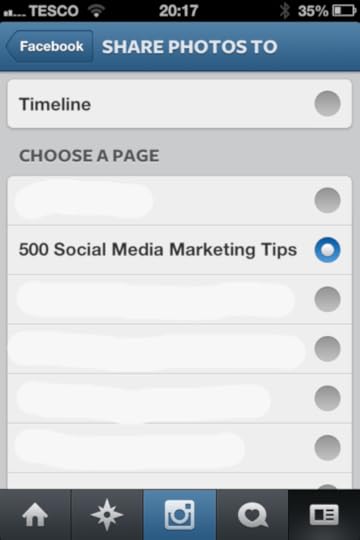
And that's it! Now, when you share a photo from Instagram to Facebook, it'll go straight to the Facebook Page you chose.
ABOUT THE AUTHOR
Andrew Macarthy is the author of the #1 Amazon Web Marketing Bestseller, 500 Social Media Marketing Tips, available for Kindle and in paperback.
Buy 500 Social Media Marketing Tips
Amazon US: http://www.amazon.com/dp/B007L50HE6
Amazon UK: http://www.amazon.co.uk/dp/B007L50HE6
Follow Me:
http://www.fa
cebook.com/500socialmediatips/
https://pinterest.com/500socialmedia/
http://www.twitter.com/500socialmedia
http://www.youtube.com/5 00socialmediatips

July 10, 2013
How to Add Admins or Managers to A Google Plus (+) Page
If your Google+ business page is particularly busy, you may want to hand the responsibility of handling it over to one or more trusted employees. For these instances. The process is really easy and only takes a few moments, but first it's handy to know...
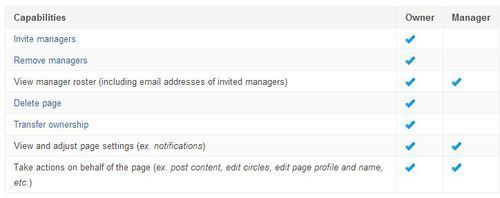
The differences between an owner and a managerGoogle+ allows you to assign up to 50 managers to your page, all who have basic admin rights, while you retain ownership. Here's a summary of the differences between an owner and a manager:
 How to add a manager to your Google+ page
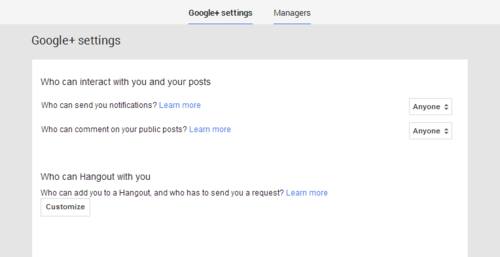
1. Sign in to Google+ and visit your page, then choose Settings from the left-hand menu.
2. On the next page, click the Managers link at the top.
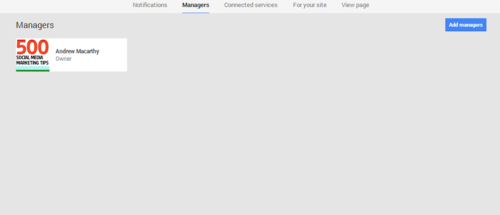
3. This is the page where all of your managers will be listed. Click the Add managers button to invite a new one.
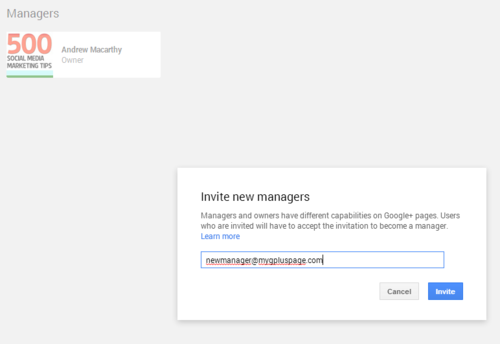
4. Simply enter the e-mail address of the person you want to add as a manager and click the Invite button. (Note: people can accept invitations to become managers, and sign up to Google+ if they haven’t already, with a different email address than the one the invitation was sent to).
When a invitation is accepted, the owner of the page - you - will be notified via email.
ABOUT THE AUTHOR
Andrew Macarthy is the author of the #1 Amazon Web Marketing Bestseller, 500 Social Media Marketing Tips, available for Kindle and in paperback.
Buy 500 Social Media Marketing Tips
Amazon US: http://www.amazon.com/dp/B007L50HE6
Amazon UK: http://www.amazon.co.uk/dp/B007L50HE6
Follow Me:
http://www.fa
cebook.com/500socialmediatips/
https://pinterest.com/500socialmedia/
http://www.twitter.com/500socialmedia
http://www.youtube.com/5
00socialmediatips
July 6, 2013
5 Ways to Make Pinterest Images That Get More Repins, Likes, and Comments
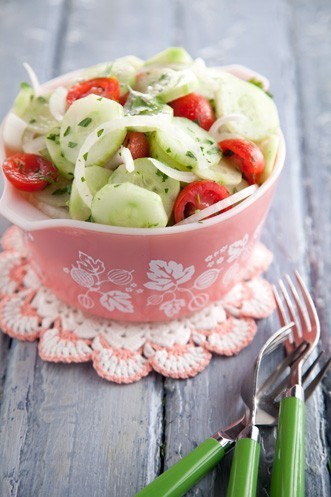
For over a year, boffins at Curalate in Philadelphia studied millions of Pinterest photos and their engagement levels to try to figure out what makes the perfect Pinterest image. The answer combines a number of characteristics, exemplified by the image above: "Aunt Peggy's Cucumber, Tomato, and Onion Salad" by cooking show host, Paula Deen. At the time of writing, it has been repinned over 300,000 times, liked over 8,000 times, and commented by over 300 people.
What elements make up the perfect Pinterest pin?Amongst the most popular images on Pinterest and Instagram, Curalate found that they all shared the following characteristics. Take a look, and work at feeding them into your own stream to encourae more engagement from your customers:

Source:
http://pinterest.com/pin/162059286562405620/
Images for Pinterest that are taken in a vertical orientation (with an aspect ratio between 2:3 and 4:5) perform better than those snapped in landscape. This is because Pinterest displays all photos in a vertical orientation, making those uploaded in other ratios look squashed and small.
Unobtrusive backgrounds
Source:
http://pinterest.com/pin/36310340717096776/
Curalate found that product images taken against a plain, artificial background - specifically if the background makes up more than 40 per cent of the total image area - see their amount of repins halves or even quartered compared to others. Instead, the best-performing pins use a minimal background that still provides compelling context.
No human faces
Source:
http://pinterest.com/pin/374080312768342774/
Somewhat surprisingly - as marketers often feel that people connect with images of other humans - images without faces get repinned more than those that have them. Curalate surmises that this is that while Facebook, for example, is the social network of people, Pinterest is the social network of things. And on a network of things, people's faces only serve as a distraction.
Multiple colours and lots of red
Source:
http://pinterest.com/pin/492440540475715870/
Pinterest pins with multiple dominant colors garner more than three times the replies as images with just one, it was found. In addition, images that were made up predominantly of red or orange images were found to get twice the repins as predominantly blue images.
Moderate light
Source:
http://pinterest.com/pin/11259067789676883/
Very light and very dark images are, on average, repinned one-twentieth as often as images with medium lightness.
Buy 500 Social Media Marketing Tips
Amazon US: http://www.amazon.com/dp/B007L50HE6
Amazon UK: http://www.amazon.co.uk/dp/B007L50HE6
Follow Me:
http://www.fa
cebook.com/500socialmediatips/
https://pinterest.com/500socialmedia/
http://www.twitter.com/500socialmedia
http://www.youtube.com/5
00socialmediatips
July 2, 2013
How to Make a 360 Degrees Vine Video #360vine

One of the great things about Vine is, though the app is so simple to use, you can produce some really great effects and engaging content from it. One of these is the 360 degree Vine. Making one is fairly simple. Before I show you how, here's the result of one of my recent attempts:
How to Make a 360 Degrees Vine Video
The trick to making a 360 vine video is to point the camera at a fixed point as you film. In my case, the fixed point was the top and centre of my book. To make lining up the shot easier as you rotate around the subject, place a small piece of tape on your phone's screen and mark it with a dot, as above. As you record, keep the dot in the same place for every short burst of footage.
Bonus TipsThe shorter each tap/press of recording each "frame" is, the smoother your 360 degree Vine video will be.For a longer and more dramatic Vine, position the camera further away from the subject as you move around it. To record a smooth 360 degree rotation, strap your camera to something that will move with little friction, like a glass, or a toy car. To ensure as perfect a circular recording as possible, mark out your path beforehand. One easy way to do this is to tie a pencil to the end of a piece of string and pin the non-pencilled end down where your subject will be positioned. Then, pull the string taut and draw to mark the circumference of your circle.When you post your Vine video, add the hashtag #360vine to group it with similar videos and make it more discoverable. ConclusionThat's all there is to it! If you found this tutorial helpful and are inspired to make your own 360 Vine, I'd love to see the result. Tweet me @500socialmedia with your creations!
ABOUT THE AUTHOR
Andrew Macarthy is the author of the #1 Amazon Web Marketing Bestseller, 500 Social Media Marketing Tips, available for Kindle and in paperback.
Buy 500 Social Media Marketing Tips
Amazon US: http://www.amazon.com/dp/B007L50HE6
Amazon UK: http://www.amazon.co.uk/dp/B007L50HE6
Follow Me:
http://www.fa
cebook.com/500socialmediatips/
https://pinterest.com/500socialmedia/
http://www.twitter.com/500socialmedia
http://www.youtube.com/5
00socialmediatips
June 28, 2013
5 Ways Brands Can Use Hashtags on Facebook for Marketing | Facebook #Hashtags Marketing
Facebook recently introduced hashtags to its site - and about time too! - giving marketers a fascinating new tool to help try to boost engagement and interaction with their fans. Here are five ideas to help brands kick start their use of hashtags on Facebook:
1. Add your hashtag to your cover photo
One of the easiest ways to promote your hashtag to fans is to feature it in your cover photo, whether it's a hashtag that will always stay the same (such as your brand name) or one that will change over time (like one related to a seasonal promotion).
2. Search your hashtag and join the conversation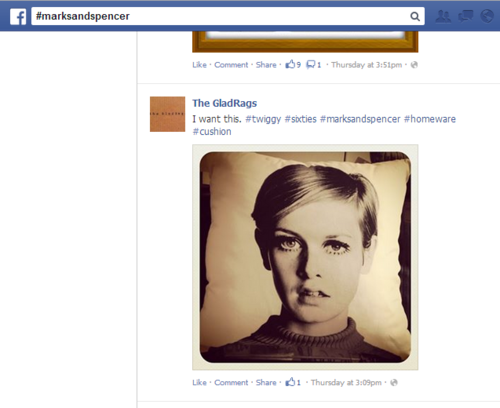
Hashtags on Facebook give you a much easier way to find out what people are saying about you and your brand. So, search for mentions of your brand's hashtag periodically and join in on the conversation to help drive engagement and strengthen relationships with your customers.
3. Use hashtags in your status updates and comments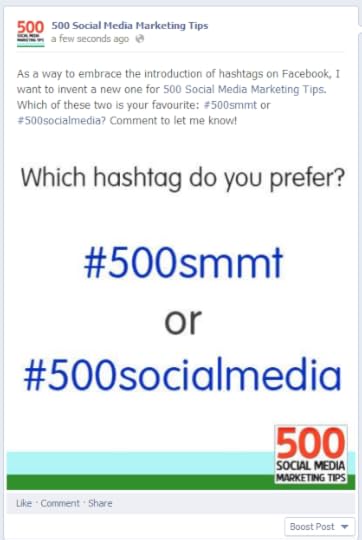
Facebook hashtags work as clickable links in Page posts, personal profile posts, and in comments, so don't forget to feature them in these places where appropriate. With consistent use and the odd prompting, you will educate your customers to start using your hashtags too!
4. Utilise your hashtag's unique URL to drive traffic and engagement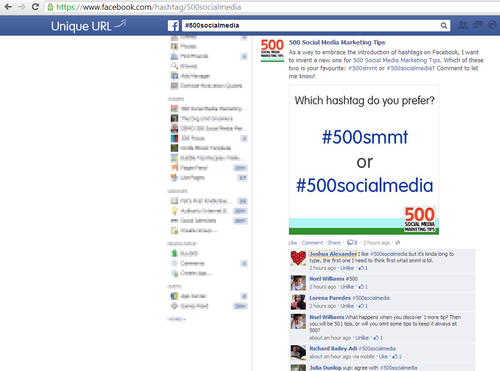
Each hashtag used on Facebook has its own feed and unique URL. In the above example, the hashtag is #500socialmedia to represent my book, and the URL is http://www.facebook.com/hashtag/500socialmedia. The format always stays the same: facebook.com/hashtag/yourhashtag.
Use this knowledge to drive customers to your hashtag feed - especially in real world marketing material - to interact and engage. Utilise re-directs and URL shorteners like bit.ly to make a link to the feed more memorable.
5. Remember: #hashtags join across all Facebook-integrated services
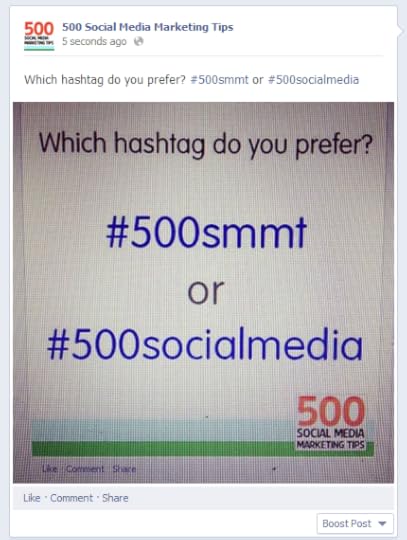
One of the coolest things about Facebook hashtags is that their function is maintained across Facebook-integrated services. In the example above, I shared this image from my Instagram account to my Facebook fan page. The image's caption remained in tact, and its hashtags are there and clickable too.
ConclusionI hope this post has given you some inspiration for how you might use hashtags on Facebook as part of your own social media marketing strategy. Let me know how you intend to integrate hashtags in the comments below!
ABOUT THE AUTHOR
Andrew Macarthy is the author of the #1 Amazon Web Marketing Bestseller, 500 Social Media Marketing Tips, available for Kindle and in paperback.
Buy 500 Social Media Marketing Tips
Amazon US: http://www.amazon.com/dp/B007L50HE6
Amazon UK: http://www.amazon.co.uk/dp/B007L50HE6
Follow Me:
http://www.fa
cebook.com/500socialmediatips/
https://pinterest.com/500socialmedia/
http://www.twitter.com/500socialmedia
http://www.youtube.com/5 00socialmediatips

June 24, 2013
How to Embed An Instagram Video on Your Blog or Site in 3 Steps | Instagram Video Embed Code

Instagram video gives individuals and brands a great new way to produce fresh and exciting content to their fans and followers to view within the app and via instagram.com, but what if you want to embed an Instagram clip on your blog or website? There is no official method at the time of writing this, but there is a pretty simple workaround. Below, you'll learn how to embed an Instagram video in three simple steps.
1. Grab the URL of your video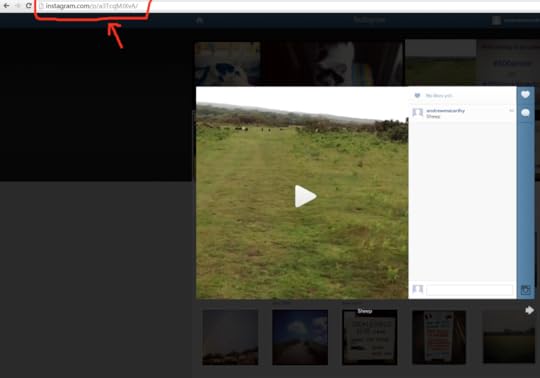
Visit your Instagram profile on the web at www.instagram.com/yourinstagramusername, click on the video that you want to embed, then copy its unique URL from your browser's address bar.
2. Generate the embed code

Embed Your Own Instagram Videos
Visit www.instaembed.com, paste the unique URL you copied into the box here, and click the Generate Code button.
3. Embed the code on your blog or websiteCopy the generated code and paste it as HTML into your blog post or onto your website. The result will look like my example above. The default size of the video is 640 x 640 pixels, but you can change this by editing the height and width in the code. Lastly, if you're feeling courteous, do leave the "Embed Your Own Instagram Videos" link in at the bottom, to give instaembed the credit it deserves.
ABOUT THE AUTHOR
Andrew Macarthy is the author of the #1 Amazon Web Marketing Bestseller, 500 Social Media Marketing Tips, available for Kindle and in paperback.
Buy 500 Social Media Marketing Tips
Amazon US: http://www.amazon.com/dp/B007L50HE6
Amazon UK: http://www.amazon.co.uk/dp/B007L50HE6
Follow Me:
http://www.fa
cebook.com/500socialmediatips/
https://pinterest.com/500socialmedia/
http://www.twitter.com/500socialmedia
http://www.youtube.com/5 00socialmediatips

June 20, 2013
How to Record Video on Instagram: A Guide to Shooting Video on Instagram
In June 2013, Instagram introduced video creation to the mega-popular mobile app. Shooting video on Instagram is super easy, so let's take a look, and answer any questions you might have about how it works:
How to record a video on Instagram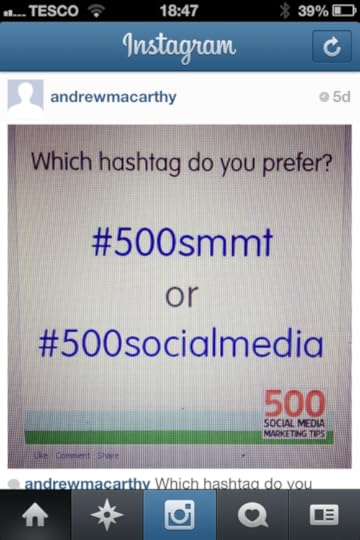
1. Open Instagram as normal and tap on the camera icon at the bottom of the screen.
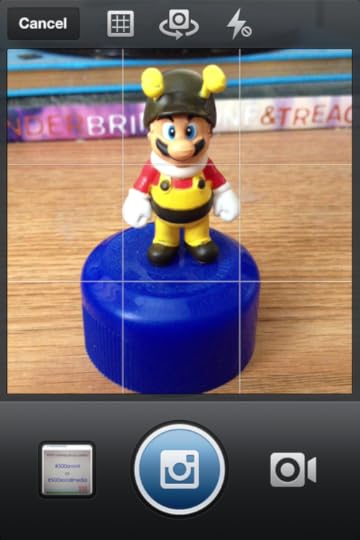
2. The app will default to taking a still image. To change to video recording, cick on the video camera icon.

3. To begin recording, press and hold your finger on the red video camera icon. To stop recording, lift your finger off. Every time you stop and start a new snippet of video recording, a break in the blue video bar is created to show it.
Instagram video clips have a maximum length of 15 seconds, and a minimum length of 3 seconds. And unlike with photos you cannot import videos into Instagram; they must be recorded from within the app.

4. If you are unhappy with the previous snippet of video that you shot, you can remove it by tapping the 'X' arrow. When the snippet of video you want to remove is highlighted in red on the video bar, click the trash can icon to confirm its deletion. You can only delete the previous clip, so be careful that each shot is as you want it before you record a subsequent snippet. When you're done recording, click Next.
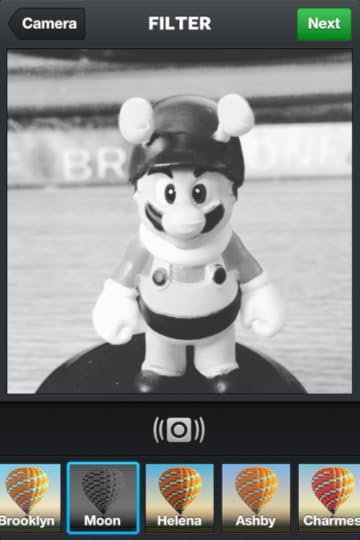
5. On the next screen, you can choose from over a dozen filters specific for video and preview how your video will look. When you tap a filter, your video will play automatically.
Cinema for InstagramSee the "shaky camera" icon below the video? That's Instagram's new Cinema mode, designed to eradicate the jittery quality of so many mobile videos. Tap it and the effect will be applied, smoothing out your unsteady camera work as best it can. Click Next when you're happy.
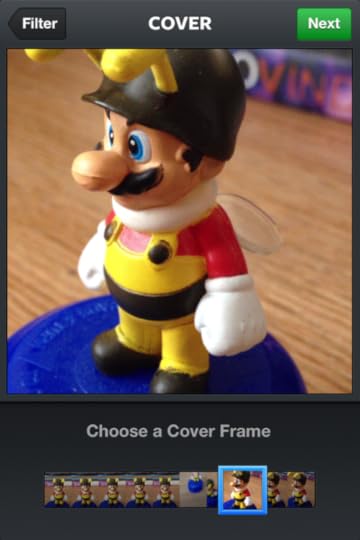
6. Now it's time to choose a cover frame for your video. Like YouTube's video thumbnails, a video cover is the snapshot that will represent your video in its best light in Instagram search and in your friend's feeds. Simply tap and slide your finger over the bar at the bottom to select the frame you like best, and then click Next to continue.
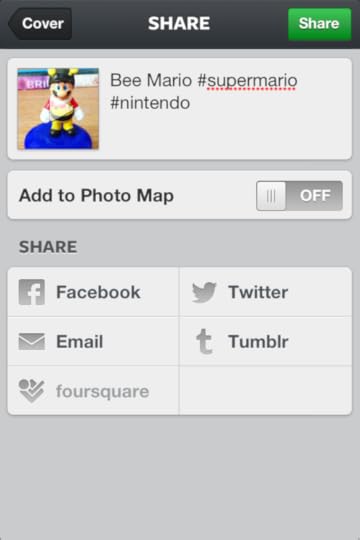
7. Last up, it's time to give your video a caption (with hashtags, of course) and choose your sharing options. Unlike with photos, you cannot tag people in videos.
To post your Instagram, hit Share. Instagram will process your video for a short while before it appears live on the app and on the web.
ABOUT THE AUTHOR
Andrew Macarthy is the author of the #1 Amazon Web Marketing Bestseller, 500 Social Media Marketing Tips, available for Kindle and in paperback.
Buy 500 Social Media Marketing Tips
Amazon US: http://www.amazon.com/dp/B007L50HE6
Amazon UK: http://www.amazon.co.uk/dp/B007L50HE6
Follow Me:
http://www.fa
cebook.com/500socialmediatips/
https://pinterest.com/500socialmedia/
http://www.twitter.com/500socialmedia
http://www.youtube.com/5
00socialmediatips

June 18, 2013
How to Use Hashtags on Facebook Pages for Business Marketing
Hashtags finally rolled out to Facebook
Facebook - after a long period of expectation from many quarters - has rolled out the use of hashtags in posts that appear on Pages and in the news feed. At the time of writing, hashtags will only be clickable by desktop users on the site, although Facebook hints strongly that this will extend to mobiles and ads sometime in the future.
How Hashtags work on Facebook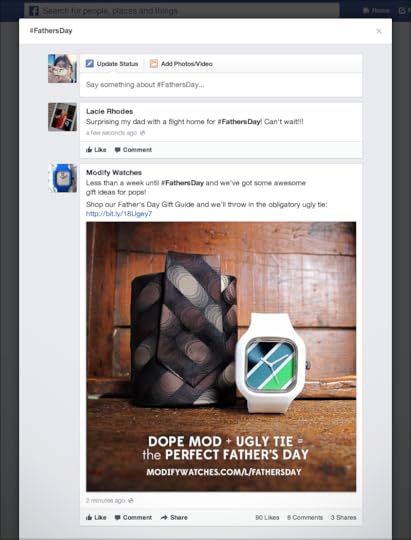
If you are familiar with Twitter, Google+, Instagram, or Pinterest, you'll know that hashtags are a method used to group similar types of content together, and can be created by typing a hash or pound symbol directly before a word while composing a status update on your Page, personal profile, or in of a comment, like this: "What do you love about your local #kohls?" or "It's Gap's summer sale, with up to 50% off! Come take a look... #targetsale" where "#kohls" and "#targetsale" are clickable.
On Facebook specifically, clicking a hashtag will open up a feed where you’ll see stories from the Pages and people who have posted with the same hashtag. People can use hashtags in Facebook search to find posts related to specific topics or interests. Billions of pieces of content are shared on Facebook every day - peaking in the 8-11pm primetime slot - so hashtags provide a huge opportunity for brands and marketers to participate in conversations in a meaningful, relevant and timely way.
Tips for Using hashtags for business on Facebook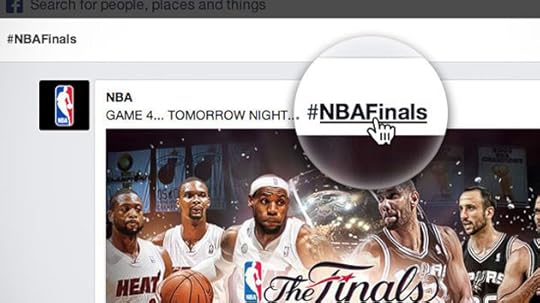
Use hashtags related to your brand or industry in your Facebook posts - either general ones, e.g. #beauty or ones you create that are specific to your business, e.g. #denverburgerbarEvery Facebook has its own unique URL, so think about driving traffic to that URL from other locations, e.g. your blog, other social networks, business cards, instore marketing materials, etc. to encourage conversation. Use a URL shortener like bit.ly to make the link small and memorable. Discover new Pages and partners by searching for hashtags in Facebook search, and search your own hashtags to monitor what people are saying about you and your brand, then join the conversation.
Note: For more advice about using hashtags as effectively as possible on any social network, including the recommending formatting and amount you should use, check out the tips on hashtags in the Twitter Tips chapter of my book, 500 Social Media Marketing Tips
ABOUT THE AUTHOR
Andrew Macarthy is the author of the #1 Amazon Web Marketing Bestseller, 500 Social Media Marketing Tips, available for Kindle and in paperback.
Buy 500 Social Media Marketing Tips
Amazon US: http://www.amazon.com/dp/B007L50HE6
Amazon UK: http://www.amazon.co.uk/dp/B007L50HE6
Follow Me:
http://www.fa
cebook.com/500socialmediatips/
https://pinterest.com/500socialmedia/
http://www.twitter.com/500socialmedia
http://www.youtube.com/5
00socialmediatips


