Lisa Bedford's Blog, page 108
March 31, 2015
Your SHTF Dental Plan: Supplies to stock up on, skills to learn

I didn’t get my first cavity until I was 27 years old. Honest. My teeth were in absolute perfect condition for almost 3 decades. I didn’t even need to wear braces. Survival dental health wasn’t even on my radar.
So, I took dental health for granted. I forgot to floss, at times drank too much soda, and sure enough, moving into my 30’s, cavities began popping up here and there and my dentist warned me about tooth decay and gum disease and their affect on my overall health.
Those same warnings are given to millions of people every year by earnest dentists and dental hygienists, but not everyone heeds them.
In a worst case scenario, visits to the dentist may become a luxury no longer available, or at least, not available to the majority of people. Even now there are millions of families who can no longer afford teeth cleanings, braces, and other expensive forms of dental care.
It makes sense, then, to learn as many alternative ways as possible to take good care of your teeth and gums and begin stocking up on the supplies you’ll need. In no way does this advice replace visits to the dentist. Please don’t use it as an excuse to avoid unpleasant dental work! Rather, I want to give you some ideas for taking extra good care of your teeth and gums in a worst case scenario and give you a list of supplies so you can begin stocking up for your own SHTF Dental Plan!
Toothpaste options for your survival dental health
It’s pretty easy to stock up on large amounts of toothpaste and toothbrushes using coupons. But if you’d like other options, here are a couple of recipes for homemade toothpaste and a tooth powder using ingredients that can easily be stocked up and stored long-term.
For these recipes, you’ll need Bentonite clay. I’ve been using the Earth’s Living brand, which originates in Death Valley. It’s a very fine powder that hasn’t been irradiated and contains calcium, magnesium, and other trace minerals. It can be stored indefinitely, which makes it a terrific product for stocking up! Just buying one jar of Bentonite clay every couple of months will give you a sizable stockpile pretty quickly.
You’ll also want to stock up on essential oils, such as peppermint, spearmint, or cinnamon, baking soda, and calcium powder. If you don’t want fluoride in your store-bought toothpaste or have other concerns with their ingredients, stock up instead on ingredients to make homemade toothpaste or tooth powder. These ingredients can last for years, if not indefinitely.
Want something even easier than this? Make a paste of baking soda and water, or hydrogen peroxide, for getting your teeth clean. Dentists warn that using baking soda over a long period of time can weaken tooth enamel, so you may want to use this with other toothpaste recipes.
My favorite alternative toothbrush
Several years ago I spent some time with Marjorie Wildcraft. She had just finished filming a DVD with herbal expert, Doug Simons, called “Alternatives to Dentists.” During our conversation, she urged me to try brushing my teeth with a willow twig.
“You’ll love the way your teeth feel and it actually makes them stronger,” she claimed.
So, on a family camping trip through Colorado, I tracked down a willow tree, snipped a small twig, and began using it to clean my teeth. I loved being able to scrub each tooth, front and back and into the gum line. My teeth felt very smooth and clean, similar to that after-the-dentist feeling. The twig doesn’t have to be from a willow tree, by the way.
If you’re skeptical of the willow twig toothbrush and don’t have a toothbrush handy, soft strips of cloth can be used to rub against teeth to get them clean.
Dentists and dental hygienists alike strongly recommend using the softest toothbrushes, not a firm toothbrush, which can damage teeth and gums. If you’re stocking up on toothbrushes, always get the softest brushes possible.
Homemade mouthwash for another alternative dental product
If, after using homemade toothpaste and a willow twig, you still feel the need for even fresher teeth, you can easily mix up a batch of homemade mouthwash. Again, great news! These recipes call for ingredients that are shelf stable and can be stored for very long periods of time. To maximize that shelf life, always store in the darkest, coolest, and driest spot in the house.
Hydrogen Peroxide Mouthwash
Easy peasy. Combine equal parts 3% hydrogen peroxide and water, just enough for one swish. Hydrogen peroxide doesn’t have an indefinite shelf life and it should be stored in a very cool location, even in the refrigerator. However, this is a very easy item to store and as a mouthwash, it couldn’t get any easier than this.
Minty Essential Oil Mouthwash
Combine together a cup of water and 10-20 drops of an essential oil. Do test the flavor of the mouthwash at 10 drops before adding any more, since some oils are much stronger tasting than others. Cinnamon essential oil is a good choice because it may have antifungal and antibacterial properties. Peppermint and spearmint are also very good choices for dental health.
Salt Water Mouthwash
Not glamorous, and if anything, a salt water mouthwash is boring, but the fact is, this continues to be recommended by dentists worldwide for its effectiveness as a natural disinfectant. It can help heal sores as well. Combine 1 teaspoon salt with 1 cup water. As effective as this is, short term, it shouldn’t be used long term because the acidity could soften tooth enamel over time. Use this option only occasionally.
Colloidal silver
While colloidal silver isn’t a mouthwash exactly, its proponents claim that it is effective against periodontal disease. Whether you stock up on store-bought or make your own homemade colloidal silver, this is another option for maintaining good dental health in a worst case scenario.
Dental floss, or “It’s time for your biannual flossing lecture.”
When my trusty assistant, Bethanne, informed me that she had a dentist appointment, she ended our conversation with, “It’s time for my biannual flossing lecture.”
Her comment made me laugh because I, too, was familiar with that spiel. I’m proud to say that I floss my teeth much more often now than I used to, but probably not as often as my hygienist would like. The main purpose of using floss is to break the contact point between teeth and loosen debris. Brushing alone doesn’t usually accomplish this.
The really great news for your SHTF Dental Plan is that just about anything can be used in place of dental floss, although before resorting to this list, use coupons and grocery store sales to stock up on plenty of floss.
Per a few dental hygienists that I know, you can use these in place of floss:
Thread
Embroidery floss (use a single strand at a time)
Fishing line
Pipe cleaners — This comes in varying sizes. Get the smaller sizes to use in between your teeth.
Oil pulling for cleaner, healthier teeth and gums
When I first heard of oil pulling, I thought it was related to an obscure beauty regimen. I was a little shocked to learn that, instead, it involved swishing oil around in one’s mouth for 15-20 minutes at a time. Incredibly, I learned that this ancient process has received approval by many in the medical and dental communities.
One dentist, Jessica T. Emery of Sugar Fix Dental Loft in Chicago explains,
“Most microorganisms inhabiting the mouth consist of a single cell,” Emery says. “Cells are covered with a lipid, or fatty, membrane, which is the cell’s skin. When these cells come into contact with oil, a fat, they naturally adhere to each other.”
Oil pulling, therefore, can help fight gingivitis, plaque, bad breath, tooth decay, and some regular users swear it has made their teeth whiter.
The process is very simple:
1. Put a tablespoon of oil in your mouth.
2. Swish it around, gently, for 15-20 minutes. If you’re just getting started with this process, start with 5 minutes, and then gradually increase the time. I usually put the oil in my mouth and swish while I’m getting ready for the day.
3. Spit out the oil and brush your teeth.
As part of your SHTF Dental Plan, stock up on coconut oil, which already has anti-bacterial properties. Olive oil and sunflower oil are also good choices. One oil that I tried, designed specifically for oil pulling, is Pulling Oil by GuruNanda. I really liked the fact that it remained in a liquid form, unlike my coconut oil that is usually solid due to the cooler temps of my home and Texas climate. The GuruNanda brand contains a mixture of sesame, sunflower, coconut, and peppermint oils and was very easy to use.
Finally, an herb that may strengthen and repair teeth enamel
Once tooth enamel has been damaged or has decayed, the general consensus is that the damage is done and cannot be repaired. Many in the alternative health fields, however, beg to differ. One of those is Doug Simon, co-creator of the Alternatives to Dentists DVD I mentioned earlier. When I interviewed Doug a few years back, he claimed that is effective against tooth decay and can actually heal cavities.
Why might horsetail be effective against tooth decay? Horsetail is a natural source of silica and may be able to re-mineralize teeth.
I have a couple of small cavities and began taking horsetail capsules daily about 4 months ago. My next dentist appointment isn’t until early summer, but I’m hoping that these small cavities have, indeed, healed. In the past, I’ve also taken 1 teaspoon of dried, ground horsetail in a smoothie or mixed with a glass of water, and Doug recommended 1/2 teaspoon of horsetail in a glass of water for my children when they were ages 9 and 11.
A word of warning about horsetail and any other herbal remedy. In a true SHTF scenario, you might not be able to, “Ask your medical practitioner for advice before consuming…” The time to do your research into herbal remedies and other alternative medicines is right now while doctors, medical facilities, and mountains of information are available. Additionally, learn a bit about herbalism yourself.
Mountain Rose Herbs has a list of schools with herbalist training. I’ve interviewed Sam Coffman of The Human Path several times, and he offers multiple classes, both on site and online.
Some common sense tips for healthy teeth and gums
You may be sitting in the middle of a worst case scenario and have all your supplies ready to maintain strong and healthy teeth and gums. Those supplies, along with your best intentions for survival dental health, won’t get you very far if you include a large amount of sugar in your diet and spend the day sipping sweet tea or juice! Just because the world has gone sideways doesn’t mean all the normal, boring advice you’ve heard for many years is suddenly ineffective.
In fact, if there was ever a time to adhere to best dental practices, that time is now.
DO avoid foods with refined sugars.
DO floss your teeth daily and brush them twice.
DON’T neglect your teeth and gums, especially in a worst case scenario. Their care should become a priority.
DO insist that every member of the family brush, floss, and otherwise take good care of their teeth.
DO rinse mouth with water (rinse, swish, and spit) after each meal.
Printable resource for you
Click here to get a free, printable resource with all the SHTF Dental Plan supplies listed in this article.
Helpful resources mentioned in this article
3 mm chenille pipe cleaners
“Alternatives to Dentists” DVD
Coconut oil (I use Tropical Traditions organic.)
Colloidal silver
GuruNanda Pulling Oil (combines 4 different types of oils)
The Herbal Medicine-Maker’s Handbook by James Green
High quality Earth’s Living Bentonite Clay (different size containers)
Horsetail capsules
Organic horsetail powder, 1 lb. bag
Rosemary Gladstar’s Medicinal Herbs by Rosemary Gladstar
The post Your SHTF Dental Plan: Supplies to stock up on, skills to learn by The Survival Mom appeared first on The Survival Mom. Be sure to check it out!


March 30, 2015
31 Delicious Apple Recipes for Every Day of the Month!
 One of the most popular blog posts here on The Survival Mom blog is, 27 Things You Can Do With Apples. What’s funny, is that I just threw that list together on a whim, based on my own search for delicious apple recipes. Apparently, I’m not the only apple-lover out there!
I love fresh apples and buy them almost weekly for snacking, but I also have plenty of dehydrated and freeze dried apples for baking and other recipes. They’re handy, year round, and when I’m in an apple-baking mood, they’re ready to go. Here are 2 delicious recipes from Augason Farms using dehydrated apple slices. Try the cobbler in a Dutch oven!!
Augason Farms Apple Cobbler
Crust
1/2 cup butter
1 cup Quick Rolled Oats
2 cups flour
1/3 cup white granulated sugar
1 cup finely chopped walnuts
Apple Filling
4 cups Augason Farms Dehydrated Apple Slices
5-6 cups Augason Farms Apple Delight Drink Mix
3/4 cup white granulated sugar
1/2 cup raisins
1-2 teaspoons cinnamon
1/4 teaspoon orange rind – optional
Vanilla Sauce
2 cups Augason Farms Country Fresh Milk, prepared
3/4 cup white granulated sugar
2 teaspoons vanilla
2 egg yolks
2 tablespoons cornstarch
To make the crust, melt butter in a medium-sized saucepan. Add sugar and stir. Mix in oats. Add flour and walnuts, mix together until crumbly. Put half of crumbs in bottom of a 9×13” baking pan.
Place apple slices and juice in a large saucepan and bring to a low boil, simmer 15 minutes. Add sugar, raisins, cinnamon, and orange rind. Spoon onto crust, sprinkle with remaining crumbs. Bake at 350˚F for 40 minutes.
Get the vanilla sauce ready by placing milk, sugar, and vanilla in a medium saucepan. Heat on low – do not boil. Add cornstarch and stir well. Beat egg yolks, take about 1/2 cup hot milk mixture and add egg yolks, mix well. Add to pan, stirring constantly until sauce thickens slightly. Pour over cobbler and bake 20 minutes longer. Serve warm or at room temperature, with or without ice cream.
Apple Cinnamon Upside Down Cake
Cake
3 1/4 cups apple cinnamon muffin mix
2/3 cup cold water
1/2 cup butter or margarine
1/2 cup pecans
1/4 cup whipping cream
1 cup Augason Farms Brown Sugar
2 cups Augason Farms Dehydrated Apple Slices – rehydrated
Topping
2/3 cup white frosting
1/2 cup whipped topping (thawed)
Caramel topping if desired
In 1-quart heavy sauce pan, cook butter, whipping cream and brown sugar over low heat, stirring occasionally, just until butter melts. Pour into a 9×13” pan. Sprinkle with pecans; top with softened apple slices (fresh apple slices may be used).
In large bowl, beat muffin mix on low speed until moistened, then on medium speed 2 minutes. Carefully spoon batter over apple mixture.
Bake at 350˚F for 40 to 45 minutes or until toothpick inserted in center comes out clean. Cool in pan 10 minutes. Loosen sides of cake from pan. Place serving platter upside down on pan; carefully turn platter and pan over and let rest about 1 minute before removing pan. In a small bowl, mix frosting and whipped topping. Frost cake and drizzle with caramel topping.
How to substitute dehydrated apples for fresh
If your recipe calls for fresh apples, you can plan on substituting 1 pound of dehydrated apples for 4 pounds of fresh or figure that the dehydrated version will be about 25-30% of the fresh. Keep in mind that when measuring out the dehydrated fruit, it packs a lot more loosely in a measuring cup, so either use a “heaping” measurement or pack the dried fruit into the measuring cup to get a more accurate amount for your recipe.
The dried fruit will need to be reconstituted in water before adding to the recipe. In a small bowl, place your dried fruit and twice the measurement of warm water. Example: 1 cup of dried apples to 2 cups warm water.
Allow the fruit to absorb the water for about 20 minutes. Before adding to the recipe, drain the fruit well.
Here are 29 more delicious apple recipes for you to try! One for every day of the month!
You’ll find all these, and a lot more, on my Desserts Pinterest board!
100-Calorie Apple-Oatmeal Muffins
Amish Apple Pie Fries
Apple Dump Cake
Apple Fritter Pull-Apart Bread
Apple Fritters
Apple Pie Bars
Apple Pie Cake
Apple Pie Moonshine
Apple Pie Taquitos
Apple Strudel
The Best Dutch Apple Pie
Bubble-Up Apple Pie
Caramel Apple Dip
Caramel Apple Dump Cake
Caramel Apple Jell-o Shots
Caramel Apple Mini Cheesecakes
Carrot Apple Bread
Cheesecake Stuffed Baked Apples
Cream Cheese Apple Coffee Cake
Easy Apple Butter
Easy Apple Dumplings
Fresh Apple Cinnamon Scones
German Apple Pancake
Glazed Apple Cake
Homemade Apple Chips
Irish Apple Cake with Custard Sauce
New England Apple Cider Cake
Skillet Apple Biscuits
Skinny Apple Tart
BONUS! Slow Cooker Apple Cinnamon Steel-Cut Oatmeal
The post 31 Delicious Apple Recipes for Every Day of the Month! by The Survival Mom appeared first on The Survival Mom. Be sure to check it out!
March 26, 2015
Is a Storage Unit a Viable Survival Cache?
 For quite some time now, caches have been rather popular amongst the prepper/survivalist crowd. Most commonly, this involves filling a large diameter PVC tube with gear and supplies, sealing it up, then burying it. Often, these caches are hidden somewhere along a bug out route, thus allowing for resupply during the journey.
One major problem, though, is finding an appropriate location for the cache. To avoid any legal issues, it should always be placed on land you own or that is publicly owned. Several times I’ve heard a recommendation of using cemeteries for cache locations. This is an extremely bad idea. Think about it. Just as you get the hole dug, along comes Officer Friendly, who is very curious to hear your reasoning for being in the cemetery in the middle of the night with a shovel.
Another issue with this type of DIY cache is inaccessibility for rotation and inspection. Remember, these PVC tubes are generally meant to be buried. The idea is to fill them with supplies that will last quite a long time. You’re not going to be digging these up every six months to rotate out canned goods and such. Once buried, it is there to stay until you truly need it. That’s usually how caches work. Because of this, most people don’t store their “good” stuff in a cache.
Might a storage unit survival cache be a viable option?
One option worth considering is to utilize a storage unit as a cache location. Once, these self-storage facilities were most often found in the seedier parts of the city but today they are everywhere. Here in the upper Midwest, I find them out in the sticks as well as in urban areas. There are usually different size units available, from the size of a closet to as big as a two-car garage. For our survival cache purposes, the smallest will usually suffice.
Quite often you’ll find these facilities are climate controlled, so you don’t have to worry about your stuff freezing or going bad in the heat of summer. While there is a cost involved, these units could serve a dual purpose. Not only could you stash some emergency gear there, you could clean out some of the clutter in your home and store it here as well. You know, the stuff you don’t really need on hand but you don’t want to throw away – kids memorabilia, household goods you’re saving for your child’s first apartment, old clothes that you keep promising to yourself you’re going to fit into again.
I’d be willing to bet that if you examined your bug out routes, you’ll find at least one or two of these storage unit businesses along the way. Look for one that is at the outskirts of town or, even better, out in the country. If you can find one that is family owned and operated, you might have a bit of room to haggle on the price, especially if you’re willing and able to pay for several months in advance.
The bonus with one of these storage units is you might be able to use it as an impromptu shelter as you’re bugging out. Not just a resupply point but a place where you can hunker down for a day to catch your breath and plan your next move.
While I would fully expect these places to get looted eventually, should the disaster go on long enough, I think it would take weeks before that starts to happen. There are just too many more appealing targets, such as supermarkets, drug stores, big box retailers, gas stations, convenience stores, and restaurants. My guess is that people will flock to those before making it to the storage businesses.
As with anything else related to survival and disaster planning, you need to take into account your own individual circumstances and determine whether this option would work for you. If it does, great! If not, just keep researching the different options available until you find the perfect fit.
Helpful resources
Survival Mom Mini-Guide: “Declutter and Organize Your Living Space“
“Storage Survival and Preparedness”
The post Is a Storage Unit a Viable Survival Cache? by Jim Cobb appeared first on The Survival Mom. Be sure to check it out!


Three Thrifty Ways To Increase Your Yarn Stash
 Within the community of knitters and crocheters, “yarn stash,” or sometimes just “stash,” is an actual term. It refers to the amount of yarn one has hiding in the closet or under the bed, likely in an attempt to keep one’s significant other from knowing exactly how much yarn you have (or from knowing how much you spent on yarn that month). If you knit, crochet, or do anything that that requires the use of yarn, then you probably have a yarn stash.
Knitting is perceived by many to be a thrifty sort of craft. Instead of dropping $50 on a designer sweater, you can just make one yourself, right? Sadly, this is not an accurate picture of what knitting entails. Many non-knitters may not realize that the yarn is often the most expensive part of any knitting project.
When I bring this up with people who are new to knitting, they almost always cite a particular brand of cheap acrylic yarn that can always be found at big box stores. That brand is inexpensive, but it is also like sandpaper next to your skin. There is a place for this variety of acrylic yarn, but that place is not in hand-knit clothing. Why would you want to put all the effort into knitting something beautiful if you can’t actually stand to wear it? Life is too short to knit with cheap yarn.
Don’t despair! It is possible to source higher-quality materials without having to pay exorbitant amounts of money, although sometimes doing so requires even more creativity than the actual knitting.
Thrifty yarn stash ideas
Method One: Recycling old sweaters

This yarn will have a second life as something I would actually want to wear.
How to do it: Take a trip down to your local second-hand store and browse their sweater section. Look for something kind of bulky. We’re going to be unravelling it later, so make sure the yarn out of which it is made is a weight that you are comfortable knitting. It is possible in this way to obtain really gorgeous yarn, yarn that is made out of cashmere, angora, and merino wool. Stuff that would ordinarily set you back about $50 per skein.
When you get your sweater home, you need to unpick the seams. It is important to unpick, and not just cut the pieces apart. When that is done, find the bind-off edge. This is the “end” of the knitting. Most sweaters are knitted starting with the bottom and going up, so the bind-off edge is likely to be near the top of the sleeves or at the shoulders. Once you get the end unbound, it’s just a matter of unraveling the sweater and rolling the yarn up into a ball. It can be knit as is, or, if you’d prefer to block it to get the tell-tale curls out of the yarn, this is the time to do it.
While that sounds pretty simple, depending on the quality of the sweater, it might be horribly difficult to unpick. However, if the yarn is nice enough, it will be worth it. Once at a local clothing exchange I obtained a really ugly, but free, Ralph Lauren short-sleeved turtleneck sweater. The yarn was a blend of cashmere, angora, and merino. Heaven! But, it being a Ralph Lauren, it took me ages to unpick that darn thing. The mittens I intend to knit with the reclaimed yarn will be worth every second I spent wrestling with the parent sweater.
Method Two: The Yard Sale, and its Maiden Aunt, the Estate Sale
I will come clean and say that I have had some success with this method, but not a lot. If you go to a yard sale with the express purpose of looking for yarn, prepare to be disappointed. It’s hard to tell ahead of time whether the person having the yard sale is a former yarn addict. But if you already browse a lot of yard sales anyway, definitely keep your eye out for yarn. (Or, more old sweaters). There will always be someone who is getting rid of her stuff and doesn’t fully appreciate the value of what she has. That includes not only yarn or sweaters made from high quality material but also other knitting and crochet supplies.
Once I came away from a yard sale with a whole grocery sack of nice acrylic/wool blend yarn which cost me $3.75 altogether. The same yarn would have cost upwards of $40 at the store. However, I have been to many other yard sales without having quite so much luck.
Method Three: Make Your Own Yarn
I’m talking about spinning. This could be its own 50-part series of blog posts, and indeed, there is even a quarterly magazine devoted solely to this topic. I include it here under false pretenses, because people don’t take up spinning to save money. But what embodies a provident, thrifty, self-sufficient mentality better than the ability to make a cute hat out of fluff?
I won’t turn your hair white with horror stories about the high cost of a decent spinning wheel (spoiler: it’s high.), but if you are interested in dabbling in the art of spinning but don’t want to spend your life savings, you can get a simple drop spindle and some spinning fiber for less than $20. Many online retailers cater to handspinners. Etsy is also a good place to look.
Spinning yarn instead of buying it allows you full control over every aspect of the finished product. I like to begin with a specific project in mind, and I can choose the fiber content, the weight, and the color. If I am working from a fleece, I can even choose the wool from a specific sheep, because every fleece has its own unique characteristics.
I taught a Survival Mom webinar on the subject of spinning, “Learn How to Spin Your Own Yarn.” Watch that for a good, overall introduction to both spindle and spinning wheel yarn spinning.
If you have ever thought of taking up spinning, I encourage you go for it. You might find that you’ll never go back to purchasing mere yarn.
Have any of you ever found yarn in unlikely places? What do you find is the most frustrating thing about finding good yarn?
Helpful resources:
Ravelry.com for a super-helpful forum, patterns, and a lot more.
The Woolery for spinning supplies of all kinds.
The post Three Thrifty Ways To Increase Your Yarn Stash by Beth Buck appeared first on The Survival Mom. Be sure to check it out!

March 25, 2015
How to Can Green Beans in a Pressure Canner
 Green beans are a great candidate for a first-time gardener and for someone new to canning. They grow well in lots of different gardening zones. They grow and produce rather quickly, and the more you pick them, the more they produce.
They are easy to can and will provide your family with a green vegetable throughout the winter, making them a great choice for food storage. We love green beans in our house. It’s the only green vegetable my whole family likes, so we eat them about twice a week, with lots of bacon grease. You can find our favorite recipe .
Equipment Required
Clean canning jars with lids and rings
Pressure canner with gauge and rack (you cannot use a water bath canner)
Canning funnel
Ladle or large spoon
Jar lifter
Magnetic lid wand
Non-metallic small spatula (I use a chopstick)
Large pot to heat jars
Large pot to heat beans
Colander
To Can Green Beans
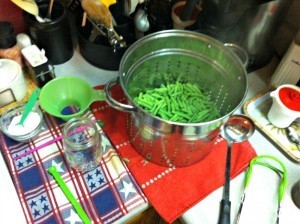
Break ends off beans and then break into smaller, 1 – 1 ½ inch, pieces. I normally break beans at night while watching TV and can them the next day. It takes awhile to get them all broken. Rinse well in several changes of water.
 Gather your equipment and wash with hot soapy water.
Place clean jars in a large pot and cover with water. Bring to a simmer. Place the lids in a smaller pot and bring to a simmer as well. Do not boil the lids.
Add water to your pressure canner to the appropriate level (check the directions for your specific canner model) and turn the burner to medium. You want to warm the water to about 180 degrees, not boil it. Tip: Add a splash of vinegar to your water to help keep your jars free from residue while processing.
Bring another large pot of water to a boil and add the broken, washed green beans. Boil for 5 minutes and remove beans from cooking liquid. Reserve cooking liquid to cover beans in jars.
 Working one jar at a time, use your jar lifter to remove the jar from simmering water, dumping the water back into the pot.
Put the canning funnel on your jar and fill hot jar with hot beans, to 1 inch of headspace.
Add canning salt (optional), ½ tsp for pints, 1 tsp for quarts.
Ladle the hot cooking liquid over the beans, leaving 1-inch headspace.
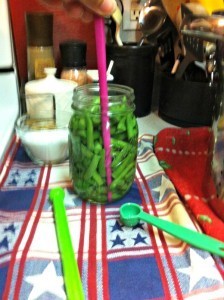 Slide your spatula – or any non-metallic utensil – between the green beans and jar; press back gently on the beans to release any trapped air bubbles. Do this a couple times, then add more cooking liquid if necessary to the correct headspace.
Into the pressure canner!
It’s now time to place each jar in your pressure canner. Your canner probably came with instructions for the amount of pressure and time for your particular location, but if you’re still unsure, refer to the Blue Ball Book Guide to Preserving or your local extension office.
Once your green beans have been processed, remove bands and check to make sure your jars have sealed by pressing down in the center of the lid. If the lid pops back up, your jar hasn’t sealed correctly and should be refrigerated and consumed within one week. Store your canned goods in a cool, dry, dark place.
Now it’s time to enjoy the fruits of your labor! You can enjoy the flavor of green beans all year long!
Want more information about canning? I recommend these resources:
Simply Canning by Sharon Peterson
Ball Complete Book of Home Preserving by Judy Kingry
The Canning Diva website
Simply Canning website
Canning Granny website
All-American Pressure Canner (Ultra heavy duty, more expensive)
DVD: At Home Canning for Beginners and Beyond
Ball Blue Book Guide to Preserving
Ball Complete Book of Home Preserving
Ball Canning Utensil Set
Presto Pressure Canner (budget-friendly)
The post How to Can Green Beans in a Pressure Canner by Courtney Wollam appeared first on The Survival Mom. Be sure to check it out!

Why You Should Include Junk Food in Your Food Storage Pantry
 Disasters are stressful, no question about it. The power goes out, maybe the water and heat along with it. The kids are whining and probably at least a little scared. You and your spouse are edgy, perhaps getting more than a little short with each other. You’re all stuck at home, either because the roads are terrible or because there’s just no place to go, no stores or restaurants are open.
This is just the time to break into your junk food storage to bring a bit of comfort.
Comfort food is just that, food that provides psychological, if not physical, comfort. It does so not because it is chock full of nutritious goodness but, in many cases at least, because it doesn’t do a damn thing for you but taste good. Much of the time, comfort foods are what we call “junk food”.
Junk food is a guilty pleasure. We know we shouldn’t eat very much of it. We know that fruits and vegetables are a far better, healthier choice for snacking. But, y’know what? Sometimes a body just needs salt, grease, and chocolate!
Now, I’m not suggesting you abandon your food storage plans and get rid of the home canned veggies, the soups, the stews, and all that good stuff. What I am suggesting, though, is you add to your storage at least a few selections from the shady side of the food pyramid.
Popcorn is a great choice, but go for the bagged, already popped, corn. Keep in mind that in an emergency, your ability to cook, whether with a microwave or stove top, may be limited. While yes, it is great fun to make popcorn the old fashioned way, with oil and a pan over a flame, that just might not be feasible depending upon the nature of the crisis. Some movie theaters sell gigantic bags of pre-popped popcorn already salted and ready to eat.
Chips are usually a hit as well. Many varieties will stay fresh a while as long as the bags are sealed. My own preference is for nacho cheese Doritos. Seriously, Doritos ranks rather high on my list of things I’m going to miss should the world come crashing down around my ears.
Of course, candy and chocolate deserve to be included on our list of comfort foods. Ideally, you already have a nice cool, dark spot in your house where you’re storing much of your disaster supplies. A few chocolate bars, maybe a few boxes of theater candy, and an assortment of other sugary goodies would be a great addition to the home emergency kit.
Most junk food isn’t packaged in a way that is intended for long-term food storage. Cookies, candy, crackers, and even smaller chips like Fritos will need to be repackaged if you plan on having junk food storage.
Now, I will readily admit that I’m a fiend for soda and I drink far more of it than is healthy for anyone. That said, I do actually drink less now than I did when I was younger, so that’s a step in the right direction. If you have a similar fixation on carbonated beverages, you might consider packing a few cans or bottles in with the other comfort foods. Keep in mind, though, that most of these fizzy drinks don’t have a very long shelf life. A bottle of soda I bought today at a convenience store is showing an expiration date about ten weeks from now. I can tell you from experience that, unlike the expiration dates you’ll find on other food products, the ones listed on Mountain Dew bottles are pretty factual. I tried a bottle once that was about two months out of date. That, um, did not go well.
I strongly suggest that any food items be stored in some sort of pest-proof container. A small Rubbermaid tote would work well, as would any other container made from heavy plastic that has a tight lid. It wouldn’t be very comforting to open up your box of goodies only to find that mice have made a nice home out of the now-empty chip bags. Keep in mind the enemies of food storage, rotate your junk food (that probably won’t be a problem!), and keep a stash for those stressful post-crisis days.
The post Why You Should Include Junk Food in Your Food Storage Pantry by Jim Cobb appeared first on The Survival Mom. Be sure to check it out!

March 24, 2015
Learn to Crochet With Free, Online Resources
 When I was pregnant with my son more than 16 years ago, I wanted to learn to knit. He was my first baby and I figured all good moms should know how to make baby blankets and booties. I tried to teach myself… what a disaster! I prayed my lack of knitting skills didn’t predict my mothering ability. A few years later I asked my husband’s grandmother – likely one of the greatest knitters of all time – to teach me. Though she could whip up the most gorgeous blankets and sweaters you’ve ever seen, she had no success in transferring that skill to me. A few years later when I recounted these past failures to a friend, she suggested I try to crochet instead and told me about some YouTube tutorials that might help.
That’s how I discovered Michael “Mikey” Sellick. Mikey is from Canada and, at that time, created crochet tutorial videos as his time allowed. Now, crocheting, running “The Crochet Crowd” website and Facebook page, and being the spokesman for several brands is his full time job. If you want to learn to crochet, learning online with Mikey is absolutely the best way to do it. With his guidance and some practice, I was able to go from brand new beginner to intermediate-advanced crocheter in a matter of months.
Why Learning Online is Great
1. Lessons can happen at any time of day on your schedule. I watched tutorials in the middle of the night on a regular basis!
2. Learn at your own pace! Live classes can be fun, but moving at group pace can be frustrating if the class moves faster or slower than you need.
3. Your teacher will never get frustrated with you! You can rewind as many times as you like to see the same instruction over and over again if you need.
Why Crochet Skills Should Be in Your Prepper “Arsenal”
1. The ability to make socks, hats, gloves, scarves, clothes, blankets, and more is not only beneficial for your own family, but it’s a barterable skill as well.
2. It’s a skill that can be easily taught to children.
3. You can save money buy making your own items instead of buying, or giving hand made items as gifts to others. The money saved can be used for stocking up on other preparedness items.
4. You can earn money selling your creations. Money earned can be used to reduce your family debt or used to become more prepared.
5. Knowing how to crochet will allow you to create new items of clothing or other items when times are tough. When your child outgrows a sweater it can be carefully unraveled and remade into hats, scarves, dish towels, etc. Did your husband stain his sweater? Turn it into a sweater, booties and hat for a baby!
Join The Crochet Crowd
There’s no better way to learn to crochet than this 24 video tutorial series that will walk you from the very beginning of crochet into completed projects in no time! (Actually, after Lesson #9 you will be able to complete 90% of the patterns out there!) And best of all… It is 100% free!
The Crochet Crowd website is chock full of patterns, inspiration, and guidance for the beginner to expert crocheter.
If you want to enter the social media world of crochet, join the Facebook Crowd! With more than HALF A MILLION followers, there is plenty of help and inspiration for the crochet community.
Another great online resource is Ravelry. It’s a forum, a source of patterns and products, and so much more. There is also a Ravelry phone app, Stash2Go.
Some of My Favorite Patterns
Never Ending Granny Square Afghan
http://www.ravelry.com/patterns/library/never-ending-granny
Arches Cowl by Mary Beth Temple
http://www.ravelry.com/patterns/library/arches-cowl
Any dishrag! (They are easy, useful, and make great gifts and 100% cotton yarn is very affordable.)
http://www.allfreecrochet.com/Dishcloths/15-Free-Crochet-Dishcloth-Patterns
Broomstick Scarf
https://www.youtube.com/watch?v=_oIOR-uuyEU
The post Learn to Crochet With Free, Online Resources by Amy Van Riper appeared first on The Survival Mom. Be sure to check it out!

March 23, 2015
Learn to Tap Your Maple Trees
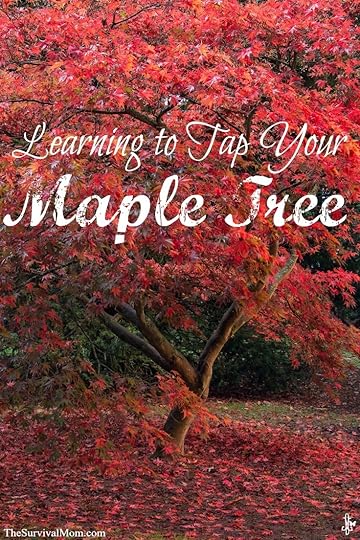 Just before spring arrives, the snow melts, ice disappears, and we start getting multiple days over 32 degrees. You know what that means??? At my house that means it’s Maple Syrup Time, and I’m so glad I learned how to tap maple trees!
After living on my current property about 18 years, I realized I had untapped resources right out in my own yard. Really. My maple trees. I could have kicked myself, thinking, “Why didn’t I ever take advantage of this”? So, last year, my friend, Bill, showed me how to do this.
One of the first things you should know is which trees are maples, because in the winter, they all look alike. I happen to have one Red Maple, and the rest are Silver Maples. The Sugar Maple is the most desired because of its higher sugar content. Its’ sap ranges from about 3-4% sugar. The Red Maple is about 2-3%, and my Silver Maples are only a measly 1-2%.
If you are lucky enough to have a Sugar Maple, it takes roughly 40 gallons of sap to make one gallon of syrup. So, I need a whole lot more sap from my Red Maple and Silver Maples to do the job. My first year (last year) I made 19 pints, and 2 quarts. I like the pint size jars, so I could give those as gifts. I used my Mason jars, so I didn’t have to order fancy bottles online.
Get your supplies together
Being the good friend he is, Bill supplied me with everything I needed, except the trees!
Several 6 gallon plastic buckets with lids
3/8″ plastic tubing in 2-3 foot lengths
Several “spiles” or taps
Cheesecloth or a fine plastic mesh “sleeve” to filter sap before boiling
Wire for attaching buckets to the trees
3/8″ drill bit-for drilling a hole in the lid to thread the tubing in
7/16 or 1/2″ drill bit for drilling the tree
Blue tape to mark your drill bit. Wrap the tape at the 2 1/2″ mark on the drill bit, and don’t drill past that mark.
Rechargeable drill. I only had an electric drill, and as I found out later, it would have been a much better idea to get a drill with rechargeable batteries. I had to connect several extension cords across my lawn to get my drill to the trees.
Getting started
I had to measure the diameter of the trees because they need to be a minimum of 12″, but I only drilled trees 14″ in diameter to be on the safe side. For every increase of 2″ in diameter, you can add another tap. The maximum is 4 taps per tree because you don’t want to stress the tree too much. The tree needs some of that sap to produce buds and leaves.
Tap the SOUTH side of the tree. That is where the sap is going to start to flow first because that side of the tree warms up first. Do not reuse the same tap next year. Move the next one over 4-6 inches up, down, or sideways. A good spot to tap is just above a large root or just below a large branch. In my area, tapping can begin in latter February to mid March and could go on for a month! Daytime temperatures need to be above freezing for about 5 days, and night time temperatures need to be below freezing for the same time period.
I began this operation in the garage. I snapped the lids on the buckets, and using the 3/8″ bit , drilled a hole in the lid. I threaded the tubing a few inches into the bucket. Then I added the spile to the other end of the tubing. I brought out the buckets for one tree at a time. My husband helped me wire the handles of the buckets around the trees. I just put the buckets directly on the ground, but sometimes it was uneven, so we put stones or shims underneath to level it off. Once everything was “staged”, it was time to drill.
Drilling and inserting the spiles
Bill drilled the first tap, the rest was up to me. (As a nurse, the saying goes: See one, do one, teach one.)
He angled the drill slightly upward, so that the sap would flow downwards. The bark was drilled away first, followed by lighter colored wood shavings. He stopped drilling when the tape mark on the bit reached the tree. We cleaned out the shavings and immediately, the sap began to drip.
Then, he gently tapped in the spile, just enough to be snug, but not too tight because you can split the wood. I could see the sap going down the tubing, and hear each drip hitting the empty bottom of the bucket. Then, it was my turn. Bill had his own trees to tap. I ended up tapping 6 or 7 trees, but each had multiple taps in them. I actually had more maples available, but not enough supplies to do any more, so I doubled my capacity this year.
Collecting and cooking the sap
Once the trees were all tapped, every other day, I emptied the buckets and placed empty ones in their place. I couldn’t let them fill all the way to the top, because the sap would slosh out of the hole in the bucket. These buckets can be very heavy when full, especially when you are walking across snow and any icy driveway. If my husband hadn’t helped lug these buckets up from the yard, I don’t think I could have done it. I would have needed smaller buckets that didn’t hold as much sap. That would have meant daily trips in and out of the cold.
Once the sap was indoors, we poured it from the bucket into another bucket lined with the plastic mesh. It caught any little bits of bark or debris that I didn’t want in my cooking pots. Then the sap went into the large stainless pots on the stove.
Every day for 3 weeks I boiled sap in my kitchen in my giant cooking pots, which, thankfully, I had found at a garage sale. The pots are 15 inches in diameter and 14 inches tall. Most people do this cooking process outdoors, but I wasn’t set up for that. However, I have a 6-burner cooktop with a heavy duty hood to vent all that humidity.
It took an hour for the sap to boil down one inch in the pot. When it was boiled down part way, I added more sap. Since I was adding sap as it boiled down, I can’t really say how much sap it took to make a pint or quart. I just did this day in and day out for about 3 weeks, about 12-13 hours a day. If I had to go to work, the sap had to go back in the garage and be kept cold, otherwise it loses its sugar content.
Once it starts reducing , you can see the sap change from clear, to pale beige, honey colored, amber, & then deep amber. I eventually went to smaller cooking pots as it reduced, and at that point I could use a candy thermometer. The condensed syrup should reach 180 degrees before final storing in jars or other containers.
Resources mentioned in this article
Backyard Sugarin: A complete how-to guide by Rink Mann
Making Maple Syrup by Noel Perrin
“Maple Syrup 101″
Maple syrup spile taps
“When is the best time for sugarmakers to tap their maple treess?”
The post Learn to Tap Your Maple Trees by Mary Blandford appeared first on The Survival Mom. Be sure to check it out!
My secret ingredient: Buttermilk!
 About two years ago, I decided to stop buying pre-made baking mixes and start making pancakes, muffins, waffles and biscuits from scratch. They tasted great, and I was glad I made the switch from store-bought to homemade.
And then I discovered what buttermilk could do.
I had some leftover buttermilk in my refrigerator from making Irish soda bread for St. Patrick’s Day and decided to use it to make pancakes. One bite was all it took to convince the whole family that we would only make buttermilk pancakes from then on. Out of curiosity, I added buttermilk to homemade muffins and biscuits, and the verdict was the same – delicious!
Buttermilk adds flavor
Buttermilk really is like a secret ingredient when it comes to making baked goods from scratch. It is also key if you make your own Ranch dressing. There is a significant taste difference to the dressing if you use buttermilk instead of milk. It just tastes better and fresher and adds a deeper, richer flavor than milk in many recipes.
What is buttermilk?
What is buttermilk? It is the slightly sour liquid left over after butter has been churned. If you haven’t tried to make your own butter, there is a very simple process, and you can see for yourself what buttermilk is. This is a fun project for kids, as a way to teach them where their food comes from and how it’s made.
The good news is that you don’t have to make homemade butter first. You can just buy it at the store. But, even better news is that you don’t even have to go buy it – you can make it with two ingredients you probably already have in your refrigerator. If you have milk and lemons or lemon juice on hand, you can make your own buttermilk and it will only take you a few extra minutes.
How to make buttermilk
Start with 1 cup of milk and add 1 Tablespoon of lemon juice. Let the mixture sit for 5 to 10 minutes. Voila! Buttermilk!
If you don’t have lemon juice, you can also use 1 Tablespoon of white vinegar, and you can substitute heavy cream for the milk. Each variation has its own taste, but they all add more flavor than milk alone.
You can freeze it!
If you buy a whole quart of buttermilk, it’s unlikely you’ll use it all up in just a few days. Stored in the fridge, it will remain fresh for at least 2 weeks after the printed date on the carton.
You can also freeze it if you have any left over. If you want small portions, freeze it in an ice cube tray and then transfer the frozen buttermilk cubes to a container once they’re frozen. To thaw, put the frozen cubes in the refrigerator or heat it on a low setting. The buttermilk will need to be whisked or blended once it’s thawed, as the freezing process may separate the solids and whey.
Start using buttermilk in old and new recipes!
Read over your recipes and see if there might already be a variation for using this secret ingredient. If there isn’t one and you want to substitute buttermilk for milk, add ½ teaspoon baking soda per cup for baked goods. Try it just once and you’ll never go back.
Here are a few new recipes for you to try.
Honey Whole Wheat Buttermilk Sandwich Bread
Blackberry buttermilk ice cream
The post My secret ingredient: Buttermilk! by Sarah Anne Carter appeared first on The Survival Mom. Be sure to check it out!
March 20, 2015
8 Reasons to Support Local Farmers

Think about all the items you put in your cart at the supermarket or megastore. Do you feel you paid a fair price for that product? If you have questions about a particular item, would you know who you could speak to for answers? Where did those potatoes come from, how old is that carton of eggs, and who is being supported by your hard earned dollars?
Chances are, it would be difficult, if not impossible, to get satisfactory answers to those questions. However, when you buy from local farmers, it’s a completely different story.
The following are some reasons why you should support your local farmers whenever possible.
Price
With a big family that includes three teenage girls and two preteen boys, keeping everyone fed at my house is certainly a challenge. Just to make a taco dinner usually requires 4 pounds of ground beef to fill everyone’s belly. With the average price of $3.99/lb for ground chuck, that is $15.96 for just one element of one meal! Yikes! One taco dinner could easily total over $35!
Obviously the grocery bill could quickly get out of hand if the average meal totaled that high every night. Fortunately for my family, we are able to purchase a half beef every spring for an average cost which totals way under what can be found at the grocery store. Even better, this low cost not only applies to ground beef but to all wonderful things beef, such as steaks, ribs and roasts. Honestly, without the benefits of buying from local farmers, my family would be eating a lot of Ramen noodles and five-dollar pizzas.
Get answers from local farmers
Of course there are many other benefits of buying from local farmers other than just price. Buying local means I can talk to the farmers about the feed and medicines used for the market beef we purchase. I can visit the facilities where the animal was raised if I wish and speak to the actual human being who was in charge of raising the animal that feeds my family. I can find out if any chemicals were sprayed on my vegetables and if so, which ones. I can ask them if they genetically modify anything I am purchasing or even ask for recipe suggestions! Farmers love to discuss their products and they should; they invest hours, days and months to get their products perfect for purchase!
Personal experience
In the summer, I can buy produce directly from roadside markets. Nothing makes you feel more like a domestic goddess than selecting fruits and vegetables so fresh you have to shake the dirt off. I enjoy rummaging through the baskets and bins of product and selecting ears of fresh sweet corn or the perfect melon without another hurried patron with shopping cart road rage pressuring me along.
Tradition
From these stands, I can see the fields of crops being handpicked and brought by the bushel full to the small, family-owned stands. Many times, these farms allow you to pick your own produce for an even cheaper rate. The family farmers are usually on site and although extremely busy, they’re usually willing to answer questions about the fruits of their labor. By purchasing from local farmers, you help keep tradition alive. Many farmers today are third or fourth generation or even greater! This is a great reason to support local farmers whenever possible.
Memories
The two farms located on each side of the small town where I live have been there as long as I can remember. I remember going to the north farm with my grandma and picking up bushels of cabbages and tomatoes. She would buy one bushel of tomatoes just for the family to eat that afternoon and a couple others for canning and stewing. I remember sitting under the shade of the big pear tree in the front yard and grabbing tomatoes straight from the bushel and eating them like apples with my grandma, aunts, uncles and cousins. I remember my grandma rounding up the entire family to go pick strawberries from the south side farm and spending the rest of the day eating them right out the little green quart containers.
It is important to take our children along to local farms and let them see how the food gets to the table. With the convenience of super stores and online shopping, little ones today might not grasp the concept of farming that may be a common mindset to older generations. Ask a farmer to talk to them or even show them around. A farm can be an exciting place with tractors, bright and beautiful colors of the produce and all the hustle and bustle of the workers planting, sorting or harvesting.
Local economic support
It is a rewarding feeling knowing the money you spend in your community stays in your community. Fresh produce at prices often lower than what is found in grocery stores is certainly a perk of shopping local farms, but supporting these local farms is important for the livelihood of our community as well. Both of the farms in our town have been in operation for as long as I can remember and are an important pillar of our local economy. Each farm provides summer employment to many local teens and adults needing a seasonal job or supplemental income.
There’s nothing like the taste
Food grown in its ideal season and picked at the perfect point of ripeness tastes much better than product mass-produced in a greenhouse in the off season. Of course this is a matter of opinion, but I am confident that the majority will agree. The one item I can tell a vast difference in taste between prime season and off season is tomatoes. I love fresh tomatoes off the vine. This most likely stems from that warm, fuzzy memory I mentioned earlier. Image those warm, juicy and flavorful tomatoes sliced for that charbroiled cheeseburger, diced and mixed with fresh basil and extra virgin olive oil for that perfect bruschetta topping or cut in chunks for that garden fresh salad; nothing beats tomatoes at their prime. Personally, I think tomatoes grown in the off season with manufactured growing processes generally result in a waxy, flavorless tomato-like substitute.
Nutrition
Buying produce from local farmers’ markets and roadside stands generally means you are getting an amazingly fresh product. Often times, produce is picked in the early morning and delivered straight to the stand for sale that same day. When produce is picked at the peak of freshness, the nutritional value is also at its peak. Each day that produce is off the vine, tree, plant, etc., the nutritional value, as well as taste, decreases.
Think about the produce in big markets and find out where it comes from. I know I have seen tomatoes from Mexico and bananas from Brazil. I am sure much of our produce comes from afar. Even with today’s sophisticated logistic methods, the produce you buy at chain stores and larger markets could be days old by the time you put it in your cart. Some industrialized farms harvest produce like tomatoes while they are still green so they do not bruise or spoil in transit and then distribution partners use gas to ripen them for market! Not only is the product picked before it reaches its nutritional peak, but the product itself is not up to par when compared with from field to table product.
Small farms across the land are what helped build our nation. Hard working folks who work 365 days a year growing and raising food the old-fashioned and natural way are finding it hard to keep their farms running when the consumer dollar is thrown toward mega-marts and superstores. Why not support local farmers when you can take advantage of the better taste, price, nutritional value and other intangible gifts of those delicious fruits, veggies, meat and eggs!
As the commercial says, “On the eighth day, God created the farmer.”
Some farming operation details and suggestions provided by:
Worthington, C. (2015, February 24). Worthington Produce. (B. S. Dibert, Interviewer)
The post 8 Reasons to Support Local Farmers by Brandy Schau Dibert appeared first on The Survival Mom. Be sure to check it out!