Lisa Bedford's Blog, page 105
May 1, 2015
Should You Consider a Tetanus Shot as Part of Your SHTF Preparedness?
 Have you ever thought of certain vaccines as a way to prepare for an uncertain future? One reader asked if a tetanus shot might be a good choice for such a scenario. I asked Dr. Joe Alton, known to many as Dr. Bones, and here is some information he provided, originally posted on his website DoomandBloom.net
Most of us have dutifully gone to get a Tetanus shot when we stepped on a rusty nail, but few have any real concept of what Tetanus is and why it is dangerous. The role of the survival medic is to maintain the well-being of their family or group in a collapse. This can be best assured with an understanding of what infectious disease is. Knowledge of risks, prevention. And treatment will be the armor plate in your medical defense.
What is Tetanus?
Tetanus (from the Greek word tetanos, meaning tight) is an infection caused by the bacteria Clostridium Tetani. The bacteria produces spores (inactive bacteria-to-be) that primarily live in the soil or the feces of animals. These spores are capable of living for years and are resistant to extremes in temperature.
Tetanus is relatively rare in the United States, with about 50 reported cases a year. Worldwide, however, there are more than 500,000 cases a year. Most are seen in developing countries in Africa and Asia that have poor immunization programs. Citizens of developed countries may be thrown into third world status in the aftermath of a mega-catastrophe. Therefore, we can expect many more cases that could be your responsibility as medic to evaluate and treat.
What Causes Tetanus?
Most tetanus infections occur when a person has experienced a break in the skin. The skin is the most important barrier to infection, and any chink in the armor leaves a person open to infection. The most common cause is some type of puncture wound, such as an insect or animal bite, a splinter, or even that rusty nail. This is because the bacteria doesn’t like Oxygen, and deep, narrow wounds give less access to it. Any injury that compromises the skin, however, is eligible; burns, crush injuries, and lacerations can also be entryways for Tetanus bacteria.
When a wound becomes contaminated with Tetanus spores, the spore becomes activated as a full-fledged bacterium and reproduces rapidly. Damage to the victim comes as a result of a strong toxin excreted by the organism known as Tetanospasmin. This toxin specifically targets nerves that serve muscle tissue.
Tetanospasmin binds to motor nerves, causing “misfires” that lead to involuntary contraction of the affected areas. This neural damage could be localized or can affect the entire body. You would possibly see the classical symptom of “Lockjaw”, where the jaw muscle is taut; any muscle group, however, is susceptible to the contractions if affected by the toxin. This includes the respiratory musculature, which can inhibit normal breathing and become life-threatening.
Symptoms and treatment of Tetanus
The most severe cases seem to occur at extremes of age, with newborns and those over 65 most likely to succumb to the disease. Death rates from generalized Tetanus hover around 25-50%, higher in newborns.
You will be on the lookout for the following early symptoms:
Sore muscles (especially near the site of injury)
Weakness
Irritability
Difficulty swallowing
Lockjaw (also called “Trismus”; facial muscles are often the first affected)
Initial symptoms may not present themselves for 1- 2 weeks. As the disease progresses, you may see:
Progressively worsening muscle spasms (may start locally and become generalized over time)
Involuntary arching of the back (sometimes so strong that bones may break or dislocations may occur!)
Fever
Respiratory distress
High blood pressure
Irregular heartbeats
The first thing that the survival medic should understand is that, although an infectious disease, Tetanus is not contagious. You can feel confident treating a Tetanus victim safely, as long as you wear gloves and observe standard clean technique. Begin by washing your hands and putting on your gloves. Then, wash the wound thoroughly with soap and water, using an irrigation syringe with 3% hydrogen peroxide to repeatedly flush out any debris. This will, hopefully, limit growth of the bacteria and, as a result, decrease toxin production.
You will want to administer antibiotics to kill off the rest of the Tetanus bacteria in the system. Metronidazole (Fish-Zole or Flagyl) 500mg 4 times a day or Doxycycline (Bird-Biotic) 100 mg twice a day are among some of the drugs known to be effective. This study compares the use of Metronidazole versus Penicillin G.
Remember, the earlier you begin antibiotic therapy, the less toxin will be produced. IV rehydration, if you have the ability to administer it, is also helpful. The patient will be more comfortable in an environment with dim lights and reduced noise.
Late stage Tetanus is difficult to treat without modern technology. Ventilators, Tetanus Antitoxin, and muscle relaxants/sedatives such as Valium are used to treat severe cases but will be unlikely to be available to you in a long term survival situation. For this reason, it is extraordinarily important for the survival medic to watch anyone who has sustained a wound for the early symptoms listed above.
As medic, you must obtain a detailed medical history from anyone that you might be responsible for in times of trouble. This includes immunization histories where possible. Has the injured individual been immunized against Tetanus? Most people born in the U.S. will have gone through a series of immunizations against Diptheria, Tetanus, and Whooping Cough early in their childhood. If not, encourage them to get up to date with their immunizations against this dangerous disease as soon as possible. Booster injections are usually given every 10 years (or if 5 years have passed in a person with a fresh wound, sometimes along with Tetanus Immunoglobulin antitoxin).
Tetanus vaccine is not without its risks, but severe complications such as seizures or brain damage occur is less than one in a million cases. Milder side effects such as fatigue, fever, nausea and vomiting, headache, and inflammation in the injection site are more common.
Given the life-threatening nature of the disease, this is one vaccine that you should encourage your people to receive, regardless of your feelings about vaccines in general. If not caught early, there may be little you can do to treat your patient without all the bells and whistles of modern medicine.

Joe and Amy Alton are the authors of the #1 Amazon Bestseller “The Survival Medicine Handbook“. See their articles in Backwoods Home, Survival Quarterly, and other great magazines. For over 600 articles on medical preparedness, go to their website at www.doomandbloom.net.
The opinions voiced by Joe Alton, M.D., and Amy Alton, A.R.N.P., aka Dr. Bones and Nurse Amy, are their own and are not meant to take the place of seeking medical help from your healthcare provider.
The post Should You Consider a Tetanus Shot as Part of Your SHTF Preparedness? by The Survival Mom appeared first on The Survival Mom. Be sure to check it out!


April 29, 2015
Normalcy Bias: It’s All in Your Head
 Human bodies don’t normally fly through the air, and I didn’t expect a real life lesson in normalcy bias, but last year that’s exactly what I witnessed while waiting for a red light to turn green.
I was sitting in my Tahoe at an intersection not far from home when I heard the loud rumble of a truck engine. I couldn’t quite believe my eyes when a green pick-up veered around me, raced into the intersection and plowed into a white sedan. While my mind was registering this violent accident, I saw a scarecrow fly through the air. I took a few deep breaths, tried to remember the details of how the accident happened and waited to give my eyewitness account to the police who appeared on the scene within minutes.
My mind re-played the scene, always with that scarecrow flying out of the truck and into the adjacent field. It wasn’t until a half hour later, when I saw EMTs trying to revive a young man did I realize that what I had actually seen was his body at the moment it was ejected from the front seat. Even now, when I remember the accident, I don’t see a human. Instead, the image of a scarecrow is imprinted in my brain because humans don’t fly through the air!
Normalcy Bias defined
This is an example of Normalcy Bias, a survival mechanism our brains are equipped with that can place us in grave danger when we’re faced with something traumatic. Simply put, it causes our brains to insist that all is okay. Everything will return to normal. For most of us who have never faced true peril, Normalcy Bias tells us that nothing bad will ever happen. “This is America!,” some people insist when I tell them about the possibility of a deeper Depression or hyperinflation. Incredibly, the most obvious warning signs are ignored.
This explains why so many Jews continued living in Germany, even after they were forced to wear identifying yellow stars and discriminatory laws were passed against Jewish people. Life had been so good for so long that, surely, things would get better. Jews who could have easily afforded to move out of the country stayed, and perished.
Oncoming hurricanes and similar disasters elicit similar reactions. We simply expect life to go on as it always has, and our brains are wired to accept that and nothing else. A driver attempts to cross a flooded river. Thousands of New Orleans residents faced with Hurricane Katrina refuse to leave the city, and city officials don’t even make an attempt to evacuate them. One survivor from 9/11 tells of going blind as she saw dozens of human bodies hitting the ground outside the Twin Towers. Our brains can accommodate billions of bits of information each day, but apparently, there are some things too terrible to comprehend.
Those of us who believe in preparedness, whether beginners or veterans, know the frustration of trying to convince loved ones that the future is not at all secure, but the Normalcy Bias isn’t something we can debate. It’s not based on logic or rational thought. It’s the brain, doing its best to help its human owner deal with terrifying events and possibilities, as well as with escalating situations whose logical, final outcomes can’t be accepted.
Here’s another example from the TSA
If you had told me that American citizens would meekly line up to walk through powerful x-ray machines that would strip them bare before low-level TSA employees, I would have said, “Never!” If you had told me that, as an option, they would stand with arms raised while their crotches were groped and would allow their pre-schoolers to be similarly molested, I would have laughed. Yet, that is exactly what happened, and not only do Americans meekly put up with this but they defend it.
The water is heating up and most of the frogs are oblivious.
“Life will get back to normal.”
“There’s nothing wrong with this!”
Each week brings another repressive ruling, and still, most American citizens insist there is no reason for concern. New legislators will make everything right again. This is just temporary.
Whatever comes next will, again, be excused and accepted. Darn that Normalcy Bias!
Eleven Tips for Banishing Normalcy Bias
Here’s the bottom line. As Survival Moms, we don’t have the luxury of looking at a catastrophe before us and saying over and over again, “I can’t believe this is happening. I can’t believe this.” If our kids can’t rely on us when all hell is breaking loose, then who can they depend on? Law enforcement and first responders are quickly overwhelmed, and your family is hardly at the top of their list. Normalcy Bias can place those we love most in grave danger.
I think a conversation about overcoming Normalcy Bias will be important and valuable in the Comment section following this article, but here are eleven ways we can begin to condition our minds to accept the unacceptable.
Be willing to go through the painful process of acknowledging the uncertainty of our future. I compare it with the Kubler-Ross grief process:
Denial (Normalcy Bias rearing its ugly head!),
Anger — at politicians, circumstances, family members),
Bargaining (“If I can just buy enough precious metals, we’ll be okay.”),
Depression (Our children aren’t facing the same, sunny future that we did, America is changing before our eyes)
Acceptance (I can’t do everything, but I can be proactive and do what I can.)
Face facts, don’t hide from them. Confront financial difficulties, acknowledge your limits. Only when you face reality can you prepare for it.
Trust your instincts. Headlines change on a dime. Take in a much bigger picture than a single, optimistic headline or the words of a politician seeking re-election. Trust your own five senses and what your gut is telling you.
Start where you are with what you have.
Fight feeling overwhelmed with lists and organization. Focus on what you will do today, this week, this month. Little by little it will all come together.
Reach out to others. Start your own Survival Mom meet-up group. Spend time on preparedness and survival forums, as long as they don’t feed your fears. If there was ever a time for people to come together, this is it.
It’s better to over-prepare than to be under-prepared. Normalcy Bias assures us that everything will be okay. A few extra bottles of water is all you really need. Those ten cans of tuna will be plenty! Go ahead and stock up more than you think you’ll need to. Make plans for scenarios that may be a bit far out but still within the realm of possibility.
Make plans. Have an evacuation plan, and prepare for it. Have a hunker-down plan, and prepare for it. Decide ahead of time how you will face the most likely crises and communicate those plans with those who need-to-know. Write down your plans! Panic and stress have a way of erasing the logical parts of our brains!
Be ready to act quickly and decisively. It’s better to take action too soon than too late.
Take time off. Forget you ever heard of the word, ‘preparedness’. Go shopping and blow a few bucks on something completely unnecessary. Go out to lunch. Play with the kids. Spend an hour on the phone gossiping with your best friend. Give yourself a mental break! Your family needs you to be strong. You need to take care of yourself, body, soul, and spirit.
Get physically fit. There is a huge connection between physical and mental fitness. Start with some sort of exercise and start today.
Normalcy Bias, although deeply ingrained in the human brain, doesn’t have to control our futures or place us in harm’s way. The first step in being prepared is becoming educated. Knowing about this bias, what it can do, and how it can be controlled will help you become a Survival Mom in every sense of the word!

This article was slightly updated on April 28, 2015.
The post Normalcy Bias: It’s All in Your Head by The Survival Mom appeared first on The Survival Mom. Be sure to check it out!


Summer On a Plate: 13 Light, Delicious Recipes

A morning smoothie greets me just about every day. I love combining fruit, almond milk, nuts, cottage cheese (yep! It blends up great!), and other flavors. I never quite know what my final result will be.
I want to share with you a great recipe from Augason Farms that incorporates their freeze dried whole raspberries. For a flavor switch-up, you could use blueberries, strawberries, or blackberries. When they’re freeze-dried, you can use them throughout the year and once the container is opened, they’ll stay fresh for months.
Take a look at just how simple this recipe is:
Raspberry Smoothie
1 cup raspberry yogurt
1 1/2 cups of Augason Farms Country Fresh Milk, prepared
1 1/2 cups Augason Farms Freeze Dried Whole Raspberries
2 Tablespoons Augason Farms Honey Powder, prepared
Blend for 2-3 minutes or until smooth.
You can omit the honey and use the sweetener of your choice, such as stevia.
Another delicious summer recipe is this one for a macaroni salad with a twist or two:
Aloha Macaroni Salad
2 cups Augason Farms Elbow Macaroni
1/2 32-ounce jar salad dressing (Miracle Whip) or mayonnaise
1 20-ounce can pineapple tidbits
1/2 lb. sharp cheddar cheese, grated
3/4 cup raisins
1 medium carrot
Peel and dice carrot and steam until crisp-tender. Boil macaroni in boiling water 7-10 minutes. Mix all ingredients in a large mixing bowl. Chill for 2 hours or overnight prior to serving.
Now, to get your summer off to a light and delicious start here are 11 more recipes I tracked down that looked too good to keep to myself!
5-Minute Healthy Strawberry Frozen Yogurt
Berry Avocado Quinoa and Kale Salad
2 Ingredient Pineapple Whip
Green Melon Summer Smoothie
Greek Vegetable Sandwich with Feta Spread
Frozen Yogurt-Covered Blueberry Kabobs
Broccoli Sunflower Seed Slaw with Poppyseed Dressing
Watermelon Lime Sorbet Slices
Cottage Berry Whip
Avocado Coconut Popsicles
Strawberry Cucumber Salad
Meyer Lemon Bars
Parmesan Garlic Zucchini Chips

The post Summer On a Plate: 13 Light, Delicious Recipes by The Survival Mom appeared first on The Survival Mom. Be sure to check it out!


April 28, 2015
18 Brilliant Home Organization Tips: The Struggle Continues!

Yes, it sounds like the title of a National Geographic documentary, delving into the plight of some animal near extinction. Is your dream of home organization near extinction? I understand. There are days you may want to be on the endangered list, hoping that someone will save you.
Not only is an orderly home important for your peace of mind, but it’s also a vital component to being prepared for all types of emergencies.
Many years ago our family went from three kids to six kids in a one year. Our children were all between the ages of 5 to 11 years old. I knew I was in trouble if I did not find a way to establish order, and fast. What followed were years of trials and many errors. Our kids are now older and the struggle still continues. My mom recently moved in and our college age children will be in and out for the next few years. I have learned that life will always be changing and my home will, too.
Download this FREE Survival Mom mini-guide, “Organizing and Reducing What You Own.”
Staying organized is a constant work in process. Hang in there, don’t put your lucidity at risk. You really can get your home and life off of the endangered list. Below are some tips that have saved my sanity and helped me conquer much of the chaos that is always a challenge to home organization.
Simple rotating menus
Buy and store what your family eats. You will save money, time and peace of mind knowing you have what you need on hand. have 12-15 dinner recipes your family enjoys and rotate through them. A great app is “OurGroceries”. The free version is all you need. Set up does not take long. This app lets me know exactly what to buy from which store and helps me remember the odd things I often forget to purchase, but need.
Everything in the home, has a home of its own
School backpacks, keys, batteries, Legos, half-dressed Barbies and bread twisty ties — each one must have a place where it is kept. If you are always losing an item, it is because it does not have a home. Give items a permanent home or get rid of it.
Have multiples of things in rooms
Pencil jars, tablets of paper, scissors, waste baskets, flash lights, water and blankets are in almost every room. We have flash lights stashed in almost every drawer in the house. We all have our own bath towels, but keep many additional towels in other rooms. One cannot predict vomit from a kid or a cat.
Use the inside of cupboards!
Post grocery lists, baking conversion charts, emergency contacts, evacuation info, CPR instructions and anything else you may need. It keeps your information handy, but out of sight.
Each room has its own cleaning supplies
The kitchen and each bathroom should have a bucket of cleaners that are specific to that room, along with a small broom and dust pan. You won’t waste time hauling a bucket of supplies from room to room and the moment you see something that needs to be cleaned, you can handle it right then and there.
Label everything that you can!
Seeing on a label what is in containers /boxes will remind you what you have and what you may need. It saves time looking for items in closets and in the garage. Own many Sharpie type markers.
Inside every room is a list of how to clean it
These lists are kept inside a cupboard or closet. It will remind kids, big and small, what needs to be done for that room to pass inspection.
Place a BIG calendar where everyone can reach it
If it is not on the calendar, it does not happen. Have a pencil attached to a string nearby, so each member of the family can add appointments, activities, due dates, etc. Using a pencil will make changes easy to make. At the beginning of the week, ask family members to fill in their activities. Family members are responsible for putting all family info into their own calendars/phones. Two family calendar phone apps that help with this are Cozi and Hub Family Organizer. Google Calendar can be synced to multiple phones and desktops.
Assign a “laundry” day and a “deep clean your room” day to everyone
Hopefully when they deep clean they will find all of the clothes that have been stuffed under the bed and in corners and wash them! Have them choose a day when work or school responsibilities are usually light. Post the laundry schedule on the inside of a cupboard along with any other instructions concerning laundry.
When age appropriate, have your kids help with the laundry
At the age of 8 years old, our kids could do most of their laundry without too much assistance. For older kids, hang a squirt bottle of stain remover (we do homemade) over the edge of the hamper. This will encourage family members to squirt the stain before they toss the dirty clothes in the hamper.
Have chargers in every room for tablets, phones or any other items
This will prevent WW III at the computer desk and you will have extra cords available when one breaks. Try to keep items regularly charged in case of an emergency.
Replace items as you use them and buy an additional one
This method works best on things you don’t use often. Examples-Propane/charcoal, matches, batteries, candles, duct tape, permanent markers, OTC meds, rope, fluids for car, etc.… This principle also work well on canned food items and staples. Let you budget dictate what you replace. Do what you can afford to do at the time.
Fill up the car with gas when you hit ½ a tank
Murphy’s Law can and will dictate that your car will run out of gas on the busiest day of the month.
We spring clean and fall clean for better home organization
Spring cleaning allows you to get out all of the summer gear, toys and clothes. In spring, go through the “hand me down” clothes box, replace broken gear, clean out the garage and put away the winter stuff. Clean and prep your home for the upcoming warm weather. Clean screens, replace home filters, etc… In the fall, pull out all the winter clothes and replace what is old or outgrown, prep for back to school and the holidays. Clean and prep your home for the winter and upcoming holidays. Remember to toss what you don’t need.
Go through 72 hour kits in spring and fall
Like the above suggestion, you can prepare your emergency kits with proper clothes for the season. Check to make sure flashlights and other items are working and in good condition. Replace the food too! Use the food you have been storing for 6 months for kids lunches or snacks. Check expiration dates on medical items in kits.
Have a cleaning schedule
You may not always be able to follow it, but a cleaning schedule will help you maintain some feeling of control in your day to day life and also when an emergency occurs. I have always struggled with this one! Children need to feel a sense of pride and responsibility for their home. Begin early and teach them how to care for their belongings and home. There have been days in our home when dinner wasn’t served until chores were done!
Make more copies of your home and car keys than you need
Leave some with a trusted neighbor or friend. You will thank me for this one day!
Have a “beginning of the day” and an “end of day” routine
Whether you go for a walk with your family, eat dinner at a specific time, say night time prayers together, feed the fish or watch a favorite show; routine makes us feel good. We create habits that make our days and nights run smoother. We also create rituals that bring us closer to those we love and reminds us to start and end the day on a positive note.
Remember, the struggle will continue! There will be times when life will not go as planned and that is okay! As time goes by, you will develop your own tricks of the trade that will guarantee your families sanity and survival. Do what works for you and your family and get off the endangered list!

The post 18 Brilliant Home Organization Tips: The Struggle Continues! by Erin Foster appeared first on The Survival Mom. Be sure to check it out!


April 25, 2015
Campfire Cooking: A Skill to Practice Now!
 I’d be willing to bet that most of you reading this have at least made s’mores, perhaps even heated up a hot dog or two, around a campfire. Fun stuff, no doubt about it. But, there’s a whole lot more involved if you need to make an actual meal over an open flame.
One of the first things that goes away in a disaster is usually electricity. If you have an electric stove top, you won’t be using it for much of anything. Same goes for your microwave oven. Patio grills are great, as are camp stoves, provided you remembered to stock up on fuel.
In the last few years, patio fire pits have become all the rage. Whether it is a brick lined hole in the ground or a metal standalone model, these work quite well for cooking. In fact, if you have a grill, you can often use the grate from it when cooking over your patio fire pit. Just lay the grate over the pit and away you go. Of course, it depends upon the size of the grate and the fire pit, but more often than not, you’ll be able to make it work.
Campfire cooking skills improve with practice
Cooking over an open flame is as much art as it is science. If you haven’t done it much at all, I highly recommend you practice it from time to time. One common mistake is to try cooking directly over roaring flames. For most things, you’re far better off cooking over glowing coals. You won’t scorch the food and the temperature will be much more stable.
It is a relatively straightforward process to heat up a can of soup or stew, of course. Just dump the contents into a pot and place it over the fire. Keep in mind, though, that the standard cookware in most homes is ill-suited for open fire cooking. Plastic handles can melt and thin aluminum can warp. What you might want to do is invest in either camp cookware or a few cast iron pots and pans. I prefer the latter but will admit they are heavy and kind of pricey.
Try expanding your horizons, too, and go beyond simply heating up canned food. For example, if you have a box of “just add water” biscuit or muffin mix, you can make them without needing a working oven. One way is to use orange peels as muffin cups. Cut an orange in half and use a spoon to scoop out the insides, leaving you with two nifty orange peel cups. Prepare the mix according to the directions and pour it into the peel cups, to about a half inch from the top. Cover them with aluminum foil, poke a few holes in the foil, then set them on a grate above the fire. As the dough bakes, a little bit will squeeze up through the holes in the foil. When that stuff looks done, stick a toothpick down into the muffin. If it comes out clean, they’re done.
Another method is to make a stiff dough using biscuit mix, then loop it around a clean and shaved stick. Hold the stick over the fire and turn it from time to time to cook the dough evenly. Try a Dutch oven cobbler for an amazing campfire dessert.
Take the time now to play around with campfire cooking. Try out different recipes and techniques, learn what works best for you. While a meal of fire-warmed hot dogs and s’mores might not be the worst thing in the world, you probably won’t want to eat it repeatedly.
The post Campfire Cooking: A Skill to Practice Now! by Jim Cobb appeared first on The Survival Mom. Be sure to check it out!


April 24, 2015
Are You Getting the Most Out of Your Prepping Supplies?
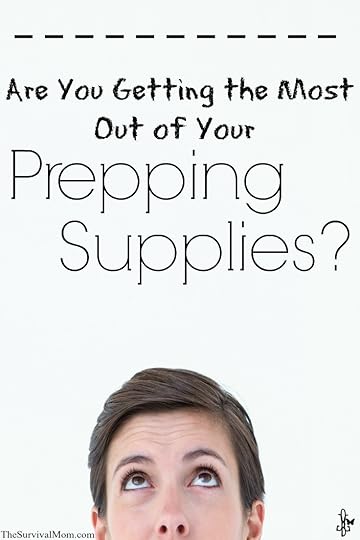 You’ve heard it a million times, “Why spend money on prepping stuff you’ll never use?” Poor excuse! I use LOTS of the supplies initially purchased, “Just in case we’re out of power”, or “Just in case there’s a huge emergency.”
Here’s how I have put my supplies for preppers to use in my everyday life
Preps to help with food storage and off-grid cooking
Root Cellar
Ours happens to be a large closet in the basement with two concrete walls where it stays around 60˚ all year. It’s perfect for food storage, especially seed potatoes. You can build a root cellar following many of the different plans online.
I love baking but hate a sweltering kitchen in the middle of summer. Thank you, Sun Oven, for no-sweat brownies in August!
Originally, I replaced the nonstick variety of cookware because I wanted to be able to cook over an open fire or on the grill in a grid-down scenario. Clean-up is so easy with cast iron, and we get extra iron in our diet rather than flecks of nonstick “stuff.” I can’t imagine cooking with anything else!
Solar-Powered freezer
Confession: this actually belongs to our preparedness buddies until our budget allows us to build our own. BUT, their small upright freezer runs on solar panels. When the power goes down, their meat investment stays frozen.
Fermenting Practices
I’m not sure yet when I’ll be comfortable canning garden goodies over an open fire, so a couple of summers ago I tried fermenting cucumber dill pickles like grandma used to do. A couple of buckets, some vinegar and spice (plus a strong stomach for skimming smelly scum off the top), and you’re set to preserve without electricity. I used this recipe, but scan the net to see what spices make your mouth water.
Staying clean with supplies for preppers
Whether it’s a Midwest ice storm, overloaded circuits in the summer, or a tornado that hits the wrong transformer, it’s nice to be able to still flush the toilet and wash our hands. And brush our teeth. We used EZ Water Well Hand Pumps and did the installation ourselves, but plenty of companies on the web will install for you.
Clothesline/Hand washer
Okay, I’ve only tried the hand powered washer on camping trips, but I use the clothesline all summer long to avoid heating up the house and to save on electricity bills. There’s nothing quite like the smell of sheets dried on the line!
Smart products for prepping and for every day
I don’t sew very well, so while I’m learning, this heat-activated tape is a quick solution. I don’t think it’s durable enough to make entire garments, but it’s great for hemming, especially when I don’t want the hemline to show. FYI, it’s also great for repairing sleeping bags.
Solar charger and rechargeable batteries
Buy batteries once and use them forever. It has saved us money over time.
I keep some string lights balled up in a mason jar on the windowsill. They put out quite a bit of light on the patio table without drawing lots of bugs, especially if I set the jar on top of a mirror. We’ve also strung them around the bedroom for a fun sleepover night-light.
Candles/Oil lamps
A little romance, a little ambiance? (More often, a little air refresher in the bathroom…)
Antique clocks
My husband has an artistic appreciation for these antique beauties, but I love them for another reason: they don’t require batteries or a hook-up to the cell tower. As long as they’re placed on a level surface, they keep excellent time.
Have you bought anything “just in case” that you find yourself using frequently?
The post Are You Getting the Most Out of Your Prepping Supplies? by Kris appeared first on The Survival Mom. Be sure to check it out!


April 23, 2015
Planning an Edible Landscape
 Make the most out of your yard by creating an edible landscape. Every March, I am consumed with spring fever and can barely wait to get outdoors and turn my winter laden yard into a fairy tale garden. This year, I decided to start the long but productive process of turning my small yard into a food producing, perennial palace. Annuals are great, but by choosing perennials, I can build my edible yard little by little each year instead of starting from scratch every time.
In addition to my annual vegetable garden that is normally filled with tomatoes, cucumbers, peppers and melons, I wanted to create more produce for my large family of seven with much less work. My solution was to begin an edible landscape. By edible landscape, I simply mean decorating my yard with food producing plants instead of only flowers and ground covers. There are several plants that provide beautiful spring foliage and then get to work producing sweet, delicious goodies to be enjoyed later in the summer.
Developing an edible landscape is a long slow process that is built upon each year. Do not try to plant everything at once or get frustrated that all your efforts still have years to yield results. Keep in mind that many perennial plants may take two to three years to develop a strong root system and become established enough to grow and flourish such as berry bushes and asparagus. Fruit and nut trees could take even longer as they need several summers to reach their full potential. Start now and add a little each year; in a few short years, your edible yard will be a rewarding and tasty accomplishment.
Planning an edible landscape — Getting started
Before beginning your edible landscape, sketch out a plan. In your plan, be sure to consider the following:
Spacing – Different types of plants require different amounts of space to grow properly.
Lighting – Be sure you are planting your perennials in areas that get the proper amount of sunlight for each particular plant.
Pollination – Know what plants are self-pollinating and which ones need a partner to produce fruit.
Grouping – Consider what the plants are going to look like when they are full grown. Can the groups survive together without choking each other? Will either of the plants become taller than the rest resulting in the low-lying plants not getting enough sunlight in future years?
Zones – Be sure to select plants that can survive in your zone. Not all perennials can survive the harsh winters of the north or the intense summer heat of the south.
Design – Get to know your plants. Research what they will look like throughout each season before deciding where to place them in your yard. Fruits and veggies do not have to be contained in one garden area. Make the most out of your entire yard!
Be creative – One of my favorite ways to turn boring food gardens into works of beauty is by making a concrete block border. Turn the blocks on their sides so the holes are facing up, fill with potting soil and plant bright and colorful flowers. I like to try and plant flowers that deter deer and other wildlife from stealing my goodies such as marigolds, impatiens and verbena.
Keep track — Make sketches of your plantings and notations of what does well, what doesn’t, and why.
The following is a list of some perennial edibles that will help you build your edible yard year after year without starting over:
Artichokes
Unharvested artichokes produce spikey vibrant purple blooms.
Asparagus
With its pointy spears poking through, the unique shape of thriving asparagus can certainly add an interest-peaking aspect to your yard.
Berry Bushes
Blackberries & Raspberries – Typically produce delicate star-like white flowers in the spring and produce tasty fruit throughout the summer. The beautiful color variations of the red to black berries provides a pop of color to any landscape.
Blueberries – The Patriot blueberry produces snow white bell-like blossoms in the spring, sweet fruit over the summer and ends its season with vibrant red leaves before going dormant in the winter.Citrus
Trees
Lemons, tangerines, oranges, limes – sunny green tree leaves coupled with the brightly colored fruit. Try planting dwarf varieties that will allow more sunlight for other plants to grow.
Cranberries
An evergreen perennial that is a little challenging to grow but makes a beautiful and tart ground cover.
Fruit Trees
Apples, cherries, pears, peaches, plums, bananas, figs, persimmons, papayas. All providing rich leaves and an array of hued contrast but be sure to consider fallen fruit into this landscape. Plant in areas where fallen fruit cannot damage other landscaping efforts or vehicle windshields.
Garlic
Grapes
Add a wall of greenery in a sunny location. Class up your landscape with the vineyard appeal. Consider training the vines to grow over trellises creating a rainfall of colorful and delicious clusters at harvest time.
Greens
Sea kale
Its large bluish leaves make this perennial a beautiful consideration as a border for flower gardens.
Sorrel
Fun, pointy leaves, this green grows well in sun or partial shade making this a good landscape filler that is great for a salad later!
Horseradish
Remember when considering this perennial that it is the root is what you want. Consider planting in areas where you can dig during harvest without damaging other plants.
Nut Trees
Pecans, chestnuts, almonds, walnuts, hazelnuts
Olive Trees
Mature trees often have unique and interesting looking trunks, small green leaves and tiny fruit. Be sure to consider the size of an older tree and the shade reach of its spanning branches.
Pineberries
A uniquely curious looking berry that resembles strawberries but are white in color and has a pineapple-like taste. Sure to be a good conversation piece in any edible landscape.
Rhubarb
Big and beautiful, this edible perennial needs room to grow. Bright red stalks and large green leaves. Remember to only eat the stocks of this plant as the leaves are poisonous.
Strawberries
Green leaves, petite white flowering blossoms and large, sweet berries. A must have for an edible landscape!
Wild Leeks (shade)
With long, tapering leaves, this edible perennial works well as a border around trees and often thrives off the organic nutrients from fallen autumn leaves. A refreshing spring flavor used for many dishes.
The effort that goes into the planning and building of an edible landscape is worth every drop of sweat. It’s a good feeling to know that everything I’ve planted will benefit my family this season and for many seasons to come. Have you considered transforming your backyard or frontyard into a food-producing edible garden?
The post Planning an Edible Landscape by Brandy Schau Dibert appeared first on The Survival Mom. Be sure to check it out!


How Many Off-Grid Cooking Methods Do You Have?

When you buy, or otherwise acquire, preparedness supplies, do you practice with them or are you a prep hoarder? I think I’ve been guilty of both, especially with off-grid cooking methods.
Maybe you know what I mean. Preppers are notorious for wanting every new survival gadget that comes out. We’ve got no less than 10 ways to cook that aren’t tied to the power grid, yet when another new off-grid cooker comes out, we simply must have it to add to the stash in the storage room.
And there they sit, safe for when we need them, gathering dust and maybe spiders,
Do you ever try them out when they come in the mail or do we add them, still in the package, to the ‘cooking shelf’ in our bug-out trailer?
I can say that I have used each of my off-grid cooking methods several times. Some had a learning curve that I’ve mastered and with others, I’m still climbing that curve. Some are easier to clean and store than others. Fuels differ, conditions they can be used in differ, set-up, clean-up and storage instructions are not the same, but we need to learn how they work.
In a major crisis, when emotions are high and everything and everyone is confused is not the time to try and figure out how to put that HERC stove together!
My family’s off-grid cooking methods
For my family, my list of methods looks like this:
Solar oven
Rocket stove
Volcano Cooker with oven tent
Butane stove burner
Camp fire
Wonder oven
Sterno stove
Tent stove in-line oven
Coleman stove
BBQ grill (using charcoal or propane)
Dutch oven
Apple box oven
And, in a pinch I can run my microwave with my generator (It’s a small microwave)
First of all, how many different cooking methods do you have for when the power goes out? You really do need at least 2 of them, making sure those 2 do not rely on the same type of fuel. Are you familiar with how to use all of the different methods you have? Are your children? What if you, THE MASTER OF ALL THINGS PREP in your home are not around or are injured or ill? Who is going to do the cooking then?
Spring and Summer are a GREAT time to get out the different tools/toys you have for cooking meals off-grid and practice, practice, practice.
Pick one night per week and make it an adventure. Have a cook-out in the back yard. Learn all about that method and gather some recipes to try it out.
April 22, 2015
Celebrating During Crises
 My family lived in Northern Alabama and experienced the April 2011 Tornado Outbreak. We saw one of the tornadoes from our front window. I worked clean up and recovery after the storms and the damage and loss was devastating for so many people. Even those of us that were spared direct damage still had to deal with days (and for some, weeks) of no power.
So, while we of course were thankful for being spared, there could have been a “mini-disaster” of our own because the day after the storms was my daughter’s 9th birthday. We were stuck at home and unable to go out for birthday fun as planned. Thankfully, I had already purchased her presents and had a dessert mix on hand so we were able to plan a last minute family celebration at home.
Now, please don’t misunderstand, missing out on a planned birthday party in NO WAY compares to the loss of property and life that was experienced due to these storms. My daughter understood what was happening and was not upset in the least by changing plans. But it made me think about a long term disaster or TEOTWAWKI event. It will be important to celebrate birthdays and holidays even in the midst of a crisis when at all possible.
My daughter’s 9th birthday is what triggered my desire to add holidays to our family preparedness plan.
Celebrate in a crisis
If we find ourselves in the midst of a pandemic, for example, and have to shelter-in-place for weeks or months, I am now prepared to still celebrate with my family on our special occasions.
Greeting cards for each birthday, anniversary and holiday
A small gift for each birthday, anniversary and holiday. Books, Mad Libs, card games, drawing books, and craft kits are great options.
Candy or other shelf stable treats related to each holiday
Stocking stuffers for Christmas. In my family that means scented hand sanitizers or lip gloss, little stuffed animals, mini Lego kits, and fun gadgets.
Rotation of these items is easy! When the birthday or holiday comes around, use what you have set aside and then buy something for the next year. I buy a bag of Halloween Candy on November 1st on sale and add it to the stash. After Valentines Day, I purchase a box of Valentine’s Cards with the candy included. Not only will my kids enjoy these, but they will have them to share with others in the neighborhood that might not have planned to celebrate.
If you find yourself in the midst of a shelter-in-place and haven’t planned ahead for some of these events, look around the house for something you can make. If you know how to knit or crochet, draw or paint, weave, make jewelry, etc, you can have supplies on hand to create a nice gift. The ability to bake cakes, cookies, or brownies and a few balloons or streamers will help create a festive occasion. Be sure to have craft items for children so they can get involved in decorating and by making gifts for each other.
Think about the emotional boost that your family would get during a TEOTWAWKI event by doing something as simple as celebrating a birthday or having presents to open on Christmas morning. Hard times have a way of putting things into perspective and the celebrations don’t have to be huge, but taking the time to honor the person or the day can lift spirits, increase resilience, bond family members, and just produce some smiles.
The post Celebrating During Crises by Amy Van Riper appeared first on The Survival Mom. Be sure to check it out!


April 21, 2015
How To Grow A Houseplant From The Top Of A Pineapple
 In 2008, when I was working at a preschool, the lead teacher decided to grow a pineapple houseplant. She was leading a unit on plants and thought it would be neat to grow the top of a pineapple in the classroom. She sliced off the top at the “shoulders” and placed it with some ceremony on top of a pot of soil. Some weeks later, when the leaves began to brown and the base began to mold, we realized our experiment had been unsuccessful. That was the wrong way to do it.
The experience stayed in the back of my mind, however, and one day when I had three pineapples sitting on my kitchen counter I decided to research how to do it correctly. I have currently four pineapple plants in various rooms of my house; the oldest is about a year old.
Here’s how you grow a pineapple houseplant
1) Before you get excited, don’t just wantonly slice off the top of that pineapple. It is better to pull the top out. This may require a tiny bit of elbow grease. You can put the top off to the side while you prepare and eat the rest of the fruit.  2) Gently trim off any excess flesh that came off with the top – this can rot and cause the rest of the plant to die. Then pluck off leaves from the base until about an inch is bare and exposed. You may see little nubby things – those are little rootlets.
 Let the pineapple top sit in a dry location for a week or so. If you place it immediately in water it could rot.
3) Place it the top in a jar of water. Be patient – you are waiting for roots to form. It can take up to a month or even longer for a decent root system to develop. The plant pictured here has been growing roots for about two weeks. You might think that these are pretty good roots, but I am going to wait until the plant has about three times as many roots before transferring it to a pot of soil.  4) Only then the roots are long and plentiful enough should you transfer the pineapple top to a pot of soil. If you act prematurely, your plant won’t grow and will eventually die. Here’s a plant I’ve had for about a year:
  That flower pot is about 18 inches in diameter; you can see that it is pretty sprawling. I admit that this one is a little sad-looking, and that is for good reason: I have three young kids and they are very talented at tampering with house plants. Which is why I tried growing them from pineapples in the first place. If it bites the dust, I will have lost the time and effort it took to grow it, but I will have saved the $20 or so it takes to buy a decent ficus from Home Depot.
I am still a newbie when it comes to the art of growing pineapple houseplants. My four healthy plants are the result of eight attempts, thus a 50% rate of success. (Once I let a pineapple top spend too much time drying out and instead of hardening against rot, it just died. Another time, I planted it in dirt before it had a chance to develop enough roots.) It is my understanding that, given the right conditions, a pineapple houseplant will flower and produce a fruit. I am very intrigued by this possibility, but must admit that I doubt that the right conditions exist in my living room.
I hope this short tutorial will inspire you to give it a whirl!
The post How To Grow A Houseplant From The Top Of A Pineapple by Beth Buck appeared first on The Survival Mom. Be sure to check it out!