Lisa Bedford's Blog, page 101
June 16, 2015
In Case The Zombies Get You…Death Preparedness

Death is not a pleasant eventuality to prepare for and many of us try not to think about it. Still it is one of the most important possibilities to prepare for. Not preparing leaves other people to decide what will happen to your body, children, pets, and possessions. Preparing for death is not just a depressing preparation for your demise. It can also ensure that your golden years stay yours instead of being hijacked by the medical system or well meaning relatives.
Insurance
Life insurance is vital for your family’s ability to care for you and themselves when you have passed on. There are many ways that it can be used.
The first and most likely way would be funeral expenses. The average cost today is right around $6600. It’s is bizarre how much your final real estate is going to cost. Take a look at these expenses:
Casket (wood or metal), $1000-3000
Clergy expense, $150+
Embalming fees, $500-600
Flowers, $200+
Grave marker, $1000+
Grave plot, $400-10,000+
Hearse, $300
…and on and on and on.
Even if you decide to be cremated, it will cost hundreds of dollars. It doesn’t matter if you want to be placed in a coffin or (my new favorite) have your remains turned into a tree. Life insurance will help pay to for your body’s disposal, and, very important, the younger you are when you buy life insurance, the cheaper it will be.
Do your research before buying any life insurance policy. Dave Ramsey prefers term life policies while other experts recommend whole life.
Wills
A will marks out your wishes when your life ends, but, shockingly, most Americans do not have a will in place. A will can make certain that your remains are cared for in the way you wish, insure that your stuff goes where and to whom you want it, whether that’s to family members or donated to charity. You can name who you want in charge of making sure your wishes are respected as your executor. This could be a friend, family member or a lawyer.
If you die without a will, generally your spouse will inherit your assets, but you will, no doubt, have special people in your life that you want to remember in a special way. Without a will, those wishes may or may not be followed. Not having this important document leaves too much to chance and puts too much power in the hands of the state, including the guardianship of your children, if you’re unmarried.
Most folks avoid drafting a will because they don’t want to deal with the reality of their own mortality, but not writing a will doesn’t help you live a single day longer! A will is an easy thing to postpone until “tomorrow”, but even someone of meager means should sit down and take the time to write this out. Perhaps all you can leave a loved one is a heartfelt letter or a small family memento. Those could have immeasurable value to someone after your death.
Do Your Own Will has a free form you can fill out to produce an official will, along with instructions. It’s a very general format and you’ll want to add details regarding specific gifts and bequeathments and other final requests. Legal Contracts is another helpful site with Last Will and Testament forms.
Living Wills
Living wills are different from regular wills. This document makes your wishes clear when you are still alive but not in control of either your state of mind or physical care. It keeps your loved ones from having to make medical choices for you because you have already made them yourself ahead of time. For example, if you are in a coma, a living will could make official your decision to be taken off support long should such an event happen. Your children or spouse aren’t put in the position of making that choice for you.
Living wills can also be used to determine care in your old age or in terminal care. You and your children may have different views about what is best for you. They, caring about your health may go overboard in making 100% healthy choices for you. On the other hand you may want to enjoy chocolate and ice cream in your old age. Having a living will allows you to make those choices for yourself and have your ice cream even if your children would have you live on vegetable smoothies and bran muffins.
Do Your Own Will has free living will forms as well as Law Depot.
Trust Funds And Allowances
Setting money aside for the ones you love can even be done after death. You can even put conditions on it. For example your children will get the money from your savings account and investments, but not until they turn eighteen, 21, or some other age that you determine. You set the dollar amount they receive per month, quarter, or year. A trust fund allows you to set up a system to help continue care for special needs kids or other family members.
It’s also handy, let’s be honest, to control the flow of money whose judgement may sometimes be questionable. They receive financial support in small, regular amounts rather than one lump sum.
In short, it’s a way to continue providing a level of financial help to those you love long after you’re gone. Trust funds aren’t just for millionaires, and it’s something to consider if you have savings and investments.
Child/ Pet Guardianship
One of the most important items of business your will will map out is who you want to raise your children should you pass on. The last thing you want for a child who who has just lost a parent to also face uncertainty about what will happen to them.
We want our children to still have a stable environment when growing up. We want to be able to pass our belief systems on to them even when we are gone. We want them be with people that treat them as equal family members. Most of all, we don’t want multiple family members fighting over their custody. These are all important subjects to discuss as a couple and with your older children.
The same is true of a beloved pet. Many pets left behind by death do not have a guardianship prepared for them. These pets often end up in a shelter. Discuss with family and friend who would be willing to take care of your pet. You may believe someone would take you furry friend only to discover an allergy prevents them from doing so. Discuss the possibility of setting up a vet trust or pet care allowance with them.
Death preparedness is a part of the bigger picture of prepping — no one lives forever. Planning ahead for a time when we won’t be around is a little like taking a dose of particularly noxious medicine. We know it has to be done, we know we’ll feel better once it’s been swallowed, but it’s hard taking that first gulp. If you do nothing else today, go to one of the websites listed above and create a basic Last Will and Testament. Add your own personal requests, sign it, have someone witness your signature, date, and seal in an envelope.
There. You’re done. You can always go back and amend the document but should something happen in the meantime, this first important base is covered.
(Be sure to store a copy of your will in a safe, safe deposit box, with an attorney, or a trusted loved one.)
The post In Case The Zombies Get You…Death Preparedness by Teraesa Farrell appeared first on The Survival Mom. Be sure to check it out!


June 15, 2015
How to Make Herbal Tinctures
 Making Tinctures for Herbal Preparedness
Herbal extracts, also called tinctures, are one of the best ways to include herbal remedies in your emergency preparedness preps. Tinctures are concentrated and have a long shelf life- much longer than dried herbs or capsules. Like other preparations, though, extracts will need to be protected from extreme temperatures and direct sunlight, otherwise they will degrade and become less potent.
Most herbal tinctures are made using alcohol. Everclear, vodka, and brandy are the most popular choices. Rubbing alcohol should never be used for a tincture that you plan to use internally. It’s toxic!
A ratio of 50/50 alcohol and water will make the strongest, longest lasting extracts, so 100 proof vodka is often a good choice for preppers concerned about shelf life. Vodka is also easier to obtain than Everclear, and there’s no need to worry about adjusting the proof.
The Simple Way to Make a Tincture
There are two ways to make a tincture. The first way is an easy, general guide that’s safe for most plants and useful if there is no convenient way to measure out exact amounts. We’ll look at that method here, because it’s great for beginners. There’s no tricky math to figure out ratios or trying to deal with grams of dry weight vs fluid ounces of the alcohol. This method is the traditional, or “folk” method of making tinctures, and is what I use the majority of the time.
For this method, place dried or fresh herbs into a glass canning jar and add brandy or vodka to cover the herbs by one inch. Place the lid on the jar, and leave it in a cool, dark place for two weeks so that the herbs can fully extract into the alcohol. During the two weeks, check on the tincture once a day. Add more alcohol if needed, as the herbs may absorb some of it over time, and shake the jar gently each time you check on it.
After two weeks, use a mesh sieve or small colander lined with muslin or cheesecloth to strain the extract into a clean jar. The herbs left over from the tincture are called the marc. Twist the top of the cloth together to form a small bundle with the marc inside, and press as much liquid out of the marc as you can for your tincture. The mostly-dry marc can be added to a compost pile, if you like.
Storing Your Herbal Tinctures
It’s best to keep your finished tinctures in blue or amber glass to help reduce exposure to light. Opaque screw top nalgene plastic bottles can be used as well for a more durable option. Be sure to label your extracts clearly with the name of the herb, alcohol used, and the date it was pressed.
Herbal tinctures kept in a cool environment and out of direct sunlight can be expected to last anywhere from three to five years, or even longer. Signs of spoilage to look for include mold (most likely to happen in a tincture made from fresh herbs, because they have a higher water content which dilutes the alcohol), a change in consistency, or changes in color. Tinctures will evaporate over time, so be sure to use a tight fitting lid and store the jars standing upright in a position where they are less likely to leak.
One other quirk of homemade tinctures to be aware of is the tendency for the extract to form a layer of sediment in the bottom of the jar. To lessen this, the tincture can be dripped through a few layers of coffee filters to clear it from the dust-sized particles of herbs that the cheesecloth didn’t trap earlier. It’s always a good idea to store glass dropper lids separately and seal your homemade tinctures with a regular screw cap. The same sediment that can form in the bottom of the jar can also clog up a dropper pipette and be difficult to clean out.
Using Tinctures Safely
Making your own herbal tinctures is a very cost effective way to add to your herbal preps, and a very good preparedness skill to have. Most importantly, though, you need to learn how to safely use the herbal tinctures you make.
Be sure to research each herb individually so that you understand potential safety issues, drug interactions, and the traditional dosages of each herb. Most herbs will have a range of between 15 and 30 drops per serving. If an herb is traditionally used in smaller or even single drop doses, it should be used by experienced herbalists only and should not be made using the “folk” method- more precise measurements are required for low-dose herbs.
The post How to Make Herbal Tinctures by Agatha Noveille appeared first on The Survival Mom. Be sure to check it out!


June 13, 2015
Snake Bite Smarts for Wilderness Survival
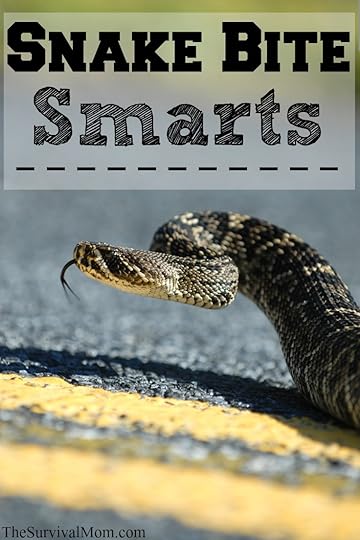 For people venturing outdoors to hike, backpack, camp, hunt, or just enjoy the wilderness, snakebites are a scary possibility, and yet more��people die each year from being crushed by vending machines than from snake bites.
Now, that���s not to say that snake bites rarely happen. ��About 37,500 are reported each year, but it���s more important to take preventive measures than to spend time worrying about death by snake.
Snakes will bite whatever body part is easiest to strike, and that���s usually a foot, ankle, hand, or arm. Wearing hiking boots and a pair of thick socks that extend above the ankle can protect those vulnerable spots as will a pair of loose, long pants.
Keep in mind that snakes are more active in warmer months. They also like to cower under rocks and in dark holes. I shouldn���t have to tell you this, but don���t stick your hands in those types of places without looking first. This is something that kids, in particular, like to do, so warn them ahead of time of the dangers.
And, it’s not just hands that are a problem. Poking under rocks and in dark cubby holes with a stick can be equally dangerous if a sleeping snake is awakened. They can move surprisingly fast and if they aren’t in a good mood, who could blame them?
Wilderness snake bite help tips
In spite of these precautions, let���s assume that you are, indeed, one of the unluckiest people on the planet. You���re far from a medical facility and you���ve been bitten by a poisonous snake. What do you do? First, don���t panic. As the venom enters your blood stream, you can slow down its spread by staying calm and moving as little as possible. Learn now my “16 Second Survival Breathing” technique to help with this.
I���m not going to lie to you. The pain is going to be intense, but��it’s important to not��take any pain medication without a doctor���s advice.
If others are with you and have a cell phone with the Red Cross first aid app, or a similar app, it wouldn’t hurt to look up “Snake Bites”, but otherwise, follow these instructions:
1. ��Clean the bite wounds with water and soap and then apply a bandage to keep bacteria out. A glob of pine tree sap is a good alternative to a bandage, if that���s all you have on hand. ��Use a pen to draw a circle around the wound and write on the skin the time the bite occurred. This will provide a gauge for tracking the reaction to the venom as well as any possible infection.
2. ��Expect some swelling in the bite area, so remove rings, watches, and any tight clothing. Next, use a length of cloth or an Ace bandage to create a compression wrap starting about 4 inches above the bite wound and continuing down toward the hand or foot.
Rule of thumb: If you see swelling and the skin around the bite changes color, the snake was most likely poisonous.
3. ��Next, if you are ��move slowly and steadily toward the closest medical facility, hopefully with the assistance of other people. If you���ve brought along a cell phone, call Poison Control as soon as you have a clear signal, 1-800-222-1222.
At no point should you try to suck out the venom with your mouth, unless you really want to experience the effects of a snakebite without the actual bite. More than one person has died from ingesting snake venom in this manner. You also shouldn’t waste time looking around for the snake in an attempt to kill it and take it to the medical facility. Just do your best to remember as many details as possible of its pattern of color and size. If you do see the snake nearby, take a quick pic with your cellphone for later identification.
Supplies to carry with you:
Soap or small bottle of waterless soap
Small roll of Ace bandage
Ink pen or Sharpie
4-5 adhesive bandages
Snake bite kit — Be sure to read the instructions��before heading out into the wilderness.

The post Snake Bite Smarts for Wilderness Survival by The Survival Mom appeared first on The Survival Mom. Be sure to check it out!
June 11, 2015
How the California Drought Has Tightened Up my Prepping
 In all my years of preparing to work in Emergency Management, it never occurred to me that one of my biggest personal challenges would be a California drought.
I was in Sacramento for the Yuba County floods of 1997, when flood waters caused 80,000 people to evacuate. In 2010, I was working in Orange County when the floods came, warranting a Presidential Disaster Declaration. Drought was something that happened overseas somewhere. We usually had much more water than we knew what to do with.
And yet, here we are in a drought. Families in central California have wells that have gone dry. Big plastic water tanks sit in front yards, periodically refilled by water trucks. Firefighters are honestly asking, will we have enough water to fight fire? Our Governor has made abundantly clear that the drought is a priority for all Californians.
Taking it personally

Pond is a great backup water supply
I have a challenging environment: a �� acre lot with a 2,000 gallon pond and a school of mixed koi and goldfish. The pond is part of my preparedness, so draining it is non-negotiable. The water is easy to filter and treat for safe use if needed.
I also have a bunch of rose bushes and other ornamentals in my front yard that hold sentimental value, so my plan must include their survival. On top of that, I am known to work for the state government, so I can expect no slack from my neighbors.
Inside and Outside
���Experts��� say we use much more water outside than inside, on our lawns and landscaping. In my case, I didn���t spend a lot of water on my front and back lawn but the pond needed about 15 gallons a day just to offset the evaporation loss. Based on what I���ve read, the average per-person use was about 50 gallons a day; my goal was to use under 40 gallons a day, or 1,200 gallons a month. What this goal required was a complete survey of how I used water in the house, from tap to toilet.
Inside the house, there are four major water uses: shower, toilet, dishwasher, and washing machine. Also, sinks are used for hand washing, hygiene and dish rinsing, and this water can be re-used. All of these uses have control points, and secondary uses. In other words, I have control over the amount of water used for each of these uses, and with the exception of toilet flush, I can re-use the water for another task.
Making it Count

Tiles help collect shower water
Water coming out of the tap is potable water. In reality, only a few uses require potable water. Showers, hand washing, and clothes washing require potable water, so my most serious attention is focused there; water used for these purposes can be collected and re-used as gray water.
I choose soaps and shampoo that are known to be biodegradable. I start with the shower. I have to shower for work, but I can collect the cold water that flows until the hot water reaches the shower and I can get in; about three gallons per shower for the pond is collected here.
I placed concrete paving stones in the shower pan to displace water (makes it easier on the pump) and provide an elevated platform for me to stand out of the collected water. A small centrifugal water pump moves the used shower water into a 10-gallon capacity plastic tank for re-use. Is it easy? Not hardly, but it makes me conscious of every gallon I use.

Pump collects shower water for re-use.
Gray Water
My recovered shower water is designated for toilet flushes. Each sink (kitchen and bathrooms) has a basin to collect water used for hand washing and dish rinsing; this water either supplements toilet flushes, or helps water the landscaping. In the garage, I have a 55-gallon drum that collects water discharged from the clothes washer. A pump draws water out of the drum to irrigate the lawn and plants. In the kitchen, a 15-gallon container collects the gray water discharge from the dishwasher, which is also used to irrigate ornamental plants. I would use caution about using untreated gray water on edible plants, but the roses and bushes love it.
The Pond
In the drought, rain is a rare blessing. When we do get rain, I have a method to divert roof runoff into the pond. Even in a moderate rain, I can usually recover several hundred gallons to refill the pond.
Evaporation from the pond was a serious issue, so I covered half of it with a vinyl pool cover. While it reduces the aesthetic appeal of the pond, I���m hoping it will be a temporary measure during the drought, and when the rains return I can pull it out. The fish don���t seem to mind! It reduces evaporation loss to about 5 gallons a day, which is easily replaceable.
The Bottom Line: I���m Better Prepared
Any reduction in the consumption of a valuable resource like potable water is a positive, especially in context of preparing for disasters. Not only do I have a water conservation routine that has been refined with experience, I have those ���infrastructure��� items like containers, pumps, and hose that make it work and can be modified quickly if needed. My next step is to plumb a water line from the pond to the house, to make use of the pond water easier.

The post How the California Drought Has Tightened Up my Prepping by Jim Acosta appeared first on The Survival Mom. Be sure to check it out!
June 9, 2015
7 Prepper Steps You Should Have Taken Yesterday
 We all have things we know we should have already done in life. Preppers are no different. Here are the top 7 prepper steps you should have already taken care of:
Evaluated your health. Health is everything and physical fitness needs to be an ongoing effort. This may be the most difficult area of preparedness because it requires daily, and sometimes hourly, effort. But in a crisis or a collapse of our economy, medical care may be nearly impossible to find, and it will be the healthiest who survive, not necessarily those who have amassed the largest caches of firearms and/or food.
Put up a shingle for a new home-based business. Figuring out ways to bring in two, three, four or more streams of income isn’t greedy, it’s necessary. Depending on a single source of income, unemployment and other government assistance included, is dangerous in an economy that continues to struggle and spiral downward.
Joined a preparedness related MeetUp group or connected with another person or family who can teach you and yours a new skill. Hobbies have always connected like-minded people, with many of them forming lifelong friendships. Just ask an amateur radio operator! If the hobby is also a skill that will be useful now and into the future, learning it will equip you and your family for rough times ahead, and the friendship just might turn into an ally.
Started a formal, methodical savings plan. Even if the economy collapses, having money saved will be far better than having nothing at all. When currencies have been devalued, the old currency was always worth something. Even if you’re a complete pessimist about the future, it may take many months or even years for a collapse to occur. In the meantime, having a nice stash of cash will help you prepare, buy land, pay off bills, and take other smart financial steps that will make your future a little more secure.
The 52 Week Savings Plan is a super easy way to save over $1300 in one year! There is even a Facebook support group for Survival Mom’s working on this challenge.
Stocked up on effective nutritional supplements. The FDA has long had its sights set on regulating supplements and likely banning many of them. If you’re like my mother and swear by stinging nettle, echinacea, and a few others, it might be smart to stock up on several months worth, or more. When it comes to storage, treat the supplements as though they were food, storing them in a cool, dark, and dry place.
Paid off all vehicle debt. Most families rely on their vehicles to transport them to and from work, job sites, employment interviews, medical appointments, and shopping trips. If you can’t stay up to date with payments, there goes your ability to earn a living, seek medical care, and buy necessities.
Stocked up on at least 2 months of food and supplies. If you’ve done this over time, you’ve no doubt noticed that container sizes have decreased while prices have increased. When you buy food, toiletries, over-the-counter meds, etc. now, you’re buying them at today’s prices, which will almost certainly be cheaper than prices down the road.
Hopefully you have already taken care of at least a few of these. The ones that are left should be the next items on your Prepper-To-Do list!
Need specific guidance for stocking up?
These links might help!
Simple Food Storage Meals for Tight Times
Top 10 Foods for Stocking Up
The 6 Enemies of Food Storage
The Everyday Emergency Kit — Customize to your own needs.
Make a Grab-n-Go Binder — Keep all your vital documents in one place.
Quick Start Guide to Getting Prepared
Vehicle Emergency Checklist
Updated from original article published on December 28, 2011.

The post 7 Prepper Steps You Should Have Taken Yesterday by The Survival Mom appeared first on The Survival Mom. Be sure to check it out!


7 Prepper steps you should have taken yesterday
We all have things we know we should have already done in life. Preppers are no different. Here are the top 7 prepper steps you should have already taken care of:
Evaluated your health.�� Health is everything and physical fitness needs to be an ongoing effort. This may be the most difficult area of preparedness because it requires daily, and sometimes hourly, effort. But in a crisis or a collapse of our economy, medical care may be nearly impossible to find, and it will be the healthiest who survive, not necessarily those who have amassed the largest caches of firearms and/or food.
Put up a shingle for a new home-based business. Figuring out ways to bring in two, three, four or more streams of income isn’t greedy, it’s necessary. Depending on a single source of income, unemployment and other government assistance included, is dangerous in an economy that continues to struggle and spiral downward.
Joined a preparedness related MeetUp group or connected with another person or family who can teach you and yours a new skill.�� Hobbies have always connected like-minded people, with many of them forming lifelong friendships. Just ask an amateur radio operator! If the hobby is also a skill that will be useful now and into the future, learning it will equip you and your family for rough times ahead, and the friendship just might turn into an ally.
Started a formal, methodical savings plan. Even if the economy collapses, having money saved will be far better than having nothing at all. When currencies have been devalued, the old currency was always worth something. Even if you’re a complete pessimist about the future, it may take many months or even years for a collapse to occur. In the meantime, having a nice stash of cash will help you prepare, buy land, pay off bills, and take other smart financial steps that will make your future a little more secure.
The 52 Week Savings Plan is a super easy way to save over $1300 in one year! There is even a Facebook support group for Survival Mom’s working on this challenge.
Stocked up on effective nutritional supplements. The FDA has long had its sights set on regulating supplements and likely banning many of them. If you’re like my mother and swear by stinging nettle, echinacea, and a few others, it might be smart to stock up on several months worth, or more. When it comes to storage, treat the supplements as though they were food, storing them in a cool, dark, and dry place.
Paid off all vehicle debt. Most families rely on their vehicles to transport them to and from work, job sites, employment interviews, medical appointments, and shopping trips. If you can’t stay up to date with payments, there goes your ability to earn a living, seek medical care, and buy necessities.
Hopefully you have already taken care of at least a few of these. The ones that are left should be the next items on your Prepper-To-Do list!
Updated from original article published on December 28, 2011.
The post 7 Prepper steps you should have taken yesterday by The Survival Mom appeared first on The Survival Mom. Be sure to check it out!
Off-Grid Living: Take Care of Personal Hygiene
 The vast majority of people want to be clean and hygienic. Daily showers or baths (sometimes more than one!), multiple hand washings, and brushing teeth a couple times per day is the norm. If the grid goes down, we will still want to be clean, but it may get a little more difficult to do so. Here are a few things to remember about off-grid personal hygiene.
Proper Hand Washing
Many people wash their hands ineffectively. It is critical in an off-grid situation to do a thorough job to prevent illness and disease in yourself and those around you. This should be the #1 priority in personal hygiene. If you do nothing else, keep your hands clean!
The CDC instructs that this is the proper way to wash your hands:
Wet your hands with clean, running water (warm or cold), turn off the tap, and apply soap.
Lather your hands by rubbing them together with the soap. Be sure to lather the backs of your hands, between your fingers, and under your nails.
Scrub your hands for at least 20 seconds. Need a timer? Hum the “Happy Birthday” song from beginning to end twice.
Rinse your hands well under clean, running water.
Dry your hands using a clean towel or air dry them.
Antibacterial Gels
There’s some controversy about the use of antibacterial gels. Water, soap, and friction is just as, or more, effective as the gels in removing germs from hands. But when water is at a premium, or completely unavailable, using an antibacterial gel to clean your hands after using the restroom, before touching food, before eating, and before caring for the sick or injured can be an excellent option. The use of these products is about prevention of illness and disease rather than the removal of dirt and odor but ideally, your hands are free of dirt and debris before using the gel. This is a very simple, off grid personal hygiene option that only requires a supply of hand sanitizer.
Your anti-bac should contain at least 60% alcohol. The higher the better, but less than 60% is ineffective.
You should use enough of the product to cover all surfaces of the hands.
For a germ or virus to be killed it must come in contact with the gel. Be sure to get the backs of the hands, in between the fingers, under the nails, and around jewelry.
You should rub the gel on your hands until completely dry. Wiping them on a paper towel (or your pants) counteracts the effectiveness of the gel.
Another reason to keep antibacterial gel on hand? It’s a good fire-starter.
Bathing
If you have water to spare for showers, consider using an outdoor heatable bag shower. The Coleman 5 Gallon Solar Shower can be filled and hung from a sturdy tree (it weighs 40 pounds when full!) where it will use solar energy to heat the water. The shower hose has an on-off valve so you can control the flow. The water pressure is fairly low, but it gets the job done. Beware however… left out in the sun long enough and the water gets HOT! Carefully check the temperature before using. (This product can also be used to heat water for washing dishes and clothing without using consumable resources to create heat.)
If you do use water for showering, consider standing in a kiddie pool to catch the water for reuse in your garden. Even with soap and shampoos, the level of chemicals is too low to affect plants negatively. Other ways to reuse bathwater include toilet flushing and, if you weren’t too dirty, to wash your clothes. If you wash your body without shampoos or soap, or when using some “green” products, you can potentially reuse this water for drinking or cooking after boiling to kill germs.
Bathing in lakes and streams is a great option. Even without soap you can often get “clean enough.” Beware of getting the water in your nose or mouth. If it’s water you would normally heat or chemically treat to make it safe to consume, you don’t want to drink any while bathing.
If water becomes a precious commodity during your situation, you will want to have ways of “dry” bathing. My first choice is adult hygiene wipes. These are made specifically to use on bed bound patients or people who cannot get into a shower or tub due to injury or infirmary. In my experience, four wipes are sufficient for basic cleaning: One to hygienically clean the “important parts,” one for your face and hands, and a couple for your body. Of course if you have layers of dirt, it may require more wipes. You can buy a “club sized” package with 240 wipes, which should be sufficient for 50-60 washings. These wipes are excellent for cleaning the body but will not clean the hair well.
To clean your hair, use a waterless shampoo. Simply work the liquid or foam into the hair for effective cleansing with no need to rinse. Most were formulated for camping or for bed bound patients and would work great in an off-grid emergency situation. Waterless body washes are also available.
Off Grid Personal Hygiene: Dental Care
We all know the “rules” for clean teeth: Brush at least twice a day (preferably after each meal), floss every day, and don’t forget to clean the tongue. But in an emergency off-grid situation, this basic hygiene step becomes critical. Many dental problems are preventable with good hygiene practices, and when that fails, disaster could strike. If you’ve ever had a toothache you know who debilitating it can be. Now imagine having no access to a dentist to help fix it. In addition, poor tooth care can lead to more than just cavities and abscesses. Gum disease and gingivitis has been linked with heart and lung disease and stroke, as well as low birth weight babies.
Replace your tooth brush every three months and keep a good stock on hand to supply for at least one year per family member. If you believe your tooth brush has become contaminated, it can be boiled to kill germs. Typically, this only needs to be done after illness, if you know it was somehow contaminated, or if you are sharing a toothbrush with someone else. (Sharing toothbrushes is NOT recommended, but if there’s only one, do it. The risks of “sharing germs” are lower than not brushing and having to deal with rotting teeth, especially if you are able to boil the toothbrush.)
The next time you open a new tube of toothpaste, write the date on it. See how long it lasts with normal use and then adjust your back stock accordingly to have a year (or more) of toothpaste for your family. Buy it on sale and with coupons and then rotate new toothpaste in as you finish a tube. There is a printed “expiration date” on toothpaste. That is the time when the manufacturer says the fluoride may no longer be potent. It is not dangerous to use toothpaste after it’s printed expiration date, but it may not be as effective as it once was.
Don’t forget to floss! Flossing is an important and often neglected part of dental hygiene during good times. In bad times, when receiving professional dental care is difficult to impossible, flossing becomes even more important. Floss is cheap to buy and easy to store in bulk. Use it now and continue to use it daily.
If you’re out of toothpaste, you can use straight baking soda or a mix of baking soda and a couple drops of hydrogen peroxide to form a paste. If you have no toothpaste, brushing without it, flossing and rinsing, though not ideal, is better than skipping it altogether.
There may come a time when you will have no access to a dentist. Would you know how to pull an infected tooth? How to repair a filling? What dental tools you should have on hand? You can now download for free the entire “Where There Is No Dentist” guide for your prepping library.
Proper dental hygiene now, in the good times, is essential. See your dentist for regular cleanings, get treatment and repairs completed as soon possible, and be diligent in good dental hygiene for you and your family every day.
Women’s Issues
Ladies, for the majority of us, monthly menstruation is a fact of life that isn’t going to go away if the grid goes down. We are going to have to deal with it, so it’s best to be prepared.
A NOTE FOR THE MEN: Initially, I was going to encourage my male readers to “hide their eyes” for a few paragraphs. But then decided that they too would benefit from understanding these options in preparedness planning, especially if they have a non-prepping wife or girlfriend. Menstrual supplies have many other uses besides the intended and can be used for bartering… and you are guaranteed to be the much adored knight-in-shining armor for one or more ladies when you can meet this need when they cannot! You can anonymously buy these items online if you don’t want to put them in your real life shopping cart. If you won’t take my word for the need to to have tampons in your preps, head over to The Art of Manliness website and read their article, “Yes, That’s a Tampon in My Mouth: The Swiss Army Survival Tampon — 10 Survival Uses”
Tampons and Pads – Determine what a monthly supply looks like for you, multiply that for the number of months you need to be prepared – I recommend 12 – and stock your home accordingly. Pros – No-brainer, easy to purchase and store, has other uses besides dealing with menstruation. Cons – Consumable, storage takes up more space than other options, and you will have to find a way to dispose of the used products.
Diva Cups – Diva Cups are reusable cups that are worn internally to catch rather than absorb the menstrual flow. They can be cleaned with regular soap and water or with a special cleanser. Lifespan can be a year or more. Pros – Very small storage space, stores easily in a Bug Out Bag, reusable, nothing to dispose of after use. Cons – Becomes ineffective if damaged, requires water to clean, more expensive initially, but cheaper in the long run than a year’s worth of pads and tampons. You can read a Survival Mom review of Diva Cups here.
Reusable Pads – Many women use washable, reusable pads. They can be purchased or you can make your own. Pros – Fewer supplies are needed to achieve a one-year supply, no trash to dispose of. Cons – Requires washing which consumes time and water.
The best option may be to invest in all three courses of action to extend the time you will be covered during an off-grid situation.
NOTE: If you have young girls living in your home, consider their future needs as well as you stock up on the product(s) of your choice.
Remember: A Little Dirt Doesn’t Hurt!
You don’t *have* to bathe every day. Cleaning the “critical parts” is all that’s needed to help stave off illness and infection. A layer of regular dirt and set on the rest of your body isn’t going to cause harm, except maybe to the sense of smell of those around you. However, don’t underestimate the psychological value of personal cleanliness. When you’re dirty and gross, there’s nothing better than a nice shower, clean hair, and freshly brushed teeth.
OPSEC Warning: One thing to consider in an emergency grid-down situation is that too much personal cleanliness could be a bad thing. Being too clean and smelling too nice might send an unintended message to those around you. It says you have resources. Not long into a grid-down world, smells that were once considered offensive to the nose will mostly “disappear” and we won’t notice them anymore. If someone walks in with minty fresh breath and smelling of Dial soap, they will be noticed. A layer of dirt and some halitosis can be a benefit in some situations.
The post Off-Grid Living: Take Care of Personal Hygiene by Amy VR appeared first on The Survival Mom. Be sure to check it out!


Off-Grid Living: Take Care of Personal Hygiene��
The vast majority of people want to be clean and hygienic. Daily showers or baths (sometimes more than one!), multiple hand washings, and brushing teeth a couple times per day is the norm. If the grid goes down, we will still want to be clean, but it may get a little more difficult to do so. Here are a few things to remember about off-grid personal hygiene.
Proper Hand Washing
Many people wash their hands ineffectively. It is critical in an off-grid situation to do a thorough job to prevent illness and disease in yourself and those around you. This should be the #1 priority in personal hygiene. If you do nothing else, keep your hands clean!
The CDC instructs that this is the proper way to wash your hands:
Wet your hands with clean, running water (warm or cold), turn off the tap, and apply soap.
Lather your hands by rubbing them together with the soap. Be sure to lather the backs of your hands, between your fingers, and under your nails.
Scrub your hands for at least 20 seconds. Need a timer? Hum the “Happy Birthday” song from beginning to end twice.
Rinse your hands well under clean, running water.
Dry your hands using a clean towel or air dry them.
Antibacterial Gels
There���s some controversy about the use of antibacterial gels. Water, soap, and friction is just as, or more, effective as the gels in removing germs from hands. But when water is at a premium, or completely unavailable, using an antibacterial gel to clean your hands after using the restroom, before touching food, before eating, and before caring for the sick or injured can be an excellent option. The use of these products is about prevention of illness and disease rather than the removal of dirt and odor but ideally, your hands are free of dirt and debris before using the gel. This is a very simple, off grid personal hygiene option that only requires a supply of hand sanitizer.
Your anti-bac should contain at least 60% alcohol. The higher the better, but less than 60% is ineffective.
You should use enough of the product to cover all surfaces of the hands.
For a germ or virus to be killed it must come in contact with the gel. Be sure to get the backs of the hands, in between the fingers, under the nails, and around jewelry.
You should rub the gel on your hands until completely dry. Wiping them on a paper towel (or your pants) counteracts the effectiveness of the gel.
Another reason to keep antibacterial gel on hand? It���s a good fire-starter.
Bathing
If you have water to spare for showers, consider using an outdoor heatable bag shower. The Coleman 5 Gallon Solar Shower can be filled and hung from a sturdy tree (it weighs 40 pounds when full!) where it will use solar energy to heat the water. The shower hose has an on-off valve so you can control the flow. The water pressure is fairly low, but it gets the job done. Beware however��� left out in the sun long enough and the water gets HOT! Carefully check the temperature before using. (This product can also be used to heat water for washing dishes and clothing without using consumable resources to create heat.)
If you do use water for showering, consider standing in a kiddie pool to catch the water for reuse in your garden. Even with soap and shampoos, the level of chemicals is too low to affect plants negatively. ��Other ways to reuse bathwater include toilet flushing and, if you weren’t too dirty, to wash your clothes. If you wash your body without shampoos or soap, or when using some ���green��� products, you can potentially reuse this water for drinking or cooking after boiling to kill germs.
Bathing in lakes and streams is a great option. Even without soap you can often get ���clean enough.��� Beware of getting the water in your nose or mouth. If it���s water you would normally heat or chemically treat to make it safe to consume, you don’t want to drink any while bathing.
If water becomes a precious commodity during your situation, you will want to have ways of ���dry��� bathing. My first choice is adult hygiene wipes. These are made specifically to use on bed bound patients or people who cannot get into a shower or tub due to injury or infirmary. In my experience, four wipes are sufficient for basic cleaning: One to hygienically clean the ���important parts,����� one for your face and hands, and a couple for your body. Of course if you have layers of dirt, it may require more wipes. You can buy a ���club sized��� package with 240 wipes, which should be sufficient for 50-60 washings. These wipes are excellent for cleaning the body but will not clean the hair well.
To clean your hair, use a waterless shampoo. Simply work the liquid or foam into the hair for effective cleansing with no need to rinse. Most were formulated for camping or for bed bound patients and would work great in an off-grid emergency situation. Waterless body washes are also available.
Off Grid Personal Hygiene: Dental Care
We all know the ���rules��� for clean teeth: Brush at least twice a day (preferably after each meal), floss every day, and don���t forget to clean the tongue. But in an emergency off-grid situation, this basic hygiene step becomes critical. Many dental problems are preventable with good hygiene practices, and when that fails, disaster could strike. If you���ve ever had a toothache you know who debilitating it can be. Now imagine having no access to a dentist to help fix it. In addition, poor tooth care can lead to more than just cavities and abscesses. Gum disease and gingivitis has been linked with heart and lung disease and stroke, as well as low birth weight babies.
Replace your tooth brush every three months and keep a good stock on hand to supply for at least one year per family member. If you believe your tooth brush has become contaminated, it can be boiled to kill germs. Typically, this only needs to be done after illness, if you know it was somehow contaminated, or if you are sharing a toothbrush with someone else. (Sharing toothbrushes is NOT recommended, but if there���s only one, do it. The risks of ���sharing germs��� are lower than not brushing and having to deal with rotting teeth, especially if you are able to boil the toothbrush.)
The next time you open a new tube of toothpaste, write the date on it. See how long it lasts with normal use and then adjust your back stock accordingly to have a year (or more) of toothpaste for your family. Buy it on sale and with coupons and then rotate new toothpaste in as you finish a tube.�� There is a printed ���expiration date��� on toothpaste. That is the time when the manufacturer says the fluoride may no longer be potent. It is not dangerous to use toothpaste after it���s printed expiration date, but it may not be as effective as it once was.
Don���t forget to floss! Flossing is an important and often neglected part of dental hygiene during good times. In bad times, when receiving professional dental care is difficult to impossible, flossing becomes even more important. Floss is cheap to buy and easy to store in bulk. Use it now and continue to use it daily.
If you���re out of toothpaste, you can use straight baking soda or a mix of baking soda and a couple drops of hydrogen peroxide to form a paste. If you have no toothpaste, brushing without it, flossing and rinsing, though not ideal, is better than skipping it altogether.
There may come a time when you will have no access to a dentist. Would you know how to pull an infected tooth? How to repair a filling? What dental tools you should have on hand? You can now download for free the entire ���Where There Is No Dentist��� guide for your prepping library.
Proper dental hygiene now, in the good times, is essential. See your dentist for regular cleanings, get treatment and repairs completed as soon possible, and be diligent in good dental hygiene for you and your family every day.
Women���s Issues
Ladies, for the majority of us, monthly menstruation is a fact of life that isn���t going to go away if the grid goes down. We are going to have to deal with it, so it���s best to be prepared.
A NOTE FOR THE MEN: Initially, I was going to encourage my male readers to ���hide their eyes��� for a few paragraphs. But then decided that they too would benefit from understanding these options in preparedness planning, especially if they have a non-prepping wife or girlfriend. Menstrual supplies have many other uses besides the intended and can be used for bartering��� and you are guaranteed to be the much adored knight-in-shining armor for one or more ladies when you can meet this need when they cannot! You can��anonymously buy these items online if you don’t want to put them in your real life shopping cart. If you won���t take my word for the need to to have tampons in your preps, head over to The Art of Manliness website and read their article, ���Yes, That���s a Tampon in My Mouth: The Swiss Army Survival Tampon ��� 10 Survival Uses”
Tampons and Pads – Determine what a monthly supply looks like for you, multiply that for the number of months you need to be prepared – I recommend 12 – and stock your home accordingly. Pros – No-brainer, easy to purchase and store, has other uses besides dealing with menstruation. Cons – Consumable, storage takes up more space than other options, and you will have to find a way to dispose of the used products.
Diva Cups – Diva Cups are reusable cups that are worn internally to catch rather than absorb the menstrual flow. They can be cleaned with regular soap and water or with a special cleanser. Lifespan can be a year or more. Pros – Very small storage space, stores easily in a Bug Out Bag, reusable, nothing to dispose of after use. Cons – Becomes ineffective if damaged, requires water to clean, more expensive initially, but cheaper in the long run than a year���s worth of pads and tampons. You can read a Survival Mom review of Diva Cups here.
Reusable Pads – Many women use washable, reusable pads. They can be purchased or you can make your own. Pros – Fewer supplies are needed to achieve a one-year supply, no trash to dispose of. Cons – Requires washing which consumes time and water.
The best option may be to invest in all three courses of action to extend the time you will be covered��during an off-grid situation.
NOTE: If you have young girls living in your home, consider their future needs as well as you stock up on the product(s) of your choice.
Remember: A Little Dirt Doesn���t Hurt!
You don���t *have* to bathe every day. Cleaning the ���critical parts��� is all that���s needed to help stave off illness and infection. A layer of regular dirt and set on the rest of your body isn���t going to cause harm, except maybe to the sense of smell of those around you. However, don���t underestimate the psychological value of personal cleanliness. When you���re dirty and gross, there���s nothing better than a nice shower, clean hair, and freshly brushed teeth.
OPSEC Warning: One thing to consider in an emergency grid-down situation is that too much personal cleanliness could be a bad thing. Being too clean and smelling too nice might send an unintended message to those around you. It says you have resources. Not long into a grid-down world, smells that were once considered offensive to the nose will mostly ���disappear��� and we won���t notice them anymore. If someone walks in with minty fresh breath and smelling of Dial soap, they will be noticed. A layer of dirt and some halitosis can be a benefit in some situations.
The post Off-Grid Living: Take Care of Personal Hygiene�� by Amy Van Riper appeared first on The Survival Mom. Be sure to check it out!
June 7, 2015
One in a million. Would your spouse live the off-grid lifestyle?
One in a million spouses, that is, would dare live the survivalist/self-sufficient lifestyle. The thought came to me as I watched my wife, Sheila, sweep the plywood floors of our hacienda style house and thought to myself, how many wives would even consider living this way? The plywood floors will be replaced next spring with tapped clay floors – and that will present its own challenges – but really, when you break it down, how many of us have a spouse who would even for minute consider the self-sufficient, minimalist life style? Truth is, maybe 1 in a million would choose the off-grid lifestyle.
Just take a look at survivalist single sites. It’s mostly men looking for a woman to share their cabin in the wilderness with. Women have a nesting instinct (nothing sexist in that remark, it’s just a truth of physiology) and usually seem to know exactly what they want. Men also know exactly what they want. Regrettably, the two seldom find common ground.
One of the books of ancient wisdom says “two cannot walk together lest they be agreed.” Unfortunately, we have seen a lot of people trying to do just that – living the off-grid lifestyle because that’s what their partner wants, not because that’s what they want. This always results in failure. All too often that failure exhibits itself in sub-conscious self-sabotage.
Convincing your spouse
I can’t count the number of times someone has contacted us to ask us to convince their spouse to agree with them about the need to prepare. Certainly more than the number of times we’ve met a couple who shared the same sentiments about the self-sufficient lifestyle. And it’s about 50/50 as to whether it’s the woman or the man in the relationship who “needs convincing”.
But the truth is, you can’t – and shouldn’t try – to convince anyone to live a lifestyle that is foreign to them. All you can do is put the information before them and allow them to do with it what they will. If that is ignore it or run away from it, then they’ll ignore it and run away from it. If they ask more questions, perhaps they can face the reality of what is happening and can understand the need to take action after being given a bit more information.
But if the significant other cannot bring themselves to make a life-change, then the next step is to make your decision. You may choose to go on to a new lifestyle without your spouse – or you may choose to stay where you both are. Each circumstance is unique and no decision about this should be judged by others outside of the relationship. But if you make the decision to stay, do it with your eyes open and without resentment of the other person. Do it because it’s your choice, given all the information, emotional information included.
However, in the infinitesimal number of cases in which both spouses are of the same mind about living the self-sufficient/survivalist life, amazing things can be accomplished by two people who love each other and work together on a common goal.
Certainly, one can survive alone. But if you are going to live the self-sufficient life with someone, make sure it’s someone who honestly has the same goal as you.
Dan and Sheila are the authors of Surviving Survivalism – How to Avoid Survivalism Culture Shock and hosts of the free podcast, Still Surviving with Dan and Sheila, both available at http://survivingsurvivalism.com .
Updated from the original article published on September 24, 2012.
The post One in a million. Would your spouse live the off-grid lifestyle? by Guest Poster appeared first on The Survival Mom. Be sure to check it out!


June 6, 2015
Instant Survival Tip: How to Store Charcoal
 It’s summer! Summer means barbeques, and barbeques mean grills. And grills need fuel. Of the potential fuels for grills, charcoal is the easiest and safest for a prepper to store long-term. Add the fact that it’s cheap, lightweight, and regularly goes on sale in the summer and we have a real prepper winner! And the cherry on top? Unlike propane and many other fuels, you can make your own charcoal if a disaster goes on for long enough and charcoal is a much safer fuel to store.
However, Since it is still a fuel, it’s important to never be careless about how and where you store it. Here are some considerations to keep in mind.
Choosing a container
Charcoal briquettes are made from sawdust and wood scraps. As such, they need to be dry to light. A moisture proof container with a tight lid is key.
To keep charcoal dry, you can use metal or plastic containers, but metal is generally recommended because it is fireproof and not as porous as plastic, which can allow some air and moisture in even when sealed. Since metal, unlike plastic, can rust out if left on a damp surface, it is important to elevate metal cans a few inches off the ground. One common method is putting several bricks underneath or a wooden pallet.
For truly long-term storage, you can use an airtight plastic bucket and seal it shut with caulk to keep the humidity out. For a metal container, use aluminum duct tape. To be extra-sure the charcoal is dry, toss in a handful of silica packs to absorb any stray moisture. Just know it will take a whole lot more of these desiccants than a five pound bag of flour does!
Choosing a storage spot
Store your charcoal out of the sunlight in an area that stays cool but not damp. If you have a basement that is either naturally dry or where you run a dehumidifier regularly, that’s a great choice.
Outdoor sheds can be a good place, but be sure the containers are well sealed, off the ground, and not near a window / direct sunlight. You will also need to be sure the shed doesn’t get excessively hot, especially if there is a heat wave.
Using charcoal for cooking
Using charcoal for fires and cooking is one way to pick up an off-grid living skill. One tool you may want to invest in, to make this easier, is a charcoal chimney. The handy tool is simply a metal container that you fill with charcoal, light, and then quickly heats up the briquettes for use.
If you’re planning to use your charcoal for Dutch oven cooking, experiment with the number of briquettes you place in the chimney. You may not need to fill it completely in order to have enough hot fuel to cook a Dutch oven meal.
Once you know how to store charcoal and stock up when the prices are low, you’ll be ready for outdoor cooking as well as a long-term power outage.

The post Instant Survival Tip: How to Store Charcoal by Liz Long appeared first on The Survival Mom. Be sure to check it out!