Lisa Bedford's Blog, page 100
July 4, 2015
Living Off the Grid, (or Close to it) Urban Style

Admit it, you have been thinking about it. Off the grid living.
Late at night, at the end of a long day, you have pictured your life off grid. Images of Little House on the Prairie come to mind. Maybe you ponder becoming a long bearded man living in the mountains, content to be a hermit.
You are not alone in your thoughts, as more people are choosing an off grid lifestyle. Some are able to escape the noisy concrete city and move to quiet acreage in the Midwest or another idyllic country setting. However, for many, like me, work and family obligations make that impossible, but that doesn’t mean we can’t do our best to live as off the grid as possible.
Living off grid is defined as being self-sufficient of municipal utilities, such as water, natural gas, electricity, sewer and trash services. Choosing to live an urban off grid life is possible and does have many advantages.
One advantage is knowing that you and your family can be prepared and will be able to survive quite well when a disaster happens. Many have been able to save money on their utilities and purchases. Others have found peace and confidence in their new learned skills along their path to grid-less-ness, but do not conjure up a romanticized version of happily churning your own butter and building an outhouse. Off-grid living, whether urban, suburban, or rural, isn’t the easiest choice you’ll ever make!
Urban living off-grid
The type of home in which you are living determines, in large part, the extent to which you can go grid-free. If you are in a home with a yard, it is easier to become more self-sufficient. Apartment life can accommodate a degree of off-grid living, just in a smaller scale.
An advantage for both types of homes is that everything you normally need in the course of a day or week is close to home. Walking or biking around town provides great exercise and saves money on gas, vehicle maintenance and insurance. Bikes can be inexpensive and easy to repair. A wagon or cart can be added to the back.
Public transportation, like the bus system, can be very economical. Try the various methods of transportation your city offers and know what works best for you. Look into monthly passes, if used regularly, it may save you money. Pay attention to where you go and its location. Combine trips, shop in your local neighborhood and learn of new activities in your community for your family. Libraries, parks, swimming pools, local colleges and recreation centers offer free or low cost entertainment and activities. All of these options will allow you to not be reliant on your gasoline/diesel powered vehicles and the supply of fuel into your community. It will also help you to save money.
Being independent of all utilities may not be possible, but minimizing usage and creating your own electricity can be. Solar panels are one alternative and can be installed on various types of homes. Be aware that an entire house solar system will be tied to the grid and will be vulnerable to the effects of an EMP, should that ever occur.
Another way to save money and energy is to minimizing your electricity usage. Some easy suggestions are:
• Unplugging everything that isn’t currently being used. This will help you realize what you rely on the most and then find ways of coping without that appliance, electronic, or whatever.
• Turning off lights. Try to go for 48 hours without using any lamps or electric lights of any kind. This will help you figure out what kind of lighting you would need in a grid-down emergency.
• Throwing on an extra layer of clothing on in the winter
• Hand washing clothes
• Hanging clothes on a clothes line
• Insulating your attic
• Wash dishes by hand
• Close unused air vents
• Swap regular bulbs with compact fluorescent light bulbs
Going off-grid with your water and food supply
We need to use water for cooking, cleaning and washing, we just need to be wise about our water usage. Whether your water comes from a well or the city, less is better. Try some of these simple methods to reduce your dependence and cost of water:
• Short showers, maybe shower at the gym. A 5-minute shower can save you up to 1,000 gallons per month.
• Have a 5 gallon bucket in the shower to hold any water that is running while you find the right temperature for your shower. Use this water for plants or flushing the toilet.
• Keep a clean dishpan in the kitchen sink. It will hold the running water you use when washing hands and rinsing veggies.
• Use this water for your garden or washing dishes
• Install water saving shower heads, faucets and toilets
• Use a rain barrel system to collect water for your garden
Begin to minimize your dependence on grocery stores by growing your own food as much as possible. Start small with just 1 vegetable and 1 herb. If the plants don’t seem to be thriving, try using more or less water, a fertilizer (consult a nursery), but be sure to make notes. Growing food to any large extent is extremely difficult and can take years to master.
Apartment balconies can hold pots for vegetables and you can build vertical growing systems. In a home, you can plant in flowerbeds, allot a spot in your yard for a garden or add containers for additional space. Learn how to vertical garden and utilize the fence and exterior walls of your home. If you do not have the space to garden, consider community gardens. The are a low cost option and give you an opportunity to know your neighbors. Another option is to arrange with a neighbor that, in exchange for the use of their backyard for your garden, you’ll give them a percentage of the harvest and cover the cost of water, fertilizer, seeds, mulch, and the like.
Choosing to become more self sufficient and rely less on the grid can be an overwhelming thought. It is a lifestyle choice, a commitment to use less, save money and prepare. Take these suggestion and implement them into your life one by one. You will find more money in your budget to stock up on food and other emergency supplies for your family as you implement urban living off-grid. Maybe this will increase your savings so you can get that acreage in your favorite rural countryside.
*Check with city and county codes before going partial or off grid.
The post Living Off the Grid, (or Close to it) Urban Style by Erin Foster appeared first on The Survival Mom. Be sure to check it out!


July 3, 2015
9 Tips to Avoid the Summertime Prepping Slump
 It’s so easy for the hot, lazy days of summer to just sort of run into each other until the day arrives when it’s time once again to get the kids ready for school, and we ask, where did the summer go?
If your prepping goals have taken a break right along with your pledge to have the kids do daily math drills and read for at least 30 minutes every day, then here are a few prepping activities and tips to avoid the summertime prepping slump.
1. Get the kids involved in prepping activities
If they’re sitting around the house doing nothing, then they can help you prep! They can fill canning jars, mylar bags, and buckets with dry goods and oxygen absorbers. They can help weed the garden and pick ripe fruits and vegetables. They can wash and prepare produce for canning and dehydration. Kids can go through their closets and drawers and pull out toys they no longer play with and clothing that no longer fits.
Download my FREE ebook, Declutter and Organize Your Living Space. It contains enough tips and information to keep your kids busy all summer!
Hey, every time they say they’re bored, give them a prepping related task! They’ll have something productive to do and you’ll accomplish your prepping goals more quickly.
2. Learn something as a family
Check out online calendars for craft stores, REI, Cabela’s, gyms, and your city’s summertime offerings. Many of these are survival and/or prepping related, such as learning how to read a compass, learning how to crochet or sew, etc. and very often these classes are free.
If these resources aren’t readily available to you, then check out a how-to book or watch some how-to YouTube videos on something your family would like to learn and do it yourselves!
Browse through my Skill of the Month page for dozens of ideas that will appeal to all members of your family!
Or, ask around and see if there is someone in your circle of friends and acquaintances who has a skill you would like to learn and is a willing teacher.
For more insights into staying motivated, listen to this episode of The Survival Mom Radio Hour!
3. Turn a family outing or vacation into survival training!
Camping, hiking, fishing — those are all survival related, fun, and everyone can be involved. Check out these articles with more information about enjoying the great outdoors, as a prepper:
7 Summer Children’s Activities for Sowing Survivalist Seeds
25 Things I Learned From Long-Term Camping
A Camping Skill Basic: Safe Fire Building
Camping is More than Just Equipment — Here is a list of skills you need to have
Make This Summer a Family Camping Summer
Survival Mom Camping-Survival Secrets
And then there’s my series on family road trips. As a veteran of some 16,000 highway miles, I consider myself to be somewhat of an expert in this area!
Eating On the Road: A Family Road Trip Survival Plan
Survive the Family Road Trip With These 13 Tips
Surviving the Family Road Trip
4. Check into summer day camps related to prepping
Two summers ago my kids learned rifle skills in a 2-day camp at a local gun range. Lots of towns and cities start the summer with directories of these day camps. If your kids are in a day camp or have gone away to camp, learning some sort of practical skill, then you’ll have time to either take a nap, read a relaxing book (just for fun!), or do anything else you like! Free time for mom is necessary!
5. Amass produce in quantities and begin canning and dehydrating
Summer is prime produce time. Even if your garden was a flop or you didn’t get certain items planted, there are probably local gardeners and farmers who would love to share their bounty. Some might even be willing to trade a portion of their harvest for a portion of yours.
Bountiful Baskets is a large produce co-op that operates in many states. Do an internet search for “produce co-ops” in your area and you may end up finding a source of delicious, fresh product that you can then preserve for later.
Here are a few resources I’ve accumulated here to help you with canning different foods;
Bing Cherries
Can your own meat and chicken
Canning basics and getting started with applesauce
Chicken breast
Canning home preserved peach jam
Green beans
Homemade strawberry jam
Tomatoes
Once you have a good amount of green beans or tomatoes or whatever, make a simple plan for canning, dehydrating, and/or pickling. If your kids are whining about being bored, then you know who your helpers will be!
6. Get away from the electronics!
Nothing zaps energy faster than sitting in front of a TV or computer screen hour after hour. Not only is time wasted but our minds and bodies become accustomed to inaction and it becomes even hard to get up and start doing something!
Allow yourself and the kids only a certain number of minutes per day in front of a screen.
7. Take a few minutes to make lists to organize your prepping activities
A lot of time we find ourselves in a slump because we’re unfocused and are not sure what to do next. I’ve found that when I have all my scattered goals written down, it helps immensely.
Three lists that have helped me stay organized and focused on my preps are To Learn, To Do, and To Buy. From my book, Survival Mom:
List #1: To Learn
On this list you’ll keep track of skills and knowledge you realize will be important. A few examples on my own list are: Learn to tie various knots and know when to use them; work on creating recipes from my food-storage ingredients; and push my knitting skills to a higher level and knit a pair of socks.
Interestingly, many items on this list won’t cost a dime. If your budget is already strained, and buying even a few extra cans of tuna is a stretch, put more time and energy into learning skills, gaining knowledge, and seeking out other Survival Moms as resources.
List #2: To Do
Here’s another list that doesn’t have to empty out your bank account. Have you been meaning to compile all your important documents or inventory a garage filled with tools? Do you need to prepare your garden for the spring season?
There are simply dozens of things we intend to do, but they flicker in and out of our minds and are then . . . gone! As you read this book, start adding tasks to a To Do list and keep track of what you accomplish. It’s very empowering to see progress, although you will likely never have an empty To Do list!
List #3: To Buy
Although Lists 1 and 2 will keep you busy, there’s really no way around List 3. Stocking up on food, extra toiletries, good quality tools, and other supplies requires money. However, the good news is that a master To Buy list will help set priorities, keep you on budget, and even provide a shopping list when hitting the garage sale circuit.
Without a To Buy list, you may very well find yourself (a) spending money on things you later discover tucked away in a back cupboard or (b) snatching up purchases in a panic. This list helps save money as well as time.
8. Assess whether or not the emotions that started your prepper journey have changed
If we begin a project or set a goal based mostly on emotion, when that emotion fades, and it will, very often our motivation fades as well. If you began preparing out of fear or panic, it’s likely that you’re not as motivated as you once were.
That’s all perfectly normal, however, if the logical part of your brain is convinced that prepping is important to the well-being of your family. You’ve just entered a new level of motivation based on rational conclusions. This is where lists come in handy: To Do, To Learn, To Buy. They’ll help you stay focused on what is most important regardless of the current state of your emotions.
9. Start making plans and goals for when the kids are back in school
Summers are wonderful but let’s face it. When the kids return to school, so do routines. Having a predictable schedule once again will help you set priorities, focus on achieving small prepping goals, continue with prepping activities, and become the Super Survival Mom of your dreams!
Want to stay up to date with articles like this one?

The post 9 Tips to Avoid the Summertime Prepping Slump by The Survival Mom appeared first on The Survival Mom. Be sure to check it out!


July 1, 2015
12 Tips for Living Out of Your Car
 If you need knowledge, read a book.�� If you want to really know something, experience is the best teacher.�� My advice for anyone reading this is to try living in a car or van for a week or two.�� There isn’t anything better to wring out your survival kit than practical use.
Here are some tips from my own experiences.

image by thomas riboulet
Add a flip-up roof vent to the van, if that’s what you have.�� Heating/cooking with propane produces water as a byproduct.�� The vent will get rid of the�� interior water buildup .�� It will also exhaust hot air in the warmer parts of the year.�� A solar powered fan in the vent is even better.
Solar film on the windows keeps things private, but you need a blackout curtain to keep light from being seen at night.�� I used a denim tube and lined it with high density foam, hung from wire springs on both the top and bottom of the tube curtain.�� The curtain needs to cover the whole window.�� It provides a bit of insulation, too.
Never park in the same place twice in the same week.�� Stay away from other parkers in your same situation.�� Parking around a 24-hour biz is better than residential areas.�� Apartment complexes offer a degree of stealth street parking due to the high turnover of tenants and friends, NOT in their parking lot, however!�� Same for 24-hour grocery stores.
Sometimes your employer will let you park behind the biz if you’re a good employee and they want to help you out.�� That’s always a personal call that depends on the boss’s personality and the particular job.�� Sometimes it’s better the boss doesn’t know your situation.
Rent a mini-storage cubicle with 24-hour access for your spill-over and items that might be stolen from your vehicle.�� If you’re a customer, you have bathroom privileges.
A health club membership is the golden ticket for street living.�� You can shower, steam, and work out, too.�� Municipal indoor pools are good, too.�� Learn to bathe in a sink, as in sponge baths.�� Always clean up your mess!
A private mailbox that provides a street address (not a Post Office box) makes you look more like someone with a real address.�� This comes into play for drivers licenses, state ID cards, car insurance, job applications, etc.
A pay-as-you-go cell phone provides a telephone for job calls and if you need emergency services.
Try to find an apartment manager job if you have good people skills and some simple maintenance experience.�� The local Apartment Association may offer training so you can get that job.�� Once you’re in, you’re in for life.�� They like peeps that have experience, so this is the route in.�� Much easier if you’re a couple.�� Mini-storage management is even better.�� Usually small buildings only trade an apartment and light housekeeping duties for your time.�� You will need to work part-time to pay the bills.
A portable CD player with a radio is very handy for entertainment and news.
Most libraries have computer access.�� If you have a wireless laptop, then those businesses that let you surf on their wi-fi connection for a cup of coffee are helpful, too.
Always dress and act middle class or better.�� The way you look determines how the police will handle you when they come calling.�� That’s when, not if.
Don’t think you are depression proof.�� Plan ahead for�� hard times and practice.�� You won’t be disappointed.�� Living hand to mouth eventually gives you a can-do attitude that can be a life saver.�� Even if you have to give up your home, you will still have one.
This advice came from webbee, over on��Survivalist Boards�� who granted his permission to re-post it here.�� You and I may never have to live in our vehicles, but this advice is helpful for evacuations or if you’re ever stranded somewhere without funds for a hotel.��
See also:
Even If You Aren���t Living In A Car, You Need To Read These Terrific Survival Tips!
Getting Started With Dumpster Diving
Want more survival information like this?
The post 12 Tips for Living Out of Your Car by The Survival Mom appeared first on The Survival Mom. Be sure to check it out!
June 27, 2015
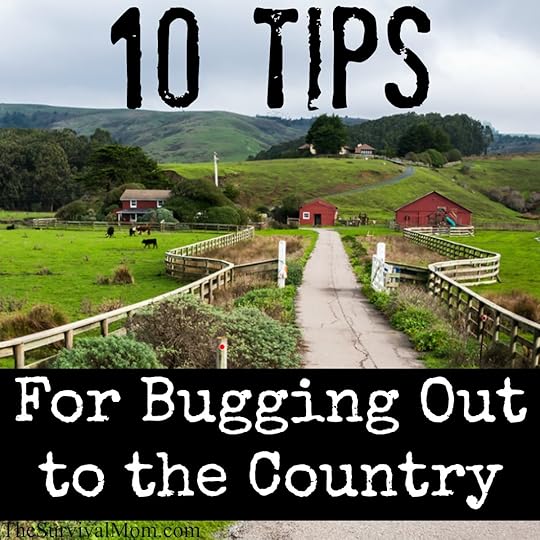
10 Tips For Bugging Out to the Country
 When many urban or suburban people think about Prepping or Survivalism, they think about bugging out to a more rural location. This has to be one of the most frequently-expressed fantasies in the Prepping world, and reams have been written about where to go and how to get there.
But very little has been written from the perspective of the rural dwellers. How does your average farmer or homesteader feel about urban folks bugging out to the country?
We live on a twenty-acre homestead farm in rural north Idaho. Wow, I can see your eyes sparkling from here. You’re thinking, “What a perfect bug out location!” Then believe me when I say the most dreaded words a homesteader can hear on the subject of Prepping is, “Well, if the bleep hits the fan we’ll just come live with you.”
Oh, bleep.
The truth about farms and homesteads
“Farm” does NOT mean remote or isolated or even self-sufficient. Farmers live pretty much like you do, but with more elbow room. We go to the grocery store. We have jobs. We have neighbors. And we have towns nearby.
Okay, granted those towns can be pretty small by urban standards, but they’re just as full of unprepared people as anywhere else. That means if the manure hits the rotating device, we’re going to have our hands full dealing with them.
Bear in mind that most people in the country may not be much more prepared than you are – which is to say, perhaps not at all. Unless rural folks already have a Preparedness mindset, they’re just as susceptible to societal interruptions as your average city person.
Our only advantage is we’re farther away from the Golden Horde, that mythical group of city folks who will take to the road in times of disorder, or so some survival experts believe.
Or, are we really that far away and safe from thousands of straggling refugees? In our case, we live within a very short drive (as in, four minutes) from a town of 1000, many of whom are on welfare and are just as dependent on government checks as anyone in the inner city. This means they will certainly go “foraging” when they get hungry.
Many people don’t realize that the Greater Depression has already impacted rural areas. Hard. Jobs out here are as scarce as hen’s teeth (as the saying goes) and unemployment in our county hovers around 20%. Most of us are poor to begin with, especially by urban standards. That means we don’t have a lot of money to pour into elaborate “prepper” projects.
So does this mean you should give up your idealized little dream about bugging out to the country? Yes and no. It depends on how realistic you’re being about your bug out plans.
Ten Tips if you decide to bug out to the country
To smooth the way, here are ten tips that may make your welcome a little warmer.
1. Don’t Come Unannounced
If you want to escape from the city, make your own private plans in advance and do not broadcast them to every Tom, Dick, and Harry of your acquaintance. Nothing will dismay a rural friend or relative – much less a perfect stranger – more than having a brace of new people on their doorstep asking for food, shelter, and protection. There’s nothing wrong with talking to rural-dwelling friends or relatives about the idea of deploying to their place if things get bad. But if you do……
2. Prepare the Way
One of the “panic” aspects we country folk feel is that we don’t have enough supplies to provide for a hungry horde. And we don’t. Let’s face it, sometimes we barely have enough supplies to feed ourselves (remember, 20% unemployment in our area). Do the math to understand our concerns. If, through hard work, thrift, and diligence we’ve managed to squirrel away a year’s worth of food for our family of four – and then you show up with your family of four – then we’ve automatically halved our supplies to six months. Now can you understand our fears?
Pretend you’ve bought an isolated cabin in the mountains to use as a bug out. Would you be pleased to show up, exhausted and scared, to a cabin with no food, water, bedding, lighting, heat, or other necessities? Of course not. Presumably you would outfit your cabin to be ready for a bad scenario.
Your plans to bug out to a host family should be no different. Send supplies in advance. Send lots of supplies in advance. Can’t afford it? Well guess what, neither can we. That shouldn’t stop you from sending a case of canned goods, a few sacks of rice and beans, perhaps some boxes of ammo. If the host family has an unused corner of their barn, perhaps they’ll allow you to dedicate that area for your supplies. Don’t forget clothing, sleeping bags, toiletries, firearms, medical supplies, etc., and make sure you make everything weather, insect, and rodent-proof.
If your finances permit, consider funding an expensive project that may be beyond a host family’s reach, such as a windmill, pond, or other pricey item. Think of it as a sort of investment.
Sending supplies in advance proves your worth. It demonstrates you don’t plan to be a leech.
3. Clarify your Baggage
Even if you’ve made plans ahead of time and stashed adequate supplies, don’t expect a host family to welcome all your baggage. For example, we have two large and semi-aggressive dogs. We have large and aggressive dogs on purpose – they help protect us. If you show up with a yappy Pomeranian and four cats, don’t expect us to be happy about it. Our dogs would spend every waking hour trying to eat your pets for lunch. And no, it’s not our fault that our dogs are “aggressive.” It’s your fault for bringing animals into a situation that we’re not prepared – or willing – to handle.
4. You’re Not the Boss
This is our home. We live and work here. We pay the mortgage. No matter how much we may love and welcome you, you’re still coming as a supplicant, not a part-owner of our farm. You are in no position to make demands or request that we change our way of doing things unless you can demonstrate you’re an expert. And even then, it’s still our house, property, equipment, and possibly food and other supplies.
Hint: diplomacy will go a long way if you think you know a better way to do something.
5. Prepare to Work
If you bug out to a rural host family, remember they’re not running a bed-and-breakfast. Don’t expect them to wait on you or cater to your every whim. A farm – especially post-bleep – will be a place of constant and brutal work. Nothing will annoy a host family more than some lazy jerk who does whatever he can to weasel out of the day’s chores. Be ready, willing, and able to help. It’s possible that lives may depend on the willingness of everyone to pitch in and work together to do what must be done.
6. Don’t Be Wasteful
When you arrive at your host family’s rural location, you must immediately change any wasteful habits you may have and become very parsimonious. If you spill something, don’t lavishly use paper towels to wipe it up because you can’t buy any more. Use a rag. Treat everything as irreplaceable – because believe me, if you’ve bugged out in the first place, it’s probably because the bleep has hit the fan and common everyday things are irreplaceable.
7. Bring Skills
Host families in rural areas will be more likely to welcome those with useful skills. If your most useful skill is shopping or meditation or social activism, don’t expect a whole lot of sympathy. Your master’s degree in 18th century French literature is not likely to do you a whole lot of good post-bleep. But if you have practical skills – medicine or defense or mechanics or food preservation or animal husbandry or veterinarian skills or sewing or something similarly needed – you’re far more likely to find an open door.
And this should go without saying, but I’ll say it anyway: Don’t lie about your skills or abilities. If you state with confidence that you’re an expert at hunting and butchering – but have never held a rifle or dispatched a steer – that will be discovered soon enough. Learn those skills first before you claim knowledge. Duh.
So learn stuff. Don’t show up ignorant.
8. Clarify by Contract
If/when the bleep hits the fan, people (urban and rural) are likely to be a lot more hysterical than normal. Having your plans in writing ahead of time clarifies all the obligations, expectations, and limitations between the two parties. This contract can also include what the urban person can and cannot bring. Pets should be included in this list. If the rural refuge is not prepared to handle your yappy Pomeranian because he has three aggressive German Shepherds, you need to know that in advance.
This contract should include one very important part: how many people the host family is expected to take in. If, in your compassion, you gather up every second-cousin-twice-removed and show up with a swell of fifty people, do you honestly think that’s going to work?
9. Shut Your Mouth
Okay, let’s say you’ve done everything right. You’ve made a contractual plan in advance with a rural host family. You’ve sent plenty of supplies ahead of you. The welcome mat is ready to be rolled out.
Now whatever you do, shut up. Don’t blab your plans to friends and coworkers, because doubtless they’ll want to know more, and before you know it, the host family’s OpSec is blown. The host family is already going out on a limb by agreeing to take you in – don’t compromise their safety even more. And if martial law ensues and your gossip spreads about the host family’s supplies, it may mean those supplies may be confiscated. Congratulations, now you’re screwed – and so are the people who took you in.
10. Practice Forbearance
The dictionary defines forbearance as “patient endurance and self-control.” Believe me, if the bleep hits the fan, we’re all going to have to practice astronomical amounts of forbearance.
It is not easy to move into someone else’s house. It’s not easy for the hosts to have permanent guests either. Imagine a standard-sized ranch house with five women in the kitchen. Do you honestly think they’ll all get along swimmingly? If that’s too sexist for you, imagine a building project with five guys or (worse) five engineers who all have their own ideas of how something should be done. Who’s right?
Hint: Whoever owns the house gets the final say unless you can diplomatically demonstrate you’re an expert in something. And even then, ownership trumps expertise.
Remember what it’s like at your home when friends and family arrive for the holidays? After three days, you long for everyone to leave. Well if it’s TEOTWAWKI, it won’t be a three-day vacation. There will be stress, anxiety, and short tempers. Everyone will need to walk gently, or the biggest danger for all may be much closer to home than you realize.
Living spaces are likely to be cramped and not private. There is only so much room in the average country home. It’s not like farmers live in mansions with multiple extra bedrooms. Expect to be bunked down on the living room floor or even the barn, shoulder to shoulder. (And no, the host family should NOT have to give up their bedrooms for you.)
Additionally, septic systems are easily overwhelmed by extra usage. One of the first projects everyone is likely to be involved in is digging an outhouse. Please don’t complain about its construction or usage.
If the circumstances with your host family become hostile and unbearable due to stress, high emotions, and general fears – then feel free to make other arrangements and leave.
I apologize if this list makes me sound hostile, but I’ll admit rural folks get tired of being treated like everyone’s personal deep larder if the bleep hits the fan, expected to uncomplainingly provide food and water and medical care and shelter and protection for anyone unprepared enough to show up on their doorstep. Don’t get me wrong, we’re not without Christian charity and will do what we can to help; but like most of our neighbors, we are low income and our resources are NOT INEXHAUSTIBLE. Our primary focus will be our family, neighbors, and beloved friends.
This article is not necessarily to discourage anyone from making plans to bug out to the country. This is just an attempt to make you look realistically at the people whom you’ll be bugging – and I use that double-meaning intentionally.
Guest post by Patrice Lewis, columnist and blogger at Rural Revolution.
Want to read more articles like this one? Subscribe to my emails!
The post 10 Tips For Bugging Out to the Country by The Survival Mom appeared first on The Survival Mom. Be sure to check it out!


June 26, 2015
Food Storage Can Sizes: When to go big, when to go small
 I’ll never forget the very first time I placed an order of food from a food storage company. It was with Walton Feed and, although their products are very good quality, their order form made me dizzy. A friend helped me through the order process and for many years afterward, I figured that the big #10 cans were the way to go. The bigger, the better, right?
My pantry is currently stocked with mostly #10 cans. If my family’s survival depends on this food, I’ll be glad I went for the biggest containers possible.
That’s what I used to think.
Now, 7 years later, I’m rethinking that strategy. It all started when a perfectly good #10 can of freeze-dried grapes became virtually inedible due to a small level of humidity one Phoenix summer. The grapes became sticky, a little gooey, and clumped together. It was hard to eat them and I ended up throwing most of them away. That can of grapes was a #10 can, and my young kids just couldn’t eat that many freeze-dried grapes and weren’t all that crazy about them to begin with.
Food storage can sizes can be confusing
Food storage companies sell most of their freeze dried and dehydrated foods in 2 different size cans. Cans labeled #10 are the really big cans you might see at Costco or Sams Club, holding foods like nacho cheese sauce. They hold about a gallon of food each and in many, many homes are the building blocks, so to speak, of a family’s food storage. The smaller #2.5 can holds about 1/4 that amount.
In almost every case, if you are stocking up just for yourself or maybe one other person, you may want to buy more of the #2.5 cans, but that depends on the individual food. For smaller households or for people who eat smaller amounts, these cans each hold enough of any given food to last several days or weeks, and you’ll likely consume the contents before they’re negatively affected by heat, humidity, oxygen, light, or pests. They’re also easier to transport and their smaller size means they can fit into nooks and crannies — space that would otherwise be wasted.
Confused about #foodstorage? Complete tutorial here!
Click To Tweet
Recently I reviewed the sites of a couple of food storage companies and developed a sort of checklist I’ve followed to determine which size of can is the best choice for my family. Three of the biggest companies, Thrive Life, Augason Farms, and Emergency Essentials all carry similar products. Here are my recommendations for what you should buy in a #2.5 size can or a #10 can.
My suggestions for #2.5 cans
NOTE: Virtually all baking ingredients should be purchased in smaller amounts, except for sugar and flour — if you normally use those 2 ingredients frequently.
Baking powder. Your can of grocery store baking powder has lasted for how many months? Don’t bother buying this in a #10 can.
Baking soda. If you use baking soda just for baking, this size is fine. If you use it in household cleaners or in other ways, I recommend either a #10 can size or the much bigger 5 or 13.5 pounds bags available at Costco, Sam’s Club, or on Amazon. That’s what I’ve purchased, along with a handful of #2.5 cans to use for baking.
Beef and chicken bouillon. Humidity can affect this in a big way and unless you’re making meals in a jar that call for bouillon, for most households, the smaller can size is best.
Butter powder. A little goes a long way and this product produces a flavorful spread but it can’t be melted
Cheese blend. This is a powder, similar to what you would find in a package of store-bought macaroni and cheese. Not everyone likes it, but it’s a handy ingredient for making cheesey things. A smaller can will last for quite a while.
Hot chocolate mixes. Most people just don’t go through this very quickly. A small can will do very nicely.
Iodized salt
Freeze-dried cheese, if you’re stocking up for just 2 or 3 people.
Freeze-dried parmesan cheese. How long has that green can of Parmesan cheese lasted in your house? Probably a very long time! Therefore, if you buy this version, plan on buying the smaller can.
Freeze-dried meat and chicken, if you will be preparing meals for just 1-2 people.
Juice mixes. I’m not a big fan of these and my family never drinks juice, but if yours does, look for varieties that offer a nice dose of Vitamin C, in particular.
Shortening powder, unless you make biscuits frequently
Specialized grains, such as millet and amaranth
TVP (Textured Vegetable Protein) – If you choose to stock up on this, a little goes a long way. I use 1/3 cup, for example, in soups.
Yeast or Instant Dry Yeast. This tends to not store very well, long-term. You’re better off with smaller packages. If you very rarely need yeast, you might just want to buy an occasional jar of it at the grocery store so less is wasted if the yeast becomes too old to be effective. Always proof yeast that is more than a few months old.
Yogurt bites. These are very sensitive to humidity. Get the smaller cans and enjoy them while they’re crunchy. They are a great addition to homemade trail mixes.
Produce
Most fruits, especially if you live in a humid climate. Humidity causes the sugar in fruit to become sticky and the pieces clump together.
Vegetables that you don’t use very often or that only a few family members like.
Vegetables that are cut into very small pieces — a little will go a long way. Examples: celery, onions, peas, chopped carrots. Even a #2.5 can of dehydrated onions will last practically forever.
Vegetables and fruit that you really love but are very expensive in their freeze-dried or dehydrated versions. Examples: cherries, raspberries, mangoes.
NOTE: Definitely consider buying varieties of freeze-dried and dehydrated vegetables and fruit that you cannot grow yourself, for whatever reason, and/or tend to be pricey. Blackberries, raspberries, cherries are all some of my favorites, but I’ve chosen to stock up on their freeze dried versions because they usually are more expensive in the grocery stores. I’ve purchased fewer freeze dried blueberries because I live in Texas blueberry country and can easily buy them in large quantities and can them for later.
My suggestions for #10 cans
Bakery mixes. Some companies offer cookie, cornbread, bread, biscuit, muffin and brownie mixes. Before ordering these, take a look to see how much is required for one batch of a recipe. One sugar cookie mix recipe calls for 3 1/2 cups of the mix! Just 4 or 5 batches, and that can is ready to recycle. You’re better off stocking up on the individual ingredients to make your favorite desserts, but some people really like the convenient mixes.
Beans. Beans have a very long shelf life, even when the can is opened.
Fruit varieties that you know you’ll use frequently. Apple slices, for example, if your family loves apples and you use them in lots of recipes.
Freeze-dried cheese. Most recipes will call for at least 2-3 cups of rehydrated cheese (think enchiladas or a lasagna). If these are recipes you want to continue making, the larger cans will be best.
Grains. Virtually all grains, from wheat to pasta to oats and rice, are fine in the larger cans. If you use grains at all, they are probably a staple of your family’s diet and you’ll have no problem using up the contents in a #10 can as these foods store very well, long term.
Just-add-hot-water meals. You’ll most likely use a few cups of these meal mixes at a time.
Most freeze-dried meat and chicken. Some brands say that opened cans of their freeze-dried meats are only good for 30 days or so, while other companies estimate a few months. Honeyville says to use their freeze-dried meat within 30 days once opened and within a week if it’s not refrigerated. Thrive Life’s meat and chicken have longer shelf lives once open. If you have Honeyville meats, then smaller can sizes might be a better choice, unless you normally feed a large family and can easily use up a #10 can within 30 days.
Some vegetables. For the most frequently used veggies, you might want to opt for the larger can size. Do you cook a lot of meat and potatoes? Then #10 cans of potatoes in all their varieties is probably your best choice. One caveat is for those living in a very humid climate. In that case you may want to buy the smaller 2.5 size cans because humidity will affect freeze dried and dehydrated vegetables.
Is Food Storage new to you? Check out my list of food storage articles for newbies here!
As always, always, your mileage may vary! One of my prepper pet peeves is the occasional complaint by some of my readers who don’t stop to think for themselves when they read different types of survival advice: “You say to stock up on peanut butter, but we’re allergic to peanut butter.” “Why should I buy mangoes when we hate mangoes?” All food storage absolutely must be customized to your household’s preferences, allergies, food sensitivities, storage space available, finances, and even the level of motivation.
In survival and preparedness, as in every other area of life, you must make the decisions that suit your family and your circumstances best! Use my suggestions here as guidelines but do consider:
What will my family actually eat?
What ingredients do I normally use in the course of a month?
Are there any allergies or food sensitivities that I need to keep in mind?
In a worst case scenario, who else might I need to feed? (If you think there will be loved ones showing up at the door, stock up on a lot of meal stretchers. These extend just about any recipe and are calorie dense.)
What is my monthly budget for extra food storage?
Where will I store all this extra stuff? Never store food in an attic, garage, outbuilding, or any place that isn’t, at the very least, well insulated. Ideally, food should be stored in the 70-75 degree range.
What are my priorities when it comes to food storage? Just the basics, beans, wheat, rice, and salt? Making sure my loved ones continue to enjoy the same familiar and comforting recipes no matter what happens?
When the #10 can is just too, too big
Sooner or later you’ll be faced with the dilemma of what to do with the contents of an opened #10 can when you know, full well, that you aren’t going to polish it off any time soon. The food doesn’t have to go to waste, and shouldn’t. You can easily repackage it.
Most of the foods I’ve listed here can easily be repackaged in canning jars of the size you prefer. You’ll need a selection of jars, canning lids, a vacuum sealer, and a jar sealer attachment. This is a very, very simple process, and I’ve used it to package in jars everything from salt to biscuit mix to quinoa.
You can also use the vacuum sealer and vacuum sealer bags. That’s a nice option because the individual bags can be stored in larger bins and buckets.
In this video, I demonstrate how to use a vacuum sealer and jar sealer attachment to store small amounts of food in canning jars.
The post Food Storage Can Sizes: When to go big, when to go small by The Survival Mom appeared first on The Survival Mom. Be sure to check it out!


June 24, 2015
Going From One Income To No Income: The Plunge Has Been Taken
 Several months ago I wrote about my family’s plan for my husband to continue his education: he was going to quit his job as a software engineer and then become a full-time student at our local university, working toward a degree of electrical engineering. We would be living on no income for an extended period of time — living off of savings and food storage.
More backstory to fill in the blanks
My husband has been very slowly working toward his bachelor’s degree for many years now. About three years ago, we made the decision for him to go from a 40-hour work week to a 32-hour work week at his office. We would still keep all our benefits, and though our income would take a hit, we would still be able to save money. With the extra time per week, he would be able to take one class per semester at the university as a “non-traditional student.” His guidance counselor determined that at this rate, he would graduate around 2021. Eek! But, if he decided to go full time, including spring and summer terms, he could graduate by December 2016; a much more workable plan.
I was nervous to tell my mom about what we were planning, but when I did, she said, “If anyone can do it, it’s you two.” It was really nice to have the parental support, because the internet was not so kind. People called us irresponsible, misguided, and said that we were crazy dreamers. My favorite comment was, “This is the stupidest thing I’ve ever heard of.” At least I know my mom likes me!
As the date approached for my husband to quit his job, I grew increasingly nervous. What if those internet commenters were right? What if we were just being foolish?
In the end, it was a moot point. My husband’s company underwent some major restructuring that resulted in most of his team being laid off, including himself. His boss and others in management had known about his plans to quit for months but very generously fired him, so that he would be eligible for a severance package.
So far, so good with our living on no income experiment!
So now, here we are, more than two months since my husband stopped work, and already finished with his first term (it was an accelerated course). How are things going so far? Well, not so bad, actually.
Thus far the changes have been minor. Some have been good – the university is closer to our home than my husband’s former office, so he rides his bike, leaving me free to use the car. Other changes haven’t been as wonderful – my husband is gone more hours per day so he can do most of his work on campus.
One of my concerns in planning our adventure involved the amount and type of food we would have access to. In my imagination I worried about being hungry all the time, forced to eat sludge with depressing names like, “gruel,” “mash,” and “cabbage soup;” things that taste like sadness and broken dreams.
If you’ve read Survival Mom’s Could You Stomach These Great Depression Meals, you know what I’m talking about!
After assessing our expenses, however, we found that our grocery bill comparatively minuscule. We can still comfortably purchase fresh fruit and ground beef. It helps, though, that the meals I make from our food storage are flavorful and exciting: falafel, hummus, and black bean tacos.
Are you experiencing lean times, too? Don’t miss my monthly “52 Weeks Savings” series. Each month I post that month’s best bargains, discounts, and deals for the frugal-minded Survival Mom! Here’s a sample for the month of June.
We’re not in lean times, yet. It’s difficult to feel the pinch when there is still so much leeway. We are still making our mortgage and utility bills out of our savings, and expect that this will be the norm for some time. We have already begun eating up our food storage. We did not qualify for grants and scholarships at the beginning of this year because my husband was still employed, but we will qualify for those grants next year, and that will go a long way toward stretching our savings.
Although we will qualify for programs such as WIC and SNAP, we don’t anticipate that we will have to use them. We have no plans to take out student loans, either. The only sticky question that remains relates to health insurance. We don’t want to use Medicaid because we don’t want to become a burden on an already strained system. It’s something of an ethical labyrinth because being uninsured is far too risky (it’s also against the law, thanks to the Affordable Care Act). Yet the price of private health insurance is astronomical. We submitted an application to the healthcare.gov website, in hopes that it will direct us toward a middle ground: health care that is truly affordable that doesn’t constitute accepting a free lunch.
It is not my intention to, in any way, put down those who must use these programs by necessity. Rather, it is to illustrate our mindset. We know that living on no income on purpose is risky, but we have a strong desire to retain our independence and an even stronger desire to refrain from using resources that could go to people whose needs are greater than ours.
In all this, I’ve discovered a very good surprise. For most of our almost ten-year marriage, my biggest fear was that someday my husband would come home from work with news of being laid off. I’ve discovered that this doesn’t have to be such a scary thing. We had prepared for this, long before we made the decision for my husband to quit work. If this had been an unexpected layoff, we still would have been able to feed our children and fulfill our financial obligations, with a lot of room to breathe. If, in the next few months, circumstances prove that our current plan is untenable, we will still have the resources to stay afloat while seeking out another job. This, I feel, is the essence of emergency preparedness: so when the axe falls, preparation softens the blow.
Are you ready to live on no income?
One of the potential disasters that preppers keep in mind is suddenly having no income. Learn more about how to be a prepper with this selection of recommended books:
52 Prepper Projects by Dave Nash (Budget-friendly and practical.)
Countdown to Preparedness by Jim Cobb
Food Storage for Self-Sufficiency and Survival by Angela Paskett
The Pantry Primer: How to build a one year food supply in three months by Daisy Luther
The Preppers Blueprint by Tess Pennington
The Prepper’s Pocket Guide by Bernie Carr
Survival Mom: How to Prepare Your Family for Everyday Disasters and Worst Case Scenarios by Lisa Bedford
The Survival Mom, Lisa Bedford, teaches you how to be a prepper in this video
The post Going From One Income To No Income: The Plunge Has Been Taken by Beth Buck appeared first on The Survival Mom. Be sure to check it out!


June 23, 2015
Clean Your Clothes Without Electricity

Our washing machine was not appreciated. It faithfully sat in the corner of our laundry room and dutifully agitated and spun the dirt away… until it broke last summer. It had served us well by cleaning 60 loads a month, but it was not worth repairing.
This was our unplanned introduction to off the grid washing and putting into practice the skills needed to clean clothes without electricity. No one, except me, was enthusiastic about this new adventure. For two weeks we did our laundry by hand and lived to tell about it.
We knew enough of the basics and we did have clean clothes, but as those 2 weeks wore on, we learned a lot more. If you’re ever without power or if there’s ever a grid-down scenario, these tips will come in handy.
Clean clothes without electricity — not easy, but doable!
• Do your best to keep up on laundry. When an emergency happens, you will feel some sense of assurance that most of your family has clean underwear. In fact, hurricane-hardened moms know to go on a laundry-cleaning marathon once a hurricane is just 3 or 4 days out. If the power goes down, at the very least you’ll have clean sheets, towels, clothes, and plenty of clean underwear!
• Assign a laundry day to each person in the home. If they are old enough to, have them be responsible for their own laundry, this includes their linens. Teach and help younger children how to do laundry, including sorting, which detergent to use, how to remove stains, how to fold each type of item, and finally, where everything goes once folded. When they are 12 years old they should have this mastered. It’s a life skill. Am I right?
• Stock up on laundry soap, dryer sheets, fabric softener and stain remover. A 3 month supply would be awesome! If you want to make your own products, download Switch From Store-Bought to Homemade, a FREE Survival Mom e-book!
• We have stored bars of Fels-Naptha and Zote soap. These bars can serve as a pre-treatment stain remover and as detergent. They are inexpensive, small, easy to store and last a long time.
• As a bonus, Fels-Naptha can be used for poison ivy treatment, cleaning very greasy/dirty hands and household cleaning. Do not wash dishes with it or use it as a regular hand soap.
• Zote is a great soap for those with sensitive skin or for baby clothes. It has a strong scent, however.
• Clotheslines and clothes pins are a must. Clotheslines come in a variety of styles. Buy what works best for your home and size of your family. Be prepared to have a drying method for inside your house on rainy and/or wintery days. Wet clothes have been known to freeze solid on a clothesline!
• Have a backup location to wash and dry. In Southern California we found the weather to be wonderfully cooperative! Consider the bathroom a great place to wash. You will need to drain the water somewhere. Maybe a garage or basement would provide the room needed for a clothes line.
• Once in a while, wash clothes by hand or just bypass the dryer. There is much to learn about the art of hanging clothes on a line. More people than you might think continue to use a washboard for scrubbing clothes by hand.
• In a true grid-down scenario or a severe drought, be prepared to recycle your grey water. Grey water is the water that you used to do laundry and can be used to water plants, wash a vehicle, or other uses that don’t involve contact with food. If you’re planning to do this, use water that has not been used to wash underwear, since any water that comes in contact with feces will be too contaminated to re-use. The solution for that is simple: schedule one or more loads of “underwear laundry” per week and wash everything else separately.
• Consider buying a non-electric washing machine as a backup for power outages. These units run around $50 and the WonderWash was reviewed here a few years ago. Some of these units have a foot pedal or a hand held crank and hold about 6 lbs. of clothes. They require less physical strength and it only takes a few minutes of turning to have clean clothes. Rinsing goes fast and the clothes can be spun to expel much of the water.
There are a variety of laundry soaps and stain treatments that you can make at home. I have made both the powder and the liquid. The powder is faster to make. I recruited one of my children to grate the soap to see how it would work. It went well and I got a clean smelling kid out of it. A food processor was used to grate another batch. It got the job done but it did required electricity. You could easily make a 6 month to a year supply of laundry detergent in an afternoon. Personally, I store bars of soap and have additional store bought detergent as well.
Download Switch From Store-Bought to Homemade for free recipes and instructions for homemade laundry detergents.
Methods of off grid washing vary. If you are strong, want to get strong, or have kids that need to burn energy, I recommend the 5 gallon bucket and plunger method. It is cheap to make and simple to store. This is what you need:
• 2 5-gallon buckets (home improvement store, some restaurants give them away for free)
• Lids for buckets. Washing can be done without a lid, as we have learned, but a lid is better!
• A new plunger, average quality is the minimum.This one was designed specifically for off-grid laundry use.
INSTRUCTIONS:
Take one of the 5 gallon buckets and drill holes all around the side of it. Drill holes in the rubber part of the plunger, if you’re using a traditional plunger and not the one pictured here.
If you choose to use a lid, drill a hole in the lid that is large enough to place over the stick of the plunger. Put the bucket with holes inside the other bucket. Add water, soap and clothes. Allow enough room for agitation!
Grab a chair, put the bucket in front of you, and pretend you are plunging the toilet for about 10 minutes. Dump dirty water out, fill with clean water and continue plunging. When you are finished rinsing, place the outer bucket inside the bucket with holes and press or sit on it. Most of the water will drain from your clothes.
If you are determined to permanently wash without electricity, there are other options to be explored. A bicycle powered washing machine or a large hand cranked machine can be purchased. Antique stores and auctions often have non-electric washing machines from many years ago that are still functional. These vary in price and quality. What matters most is that you have a plan and the proper equipment ready to clean clothes without electricity. It’s not easy, but it’s definitely doable!
Learn more about off-grid living skills
Follow my Off-Grid Living Pinterest board
Getting Started With Cooking Off the Grid
June Skill of the Month: Off-Grid Living
Off-Grid Living: Take Care of Personal Hygiene
One in a Million: Would your spouse live the off-grid lifestyle?
The post Clean Your Clothes Without Electricity by Erin Foster appeared first on The Survival Mom. Be sure to check it out!


June 22, 2015
It’s June! Mid to Late Summer Vegetable Gardening

Even the most avid gardeners have a bad year! Any number of things can keep you out of the garden in April and May, weather problems, work commitments, family problems . . . we’ve all been there. But don’t give up on your summer vegetable garden just yet. There are still plenty of yummy veggies you can get planted now (in mid to late June) and get a nice harvest before the summer ends.
Let’s talk about what you can still get planted now and also talk about a few things that you can wait on and plant in about 5 or 6 weeks (Around August 1st for most of us).
Want more in-depth training to help you get the most out of your vegetable garden? Take advantage of Rick Stone’s decades worth of gardening experience by signing up for his online, self-paced gardening classes: Year-Round Gardening ($20 with current discount for Survival Mom readers) and Seed Starting Simplified ($14 with current discount).
Summer or Warm Season Veggies in Your Summer Vegetable Garden
Tomatoes
No summer garden is complete without a few tomato plants and you can still get some in. Hurry on this one! Most nurseries will still have a few tomato plants hanging around but they wont last much longer. (Don’t try to plant tomatoes by seed this time of year.)
 This late in the year you want to be thinking about smaller, quicker maturing varieties. Try some type of cherry tomato (varieties to look for include Sun Sugar, and Sweet 100). They are relatively fast growers and should still give you a good harvest in September and early October.
You can also try some of the tomatoes that produce small to medium sized fruit. Think varieties like Early Girl, possibly Celebrity, or many of the Roma tomatoes. Try to find tomatoes that grow on determinate vines (vs indeterminate) as these will spent less time growing vines and more time growing fruit.
The 6 weeks you have lost in growing time means you won’t have a huge harvest this year, but if you get them in soon you should still have plenty for fresh eating and, hopefully, canning!
Summer Squashes
Zucchini and yellow crook neck squash are actually quite fast growing. Look for varieties that have a maturity date of around 60 to 70 days and you should still have lots of time to grow more zucchini that you can eat! You could also look for a patty pan squash with a short maturity date.
Green beans
Most bush type green beans have a maturity date of around 60 to 70 days, so there is plenty of summer left for beans. In fact I don’t make my last planting of green beans until mid July and still have a great harvest!
Melons
If you would still like to plant a melon, you have a little bit of time left. But choose the small “ice box” types as those take much less time to mature. You can also get cantaloupe planted now. Again, don’t expect a huge harvest this year, but you will still have a few melons that will be ready before the frost comes.
Potatoes
If you can find the seed still around at your local nurseries, there is time to grow a nice crop of potatoes. In fact, you could continue to plant potatoes until mid July in most areas of the country and still get a nice harvest of small roasting potatoes. This time of the year I would stay away from the big “baking” potatoes, like russets. You are running short of time to get them to maturity.
 Cucumbers
Cucumbers are a good late season planter. Again, you may not get the huge yields you are used to but by planting seeds now, you can still have a fairly respectable crop.
Onions
If you can still find a package of onion sets at your local nursery, they will do okay this time of year. You won’t get a lot of large onions but you will have plenty of smaller onions and green onions. Don’t try growing onions from seed or starts this late in the year.
Herbs
Many herbs will still do well if planted this time of year. It would be best to plant starts, instead of trying to plant seeds.
Cool Weather Veggies
You can still have an awesome harvest of cool weather veggies by planning now to get them planted in late summer and early fall. Nearly anything you would normally plant in the spring time, you can also plant in the fall. A good, solid summer vegetable garden can extend into the cooler months, if you jump on it now!
 Cole Crops
Broccoli, cabbage, kale, and kohlrabi. If you grow your own seedlings, mid June is a good time to start a fall crop of all these yummy cool season veggies. If you plant any of the Cole crops indoors now, they will be ready for planting out in the garden in about 6 to 8 weeks.
That means you will be planting them around mid August and they will mature in October when the weather has cooled back to those temperatures that Cole crops love so much! You may find many of these veggies are even tastier in the fall because a night or two of frost helps to sweeten the flavor.
Lettuce
You can start replanting lettuce about 6 to 8 weeks before your first frost (for us that’s August 1 – 15). Fall planted lettuce can last unprotected in your garden until early December, depending on where you live.
Spinach
Most people see spinach as a spring only crop, but it does very well in the fall! Again look at planting about 6 weeks before your first frost and you will be able to start harvesting in late October. Then cover those plants with a cold frame or hoop house and they will over winter for an extra early spring crop.
Root Crops
Carrots, turnips, beets and radishes all do well in the fall and you can start replanting them around 6 weeks before your last frost.
 So as you can see, all is not lost for your summer garden! Get out there this weekend to put some seeds and plants in your garden so you can still have an awesome harvest this year! Be sure to check out my blog, www.ourstoneyacres.com for lots of great gardening tips!
Would you like to learn more about starting your own seeds or gardening year round? Please consider taking one or both of my on line video courses – Seed Starting Simplified and Year Round Gardening. They are both on sale to thank The Survival Mom for allowing me to guest post on her site!!
Guest Post by Rick Stone of www.ourstoneyacres.com.
The post It’s June! Mid to Late Summer Vegetable Gardening by Guest Poster appeared first on The Survival Mom. Be sure to check it out!


June 19, 2015
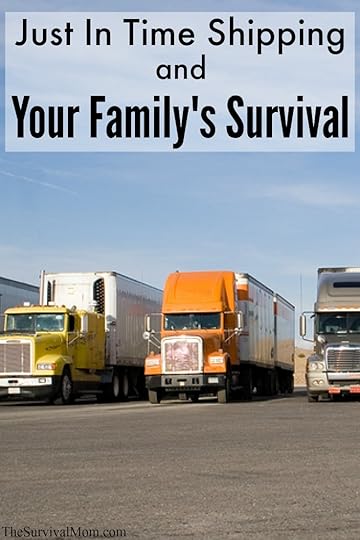
Just in time shipping and your family’s survival
 Back in the day when I clothed my kids in Gymboree from head to toe, the sales clerks could almost always manage to find the size I needed by, “checking in the back.”�� Every store has a stockroom in the back where, presumably, massive quantities of extra products are shelved.�� Well, a couple of years ago I was surprised to find out that this isn’t true, Gymboree notwithstanding.
In fact, most stores operate on a system known as, “just in time shipping”�� or “just in time management.” In other words, products arrive just in time to be put on the shelves to replace whatever has been purchased.�� That’s why, when a store has a particularly good sale on an item, once it’s sold out, it might be out of stock for days or weeks.�� There are no extras hidden in the back room.�� Retailers keep their inventories to a bare minimum in order to save money and to��not end up with a stockpile of a product that isn’t selling.
One impressive��feature of this system is that it is run by computers and can actually forecast which products will be needed where and when.����For example, when the weather in a certain area takes a turn toward higher temperatures, the system will automatically begin shipping items such as sun block and beach toys.�� An��oncoming hurricane will trigger the shipment of bottled water, baby formula and ice.����You can read more about this impressive system here.
Now, what does this information have to do with your family’s survival and preparedness?�� Imagine there’s a major crisis in our country that slows the shipping business down to a crawl.�� It could be a natural disaster affecting the busy ports along the west coast.�� Excessively high diesel prices could drive some trucking companies out of business and reduce the amount of goods being shipped via our highways.
The fact that our nation is so very dependent on technology is exactly what makes us so vulnerable, ironically. Just in time shipping has been serving manufacturers, wholesalers, retailers, and consumers very well, but it’s also a fragile system. It depends on our nation’s power grid and ready access to the internet. A massive power grid failure, cyber-terrorism, or just mischievous hacking could create a cascade failure of important goods reaching their destinations.
Whatever the event, the just in time shipping strategy may leave the average American family high and dry in the middle of a major crisis.
The American Trucking Association presents a sobering view of possible consequences to a partial or complete interruption to our nation’s trucking business.�� You��should take a few minutes and��read the entire paper, but here��is a brief summary of a possible timeline in the event of a truck stoppage.
Within 24 hours
Delivery of medical supplies to the area affected��by a disaster��will cease.
Service stations will begin to run out of fuel.
U.S. mail and other package delivery will cease.
Within one day
Food shortages will begin to develop.
Without manufacturing components and trucks for product delivery, assembly lines will shut down, putting thousands out of work.
Within two to three days
Food shortages will escalate, especially in the face of hoarding and consumer panic
ATMs will run out of cash, and banks will be��unable to process transactions.
Garbage will start piling up in urban and suburban areas.
Within a week
Automobile travel will cease due to lack of fuel.�� Without autos and busses, many people will not be able to get to work, shop for groceries, or access medical care.
Hospitals will begin to exhaust oxygen supplies.
Start keeping track of the goods you buy most often and the most important services your family uses. Virtually every one of them will be affected by a disruption in our just in time shipping system.
Preparedness now is the key.�� Simple steps toward three months or more of food storage may make the difference between your family getting daily, nutritious meals and standing in line with hundreds of other hungry people, hoping to get a few groceries.�� A home garden will produce fresh produce, and safely storing several gallons of fuel may help you and your family get through the worst of it.
Just in time shipping works well for manufacturers, wholesalers, and retailers but is vulnerable when calamity strikes.�� Fortunately, preppers can take advantage of this knowledge by taking prudent steps to safeguard our families regardless of what is on a store’s shelf.
This article was originally published on December 18, 2009, and has been updated.
The post Just in time shipping and your family’s survival by The Survival Mom appeared first on The Survival Mom. Be sure to check it out!
June 18, 2015
21 Ways to Use a DeLorme Atlas to Plan Emergency Evacuations
 Over the river and through the woods to Grandmother’s ��house is not a bad evacuation plan at all as long as you have a working vehicle and enough gas to reach your destination. However, not all evacuation routes are that simple, and sometimes you need a detailed map to plan primary, secondary, and even tertiary routes in times of trouble.
Humans are creatures of habit and many of us could probably drive to work, school, the grocery store, or our favorite restaurant with our eyes closed. But in an emergency, a natural disaster, for example, could we get home or to another safe location from those places and how many different routes could we use?
The problem with any passageway, be it a dirt road, city street, or interstate highway, is that they can easily become impassable for a variety of reasons:
Flooding
Large scale traffic jams
Rock or mud slide
Multi-vehicle accident — even an accident involving a single vehicle can easily stop traffic
Street damage due to an earthquake
Riots or violent crime
Wildfires
Blizzards
Roadblocks — by law enforcement or other authorities��or by 2-legged predators
Evacuation routes can be planned well in advance, traversed multiple times to help with familiarity, and shared with family members. It’s vital to have multiple, planned routes, marked on a map, because the odds favor one or more of those routes becoming impassable.
Those routes should head in different directions: north, south, east, and west. If you’re at home and learn of a wildfire just a couple of miles to the east and your only planned evacuation route heads in that direction, you’re in trouble! Also, the routes should be prioritized with Route A being the preferred route for familiarity, best direct route, ease of travel, access to gas stations, banks, grocery stores, etc. Route B, Route C, and so on should be marked��on the map and be included on��occasional practice runs, but those routes will be less preferable for any number of reasons: rough roads, a longer route, fewer amenities along the way, etc.
Use the DeLorme Atlas for evacuation route planning
One of the best resources I’ve found for this type of planning is my DeLorme Atlas & Gazetteer. These very large atlases can be found in bookstores and online and there’s one atlas per state in most cases. I bought mine on Amazon.
The DeLorme maps are extremely detailed and as I browsed through mine, I came across a multitude of helpful features. Here are some from my list, along with my notes for their potential usefulness:
1. Hundreds of back roads, marked as thin, red lines,��are included in the DeLorme Atlas. These little known routes might help you get from Point A to Point B, if other routes are blocked.
2. Different types of roads are marked, which is helpful in determining the type of vehicle(s) used for bugging out. Be sure to check out each route in person to determine whether or not your vehicle will be able to handle road conditions.
3.��Reservoirs are clearly marked, allowing you to plan a route that takes advantage of this water source or avoid a possible flooding area.
4.��Airports of all sizes are indicated. If flying away from the danger zone is an option, you can look for multiple routes to get to the airport. At smaller airports you might be able to find a pilot for hire.
5.��You can easily avoid��bridges��as your make your plans. Bridges can be washed out or become choke points in a mass evacuation.
6. Because this particular map is so very detailed, it allows you to plan multiple routes with a pretty good idea of what you can expect to find along the way.
7. You’ll find��railroads marked on the DeLorme maps. If you’re evacuating on foot, it could be handy to follow these routes, since you know they’ll lead to populated areas, and you’ll know ahead of time which areas those are so you can either avoid them or not.
8.��Military sites are indicated. In a dire emergency, you could head there for help.
9. Along highways, rest areas are marked. At the very least, you’ll find water and toilets at these, but, depending on the location and circumstances, they aren’t always a safe place to stop.
10. The DeLorme maps include charts showing what types of wildlife are in the area for fishing and hunting. There’s no guarantee that you’ll be successful in your fishing and hunting endeavors, but at least you’ll know which animals to look for.
11. A very important feature are the hiking trails that are indicated. There are certainly more trails to be found, but having these already marked is a big help if you must evacuate on foot.
12.��Campgrounds are also a feature of the map. If you have absolutely nowhere else to go, you can head for those. If you have a head start on the majority of evacuating people, you might find a prime spot at a well-equipped campground. Otherwise, you can head for a lesser known campground at a state park.
13. The DeLorme atlases are huge, which is a big help for seeing all the details. You can always tear out the pages you really need, laminate them, and keep them in an emergency kit. Keep the rest of the book handy, though, because you never know when you’ll need to expand your planned evacuation route further than you originally planned.
14. Canal and dam systems are marked, making it easier to find water sources.
15. Lakes, even small ones, can be found on the DeLorme maps. If you know how to fish, be sure to include basic fishing gear in your emergency kits or just always have them packed in your vehicle. Planning on drinking lake water? Be sure to have a really good water purifier/filter, such as the Sawyer Point Zero Two Water Purifier.
16. The DeLorme maps provide topographical information, so you have an idea of the elevation of your location and route. During a rainy season or hurricane, this can help you avoid areas that are likely to flood.
17. You’ll also find information about the type of terrain in different areas. At a glance, you’ll be able to locate wetlands, sandy areas, forests, and the like. All helpful to know when planning your route and where you’ll stop overnight, if necessary. If you’re planning to walk, this information can help you plan ahead for the right type of footwear, gear, and shelter, as well as some of the basic survival skills you’ll need for a particular type of terrain.
18. There is a separate DeLorme atlas for every state. If you think your route(s) may take you into neighboring states, get those atlases as well. Since they are mapped by the same company, the map markings will be consistent from state to state.
19. Where lakes and rivers are marked, you’ll also find boat ramps marked. This could be handy if evacuating by water is part of your plan. Also, where there are boat ramps there are also small businesses that sell food, water, and boating related gear.
20. State and national land is indicated on each map. If you really want to get away from it all, you could head to those areas.
21. Detailed maps such as the DeLorme atlases are great for kids learning how to use a real, paper map. Teach them how to use a map key, compass rose (N, S, E, W), and have them help you plan different routes for evacuations, vacations, or trips to Grandma’s house. Our kids are already too reliant on electronics and map reading skills could save a life someday.

The post 21 Ways to Use a DeLorme Atlas to Plan Emergency Evacuations by The Survival Mom appeared first on The Survival Mom. Be sure to check it out!