Lisa Bedford's Blog, page 107
April 7, 2015
3 Things To Make With Wheat Besides Bread
 Lots of us like to store wheat. It has a long shelf life, it’s nutritious, and you can use it to make that beloved staple of Western Civilization: bread. In fact, in Medieval Europe, all other foods – meat and vegetables – were considered, “stuff you eat with bread.” However, the ovens the Medieval Europeans used to make this bread were huge, required enormous amounts of fuel, and took most the day to heat up.
We are certainly spoiled with our nice little electric ovens that come up to temperature in less than twenty minutes, but without modern conveniences, how would you bake that bread? Most of us don’t have Medieval bread ovens out in the backyard. And even if you did, what would you use for fuel? It would be a shame to let all that wheat go to waste.
Fortunately, bread is not the only thing wheat is good for. If you have a grill, or at least a cast iron frying pan, a manual wheat grinder, and just a few extra ingredients, you can make a wide variety of meals. I’m not even going to mention cracked wheat cereal, which brings to mind thin, sad faces and Little Orphan Annie. I mean meals that you would actually want to eat, like pancakes and biscuits.
Even without a modern oven or range, you can place a frying pan over your outdoor grill or over a campfire. This method is perfect for making things like pancakes and tortillas, and can also be used for other quick breads like biscuits (you will have to flip them).
Knowing alternative ways to cook, and having the tools to do so, is important for short-term power losses and even a long-term failure of the power grid.
Pancakes
Any pancake recipe can be converted into a whole wheat pancake recipe simply by substituting whole wheat flour for white flour. For very best results, use buttermilk. If you don’t have buttermilk, you can use reconstituted powdered milk and add a tablespoon of plain yogurt. Here is my children’s favorite recipe:
2 Eggs
1/4 cup vegetable oil
1 1/5 cup milk or buttermilk
2 cup whole wheat flour
2 Tbsp brown sugar
4 tsp baking powder
1 tsp salt
Combine all ingredients, cook as you would any other pancake recipe. Makes 6-8 pancakes, depending on size.
Tortillas
We eat a lot of tortillas at our house in the form of fajitas, enchiladas, soft tacos, burritos, et cetera. I went through a lot of tortilla recipes trying to find one I like, and this one is pretty fool-proof. I usually double it for my family of five:
2 cup whole wheat flour
1/2 tsp salt
3/4 cup water
3 Tbsp olive oil
Combine all ingredients and mix by hand until it forms a ball. If the dough is too sticky, add more flour a little at a time until the desired texture is reached. Let the dough rest for about twenty minutes, then divide into six portions. Roll out each ball and cook about a minute on each side. Makes 6 tortillas.
Biscuits
This recipe is adapted from a recipe book that used to belong to my great grandmother.
2 cup whole wheat flour
4 tsp baking powder
1 tsp salt
4 Tbsp shortening (the amount can be decreased to 2 Tbsp, but I prefer the flakier texture that comes with more fat)
3/4 cup buttermilk
Mix the dry ingredients together, cut in the shortening. When adding the buttermilk, do not overmix. Instead of rolling out the dough, save time and form the dough into a log, then cut the log into biscuit-shaped slices. Allow 4-5 minutes per side on medium heat, taking care not to let them burn. For best results, cover the pan. Makes 12 biscuits.
You’ll notice that none of these three recipes require more than two cups of flour . That is because I assume that if you don’t have your electric stove, you probably don’t have your electric wheat grinder, either. Have you ever tried to grind six cups of flour at once with an ordinary hand-powered grain mill? It’s incredibly tedious. You’ll be having flashbacks from Laura Ingalls Wilder’s The Long Winter for days. Two cups at a time, however, is entirely doable. You’ll be able to finish in less than a half hour.
I hope you will be inspired to test out these recipes. I was skeptical about the idea of skillet biscuits on the grill, but was pleasantly surprised by how they turned out. What are some other non-bread ways you have used wheat in your home?
Helpful resources for you
Wondermill Junior review
The Wondermill Junior, on Amazon
Wheat storage worksheet — use this to calculate how much wheat you should store
“Wheat for dummies”
The post 3 Things To Make With Wheat Besides Bread by Beth Buck appeared first on The Survival Mom. Be sure to check it out!


April 6, 2015
Planning and Building a Bee-Friendly Backyard
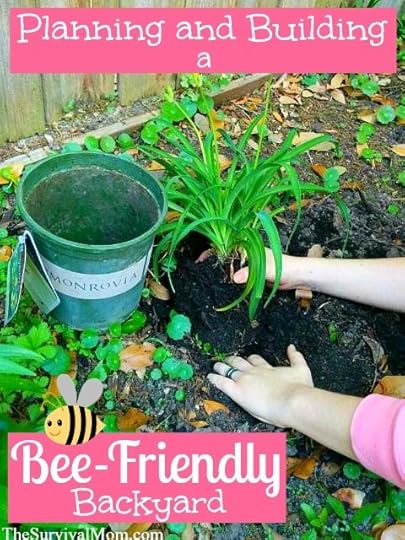 Like most of you, I have a love/hate relationship with bees. I hate their stings, and thank goodness, no one in my family is allergic to them, but I love their role in nature, acting as the major pollinator. Without them, many different species of plants and animals wouldn’t survive and one way to support them is to create a bee-friendly backyard.
Last year we decided to develop a close, personal relationship with bees by adding beehives to our busy backyard. Already we have an owl habitat and both herbs and vegetables growing alongside pines, oaks, and crepe myrtle trees. It’s an odd assortment, to be sure, but we figured that bees would fit right in.
When I was asked by Monrovia Plants to learn more about their varieties of pollinators, I was thrilled. It was the perfect chance to add more flowers to our backyard, enticing bees as well as butterflies and hummingbirds. With our vegetable plants, in particular, we want to make sure that plenty of pollination occurs, since we’ve hand-pollinated our tomatoes this year.
How to create a bee-friendly backyard or garden
For our own backyard, we immediately realized the need to add flowers. We have plenty of trees, grasses, and shrubs but very few flowers. When I visited a local nursery, looking for Monrovia pollinating plants, I zeroed in on the Baby Pete Lily of the Nile for its beautiful, deep purple blossoms and the Stella De Oro Dwarf Daylily. Both of these will do well in our growing zone, 9A.
Select plants that are compatible with your zone
The first rule to develop a bee-friendly backyard is to plant varieties of flowering plants that will thrive in your growing zone. However, in every backyard, frontyard, garden, or homestead there are also microclimates, and it’s important to keep those in mind. Microclimates are very small areas that have a different climate from the surrounding areas.
When we used to live in Phoenix, I was occasionally amazed to learn that one friend or another was able to grow something that I had thought would never grow in that hot, arid zone. One friend had an enormous bed of calla lilies on the side of her house where they had plenty of shade and the soil held its moisture. Your property also has microclimates and you may, too, be surprised by what you can grow once you figure those out. Just look for areas that have more/less shade, slope, exposure, and wind. One clue to look for is any native vegetation that might be growing where it’s not “supposed” to.
The daylilies and the purple Lily of the Nile will do well planted alongside our driveway where there is some shade for the hottest part of the summer and the soil is very rich. I could also have planted them in pots, which is an option for anyone without a yard.
Bees are attracted to certain colors
Just as you and I have favorite colors, it seems that bees do, too. They cannot see colors in the red end of the color spectrum, so good color choices are yellow, white, purple, orange, pink, and blue. Both of the flowering plants I bought from Monrovia fill the bill.
A few flowers to consider for your own bee-friendly backyard are:
Basil
Coneflower
Fennel
Lantana
Lavender
Lobelia
Lupine
Mint
Oregano
Rosemary
Salvia
Sunflowers
Sweet alyssum
Yarrow
It’s best to plant flowers that grow in clumps, rather than single blossoms on long stems and then to plant them close together. Bees are more attracted to clumps of blossoms and having them close together makes it easier for them to do their pollinating job.
There are many other colorful plants, but as you can see, both flowering herbs and food-producing plants make bees quite happy and it’s a win-win if you’re trying to grow your own food!
Think year-round, if possible
Your backyard or garden can provide pollination opportunities for bees year-round, since bees need pollen and nectar throughout the year. As you begin to narrow down the types of plants that do best in your growing zone, select ones with bee-attracting colors, also check to see when they will flower. Ideally, you’ll want to have plants that flower in the spring and summer, along with those who produce blossoms in the fall and winter. My Monrovia plants are both perennials and will be ready to produce blossoms again next year.
If you live in zone Frozen-to-Death-from-October-through-April, this may not be possible!
Re-think insecticides
Along with helpful insects like bees, butterflies, and ladybugs, there are also mosquitoes and other insects that we definitely do not like! However, the over-use of insecticides will also poison bees. Before reaching for an insecticide, do some research and try a natural remedy first.
Some natural insecticides you might try:
10 Natural Insecticides and Repellants
A Dozen Homemade Organic Garden Remedies
Our plan this summer is to plant multiple pots of lemon grass, citronella, and lemon balm around our back patio to ward off mosquitoes.
Add a simple water-feature
When my husband and I took a beekeeping class last year, we were surprised to learn just how much water bees consume. In fact, during long, dry seasons, beekeepers have to make sure there is plenty of water in the form of a pond, fountain, pool, bird bath, or other water feature. Even bowls or jars of water are better than nothing for helping keep bees hydrated.
Consider taking up beekeeping
Our beekeeping class was one of the educational highlights of our year. We were already interested in becoming beekeepers, but the class generated more information than we had expected. Some resources we’ve found very helpful are:
American Beekeeping Federation
DIY Backyard Beekeeping
Organic Beekeeping 101
Have a bee problem?
It’s possible that your home or backyard may end up with too many bees in the form of an unwanted swarm. Now, just because they’re unwanted by you doesn’t mean that a local beekeeper might welcome them! The National Honeybee Swarm Removal project is run by volunteers who will remove swarms for free in an effort to help both the bees and the home or property owner. Give them a call before resorting to deadly methods.
There really is a significant problem with bee colonies dying around the country. We rely on them for so many reasons, and it’s relatively simple to make a few changes to our backyards and gardens to provide a bee-friendly space for them to thrive.
Add colorful plants that attract bees. Mine are from Monrovia — they have other varieties than the 2 I purchased. Plant a variety so you’ll have blossoms year-round. Avoid the over-use of insecticides and use organic, natural remedies instead. Provide water for them, especially during droughts or dry seasons of the year and learn more about becoming a beekeeper.
This post was sponsored by Monrovia who provided the plants and other compensation. When they contacted me, I accepted because it was perfect timing for our Skill of Month: Advanced Gardening Skills! Visit their website for even more information about gardening and pollinating plants.
The post Planning and Building a Bee-Friendly Backyard by The Survival Mom appeared first on The Survival Mom. Be sure to check it out!
Is your food storage plan missing these six essential pieces?
 Ask any “food storage expert” what they recommend in a basic food storage plan and they will likely recommend the same types of things: wheat, rice, dry milk, salt, beans, sugar / honey, oil, pasta etc. The Survival Mom recommends many of these important items on her list of top 10 foods for stocking up.
But with all their similarities, sometimes these lists include an item here or there that I hadn’t thought of before…something useful that I suddenly see as essential to my food storage plan. I thought I’d share a few of these with you today. Some you may have, or plan to have eventually. Others may be new to you. Or, you may have something to add to the list!
Don’t forget the vinegar!
Vinegar has many many uses: just look at all the uses for it you can find on pinterest!
Some of my favorites include prolonging the life of flowers in a vase, keeping ants away, getting rust off of things, sterilizing laundry (instead of bleach), removing perspiration stains and more.
The uses in the kitchen are just as varied: use it to make fluffier rice, use it to make buttermilk, wash fresh vegetables and fruits (especially berries) in it to make them last 2-3 times as long, use it to tenderize meat, make salad dressing or pickle anything. I also use it to get rid of onion or garlic smell on my fingers..
Vinegar is truly versatile!
In addition, vinegar is inexpensive, readily available and stores very well.
Are seeds a part of your food storage plan?
The ability to grow your own food is essential for true self-reliance. Storing heirloom seeds is simply smart. You will need to rotate them every couple years or so, but seed packets are inexpensive so this shouldn’t be too difficult.
Vitamins
Often, many “basic” food storage plans lack variety. They include items that provide a lot of calories, are inexpensive and easy to store for a long time. Unfortunately, this doesn’t always mean they provide a wide variety of nutrients and vitamins.
This is often true even if you buy a pre-made food storage package. Often, they are heavy on nutrient-weak calories such as sugar and drink mixes. There are many reasons I don’t recommend pre-made food storage packages, but this is one. People invest in these packages thinking they are getting a certain number of calories. I feel it is a bit deceiving when a heavy number of those calories are nutrient-less.
However, not everyone can afford to go out and buy nutrient dense freeze dried fruits and veggies as part of their food storage plan: especially right at first. They may be able to invest in some canned produce, but even these are lacking in nutrients compared to their fresh counterparts.
A diet full of calories, but not balanced nutrients will not be likely to give you the energy and mental acuity you will likely need in a disaster situation.
While fresh is always best, storing vitamins can help combat this issue until you reach a point when you can invest in more nutrient dense foods.
Nuts can be stored, long-term
Nuts are a great protein and fat source, are less expensive than freeze dried meats, and tastier and healthier than TVP. They can be eaten for breakfast, lunch or dinner and are available in a large variety.
But nuts have one issue: they are tough to store long term because of the oil in them. Jane from Mom with a Prep solved this problem with one amazing post: Awww Nuts! A Guide to nuts and their long term storage benefits.
Spice / Herbs / Bouillon
A diet full of items recommended in many food storage plans: rice, pasta, bread, milk and beans would become pretty boring very quickly without some flavor!
Spice it up a little! Bouillon can be used to make soups and flavor rice. Spices can add an incredible variety to basic staples. If you are adventurous, you can dry your own or if that is too overwhelming simply buy a few extra of the spices and herbs you use most often now so that you can easily rotate through them.
Cookbooks
How many of you have the majority of your family’s favorite recipes stored electronically (on your computer or online somewhere)? What would you do if you couldn’t access those electronics? Do you have recipes specific to the food you have stored?
Make sure you have recipes for the food you have stored in a non-digital format so that you can access and use them anytime you need to. The more recipes you gather, the more variety you will have in your meals. Old cookbooks can be especially valuable for many reasons!
That’s it! Which of these items were new to you? What would you add to the list?

The post Is your food storage plan missing these six essential pieces? by Misty Marsh appeared first on The Survival Mom. Be sure to check it out!
April 5, 2015
52 Weeks Savings Plan: April discounts are here!
 Spring is here and with it comes lots of fun and activity in April – and lots of great things on sale. Don’t let the joke fall on you on April 1. April sales are no laughing matter!
Passover starts April 3 and Easter is April 5. Taxes are due April 15. Earth Day and Administrative Professionals Day is April 22. Arbor Day is April 24.
TIP: Expect a tax refund this year? Now is the time to start thinking how you would use any tax refunds you may receive.
Awesome food sales to expand your pantry
The biggest food sales are going to happen right after Easter. Ham, candy, baking items (like flour, yeast, chocolate chips, mixes and frosting), eggs, mustard, pre-made breads and dough, pies and pie crusts should be on sale. Organic foods and mushrooms are also April food sale items. You should find deals on produce like lettuce, red peppers and tomatoes if the weather stays warm where they are grown.
One friend buys pastel colored Easter candies and then uses them for different holiday celebrations during the year. Pink foil wrapped Hershey Kisses, for example, are perfect for Mother’s Day, a wedding shower, or a girl’s birthday party. Pastel M&Ms can be separated into different colors for different holidays and celebrations. If you’ll be storing chocolate candies long term, be sure to check out the video at the bottom of this article.
Produce in season for April are:
bananas
broccoli
cabbage
green beans
honeydew melon
lettuce
mangos
mushrooms
onions
leeks
peas
pineapple
rhubard
spinach
strawberries
Household sales to assist your 52 Weeks Savings Plan goals
Indoor kitchen appliances will go on sale as people move to cook outside with nice weather. Consumer Reports can help you compare appliances, models, prices, and product reviews.
Cookware, cookie cutters and Easter-themed linens, plates and supplies round out the kitchen deals for the month. Pastel colored paper goods are nice for stocking up since they can be used for birthday parties, wedding and baby showers, Mother’s Day, and more.
Rain gear, swim gear, spring clothing, sneakers and winter gear (coats, boots, clothing) go on sale in April. Winter bedding is also on sale before it clears off the shelves.
Spring beauty products will also be on sale. If you find these at super-bargain prices, they’re great for stocking up, long term since they generally have long shelf lives.
Spring cleaning will prompt sales on organic and natural cleaners, as well as vacuums. Deals can also be found on home improvement supplies this month. With spring storms and hurricane season ahead of us, check into what supplies you might need to storm-proof your home. It’s better to do it now, before your home is actually hit with devastating weather.
Sales after Easter can supply various crafts and gifts for the upcoming year – baskets, ribbon, decorations, toys and stuffed animals will be on sale. Almost anything that can be used to fill an Easter basket can be used for future birthday party gifts, a rainy day craft or even stocking stuffers. Also, Easter outfits can be bought for future fancy occasions, like upcoming weddings, or for next year’s holiday in a bigger size or two.
Outside the house
Lawn mowers will be on sale this month before the grass starts growing long and people need them. Garden supplies and outdoor furniture will be on sale as well. Garden centers and nurseries will probably have good deals on loss leaders to get people into their locations with the hopes that they will buy more.
Websites, such as Monrovia.com, offer information about plants, growing seasons, and sometimes coupon codes and in-store discounts. Since this is garden season, establishing a garden can be expensive, so shop around and do your research before plunking down a lot of money.
Car care is also an April deal focus. Tires, auto parts and car care supplies will be on sale. Planning a road trip this summer? Prices might be at their lowest for getting your vehicle all prepped and ready for a safe trip.
Electronics
April is a good month to look at electronics because it is the end of the fiscal year in Japan. Computers, laptops, TVs, tablets, digital cameras, etc., are among the items that will have discounts. Think ahead to upcoming gift-giving holidays – Mother’s Day, Father’s Day and graduations – and see if you can find a good deal, along with their accessories.
For preparedness uses, ebook readers, loaded up with survival manuals, fiction, and free classic novels are perfect for Faraday cage storage.
Sports and Fitness
Indoor fitness equipment will still be on sale this month as people start exercising more outdoors with nice weather. You may see deals on summer activity gear as the stores start gearing up for the season – kiddie pools (see 15 prepared uses for kiddo pools), sidewalk chalk, bicycles and swim gear.
Events and Travel
April is Stress Awareness Month and with that comes Spa Week from April 13 to 19. Spas across the country will offer 1 hour massages for $50. For more information, visit www.spaweek.com.
Check local events for any Arbor Day or Earth Day celebrations. Some communities will offer free festivals with family-friendly events, and there might even be free plant or tree giveaways. Also check your local nurseries or parks for free gardening classes. You can even try doing an Internet search for free seeds and see if any companies are giving away sample seeds. There have been a few giving away free seed packet for bee and butterfly gardens. Home improvement stores will start offering free classes for children on the weekends.
National Parks offer free access April 18 to 19 to celebrate the opening weekend of National Park Week. If you are thinking of going on vacation, now is the time to contact the local chamber of commerce or visitor’s center and ask for free brochures and see if they have any free events coming up.
As you do your spring cleaning, assess what you have and see if you have enough to do a yard sale.
By the end of April, you should have $153 saved if you’re following the weekly savings plan (17 weeks). If you have extra right now, perhaps going to a higher week in the chart and putting that money away would be a smart thing to do.
Saving money is a daily lifestyle and the key is having a good attitude. Don’t focus on what you can’t do – focus on what you can do and what you can enjoy. Take pride in what you have already saved up and learn from any mistakes. Take each day as it comes and keep saving!
Take advantage of April’s deals and enjoy the sunshine spring brings. Come back next month to see what deals May offers to help you save AND prepare!
Other resources for you:
Survival Mom’s Hurricane Preparedness Pinterest board
Survival Mom’s Tornado Preparedness Pinterest board
Survival Mom’s Spring Survival Pinterest board
The official Survival Mom 52 Weeks Savings Plan Pinterest board
52 Weeks Savings Club Facebook group
The post 52 Weeks Savings Plan: April discounts are here! by Sarah Anne Carter appeared first on The Survival Mom. Be sure to check it out!
April 4, 2015
Spring Gardening: 5 Steps to Grow What You Eat
 When spring fever hits, it is easy to want to plant everything you can think of in your garden, as soon as you are able to work the soil. If you are a new gardener, it is common to make this same mistake. Planning out your garden by season, as well as by what you actually eat, will make your life so much easier.
Many people don’t realize that certain vegetables grow better at certain times of the year. So planting peas and cabbage at the same time as tomatoes and peppers isn’t really necessary. If you get your timing right, you can grow more and stock your pantry and freezer to feed you through the winter months.
Step 1: Know Your Zone
The fist thing you need to do to plan your garden is know your garden zone. Some plants do better in tropical climates while others do great in colder climates. Know your zone and that will tell you about how long you have to provide the best conditions for the vegetables you want for your spring gardening.
On the back of my packet of radish seeds, it says it takes 20 to 50 days for them to reach maturity. So I know I need to time them so they are ready before the hot summer months when they won’t do as well.
Keep in mind, many vegetables can be started inside as well. Or you can buy plants instead of starting them from seed. The advantage of this is, you can harvest your vegetables sooner while the growing conditions are ideal.
Step 2: Know What You Eat
The next step in planning your garden is to make a list of what you actually eat. Some of those items may not be reasonable to grow in your area, so cross those off your list. For example, I can eat a lot of avocados, but I am unlikely to be able to grow any in southeast Wisconsin. In Florida, however, they would be a more realistic possibility.
I started lots of lettuce indoors this year because we love salad. That would have given me a jump-start on the season because I could harvest them early while re-seeding every two weeks. I would have had a continual crop of salad greens all year until frost, except the rabbits got into my garden (arg!). Now I will have to either buy starts or restart from seed. In the meantime, I have to buy salad at the store. Clearly my planning this year was not thorough enough. Never underestimate the value of good fencing.
Step 3: Choose Your Vegetables for Spring
Once you have your list, you can do a little research to see what weather conditions those foods grow best in. Since it is spring, you will want to choose vegetables that are considered hardy or semi-hardy.
Hardy Vegetables
Cabbage
Asparagus
Onions
Brussels sprouts
Peas
Radishes
Spinach
Turnips
Kale
Parsley
Mustard greens
Leeks
Kohlrabi
Collards
Broccoli
Semi-Hardy Vegetables
Lettuce
Celery
Cauliflower
Beets
Carrots
Swiss chard
Chinese cabbage
Salsify
Radichio
Rutabagas
Endive
Irish potatoes
Now, here is the trick. Think about which of these vegetables are the ones you really eat a lot of. Which ones can you grow, not only to eat fresh out of the garden, but to preserve for the future once the garden is done? For example, I have never tried salsify, so I have no need to grow it. I also can’t stand beets, so there is no chance I will want to grow them!
On the other hand, my family eats a ton of broccoli, so if I can grow a lot of it, I can freeze it for use during the winter. Taking into consideration what my family eats, my spring garden will have lettuce (we go though unreal amounts of salad in this house), broccoli, spinach, onions and asparagus.
Step 4: Plan Beyond Just Spring
As a caveat, I have to mention, you obviously can’t freeze lettuce to use during the winter. I am pretty sure you would not like the resulting salad. However, you can grow salad greens in your house in the winter, which will be the topic of a future article.
Another thing to keep in mind is this: You may not be able to grow an entire year’s worth of a vegetables in one season unless you have a very big garden. But guess what? These same vegetables can be grown in the Fall garden. That gives you two growing seasons to grow as much as you can of your favorite vegetables.
It may take a few seasons for you to figure out exactly how much you need to grow to provide for your family’s needs, but the more you are able to grow yourself, the less you have to buy. And I am sure you will agree, the more self-reliant you can be, the better.
Step 5: Expanding Your Options
Once you have an idea of how much you need to grow to provide for your family, you may want to consider experimenting a bit. Even though I have never tried salsify, I might want to see what it’s like. Since I already have my basic Spring garden plan, I know where I can squeeze it in without taking away from the space needed to grow what we actually eat now. That way if we don’t like it, I don’t feel like I wasted space in my garden.
Each year’s garden catalogs make everything seem so tempting. Consider trying something new each year and you may quickly find some new favorites.
What are your favorite spring vegetables? Are you able to grow enough for your family for the whole year?
The post Spring Gardening: 5 Steps to Grow What You Eat by The Survival Mom appeared first on The Survival Mom. Be sure to check it out!
April 3, 2015
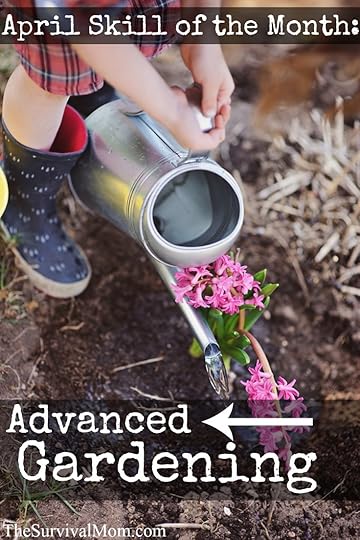
Skill of the Month: Learn a New, Advanced Gardening Skill
 Planting seeds or buying a seedling is probably the most optimistic thing I do all year. I have never had a green thumb and more houseplants have died under my care than I want to admit. Advanced gardening skills have not been my forte.
However, every year, right about now, when the trees start bursting with fresh green leaves and blossoms are everywhere, I get in the mood to plant something! We’ve enjoyed huge herb gardens and very successful tomato and pepper plants over the years. We’ve also watched our eggplants wither away to nothing and about a dozen cilantro plants fizzle. For sure, my family and I have experienced both the ups and downs of gardening.
This month, we’re trying some new things and I want to invite you to join us. Our April Skill of the Month is, Learn a New, Advanced Gardening Skill.
Don’t be scared off by the word, “advanced” because what is “advanced” to me could be common knowledge to you, and vice versa! Over the next four weeks, I’ll be posting articles and links to the best websites and videos with a variety of gardening skills. Pick one or two, and then go for it!
Our April Webinar is all about the garden!
I’ve asked gardening and homesteading expert, Rick Stone of Stoney Acres, to teach you all about “Four Season Gardening.” When he sent me his ideas and outline for this topic, I jumped on it, and I think you’ll love it, too.
Rick will be talking about creating a plan for your growing zone and microclimate that will help you reap a harvest of something year round. He says, “Protection, crop selection, and timing are the keys,” to this type of gardening.
Put this date and time on your calendar and just click on the link a few minutes before starting time. If you want a reminder, sign up for my weekly email (comes out every Sunday morning).
DATE: Monday, April 20
TIME: 8 p.m. CT (9 p.m. ET, 7 p.m. MT, 6 p.m. PT)
CLICK ON THIS LINK TO JOIN: http://connectpro19068335.adobeconnec...
So what are “advanced gardening skills?”
To get the wheels turning, here are a few skills you might want to consider for this spring gardening season.
10 Healing Herbs to Grow in Your Survival Garden
10 Ways to Keep Weeds Out of Your Garden
Companion Planting: What NOT to Plant Together
How to Grow Potatoes in a Trash Can — We’re doing this right now!
How to Make Raised Beds from Pallets
Soda Bottle Drip Feeder for Vegetables
Top 5 Gardening Apps You Need Today!
Use Epsom Salts For a Healthy Garden
You’ll find all these articles and a lot more on my April Skill of the Month Pinterest board! Follow me for more brilliant articles.
What advanced gardening skill do you want to try?
The post Skill of the Month: Learn a New, Advanced Gardening Skill by The Survival Mom appeared first on The Survival Mom. Be sure to check it out!
9 Great Ideas to Improve Family Gatherings
 Family gatherings. They happen throughout the year. Whether it’s a big holiday, like Thanksgiving or Christmas, or smaller ones like Memorial Day or Labor Day, or even a special event like a family reunion or a wedding, there are times when our extended families gather together. Knowing the family dynamics, and possible ongoing arguments we will face, can make even the most family-focused of us less than excited to see our extended family.
But what if you want something different?
Most families don’t really want to rehash the same arguments, listen to bragging and comparing, or repeat the same questions about future plans. And the bigger the family, the harder it is to avoid family drama.
So what can you DO to improve family gatherings?
Realistically, those things won’t go away, but you, your own individual self, can make a plan to do things differently and maybe, just maybe, you’ll get some of the others on board and family gatherings will become more fun for everyone. I think doing is really the key.
Remember: “younger family member” doesn’t mean kids. My parents retired more than a couple years ago, but in certain groups they are still “younger family members”!
1. Instead of sitting on a sofa watching TV, get people up and helping with whatever is going on. Just try not to play into ongoing family drama and make things worse. This first step is really the basis for everything else in this post.
2. Is Grandma making her secret recipe? Have someone work with her and learn the secret to getting it just right, and don’t assume boys won’t be interested. As several preschoolers told me, “Boys cook. Girls don’t.”
As in all things in life, prep helps make things go more smoothly. If you know an elderly aunt or uncle has a special family recipe they haven’t broken out since their arthritis got bad a few years ago, arrange for them bring it and teach “the younger generation” – even if that generation is in their 50s. But please, make sure you have all the ingredients, utensils, and equipment on hand! Remember to write everything down so future generations can enjoy this same dish.
3. Is Uncle Stew putting up some last-minute decorations? Help him decide where they go and hold the ladder so he doesn’t fall off. Better yet, have a younger family member learn some new skills by really helping put them up. Even using simple tools like levels and hammers are skills people need to learn.
While teens in particular may not want to help, phrasing is important. Instead of, “Do you want to help Grandma?”, try “Do you want first dibs on dessert, or to play with the little kids for two hours?” I find one is more effective than the other, especially if one of the little kids has a nasty cold or is generally badly behaved.
4. If Great-Gramps used to work on the railroad and there are youngsters who love trains, have him work with them on the best-ever wooden train layout – or maybe even their very first electric train layout. You can buy a complete set, including track, for as little as $50. Just don’t expect top quality for bargain-basement prices.
In short, spend a little time thinking about who might have common interests and get them together.
5. Think about who has skills another generation could use. Having one of the kids teaching the older folks skills like taking a picture on Instagram and forwarding it on their phone could be a holiday highlight for them all! Everyone likes to have their knowledge valued, even little kids.
The older your family and friends, the more likely it is that they have skills from their youth that a prepper can use. Canning, using hand tools, gardening, home remedies – the list is HUGE! Now is the time to try to get them to share their knowledge. Remember: many families gather throughout the year, so skills that are seasonal can wait for the right time of year.
6. Older relatives also have stories. Many of these stories are probably about hard times – wars, depressions, job losses, natural disasters. Sometimes, all at once! IF you can get the family to listen to them, it might just do more than anything you will ever say to help them see that prepping isn’t crazy-talk, it’s just plain common sense.
I once asked an older woman how many houses she had bombed out from around her before she immigrated her. Her answer? One – she wasn’t home for the others. The mere matter-of-factness of her statement makes a point no book can about living through a war.
7. If you can get someone to record either the stories or the skills-teaching, then your friends and family can keep learning from these folks, and it will probably tickle them pink to know someone cares enough to record them for the future. As an added bonus, if there are high school or college students, or Scouts, in the family, they might even be able to fill a requirement by recording oral history from one of the family elders. (This ebook on recording family history is a great resource; it even includes sample questions.)
8. Depending on where the gathering is, people may be able to learn/teach different skills. The image above shows two generations outside exploring together, not sitting in the house gossiping.
9. If you are at someone’s home, look around at their stuff (not snooping – the stuff in plain site) and ask questions. When my husband visited one relative’s home for the first time, he came home shaking his head in amazement. When I asked about the visit and my husband’s reaction, my Dad explained, “That’s what happens when a family reads every issue of Popular Mechanics for three generations.” Among other things, they found a way to use naturally cool underground air to cool their home in the summer.
Other relatives have sewing, canning, gardening, musical, military, and all sorts of other items related to their areas of passion and their personal history, including military service, out and visible. Ask a few questions, and you could spark a long conversation and learn a lot.
So the next time you have a family gathering approaching, instead of dreading the drama, take a little time to appreciate your family history. Then make plans to spend time learning from the others in your family instead of going through the same-old-same-old.
The post 9 Great Ideas to Improve Family Gatherings by Liz Long appeared first on The Survival Mom. Be sure to check it out!
April 2, 2015
A Short Guide To The Proper Storage of Cookie Ingredients
 If the #1 rule to purchasing a home is, “Location, Location, Location,” then the #1 rule of food storage is, “rotation, rotation, rotation.” I mention it because some thirty-year-old brown sugar and chocolate chips recently came into my possession, and it probably would have been good if it had been rotated out a few decades ago, but no one gave a thought to storing cookie ingredients.
Because I am an intrepid prepper, and also slightly reckless, I decided to make some chocolate chip cookies with it, as an experiment.
Before I tell you how they turned out, I’ll relate some useful information I discovered about storing cookie ingredients — precious ingredients crucial to making our favorite treats.
Storing cookie ingredients the right way
A lot of people store chocolate as an important part of their emergency preparedness. Even though something like chocolate cannot be considered a necessity, the availability of your most beloved dessert can do wonders for morale during a crisis. Let us discuss the humble chocolate chip cookie as an example.
The main ingredients of this treat include butter, sugar (white and brown), white flour, vanilla extract, and chocolate chips. Some of these are trickier to store than others, but with good planning and efficient rotation, you can always be confident that you can have cookies within your grasp at a moment’s notice.
Properly storing the key ingredients
Butter
The zoning laws in my town prohibit me from keeping a dairy animal in my (very small) back yard, so I have had to make do with keeping a stash of butter in the freezer. I’ve never needed to keep any single package of butter in the freezer for more than a couple months – not nearly enough time for it to go bad.
Commercially canned butter is also available, and it has a guaranteed shelf life of at least two years, according to the manufacturer. This option is much pricier, but may prove a godsend if you are without electricity, and by extension, refrigeration. Other manufacturers also offer powdered butter. Powdered butter is useful in recipes, including baking, and when mixed with water, it produces a nice spread for bread and rolls.
Sugar
White sugar is exceedingly shelf-stable and can practically withstand a nuclear blast. Brown sugar, however, has a tendency to become rock-hard over time. One suggestion is to nix brown sugar entirely, and store white sugar and molasses, instead. Add a small amount of molasses to the white sugar, and voila! Messy, but effective. Molasses has a shelf life of 18 months to two years.
Before you throw out all your old brown sugar, though, know that it can easily be softened by storing it with a piece of bread or another moist food item. I was able to soften some brown sugar that was at least thirty years old. Once it had regained some of its moisture, it looked and tasted completely untouched by time.
White Flour
So much digital ink has been spilled discussing the pros and cons of storing white flour, I don’t feel the need to further expand upon it. In short: white flour is not something that can be stored for long periods of time, but with proper rotation it can be a very good thing to have. Around the holidays, prime baking season when prices are quite low, stock up on a year’s worth of flour and store it in the freezer for longest shelf life.
Vanilla Extract
Vanilla and other flavoring extracts are alcohol-based and if stored improperly have a tendency to quietly evaporate away. Stored in a dark place in a tightly sealed container, however, vanilla extract can have a very long and happy shelf life.
Chocolate
Alas, chocolate is temperamental. Chocolate in bar and chip form contains a lot of fat solids, and these can bloom or go rancid. Some people recommend storing chocolate in the freezer in its original packaging, taking care not to allow condensation to appear upon the surface of the chocolate, and also ensuring that it does not change temperature too rapidly.
Chocolate manufacturers suggest that under ideal conditions, chocolate will remain in its pristine condition for up to two years, though it will still be edible for some time after that. Another thing to consider is that chocolate can absorb the flavors of other foods – flavor transfer can occur through plastic packaging.
An option that works quite well for a lot of food storage experts is storing chocolate in canning jars, and using a jar sealer to vacuum out the air and damaging oxygen.
To summarize, while some of these ingredients can be stored for several decades with no ill effects, others will benefit from a good system of rotation. Successfully storing cookie ingredients is possible.
So what about those chocolate-chip cookies made with thirty-year-old chocolate chips? Before baking, the chocolate chips tasted decidedly “off,” though in a way that is difficult to describe. One taste-tester suggested that they had absorbed some flavor from the brown sugar with which it was stored.
After baking, the chocolate chips failed to melt in the usual way to which I have become accustomed. I thought the cookies tasted fine so I served them to several people who noticed no difference in taste – including some picky toddlers I happen to know. My husband, however, was aware that the chocolate chips were put into storage during the Iran Hostage Crisis and did not appreciate being fed poison. He said, “I feel like I just got hit with something weird.” That was definitely the chocolate chips.
Rotation, rotation, rotation.
The post A Short Guide To The Proper Storage of Cookie Ingredients by Beth Buck appeared first on The Survival Mom. Be sure to check it out!
April 1, 2015
Getting Started With Cooking Off the Grid — Solar Ovens
 How long can you go without craving a hot, homemade meal, eating only cold rations and snacks? If you’ve ever been without power for more than just a couple of days, eating cold ravioli or tuna out of the can gets really old, really fast. Most survival minded people realize, better than most, that it doesn’t take much to disrupt the flow of electricity we depend upon for cooking. A natural disaster or freak weather event can turn the most modern home into a survivalist camp within a few hours. Electricity can also be interrupted by man-made crises, such as civil unrest, terrorism, or an EMP, making that hot meal a rare treat.
A popular slogan among survivalists and preppers is, “Always have a back-up to your back-up.” When it comes to cooking, what is your back-up to your back-up? Do you have more than one way of cooking a hot meal when the power is down?
One simple addition to your emergency preparedness is a solar oven. It’s a great way to get started cooking off the grid.
As long as the sun is shining and the sky is relatively clear, a solar oven can serve up a delicious pot of rice and beans and brownies for dessert without requiring any fuel. In fact, its dependence on the sun as its only source of fuel, is the reason every home should have a solar cooker. Solar cooking is an unbeatable back-up for making sure there’s a hot meal on the table three times a day.
There is something new under the sun
Solar cooking and using the sun to preserve food has been around for hundreds of years, but only in modern times has the use of solar cookers become widespread both in the survival community and among communities around the world with unreliable electrical power. Its advantages are obvious.
There is no need to store additional fuel.
Sunshine is free, unlike propane, butane, gas, and other fuels.
It’s possible to store several months’ worth of food, but storing all the fuel you might need isn’t as easy.
Once paid for, there are no other expenses involved and maintenance is simple.
There are no dangerous fumes or safety issues to worry about.
A solar cooker can be used for every type of cooking, except frying.
Food never burns in a solar cooker.
During hot, summer months, the use of a solar cooker helps keep the kitchen, and the cook!, cool.
Over time and with frequent use, the use of a solar oven will save money on the electric bill.
A solar cooker for every home
A solar cooker is a must-have as a back-up method for cooking food. It is the single most self-reliant way to cook food and heat water, and has the additional advantage of being a DIY project if there’s a handyman (or woman) in the family.
Commercially produced solar cookers, such as the All-American Sun Oven, are perfect for the prepper who is too busy for even one more DIY project. Depending on the brand you choose, these stoves have consistent quality construction, are designed to reach temperatures for the quickest possible cooking results, and have features for enhanced usability, such as interior thermometers, large reflecting panels, and a weather resistant design.
However, some of these ovens carry a price tag of $300 or more and can be large and bulky. In a Get-Out-Of-Dodge scenario, there might not be room for my Sun Oven in the back of our Tahoe, and if I ever had to cook for more than my family of four, it might be too small. That’s one of the limitations of a store-bought solar cooker. You’re stuck with a standard size that may be too small, and your budget may not allow for a second cooker.
On the other hand, a DIY solar cooker can be customized to your specific needs. One friend used a large ice chest on wheels for her solar oven. She could wheel it to any location in the backyard and she chose a size that could accommodate as many as four baking dishes. Another ingenious DIY plan that can be found on the internet uses a 5 gallon bucket and a reflective sunshade. Total cost? Not much more than five bucks, if that. The advantage of many DIY solar cookers is that they can be dismantled for convenient transport, and all of them require materials that are already in most garages. Plans for homemade solar cookers can be found on dozens of websites and demonstration videos abound on YouTube.
The DIY solar cooker comes with a few disadvantages. If the design doesn’t maximize the amount of sunlight available, you may end up with nothing more than a hot silver box sitting out in your yard. I recommend testing and tweaking any DIY design until it consistently reaches 350 degrees or more. Reliable temperatures will help you plan mealtimes and insure that foods reach temperatures that will deter any bacterial growth. Another issue with the DIY cooker is its durability. If a slight breeze knocks over your cooker and pot of beans, you’ll know you need to fine-tune the design for added stability.
Getting started with solar cooking
Regardless of which solar cooker you settle on, some foods are easiest for getting started. Be sure to keep a log of foods you cook, time of day you begin cooking, and the length of cooking time required. This log will be a huge help to you as you branch out and begin cooking a wider variety of foods.
Hard boiled eggs. Place eggs on a dark colored towel or inside a dark pot inside your cooker. After 20 minutes, check one egg for doneness. Solar cooked hard boiled eggs will be softer than those cooked in a pot of boiling water.
Rice is either cooked or it’s not. It’s probably the easiest food to experiment with when you’re new to solar cooking. Combine rice and water in a covered pot. Check for doneness after 25 minutes. A package of Rice-a-Roni works just as well for your experimentation.
Yes, brownies! Mix up a batch of your favorite store-bought or homemade recipe, pour it into a dark, greased pan and place it in your solar cooker. Use the baking times recommended by your recipe, test for doneness, and leave in for additional minutes if required. I’ve found that solar-baked brownies are usually finished in the same amount of time as oven-baked.
I’m almost embarrassed to suggest heating water in your solar cooker, but having a way to pasteurize water could be very important. Check the temperature of water after 30 minutes. At 149 degrees Fahrenheit (65 degrees Celsius) all germs, viruses, and parasites are killed. This information, along with your solar cooker, could be one more way to insure safe drinking water in an emergency and provide sterilized water for medical and first aid purposes.
Like any new skill, the only way to learn how to cook with a solar oven is to just do it. For most dishes, allow at least an extra 30 minutes to your cooking time.
Ten Top Tips for Solar Cooking
Solar cooking isn’t an exact science. It requires a bit of trial and at least a few errors to determine the correct cooking time for any food.
Always use dark pots and pans with any solar cooker. If you must use a light colored or shiny baking dish, cover it with a dark colored hand towel.
Thin metal baking dishes work best in a solar cooker. They will heat up more quickly and lessen the amount of cooking time needed.
A thermometer is a must-have for a solar cooker.
Allow your solar cooker to pre-heat for 15-20 minutes. Pre-heating will shorten the cooking time a bit. Just be aware that the interior of your cooker will be hot, so be sure to use pot-holders.
Always use a baking dish with a lid for all your solar cooking. The lid retains important heat and moisture. There’s no need for a lid if you’re baking. Pies, brownies, cookies, cakes, and bread won’t require a lid.
If you’re cooking meat, make sure the interior of the oven reaches at least 180 degrees. Again, a thermometer is a must to insure food safety and predictable cooking times.
Use the ‘slow-cooker’ method when you’ll be gone all day. Place the solar oven so that it faces directly south. Pop in your baking dish, close the lid, and by dinner time, you’ll have a hot, delicious meal waiting for you.
Moisture will likely collect inside the cooker during the cooking process. Wipe the inside dry before storing it.
Turn your solar cooker into a food dehydrator by propping open the oven door by a half inch or so. This allows moisture to escape while the interior of the cooker retains heat.
If you’re new to solar cooking, prepare to be amazed. There’s nothing quite like placing a baking dish in a box out in the sun and coming back later to a fully cooked and delicious meal. A prolonged power outage doesn’t mean the end to hot, nutritious meals when you have a solar cooker as a back-up.
Coming next: Getting Started With Cooking Off the Grid — Multi-fuel stoves
The post Getting Started With Cooking Off the Grid — Solar Ovens by The Survival Mom appeared first on The Survival Mom. Be sure to check it out!
March 31, 2015
DIY No-Sew Waterproof Picnic Blanket
 Can’t sew? No worries! A bit of fleece, some scissors, and a little patience are all you need for a one-of-a-kind blanket. This no-sew blanket is perfect if you’re looking for a quick, easy project for yourself, the kids, or grandkids.
Now, this idea isn’t new; plans abound for knotted, no-sew blankets. For my own no-sew blankets, I like this picture tutorial from Instructables. I used two 60″ x 82” pieces of fleece for a final blanket that measured about 48×80”.
Simple instructions in a nutshell
Do take a look at the detailed tutorial if you’ve never made one of these before, but in a nutshell, here are the steps for making the basic blanket.
1. You’ll need 2 pieces of fleece, the same size.
2. Line up the fleeces, back to back.
3. Trim the edges, if necessary, so the two pieces are an exact match.
4. Cut a 5″ square from each corner. (See photo.)
5. Begin on one side to cut the fringe and continue around all 4 sides. I’ve used a yardstick to draw a light pencil line from the inside corner of one cut-out square to the opposite inside corner and cut each fringe about 1/2″ in width.
6. Make sure all fringes of the 2 layers of fleece are aligned, and begin tying them in knots. (See photo for Step 6.)
7. Continue tying knots all the way around the blanket.
In about two hours I had the perfect themed blanket for our high school’s spring baseball season (take that, months-long quilting project!). With so little time and less than $40 invested, I’m happy to send it out for sleepovers and football games, too.
Presenting the no-sew waterproof picnic blanket!
I wanted to have a more versatile fleece blanket, though. I wanted to find a way to make this blanket a little more “outdoor friendly” without rendering it noisy or uncomfortable when camping or curling up for family movie night, so I decided to add a waterproof layer by attaching buttons on each corner and then buttoning that waterproof piece to the blanket.

Fastening the buttons
Once the knotted blanket is made, it’s easy to attach a large button at each corner. First, though, pull a fringe piece from the top and and a second fringe piece from the side and bring them together in the spot where you’ll sew the button. (After the button is sewn, you’ll want to be able to secure the fringe edges over the button so they’ll tuck neatly under the waterproof layer. I eyeballed how far in to sew the button before attaching it. If the button is too close to the fringe, the edges will stick out and get dirty.) Once you’ve determined your placement, lay the tassles back down and attach the buttons.
When I sewed the buttons on each corner, I only brought the thread through the top piece of fleece. Use a double strand of thread and sew through the button holes until they feel secure—maybe a dozen times or so.
Next, I took a couple of fringes at each corner of the blanket and cut a parallel slit through them. (Remember, if you’ve measured before sewing the buttons, pulling up just a couple should keep the rest of the tassles tucked in.) Slip the button through the slits to protect the fringed edges under the final layer:

Add a waterproofing layer
I placed a cheap tablecloth (72”) soft side down and cut small slits lining up with each button. There’s no need to make the slits as large as the button, as the cut will show, and the fabric will stretch to let the button pass through. I also dabbed a bit of clear nail polish on the underside of the slits to minimize fraying. I chose buttons over hook-and-loop tape because movement on the blanket can detach the tablecloth. As you can see, the folded-up tassles can “hide” under the tablecloth so they don’t get dirty at your next picnic. If you’re snuggling up, simply remove the tablecloth and slip the button out of the slitted tassles for a traditional fringe blanket.

That’s it! In a couple of hours you, too, will have a unique blanket with a detachable waterproof layer. If you have suggestions for improving the prototype, I’d love to hear your comments!
The post DIY No-Sew Waterproof Picnic Blanket by Kris appeared first on The Survival Mom. Be sure to check it out!