Lisa Bedford's Blog, page 106
April 20, 2015
27 Important Things You Should Know About Saving Seeds
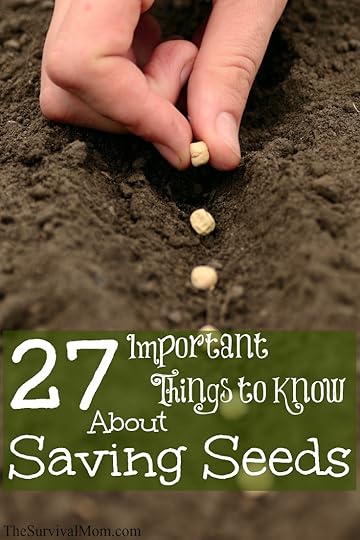 Saving seeds is both a science and an art. Here are 27 things I’ve learned about seed saving over the years.
1. Saving seeds helps preserve the genetic material of the plant varieties we have. Within the last 100 years, we’ve lost over half of the varieties we used to have.
2. Saving seeds will give you crops that are better adapted to your specific environment. You’ll be collecting seeds from the plants/varieties that thrived. It gives you a lot of control over what grows in your yard.
3. It saves money.
4. It’s easy to share and trade seeds with others.
5. Save seeds from heirloom and open pollinated varieties. An heirloom variety is one that has been passed down within a family for 50 years or more. Open pollinated is simply a plant that has pollinated by itself or its type. Both will give you crops true to the original plant.
6. Seeds from hybrid plants will not give you the same crop as the original plant. In fact, seeds saved from a lot of hybrid tomato varieties end up growing cherry tomatoes! One something is hybridized, anything in the genetic chain can come up in a crop. If you’re serious about saving seeds, you’ll need to take steps to avoid cross pollination, which will produce hybrids!
7. If you live near large commercial farms that grow soybeans, alfalfa, canola, corn, cotton, or sugar beets, there’s a very good chance those crops are GMO. There’s a possibility that cross pollination could occur, but the seeds that are available to the consumer are not GMO.
8. If you intend to save seeds from specific plants, it will take some planning to avoid cross pollination, since bees and other pollinators, including wind!, carry pollen from blossom to blossom. Read more about this here.
9. You can avoid cross pollination by placing small organza gift bags over the blooms you want to protect and hand pollinate. These are nice because they’re reusable and you can use the drawstrings to tighten the bag over the plant.
10. Hand pollinate early in the morning while the pollen is still visible. Female flowers are only open once.
11. Know what your neighbors are growing, if possible. Some plants, such as carrots, are in danger of cross pollination if other carrots are being grown within just a mile!
12. To physically collect seeds, know that some seeds are harvested dry by letting the plant go to seed, while others, such as tomato seeds, are harvested wet.
13. Dry harvest seeds from plants such as onion, beans, basil, carrots, and others that produce the seeds in pods or husks. Make sure the seeds are completely dry — I check to see if the pods “crackle”. Then, remove the seeds, shake off any chaff, and store.
14. To save basil seeds, wait until at least half of the seed stalk has turned brown. Then snip the stalk off, put it in a bag and bring inside for the seeds to dry.
15. Wet harvest seeds from tomatoes, pumpkins, eggplant, and squash by washing the seeds and allowing them to dry completely.
16. Save only the very biggest seeds from the plants that thrived best.
17. Keep saved seeds at a stable temperature in a cool, dark, and dry place. The vegetable crisper drawer in your refrigerator is a good location, but keep the seeds there, since a consistent temperature is the most important variable for maintaining seed viability.
18. Degradation of viability begins at around 80-85 degrees Fahrenheit.
19. Storing seeds in the freezer is an option for very long term storage.
20. Use paper envelopes for short term storage.
21. Place the paper envelopes in small jars or Ziploc freezer bags. Do NOT vacuum seal or use oxygen absorbers.
22. Saved seeds will retain their best viability for 1-3 years. After that there will be a gradual decline in their viability rate.
23. Seeds may germinate but that does not mean the plant will thrive.
24. The easiest plants from which to save seeds are peas, beans, lettuces, and peppers. They self-pollinate most of the time. To be on the safe side, plant one variety in the front yard and a second variety in the back to avoid the possibility of cross pollination.
25. Save seeds from peppers by simply removing them from the pepper once it’s fully mature. (Bell peppers turn red when mature.) Put the seeds in a jar with water and shake the jar for a minute or two. Good seeds will sink to the bottom; seeds not worth saving will float on top. Throw those away and dry the good seeds.
26. If you’re growing both hot and not-hot peppers, “hot” is a dominant trait! If Scotch bonnet peppers are grown near bell peppers and any cross pollination happens, your bells will be HOT. Plant hot varieties in the back yard, not-hot varieties in the front, or just far away from each other on your property.
27. Coordinate with friends when it comes time to plan your gardens. Since serious seed savers know they have to separate varieties in almost every case, plan who will grow what and then share your saved seeds.
You can learn tons more about saving seeds at How to Save Seeds.com
For more information, these handbooks are very comprehensive:
The Complete Guide to Saving Seeds by Robert E. Gough and Cheryl Moore-Gough
Seed to Seed by Suzanne Ashworth
The post 27 Important Things You Should Know About Saving Seeds by The Survival Mom appeared first on The Survival Mom. Be sure to check it out!


Four Season Gardening — Webinar Recording!

UPDATE: If you missed the super-helpful webinar with Rick Stone, here’s the link to the recording: http://connectpro19068335.adobeconnect.com/p9tgwyny8nk/
Don’t miss this free webinar tonight with gardening and homesteading expert, Rick Stone. Rick has a popular gardening class on Udemy, which he’ll tell you about, but tonight the topic is all about planning and “Four Season Gardening”.
TIME: 8 p.m. CT (9 p.m. ET, 7 p.m. MT, 6 p.m. PT)
LINK: http://connectpro19068335.adobeconnec...
I’ll be recording this webinar and will post the link right here, as well as in my newsletter and on Facebook.
See you tonight!
The post Four Season Gardening — Webinar Recording! by The Survival Mom appeared first on The Survival Mom. Be sure to check it out!


April 18, 2015
Sprouting Seeds – An Essential Part of Your Food Storage Plan
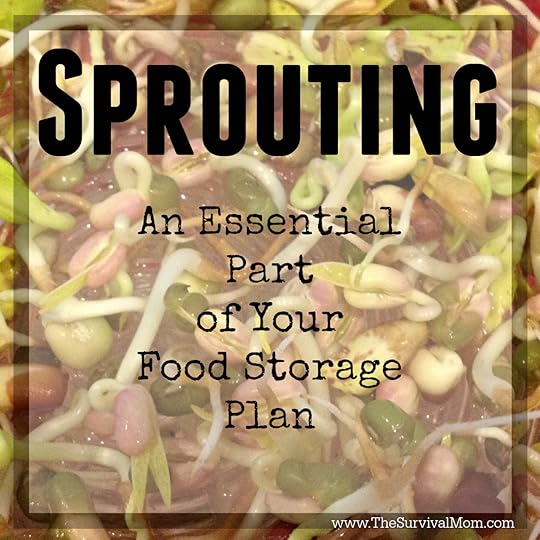 Do you like sprouts? I had only ever eaten plain, long white mung bean sprouts from the grocery store and didn’t really care for them. Then I discovered home sprouting and the wide variety of seeds, beans, lentils and nuts that could be sprouted. My family now eats them on salads and sandwiches and sometimes even just straight from the sprouter!
Beside the fact that sprouts are healthy for everyday eating and should be added to your diet for nutritional reasons, sprouting is an excellent prepping skill to have.
Top 5 Reasons Preppers Should Sprout
1. Nutrition
Certain seed mixes combine not only for great taste, but for high nutrition. Some seeds provide every amino acid, a long list of vitamins and minerals, and many are high in protein. Access to a fresh, non-meat/dairy source of protein during hard times is highly desirable. Broccoli sprouts are one of the most nutritious… eating one ounce of broccoli sprouts gives you as many antioxidants as 3 pounds of mature broccoli! Check out this link for a list of nutritional content for the most popular sprouts.
2. Garden Indoors All Year
If you live in an extreme climates that limit your outside growing months, you can grow a variety of fresh greens year around. No dirt under the nails, no back breaking work, no worries about early frost.
3. Security
If you have a security reason for not gardening outside, you can still have fresh greens by sprouting indoors. In fact, you can hide them even more if needed by putting your spouters inside a cabinet, under a bed, etc. Sprouts do not need any light for growth. Exposure to sunlight at the end of growing will activate the chlorophyll and green up the sprouts, but it is not a requirement for taste or nutrition.
4. Portability
You can sprout on the go by taking your sprouter in the car or even by putting it inside a backpack. In a bug-out situation, you can carry a great deal of food in very little space. (See #5.)
5. Shelf Life and Compact Storage
Sprouting seeds have a shelf life of 1 to 5 years depending on the variety. Refrigerating can double the lifespan while freezing can extend it 4 to 5 times. See a full list here. Most sprouting seeds are very small, but grow exponentially. A single pound of alfalfa sprouting seeds can produce 7 pounds of edible food!
 The only potential “downside” with sprouting during emergency situations is the amount of water needed. Sprouts need to be initially soaked and then rinsed twice a day. If access to safe water is an issue, it could be difficult to impossible to grow the sprouts. However, sprout water does not need to be discarded. In fact, the water used for the initial soak is full of nutrients that could be consumed as is, used as soup stock, or as needed to reconstitute dehydrated or freeze dried foods.
My Favorite Sprouters
Sprouting is so easy, a child can do it. If you can measure and rinse seeds, you can sprout! All you need is the right sprouter.
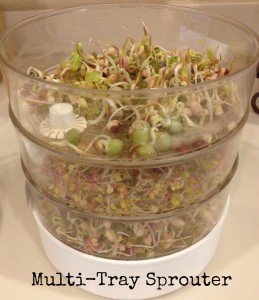
Four Tray Sprouter – The trays of this sprouter allow you to either sprout a variety of different seeds and beans in one compact footprint, or enable you to stagger your growth by starting the trays a couple days apart so you have fresh sprouts constantly at the ready. Watch this video to see how this sprouter works.
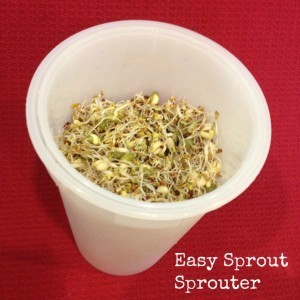
The Easy Sprout Sprouter – Simple, compact and likely the most popular sprouter of all. This one is a must if you want to sprout on the go. Here’s an instructional video to show you just how easy it is!
 It’s surprising how quickly sprouts can begin to go bad, so both these sprouters allow you to make relatively small amounts of sprouts so they can be eaten within just a couple of days.
My Favorite Sprouts
There are dozens and dozens of seeds, bean, lentils and nuts you can sprout on their own, but mixing them together for a gourmet treat is what I like best. Here are three of my favorites, but be bold and be sure to try a wide variety to find your own favorites. The best way to do that is to find variety samplers like this one or this one.
French Garden – Put this on your sandwich (if you have any left over after eating it straight from the sprouter!). Healthy, high protein and so good.
Nick’s Hot Sprout Salad Mix – Spicy and fragrant and 35% protein.
Pea Carnival – A mix of different peas. I was surprised at how much I liked this one. Yum!
The post Sprouting Seeds – An Essential Part of Your Food Storage Plan by Amy Van Riper appeared first on The Survival Mom. Be sure to check it out!
April 16, 2015
STOP! Don’t Throw Away These Treasures!
 Storage and preparation can both be pretty expensive. It would be a shame to throw away items that would save us money when you can turn your trash into treasures, but that’s what we do every day. Many items that we throw out can be used to create tools and even appliances that we could use in our storage, while camping and in emergency situations.
Turn Your Trash Into Treasures.
Soda And Juice Bottles
 Soda bottles are great for storing water in, but that isn’t all they are good for. They can be cut into other tools as well. Just cut the top half off and turn it upside down and that soda bottle can become a funnel. You can also cut it into a scoop. The top can be used as the scoops handle. Use different sized bottles to get different sized funnels and scoops.
Twist Ties, Rubber Bands, And Grocery Bags
Sometime we need to seal opened items in our storage. We use bucket and old oatmeal canisters (another good item to keep off the throw away list). When you don’t have those items available there are some temporary but quick fixes to sealing storage items. For items like an open flour or sugar bag, place a grocery bag over the top to of the open ingredient bag and slide a few rubber bands over the two, leaving plenty of space before the end of the grocery bag.
Items such as small open bags of rice or beans use twist ties to re-close them and them keep them in a tied grocery bag. This reduces the chance of creepy crawlies finding their way into your small open bags. Find ways to use these items before other items in your storage.
Candle Wax
That wax left over from candles can be used to water proof matches. You just melt the wax and dip the matches in. You could tie ten matches together and water proof them all at once, but I have found the water proofing is more complete when each match is dipped individually. Lay them out on wax paper to dry.
Jars
Candle jars are the best type of garbage to keep around. You can use them to sort nuts and bolts. You can use them as a resealable grease jar when saving drippings to make your own candles. They can be used for storing dry goods. All in all they hit the double use jackpot.
You can also reuse old food jars to can your next generation of food storage. You just need to clean and sterilize them. YouTube has a great video for this: How to Sterilize and re-use old glass jars for preserves and jam.
.
Paper
Junk mail, newspaper and old school papers can be shredded and pulped to create your own recycled paper. An easy YouTube video to follow for this: How to make recycling paper. I spread the pulp over a screen (like a window screen)instead of plastic wrap. I feel it gets the water out of the paper pulp faster. Then you let it dry in the sun and remove it from the screen. It may be thicker than store bought paper, but you have your own home made recycled paper. This paper can also be used to make all sorts of other items that you may need ranging from bags to baskets from following the directions of YouTube videos.
Boxes
Always save boxes. Boxes simply used as they were meant to be used is enough reason to keep them, but they can be used for other things as well. Boxes can be used for storage containers. They can also be used to transport storage items.
Boxes can also be used as the main body of a box oven. The best video I have found for instruction in making a box oven is on YouTube: Gourmet Cooking in the Wild- Box Oven Chicken. This video not only shows how to construct the oven, but also shows how to cook a chicken in the oven.
The post STOP! Don’t Throw Away These Treasures! by Teraesa Farrell appeared first on The Survival Mom. Be sure to check it out!


April 15, 2015
Health Benefits of Tomatoes
 A vegetable “survival” garden isn’t a vegetable garden without some nice tomato plants, but is the tomato really a vegetable, or is it a fruit? In 1893, this question went all the way to the U.S. Supreme Court, which ruled (erroneously) that the tomato is a vegetable!
So what determines whether something is a fruit or a vegetable? Technically, if it results from the flower of a plant and the seeds are in the part that you eat, it’s a fruit. Interestingly, this makes a fruit out of a lot of things you might consider vegetables, including:
• Cucumbers
• Green beans
• Squash
• Peppers
• Olives
True vegetables don’t have seeds in the parts we eat, such as leaves, stalks, bulbs, or roots, and include:
• Carrots
• Celery
• Potatoes
• Onions
• Lettuce
• Cabbage
Health Benefits of Tomatoes
Both fruits and vegetables are part of a healthy diet, and tomatoes are some of the healthiest foods you can eat. One serving (1 cup) of red tomatoes is good source of vitamins and minerals such as the following:
• Vitamin A
• Vitamin C
• Vitamin K
• Vitamin B6
• Thiamine
• Niacin
• Folate
• Potassium
• Phosphorus
• Copper
• Chromium
• Magnesium
• Calcium
Whew! Tomatoes also help provide fiber to the diet. In addition, tomatoes are low in a lot of things you might not want:
• Sodium
• Saturated fat
• Cholesterol
• Calories
Another substance in tomatoes that has known health benefits is Lycopene , a vital anti-oxidant. Lycopene flushes out free radicals, substances involved in cell damage. Our body doesn’t produce lycopene on its own, so we need sources like tomatoes to reap its benefits. The tomato isn’t the only plant that contains Lycopene, but nothing else has so much of it. You’ve probably heard that cooking often removes some of the vitamins from food, and that’s mostly true, but tomatoes actually retain their lycopene content if cooked.
Tomatoes have beneficial effects on a number of organ systems:
1. Hair and skin: Lycopene and Beta-carotene in tomatoes protect skin against damage from the sun’s ultraviolet rays. Vitamin A helps keep your hair thick and shiny.
2. Eyes: Vitamin A helps protect against night blindness, and might even reduce the risk of macular degeneration, an irreversible deterioration of the center of your visual field.
3. Bones: Lycopene in tomatoes may improve bone mass, which protects against osteoporosis, a brittling of the bones which occurs with age, especially in women. Tomatoes also contain vitamin K and calcium, which helps strengthen bone tissue.
4. Heart: Potassium and Vitamin B in tomatoes help to lower blood pressure and possibly cholesterol, leading to less risk of heart attacks and strokes.
5. Lungs: Although eating tomatoes doesn’t make you want to stop smoking, chlorogenic and coumaric acid may mitigate some of the damage caused by the carcinogens in cigarettes.
6. Pancreas: in tomatoes may help diabetics keep blood glucose levels under control.
In addition, tomatoes may lessen the chance of prostate cancer, stomach, colorectal, and other cancers (again, due to Lycopene) and may have a role in inhibiting cancerous cell growth.
Tomatoes are a terrific way to help with weight loss, as well. Due to their high water content and fiber, they fill you up faster without adding a lot of calories or fat.
So consider adding some tomato plants to your garden this Spring and incorporate them into delicious recipes. For information on how to grow an awesome crop of this healthy fruit, check out Nurse Amy’s video on the subject:
The post Health Benefits of Tomatoes by Guest Poster appeared first on The Survival Mom. Be sure to check it out!


April 14, 2015
Berry, Berry Delicious: 21 Berry Desserts to Make Your Mouth Water!
 Everyone loves dessert. If you love berries, too, this is the post for you! These are all tasty and far healthier than many other desserts. Several are even gluten free.
The first two recipes are from Emergency Essentials and include ingredients that are shelf stable, meaning they can be stored at room temperature for long periods of time. If your family loves berries of all kinds, you should check out the freeze-dried versions. They’re nearly as nutritious as the fresh versions and they are super easy to incorporate in recipes. I use them frequently in my breakfast smoothis.
Be sure to learn about the 6 enemies of food storage so your food will remain nutritious and tasty, long term.
Sweet Strawberry Cake with Strawberry Buttercream Frosting
Add ½ cup Strawberry Powder to a white cake mix or batter, along with ½ cup extra water. Bake according to directions for your altitude.
Strawberry Buttercream Frosting:
INGREDIENTS:
3-4 cup Powdered sugar
1/3 cup Strawberry powder
1 cup softened (but not melted) butter
1/2 tsp salt, if you used unsalted butter. If you use salted butter, omit this salt
2 tsp vanilla extract (optional)
Milk or cream to achieve desired consistency (more than plain frosting, as the strawberry powder tends to thicken)
DIRECTIONS:
Using an electric mixer, beat the butter on medium speed to be sure it’s all soft and creamy.
Mix strawberry powder with powdered sugar.
Gradually add 3 cups of the powdered sugar mixture, beating on low speed. Once it’s mixed, increase speed to medium and add vanilla if desired.
Add milk or cream to achieve the consistency you want in your frosting.
Blackberry Cobbler Delight
INGREDIENTS:
1/2 cup butter or margarine
3/4 cup sugar
3/4 cup dehydrated fat-free milk
2 tsp baking powder
1 cup flour
4 cup Freeze dried blackberries with juice
DIRECTIONS:
Preheat oven to 350°F.
Melt butter in a 9″ x 13″ cake pan.
Mix next 4 ingredients into a smooth batter.
Pour melted butter into flour mixture without scraping pan. Stir until blended.
Pour blackberries with juice over batter.
Bake for approximately 1 hour.
And now for 19 more berry dessert recipes!
You’ll find all these and more on my Pinterest dessert board!
Sweets
Frozen Berries with Hot Chocolate
Recipes in a Jar: Cherry Cheesecake
Superfood Triple Berry Chia Pudding
Baked Goods
Berry Medley Oatmeal Crumb Bars
Double Berry Swirl Greek Yogurt Cake
Gluten Free Brownie and Berries Dessert Pizza
Soft and Fluffy Strawberry Banana Cake
Vanilla Bourbon Cherry-Blueberry Pie
The post Berry, Berry Delicious: 21 Berry Desserts to Make Your Mouth Water! by The Survival Mom appeared first on The Survival Mom. Be sure to check it out!


April 13, 2015
Build your Food Storage from Scratch: Homemade Strawberry Jam
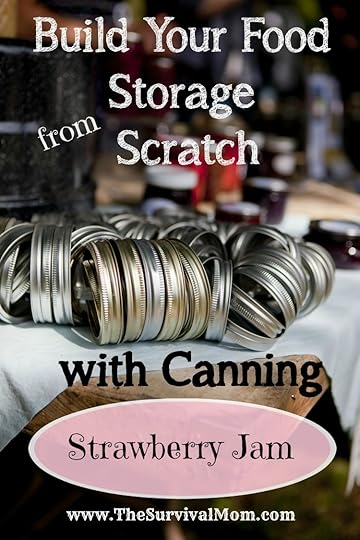
Strawberries…….the “first fruits” of canning season (I can year round, but strawberry jam seems to me, to “begin” the real seasonal canning blitz!) and there is nothing like real, fresh strawberry jam! BONUS ? It is SO very simple to make and can up!
Homestead Strawberry Jam
8 cups of fresh strawberries, stemmed, cut and washed up
2 Packages of All Natural No Sugar Pectin
2 cups of real grape juice
1 cup of organic sugar
Just dump your stemmed, washed and sliced strawberries in a big enamel or stainless steel pot, turn your burner on medium to medium high, mash them up quickly with a potato masher!

Then, add in 2 packages of Sugar Free Pectin, 2 cups of grape juice, sugar and stir.

Last year I was making a batch and found I was out of grape juice (the horror!) and so I just omitted it and dumped in a half cup of water. My family declared that batch to be their new favorite! So, just note this recipe, is very forgiving.
Bring this to a rolling boil for 5 – 7 minutes, stirring all the while so it doesn’t stick. Turn off your burner and remove from heat.
This is where a good canner has her canning jars, lids and equipment all ready to go! Or you have wonderful children who gather it all together and prepare it for you! Canning is a ‘must have’ skill at our homestead, so I involve the children and we all work together!
Ladle your hot jam mixture into your prepared jars, leave 1 inch head space, and wipe the rims of your jars down good with a clean damp cloth. Jar rims must be clean. If not, food on the rims can prohibit a proper seal. ALWAYS wipe down your jar rims.
Now, put on your lid/ring (tighten just slightly—do not wrench down on them) and set all your jars in your canner rack. Lower your rack into the boiling water, making sure the jars are covered with water. Once your water gets to a rolling boil, start your timer.
Check your Ball Blue Book for times related to the size of jar you are using and your elevation. I like to use pint jars or smaller, primarily, for jams. For me, at my elevation that means I am going to process my jam (“process” = keep jars in the full rolling boil water) for 20 minutes. Once time is up, I turn off my burner, and let the pot just sit for a few minutes prior to removing my jars.
Once I start removing my jars, I place them on the towel I have set out on my counter or tabletop (a place out of direct sun, drafts and that your jars will not be disturbed for 24 hours) and let them sit. If I don’t have more jam to process I clean up and get my canning equipment put away, so it’s easy to be ready for the next canning session.
This recipe makes PERFECT Jam! You can omit the sugar if you want, it is DElicious jam, a tiny bit tart with no sugar–but we like it that way, too! If you want to add the one cup of organic sugar, it sweetens it just perfectly! There is no need for those overkill, “10 cups of white sugar” recipes, unless that is what you want to make. Not only is this version cheaper, it is SO much better for you and, we think, it tastes better, too!
I did this entire batch (with help from my children cutting and washing berries & getting together canning equipment) from start to finish in less than an hour. In season, local produce (from your garden is the cheapest and freshest way to go!) is the time to stock the pantry! Plan ahead this year to line your pantry shelves with home canned food–it doesn’t get any better!
Happy Canning!
Helpful resources
All-American Pressure Canner (Ultra heavy duty, more expensive)
DVD: At Home Canning for Beginners and Beyond
Ball Blue Book Guide to Preserving
Ball Complete Book of Home Preserving
Ball Canning Utensil Set
Presto Pressure Canner (budget-friendly)
Simply Canning by Sharon Peterson
The post Build your Food Storage from Scratch: Homemade Strawberry Jam by Lisa Barthuly appeared first on The Survival Mom. Be sure to check it out!


April 11, 2015
Gardening in a drought

I have lived in many countries over the years, and have always had a vegetable garden. Not just for saving money, as many of the countries I have lived in have had what we considered dirt cheap food, but for the better quality. Nothing compares to the taste of veggies fresh from the garden.
During the past several years, severe drought has hit a number of states here in America. Gardens are blackened and burnt, with food only coming in, grudgingly, thanks to heavy watering every other day. Watching this happen immediately took me back to two of the hardest places I have ever tried to raise food.
Kenya and Botswana. Both places have no rain at all for months and months at a time, and then an entire year’s worth of rain in about 6 weeks. The temperatures, especially in Kenya, make even Texas heatwaves look like a refrigerator. Water sources are unreliable, even in the towns. Yet both places are stuffed with families that grow not only enough to feed themselves, but enough to sell from their personal gardens, not from farms.
So how do they manage that?
They use the following technique, which involves three separate components, all of which are easily made by anyone with the ability to use a shovel, hammer or a trowel.
Raised beds
When we rented our home in Botswana, in the yard behind the house was a series of concrete troughs, roughly 4 feet wide, 2 feet deep, and 15 feet long, running north to south. Concrete base, concrete sides, they looked like fish pools. In the corner of the yard was a pile of soil. Red, dry and fairly lifeless. Those concrete troughs were the raised beds, designed to keep every drop of water you added to the soil from disappearing into the parched earth.
You would fill them with soil during the rainy season and plant your seeds. Drainage holes about 16 inches below the top of the beds would prevent the seeds damping off, and ensure a goodly amount of water for the initial growing. One improvement we made was to use each trough in turn as a deposit for any vegetable waste – a three inch layer of chopped vegetable waste or cow manure in the bottom of the trough would rapidly compost down and improve the soil immensely. At the end of the dry season, when you had harvested the crops, you would shovel out the soil and let the sun sterilize them for the next crop.
Shade netting
Every 3 feet in the troughs was a hole, just the right size to hold a ¾ inch PVC pipe. Most people used branches, but the PVC pipe was more stable and used by anyone who could afford it. Horizontal pipes across the top turned the uprights into a frame, to which you would attach the shade netting, a fine mesh nylon weave. You have seen it before, if you have seen a stone building being renovated – it costs about $30 for 100 yards of 5 foot wide and cuts down the light to the beds by about 40%, according to my very old light meter.
One length of the netting is tied to the top of the frame, and one length on the Eastern and Western side which could be raised or lowered, depending on the day. Our drying evening winds invariably came from the West, so lowering the side flap and tying it down until sunset prevented a lot of wind drying of plants. Then raising it again and tying down the Eastern side, just before bed, prevented the plants being scorched by sunrise.
Thread watering
Watering plants is the biggest problem during a drought. For some plants, the watering can came into play, but for others, like bean vines, pea vines, tomatoes, zucchinis, pumpkins and squashes, we used a technique called thread watering.
Along the top of the shade netting frames for these beds ran three PVC pipes, capped at one end, and attached to a gallon lidded bucket at the other. Each pipe had holes drilled in them – very small holes, less than a millimeter across. At each hole location, you would tie a coarse thread – about 6 lb. test fishing line size, and run the thread down to the base of the plant, pegging it into the soil with a 6” nail. Fill up each bucket every night, and the single gallon of water would irrigate the whole row for 24 hours with minimal losses. The lids did dual duty of preventing evaporation and preventing mosquitoes breeding.
You may want to try it, you may not. But I thought it would be interesting for those who are in the drought to see how people who are always in a drought feed themselves.
Helpful resources:
All New Square Foot Gardening by Mel Bartholomew
Desert Gardening for Beginners
Extreme Gardening by David Owens
The Rodale Book of Composting by Grace Gershuny and Deborah L. Martin
Guest post by reader Mark M. Updated on April 9, 2015.
The post Gardening in a drought by The Survival Mom appeared first on The Survival Mom. Be sure to check it out!
April 10, 2015
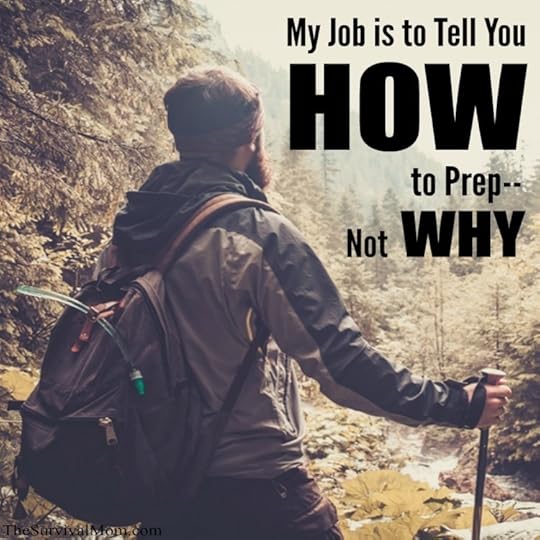
My Job is to Tell You HOW to Prep – Not WHY
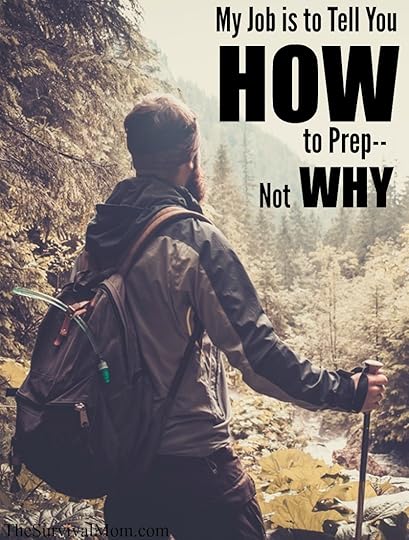 Several months ago, I was a speaker at a local prepper expo. Toward the end of the day, I and a few others were assembled to do a panel discussion. One of the first questions is one that I, as well as just about every other survival/prepper instructor, tired of long ago and it’s all about why you should prepare:
“So, what do you think is going to happen?”
It has been phrased differently, of course, but no matter how you word it, the question is the same – what big disaster do you think is really going to occur and when?
I don’t know about you but my crystal ball hasn’t worked well in many years. I don’t have any top secret information that I’m not sharing with folks. I can’t reliably predict tomorrow’s weather let alone what major events might take place in the immediate future. Personally, I find predictions largely just amusing rather than useful and informative.
I used to know this guy, we’ll call him Jay. He was, and probably still is, heavily into Bible prophecy. Jay and I were both members of a certain online forum. Every year, Jay would predict that “the end is nigh” and that year, I believe in October, the S was going to HTF. He would hammer on this for months and months. Then, come October, nothing happened. He’d quiet down for a month or two, then start right back up about it happening NEXT October. This went on for about eight years or so. Heck, he might still be doing it. I stopped paying attention a while ago. The point here is that no one can reliably predict the future so rather than trying to do so, we should turn our efforts and energy elsewhere.
Here’s the thing:
My job isn’t to convince you WHY you should prep. My role here is to show you HOW to prep. If you’re surfing this website, reading one of my books, or listening to me speak at an expo, you already recognize the need for being better prepared for emergencies. We don’t need to talk about the importance of prepping.
In all actuality, the WHY of prepping is largely irrelevant. As a practical matter, prepping for an EMP strike isn’t much different than prepping for a pandemic…or a zombie uprising…or the New World Order…or any number of other apocalyptic scenarios. It doesn’t matter if the power grid goes down or the dollar collapses, we each still need food, water, shelter, and all the other basic stuff that keeps us on the green side of the grass.
Don’t get me wrong. It can be fun to play “What if?” sometimes. And studying history can help us to recognize when we seem to be making the same mistakes again. My point is to not get too caught up in trying to guess what the future holds. Just prep to the degree it makes you feel safe and comfortable. Think in terms of disaster length rather than disaster make up.
In other words, decide whether you are most concerned about short, medium, or long-term events and work on being able to meet all of you and your family’s basic needs for that length of time.
Work on the HOW and don’t worry about the WHY.
Here’s Survival Mom’s take on preparing for no other reason than you just feel uneasy about the future:
Helpful resources for you
Countdown to Preparedness by Jim Cobb
Make a personalized threat assessment
Prepper’s Long-Term Survival Guide by Jim Cobb
The Prepper’s Complete Book of Disaster Readiness by Jim Cobb
The post My Job is to Tell You HOW to Prep – Not WHY by Jim Cobb appeared first on The Survival Mom. Be sure to check it out!
April 8, 2015
The Homeschooling Starter’s Guide

There are many benefits for the home schooled child and newcomers often want to know how to start homeschooling and why.
First, their class size is only as big as the number of siblings they have being home schooled with them. They get more one on one attention from their teacher. Second, their teacher is someone who knows how they best learn and has their best interest in mind. Third, homeschooling has the potential to be more fun and engaging than a public school setting. One of the hardest parts of homeschooling, however, may be knowing how to get started.
The Legal Stuff
Home school laws vary from country to country and, in the United States, from state to state. To home school, you need to know what the local law requires of you and your child. Some states require a certain number of college credits from the parent(s) who will be teaching them. Others only require a high school diploma. Most will require that you go to your school district and declare your intent to home school, a curriculum and yearly testing of your child, and some states have virtually no requirements at all.
Time and cost involved
Home schooling is worth it for both you and your child. It does, however, take some effort from both of you. It’s important to know that there are no two families who homeschool in exactly the same way. Some parents set up an actual classroom in the home, many homeschooled kids work at the kitchen table or sprawled out on the couch. Parents who work late hours prefer that their kids do some schooling in the evening or into the night, so they will be there to help, and then there are the early bird homeschoolers who are up at dawn, working furiously on their schoolwork, so they can play all afternoon!
There is no single, best way to homeschool, but depending on your style, circumstances and the ages and abilities of your kids you may want to:
have some type of organized schedule for schoolwork, activities, playdates, etc.
set aside time to create and go over lesson plans or use ready-made plans that come with many types of curricula and on websites.
set measurable goals for your child’s progress.
set a school schedule. It can be flexible, but the time for education should be clearly marked out.
Homeschooling will also have a cost, but it doesn’t need to be expensive. You will need basic school supplies and materials for every day class, such as pencils and paper or a dry erase set. You will need art supplies if you plan to teach your children about art. If you plan to take your children on field trips or sign them up for extracurricular lessons, you’ll need to have money set aside for that.
There are plenty of free materials available online, though. Khan Academy offers online, video lessons beginning with kindergarten through high school. Note that Khan Academy is aligned with Common Core, which you may or may not want. Ambleside Online is an excellent free curriculum that only requires you to obtain the books used in reading assignments, and many of those are either free or extremely inexpensive.
Identify Your Child’s Learning Style
No one know how your child learns better than you. As a homeschooling parent/ teacher you will be able to cater to your child’s learning style. If your child has more of hands on learning style, you can teach geometry by digging a hole in your back yard to certain specifications. If they are having trouble with their fractions you can have a cooking class and let them work the measuring cups while explaining their size relation to each other. Keeping your child’s learning style in mind can help you plan a creative curriculum around them, one that suits them best and will provide real, successful learning.
Where To Find Curriculum
Home school curriculum used to very expensive, even when buying your books used. With the joy that is the internet that is no longer true. In fact many curriculum can be found online for free. Some are religious and others are not. Some even have a list of materials you will need to buy as well as downloadable material. Here are a few of my favorites.
Ambleside Online — Used by The Survival Mom.
Free Homeschooling Stuff Online
In addition to the full curriculum you can find online, there are also plenty of extras that you can find and integrate into your lesson plans. For example, you may have chosen a curriculum with a great focus on core classes, but nothing on the subjects of art or music. You can go online and find plenty of craft ideas and coloring pages. YouTube is full of classical musical performances for virtually every composer. You can find many different types of songs to help your child’s memory recall of lessons they may be struggling with. If you want to supplement your homeschooling experience try some of these websites.
Home Schooling Groups
There are groups available to help with homeschooling and offer support. Homeschool Legal Defense Association has a directory of the groups in your the United States by state and county. There are groups that offer extra classes, 4H groups, or sports teams. You could also start your own group should you feel so inclined. You could offer to teach a subject you are strong in, such as science or literature, while another parent may teach math.
Field trips and getting outside!
Home schooling doesn’t mean hunkering down at home with your children and a bunch of books (although if that’s what you want, I’m sure you could). It also means that there can be more field trips. Go to national parks for classes in biology. Visit a rock climbing studio for physical education. Visit museums, beaches, art galleries, aquariums and zoos. Many local attractions are either free or very inexpensive. It allows your classes to be creative and gives your child a chance to see the education given to them has real world application.
There is an astonishing number of activities geared to homeschoolers and some museums, science centers, and the like even offer daytime classes, specifically for them.
Online Schooling
You may want your child to have the experience of being home schooled but are uncertain about getting started. You may doubt if you have the time or the knowledge to make curriculum choices or doubt your teaching abilities. That’s okay. There is an option for those that fall into this category but would still like to have their child be educated in their own home. Consider an online public school. Your child will be able to connect to a teacher online and they will plan the curriculum. Your job will be to keep your child on track with their lesson plan and introduce supplement activities or outings as you see fit.
Connections Academy
Calvert Virtual Schools — Will be aligned with Common Core.
K12 online school — Lisa’s note: I DO NOT recommend this program. When I contacted them via online chat, I was steered toward the “tuition-free” option. I asked where the funding came from and the agent admitted that they are paid for each student enrolled in the public school option, which is Common Core aligned. Other than the child being at home, there is virtually no advantage to this program.
The agent told me that their private programs are different because they don’t have to follow the curriculum of states. When I asked where I could find the funding information on the K12 site, my online chat was suddenly disconnected.
The downside to online public school is that all curriculum choices will be out of your hands, as will assignments and accountability. Most homeschoolers enjoy shorter school days but online public schools may require a minimum number of “seat” hours per day. As well, it will almost surely be aligned with Common Core — a controversial curriculum, at best.
Helpful resources
Homeschool Legal Defense Association — This group is Christian but will defend all homeschoolers against illegal harassment regardless of their faith.
Information about learning styles
Learn about your state’s homeschooling laws at the HSLDA website
Homeschooling advice from The Survival Mom — A collection of articles that have appeared on this blog.
Dumbing Us Down by John Taylor Gatto — A classic, written by an award winning public school teacher.
The First Year of Homeschooling Your Child by Linda Dobson
So You’re Thinking About Homeschooling by Lisa Whelchel
Teach Your Own by John Holt — A classic written by a pioneering homeschool dad.
The Well-Trained Mind by Susan Wise Bauer
The Ultimate Book of Homeschooling Ideas by Linda Dobson
The post The Homeschooling Starter’s Guide by Teraesa Farrell appeared first on The Survival Mom. Be sure to check it out!