How to Can Green Beans in a Pressure Canner
 Green beans are a great candidate for a first-time gardener and for someone new to canning. They grow well in lots of different gardening zones. They grow and produce rather quickly, and the more you pick them, the more they produce.
They are easy to can and will provide your family with a green vegetable throughout the winter, making them a great choice for food storage. We love green beans in our house. It’s the only green vegetable my whole family likes, so we eat them about twice a week, with lots of bacon grease. You can find our favorite recipe .
Equipment Required
Clean canning jars with lids and rings
Pressure canner with gauge and rack (you cannot use a water bath canner)
Canning funnel
Ladle or large spoon
Jar lifter
Magnetic lid wand
Non-metallic small spatula (I use a chopstick)
Large pot to heat jars
Large pot to heat beans
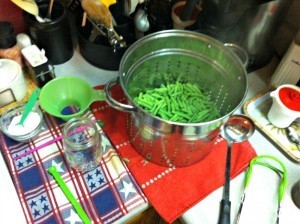
Colander
To Can Green Beans
Break ends off beans and then break into smaller, 1 – 1 ½ inch, pieces. I normally break beans at night while watching TV and can them the next day. It takes awhile to get them all broken. Rinse well in several changes of water.
 Gather your equipment and wash with hot soapy water.
Place clean jars in a large pot and cover with water. Bring to a simmer. Place the lids in a smaller pot and bring to a simmer as well. Do not boil the lids.
Add water to your pressure canner to the appropriate level (check the directions for your specific canner model) and turn the burner to medium. You want to warm the water to about 180 degrees, not boil it. Tip: Add a splash of vinegar to your water to help keep your jars free from residue while processing.
Bring another large pot of water to a boil and add the broken, washed green beans. Boil for 5 minutes and remove beans from cooking liquid. Reserve cooking liquid to cover beans in jars.
 Working one jar at a time, use your jar lifter to remove the jar from simmering water, dumping the water back into the pot.
Put the canning funnel on your jar and fill hot jar with hot beans, to 1 inch of headspace.
Add canning salt (optional), ½ tsp for pints, 1 tsp for quarts.
Ladle the hot cooking liquid over the beans, leaving 1-inch headspace.
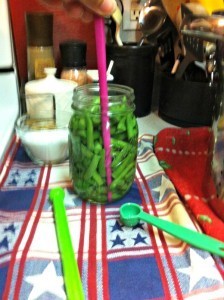 Slide your spatula – or any non-metallic utensil – between the green beans and jar; press back gently on the beans to release any trapped air bubbles. Do this a couple times, then add more cooking liquid if necessary to the correct headspace.
Into the pressure canner!
It’s now time to place each jar in your pressure canner. Your canner probably came with instructions for the amount of pressure and time for your particular location, but if you’re still unsure, refer to the Blue Ball Book Guide to Preserving or your local extension office.
Once your green beans have been processed, remove bands and check to make sure your jars have sealed by pressing down in the center of the lid. If the lid pops back up, your jar hasn’t sealed correctly and should be refrigerated and consumed within one week. Store your canned goods in a cool, dry, dark place.
Now it’s time to enjoy the fruits of your labor! You can enjoy the flavor of green beans all year long!
Want more information about canning? I recommend these resources:
Simply Canning by Sharon Peterson
Ball Complete Book of Home Preserving by Judy Kingry
The Canning Diva website
Simply Canning website
Canning Granny website
All-American Pressure Canner (Ultra heavy duty, more expensive)
DVD: At Home Canning for Beginners and Beyond
Ball Blue Book Guide to Preserving
Ball Complete Book of Home Preserving
Ball Canning Utensil Set
Presto Pressure Canner (budget-friendly)
The post How to Can Green Beans in a Pressure Canner by Courtney Wollam appeared first on The Survival Mom. Be sure to check it out!