
Ali Edwards's Blog, page 221
May 7, 2014
Yesterday & Today Self-Paced Workshop Now Available
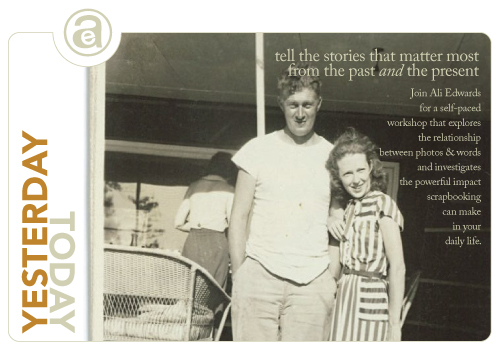
I’m super excited to bring back and make available one of my most-loved, content-rich workshops Yesterday & Today.
Where do you begin creating with photos from generations past?
What do you wish you knew about your parents when they were growing up?
How do you document the challenging times in your life?
How do you create layouts that tell special stories when you don’t have any photos?
What are the lessons of your life so far?
The goal of Yesterday & Today is to help you meaningfully document and celebrate life by looking to the past before approaching the stories of today.
The benefit of looking to the past is that we gain perspective. We see things differently after developing an awareness of what we know and what we wished we knew. Looking back, even if we’re just viewing old photos of people we don’t know, can change the way we approach the photos we take and the stories we tell today.
WHAT YOU CAN EXPECT
Yesterday & Today includes 12+ lessons. All lessons are immediately available to you upon purchasing this workshop.
The first six lessons of Yesterday & Today address topics related to yesterday: dealing with old photos, identifying which stories mean the most, gaining perspective. You’ll then transition for a couple of lessons and shift your focus to cover stories that include content from both the past and the present. The last few lessons are devoted to exploring techniques that help you tell the stories of everyday life right now.
Yesterday & Today is designed to:
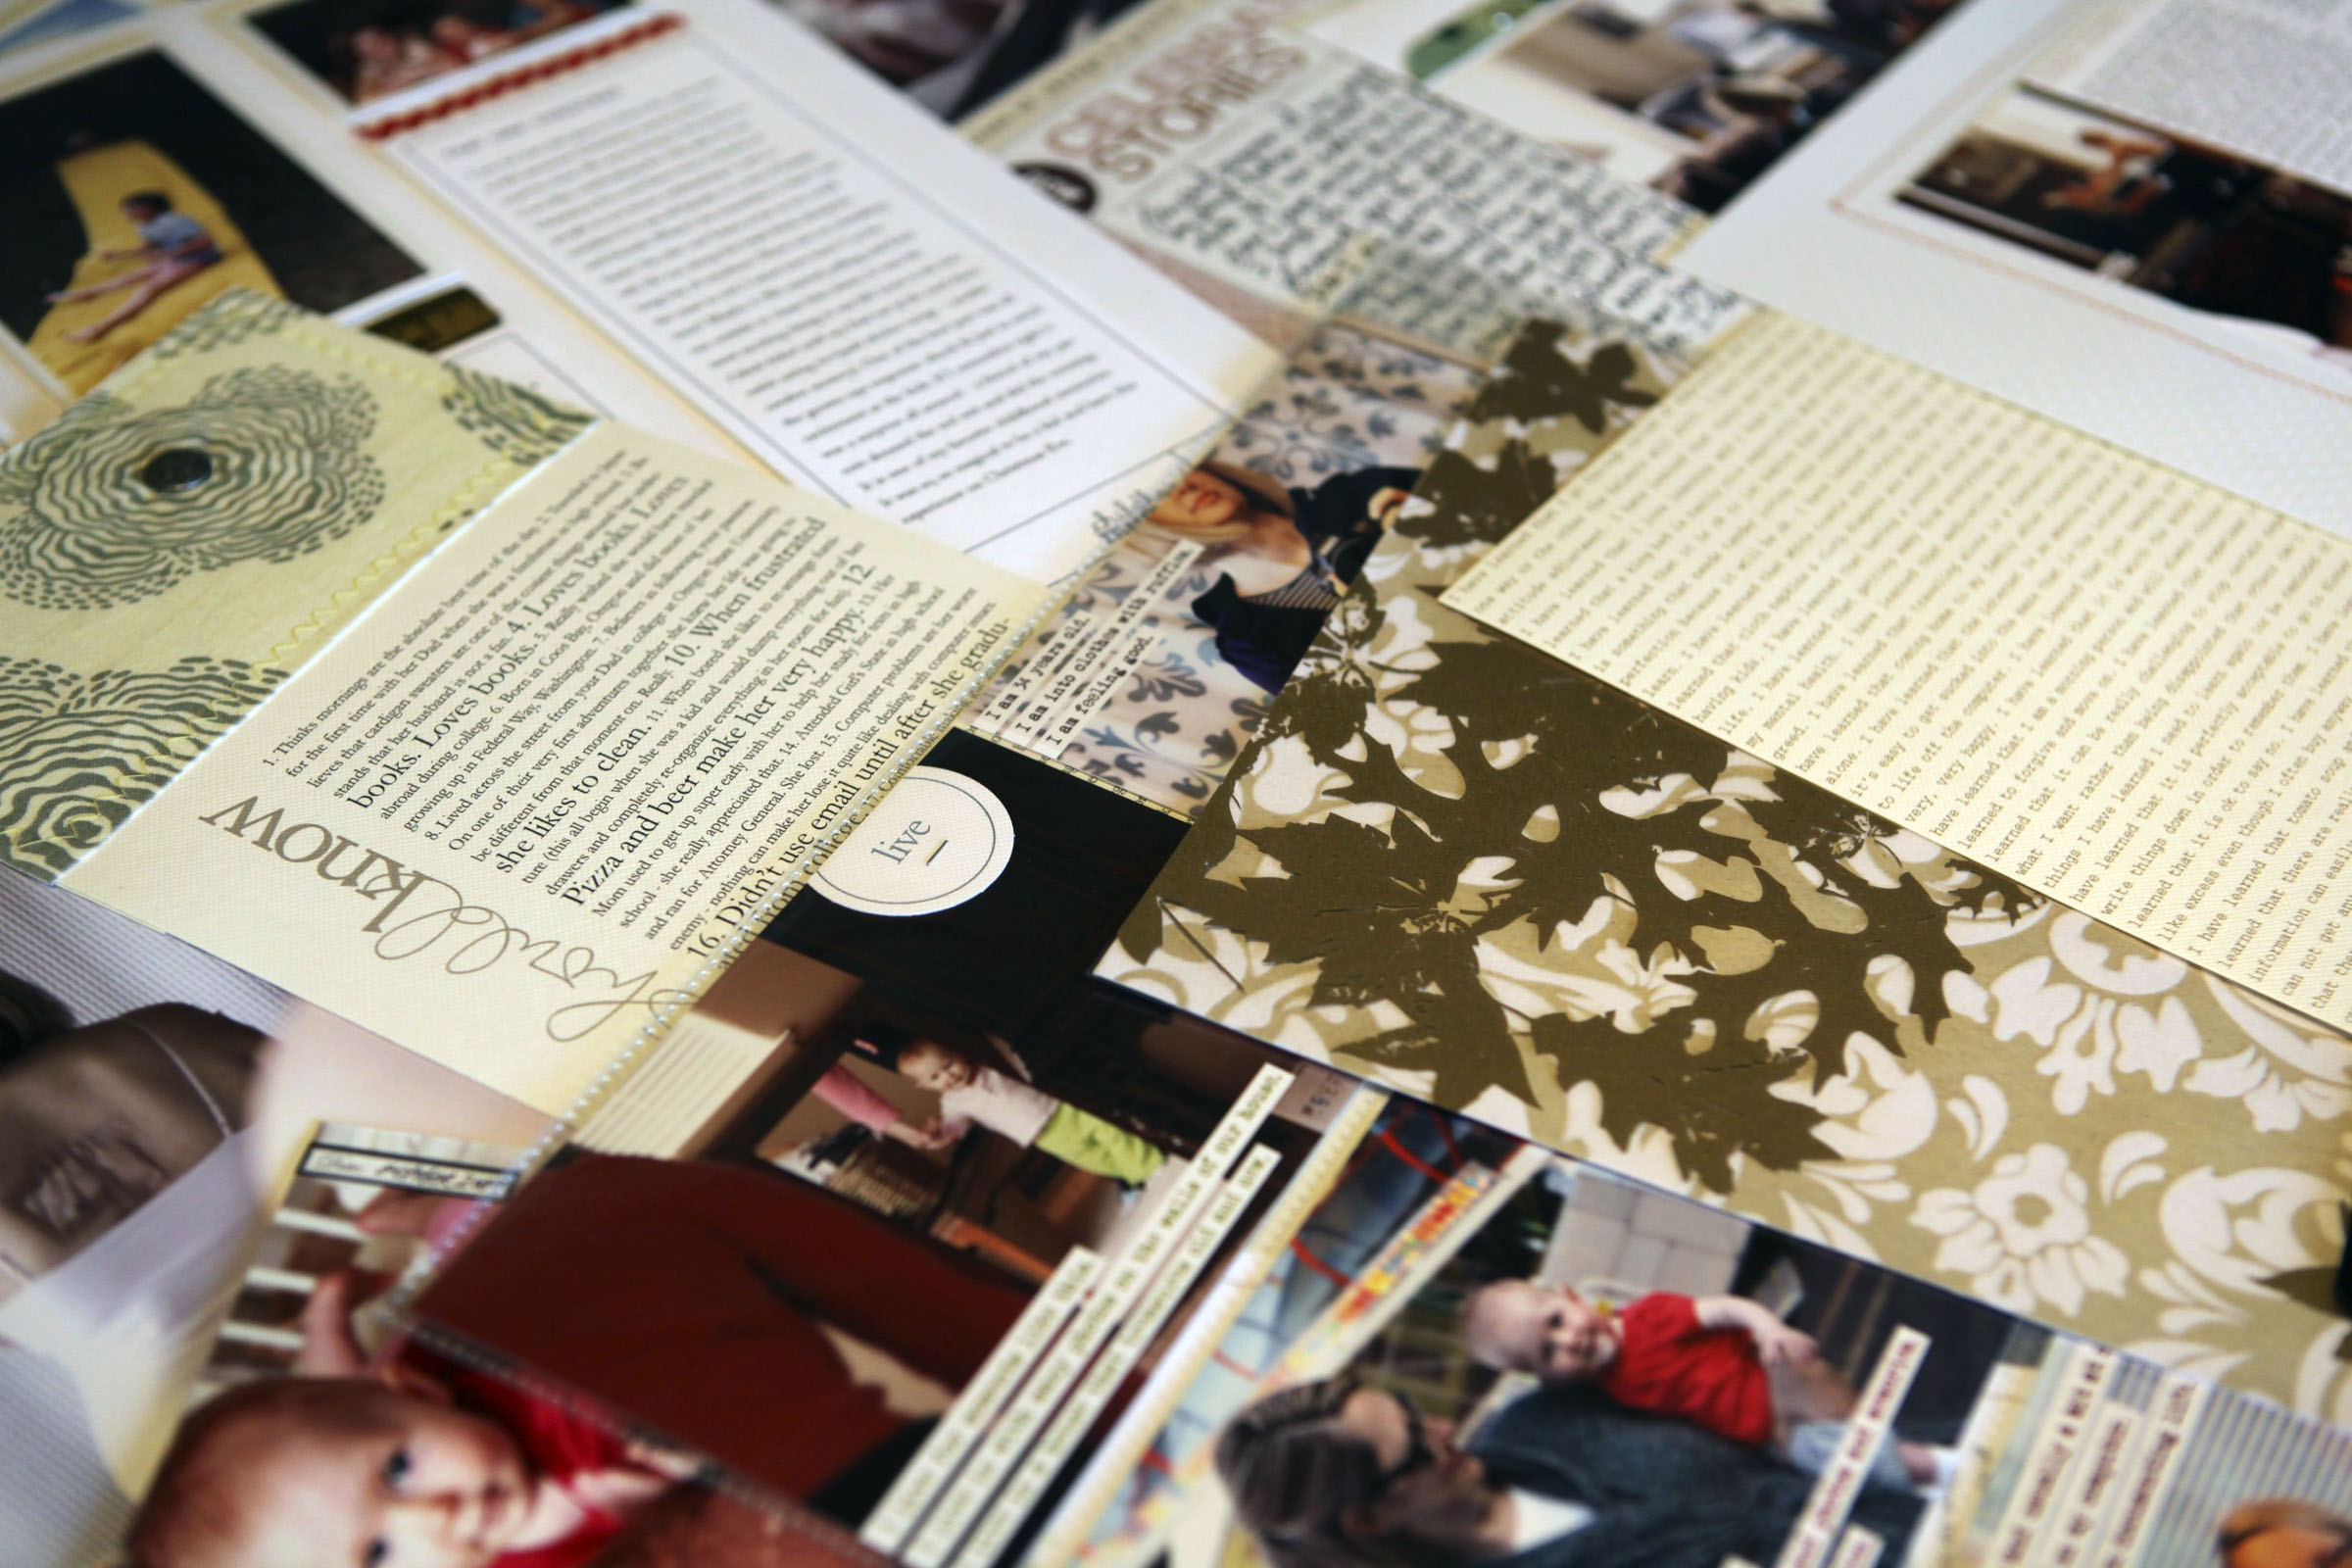
Begin the journey of creating a life-affirming 12″ x 12″ album that mixes stories from the past and the present.
Be about you OR about someone you love (or you can do a bit of both). Each layout topic can be translated into a page about yourself or a loved one.
Be an in-depth exploration of each topic per week. There will be just one layout project per lesson. You will not be scrapbooking your entire life story as you work through this workshop.
Be an opportunity to use what you have from your current stash of supplies.
Challenge (or affirm) the way you think about scrapbooking. It is less about playing with products and more about focusing on the words and photos.
Inspire you towards a deeper understanding of the power scrapbooking can have in the way we live our day to day lives.
Give you a plethora of ideas for additional layouts to complete and stories to tell once the workshop is finished.
Instill confidence in your personal creative process.
Be open to all memory keepers whether you prefer paper or digital (or a bit of both).
LESSON TOPICS
LESSON ONE | Saying Goodbye, Saying Hello // Story Brainstorm
LESSON TWO | Choosing & Working With Photos // Working With Old Photos // Scanning Tips
LESSON THREE | Telling The Story // Lessons Learned // Storytelling Rhythms
LESSON FOUR | Why We Scrapbook // Telling The Challenging Stories
LESSON FIVE | Stories Without Photos
LESSON SIX | Change & Growth // Building Stories With Structures
LESSON SEVEN | Past & Present
LESSON EIGHT | Personal Past Perspective // Cultivating Mindfulness
LESSON NINE | Day In The Life // Everyday Details
LESSON TEN | This I Believe // Life Lessons
LESSON ELEVEN | Embracing Imperfection // Getting Yourself In The Photos
LESSON TWELVE | The Stuff Of Life
LESSON THIRTEEN | Review
Each topic includes a video/slide show presentation along with a full-color PDF handout that includes inspiration and instruction.
OPTIONAL FACEBOOK GROUP
Once you’ve registered you have the option to join the Facebook group. Even though this is a self-paced workshop this will create a community and opportunity to share your work and ask questions and support one another.
A couple of notes:
Although this project uses specific materials I definitely encourage you to use what you might have on hand.
You need Adobe Reader to open the step by step PDF file. Download Adobe Reader for free here.
There are no supplies included with this class and nothing is mailed to you.
This class was originally created in 2009 and it is the same content. Some of the products I use might not be available but I’m happy to suggest alternatives.
HOW IT WORKS : This is a self-paced class. Payments are made via Paypal. After going through the payment process you will receive an email that includes a link to download your Welcome To Class PDF. Depending on your method of payment through Paypal (credit card, bank transfer, etc) you might be able to download the file immediately or you may need to wait a couple of days for the e-check to clear. Access information for the class and video passwords will be listed on the Welcome To Class PDF. All other content will be available for you to download once you are in the classroom.
Your Welcome To Class PDF will be mailed to the address you use for Paypal.
Because of the online nature of this workshop (passwords for content and videos for the year are included with the Welcome PDF) no refunds are available.
REGISTER HERE
COST | $30
Questions? Contact Ali or Katie via email.
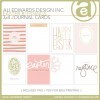
OPTIONAL DIGITAL PACKAGE OF ELEMENTS & TEMPLATES
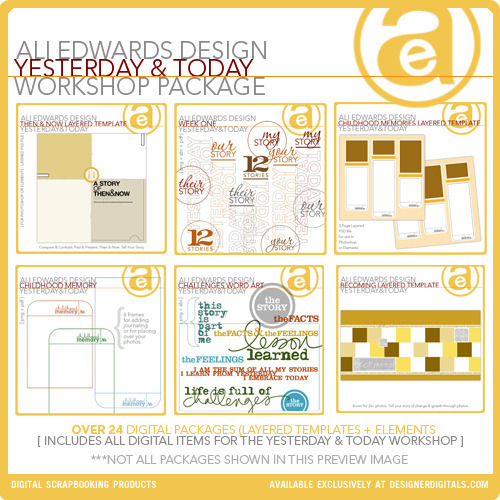
OPTIONAL DIGITAL PACKAGE | $25 (purchase through Designer Digitals here)
PLEASE NOTE | When this class first ran (in 2009 and 2011) it was $99 and included the digital elements. I’ve brought the price down to $55 if you purchase both the workshop lessons + the optional digital package through Designer Digitals. You can choose to purchase the optional digital package after diving into the content and seeing if it’s something you really want as a part of this educational experience.
YESTERDAY & TODAY REVIEWS
Trisha | Ali, thank you for a great class! I now have a meaningful, beautiful album full of things I never would have thought to document. I am so happy with it! I appreciate your thoughtful, genuine love of all things that embrace life. Thank you from the bottom of my heart for this wonderful class and for being YOU.
Hannah | I highly recommend this class. It doesn’t matter what kind of a scrapbooker you are, or even if you aren’t one, the thoughtful assignments and journal prompts are powerful to say the least. The ability to go at your own pace means you can take your time until you are ready to deal with the issues that come up, and not get behind- I finished it 2 years after starting! Looking back and comparing now and then was a powerfully healing experience for me- it helped me address issues in my marriage, feel closer to my parents, and change my perspective on my present and future. It not only changed the way I scrapbook, but the way I think. In short, this class is like therapy, only a lot cheaper and you get a great album at the end of it!
Anne | I took this class a couple of years ago… It was without a doubt, the hardest class I have ever taken! (And I am a college graduate). You somehow got me to thinking of things that happened a long time ago…your questions pulled my life story right out of me! I am so thankful to have a Yesterday and Today scrapbook… It really is my story!!!
REGISTER HERE
COST | $30
Questions? Contact Ali or Katie via email.


May 6, 2014
Easter 2014 | Scrapbook Layout
I know I’ve said this before but one of the things I love about having blog is that it acts as a home for my stories until I have a chance to scrapbook them.
This works especially well for longer stories.
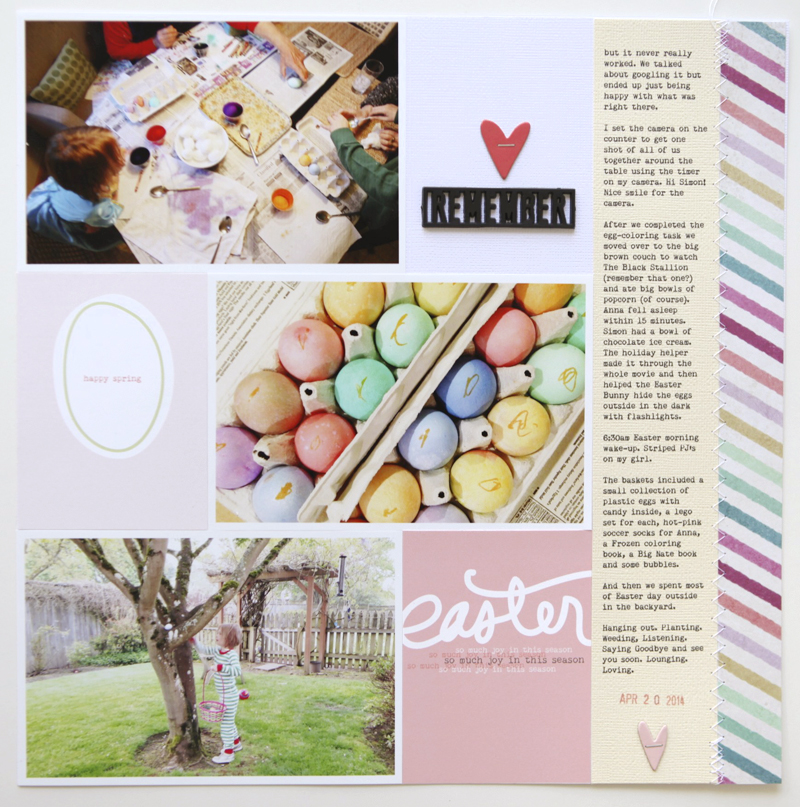
Today I’m sharing a layout I made documenting Easter that includes journaling from this post. This documentation could have gone in Project Life® as an insert (longer stories for me often mean creating an insert) but I was more interested in playing around with a traditional layout. Thankful for options.
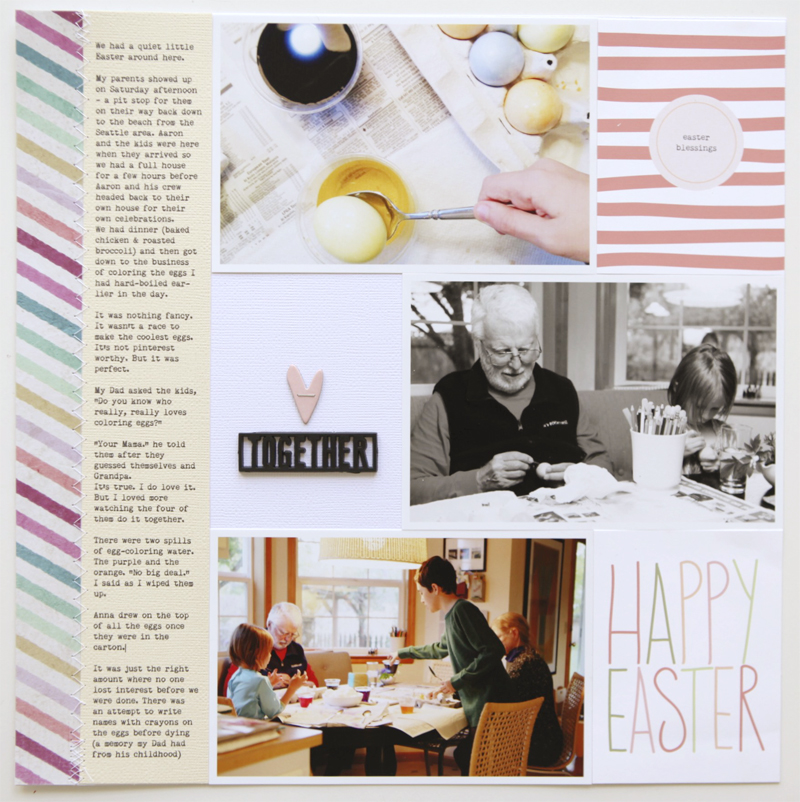
This layout feels really classic to me, maybe almost old-school if that’s such a thing in scrapbooking. It’s very clean-lined and organized and everything has a home.

I wanted to use 4×6 photos paired with the Easter Blessings 3×4 cards on a traditional layout.
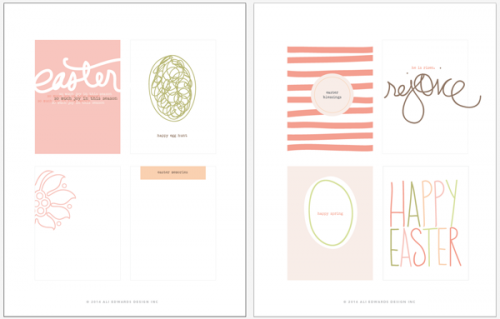
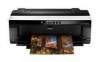
To print out the 3×4 cards I used an Epson R2000 printer and Epson Matte Presentation Paper. I also used that printer for the long journal strips (on cream cardstock).
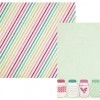
Pattern paper along the edges is from Simple Stories: Hey Mom | Lovely.
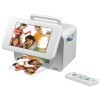
The Epson Picturemate prints photos with the white border (it’s an option).
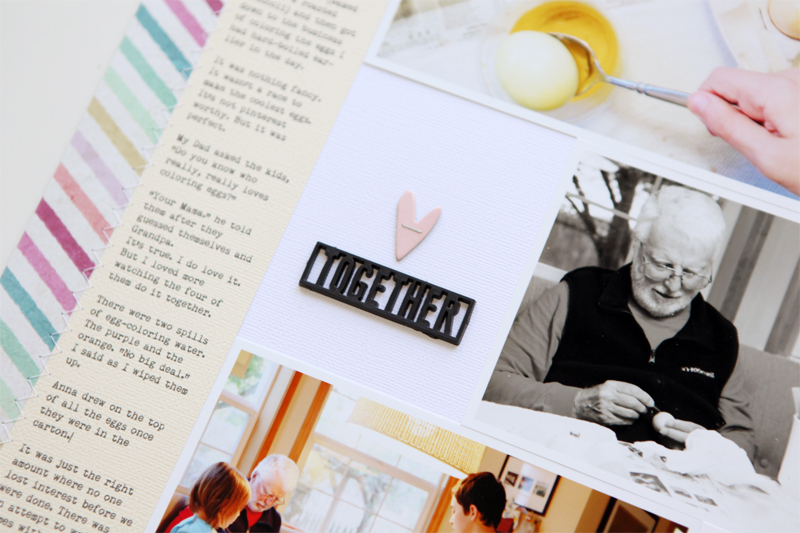
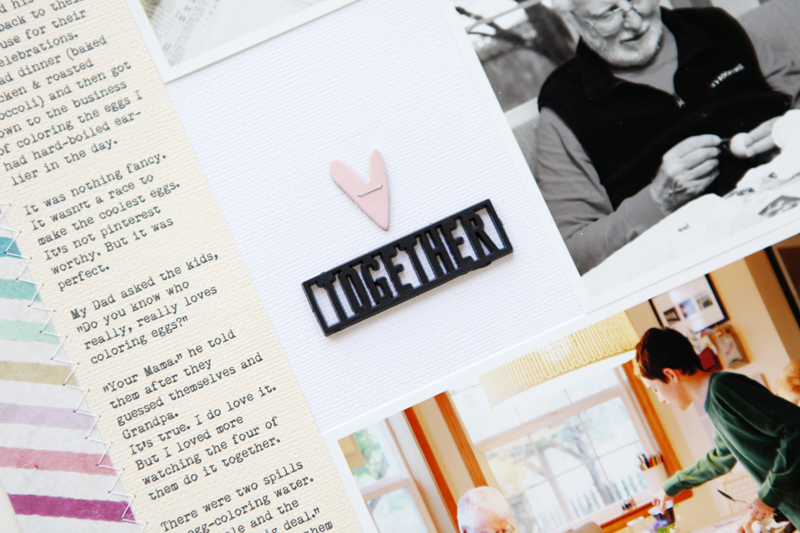
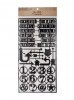
The black embellishments are Tim Holtz Alpha Parts Framed – love them. They are a raised plastic piece that you twist or cut out and they already have adhesive on the back.
When I first got all the items together for this page I planned to use six of the Easter 3×4 cards. As I was adhering elements I decided to subtract two of the cards and use the simple embellishment mix of the chipboard heart + the black plastic word in it’s place. I love how that turned out.

ACTION ITEMS/IDEAS
Those of you who’ve taken my Hello Story workshop have heard me talk about using subtraction as a design technique. For this layout I subtracted two of the 3×4 journal cards and added embellishments in those spots. What can you subtract from your next project (and maybe or maybe not add something in it’s place)?
The basic design principles found in divided page protectors can be used on traditional pages to create home for your words, photos and embellishments. Think in terms of this sort of grid as you lay-out your next scrapbook layout.
SUPPLIES | EASTER 2014
Click on the images to link to the products.

InLinkz.com


May 5, 2014
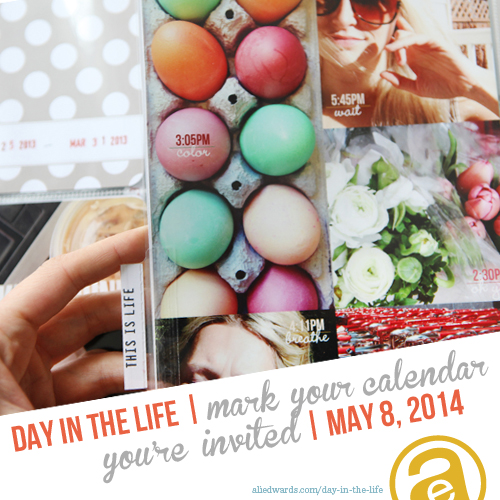
Day In The Life This Thursday (5/8) | Want To Play Along?
I was thinking last week that it’s been way too long since I last did a Day In The Life.
Actually it was last June to be exact.
Last year (2013) I started the year with the plan that I’d do it once a month. I lasted about half year and then let it go because it just wasn’t inspiring me and other things got in the way.
You’re invited to join me this Thursday, May 8th to document a day in your life.
It’s just more fun when we are doing it together.
Grab a free downloadable Daily Sheet for documentation. You can download a free set of Daily Sheets (originally designed for Week In The Life but you can choose to just print one page) here. I use this as I go about my day.
In 2012 I did a Day In The Life in February. Here’s the posts that went along with that project:
Overview + Free Download (great starting place)
The Documentation
Project Life 2012 | Week Six (the week I added in the Day In The Life content)
There’s lots of options for how you might choose to make something with the words and photos you gather over the course of the day. With the content you collect maybe you will:
Create a traditional scrapbook page.
Add your content to Project Life® as an insert or consider using a whole spread for just one day. See below for how I’ve done that in the past or check out my Day In The Life archives.
Document your day on Instagram. Fun and easy!
Make a mini-book. It would be so fun to use one of these little We R Memory Keepers 4×4 albums for a Day In The Life.
WEEK IN THE LIFE 2014 | And in case you are wondering I do currently plan to embark on a Week In The Life project again this year as well starting on September 8th.
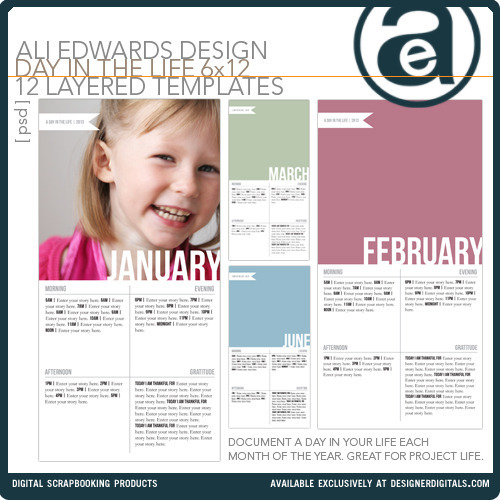

Last year I designed a set of 6×12 Day In The Life layered templates that I can use as inserts in Project Life. They include space for a photo plus areas for journaling morning, afternoon, evening and gratitude. Here’s a tutorial for working with this specific template: Day In The Life Layered Template Tutorial.
I’ve also designed a 6×12 Photo Collage Template set to go along with the Day In The Life layered templates. They can be used in conjunction or on their own for anytime you want to add a 6×12. You can also combine the two together to create a 12×12 layout. I’ll be using these as the back page of the 6×12 insert to include photos I take throughout the day.
Like the idea of 6×12 layered templates? You can also check out my 6×12 Words And Photos Layered Templates and see how I used them in Project Life here.
 Two (2) people will win a $75 credit towards their next purchase at Minted.
Elizabeth Icaza
Sherrie Davis
One (1) person will win a May Main Scrapbook kit from Paper Camellia Kits. US & Canada Addresses only.
#424 | Alyna said…What an amazing kit! Thank you so much for the chance to win it!


May 3, 2014
Sponsored Giveaways | Paper Camellia Kits

GIVEAWAY | One (1) person will win a May Main Scrapbook kit from Paper Camellia Kits. US & Canada Addresses only.
Our May kits are filled with a fun mix of Spring brights and fresh designs from the latest releases. Papers in tones of pinks, greens, and crisp blues, as well as, wood veneer, flair, fun enamel elements and die cuts will keep you creating through the month and beyond!
SPECIAL OFFER | Receive 10% off any purchase from Papercamellia.com including Subscriptions. (New subscriptions only, 10% will be deducted off of your first month’s subscription price.) Use promo code ALI10MAY at checkout. Offer good through 5/14/14.
ABOUT | Paper Camellia Kit Club is your destination where beautifully coordinated scrapbook kits come together with inspiration, creativity and exceptional customer care. Delivery right to your door, every month. We design our kits with an eye for the latest products, a clean style, as well as quality and value.
Join us as a subscriber to be assured to receive the Main Scrapbook kit or Everyday Life kit each month. We are a no-commitment kit club and you may cancel at any time without fees. We invite you to visit us at Papercamellia.com for a look at our kits, and wonderful creative inspiration from our design team!
CONNECT | Shop | Website | Blog | Facebook | Pinterest | Instagram
TO BE ENTERED into this giveaway please leave a comment below (if you are reading this post on Facebook please come to my blog to leave a comment). Comments will be closed at 8pm Pacific on Sunday, May 4th. The winners will be announced shortly after. Please be sure to check back or subscribe (click here to get posts delivered to your email box) to see if you are receiving one of the items.


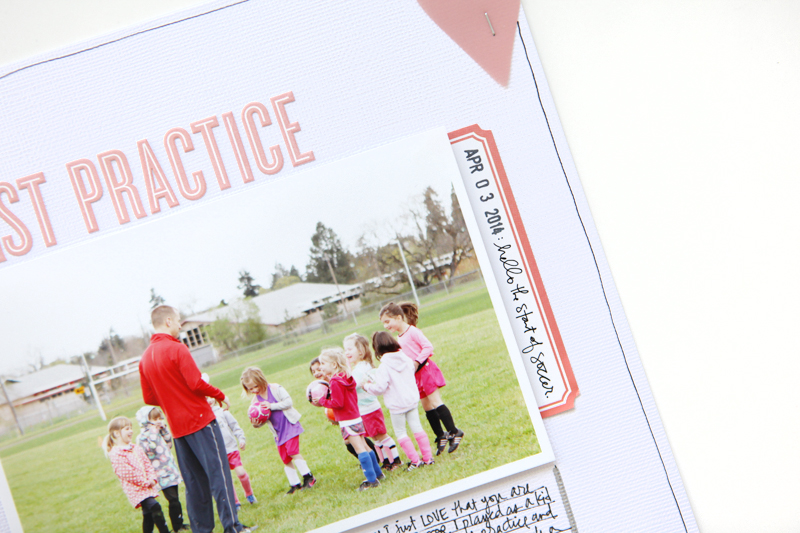
First Practice | National Scrapbook Day 10k

Today I’m participating in Big Picture Classes National Scrapbook Day 10k.
They’ve got a goal to have 10,000 scrapbook layouts posted on Instagram today. Love that.
Here’s how to join the fun:
Register for our National Scrapbook Day “10k” for FREE here.
Log in to our private online classroom on Saturday, May 3, every hour from 9:00am PT to 6:00pm PT for a new quick-scrapbooking tip from one of our 10 amazing instructors.
Follow @bigpictureclasses on Instagram to keep up with the fun and be eligible for our sponsored prize giveaways.
Create as many pages as you can on National Scrapbook Day and post them to Instagram, using @bigpictureclasses tag and #NSD10k hashtag. Every full layout image you post (no close-ups or detail shots) is an entry into our random prize drawings.
If you don’t have a smartphone or Instagram account, you can upload layout images to the classroom gallery instead for some alternate prizes.
Deadline for uploading layouts is Monday, May 5 at 11:00pm PT. Prize winners will be announced in the classroom and on our Instagram feed on Tuesday, May 6.
PLEASE NOTE | Your Instagram account must be set to public, at least for the duration of this event, in order for your posted layouts to be eligible for our prize giveaways. (We won’t be able to see them otherwise.)
In addition Studio Calico has a fun kit available today. Here’s a peek at that kit:
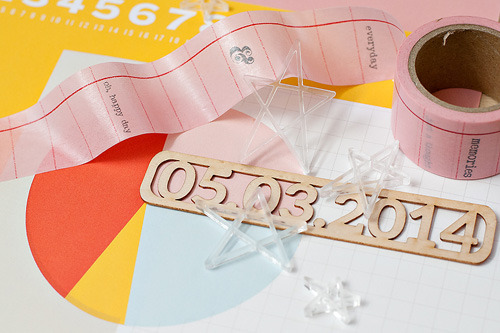
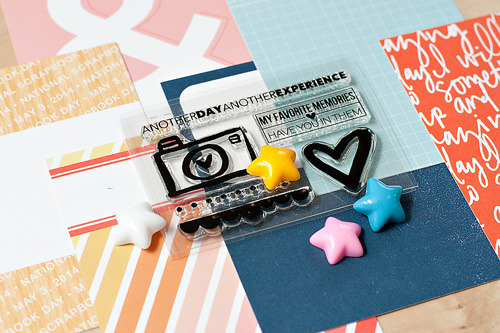
Here’s a look at the layout I created for this event using the Sugar Rush kit from Studio Calico:
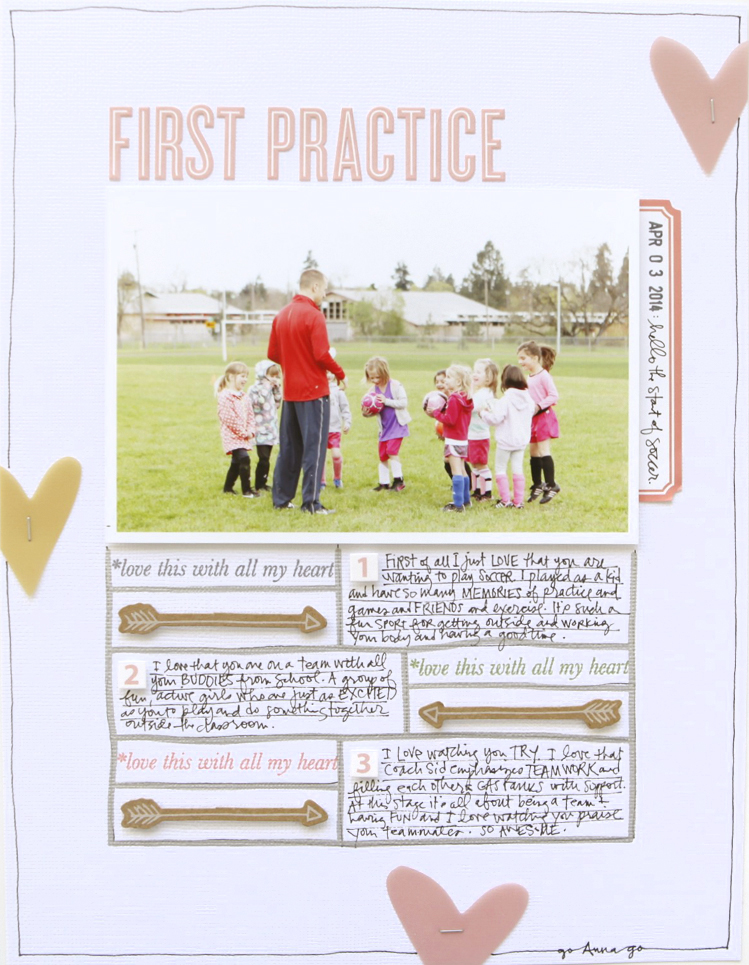

TIME SAVING TIPS
Stick with one, 4×6 photo.
Use number-based list journaling to help you tell the story.
Include a grid to hold your content.
Don’t forget the date! One too many times I have looked back and forgotten to add the date and it always bums me out.
And one more: COPY YOURSELF.
Do you have a layout you’ve made before that you love? There are no police out there that are going to come after you if you use the same technique, idea, sketch/foundation, products, etc. again and again.
Here’s another layout I created using the Sugar Rush kit from Studio Calico: Sweet Anna Girl
DESIGNER DIGITALS SALE | Also a heads up that Designer Digitals is having a sale today and tomorrow (Sat & Sun) with everything in the store 25% off. Check out my latest printables and designs here.


May 1, 2014
Project Life® 2014 | Week Six
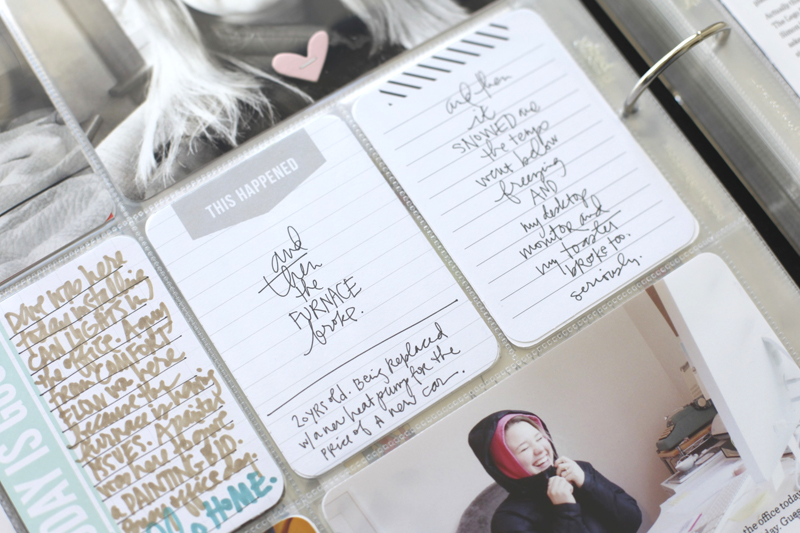
Welcome to Project Life® 2014 | Week Six (February 3rd through February 9th).
This was quite a week. Looking back at the photos today while I was finishing up this week made me think about how it’s challenging to adequately represent how crazy this week really was while I was living it.
The card that says, “and then the furnace broke” should be an indication of the kind of week we were experiencing (+ a dying monitor + a dead toaster). Ha.
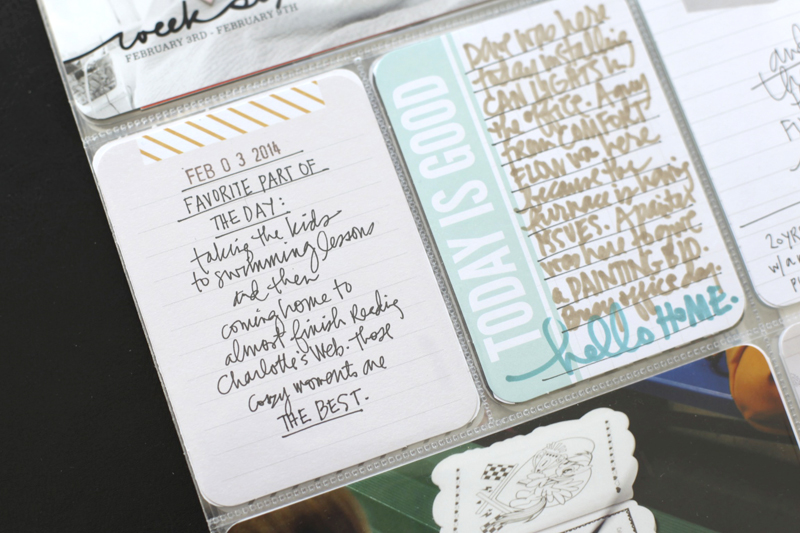
Here’s a look at Week Six:

This is one of those weeks that’s actually been almost done for way too long but I kept thinking I wanted to add more. Today, before taking photos, I added the chipboard hearts, printed two more photos (the one of me and then the one of Anna coloring), filled in the journaling on the “yes” card, added a couple white stickers and added a bit of writing on a couple of the photos to finish it up.
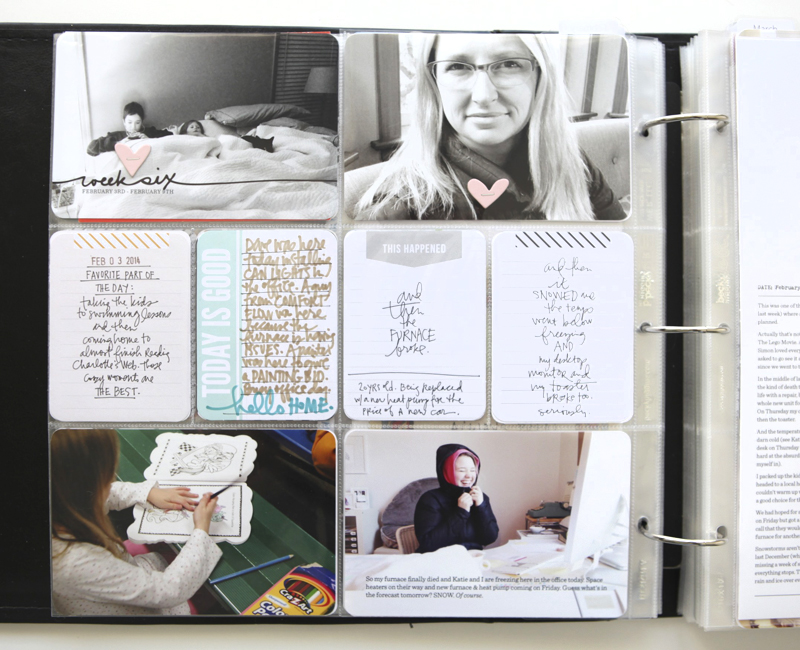
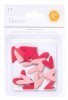
Those sweet little pink chipboard hearts are from Studio Calico. I attached them with the Tiny Attacher.
These two cards are from the Midnight and
April 30, 2014
Around The Office | Spring 2014 Update
Ah, the office.
Some of you have been wondering silently and some have been asking in the comments here or on Facebook “what about the office update?”
Maybe I was waiting for it all to be perfect, even though I know it will never be (and I’m totally okay with that).
Maybe I was waiting for us to settle in. Is over a year long enough?
I know I was giving it some time before writing up a big post to see how we work in this space. What works here and what doesn’t. If I’ve learned anything over the years of home offices/creative spaces it’s that things that work in one house or at one point in time don’t always work again or continue working the same way over time.
So last week I had Katie go around and just take a bunch of photos of exactly what’s happening in here right now. Just like I did back in 2011 – holy moly check out the difference between then and now here.
Remember, my goal is to not spend a lot of time organizing stuff. My goal is to make stuff. I don’t want to be constantly organizing or thinking about organizing or worried that it’s not organized enough to get to work.
My other goal, that you might know or not know, is not to have mass amounts of product. I want options and I want selection but not excess. I don’t need every color of album, every letter sticker option, etc. I want breathing room in here. I want space to work with what I have and not always be wishing for something else or wanting more.
I’m so thankful for this space. For the light and the white walls and the floors. We feel good in here. Things are happening in here. We are documenting and creating and making stuff and having fun and providing for my family.
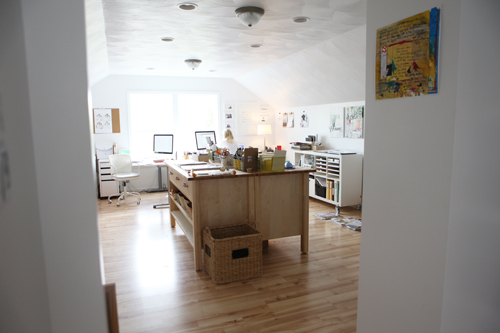
Here’s a look at what’s happening in here right now:
Nothing much new in this area which you walk past as you enter the office.
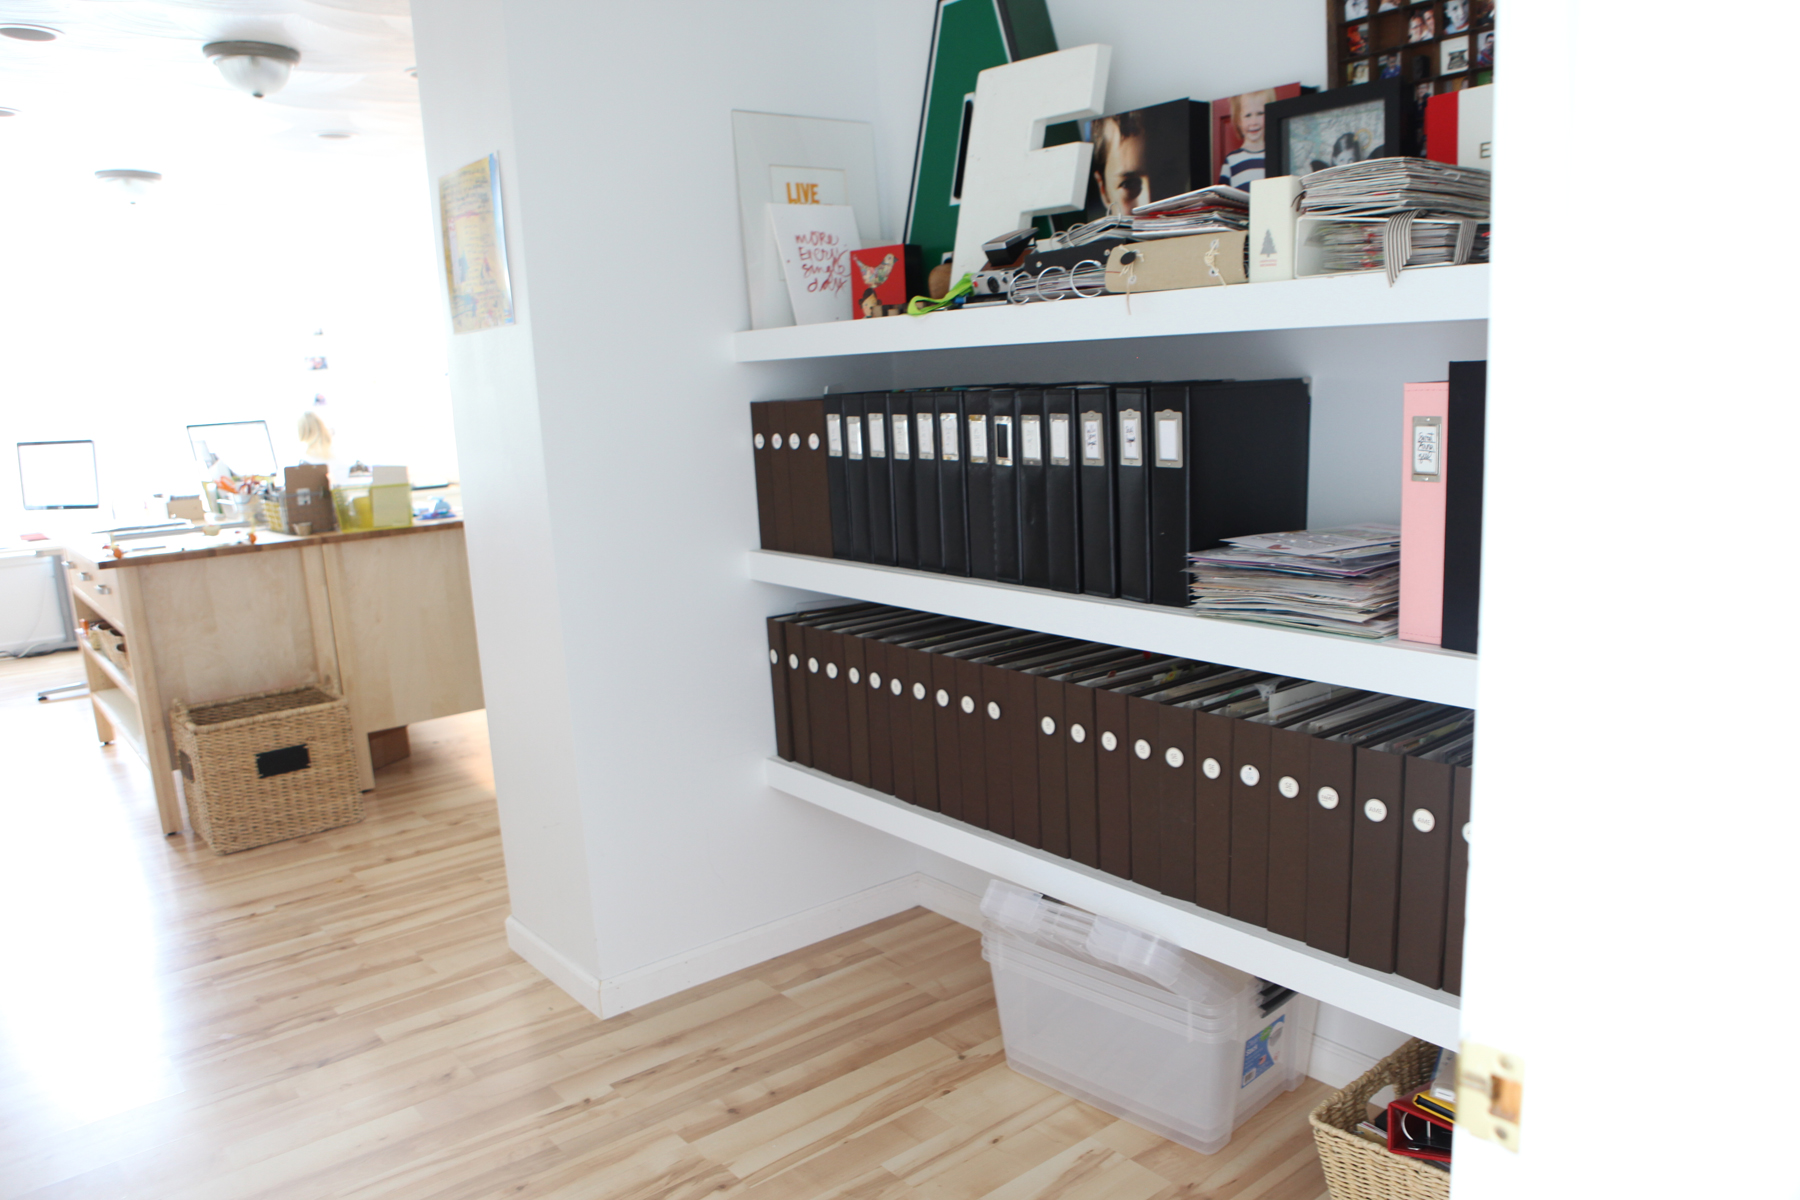
The shelves hold all my 12×12 albums. Along the top right now you can see my collection of December Daily® albums that need to be put into one or two of those plastic bins on the bottom and put into storage for next December. I like to put those away during the year and bring them out in December.
The albums you see on those shelves are either from American Crafts or We R Memory Keepers and they include family albums (such as Ali & Chris, Ali childhood, Anna’s First Year), annual albums (like 2012, 2013), Simon albums (which basically runs from 2002 up until 2008 – it was around that time that I started just keeping annual family albums), and Project Life® albums (2011-2014).
If you’re interested in reading more about album organization you can read a series of posts I did about organizing all my layouts into albums here: Part One | Part Two | Part Three.
There’s a stack of layouts there that need to be organized into the correct albums.
Here’s a view from the opposite side of the office looking back towards the door:
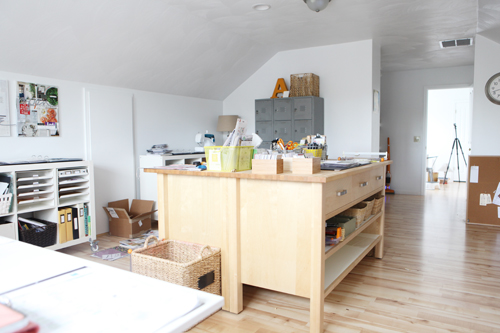
The Varde tables from Ikea are awesome. They have worked perfectly in this space. The work area is nice and big and there’s room on the top for us to keep some supplies with most things being stored in the drawers or in baskets below.
I’ve always been one of those people that stands up to create my projects (unless of course I’m sitting at my computer desk) and these tables are just the right height. I’m 5’9 and Katie is 5’2 and the height has been fine for both of us.
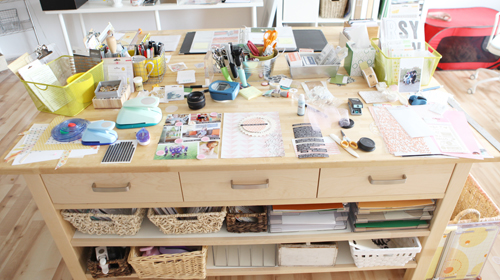
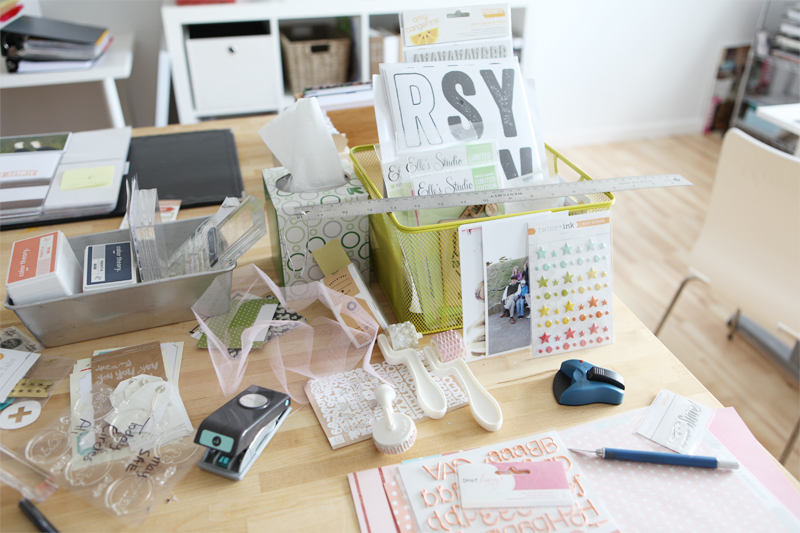
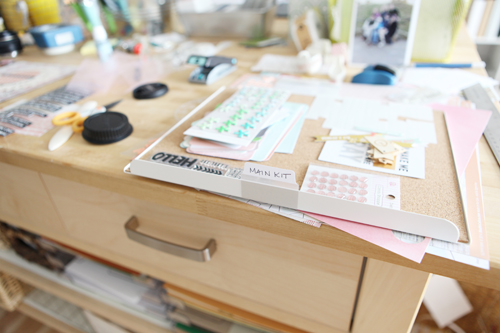
Here’s a look at my side of the work table (there’s two islands put together there and we just refer to it as the “table”). Katie keeps her Project Life® album out on the other side most of the time. My Project Life lives on top of a shelf unit as you’ll see below.
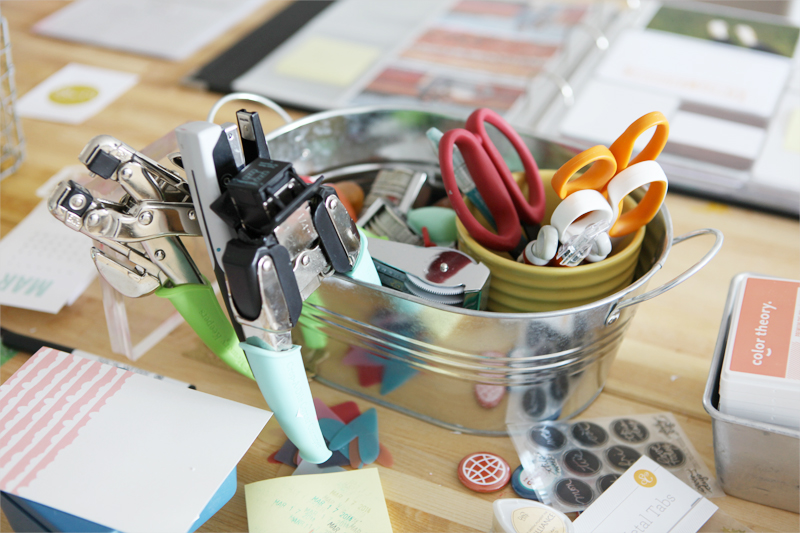
On top of the table at any given time are layouts in progress, a bucket that holds rolling stamps + scissors + the Crop-A-Dile + the Corner Chomper + the Tiny Attacher.
I also usually have a couple small baskets with products I love and/or want to remember to use.
We recently went through everything on the table and moved off anything that wasn’t a regularly used item – it basically had just become too cluttered. It looks messy right now because I’m in the middle of a couple projects.
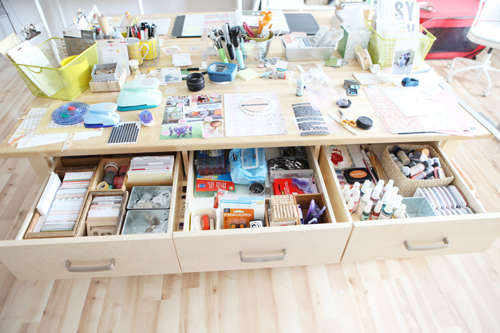
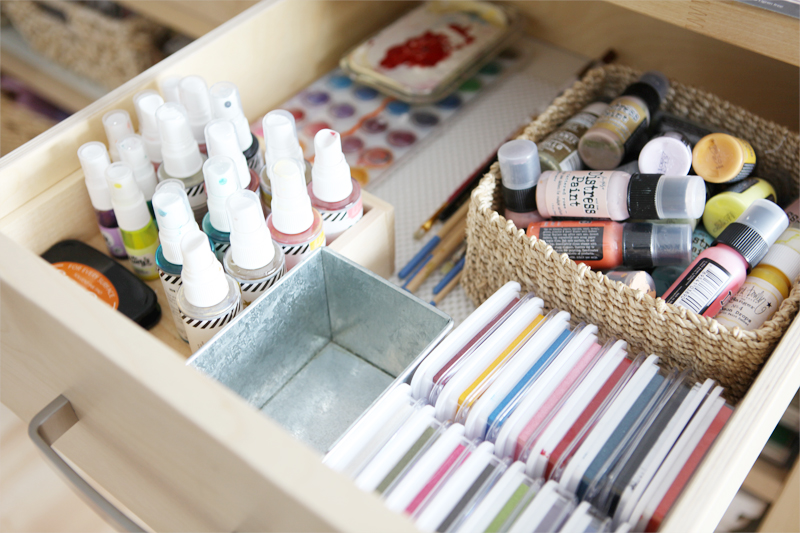
Here’s a look inside the three large drawers. The left drawer holds Project Life® cards, washi tape, and metal rimmed tags. The middle draw is for adhesives, corner rounders, etc. The right drawer holds my most used mists, paints, inks, etc.
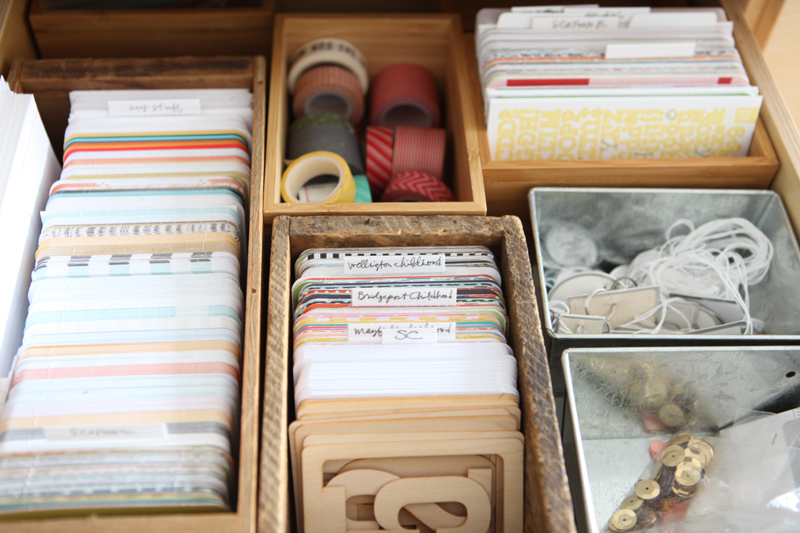
A close up look inside the Project Life® card drawer. I’ve got a few different boxes and little metal bins in there. This is more of a storage vs. a working drawer.
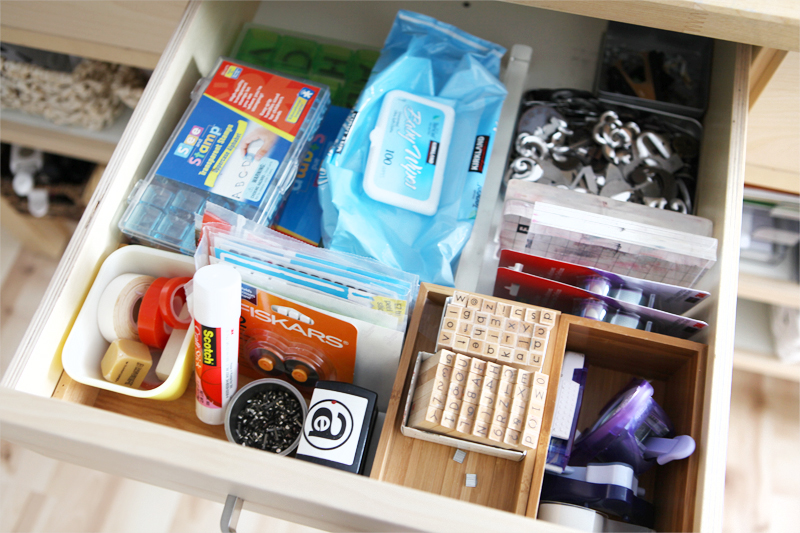
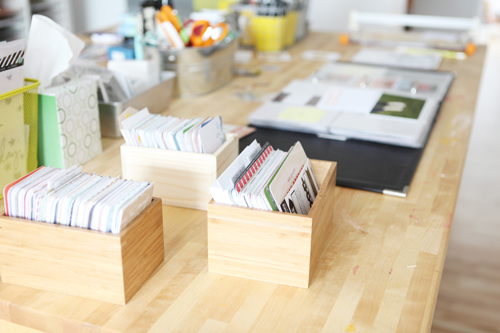
Katie’s got some of the boxes on her side of the table. Those little boxes are from Ikea.
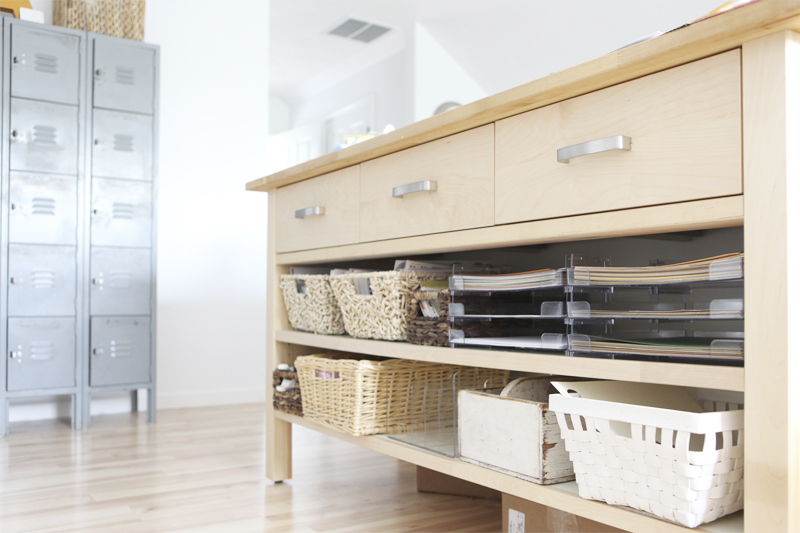
These tables have shelves under the drawers. Right now I’ve got baskets that hold letter stickers and Display Dynamics 12×12 trays to hold cardstock. The other baskets hold my collection of punches and scraps of pattern paper.
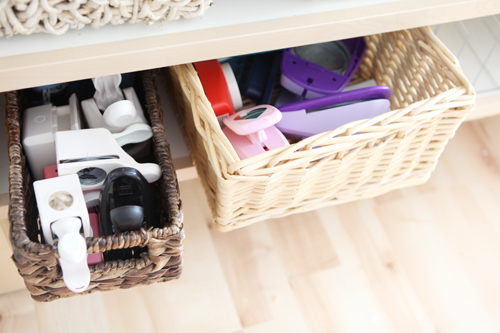
The punches. I still love them. The baskets are from a variety of sources over the years – Target, Goodwill, Ikea, etc.
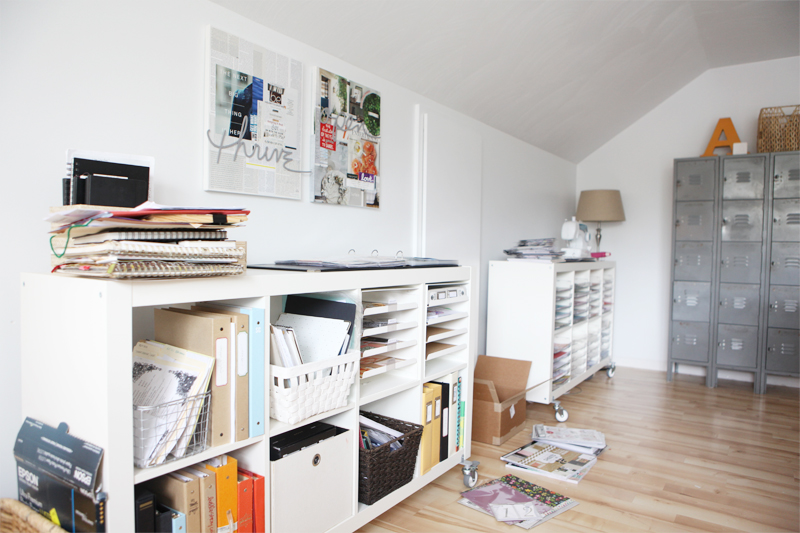
Along both walls are Ikea Expedit shelves on wheels. These have been renamed Kallax if you go looking for them at Ikea. They are awesome on their own but having them on wheels makes them that much more awesome.

This unit which is closest to my computer desk includes work binders for my online workshops and other business-related stuff.
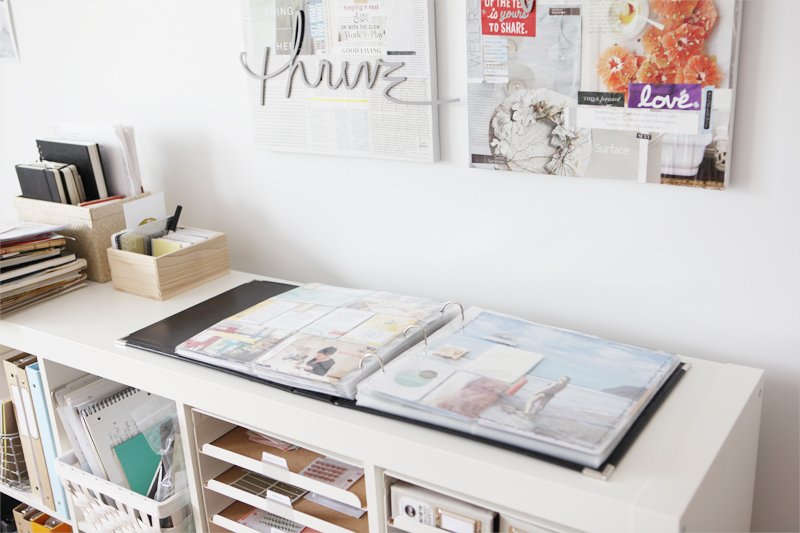
On top of this shelf is where my 2014 Project Life® album sits. I add to it throughout the week and then move it over onto the table when I’m actually completing weeks. The surface area on top of this shelf has been a great home for that album.
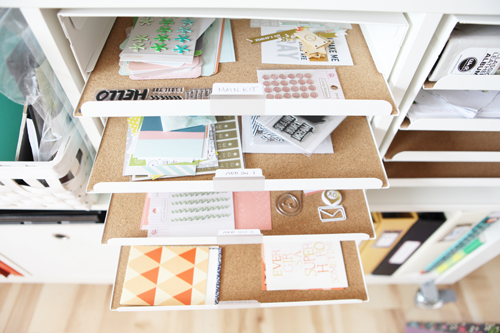
One of the things you’ll find in that shelf are these great pull-out Kvissle Letter Trays from Ikea. We use them to store the current Studio Calico Project Life® kits each month.
After I complete my page(s) using those kits and new ones come in the mail we rotate the products out. At that time I make a decision if I want to hang onto anything for future use (if there’s much left after) or put things in the donation box that gets shared with local friends or Anna’s school.
I love that I can pull the whole tray out and move it over to the work table and then move it back when I’m done and it keeps all the kit contents together. It’s similar to the way I’m using my unfinished projects trays.
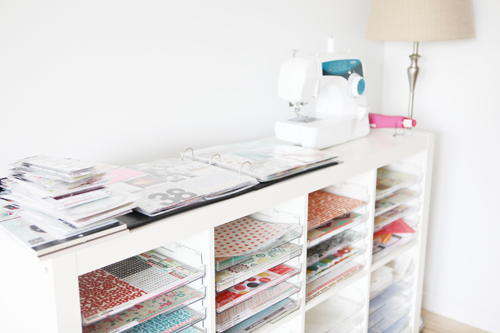
The second shelf unit is full of those Display Dynamics 12×12 trays and all my pattern paper and page protectors. Right now the pattern paper is organized by manufacturer and the page protectors are separated by style.
On top of this shelf are some new products that need to be organized/put away, my 2013 Project Life® album, my Brother sewing machine (I have to have it out in order to remember to use it) and my heat gun.
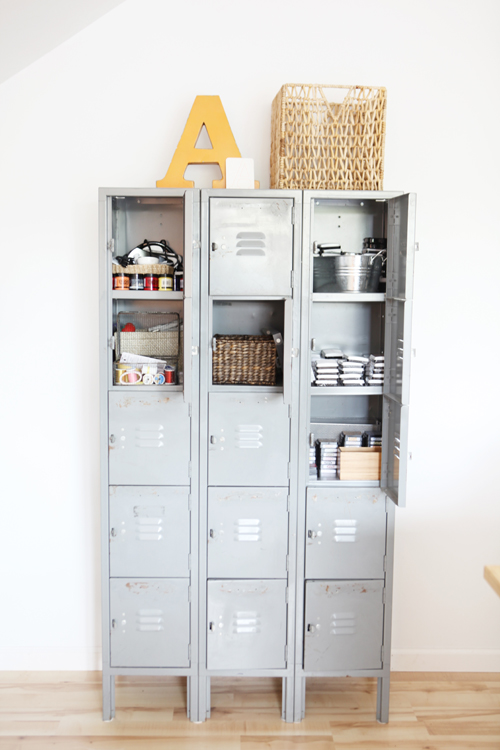
Next to that shelf, along the back wall, is my beloved set of lockers. Over the years I’ve talked about painting them but I’m currently super happy with the metal grey color.
Inside those doors you’ll find inks, paints, ribbons, sewing supplies, etc. Most of those things I don’t use every time I’m making something so I like having something like the lockers to hide away some of the stuff.

On the opposite side of the room from the lockers, right next to the windows, is our computer desks. We love this set up where we sit across from each other – it’s worked out great. We’ve also been really happy with the choice of these white tables – also from Ikea.
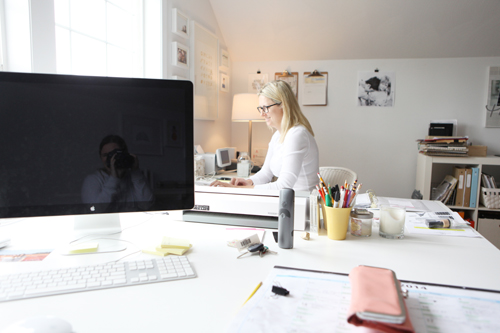
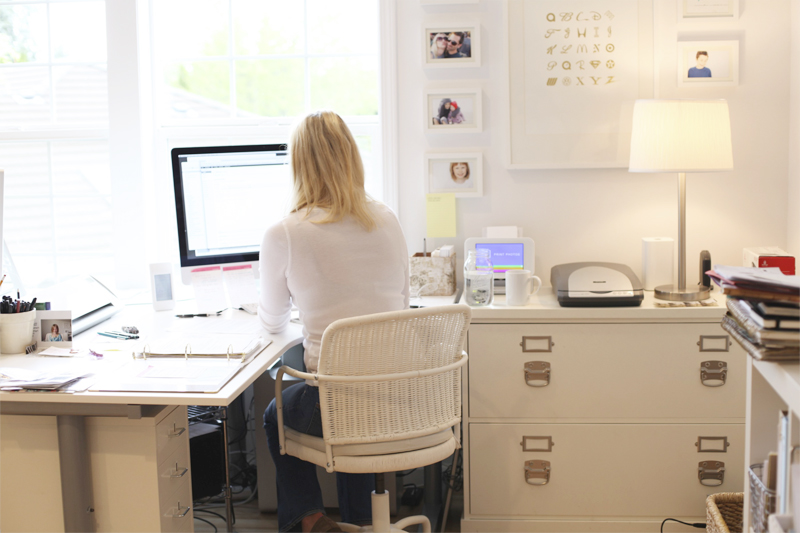
Next to my side I have a Pottery Barn filing cabinet that I’ve made good use of over the years. You can also see that my scanner and my Epson Picturemate printer sit on top of that filing cabinet.
The white chairs are also a recent addition I picked up at Ikea.
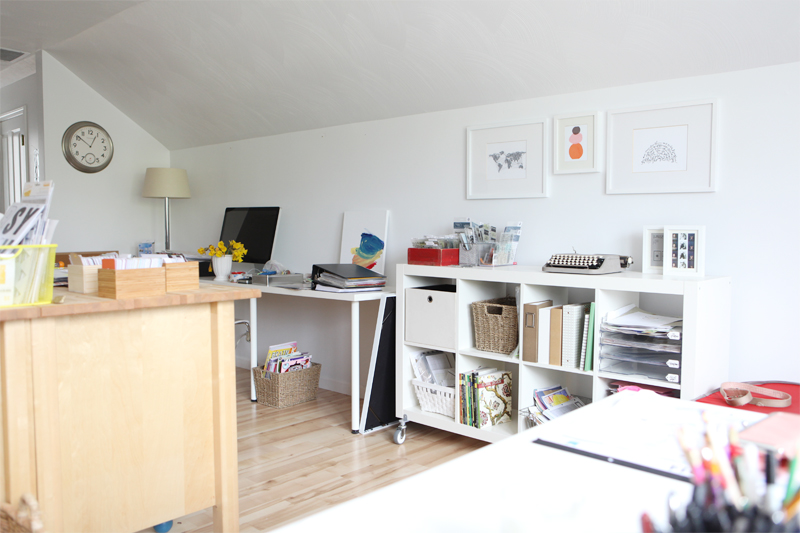
Along the other wall is the third Expedit/Kallax (not sure I can get used to the new name) unit. Next to it is a long white table that used to be in Simon’s room. Right now it’s a dumping spot (hate that) so I need to decide whether we really need it in here or what. I like that it could be a third computer station (the monitor is sitting there waiting to be hooked up to something) but I don’t love it in that space.
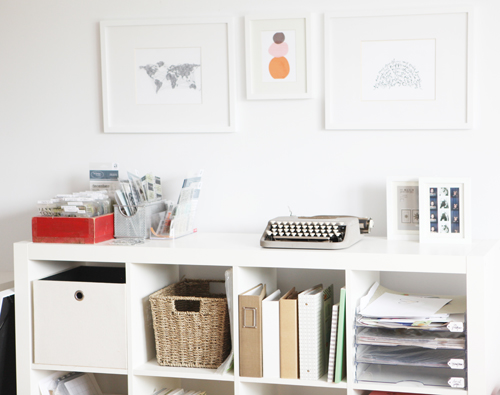
The artwork above the shelf is from Minted (The Worldwide Web,
April 29, 2014
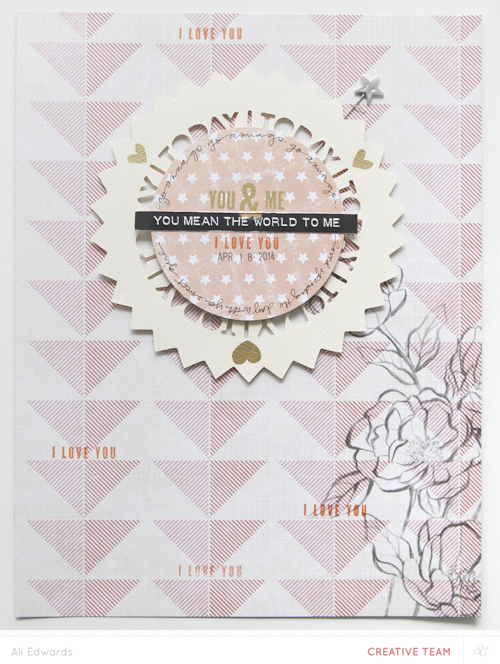
Today You | Scrapbook Layout
A storytelling theme I used to employ regularly for layouts was “today you” – here’s one of Anna from back in 2011.
I thought about that theme a week or so ago when Anna had the day off from school and I decided it was going to be “Anna & Mama” day. After dropping Simon off at school we headed over to Starbucks for a kids hot cocoa and a lemon pound cake and I just started taking photos with the intent of focusing on capturing some of the different things that happened for her over the course of the day.
Basically it was a quicker version of Day In The Life without the pressure of trying to capture every little detail (not that I really worry about that anyway but I bet you know what I mean).
When it came time to document the story I decided to work with the Camelot Scrapbook Kit from Studio Calico. I include products from that kit, from the SC Project Life® kit and from one of the add-on kits, and from my stash of supplies.
I love this kind of layout.
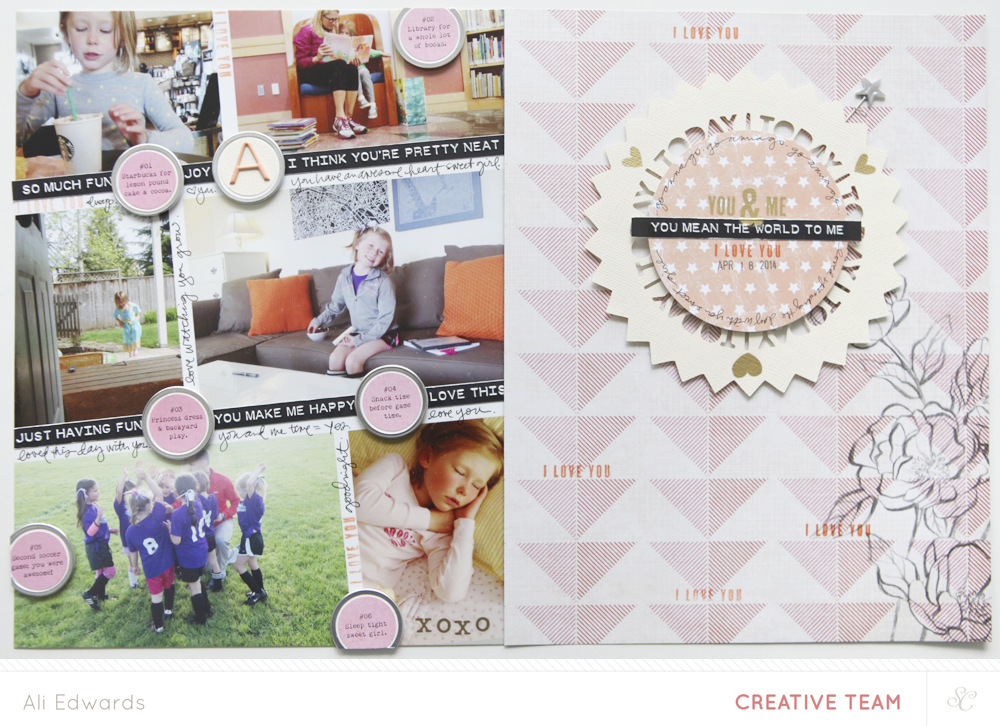
This layout is a 2-page, 8.5×11 layout.
I’m liking doing two page spreads right now that include most of the content on one page and some playful designs on the second page. It’s a nice way to get to include a little bit of everything I like.
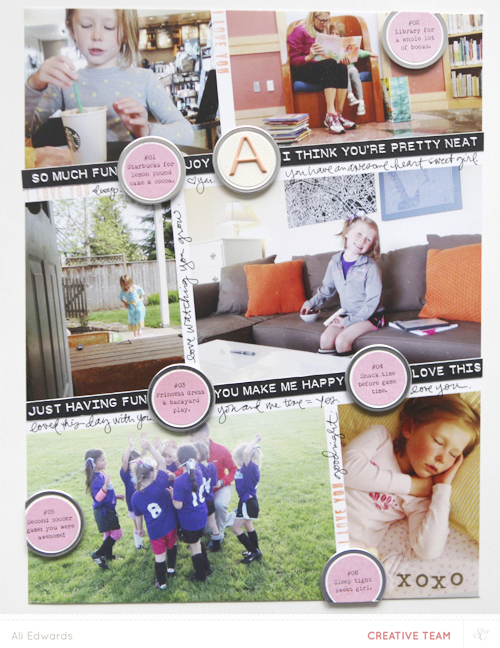
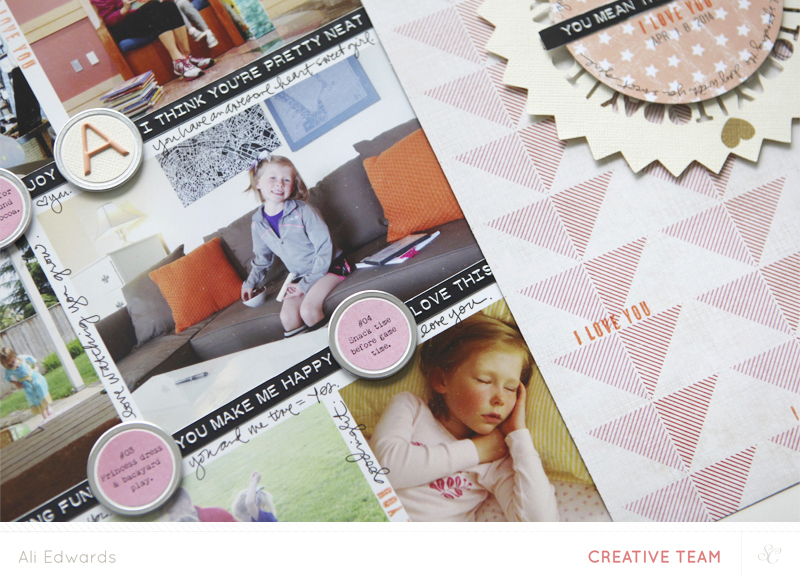
To begin this page I created a digital layered template that features the photos on the diagonal. You can easily achieve this same look by printing out 4×6 photos with white borders and adhering them on a diagonal on an 8.5×11 sheet of cardstock.
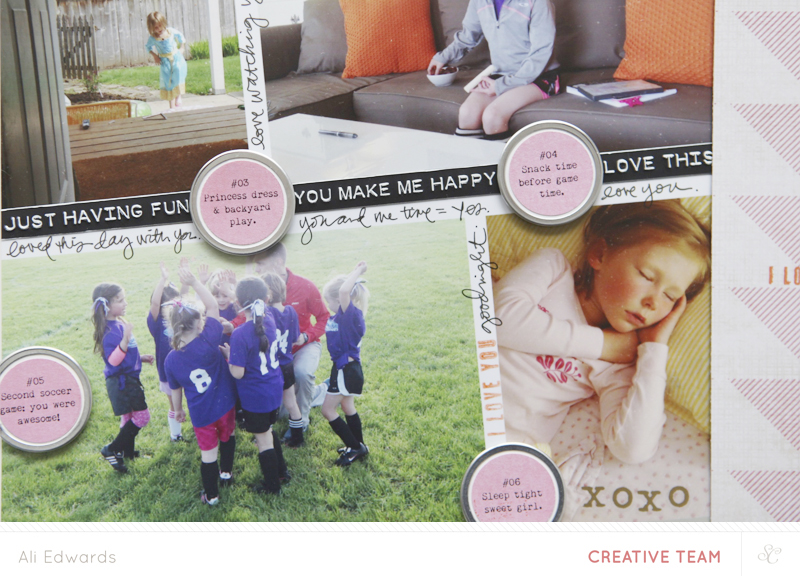
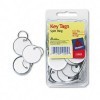
I used Avery Metal-Rimmed Circle tags to create little journaling circles that give a short description of each photo.
In Photoshop I created a bunch of 1-inch circles and added my text inside each one. That got printed on pink pattern paper from the Camelot scrapbook kit. I used a 1-inch circle punch to get the nice little circles that fit just right inside those circle tags.
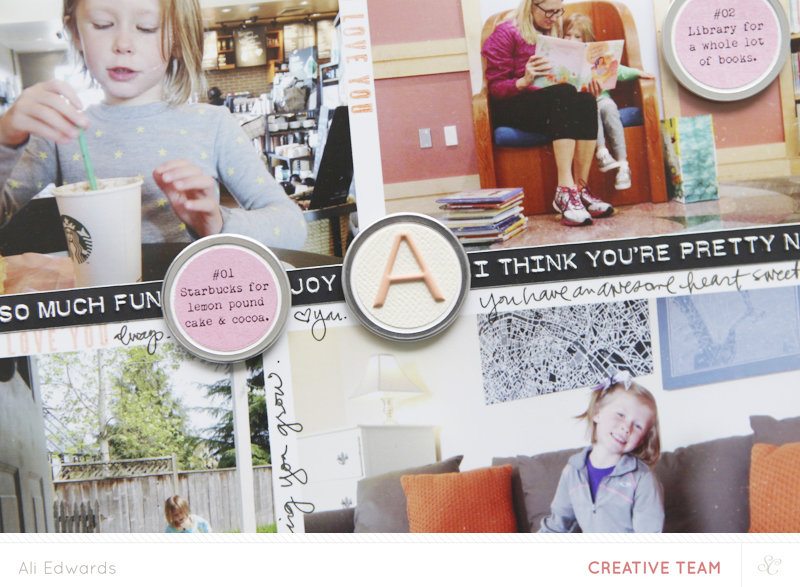
I used foam squares to adhere the circle tags. I love the little bit of lift that comes from those squares.
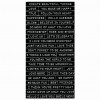
The black phrases are from this awesome set of label-stickers from Cosmo Cricket.
The “I Love You” stamp is included with the Project Life® kit. I used Orange Color Theory ink for stamping it on top of the pattern paper.
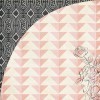
That awesome background pattern paper is from Basic Grey and is included in the main Scrapbook kit.
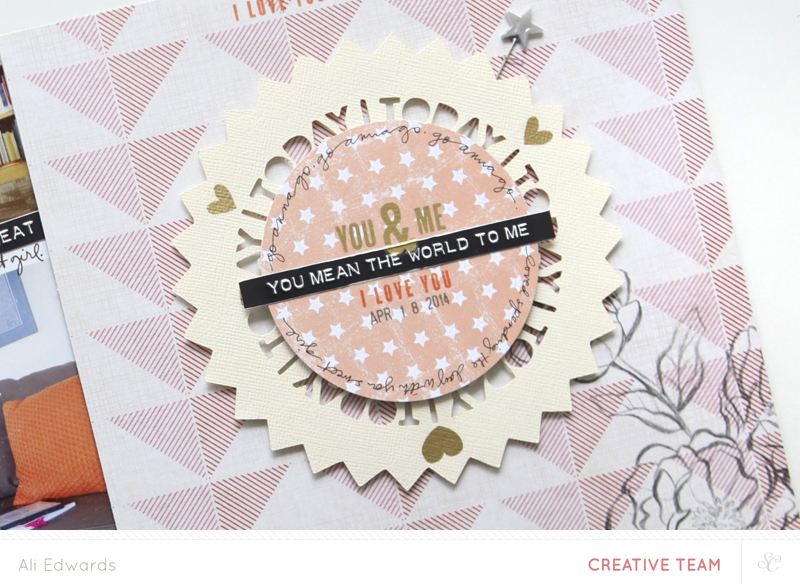
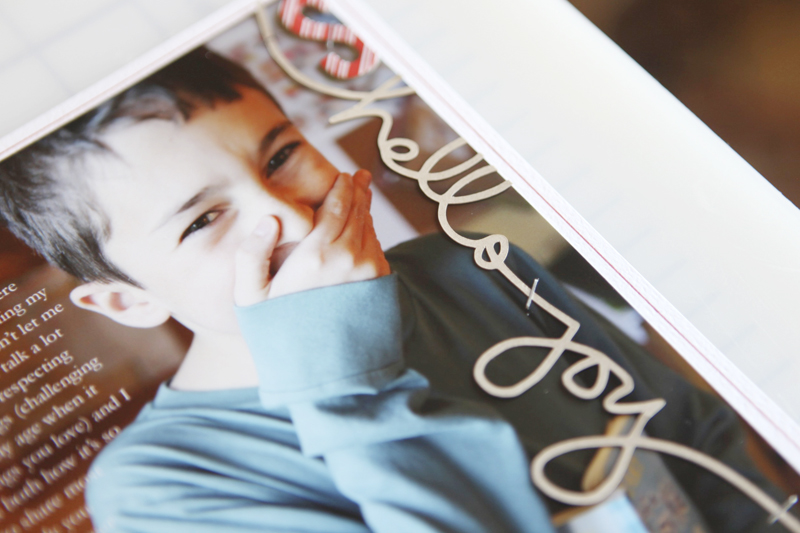
For this title design I used one of the designs from my Daily Starburst set. I opened and traced and cut it with the Silhouette software and then adhered it to my page with foam dots. I’ve got a video tutorial right here if you’re interested in learning how to trace PNG files (super easy) for use with the Silhouette.
On top of the Silhouette added a 3.5 inch punched circle of star pattern paper that comes with the Scrapbook Kit. The gold rub ons (hearts & text) and the metal star are also included. I added the date with a rolling date stamp and did a little writing around the outside of the circle.
ACTION ITEMS/IDEAS
Document the day of someone you love – or yourself. Don’t make it complicated – even just the highlights as you move from one thing to the next captures a slice of their life.
Create a 2-page layout that includes photos + words on one page and play with product that supports your story on the second page.
Go slanted. Try tilting your photos and embellishments and working on a diagonal to change things up.
SUPPLIES
Click on the images to jump to the products.


InLinkz.com


April 28, 2014
Goodbye Kids, Hello Holiday Helper
NOTE BEFORE READING | This post includes holiday spoilers for kids.
A couple weeks ago (before Easter) Chris had “the talk” with Simon about some of the ways of the world related to the holidays. We had decided together it was time for him to hear it from us vs. from kids at school (whether well or ill intentioned). The talk went really well and I asked Chris if he’d be willing to write up the experience and if I could share it here. My hope is that it might help another parent as they navigate these waters with their kids. Obviously, every kid is different but the approach of becoming a “holiday helper” really seemed to resonate with Simon.
Since before this last holiday season of 2013 (Simon was 11), I have been concerned about how and when we were going to tell Simon the truth about those holiday icons, Santa and the Easter Bunny. You see, Simon has always been a true believer. And that kid has more Holiday spirit than anyone I have ever met. It is difficult to get away with cutting corners during the holidays with Simon. From advent calendars to outside lights on the house, there are certain things that you just do at the holidays….and he truly enjoys every moment and every tradition.
So you can imagine the angst as we had been anticipating how the conversation would go and how he would react. When we discussed it prior to last holiday season, we weren’t sure he was quite ready to make the leap in perspective…from one of innocent believer to one of being “in on the secret”. But it was clear that when he got into an argument with a sixth grade peer about whether Santa was real or not, that it would be time to let him know at least by next Christmas. I think he must be among the very last in his class to still believe. For many kids, it perhaps isn’t a big deal. But to Simon, truth is truth. He has always been a Santa believer and he is getting to the age where it could become another source of division between him and his classmates.
I talked with Tiff about this and she suggested approaching it by emphasizing that we were letting him in on a secret. She also suggested it would be an easier conversation when the holidays were way in the future, such as during the summer. I thought so too. Simon likes being “in the know” when others aren’t. He likes surprises. He loves giving surprises. He is good at keeping those secrets. In short, he is now old enough to join the grownups as a fellow keeper of holiday traditions and spirit.
Ali and I talked about it and agreed that this would be the year.
I decided to lay the groundwork with St. Patrick’s Day. When the kids woke up in the morning on March 17th, for the third year in a row, the Leprechauns had visited us in the night, making their usual mischief by turning over tables and chairs and leaving the house in disarray. What was different this year, was that after dropping Anna off at school, I let Simon in on a secret.
He just grinned when I told him that it had really been me that had turned the furniture over and pretended that it was Leprechauns. He actually thought it was pretty cool…both the trick and that he knew about it.
Fast forward to the week before Easter. I was in the hot tub at our local athletic club with both Anna and Simon. Tiff came to take Anna to the girls’ locker room to get changed so we could go eat dinner. Apparently Tiff had just seen the Easter Bunny walking through the lobby, so she and Anna hurried off to see if they could go see it. Simon wanted to see the Easter Bunny too but I suggested that Simon wait back for a minute while they went ahead. I don’t remember the exact order or wording of the conversation, but this is more or less how it went:
“So Simon, I want to let you in on a secret.”
“Uh, yes?”
“Do you remember Simon how on St. Patrick’s Day I told you that the Leprechauns don’t really exist, and that it was me that turned over all the furniture and pretended that the Leprechauns had visited us in the middle of the night?”
“Um, yeah…”
“Well, that is the same as with the Easter Bunny.”
Pause, pause, pause while I read his face as he is thinking – terrified that this could go very badly.
“Yep, we do that to make a fun holiday tradition for the kids. And all the grownups are in on the secret. And we all play along to make it fun for the kids on Easter. And now Simon, you are old enough to be let in on the secret. Now you are old enough to cross over to the other side and to even help up with the Easter holiday tradition.”
Pause, pause, pause….so far so good. No tears. No arguing. He’s clearly thinking. Wow this has to be a lot to absorb for such a strong holiday believer.
Pause, so far so good. If this keeps going this well we might as well rip the entire bandage off. I won’t bring up Santa but this could clearly end up with a discussion about the big guy.
“What do you think about that Simon? What do you think about us letting you in on the secret?”
Finally a grin.
“I think it’s pretty cool.”
And then started the questions.
“Wait, so when does the Easter Bunny hide the eggs?”
“He doesn’t. The Easter Bunny isn’t real. I am the Easter Bunny. Or mom is the Easter Bunny. Or maybe now you can even be the Easter Bunny. Every Easter morning I (or your Mom) set my alarm for really early and I get up and hide the eggs before you and Anna wake up. That’s why you never see the Easter Bunny.”
“Oh. But what about the Easter baskets?”
“That’s also grownups. We buy stuff for your baskets and then put them out early in the morning when we hide the eggs.”
“Oh, I see.”
“It’s a pretty cool tradition isn’t it? All the grownups having the same tradition to make the holidays special fun for the kids.”
“Yeah, it sure is.”
“And Simon, now YOU can be a part of that!”
Grinning.
“Yeah.”
He’s clearly still processing and thinking.
“Um, what about Santa Clause? Is he real?”
Here we go….Leprechauns, the Easter Bunny…..they’re cute, but hardly the focus for weeks if not months prior…..but Santa….oh man that is where things could go really sideways.
“Well Simon, it’s the same with Santa. Santa is a tradition created by grownups so that all the kids can have fun at Christmas. Just like the Easter Bunny or the Leprechauns. It is a secret that the grownups have to make Christmas magical. And now you are old enough to be let in on that secret also.”
At this point he again visibly grins and even chuckles as he puts all the pieces start to fall into place for him. Pause, pause, pause.
“That is how Santa always knows what you want for Christmas. Because Santa is really Mom and me. We keep track of what you are saying you want for Christmas and then we get you and Anna presents from us but we also get you presents that we say are from Santa. And now you are in on the holiday secret.”
Then the grin fades to a brief look of concern as he poses the next question.
“Wait, will I still get presents?”
“Oh yeah Simon, you’ll still get presents from Santa. You will notice that even the grownups still get presents from Santa. We just always wrap those in one kind of wrapping paper that is different so they look like they are all from Santa. But really they are from each other.”
“But what about when we see Santa and tell him what we want for Christmas?”
“Well that is another grownup in a costume pretending to be Santa. You know how this year you were saying that Santa looked different than last year? And remember how Santa in Bend looked different than the Santa here in Eugene? That’s because they are different grownups in costumes. But since either Mom or Dad is always with you when you go see Santa we know what you ask for. Santa Clause is a great tradition that all the grownups around the world are a part of and we do it for kids at Christmas. And now you are old enough to be a part of that tradition. Pretty cool huh?”
“Mom and I talked about it last year, but we weren’t sure that you were ready yet to be let in on the secret. But this year, we think you are old enough to be a part of it and to be able to keep the secret yourself and to even help us. Now you can help and even be the Easter Bunny or Santa yourself! ……….Let’s go get showered up Simon so we can eat dinner.”
Then with a look of excitement he flicked his hand in the air (one of his signature moves) and declared, “Goodbye kids, hello helping holidays!”
And with that he grinned and seemed to stand a little taller as we walked to the boys locker room, where he continued to ask a few more questions about the tradition of Santa Clause… from the other side.
It went as well as I could have hoped. His heart wasn’t broken, and Simon still has the greatest holiday spirit of anyone I know. And now whenever he talks with us grownups about the Easter Bunny or Santa Clause in the presence of Anna, he includes a knowing wink. I love that.
Welcome to the other side Simon.
The image at the top of this post is from my 2011 December Daily® album. See more details here.


April 27, 2014
Project Life® 2014 | Week Twelve (Studio Calico Project Life® Kit)

Say hello to Project Life® 2014 | Week Twelve (March 17th through March 16th). You can check out all the new kits for May (called Camelot) over at Studio Calico here: Scrapbook Kit | Project Life® Kit | Card Kit.
This month I received a suggestion to play around a bit more and include a traditional layout within Project Life®.
I gladly accepted the challenge and well, I kinda did it. Ha. I think what I ended up with is close enough and I liked the end result. I decided to go with a full size photo for the background of my “layout” as you’ll see below. In the past I’ve done 12×12 photos in Project Life but I cut them up to fit into the pockets. You can see examples of that here, here, and a tutorial on how I do it here.
Here’s what I can tell you about adding in a full page that was cut up into pockets: I liked mixing it up.
It was a little weird at first. I’m so used to sticking to a very specific formula for Project Life (which has been great for me and simplified my overall process). I had to let go of the way I’ve been thinking about Project Life to focus more on what I was going to choose to highlight from the second part of the week.
As you’ll see below I ended up adding a 6×8 divided pocket page which made a nice transition to the full 12×12 (and allowed me to include a bit more of the story + have the full page 12×12 with not a lot of extra stuff on there).
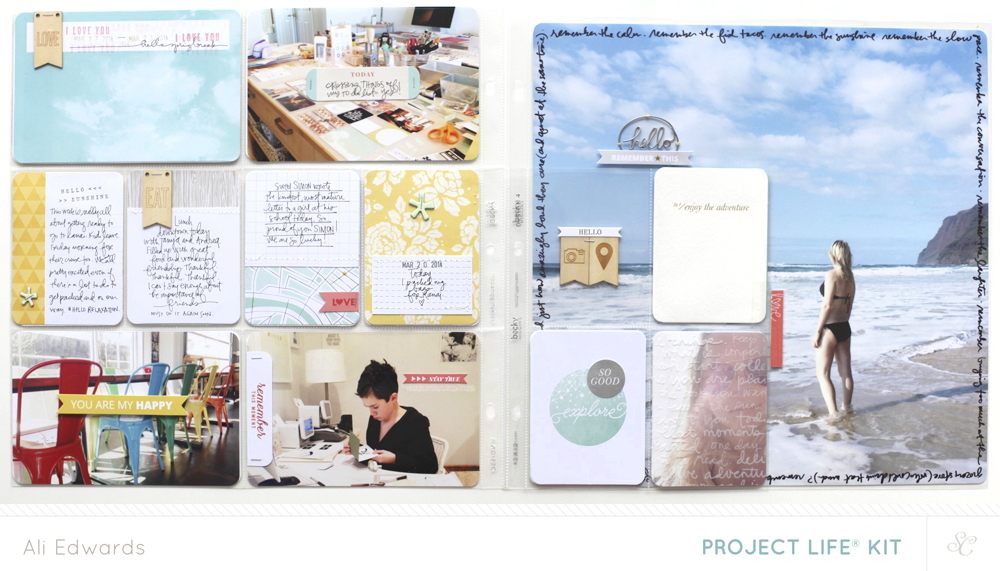
This week I used supplies from the Studio Calico Project Life kit plus a few supplies from the Project Life Add-On kits as well (those all appear on either the 6×8 insert or the 12×12 page).
I totally loved adding in that 6×8 page protector (Becky Higgins Design 4). Did you guys know they fit right into the 12×12 albums? Awesome. I did a little testing and it looks like the Simple Stories 6×8 page protectors also fit into 12×12 albums.

Yellow and teal = happy. I really liked those wood veneer banners.
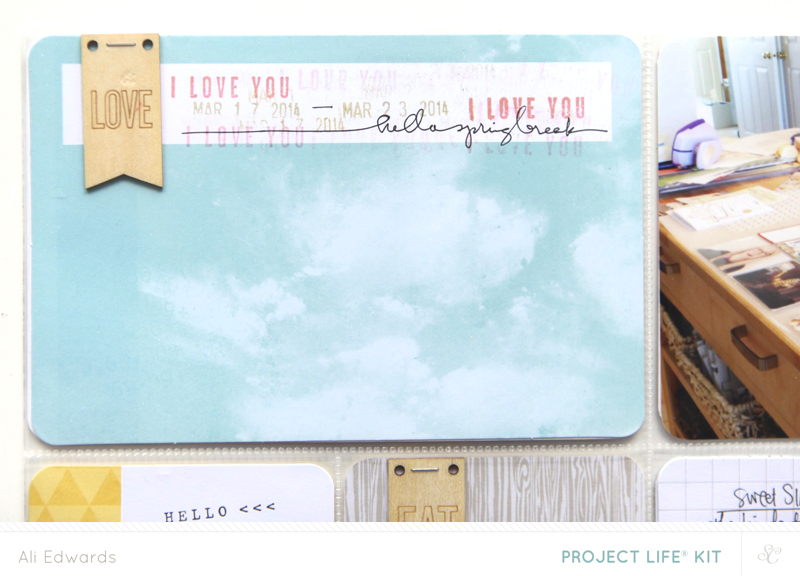
I did some repeated stamping for the date card. To do this you simply ink-up your stamp, stamp once for the full effect and then stamp multiple times around it (the ink will be less and less each time you stamp).

This week I also cut up some of the 3×4 cards to give myself more white areas for adding my stories. Most of those were stitched on with my sewing machine.
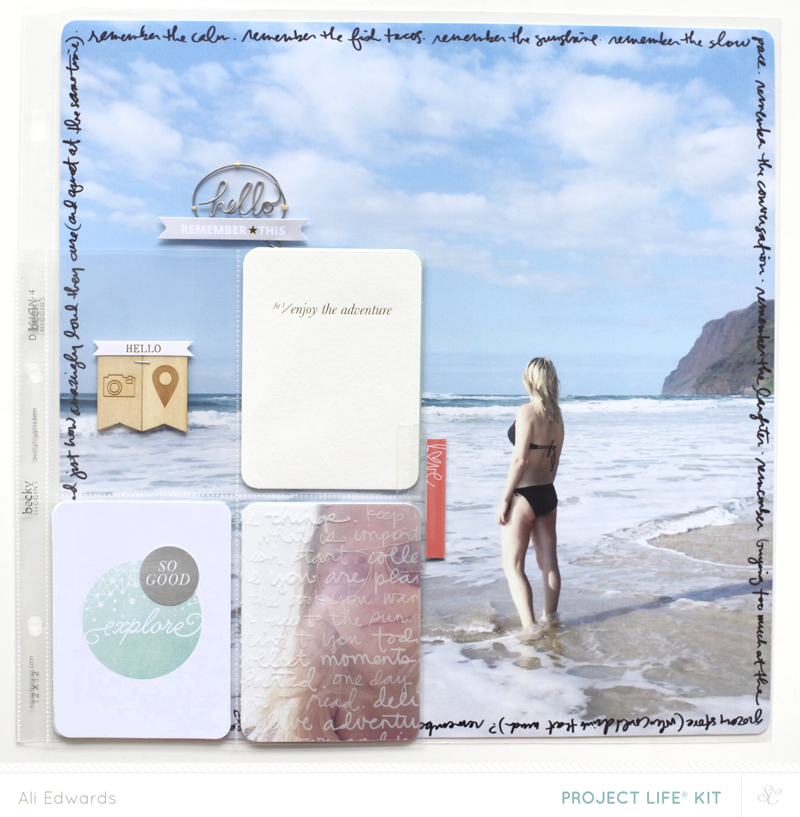
Here you can see the 6×8 page protector laying on top of the 12×12 photo as it appears in my album.
That “enjoy the adventure” card is one of those that I almost wanted to just frame instead of use. I love gold foil and I love cream cardstock. I decided to use it but not add anything to it and just let it exist on it’s own merit.

In the top left pocket I used one of the printed banners to hold two wood veneer banners together. On the back of those I used the alphabet rub ons to add “a & a” and “2014″ directly to the wood veneer (see the image below). I also added another printed banner to match the one on the other side.
Including in one of the add-on kits this month is the white printed transparency that I added to the photo of myself on the bottom.
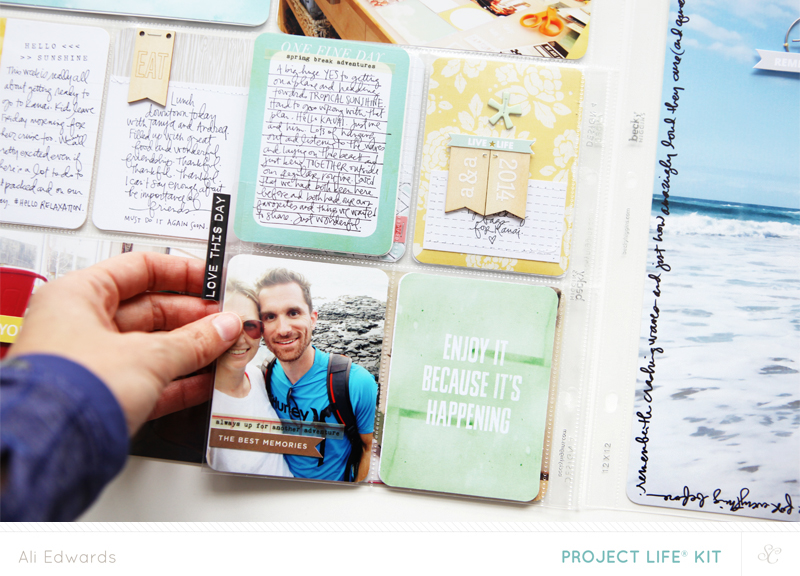
On the back I included a photo, a sentiment card and a card with space for journaling. In the plastic tab along the edge I added one of the label stickers from the Cosmo Cricket which is also included in an Add-On Project Life kit (Lancelot) this month. You can grab them individually here.

I used my Epson R2000 printer to print out this photo here at home. On top of the photo I added a “hello” metal speech bubble that’s included with the Arthur Add-On Kit. I actually hand-stitched that in place with yellow embroidery floss.
Writing around the edge of the photo made it feel more like a layout and less like a big photo added in a pocket.
I plan to do another layout/full page photo on the back of this for the beginning of Week Thirteen.
AE IDEAS/ACTION ITEMS
What can you try this week that’s different than you normally do? Changing up my approach was good for me creatively.
Mix & match page sizes. I loved adding in that 6×8 page protector this week. If you already have some 6×8 page protectors at home and the holes don’t match up you could always punch new holes using a Crop-A-Dile or other hole punch.
Add embellishments to a pocket that are smaller than the pocket size to give you a transparent view through to the next page. I did that with the wood veneer flags and stapled them in place in the pocket.
Get out your pens (I used a Slick Writer here) and write around the outside edge of your photo.
SUPPLIES | 2014 | WEEK TWELVE
Click on the images to link to the products.
InLinkz.com
Project Life® is a product and a system and a lifestyle created by Becky Higgins. It can be anything you want it to be. The core pieces used in my album are available here. If you live outside the US check Becky’s site for more information on sources. View all my posts about Project Life® here.


